
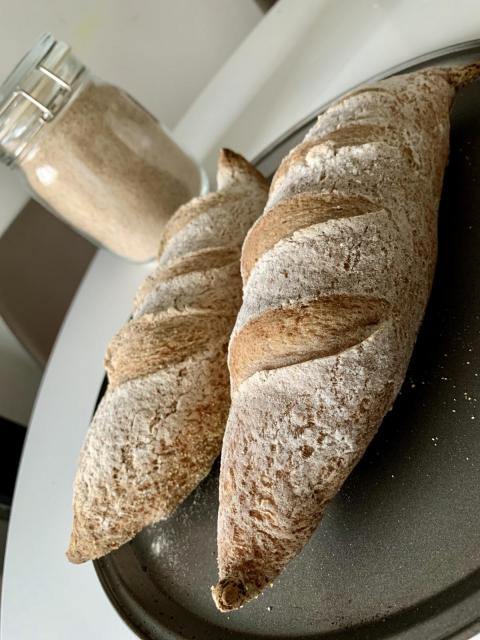
A complete protocol for gluten-free sourdough baguettes
Given my real passion is sourdough, it is odd that my first forum post and subsequent blog entry are centred on the topic of gluten-free baking. This one is for a friend. I am not an expert in gluten-free baking (or baking, for that matter), but this procedure has worked out rather well for me.
So I'm going to go through the whole thing - right from making the starter, which is still going strong after 2 weeks of use, and one refrigeration in between. The recipe itself is Laura T.'s Overnight Sourdough Rice and Teff Baguettes, with some substitutions and ranges for acceptable fermentation times. I will admit that I have not achieved the degree of open crumb as she, even after testing over the last two weeks. I remain hopeful.
*Note: I am a scientist by trade with quite a bit of bench-top experience. I find accuracy quite necessary for molecular biology, but stressful. Therefore, I've got a bit of a how-far-can-I-deviate-from-the-recipe approach to baking. I provide ranges for ingredients and time where possible.
My household has concluded that the best way to enjoy this loaf is at least a day after baking, toasted with butter. Some of us prefer it over other certain glutinous breads.
Week 1: Making yeasty water
- 175g distilled water
- 1 tsp sugar
- 50g sun dried cherries (regular raisins will probably work fine. I just chose the dried fruit I thought would have the most 'bugs' on it, so to speak.)
Add water, sugar, and dried fruit to a bottle, mix and leave it for a week. There might be bubbles that show up at the top and that is good. Mine did not, and it still worked.
Day 8: Making the starter
- water with dried fruit in it (~150 grams)
- ~75 grams teff flour
- ~75 grams brown rice flour
- Strain the water with the dried fruit in it. You might end up with around 150 grams.
- Add equal parts teff and brown rice flour to the strained yeasty water, depending on how much you recovered. Mix well.
- Leave this mixture for 12-24 hours. You'll probably see it rise.
Day 9-12: Strengthening the starter
- your developing starter
- 50g distilled water (x4)
- 20g teff (x4)
- 30g brown rice flour (x4)
- After 12-24 hours (or when you see considerable rise), discard all but 50 grams, and add the water, teff, and brown rice flour. Mix well.
- Repeat every 24 hours.
- If by day 12 your starter is able to increase in volume by at least 1.4-fold, proceed to the next step. If not, repeat for a couple more days.
(You might consider reserving the "discard" for things like pancakes, or incorporation into other breads.)
Day 13 morning: Prepare starter for baking
This step does not really differ from the above. It just ensures you have enough starter left over to keep it going.
- 60g starter (make sure it's active)
- 60g distilled water
- 24g teff
- 36g brown rice flour
- Add the water, teff, and brown rice flour to the 60g of starter. Mix well.
- After 5-9 hours, the starter will reach peak volume. When it does, proceed to making the loaf.
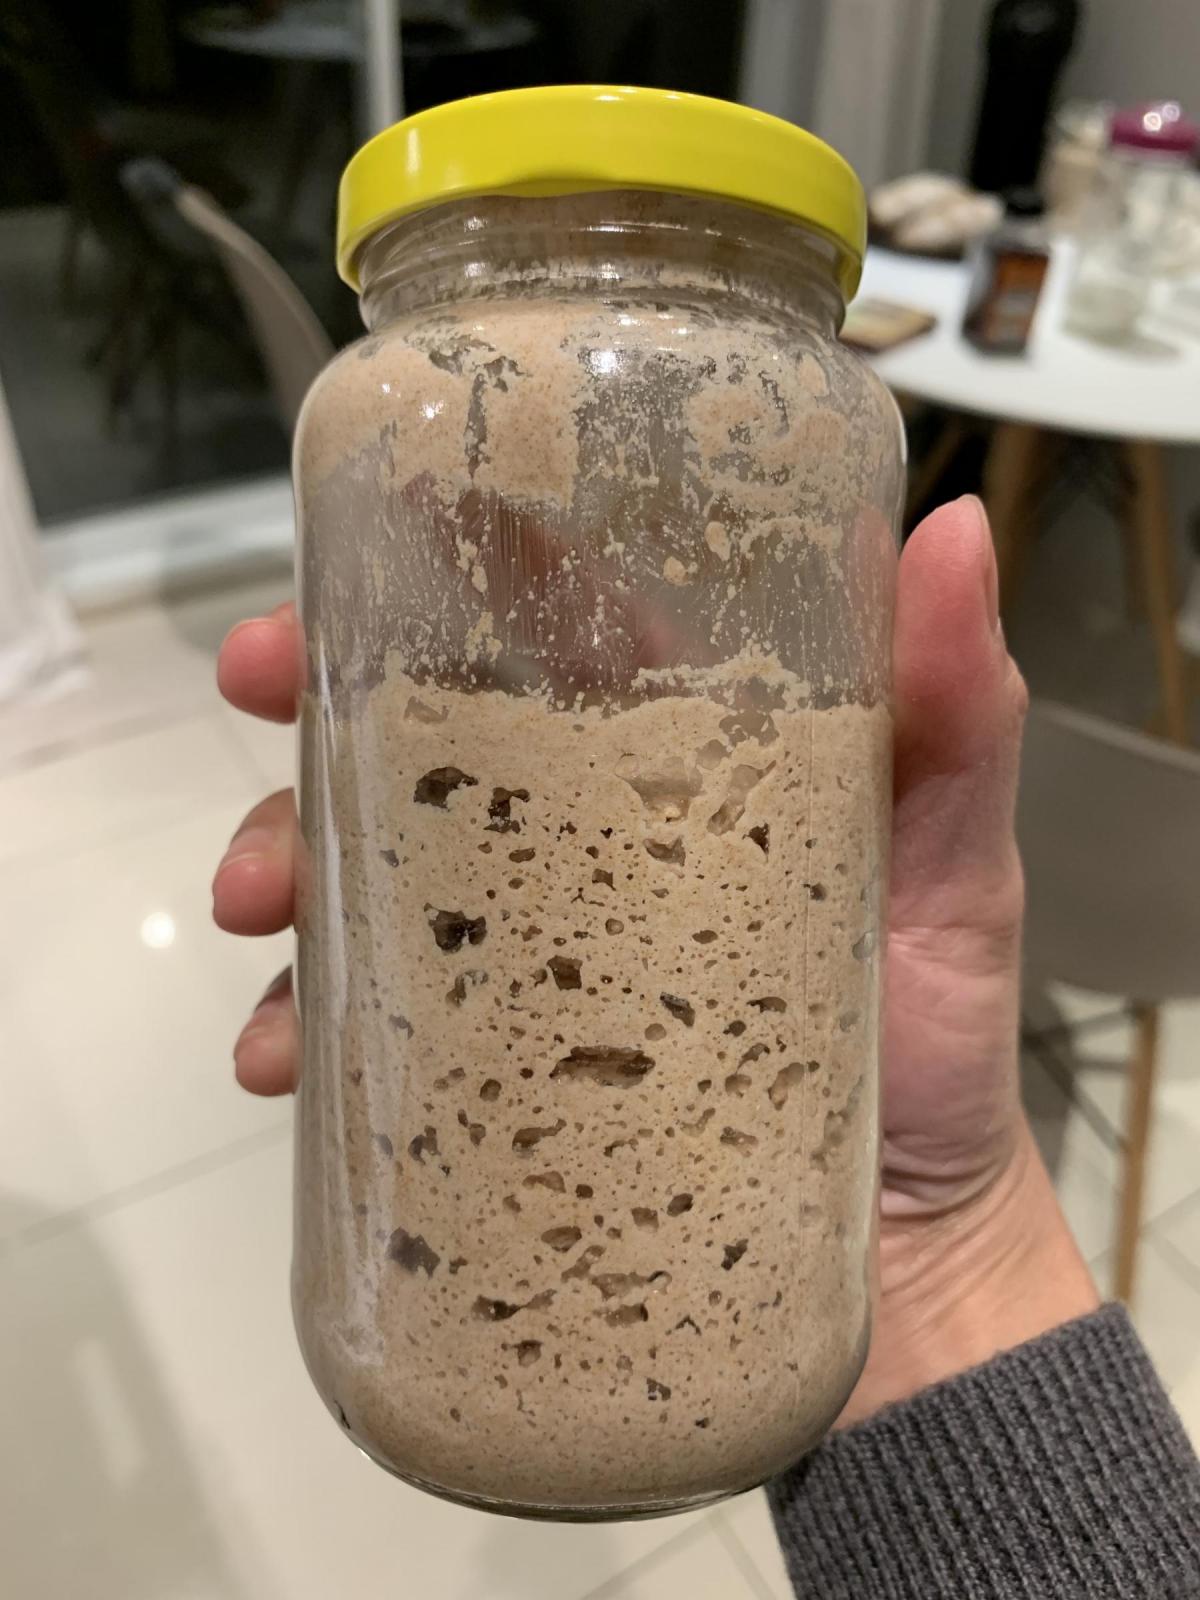
This is what your starter should look like.
Day 13 evening - Day 14: Assemble the loaf
- 25g psyllium husks (not the powder)
- 420g water (no need for distilled)
- 150g of your teff + brown rice starter
- 150g brown rice flour
- 100g potato starch
- 50g sorghum flour
- 50g millet flour
- 10g salt
- cornmeal, for dusting
- Whisk water with psyllium until a gel forms - takes about 60 seconds.
- Add all of the ingredients, except the salt.
- Form a ball and leave to rise in a covered bowl at room temperature for 2-3 hours.
It won't rise much so don't be alarmed if you don't see much change. - Add salt and 'knead' to make sure it's thoroughly incorporated.
- Reshape it back into a ball and transfer to the fridge.
- Leave it to proof for 12-24 hours. Haven't tried longer than 24 hours, but I wouldn't do less than 12.
- Remove from the fridge and leave to come up to room temp for ~2 hours.
- Divide and 'shape' into 4 baguettes.
Don't expect to shape these as you would regular glutinous bread. The consistency is a lot like clay, so it's more like moulding the dough into baguette-like shapes. - Cover with plastic wrap and prove at room temperature for another 1-2 hours.
- Preheat cast iron pan or dutch oven to 480F 30 min to 1 hour before baking (depending on how quickly your oven heats up)
- Transfer loaves to a wooden board dusted with cornmeal.
- Brush with water, dust with rice flour and slash.
I recommend holding the knife or blade at an angle and then manually "opening up" the score a bit to help encourage formation of an "ear" during baking. These loaves do not bloom like glutinous loaves do. - Slide loaves onto baking surface, and add a cup of water to the bottom of the oven.
- Bake at 480F for 10 minutes.
- Lower the oven to 455F and bake until golden brown. It'll be around 25-30 minutes.
Maintaining the starter
- 10g starter
- 10g distilled water
- 8g teff flour
- 5g brown rice flour
Mix ingredients together daily to keep the starter alive for a total of grams. Thus far, I have had no trouble re-activating this after refrigeration. I recommend feeding and letting it rise for 5-8 hours before putting it in the fridge. The proportions are what matter here but I find that lower volumes do have a small negative impact on starter activity. This starter is generally less active than my rye starter.
EDIT: After 8 months of maintaining this starter, I find that a lower than 100% hydration works better - I do around 75% now. I also find that the yeast are much happier with a higher proportion of teff - and it doesn't cost much to do this if you keep small volumes of your starter. I have modified the above to reflect this.
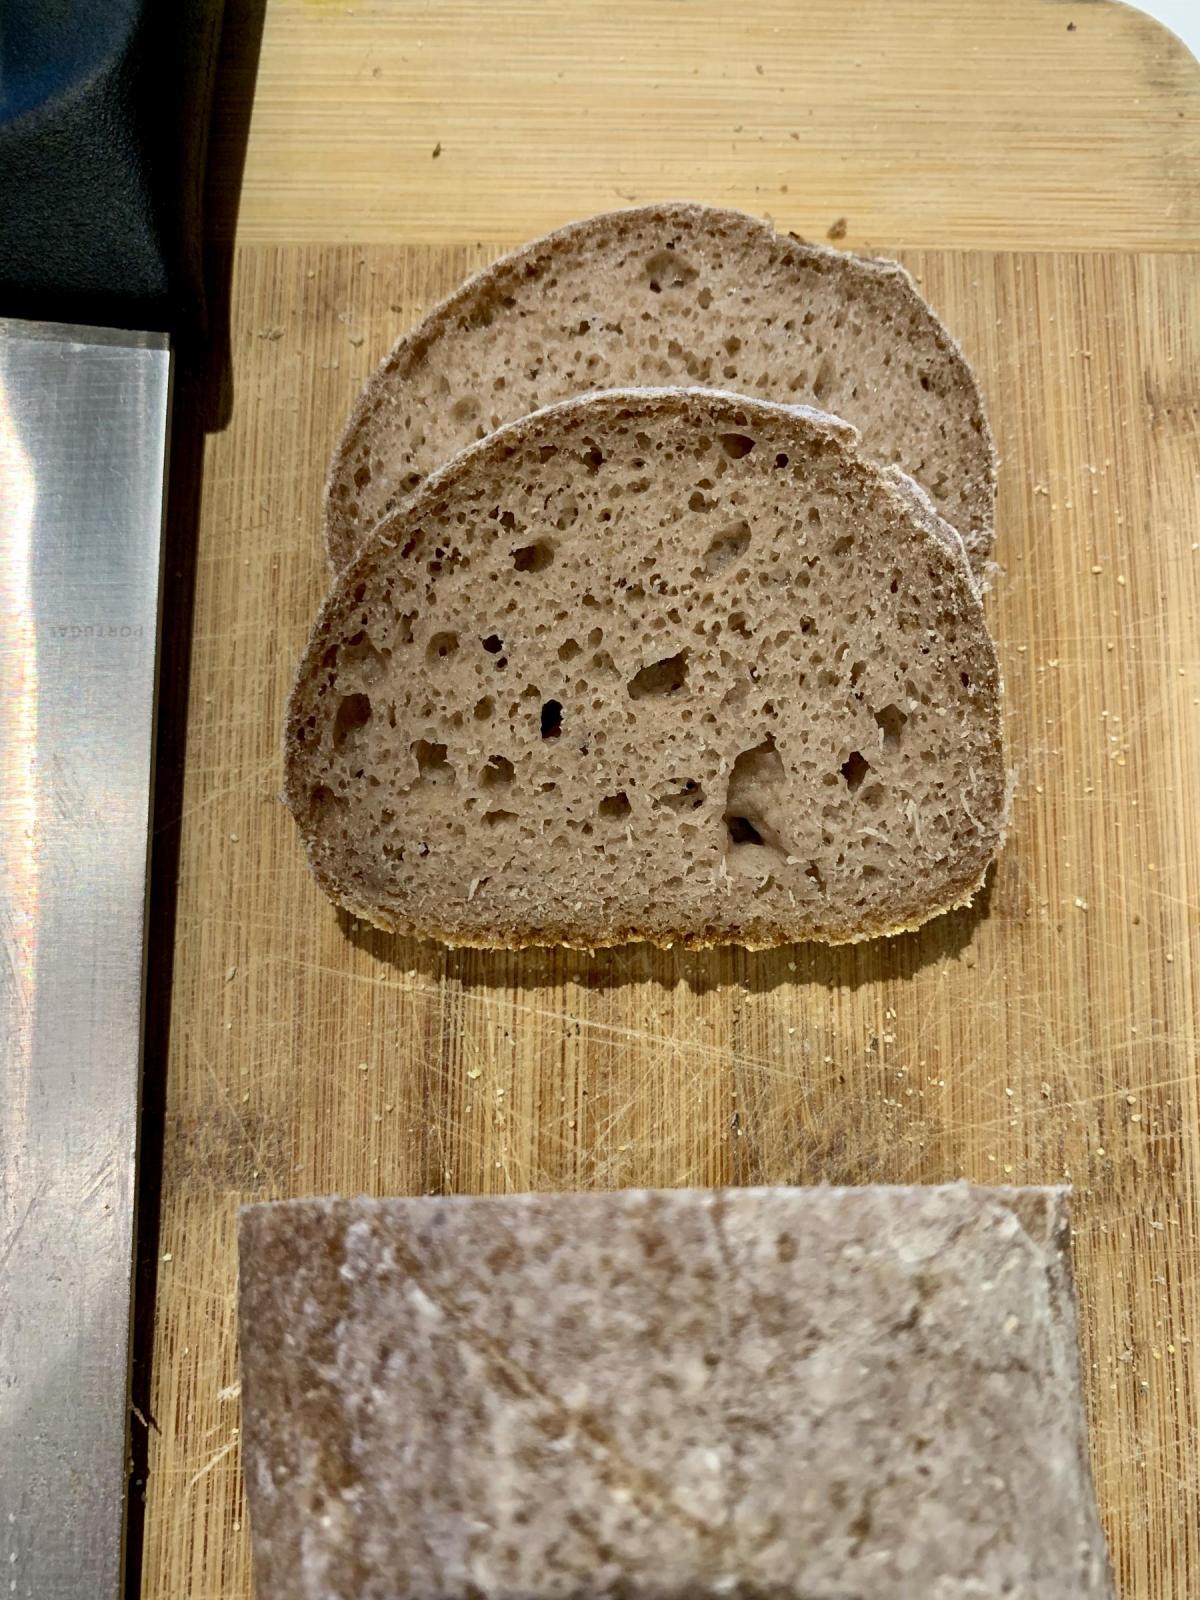
Pretty good crumb.
Quite pretty.


Comments
Semolina is durum, a wheat with gluten. Did you mean corn meal?
Nice pics! Looks delish. You're a good photographer. Your instructions are very understandable too. Good job.
And yes! I did mean cornmeal. Will correct. Thank you for that <3
Nicely written and illustrated. Bookmarked!
Much appreciated!
I plan to try again at making a sourdough gluten free bread. Thank you for posting your tips. The part that throws me is the part where I add more flour. Sourdough seems to need to grow in a loaf on the same grains that were used in the sourdough. It's not like commercial yeast where you can just use it for anything and it makes bubbles. I had a millet sourdough and tried to use it for a corn and buckwheat bread and it didn't turn out, for instance.
Meanwhile I've been using a bread machine to make decent breads gluten free. I look forward to hearing more about your baking experiences.
I think you’re right about the flour thing, and I find that the addition of brown rice flour to the starter up front might help in getting the years to respond to the different flours amidst the brown rice flour. However, I am also finding that I can use a much higher proportion of teff flour to maintain the starter and have great results. The teff really produces an active starter - but of course teff is quite expensive which is partly why I cut it with more brown rice flour than teff. On the other hand, I tried to maintain a purely brown rice starter, and while it worked well for producing bread, it was much trickier to maintain.
Oh! I also just realized you were talking about commercial yeast! So naturally leavened bread is entirely different and works on a much longer time scale than instant yeast, and benefits more from cooler temperatures, longer proofing times, etc. I have about a year’s worth of experience baking sourdough now and have applied what I know about that process to the gluten-free case.
Yes I've been using commercial yeast for now, but so far I've only used Active since I think it tastes better to let the bread sit longer. Some of the people who read my blog are seniors and so I've been trying to work out some recipes that have a homemade familiar taste in a bread machine. I know that's "not really bread" in the view of many, but it's an important independence factor for a Celiac senior or someone chronically ill. I want to find an ordinary cycle that works for decent bread because programmed settings get lost if you unplug the machine and I can't imagine a senior fiddling with it, or a caregiver having to guess the programmed settings. I will probably have to switch to Instant yeast to accomplish that. So that's my current project.
I took a gluten free sourdough workshop (nothing added, just the yeasts on the grain) and tried to replicate the process at home but it didn't work out too well. Some grains do seem to ferment more easily than others. I've heard rumors that sorghum ferments very easily, but I haven't tried it. I'll have to try teff too. So far the best fermentation I've had is from quinoa, which I love the flavor of, in bread, it's just hard to find unhulled quinoa anymore. The local Asian market has organic red quinoa so my plan is to try a quinoa bread again after I've had my fun with the bread machine.
I had a starter going, with millet only, and it was tricky. I added quinoa, and in a few days it looked normal the way it should be. I wasn't grinding the millet fresh from whole grain though. And I was grinding the flour fresh from quinoa. So maybe that made the difference. Later when I tried to go back to millet it proved tricky again and I added some kefir starter (from Cultures of Health) which stabilized it. I guess I got desperate not to lose the "sourdough pet." I made some stellar sourdough pancakes but I never did manage to make a loaf that was nice to show. Your achievement is very impressive.
Really great-looking baguettes, congrats! I have been wondering for a while why some gf recipes specifically call for either whole psyllium husks or powder, I just can't figure out why. I guess they're supposed to behave differently, but in what way?
I believe it is just a texture issue. Kind of like the difference between coarsely ground wheat and finely ground flour. Both can be used to make bread/cakes/pancakes but the textures will be quite different and the handling techniques vary greatly in order to achieve a palatable product. Do remember that finely ground psyllium powder has extraordinary gelling capability and a LOT less is required in a recipe.
I'm new to the site and loving what I see and read. I followed your directions for the GF Sourdough starter. The baguettes are sitting on the pan rising now. I had a little trouble with the rise of the starter and wondering if it was the heavy humidity over the last few weeks. It never went past a few hours and then fell every time. Bubbles were smaller and didn't look like yours when finished although it seems to have lots of activity and life in it. Maybe humidity made it fall. Nowhere near 12 hours! Anyway I am so happy to find this recipe. Thanks for posting and sharing. It's also hot and humid today and turning the oven on is going to be torture.
Linda in Saskatchewan