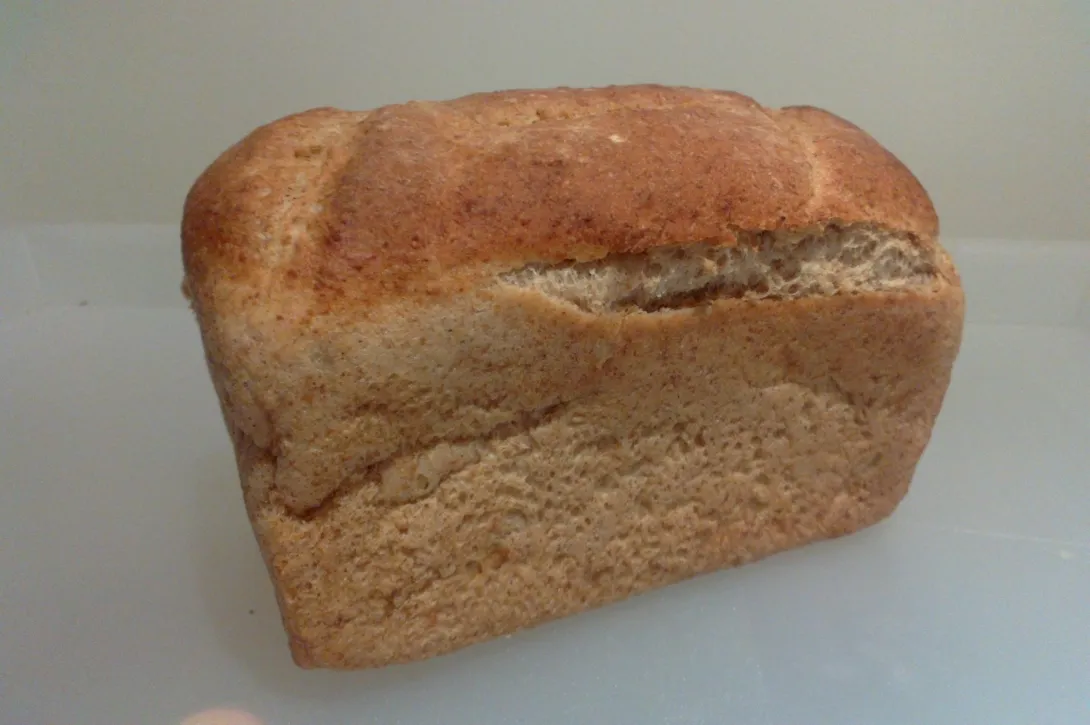
The Fresh Loaf

A Community of Amateur Bakers and Artisan Bread Enthusiasts.

Blogs

aptk's picture
aptk

Yesterday I had a big bunch of starter and two baking plans. One was an artisan loaf, which totally failed, it didn't hold its shape at all, I ended up with a 10 in round disk that had such a crust you could hardly cut it. Today it is bird food out in the back yard.

The second project was the cinnamon rolls, flavored with orange zest, sprinkled with cranberries and walnuts in addition to my regular cinnamon roll fare, frosted with a cream cheese orange glaze, and it's delicious.

Szanter5339's picture
Szanter5339


Szanter5339's picture
Szanter5339


Juergen Krauss's picture
Juergen Krauss

Tailrunner's recent post 

http://www.thefreshloaf.com/node/35029/40-rye-60-spelt-ryw-and-whey

brought my attention back to a bread I posted about here

http://www.thefreshloaf.com/node/28855/spelt-beach

and which I hadn't made for a while.

This made myfingers itch, and I made a 1000g loaf using spelt biga with a tiny amount instant dry yeast, instead of adding the yeast to the final mix.

The result is a very fragrant, pleasing bread that goes especially well with cheeses.

The dough was less difficult to handle than I expected / remembered.

The formula on the second tab of  the Google sheet

https://docs.google.com/spreadsheet/ccc?key=0AkcYHhPxccKtdFhkY1ZNMlR4VVc3ZmdwZGRWQjl1a2c&usp=sharing

and will also be published at the end of this post.

The process follows the single step detmolder published here:

http://www.thefreshloaf.com/node/23830/german-baking-day

Here some pictures and notes about the process:

The two preferments, rye sour (100%HL) and spelt biga (60%HL)

The rye sour ripened for 16 hours, the biga for 5 hours.

The dough, withsome gluten development, after 2 minutes of slap-and-fold. Ready for the bulk proof:

The bulk proof takes about 1 hour at 26C, I stretched and folded twice.

The dough is a bit sticky and fragile, after shaping with a light hand left to proof in a basket:

The final proof takes about 50 minutes.

After this I turn the loaf out onto a peel sprinkled with semolina, and slash:

Baked with steam in a hot oven, starting at 240C, turned down after 15 minutes to 210C and baked for 20 more minutes, voila:

The crumb is quite closed, as usual with detmolder style breads.

And here the formula:


Bakers %

Weight (g)

Straight Dough


Wholegrain Rye flour

20

115

Light Rye flour

20

115

Light Spelt flour

60

345

Water

72

414

Salt

1.8

10.35

Yeast (IDY)

0.1

0.58

Yield

173.9

1,000


Rye Sour


Wholegrain Rye flour

20

115

Water

20

115

Mature Sour

2

12


Spelt Biga


Light Spelt Flour

20

115

Water

12

69

Yeast (IDY)

0.1

1


Final Dough


Light Rye flour

20

115

Light Spelt flour

40

230

Water

40

230

Salt

1.8

10.35

Spelt Biga

32.1

184.59

Rye Sour

40

230

Yield

173.9

1000


Casey_Powers's picture
Casey_Powers

I attempted txfarmers tried and true baguette recipe.  I am way above my scope.  However, bread is a spiritual process that truly stretches you to develop your skills both literally and figuratively.

 A three hour recipe began at 1pm took me till 7:40pm.  The recipe was fine.  I realize that for me I read a recipe very literally like walking 1 step at a time In baby steps. This wet dough is a  challenge for my amateur skill set.  Perseverance is my motto in the process of creating A baguette.  

I am looking to develop my ability in artisan bread.  I would like to be able to use my lame accurately to help my dough to rise and release the steam etc.  I would like a good crust and crumb.  I want to see some holes in a pattern. I would like to learn how to handle a high hydration dough with skill.

  As a funny note, I survived a dog attempting to eat my proofing dough, a finger cut by my new lame, melting children, soccer practice, and I have boys. I  think being a mother of boys says it all.

Floydm's picture
Floydm

Some Lazy Man's Brioche I made this week.  Quite tasty.

My biggest takeaway, baking-wise, from the Kneading Conference West this year is that I've been baking with too strong flour.  I almost always use bread flour, and generally try to bake with the highest protein flour I can find.  It works, in the sense that I usually have strong loaves that can hold their shape well, but they are tougher and less tasty than they need to be.  So I'm trying to ease up and get used to mixing in more AP flour.  I did this with a batch of pizza dough last week and it turned out really nice, much more extensible than what I typically make.  

Still much more to learn about and explore.

HokeyPokey's picture
HokeyPokey

As the weather is getting colder, I am getting more and more into autumn spices - cinnamon and ginger, and what could be better than a warm spicy apple pie on a cold autumn day with a nice cuppa

A full recipe here

aptk's picture
aptk

Bread, the world over, takes many forms. And in the American Southwest this is one of my favorites, the sopapilla.

Now, technically, I understand that this is not a loaf of bread. But psychologically, this perfectly fits the crispy, flaky crust while still being "light". it's a giant air bubble covered with light, flaky crust. You can sprinkle it with sugar, or drizzle it with honey, you can open a corner and fill it with whatever your heart desires, you can sop up your favorite soup or stew, so for me anyway, it's close enough to bread to BE bread.

Three cups of flour, 3 teaspoons baking powder, 1 teaspoon salt, 6 tablespoons shortening, 1 cup warm milk. Mix the dry ingredients, cut in the shortening, add the milk all at once, work into a ball and then let it rest for about 15 minutes.

Divide into two equal parts. Roll out to about 1/8 inch thick, (if it keeps shrinking, roll it as thin as you can and let it rest for about 10 minutes, then come back and roll it again. Using a sharp knife, cut it into squares 3-4 inches. Fry in hot oil (375F-400F), 3-4 at a time, turning to cook on both sides. Drain on paper towels and then eat them while they're still warm.

I will post a more detailed recipe and instructions soon.

pmccool's picture
pmccool

Although this past Saturday morning was wet and dreary outside, things were lively inside the Culinary Center of Kansas City.  Twenty students showed up to try their hand at a Swedish-style bread and practice several shaping techniques.  

One student arrived a few minutes early.  She has attended other classes that I have taught, too.  While we were chatting, she said to me "You've created a monster, you know."  I asked what she meant.  She said, "Well, I bought that book (meaning ITJB) and I've been baking a lot from it."  When I replied that that sounded like a good thing, she said she had killed her Kitchen Aide double ovens and had to replace them.  Apparently her steaming method had cooked the electronics and the cost of replacement was high enough that she figured it would be better spent on a new appliance, so she bought a high-end prosumer brand.  Since she bakes for markets, it's probably justifiable but her husband has apparently been grumbling somewhat.

Other familiar faces included Fuzzy Whiskers and her daughter.  The rest were as new to me as I to them but it didn't take long to break the ice and start having some fun.

The bread itself is lovely, rich with milk and eggs and butter and redolent of cardamom and cinnamon.  Just for good measure, some almonds made their way into the mix, too.  Contrary to most American sweet breads, this bread is just slightly sweet, making it an excellent accompaniment for tea or coffee.

As part of preparation for class, I had made up a double batch of dough and baked it off in four different shapes so that the students could see how the finished product looked.  And then, of course, we served it up so that they could see how it tasted, too.  There were only a few pieces left by the end of class.

Class began with a demonstration of mixing and kneading the dough while fielding questions from the students.  One part of the demonstration included the slap and fold method of kneading, since the dough is quite soft.  It's almost magical to see the dough firming up and gaining body after just a couple of minutes of this treatment, while losing its stickiness at the same time.  The students then went to their workstations and set to work with a will.  As they worked, I moved from station to station to answer questions and offer tips.  It's in this stage that I am often reminded of just how many small things we learn as we develop our skills.  Examples: "See how the dough sticks to your hands less if you pick it up with your fingertips instead of in your fist?"  "Yes, slapping it down is necessary but look at how we stretch the dough outward, too."  "It's okay that the butter isn't perfectly dispersed at this stage of mixing; you will finish blending it in as you add the flour."  And, always, reading the dough's consistency.  

Once the doughs were prepared, I had the students leave them on the bench, covered with the mixing bowls.  Then it was back to the teaching station to demonstrate four different shaping techniques.  The first was just a simple, three-strand braid.  Everyone felt confident that they could handle braiding without practicing in class, so we moved on to the next shape, which was the epi.  Although the epi is usually associated with baguette doughs, it makes a lovely presentation for a cinnamon roll, too.  Everyone wanted to try their hand with this shape, so it was back to the workstations for practice.  None of the practice shaping included the filling, since I wanted the students to gain confidence with the mechanics of the shaping method rather than having to worry about spoiling their bread.  I noticed that a few went ahead and made some braids, too.

The third shape will be familiar to anyone who has made Floyd's Blueberry Cream Cheese Braid.  As before, I demonstrated the method, then the students went back to practice it with their own dough.  It is pictured, below.

The fourth shape was inspired by breadsong's A Rose for Christmas post.  For the class, I treated it as a simple twist rather than coiling it into a rosette.  Following the previous pattern, I demonstrated the technique and then the students practiced it at their workstations.  It is also pictured, below.

What I heard, repeatedly, was "I had no idea something that fancy was that easy!"  People were surprised, and impressed, that they could turn out some very pretty breads all on their own.

At the end of the shaping practice, everyone's dough was bagged up so that they could take it home for shaping and baking as they wished.  We concluded with some further Q&A and then our time was up.

Since I had some take-home dough of my own, I baked it that afternoon.  Here's a picture:

Most of it went to friends at church this morning.

The other thing that I did this weekend was verify the formulae and run some test bakes for an upcoming class on October 14.  Here's a preview, PG:

Paul


foodslut's picture
foodslut

I was reading online this week about baking bread in slow cookers (more here and here), so I decided to make a 3.2 kg (~7 lbs) batch of my house loaf - here's the formula ....

.... and bake three 800 gram (~28 ounce) boules in the oven, and one in our trusty old slow cooker/crock pot.

Whipped up the dough, fermented it overnight in the fridge, shaped up the boules and proofed them (three in cane bannetons, one in the slow cooker ceramic insert lined in parchment paper) for about 90 minutes at coolish room temp. 

I baked the oven boules on a stone, 500 degrees for 9 minutes with steam followed by 45 minutes at 400.  I baked the proofed crock pot boule at "high" for two hours.  In both cases, the internal temp of the bread ended up ~200 degrees. Here's what the slow cooker version looked like out of the pot:


After removing the crock pot loaf, I crusted up the top for 3-4 minutes under a high broil.

Here's a compare and contrast shot, with the boule trio on top, and the crock pot loaf down front.


The boules came out with the usual nice crust.  The crock pot loaf came out VERY soft - when I first poked it after the two hours, it didn't feel quite done.  Checked the internal temp, though, and it was up to 200.

The crumbs?  Not a gross amount of difference ....

Both tasted about the same, with the oven version (not surprisingly) having a much nicer crust to chew on, and the slow cooker version being moister overall (again, not surprisingly, given its cooking in a steam environment).

Bottom line? 

Yes, you can bake bread in a slow cooker using artisan formulas, and it comes out like a nice, soft sandwich loaf - probably close to how I imagine it might come out in a bread-making machine. 

No, the crust won't be anywhere near as nice as doing it in a hotter oven.

That said, it might make an interesting "steam bread" tool, or could be a last resort for someone truly desperate for some home-made bread without access to an oven.

Pages

Subscribe to RSS - blogs