The Fresh Loaf

A Community of Amateur Bakers and Artisan Bread Enthusiasts.

SylviaH's blog

SylviaH's picture
SylviaH


This is my version of Carol Fields lovely currant buns from her book 'Italy in Small Bites'.

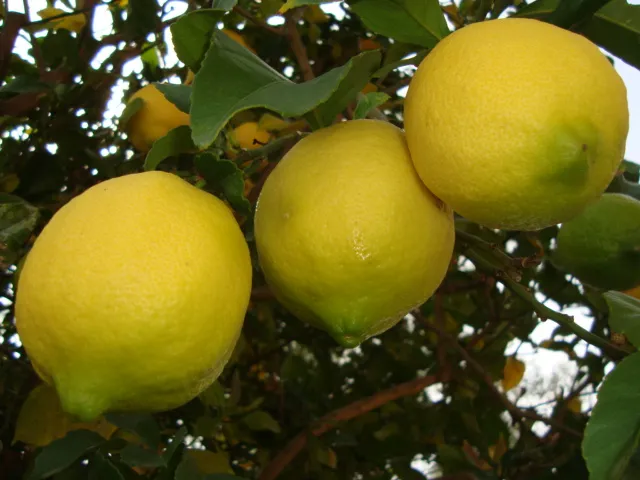
The buns are especially delicious because of the way the lemon zest is infused into the milk, lots of zest and I used my homemade candied lemon peel and fresh unsoaked currants. 

In place of some sugar I used honey and also refrigerated the  shaped buns for an overnight ferment for fresh baked warm morning buns.  

I made some changes to adjust for the extra hydration because of the 3 eggs and yolk used in her recipe..but all in all they did turn out tender and delicious.  

I plan on using the 'lemon buttermilk soak' in my favorite Hot Cross Bun recipe for Easter.  It adds just the right touch of  lemon flavor.  

The buns are not overly sweet or tart...just delicious and tender!  


Zest of 1/2 Organic Lemon, Pith removed

3/4 cup - 170g Buttermilk

Six hours before you plan to bake these little sweet breads, cut the lemon zest in half and score the surface.  Place into the buttermilk, soak 6 hours, drain and reserve the milk.  Finely chop the zest.  

I used fresh fine grated zest from an organic lemon instead of chopping the soaked zest.


SPONGE

2 1/2 tsps.  I used the Gold OIADY for higher sugar content dough

1 TBsp Honey

Reserved Buttermilk

100 g APBF

Stir in a KA mixer the buttermilk, yeast, honey, flour.  Cover and rise until doubled, about 30-45 minutes.


DOUGH

1/2 cup plus 1 TBsp Sugar

3 eggs, room temperature

1 egg yolk, room temperature

About 3 cups minus 1 TBsp. (400 grams) APBF

3/4 tsp. sea salt

9 TBsp. unsalted butter, room temperature

1 3/4 cups currants - I used a little less 

2 to 3 TBsp. APBF

1/4 cup Candied Lemon Peel


GLAZE

Egg yolk and milk or cream


Stir the sugar, eggs, egg yolk, and reserved lemon zest into the sponge.  Mix in the flour and the salt and stir until smooth, using the paddle of the electric mixer.  Beat in the butter, 2 TBsp at a time, and mix thoroughly until the dough is smooth and velvety.  Change to the dough hook and knead for 4 minutes.  The dough should be velvety, smooth, and soft.

First rise

Transfer the dough to a buttered bowl, cover well with plastic wrap, and let rise until doubled.  Thirty minutes before you plan to shape the dough you can soak your currants in tepid water.  


Filling and overnight proof

Drain the currants well, pat them dry, and toss them with the 2 - 3 TBsp. flour.  Flatten the dough on lightly floured work surface and spread the currants and candied lemon peel on the surface.  Gently roll up tucking in the sides.  Let it recuperate for about 5 minutes.  The dough into 12 to 14 pieces and shpae each into a ball.  Place into parchment lined buttered pans.  Let rise until puffy and half doubled.  

I covered with plastic bags and placed overnight into the refrigerator.

Preheat oven to 400F.  

When ready to bake.  Brush with egg yolk and milk glaze.  Bake about 18 to 22 minutes until well browned and golden.


Another Use for my B&T Proofer..  Dry setting   - Speeded up making my candied lemon peels by 'One' day instead of 2 days!


I forgot to score my zest...but I give it a twist over the buttermilk.


I baked these the morning of my Birthday before leaving to celebrate with family.  What a beautiful day!


Wonderful topped with my homemade Lemon Curd


Sylvia


SylviaH's picture
SylviaH

This isn't the prettiest soda bread I've made but then it was very tasty and first of the season.  

I had only about 3/4 of a cup of regular all purpose flour.  I usually use all regular AP.  Today I added my King Arthur AP flour to the regular all purpose to bring the total up to 280 grams measured...not counting the reserved AP that is added to board, hands and light knead of the SB.  Having your soda bread turn out requires that you work the dough quickly and lightly handling it as little as possible.  

I have similar instructions with photos on an older blog post of mine... search box - Sylvia's Irish Soda Bread, there is also instructions to make soda farls.

Today I used:

280 G of KAAP mixed with Regular flour -   Also set aside a small bowl of apx. 3/4 cup of KAAP for mixing, sprinkling heavily the board, hands and any extra you feel you might need to handle this tacky dough.

7 g fine Sea Salt

7 g Baking Soda

289 g Buttermilk  - well shaken

3/4 reserved KAAP flour for  board, mixing, hands

In a deep medium bowl.  Wisk together dry ingredients.  Make a well in the center of the mixture.  Pour in your buttermilk.  

With a fork.  Gently, quickly, mix together to form a mass of just moistened dough together in a shaggy ball.  Use floured hands and gently push to hold together and dump out onto a well floured board.  Shape gently and quickly just to form a ball and gently flatten a little with well floured hands.  Do not over mix.  Sprinkle flour on top and slice a deep cross all the way down, to sides if desired 'traditional cross'.  Place into a pie pan with a little flour on the bottom of the pie pan if desired.  I don't use anything in my pan.

Baked 375F in a pre-heated convection oven  for 30 min.


Sylvia


SylviaH's picture
SylviaH

I baked this bread yesterday evening.  Sliced it this morning and left for the day and most of the evening.  My grandaughters 20th birthday is Sunday and I had some shopping to do with my daughter after seeing my oldest grandson off to his rowing club race..it was a lovely day and I didn't cook...for a change.   When I returned.  Mike had eaten almost half the loaf.  He was probably starving, because he doesn't cook or maybe he really liked this bread...I'll find out tomorrow.  I tasted it and thought it was delicious.  I haven't had much time lately for baking and look forward to making this one again soon, using the bulghur wheat gives a lovely texture to this nice sandwich or toast pan bread.  This a keeper for nice wholesome sandwich house bread.  

The formula I used was only tweaked a little from the orginal...I tend to do that..  all was hand mixed.   

If you would like to see the whole recipe...it's written out very nicely on 'bewitchingkitchen.com' blog' or better yet..Rose Levy Beranbaum 'The Bread Bible' is an excellent bread book I highly recommend.


The proofed loaf is brushed with clarified butter before baking 


Sylvia


SylviaH's picture
SylviaH

Another delicious and very interesting recipe from Freerk.  

Thank You, Freerk!

I had planned on baking these in after an overnight in the frig.  but no room left with the four loaves of that went in a little earlier for a long proof.  I'm sure Mike will be happy.  He will have a great snack when he comes in from work.

They sprang up very nicely in the oven after a cozy warm proof in the B&T bread proofer.  I did bake them at a little lower temperature of 450F and a little longer,  apx. 13 minutes.

The lemon zest is lovely in these rolls.  I use the whole lemon peel from a very large lemon off my tree.

No I'm not at Erik's house 'lol'  these look just like his..two tiered in the B&T proofer.


They are tasty and have a lovely crumb..not to sweet, just right to enjoy anytime.

kitchen lights don't help the photo, but here's a crumb shot.  

Give these a try.  You'll be very glad you did.

Sylvia 


SylviaH's picture
SylviaH

I just would not feel right without some black eyed peas on New Years Day.  Fresh black eyed peas they say represents coins and the kale money...hummm sounds good and lucky to me.  

This is my MIL real southern cornbread recipe..god bless her...I call it grandma Turner's cornbread.  It has no sugar and no flour and is dropped into a hot skillet of bacon fat.

That's italian sweet sausage from my local butcher's in the soup.  Also pictured is today's bake of sourdough loaves..the fourth one was in the oven.  It was made into a round boule..to fill with cheese, like I saw on Farine's blog...yummm.

Grandma Turner's Cornbread

Preheat oven and 10" or 12" (I use 12" for single and double recipe) inch frying pan with bacon drippings in a 400F oven.

2 cups white or yellow corn meal

1 tsp. salt

1 tsp. baking powder

1/2 tsp. baking soda

2 cups buttermilk

2 eggs

4 to 6 TBsp. of veg oil or bacon drippings  - add some or all in the pan.  I add about 6 TBsp. full and  put the pan into a hot 400F oven - removing about 3 TBsp. to go directly into mixed batter.

Mix the cornbread. 

Mix all the dry ingredients.

 Lightly beat eggs into the buttermilk

Add wet buttermilk and egg mixture into the dry ingredients.  Add hot bacon drippings - or veg. oil.   I added 3 TBsp. of bacon drippings.  Reserving about 3 TBsp. in the heating frying pan.

 Very lightly stir the mixture and pour into pre-heated hot iron pan.  It will sizzle when it hits the hot bacon drippings.  I used a 12" pan.  This recipe can be doubled if using a the large 12" frying pan.  The corn bread I have pictured is not a double recipe.

You don't have to do the hot skillet and drippings..if you do..use caution, everything is very hot!  You can just add veg. oil or melted butter to your batter and pour it into a well seasoned and greased heated frying pan.  I used all hot bacon drippings in this bake.  I also like using melted butter in the batter and then pouring the batter into hot bacon drippings in the iron pan.

Bake for apx. 20 mins.  The bread will come away from the sides of the pan and start to crack a little..that's good sign it's done!


                                                     Photo for fun and interest.  We burn a lot of oak around here, but not this one.

                                        I saw this on a television show the other day.  It's the US largest oldest living Oak Tree.  Less

                                        than 50 miles from me.  It has quite a history about the land it's on in Temecula, CA.


Happy New Year's Day!

Sylvia


SylviaH's picture
SylviaH

Wishing you all the very best for the Holidays and the New Year ahead!

'Peace On Earth'


                                                                                  Sylvia


SylviaH's picture
SylviaH

These are so delicious, I can't stop snacking on them.  Everyone loves these, make extra because they won't last long and save some for baking.  I also make lemon for baking and eating. 

The peels were dried in my oven, set on Bread Proof mood.  I had a large batch but, I imagine these would also dry very nicely in the B&T proofer, using a dry setting, No water would be added to your proofer and a higher setting of heat would be used for drying.

The proofer tempered my chocolate beautifully.  Once dipped into the fruit it set up nice and firm, with a nice snap and shine to the chocolate, without melting at room temperature.  The instructions for tempering chocolate are included with your proofer.  

I used Valrhona Le Noir Amer 71% Cacao Dark Bittersweet Chocolate, 2 bars.  I can purchase them at my local Trader Joes.

I made a lovely gift package to someone who requested these chocolate dipped from last years Christmas gift of plain candied orange peels.  Everyone loves these candied peels and the chocolate just makes them even more delicious.

Recipe for the Scorze d' Arance Candite - from My Calabria - Rustic Family Cooking from Italy's Undiscovered South - Rosetta Costantino with Janet Fletcher - 

5 large navel oranges with thik peel, unsprayed  -  I used a thinner peel navel orange - organic is  must - I like leaving the pith on the peel.

4 cups (800 grams) sugar, plus more for coating

2 tablespoons lemon juice

Cut the peel of each orange into strips roughly the shape of a marquise diamond, about 1 inch (2 1/2 centimeters) wide at the widest part and pointed at the tips, slicing from stem end to blossom end and cutting all the way throught the peel, but not into the juicy flesh.  Remove each strip as you cut it.  If you wish to remove more pith, do not slice into strips until you have finished boiling your peels.

Place the peels in a 4-quart stainless saucepan and add 2 quarts (2 liters) cold water.  Bring to a boil over high heat and boil for 2 minutes.  Drain and repeat two more times.  

After third blanching, drain the peels and return them to the pot.  Cover with cold water and let stand until cool, then drain again.

At this point you can remove some of the pith is desired.  Keep at least 1/8 inch of pith on for cushion.  At this point I sliced my peels in approximately 1/4 inch slices.

Return them to the pot, and repeat the 2- minute boiling two more times, for a total of 5 times.

Put the sugar in the 4-quart (4-liter) stainless saucepan.  Add the lemon juice and 2 cups (500 milliliters) water.  Bring to a boil over high heat, stirring occasionally until the sugar dissolves, then reduce the heat to maintain a steady but not vigoruous boil and cook for 15 minutes to thicken the syrup.  Add the drained peels.  Cook at a gentle simmer, stirring occasionally, ntil the peels look glassy and translucent, about one hour.  To test remove and cool a peel.  You should be able to almost see through it.

Remove the peels from the heat and let them cool in the syrup overnight.  They will plump in the syrup, and the syrup will thicken. (Like jam, I wouldn't advise stirring at this point.  It tends to break the syrup and it will not thicken as much.)

The next morning, set a wire rack over a cookie sheet.  I lined mine with wax paper.  Transfer each strip to the rack by hand, letting the excess syrup drip back into the saucepan.  Use your fingers to scrape excess syrup from the peels; they should not be bripping.  Let them dry on the rack until they are not longer tacky, about 24 hours.

Make a bed of sugar in a flat dish and press each strip in the sugar until evenly coated on both sides, patting the sugar into place.  Return the strips to the rack and let stand at room temperature overnight to dry further.  I used my wall oven set in bread proofer mode.

After drying.  Temper your chocolate.  Dip your candied peels.  

I place them onto parchment paper to dry.  This only takes a few minutes.  They tend not to stick to the parchment paper.  If dried on the rack they will stick.


tested photos from my IPhone 4S...worked pretty good : ) but I had to resize them in shrink photos, the only way I could figure out  how to do it.  Any suggestions are appreciated for resizing IP4S photos for TFL : )

ADDED:  Don't forget to boil and save your simple syrup.  Iced tea addition is nice, pound cake or maybe tonight I might try it on some chicken wings : )

Sylvia   


SylviaH's picture
SylviaH

RLB Bread Bible - Pugliese with durum flour.  

This is a recipe from one of my favorite breads.  I baked this bread about the same time to the day last year.  Here it is posted with a link to another posting with a recipe in the blog as, you can see, I do enjoy eating and baking this bread.   

I proofed the biga, dough and final proof in my new Brod&Taylor home proofer.

It's was very nice to be able to set the temperature of the bread proofer, to get things going at a more predictable time..so I wouldn't be up to late.  Worked perfectly as you can see from the photos, I set it at 80F to speed things up just a bit.  

I had plenty of flavor using my 2 day biga...which was warmed up in the proofer, after being removed from the refrigerator.

I doubled the recipe and it made one nice big pugliese loaf.

*My hydration levels are adjusted slightly for various reasons...dryness of flour, ect.    


I did make extra Biga 

The version I used two times the original recipe

1. Biga

KAAP flour - 150gm

IDY - 0.4 gm

Water - 118 gms

6 hrs. to 3 days ahead make the biga  -  Set aside at room temperature for about 6 hours - Stir down and refrigerate

I used a two day refrigerated biga for optimal flavor

Dough

1.  KAAP Flour - 142 gms

2.  Durum Flour - 142 gms

3. IDY - 3.2 gms or apx. 1 tsp.

4.  Salt - 10gms

5. * Water - 236 gms

*You also have the option of adding malt powder..be sure and adjust for doubling or tripling the formula.  

 All the Biga from above


Percentages below are as listed in the Doughs "orginal formula."

*You also have the Optional: use of malt powder 1/2 t. - 1.6g  

The formula above is double the orginal formula.  I also 3 times the original formula for two nice sized loaves.

Flour 100% - 74% Bread - 26% Durum 

Water 80.4%

Yeast 0.79%

Salt 2.2%


I placed my warmed weighed biga into the weighed room temperature water.  Then I added it to the wisked flours, yeast and salt.

Mixed it slowly for a couple of minutes till all was moistened.  Up the speed of my mixer gently and mixed until I had a smooth, sticky dough..about 5 minutes..adding a teaspoon of flour if needed.

The dough will be very sticky.  On a well floured, use durum flour, flour about a 6 inch square on your board.  Using a scraper or well floured hands, scrape out the dough onto the floured area.  Dust the top of the dough with a little more durum flour.  Rest a couple of minutes, the flour will absorb into the wet dough.  Give it a stretch into a letter fold.  Dust it again and allow it to rest for about 30 minutes.

Repeat a second and third time, folding the edges into a rounded shape in the corners and place into your proofing bucket, sprayed lightly with oil.  

Proof at about 75F to 80F until tripled.

Pre-heat Oven and stone -  500F for about an hour

On a counter with durum flour, very gently remove your dough onto the counter and shape into a ball and place into your basket.  Seam side up, pinch the seam together.  

Proof until ready to bake.

The loaf is baked on a parchment lined sheet pan.  For the (first half of the bake).  Then you can remove the pan.  I used my long handled bar b que spatula.  I also use my pizza pan.  You can cut a round of cardboard to help you gently remove the proofed loaf and flip onto the parchment lined sheet pan.  Don't put your cardboard round into the oven like I did..oh well, no harm done.

Pre-steam and steam your oven.  

Turn the oven down to 450F after the first 5 minutes.  Bake until bread is deep golden brown and tested done.  I baked my large loaf about 35 minutes and left it in the oven with door ajar and oven off about 5 minutes before removing it to the cooling rack.

  My Biga warming up in the B&T proofer


                 Dough proofing at set temperature


                        Looks happy.  


                                    Now the final proof


                          Time to get it in the oven.


                                  happily steaming away


                                     Steam pans, Pizza pan and parchment removed 


                                       The cooling loaf crackled and sang

              I got to bed early, thanks to my new proofer.  Enjoyed

              a slice for breakfast this morning.


                       Sylvia


SylviaH's picture
SylviaH

I ordered the Brod & Taylor proofer yesterday and, received it today!  OMG, I'm thrilled with it.

 It is larger than it appears in the video's..which I love.

 I have folding leg cooling racks pictured to show how they fit in the proofer.  A 1/4 sheet pan 'cookie sheet with extended handle ends is pictured'  and, a banneton, both would fit very nicely.  I do recommend these to go with the proofer.  They will come in very handy.

 I cover my bannetons while proofing bread, in plastic bags which would, work nicely to protect the willow straw baskets..or you could use the plastic ones, uncovered, to take advantage of the humidity option, which I don't have,  hmmm, I may order some now.

Wilton is the maker of my stainless steel pack of 3 cooling racks.  Sometimes you can find them at local stores such as Michaels, Target, Walmart type stores.  I have seen them online with free shipping at Amazon.com.  You would only need one or two.  They come in a package of three and I use them all the time.  They are very handy and not expensive.

I'm absolutely thrilled with the proofer and haven't even used it yet ; )  I have some many plans for it, especially like Eric Hanner suggests using it for preferments.  I also enjoy making yogurt and, I think it might even come in handy for baby chick eggs..just kidding...but it certainly would have come in handy when I was raising a baby pet finch tossed from it's nest 'lol'.

Thanks Eric!  Love It!

ADDED:  The Wilton racks from Amazon. com are to large, be sure and measure.  You can find these racks at fantes.com that measure 13.5X9.75 come in a pack of 3 for $11.99 ... I also use one small cooling rack hung by paperclips and adjusts in height..works great.


Sylvia

SylviaH's picture
SylviaH

Yesterday I prepared my bread for today's wfo bake.  My starter had been neglected and could have used one more feeding but it seemed to work out fine.  

I had my oven fired up very hot for several hours and could have started it later.  I had  plenty of stored heat, more than I needed.  

 I had a handful trying to rotate 5 loaves and the steam pan around for the first ten plus minutes.  So I wasn't completely happy with the way my loaves browned.  What I could have used was another pair of hands for holding my flashlight, since Mike had already left for work..one of these days I'll break down and get a clip on lamp. 

No photos of my nightly visit from the possum.  I did see his girlfriend run by..OMG... it is bigger than my Jack Russell.   This is the one Mike has been telling me about and Katie grabbed it the other night..but no harm..she obeyed Mike and let it go and Joey our Jack Russell also minds Mike..Bella just barks and keeps her distance.   Now back to baking!  

I've been practicing placing 2 loaves on one board and when one comes off the other sides to the end of the paddle and is ready to come off next with another quick movement.  Works great and is not as hard as it looks, but I pushed it placing in 5 loaves and working around the steam pan.  It made things a little awkward for me.  I use plenty of flour on the paddle and they slide right into place.  Sliding pizza's off a paddle has been good practice for me.

I baked my usual sourdough's tweaking the recipes.   The recipes are from 'Northwest Sourdough' Basic Sourdough and Mill Grain Sourdough using a 100% hydration levain, to which I added some of my Harvest Grains blend from KAFlours.  it has whole oat berries, millet, rye flakes, wheat flakes, flax, poppy seeds, sesame seeds, and sunflower seeds.  I also used some rye and wheat added to the bread flour. 


Here's what I cooked today in the WFO.

I started with Rib Eye's grilled on the Tuscan grill over wood coals

I made a pizza's I thought would go nicely with the rib eyes.

I have been looking all over for dried cannellini beans and found them at Whole Foods.


Pizza's were topped with cannellini beans, heirloom tomatoes, provolone, romano, parmesan, EVOO, garlic, basil.  This one was pretty well charred but still delicous.  The oven was so hot it cooked in under 90 seconds.  So the steaks were cooked first and then the pizza.


Sliding 2 loaves off paddle one at a time

Other bakes today...meatballs and cookies


          Crumb of Mill Grain Seeded Loaf ..... photo in night light of kitchen.. 


             Sylvia


Pages

Subscribe to RSS - SylviaH's blog