The Fresh Loaf

A Community of Amateur Bakers and Artisan Bread Enthusiasts.

Syd's blog

Syd's picture
Syd

Thanks to JoeVa for this detailed recipeI have made it three times now.  The first time my hydration was 60% as per JoeVa's recipe.  I didn't stick closely to the mixing instructions and worked the dough more than JoeVa recommended.  The crumb wasn't as open as I had hoped.  On the second time I upped the hydration to 63% and followed JoeVa's recipe to the letter. The crumb was nice and open.  On my third attempt, I once again increased the hydration: this time to 65%.  There wasn't much difference between the second and third attempts.

I retarded for 12 hours. It had a mild tang and it was delicious fresh on the first day.  It was similar in texture to a baguette with a razor sharp crust and soft interior.  I really like that contrast. 

On day two it made a good BLT, although that crust was dangerously hard and sharp after being lightly fried in the bacon renderings (and, yes, I know it isn't healthy, but it is delicious :).  I am wondering if that diamond crust has anything to do with the hard nature of semolina. 

Best,

Syd


Syd's picture
Syd

This is my version of a local speciality:  squid ink baguette.  Actually, I am not even sure if this kind of bread was first made in Taiwan, or even in Asia for that matter, but nowadays you can find it in almost any bakery. It is often sold as a sandwich with a seafood filling.

Locally, it is called Squid Ink French Bread and so I have always assumed that it was basically a baguette dough with the addition of squid ink.  It seems that I was wrong, though.  On Friday I found this recipe posted by one of my favourite local bloggers.  I recently used her formula in my Asian Style Pain de Mie post.  Her post includes two formulas: a Taiwanese version of squid ink baguettes and a lean version.  The Taiwanese version includes sugar, butter and vital wheat gluten.  Both recipes use a 70%/30% mix of bread flour/cake flour. 

I made this last weekend but wasn't happy with the result: my hydration was too high and I didn't include enough s&f's with the result that the baguettes flattened out.  The colour wasn't dark enough either.  They looked grey instead of black.  I used the ink sacs from two squid and probably should have used double that amount. 

So I had a fresh go at it again this weekend.  This time I bought a bottle of squid ink.  It was quite pricey but saved me the effort of having to clean the squid myself and I can use it for future bakes or for squid ink pasta.  I stuck to my same lean dough but included 妃娟 suggestion of using 1% Asian basil which she said would suppress the fishy smell from the squid ink.  She recommended using 3%-5% squid ink.  I used 5% because I didn't want to end up with the grey mess that I got last weekend.  I also stuck with 100% all purpose flour.

Overall Formula

  • 350g all purpose flour    100%
  • 220g water                      63%
  • 17.5g squid ink                  2%
  • 1.5 g yeast                     0.4%
  • 7g salt                               2%
  • 3.5g shredded Asian basil 1%

[Hydration = 65% (squid ink is included in overall hydration)]

Poolish

  • 140g all purpose
  • 140g water
  • 1/16 tsp yeast

Allow to ferment for about 12 hours.

Main dough

  • 210g all purpose
  • 70g water
  • 1.5g yeast
  • 17.5g squid ink
  • 7g salt
  • 3.5g finely shredded Asian basil

Bulk fermentation: 3 hours.  Divide dough into three.  Pre-shape. Rest 15 mins.  Shape.  Final proof 1 hour 15 mins on floured couche.  Scoring:  one single slash along the length of the baguette.  Bake at 230 C on a pre-heated stone for 18 mins with steam for the first 10.  Remove from oven.  Allow to cool on wire rack.  Dust with chilli pepper or paprika if you can't take the heat, but I really recommend the chilli as it is the perfect partner to this bread. 

Be warned: squid ink is an acquired taste.  It is not for the faint of heart.  Best eaten as a filled sandwich.  Suggestion: lettuce, crab meat, mayonnaise, squeeze of lemon, salt and pepper and fresh cilantro.

Syd

Syd's picture
Syd

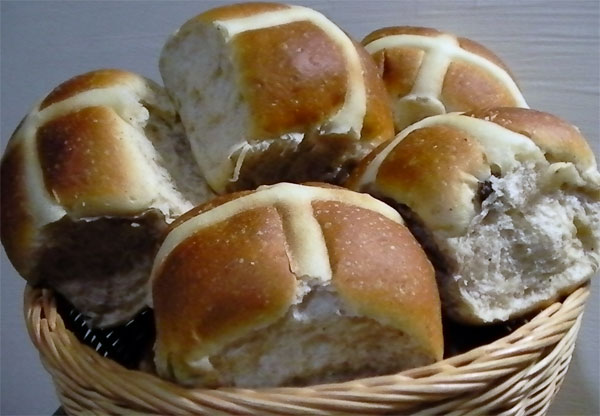
This made some of the nicest hot cross buns I have ever tasted.  I used the same dough as for the Asian Style Pain de Mie but added:

  • two very generously heaped teaspoons of mixed spice (I made my own and used these ratios which I found on the internet)

16 parts cinnamon
8 parts coriander
4 parts allspice
2 parts ginger
2 parts nutmeg
1 part ground clove

I used whole spices and ground them up in a coffee grinder. I think using my own freshly ground spices made all the difference to this dough.  The aroma was intoxicating.  Nothing I have ever bought from a shop smells even remotely as fresh and as pungent as that.  Omit this step at your own peril!


  • 230g of raisins

I scaled them at about 90g a piece and arranged them close to (but not touching) one another on a baking tray.  This amount of dough made 24 buns.  For the cross on top I made a paste of flour and water which I sweetened with some sugar and then piped it on with a piping bag.

They took about 2 and a half hours to rise.  I baked at 180C (with convection on) for 18 mins.  I allowed them to cool slightly for five minutes before removing from the pan and placing on a wire rack to cool.

They are pillow soft and delightfully fragrant.

I expect them to keep well, too seeing that I used the water roux method.  They took three and a half days to make from start to finsih but they were well worth the effort.

Syd

Syd's picture
Syd


Glenn, inadvertently, threw down the gauntlet this week when he asked a question in his post: How to get a light and tender crumb in sourdough.  I took up the challenge (even though I know Glenn didn't mean it that way) and in the process got diverted from what I had originally itended to bake this weekend. 

Initially, I considered adding milk and some form of shortening, but on re-reading Glenn's thread I realised he didn't want the dough to be enriched in any way.  So flour salt and water it is.

I am pretty happy with the result and I think the following all contributed to its success:

  • a low protein bread flour (11.5%)
  • a higher hydration than usual
  • the water roux method
  • extensive kneading
  • lower bake temperature and shorter bake time

Water Roux

30g bread flour (11.5% protein)

150g water heated to 75 C

Dump flour into water.  Stir until smooth.  Cover tightly with cling film.  Allow to cool to room temp.  Refrigerate overnight.


Sourdough Starter

30g ripe sourdough starter @ 100% hydration

50g WW flour

10g rye flour

60g water

Mix until smooth and leave to ferment for about 8 hours or until just about to peak.


Main Dough

180g water roux (pass it through a sieve if there are any lumps)

150g sourdough starter @ 100% hydration

170g water

1 level tsp diastatic malt

Whisk the above until well incorporated.  Now add:

420g bread flour (11.5% protein)

Mix to shaggy mass.  Autolyse for 50 mins.  Now add:

9g salt

Now you have to knead until you get a really good windowpane.  I don't have a stand mixer, so that meant hand mixing for a long time.  I didn't time it exactly, but if I had to guess, I would say that I spent anywhere from 30 to 40 minutes kneading.  If I had a stand mixer I would have developed the dough even more, but I don't and I was getting tired, so I stopped. Unfortunately, there was no one on hand to help me take a pic of that windowpane. Pity, because I can't see myself doing that again in a hurry.  Of all the changes I made to my regular recipe, I think the additional kneading made the least difference.  Perhaps after all that time it still wasn't developed enough.  Maybe I would have noticed a bigger difference if I had used a mixer.

Bulk Ferment

2 hours with S&F at 50 and 100 mins respectively

Pre-shape.  Rest 20 mins.  Shape.  Retard overnight.  Usually, I three quarter prove before I retard, but it was getting late, so this one went straight into the fridge.

Bake

210 C with steam for 20 mins.  190 C without steam for 25 mins.  Usually, those temps would be 230 C for 20 and 200 C for 35 mins.  Then I would switch the oven off and let the bread dry out with the door cracked open for another 5 mins.  This time I didn't do that because I didn't want the crumb to get dry.  The internal temp was 209 F.

The crust was a bit thinner than usual due to the reduced baking time and lower temperatures.  The crumb is beautifully tender and moist.


This is a nice tasting bread with a mild, but surprisingly evident, wheaty flavour despite there only being 50g of WW in the recipe.

Syd


Syd's picture
Syd

This is a super soft, highly enriched, labour intensive, Asian-Style Pain de Mie. It involves the 湯種 (tang zhong or water roux) method and took 3 days from beginning to completion.  The original recipe and instructions can be found here.  The recipe makes 2kg of dough.  It filled one, 1kg pullman pan and two 500g pans.  I baked without the lids on because I prefer the rounded tops and I also like a bit of colour on my loaves.  They always look slightly anemic when they come out of those pullman pans. 

Day 1

Water Roux

milk 70g

butter 30g

sugar 3g

salt 1/8 tsp

bread flour 70g

Heat milk, butter, salt and sugar in a saucepan.  Bring to the boil.  Remove from heat.  Dump in flour and stir to a smooth paste.  (A bit like making choux pastry). Cover tightly, allow to cool to room temp and refrigerate for 16 hours.

16 hours later

Tear into small pieces and add:

bread flour 700g

instant yeast 2g

milk 430g

sugar 20g

Knead until it comes together, cover tightly and refrigerate for at least 36 hours but not more than 72 hours.  (I retarded for 48 hours).


Baking Day

Tear it into pieces again and add:


bread flour 300g

Salt 12g

sugar 120g

nstant yeast 5g

milk 100g

whole egg 140g

It will turn into a sloppy mess and if you have a stand mixer it will be better.  I don't, so I just have to make do with slap and fold (a la Bertinet).  It actually comes together pretty quickly. When it has come together add:

butter 100g

Now knead it until your arms cramp up or until you get a windowpane as clear as a gossamer wing (whichever comes first).  Again, a stand mixer would be of great benefit here.  Bench rest 15 - 20 mins.  Shape and place into pans. 

Allow to rise until about 8/10ths full then cover (if you want) and bake.  I baked at 180 C (convection) for 40 mins.  The original author gives temps for an oven that can control both top and bottom thermostats.  My oven isn't that fancy so I just went somewhere in the middle and it worked.  Next time I will bake for 35 mins.  I think my crust was a little on the thick side this time.


Heavenly with marmalade and a cup of Earl Grey.  It tastes good on its own, too.

Syd


Syd's picture
Syd

Poolish

250g all purpose flour
250g water
1/16 - 1/8 of a tsp yeast (more if it is cold, less if it is hot)

Mix together and leave for 12 hours.

Dough

300g white bread flour 
130g milk (scalded)
unsalted butter 6g
10g salt
3g instant yeast
a little less than 1/4 tsp of ascorbic acid

[Hydration = 69%]

Scald milk and add butter and salt to it. Stir until dissolved. Allow milk to cool to room temp.  Add to poolish, then add dry ingredients.

Knead for 5mins - rest for 5mins - knead for 5mins. Allow to proof until doubled. A stretch and fold half way through fermentation is necessary not so much for gluten strength, as it is to degas the dough.  Pre-shape. Shape and put into a two pound tin. Let it rise until coming about an inch over the top of the tin. (My tin is a 10x19x11cm 900g loaf tin).

Bake at 230 C with steam for 15 mins and without steam at 190 C for 35 mins. Remove from tin for last 10 mins .


This loaf has a crisp crust and a tender, moist crumb.  It toasts very evenly and makes a good sandwich.  It keeps well, too.

Syd


Syd's picture
Syd


Levain

30g starter @ 100% hydration

60g whole wheat flour

60g water

Allow to ripen 8 - 12 hours.


Final Dough

150g levain

275g water

450g bread flour

80g dried longan

8g salt


Mix together levain, water and flour.  Autolyse 50 mins.  Knead in salt.  Finally knead in chopped dried longan.  Bulk ferment for about two and a half hours with folds at 50 and 100 mins respectively.  This turned out to be a strong dough and probably didn't need the second fold.  Divide in two. Preshape.  Rest 20 mins.  Shape into batards.  Final proof, two and a half to three hours.  Slash.  Bake with steam for 20 mins at 230C and without steam at 200C (convection) for another 20 mins.


Dried longans are expensive and I stinted on them.  I should have chopped them up finer, too.  As it was, not every slice had fruit in it or, at least not enough.  I love the taste of dried longan and more is better.  As a result the slices with not enough fruit were bland and now I am already planning the next attempt.  Next time, apart from adding more fruit, I will add some longan syrup to see if that will enhance the flavor even more.


Boule


150g ripe starter @ 100% hydration

300g water

80g sifted whole wheat

20g rye

350g bread flour

3g diastatic malt

Mix together and autolyse for 50 mins.  Now add:

10g salt

Knead until moderate gluten development. Bulk ferment two and a half hours with folds at 50 and 100 mins respectively.  Pre-shape. Rest 20 mins.  Shape into tight boule.  Allow to proof until three quarters risen.  Retard overnight.  Remove from fridge and allow to complete proof: one to two hours.  Bake on stone @ 230C with steam for 20 mins and @ 200C (convection) without steam for a further 30. Switch off oven, crack oven door open and allow to dry out for a further 5 mins.


No crumb shot for the boule, yet but will update with one tomorrow.  This is just my standard everyday bread, so I know how this one is going to taste.

Syd

Feb 22:  Crumb shot.


Syd's picture
Syd

Light Whole Wheat Batard

150g starter at 100% hydration

275g water

80g whole wheat

20g rye

350g bread flour (11.4% protein)

10g salt


Autolyse (with starter) for 50mins.  Add salt. Knead by hand until salt is incorporated.  Bulk fement 2 and a half hours with folds at 50 and 100 mins.  Divide in two.  Preshape.  Rest 20 mins.  Shape into batards.  Allow to proof to about three quarters of final size. Retard overnight in fridge.  Remove from fridge and allow to complete final proof.  Bake at 230C with steam for 20 mins and at 200 without steam for 20. 


And the cross section.


I am becoming convinced of late that sourness has more to do with the acidity of the starter prior to mixing than it has to do with length of bulk ferment, hydration of starter or retardation of dough.  I have retarded loaves overnight that haven't had the slightest hint of sourness and I have made loaves where the entire process took no longer than eight hours that were mouth puckeringly sour.  The above batards were made with a starter that had definite acetic overtones and the tang is evident in the baked loaf.  When I opened the jar to use the starter the acetic tones were actually quite overpowering, but after I gave the starter a good stir the fruity notes took over so I would only classify this as slightly acid.  The baked bread has only a very mild tang.  But I have baked bread with starters that have very strong acetic smells and the final product is really very sour.  Invariably these breads can only handle a short bulk fermentation and final proof before gluten starts to break down. 

Syd

Pages

Subscribe to RSS - Syd's blog