The Fresh Loaf

A Community of Amateur Bakers and Artisan Bread Enthusiasts.

theresasc's blog

theresasc's picture
theresasc

Here is the second loaf from this weekend.  Same formula as the first, only I ran out of time so it had to go into the fridge overnight.  Baked it this morning.  I do not think that I was as aggressive enough at deflating the dough with final shaping - the holes are irregular, some are quite large, and it looks like one of the slashes wanted to blow out.  I am thinking when I get to cutting the loaf through the big slash that there is going to be a large, empty hole.  Still have my shaping training wheels on:-)

This loaf is tangier than than the first - I am guessing that came from the cold retard.  The flavor is good but I am not looking to make real sour bread.  That is one of the reasons I am using the Blue Agave in the dough, hoping that the sweet will balance out the sour from the starter.


theresasc's picture
theresasc

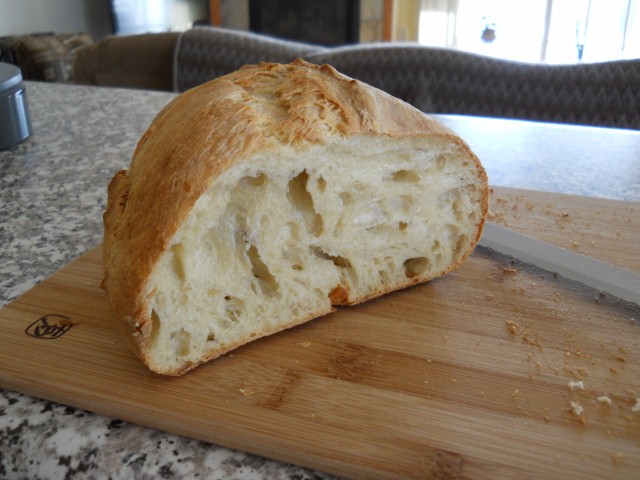
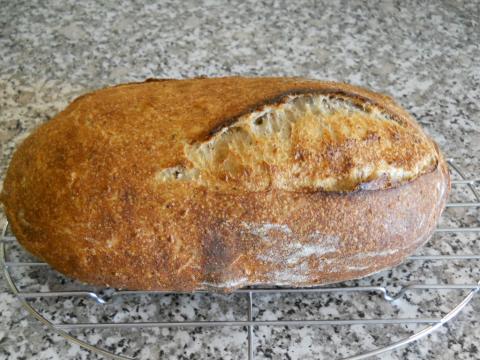
Bake 1:2:3 sourdough again today.  This is my best looking so far.  I took AbeNW11's advise and did my build a little different:


10 g 100% WW starter + 15 g ww flour + 15 g water - This sat out on the counter, it went a lot longer than I had anticipated, almost 11 hours (work got in the way)

2nd build - all of starter + 40 g ww flour + 40 g water - on the counter overnight.

Early this morning:

120 g starter

240 g water

360 g A/P (I started using Dakota Maid and it is a nice flour to bake with)

10 g Blue Agave

10 g toasted sesame seeds

10 g toasted wheat germ

Autolysed 30 minutes, added 6 g salt, slap and folds for about 5 min, and then did a series of S&F every 20 minutes 4 more times.  Bulk ferment on the counter in a covered bowl for about 2 hours.  Poured it out onto my bread board and did the first shaping like in the SFBI video, rested 30 minutes, final shaped as in the video and placed in a floured banneton.  Left on the counter for another hour, pre-heated the stone to 500F, put the banneton in the freezer for 15 minutes, flipped, wet down with wet hands, slashed, and onto stone & covered.  Baked 5 minutes at 500F, lowered to 460F, baked another 5 minutes, uncovered, turned and baked 15 minutes, til internal temp. reached 210F.

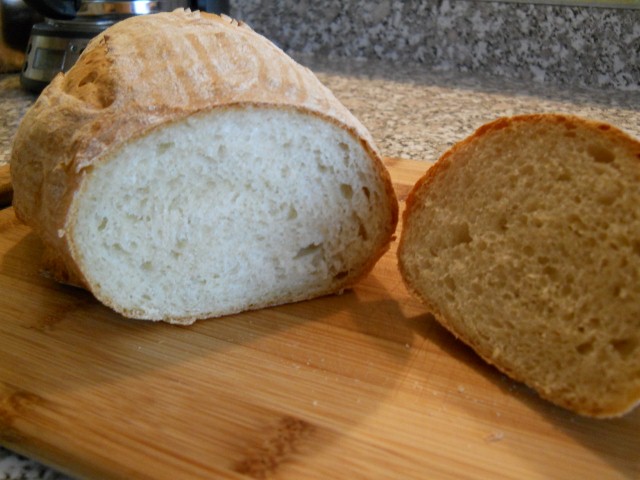
This is the nicest looking loaf of sourdough I have ever made.  The shaping was so easy thanks to that video, my dough looked just like on the video.  Taking it to Mother's Day tomorrow, so the crumb shot will have to wait.


theresasc's picture
theresasc

There were so many wonderful looking breads with lots of stuff in them posted in the last week that I decided I wanted to play too.

I had picked up a bag of spelt berries and ground some into flour to use when I was trying to get a whole wheat starter starting.  The bag and the leftover flour have been just sitting in the pantry and when I saw a couple of posts using "toadies", I thought that maybe the spelt berries would work out well like that.  I dry toasted spelt berries, which was really cool - they popped in the pan!  And then toasted some rolled oats, and some pecans, and sesame seeds. 

I made a poolish with rye flour, left out overnight.  I had been putting rye starter discards into my everyday bread in place of a poolish, but I did not have any discards, so I thought that a rye poolish would impart some of that rich flavor to the bread.  I tried breaking down the toasted spelt berries in my small food processor, but that did not work, so into my Krup coffee grinder for a few spins around.  I tossed the oats and the pecans into the food processor and buzzed them around a bit as well.  All of that went into the bowl with AP flour, WW flour, some spelt flour, the toasted sesame seeds, water, honey and yeast. 

The bread is very tasty, but I am not sure that I like the feel of the spelt berries.  They have a great flavor, but they are a bit clunky in the bread.  Maybe I could try soaking or scalding them next time.

I think that this bread should grill up really fine - so far its tasty just as it is.

Theresa


theresasc's picture
theresasc

I made pita bread using the recipe here on TFL.  It was way cool watching the pitas puff up in the oven.


 I was also able to use my grandma's bowls and rolling pin to make the pitas.  It is great to be able to use her things and keep conected through the generations.  I just recently received the bowls, and they are now my bread making bowls. 
theresasc's picture
theresasc

I have been reading up about starters, decided to jump in and find out what it is all about.  I tried doing the 1 Tb. water & flour deal that was on a recent thread but did not have very good luck that way.  Then I read about the pineapple juice starter, so I started up two, one with AP flour and one with WW flour, only I used orange juice instead of pineapple juice.

My starters finally started doubling up after about 11 days, so two days ago I built up the AP for a bake.  I used the 1-2-3 method of determining my starter/water/flour ratios for the bread, and shocking!  it worked!! 

The dough was quite a bit different from what I had been making using a poolish, and I did put it in the frig for about 3 hours after I mixed the dough up.  I then let it warm up and raise at room temperature, doing S&F's along the way.  One of the first things I noticed was that everyone is right, it takes ALOT longer to rise than a dough with commercial yeast.  It finally doubled up and I shaped it and let it raise in a banneton for about 1 -1/2 hours, then slashed and popped into my oven.  The loaf was really ugly coming out of the oven as I still have shaping issues and it seemed that one of my slashes caught up with my seam and blew the side of the loaf out.  Ugly or not, it is tasty!  The bread has a mild but better flavor than my poolish breads.  I thought that the poolish breads have been good, but this has been the best tasting bread, hands down!  I do not quite understand how it can be flavorful and mild at the same time, but there you have it - yummy!  The crumb is very open, a little chewy and the crust has a nice chew to it also.  I did not steam, I am tired of getting burned, so I wet the loaf down with my hands before popping it onto the stone.  Its ugly, but its good.  I feel like one of those old V-8 juice commercials and that I should smack my head and wonder why I did not try a starter sooner!


theresasc's picture
theresasc

I have been baking mostly the same bread since I started making bread with yeast this month. 

300 g AP flour

1 tsp yeast

1 tsp sugar

1 tsp salt

1 cup water

I tried a couple of new things today - and what is really cool is that they all worked!

1.  autolyse for 30 min.

2. did a french fold. 

3. used a brotform

I switched to instant yeast with today's loaf so it would be easier to try autolyse.  I had been using ADY.  I guess it worked the way it was supposed to.  I had a cohesive dough after 30 minutes.

I found a great video on this site for doing the french fold:  http://www.youtube.com/watch?v=9dUZ0O-Wv0Q  I have a KA stand mixer, but its just a baby Classic Plus 4.5 and I did not want to fry it kneading dough every few days.  I set up my tablet with this video playing and did a french fold.  It worked spooky well!  Lift stretch fold - repeat a lot and ended up with a very nice ball of dough.  I did have to keep my hands wet to get the dough to stretch well - I do not know if I should or not, but it worked.

I just started baking bread this month, so that means I have been able to go and buy some fun, new toys.  I bought two small, oval brotforms and used one today.  Everything worked mostly great.  The formed, proofed dough came out of the brotform with no trouble, but since I am still learning how to form batards, I did not have my seam sealed very well and it blew out during baking.  I do not like a lot of flour on my baking loaves, so I tried to brush most of it off but there was flour on the parchment paper and I could smell it while the loaf baked, I did not like that at all.  I will have to get rid of the flour off the parchment next time.

Here is the loaf out of the brotform and getting ready to be baked

This is fresh from the oven - you can see where the side blew out

and this is what it looks like inside

So, not a bad day of baking.


Subscribe to RSS - theresasc's blog