The Fresh Loaf

A Community of Amateur Bakers and Artisan Bread Enthusiasts.

GSnyde's blog

GSnyde's picture
GSnyde

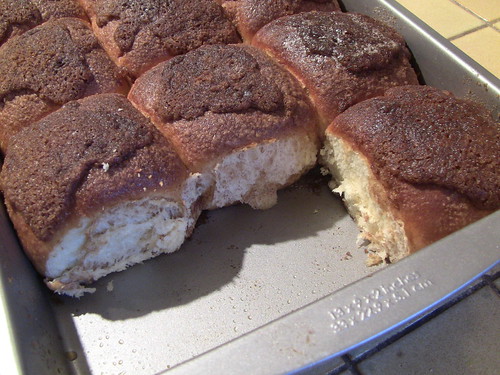
My baking this weekend was good, but not novel.  I baked more of Sylvia's sandwich buns to have with Bulgogi.  Still I feel like I should contribute a blog post this week.  So, here's one of the many excellent recipes using stale bread (a plentiful commodity in our household).  "Panzanella" (which I believe means "Nell's trousers" in Italian) is a Florentine salad, according to Wikipedia.  

As with so many things, it is magnificent if you have great ingredients.  The real key is to use excellent tomatoes (not a problem in California in July).  My recipe differs from most I've seen in its use of Pancetta.  My theory is that most salads are better if they have bacon in them, and Italian salad calls for Italian bacon.  It adds a nice additional flavor.  If you don't have access to Pancetta, I think American bacon would do fine.  (Eric, I bet Pastrami would work too if you upped the mustard in the vinaigrette).

GSnyde’s Panzanella Salad

Servings: 4 side dish or 2 main dish

Ingredients

◦       3 tablespoons olive oil

◦       3 1-inch slices of French bread (2 to 3 day old is best)

◦       2 medium size firm ripe tomatoes, cut into 1-inch cubes

◦       1/2 of an English cucumber, sliced 1/2-inch thick

◦       1/3 of a red onions, thinly sliced

◦       10 large basil leaves, coarsely chopped

◦       2 1/8” thick slices  Pancetta, cut into ¼ inch pieces (optional)

◦       2 Tbsp freshly grated Parmagiano cheese

  • Vinaigrette

◦        1 teaspoon garlic, finely minced

◦        1/2 teaspoon Dijon mustard

◦        2 tablespoons champagne (or other white wine) vinegar

◦        2 tsp fresh lemon juice

◦        1/3 cup good olive oil

◦        1/2 teaspoon kosher salt

◦        1/4 teaspoon fresh ground black pepper

Directions

1.            Heat the oil in a large saute pan.

2.            Add the bread; fry over medium heat, turning frequently, until nicely browned.  Then cool on paper towel.  When cooled, tear into bite size pieces.

3.            In a separate pan with a bit of olive oil, fry the Pancetta until brown.

4.            Whisk all the Vinaigrette ingredients together.

5.            In a large bowl, mix the tomatoes, cucumber, red onion, basil, and Pancetta.

6.            Add the bread pieces and toss with the vinaigrette, 1 tsp of the Pancetta drippings and the Parmagiano.

7.            Season liberally with salt and fresh ground black pepper. 

Before serving, allow the salad to sit for 20-30 minutes (tossing occasionally) for the flavors to blend.

I made this salad last week with Tartine Basic Country Bread and it was fabuloso.  I tried it this week with leftover Focaccia and it turned to mush.  I think you gotta use a firm hearth bread.

I hope you enjoy it.

Glenn

GSnyde's picture
GSnyde

This weekend has been pretty much perfect.  We’re on the North Coast.  The weather is sunny and mild.  The birds and flowers are enjoying Summer.  I’m barbecuing three nights in a row (loin lamb chops, Bulgogi and Tandoori Chicken).  And I baked something new and something familiar; something sour and something sweet.

After my Bouabsa baguette fail a couple weeks ago, I didn’t panic.  And I didn’t fall back on the old reliable (and always wonderful) proth5 Bear-guettes for my next baguette bake.  Yesterday, for the first time, I baked the Baguette Tradition After Gosselin After DMSnyder which Brother David recommended (http://www.thefreshloaf.com/node/23821/baguette-tradition-after-phillip-gosselin).  According to the instructions, I divided and “shaped” the gooey dough into “baguettes”, with no proofing before baking.  The shapes are sorta long and skinny—skinnier in some places than others, but they basically refused to be pulled into any regular shape.  I believe the term “roosteek” makes them sound prettier than the term “gummy snakes”.

The crumb also is not perfect.  Better than the Bouabsa ones, but still just a tad rubbery.  Perhaps under-fermented.  The crust is nicely crispy.  The flavor is outstanding, a bit sour and very complex. 

I’ll try this formula again.

Tomorrow is my brother-in-law’s annual barbecue, and today I made a bunch of Sylvia’s amazing sandwich buns (http://www.thefreshloaf.com/node/17329/buns-sandwiches) for burgers.  I had tried this formula before, and again found it simple and satisfying.  I made 14 of them with a double batch of dough.  The convection oven allowed me to bake two pans together (oooooh!).

Here they are ready to go in the oven.

And here’s the finished product.

They are delicious!  My wife says I should have made seven more so we could have a 21 bun salute for the occasion.

I leave you with a view of the garden we love to tend.

Happy Independence Day to all!

Glenn

GSnyde's picture
GSnyde

Today I made a variation on Reinhart's Cinnamon-Raisin-Walnut Bread from Bread Baker's Apprentice.  As usual I mixed Pecans and Walnuts.  This time--being out of raisins--I used dried cranberries, soaked, drained and sprinkled with sugar.

Here it is:

It's very good.  The cranberries have a nice tooth and touch of tartness.

Glenn

GSnyde's picture
GSnyde

Here’s my favorite variation on my favorite bread--the Basic Country Bread from Tartine Bread.   Since it’s now my most frequent bake, I figured I should write up my procedure both for my own reference and the breadblogosphere.

This version has 50% more whole wheat flour in the final dough than the book’s formula.   I make only as much levain as is needed for the bake, not double the needed amount as the formula calls for.  I divide the dough in two mid-way through the bulk ferment, bake two 485-490 gram boules or batards on a baking stone the first day and, having retarded the second half overnight, I bake a one kilo boule in my Dutch Oven the next day.


Ingredients:

700 grams plus 50 grams water


200 grams levain (see below)

850 grams white flour


150 grams whole wheat flour 


20 grams salt


Directions:

Make the Levain:

The night before the dough is mixed, take 1 heaping tablespoon of a mature starter (I used my usual 75% hydration mixed-grain starter) and feed it with 100 grams of warm (75-80 degree F) water and 100 grams of a blend of 50% AP flour/50% whole wheat bread flour.   I use Central Milling Organic Artisan Baker’s Craft white flour (enriched with malted barley) and Central Milling Organic Hi-Protein Fine whole wheat flour.

Cover tightly and let the levain rise overnight at room temperature.

The next morning, the levain should be airy and light.  To find out if it’s ready, put a small piece in room temperature water to see if it floats.  If it sinks, it is not ready to use and needs more time to ripen.


Mix the Dough:

Pour 700 grams of 80 degree F water into a large mixing bowl.  Add 200 grams of the levain and stir it to disperse.

Mix the flours – 850 grams white and 150 grams whole wheat – together and add the flours to the mixing bowl.  Then mix thoroughly by hand to hydrate all of the flour. 

Cover the bowl with a damp dishtowel or plastic wrap and let the dough rest (autolyse) for 30-40 minutes. 

After the dough has rested, add the 20 grams of salt and the 50 grams warm water. Incorporate the salt and water into the dough by squishing the dough between your fingers until thoroughly mixed.


Bulk Fermentation

The dough should bulk ferment for 3 to 4 hours at room temperature in a bowl covered with a damp dishtowel or plastic wrap.

During the first two hours of fermentation, give the dough one series of four stretch-and-folds every half hour or so.  During the last hour or so, stretch and fold the dough gently every 45 minutes or so.

If the dough seems to be developing slowly, extend the bulk fermentation time.  When properly fermented the dough should be puffy and gas bubbles should be visible on the surface.


Retarded Fermentation (Optional)

 I can’t fit two one-kilo boules on my baking stone at once, so I usually divide the dough in half after the first 90 minutes of bulk fermentation.   I round up half the dough, place it in a lightly oiled bowl with a tight cover, and refrigerate overnight or up to a full day.  The other half continues with the bulk fermentation at room temperature.

Take the refrigerated dough out of the refrigerator about five hours before you plan to bake.  Let it warm in the bowl for two or three hours, with stretch-and folds at the 60 minute and 120 minute points.


Shaping the Loaves and Proofing

This dough is extensible and sticky, so it takes careful handling and just the right amount of flour to shape the loaves.  The Tartine Bread formula calls for loaves of just under one kilo (two loaves from the dough recipe).  I usually make three loaves from a recipe, two scaled at about 485-490 grams and one at about one kilo.  I find that the flavor and texture are just as good as with the bigger loaves.

When the dough is fully fermented, scrape it onto a lightly floured board with the smoother side of the dough (what had been on the bottom of the bowl) downward.  Be careful not to get a lot of flour on the side of the dough that will form the seam of the loaf.  With lightly floured hands and quick movements, pre-shape a ball by stretching the dough gently from the sides, up to meet in the middle, and seal the seam by pinching.   Rest the dough balls for 20-30 minutes, covered with a slightly damp dishtowel.

With lightly floured hands, form the dough balls into boules, by again stretching the sides up toward the center and pinching the seam.  Then, on an unfloured part of your board or counter (but with well-floured hands), place the seam side down and tighten the boule surface using the method dmsnyder made famous (http://www.thefreshloaf.com/keyword/boule-shaping).

Place the boule in a well-floured banneton with seams upward, covered with a damp dishtowel or place in a plastic bag.

Having baked this bread several times, I have found that proofing it at room temperature (about 70 degrees F for me) for about 3 ½ hours results in good oven spring and a light, tender, airy crumb.  The poke test works well to check readiness.

You can also form the dough into a batard shape instead of a boule.


Baking

This bread can be baked in a Dutch oven or hearth style on a baking stone with steam.  I use a steamy combination of a cast iron skillet and Sylvia’s Magic Towels (described below).

To bake on a baking stone, pre-heat your oven to 500 degrees F for an hour or more with the stone in place and a cast iron skillet and a metal loaf pan on a rack below.   Boil a large kettle of water.   Place two rolled up small terry cloth towels in a Pyrex loaf pan or other ovenproof glass container.  Five minutes before you start baking, pour boiling water into a one-cup measuring pitcher to pre-warm it.  Then pour boiling water over the towels until they’re fully soaked and there’s water sloshing in the glass pan.  Place the pan with towels in a microwave and zap for 3 minutes on high.  Just before transferring the loaf to the oven, transfer the sopping towels into the hot metal loaf pan in the oven and close the oven door.  Do this very carefully with tongs and a very good oven mitt.

I transfer the loaf to the stone using a piece of parchment paper just larger than the width of the banneton.  Place the parchment in the palm of your left hand over the banneton, and with your right hand invert the banneton gently and shake the bread out of the banneton and onto the parchment.  Then gently place the parchment on a peel or cookie sheet.  Slash the loaves; I use the square pattern slashing at an acute angle (about 20 degrees from horizontal).  

When the loaves are slashed, pour the water out of the warmed pitcher and pour in a cup of boiling water.  Slide the loaf on the parchment onto the baking stone.  Using a good oven mitt, pour the cup of water into the cast iron pan. Close the oven door.  Reduce the oven temperature to 450 degrees F.

I bake with steam for about half the baking time.  For a one kilo loaf, that’s about 20 minutes with steam and 20 minutes without.  So, after 20 minutes, remove the loaf pan and cast iron pan from the oven.  For a half kilo loaf it’s about 18 minutes with, and 18 minutes without. During the second half of the bake you might want to open the oven door to vent remaining steam and, if necessary, rotate the loaf for even browning.  The bread is done when the crust is well-caramelized and the internal temperature is 207-210 degrees.  I usually leave the loaf on the stone with the oven door ajar for 10-15 minutes to help dry the crust.  Then transfer the loaf to a rack to cool.

To bake in a Dutch Oven, preheat the oven at 500 degrees F for about 45 minutes.  During the last 20 minutes, put the Dutch oven and lid in the oven to heat.  When the loaf is ready to bake, I transfer it to a piece of parchment about 18 inches by 9 inches, invert the loaf from the banneton to the middle of the parchment, and slash the loaves as described above.  Remove the Dutch oven from the oven, lower the loaf into the Dutch oven using the parchment as a sling, return the Dutch oven to the oven and put the lid on.  Lower the oven temperature to 450 degrees F.   After 20 minutes remove the lid and continue baking another 20-25 minutes or until done.

Full-size Loaf Baked on Stone


Full-size Loaf in Dutch Oven


Very Happy Batard

 Two Mini-boules


Crumb Shot

Notes on Variations

Three of my variations from the Tartine Bread directions are just for convenience—making only the amount of levain needed, retarding part of the dough and baking smaller loaves.  None of these variations seem to impair the quality of the bread.  Both the taste and texture are—in my experience--every bit as good as the bread produced by following the directions precisely.  I should say, though, that retarding and then re-warming the dough should be tried only after you have baked according to the book’s directions a few times, so you know what to look for in judging the proper degree of fermentation.  Also, proofing smaller loaves will take a bit less time than full-size loaves.

My last variation is for flavor.   Going from 100 grams of whole wheat in the final dough to 150 grams makes a slight difference, but a pleasant one if you like a bit more of that nutty taste for added complexity.   Some time, I plan to try adding a couple of tablespoons of toasted wheat germ to the dough.

By the way, I was watching a video with Chad Robertson promoting his book, and I noticed that on his work table was an open bag of the very same Central Milling flour that I use.  No wonder his bread is so good.

Besides its wonderful, subtle but complex, flavor, the distinguishing feature of this bread is its moist crumb texture—hitting the sweet spot between chewy and soft.  I bet it would make great tartines!

Enjoy.

Glenn

GSnyde's picture
GSnyde

I’ve been giving more attention to cooking than baking lately.   I’m trying to expand my Asian cooking experience, and Thai food and Korean food go best with rice, not bread.  But I did manage to bake some baguettes and a variation on the Tartine Basic Country Bread this weekend.

It had been many months since I’d made any baguettes besides proth5’s “Bear-guettes”.   I decided to try again the sweet baguettes from the recipe Janedo got from Anis Bouabsa, as reported by Brother David back in 2008 (http://www.thefreshloaf.com/node/9839/ficelles-made-anis-bouabsa039s-baguette-formula”).  I remember that trying to shape this wet sticky dough gave me fits the first time.  Like wrestling snakes made of tar.  This time it was easier, mostly because I have had more tar-snake experience in the interim.  

[

These are not the best looking or best tasting baguettes I’ve made.  The crumb was not as open as I’d like and the crust was not as crunchy as it should be.  I will try to handle them more gently next time and bake them a bit bolder.   I also think I just like my baguette in sourdough flavor.

The Tartine Basic Country Bread is my favorite lean sourdough bread.  Crunchy crust; moist and tender crumb.  I could eat it every day.  But, I’ve been thinking it might be even better with a bit more whole wheat flour.  So I tried it today with 15% whole wheat, instead of the 10% the formula calls for.  I like it.  I might even go for 20% next time…or maybe add some wheat germ. 

I’ve said it before, but I’ll say it again: the crumb on this bread is just what I’m looking for.  If I could keep it from going stale, I’d make a pillow out of it.

In case anyone’s interested, here’s a look at the sweet and spicy Korean Chicken I made this week.   Korean chile paste is pretty darn spicy.  This was almost eye-watering.   Good though.

Glenn

GSnyde's picture
GSnyde

For no particular reason, this weekend turned into a cheese-baking spree.   I planned to make Curry-Onion-Cheese Bread to take to our friends’ house as appetizers to snack before pizzas baked in their wood-fired oven.  And I was making the pizza dough--the Reinhart recipe from TFL’s Pizza Primer (http://www.thefreshloaf.com/recipes/pizza).  Then I learned that Beloved Spouse wanted to try baking cheese-crackers—a “homemade Cheez-Its" recipe from instructables.com

The cheese crackers were first, and I’m happy to say they are nothing like Cheez-Its, except the color.  The recipe is very simple (http://www.instructables.com/id/Homemade-Cheez-Its/#step1).  Flour, butter, salt, cayenne and lots of sharp Cheddar. 

These are sinfully delicious.  The texture is very much like a cheesy pie crust.  In fact, we decided it would be perfect as the crust for apple pie (some day when the diet is over, i.e., never). 

Next up was the Curry-Onion-Cheese bread from The Cheese Board Collective Works. This is one of our favorites. This one has a mix of sharp Cheddar, Jarlsberg and Gruyere.  Because I wanted it to be super fresh this evening, I wanted to bake it this morning.  So, for the first time, I tried overnight bulk fermenting the dough.  It needed a couple extra hours to warm up before baking, but the results were as good as always.  Our friends loved it.

It was even better briefly toasted in the 800 degree WBO

Finally, the Pizza!  We had had wood-baked pizza at our friends’ place before, but never with the outstanding dough from Peter Reinhart’s formula.   It performed admirably.  Crispy on the bottom and poofed full of holes around the crown.   Here’s our friend, Kelly, the Pizzaiolo.

My favorite of the four pizzas was topped with fresh Mozzarella, Andouille sausage, roasted peppers and Portobella mushrooms.

And this one had Proscuitto and roasted green onions.

We waddled home full of excellent cheeses.

Glenn

GSnyde's picture
GSnyde

This episode in my baking story starts with lamb.   We received a shipment of lamb meat yesterday from a ranch in the Sierra foothills that supplies several of the finest restaurants in the Bay Area.  We got some chops and some stew meat (roughly 2 inch pieces of leg meat).  I planned to make shish kebab today, even though the bizarre June rain threatened to snuff out my barbecue.

Shish kebab (lamb marinated in red wine, olive oil, onion and garlic and char-broiled on skewers with bell peppers and onions) is a dish that brings back fond food memories of my childhood in Fresno, a city with a very large Armenian population and excellent Armenian restaurants (at least back then).

One of our family’s favorite restaurants used to serve a shish kebab sandwich on peda bread, a round low profile soft sandwich bun with sesame seeds.  I believe the Armenian bakery that made that peda bread (Hy-Quality Bakery) is still in business.

I have tried before to make buns that resemble peda bread, but not with much success.  With shish kebab on the menu, I needed to try again to replicate peda bread.  The closest bread I’d made in texture and flavor was Reinhart’s Vienna Bread from BBA.  So today I tried a variation on that Vienna Bread.   I followed his formula, but divided part of the dough into 5 ounce pieces and squashed them down fairly thin before proofing them.  When they were ready to bake, I slathered them with an egg wash and sprinkled sesame seeds on them.

These buns are both delicious and pretty darn close to peda bread. 

[

I also made a batard from this dough, also sprinkled with sesame seeds.

To  make these buns even more authentically like the bread served on the shish kebab sandwiches of my childhood memory, I split and grilled them with a bit of butter, giving them a wonderful crispiness.

By the way, this lamb is about the best I’ve ever had.  And the meal brought back fond memories.

Who knew the Viennese and the Armenians were so close?

Glenn

GSnyde's picture
GSnyde

Half of the Bear-guette dough I made yesterday (http://www.thefreshloaf.com/node/23742/baguette-and-variations-junior) was refrigerated overnight.  This morning I commenced to make a couple Marguerites.  I cut one of the pieces too big and decided to trim it, and the piece I trimmed off looked so much like a leaf, that I had a rare moment of creative inspiration.  Why, I said to myself, doesn’t a Marguerite deserve a stem and leaves?   Not having a good answer, I decided to try some decorative baking (not something I expect to be good at).  Here are the results.

I also tried a new breakfast loaf today—Hamelman’s Oatmeal Bread with Cinnamon and Raisins.   The recipe makes more than enough for three loaves, and I discovered I only had two loaf pans. So, on the spur of the moment, I decided to make Oatmeal-Raisin-Cinnamon buns.  I dipped them in butter, rolled them in cinnamon sugar and let them grow together in a Pyrex pan, as pull-aparts.  Because I baked them with the loaves at 450F, they scorched a bit, but they are super yummy.  And because they have whole wheat and oats, they’re health food!  I will try this variation again, baked at a lower temperature.

I also baked a small loaf of the Cinnamon-Raisin-Oatmeal Bread (probably about  6 ounces) as a free form mini-batard.  It came out very nice, too.

All in all, a good day’s bake.

I did notice that one of my loaves seemed a bit grouchy.  I imagine he’s not excited about his prospects.

Or maybe he was peeved that we hadn’t taken him with us to see the wild flowers at Russian Gulch State Park.

Glenn 

GSnyde's picture
GSnyde

I didn’t want to steal Brother David’s blog post title without due credit.  Last Fall he told of his scissor-happy bake of epis and dragon tails (http://www.thefreshloaf.com/node/20226/baguette-and-variations).  And today I pursued a similar adventure.

Twenty-two years ago today, my wife, Cat, and I were married.  We scheduled the wedding for the Sunday of Memorial Day weekend because Sunday afternoon was the only time available for a private party at Green’s, a wonderful restaurant on the Bay in San Francisco, and we wanted to give our guests a Monday holiday to sober up and/or travel back to their homes.   The happy bonus was we almost always get a three-day weekend for our anniversary.

So, the goal today—of course—was to bake something to broaden the already broad smile on my beloved’s lovely face.  Her favorite is Cinnamon-Raisin-Pecan bread, and I’ll bake some of that tomorrow.  Her second favorite—always good for a swoon of pleasure—is proth5’s “bear-guette” (http://www.thefreshloaf.com/node/20831/starting-get-bear) which is now my usual baguette.

Having had success with this formula, including shaped as marguerites (http://www.thefreshloaf.com/node/22177/le-fleur-d’ours-flower-bear-and-other-goodies), I decided to work on my scissor skills and try some new shapes.

The poolish and levain were made up last night, and the dough was mixed this morning.  I let it ferment two hours, gave it one stretch and fold, and left it in a chilled cooler while we went to a fabulous lunch at Café Beaujolais (duck confit Cobb salad with warm bacon lardons has spoiled regular Cobb salad for me for the rest of my life).

On our return three hours later, I split the dough ball into two, put half in the fridge for tomorrow, and shaped three baguettes from the rest.  I studied the excellent videos on forming epis (http://lepetitboulanger.com/videos/coupe_epi.wmv) and dragon tails (http://www.wildyeastblog.com/2010/09/12/dragon-tail-baguettes-shaping-video/).  I am pretty pleased with my first attempts, though this dragon doesn’t have a very long tail.

And, as always with the bear-guettes, the flavor is superb, the crust is crispy and the crumb is a nice balance of chewy and open.

Anniversary dinner was excellent.  You might not think meat on a stick stands up to the elegance of baguette and Champagne, but charcoal-grilled pork satay with home-made marinade and home-made spicy peanut sauce is pretty tasty

I’ve been working on Thai cuisine.   A meal of satay and baguette is my version of crust-asian. [sorry]

Glenn

GSnyde's picture
GSnyde

Since we got back from Hawaii a few weeks ago, we’ve been craving Hawaiian sweetbread.  When we were there we bought a local bakery’s cinnamon sweetbread, pull-apart buns coated with cinnamon sugar--not gooey sticky buns, just barely sinful.

When there, I tried the Hawaiian sweetbread recipe in this post (http://www.thefreshloaf.com/node/21175/hawaiian-portugese-sweet-bread#comment-148186).  It was very good, and totally true to the local sweetbread we’ve often enjoyed.  Very much like the “poor man’s brioche” in Reinhart’s BBA.

Today, I decided to go for Hawaiian-style cinnamon buns.  I used the same dough recipe.  I divided the dough into pieces of about 85 grams each.   I made seven of them into plain sweetbread buns without cinnamon sugar.

They are soft, tender, shreddable and delicious.  They will make good teriyaki chicken sandwiches tomorrow.

The other 12 buns were brushed with water, rolled in cinnamon-sugar, and placed in a buttered baking pan, each with a dollop of butter-cinnamon-sugar glaze on top.  They were baked at 375 F for about 25 minutes.  The glaze was too dry to run down the sides of the buns, but it makes a nice crispy sugary crust on top.

They are delicious!  And not as guilt-inducing as “real” cinnamon rolls.

Tasha, of course, snoozed through the whole thing.

Hope you all enjoyed the day the world didn’t end.

Glenn

Pages

Subscribe to RSS - GSnyde's blog