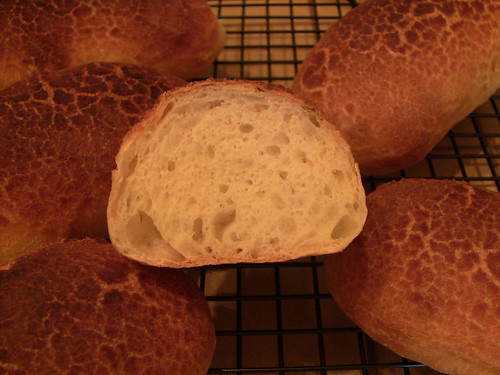
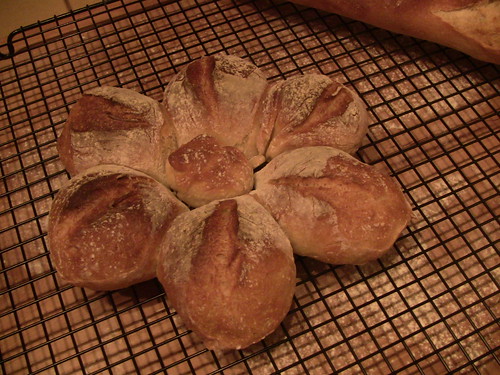
The Fresh Loaf

A Community of Amateur Bakers and Artisan Bread Enthusiasts.

GSnyde's blog

GSnyde's picture
GSnyde


IMG_2199

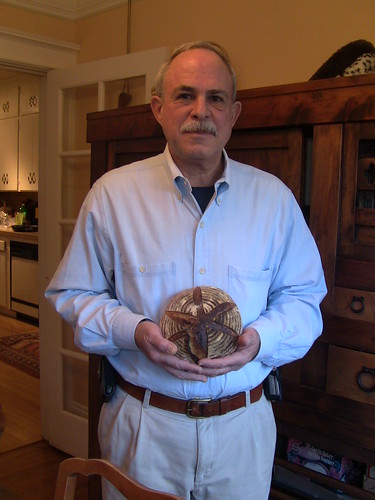
I generally follow trends slavishly, but I can’t get into the nine-pound-miche thing that seems to have taken TFL by storm.  In fact my one and only complaint about miches is they are too large for my small (albeit voracious) family of only two carbovores.  I know they can be divided and a piece frozen, but they’re never as good thawed as fresh.

So what does one do if one loves the flavor and texture of a miche but wants smaller loaves???  I pondered this for several long minutes, and then I settled on the idea of trying a radical experiment.  What if one made a miche dough, and then (gasp!) divided it into two boules!!??   Though I risk the disapproval of the Mega-Miche adherents, I took the risk in the spirit of bread science and the quest for the perfect loaf. 

I am among the seeming thousands of TFLers who have tried and admired the SFBI Miche my Big Brother David posted about five weeks ago (http://www.thefreshloaf.com/node/21644/miche-hit).   It has a magnificent caramel flavor and an admirably chewy crumb.  My favorite variation on that formula is to use 50% Central Milling Organic Type 85 high extraction flour and 50% Central Milling Organic Artisan Baker’s Craft (Malted) white flour, as described in my 1/30/11 blog post (http://www.thefreshloaf.com/node/21900/bay-area-miche-sfbi-formulacentral-milling-flours).

So this week, I used the SFBI formula but with that flour combination (and no wheat germ), and then after primary fermentation I divided the 1250 gram dough ball into two boules and plunked them into small brotforms.  After a night in the fridge and 150 minutes on the counter, they were baked with Sylvia’s magic steam towels for 20 minutes at 450F, and then dry for 35 minutes more at 430F.

IMG_2192

Besides having loaves of a size we can eat, the shorter bake time produced a rich dark crust with no burned spots.  And who can complain about the higher crust ratio of a mini-miche?

The flavor is more-or-less the same as the full-sized version, wheaty and moderately sour.  And the crust is similarly crunchy.  The crumb may be a bit more airy. 

IMG_2203

A successful experiment. 

And here’s my day’s baking output, the mini-miches with the Vienna Bread Dutch Crunch rolls.

IMG_2194

A good baking day.

Glenn


GSnyde's picture
GSnyde


IMG_2189

Since the start of my baking adventure (only six months ago), I have been searching for the perfect sandwich roll, one with a thin, crispy crust, a tender crumb so it’s squishable, but dense enough so it holds together with a burger or saucy filling, and airy but not too holey.  I had good success with SylviaH’s excellent bun formula (http://www.thefreshloaf.com/node/17329/buns-sandwiches).  

Then, Dvuong posted about Reinhart’s Vienna Bread rolls with Dutch Crunch topping (from BBA) a few days ago (http://www.thefreshloaf.com/node/22380/latest-bake-dutch-crunch#comment-159189).   And I baked them today.  The formula made enough dough for eight potato-shaped rolls of 4.5 oz each.

IMG_2184

IMG_2188

I can’t believe I hadn’t discovered this formula before!  It’s even in a book I’ve been enjoying baking with.  It’s a tasty white bread with a little egg , a little sugar and a little butter, using a good proportion of pate´ fermenteé.  The texture is just what I’ve been looking for.   The Dutch Crunch topping adds a nice …ummm…crunchiness.

They were perfect for turkey sandwiches.  I also think this formula would be good for dinner rolls or a pan loaf, maybe topped with sesame seeds.

My Number One Taster says I’ll be baking these rolls again.  And  so I know I will.  Pretty soon she’ll have so many favorites I’ll need to stop experimenting with new things.

Thanks--again!!--Professor Reinhart.  And thanks for lead, dvuong!  This is a winner!

Glenn


GSnyde's picture
GSnyde

I baked in pans this weekend.  No, there’s nothing wrong with my baking stone.  I just have freezers full of baguettes, miches and other hearth breads.   Also, I was (and am always) craving scones (using Breadsong’s technique).  My wife was urging me to make another whole grain-y sandwich bread.  And I wanted a good accompaniment for Pollo Cacciatore.  So, it was scones, Hamelman’s Oatmeal Bread and Reinhart’s BBA Focaccia.

Lemony-Cranberry Flaky Scones

IMG_2148]

Breadsong wrote about flaky scones a couple months ago (http://www.thefreshloaf.com/node/21414/flaky-scones-flavor-variations).  I had done a couple variations before (http://www.thefreshloaf.com/node/21496/people-who-live-glass-houses-shouldn039t-stow-scones).  This time, I wanted to try a tart and fruity variation.  I looked at some lemon scone recipes to see different approaches to getting lemon flavor in scones.  Some use lemon zest, some use lemon juice, and some use lemon extract.  I used all three. 

I also added some dried cranberries, soaked in water overnight. I squeezed out the excess water in a sieve, but the dough was still too moist.  So I added some flour in the mix.  Next time I’ll reduce the other liquids.  The scones came out with the same wonderful texture as before, moist on the inside and crispy on the outside.  But they didn’t rise up quite as much.  And they could have had a stronger lemon flavor.  So next time I’ll use more lemon zest, or maybe candied lemon peel.

I followed Breadsong’s technique.  Here’s the formula I recommend, with the adjustments I mentioned above:

1 cups (5 ounces) unbleached all-purpose flour

½ Tbsp baking powder 

1/4 tsp kosher salt

scant 1/4 cup golden brown sugar

2 ½ Tbsp cold unsalted butter, cut into 1/2-inch cubes 

1/2 cup chopped dried cranberries (soaked overnight in water, excess water squeezed out)

1 teaspoon lemon zest

Just less than 1 cup heavy cream (185 grams)

 2  Teaspoons lemon juice

1/2 teaspoon lemon extract

Half-and-half (for brushing)

But even though they could be improved, these scones were dang good.

IMG_2147


Hamelman’s Oatmeal Bread

IMG_2155

Having enjoyed making –and eating-- AW’s whole wheat bread last week, I decided to try another partially whole grain sandwich bread.   I chose the Oatmeal Bread from Hamelman’s Bread: with 25% whole wheat flour and 75% KAF Sir Lancelot.  Believe it or not, I made this bread exactly per the formula, with no variations.  Believe it?  Well, ok…I did substitute molasses for 1/3 of the honey, just because we love the dark, rich flavor.

The dough was fermented for one hour after mixing and kneading, stretched and folded, then refrigerated.  It almost tripled by morning.   Seriously gassy! 

IMG_2143

 It proofed about 2 ½ hours since it had to get to the temperature the yeasties like.   The home-baking formula for this bread in Bread made enough for two loaves in 9 x 5 pans and six 3-ounce rolls.  The bread has a wonderful tenderness and a wholesome oatey-wheaty flavor.  It was excellent for a dinner of turkey and cole slaw sandwiches. This is a real good sandwich bread and I’ll bake it again.

IMG_2157


BBA Focaccia

IMG_2176

Monday night we are having dinner at home with a friend of a friend, who is a writer for the New York Times, and a serious foodie.  In fact, she wrote a wonderful book about the history of Chinese food in the U.S., called The Fortune Cookie Chronicles.  I’ll be serving Pollo Cacciatore, my variation on an excellent recipe Brother David shared.  I think one needs Focaccia to sop up the delicious gravy.

Since we are traveling back to SF from our North Coast getaway on Monday, and since the Pollo Cacciatore is best re-heated the second day, I made both the chicken and a Rosemary-Garlic Focaccia Sunday.   Well, more accurately, the Focaccia dough was mixed, fermented, folded, shaped and slathered with garlic-rosemary oil Saturday evening, and retarded in the fridge overnight.

I looked at a lot of Focaccia recipes and the BBA formula seemed like a good place to start.  I figure, if I’ve got the book, I might as well use it.  This dough is a monster—sloppy and hard (but fun) to manage.  After the third fold and a one-hour rest, it was like a big jiggly pillow.  It easily expanded to fill the 17 x 12 sheet pan.  When it had warmed a couple hours the next morning, it had serious eruptions.

IMG_2167

I’ve never seen bread bubbles quite so large.  Like volcanos.

IMG_2173

The crumb is airy and tender and the flavor is outstanding with a strong, but not overpowering rosemary and garlic flavor.

IMG_2182

We also made fresh pasta today to eat tomorrow with Pollo Cacciatore and re-heated Focaccia.  Gonna be good.

IMG_2180


All in all, a good cooking and baking weekend.  We also got some good hikes in, and enjoyed the varied animal and bird life of the North Coast.  Including a rare sighting of a Flicker right on our meadow.

IMG_2163

Happy Presidents’ Day to you all.

Glenn


GSnyde's picture
GSnyde

IMG_2121


This week’s baking—and cooking-- were inspired by Fresh Loaf masters proth5, Wally, SylviaH, Hansjoakim, and AW.   There was duck confit, whole wheat bread, sandwich buns, and Pat’s “Getting the Bear” baguettes (aka “Bear-Gets”), including a Margueritte-shaped thing—"Le Fleur d’Ours".

First, let me tell you about the three-day duck.  After reading Hansjoakim’s blog post (http://www.thefreshloaf.com/node/21880/totally-not-bread-confit-de-canard), I tried to resist the temptation to make duck confit.  I could not.  I love duck, especially duck leg confit.  Han’s pictures and description started to wear down my resistance. Reading Michael Ruhlman’s blog post on the subject (http://ruhlman.com/2010/09/how-to-make-duck-confit-fall-is-here-time-to-preserve-duck.html) was the capper.

So I found a six-legged duck (Chernobyl brand).  Just kidding…actually I found a nice California-grown Muscovy duck and 4 extra duck legs (from a different duck…err…probably several).  I cut the legs off the duck so I’d have six for confit.  Friday morning, I rubbed the legs (the ducks’, not mine) with kosher salt, fresh ground pepper, crushed garlic, thyme and oregano, and put them in a zip-loc bag in the fridge for 24 hours.  Meanwhile, the excess fat from the duck and legs was rendered on the stove.  The legless duck was sprinkled with poultry seasoning, allspice, onion salt and garlic salt and roasted for dinner Friday (with yams and steamed snap peas…yummm!).  The fat drippings from the roasted legless duck was added to the other duck fat and refrigerated.

Saturday morning, I rinsed the cured legs, patted them dry and arranged them tightly in the bottom of our old Dutch oven, I melted the chilled duck fat in the microwave and poured it over the legs.  I added enough olive oil so that the legs were fully submerged.  Then I heated the Dutch oven slowly on the stove until just before the oil boiled, and put it in the oven at 180 degrees F. It stayed in that oven for 12 hours, except for an hour or so when I needed the oven for the sandwich buns described below; during that hour, I put the Dutch oven on the stove on low simmer.  I also made stock from the roasted duck bones.

Saturday evening, I pulled the Dutch oven out of the oven and let it cool for a couple hours, then put it in the fridge. 

They say the flavor of duck confit improves if you let it sit for days or weeks.  I’ m not sure this batch will last more than a couple days.  It made a splendid dinner Sunday.   I roasted two of the legs in a hot oven for 30 minutes, and served them over a bed of lentil ragout (French lentils, shallots, garlic, parsley, diced celery, diced carrot, duck stock and some good Syrah).

IMG_2139

This confit recipe was not a difficult process (I skipped the stretch-and-folds with no apparent detriment to the texture), though it takes several days in elapsed time.  I have to say it is totally worth the effort.  The best possible preparation for a sexapedal waterfowl.   And the lentil ragout (my attempt to replicate a dish served at a wonderful local bistro called Fringale) was a great success.  Recipe provided on request.

Now, about the breads…starting with a 37.5% whole wheat sandwich bread.

I hadn’t made a whole wheat sandwich loaf since I was a real beginner (back last September), and it was only so-so.  But my wife and I do love whole wheat bread, and I recently acquired some special whole wheat flour from Central Milling: the high-protein, fine ground organic whole wheat flour they sell to Acme Bread.   I searched TFL for a recipe and found AW’s post with her friend Ben’s formula, which has become very popular on TFL (http://www.thefreshloaf.com/node/16345/whole-wheat-sandwich-bread).

I followed AW’s formula, substituting vegetable oil for shortening and a combination of honey and molasses for brown sugar.  In an embarrassing lapse of baking sense, I forgot to reduce the water to compensate for the liquid sweeteners, so the bread took a while longer to bake than prescribed, and the crumb is very moist.  Not gummy or unpleasant, just very moist.  It is soft but holds together well when sliced.   I also under-proofed the loaves and they blew out.  It’s not the prettiest bread I ever baked, but the flavor is outstanding!  Wheaty and molasses-y, it tastes healthy, but it’s good.  It made good duck breast sandwiches.

IMG_2101

IMG_2123


Then, about SylviaH’s buns!!

One of my great aspirations as a baker is to make good-tasting simple sandwich buns that hold up to sloppy sandwich ingredients like saucy barbecue beef.  I’d tried the Italian bread rolls (http://www.thefreshloaf.com/node/12485/sourdough-italian-bread-and-sandwich-rolls) and the sourdough potato rolls (http://www.thefreshloaf.com/node/3886/sourdough-potato-bread).  Both were good, but too heavy and too chewy for what I was after.  Brother David suggested I try SylviaH’s highly-enriched sandwich buns (http://www.thefreshloaf.com/node/17329/buns-sandwiches).  So, I did.

Having roasted a tri-tip (with Tony Cachere’s Cajun seasoning) during the week, I had a hankering for barbecue beef sandwiches.  I had half of bottle of the Firehouse No. 2 barbecue sauce in the fridge, so all I needed was buns.  Sylvia’s formula is easy and the results are excellent!  It’s basically a challah dough with some potato, and it tastes like delicious challah.  Eggy in a good way, tender crumb.  It held up well under barbecue beef.

IMG_2103

IMG_2105

IMG_2107

IMG_2109


And, finally, the “Bear-Gets”.

Proth5’s baguettes are legendary for good reason.  Brother David had recommended Pat’s prior formula, and I made them several times, and always loved them.  I’ve baked her new “Getting the Bear” baguette formula (http://www.thefreshloaf.com/node/20831/starting-get-bear) a couple times. It may or may not be better (which is better: magnifique or merveilleux?), but it’s real dang good.

I followed the formula, using my favorite white flour, Central Milling’s Organic Artisan Baker’s Craft, enriched with malted barley flour.  I made enough for four 9.5- ounce mini-baguettes and two 13-ounce Marguerittes, inspired by Larry’s recent adventures (http://www.thefreshloaf.com/node/21929/little-baguette-fun).  I had to do three bakes because of the size of my stone.  I baked a Margueritte and a mini-baguette Saturday evening after a 6-hour retard; then two batches Sunday morning.

The dough was incredibly airy, but easy to handle.  The crumb is just about perfect.  Here’s a crumb shot of a baguette followed by a piece of La Margueritte.

IMG_2124

IMG_2137

Making les marguerittes was fun.  This is the first time I’ve scissored dough, and it was a good experience.  I found the video linked in Larry’s post very helpful.  Nothing difficult about it, but there’s lots of room for improvement in the snipping and shaping.  The pull-away rolls from “le fleur d’ours” are delicious.

IMG_2133

Anyway…that was a long blog post.  The next one will be shorter.  Tasha’s learning to write.

IMG_2142

Glenn


GSnyde's picture
GSnyde

I wanted to make a sandwich roll that had some substance both for chew and to hold up under moist sandwich ingredients, but something tender enough to be compressible.  I’d been meaning to try a bread with some potatoes in it, as I’d heard that potatoes add some tenderness to the crumb (and every crumb needs a little tenderness).

I looked in several baking books and all over TFL.  I settled on the Sourdough Potato Bread that Prairie19 posted about back in 2007 (http://www.thefreshloaf.com/node/3886/sourdough-potato-bread), which was described as a sourdough version of Hamelman’s Roasted Potato Bread.

I mostly followed Prairie19’s formula, except I didn’t have the extra night to retard the dough. And instead of bread flour, I used Central Milling’s Organic Artisan Baker’s Craft flour, along with some fine ground organic whole wheat flour from my market’s bulk bins.

I found the formula very straightforward.  The dough was easy to work with.  Somewhat loose, but trainable with appropriate discipline.  Since these rolls were made to surround Salmon Teriyaki, I sprinkled them with sesame seeds when they were shaped, since every one knows that sesames are Salmon Teriyaki’s favorite seeds.  

The rolls came out very nicely.  The crumb and crust are tenderer than lean sourdough bread, but by no means wonderbread soft.  I was hoping for a slightly softer roll. Maybe I’ll try this formula but with a bit of milk in place of some of the water.  The potato flavor is scarcely noticeable.  The flavor is nice, a bit sour, but unremarkable (ok, I’ve been eating great miche, so what can you expect?).


IMG_2090

IMG_2093

Though the rolls were not perfect, the Salmon Teriyaki was pretty close.  And the sandwiches (with garlic-lemon sauce and cukes) went down good with a nice pale ale.

IMG_2094

This is a very nice sourdough roll.  I’d enjoy a full sized loaf, too.

The formula is on the page linked above.  I used the same quantities for 6 rolls.

Enjoy!

Glenn


GSnyde's picture
GSnyde

Foodies (myself included) can be really annoying.  Especially the obsession with details of the provenance of ingredients.  I don’t need to know what species of leaves are in the mulch that fed the grass that fed the lamb that I eat.

One foodie principle that I endorse, though, is the locavore concept, the idea that it is beneficial to use local ingredients and to celebrate local cuisine.  Well, we don’t grow wheat here in the Bay Area, but my bake today is decidedly local to the Bay Area.  

The recipe for this miche was developed at San Francisco Baking Institute in South San Francisco; the flours are produced to the specifications of, and distributed by, Central Milling Company in Petaluma; and the whole shebang was put together right here, just a mile from the Golden Gate, by a middling local baker in a worse-than-middling local oven.

The SFBI miche formula has been much touted in the last few weeks, and can be found in Brother David’s recent blog post (http://www.thefreshloaf.com/node/21644/miche-hit).  Many of you have baked this formula, and have been pleased with it.   I followed the formula, except I used 50% Central Milling Organic Type 85 flour and 50% Central Milling Organic Artisan Baker’s Craft flour (a white flour, enriched with malt, that I’ve been happily using for a range of breads).  I used Bob’s Red Mill Wheat Germ (ok, that’s from way up in Oregon).

The dough behaved nicely in mixing.  I found it very slack and sticky, like a high-hydration baguette dough.  Indeed, it was pretty difficult to form the boule as my floured hands kept sticking to the dough.  I either succeeded or failed to properly form a tight boule; I gave up trying at a certain point, and plopped it in a genuine SFBI linen-lined proofing basket.

After 15 hours in the fridge, and 90 minutes on the kitchen counter, the dough ball was very nicely risen, and the poke test indicated proper proofing.

IMG_2073

The loaf sprung up nicely in the steamed portion of the bake.  I baked at 450 F for 65 minutes total, and the internal temperature got to 210 F.  The crust is near burnt in places.  My oven is considerably hotter at its top and this loaf was close to the top (no room to use a lower shelf).   Next time I’ll try a slightly lower temperature.  Still, not a bad looking bread, and nicely crackled.

IMG_2077

IMG_2078

The crumb texture and flavor are awesome—very tender and airy, and complex, sour and toasty-wheaty taste.  I can’t say I notice the wheat germ, compared to the last miche I made using 100% Type 85 flour.  The flavor of the crust is just a tad past “bold”, verging on burnt.  But, this is a really yummy bread.

IMG_2079

IMG_2080

So this was the last of a three-bake weekend, producing also a nice Cranberry-Walnut bread and some tasty “Bearguettes”, all described in my previous blog post (http://www.thefreshloaf.com/node/21860/when-cat’s-away-mouse-bakes…-lot)

IMG_2084

Happy Baking, all!

Glenn


GSnyde's picture
GSnyde

My wife, Cat, is away in Australia on business.  Yes, my wife’s name is Cat, which may cause some confusion because we also have a cat.  But the cat’s name is not “Wife”, which would make it even more confusing…and be pretty weird.  Especially since one of my wife’s many nicknames is “Wife”.

Anyway, I’m stuck in boring San Francisco while she’s off traveling the World.  So, I have to find a way to entertain myself.  And what entertains me these days is baking.  So, here’s the plan:

IMG_2057

It’s now Friday night, and I’m on schedule.  Last night I mixed the levain, toasted the walnuts and soaked the cranberries for Cranberry-Walnut Bread, based on the SFBI Raisin-Walnut Bread that David blogged on (http://www.thefreshloaf.com/node/21289/walnut-raisin-sourdough-bread-sfbi-artisan-ii).  I have made that bread with raisins (http://www.thefreshloaf.com/node/21384/sfbi-walnutraisin-bread-–-northern-version) and thought it might be even better with dried cranberries in place of the raisins.  This morning I mixed the dough—the cranberries were a bit watery, but it all worked in with extra kneading.  I let it ferment while I started my work day (many hours on the phone and email). Oh, yeah, I also mixed the levain and poolish for proth5’s new baguette formula (aka “Bear Baguettes”).

The Cranberry-Walnut dough rose like crazy even though the dough temperature was below the prescribed 78-80F.  I think my sourdough starter might have rabies (Is that possible? Anyone?).

During a self-imposed lunch break, I pre-shaped and shaped the Cranberry-Walnut loaves, one batard and one boule.   The loaves also rose more quickly than I would have expected.  During a self-imposed coffee break  (a delicious macchiato), I slashed, steamed and loaded.  By time my 3:30 call started, the loaves were cooling.

By time that call was over, I was hungry, and I happened to have some cream cheese--the perfect topping for this bread.  Totally delicious!  The crust is toothsome, the crumb is tender, the cranberries are tart and chewy and the nuts are nutty!  A good bread.

IMG_2053

IMG_2054

Later, the poolish and levain for the Bear Baguettes (maybe we should just call them “Beargettes”?) were ready.

IMG_2059

I mixed the baguette dough ‘til massively shaggy, let it autolyse 45 minutes, and mixed it up gently…a light mix as David and Pat have recommended.   I found that my initial mix had not been adequate to incorporate the flour, and there were small clumps of dry flour.  But I didn’t panic.  I put on my “c’est la fleepin’ vie” hat, tried to hydrate the whole big ball of dough without over-mixing, and covered the bowl.  If it doesn’t all work out, I’ll know better next time.  Besides the flour clumps, the dough felt great.  And after the stretch and fold, it seems silky and strong.

‘Nuff for now.   More to follow.

UPDATE:  Saturday Eve

My attempt at proth5's new baguette formula (http://www.thefreshloaf.com/node/20831/starting-get-bear) is out of the oven, cooled and tasted.  I retarded the dough overnight, let the dough come to room temperature for a couple hours, shaped, glued on seeds, proofed 90 minutes, slashed and baked at 475, using Sylvia's steaming towel technique.

The flour is 100% Central Milling's Organic Artisan Baker's Craft with Malt (except the tiny bits of WW and Rye in my mother starter).

The result is gooood. Crispy on the outside and airy-chewy on the inside.

IMG_2061

IMG_2068


I had said earlier maybe we should call these "bearguettes."  But since I had most of one with a dinner of lamburgers, I think they are "baaaguettes".

Tomorrow I bake the big SFBI miche.

Glenn


GSnyde's picture
GSnyde

IMG_2044

Last week I made San Francisco Sourdough, and learned a lot.  I decided to try it again this weekend with some variations relating to flour mix, dough handling, retardation time and loaf shape.

I again used the formula in Peter Reinhart’s Crust and Crumb, and I again used primarily Bob’s Red Mill bread flour.  But this time, instead of 100% bread flour I used about 9% dark rye flour and about 11% whole wheat flour.  I used the rye and whole wheat in each of the three mixes: the liquid starter, the firm starter and the main dough.  I did not adjust the hydration (64%).

My other departures from the C&C formula were:

  • Though the formula calls for kneading the dough, then letting it sit unmolested in a bowl for four hours, I gave it a four-way letterfold every hour.  The dough was firmer (less slack) this time, compared to last weekend when I did no folds.
  • I followed the formula’s specifications for ripening and then retarding the two starters, but I decided to test the effects of retardation after proofing and to test the attributes of different loaf shapes using this formula.  I scaled the dough for 3 mini-baguettes of 250 grams each and a boule and a batard of 615 grams each.  The baguettes I baked as soon as they were proofed; the larger loaves were put in the fridge overnight after proofing 3 hours as in the formula.

I should also mention that I proofed the baguettes and the batard on linen couche, and the boule in a linen-lined basket.  I did not spray oil on the loaves at the beginning of proofing as Reinhart specifies.  The baguettes were covered with a fold of couche fabric and a tea towel over that.

Here’s the fermented dough after a 3 ½ hour rise.

IMG_2035

Here’s the proofing loaves. 

IMG_2039 

The baguettes baked at 450 on a stone with steam for 10 minutes, then without steam at the same temperature for another 10 minutes.   Then I left them to sit on the stone with the oven off and the door ajar for another 10 minutes.  The internal temperature was 209F.  They’re really pretty to look at.

IMG_2040 

IMG_2042


The crust is darkish, and very hard.  Indeed, it is positively tough, as in hard to bite through.

The crumb is very good tasting and nicely chewy, not what I’d call tough.  Not a very open crumb, but not really dense.

It was a really good thing I had delicious Chicken Cacciatore to dip the bread in to moisten it (the bread made a fine mop).  Thanks for the recipe, David.

IMG_2045


So, you experienced bakers, what caused the rock hard crust this time?

  • ·      Increased gluten strength from the folds during ferment?
  • ·      Baguette shaping?
  • ·      Baguettes getting too much air (not sealed in plastic) during proofing?
  • ·      Too low hydration?
  • ·      Too bold a bake or too much time drying on the stone?

Any help would be appreciated.  The boule and batard just came out of the oven, and I’ll report results later.

Thanks.

Glenn


GSnyde's picture
GSnyde

Saturday 1/15/11.  Today, I am musing on my bread-ucation.  Sort of a milepost marking.  I have been baking for five months.  But I am beginning to feel somewhat knowledgeable about a narrow category of breads, due in large part to (1) The Fresh Loaf and readings recommended here and advice given here, and (2) an enthusiasm for baking that has me making lots of bread as often as I can.  I learn stuff every time I handle dough and bake bread.

In that short span of baking experience, here are some things I've learned about baking simple sourdough breads:


  • To make bread the way you like it takes lots of study and gathering of general information (reading, watching videos, asking questions, and the like) and even more hands-on trial and error (the error part is very important). It's good to know some bread science--what factors have what results and why--but you can only improve your bread-baking by keeping track of what you do each time and making adjustments the next time.
  • You may like bread to be a certain way that others don't, and your tastes may change.  Some like big holes in the crumb, others don't; some like really dark crusts, others don't; some like sourer flavor than others do, etc.  Make it the way you like it and  be your own judge.
  • There are lots of variables that affect the crust, crumb and flavor: to name a few: flour choices; hydration; attributes of your starter culture; dough handling at each stage (including mixing, kneading and/or folding, dividing, pre-shaping, shaping, scoring and loading); time of each stage; temperature of ingredients; temperature of environment; type, quality and duration of steam during the bake; characteristics of the oven; attention to, understanding of, and reaction to the sensory information the dough provides; and luck, blessedness, karma, whatever you choose to call it.  All of these variables are important, but I think the last two in the list are the most important.  
  • There is no perfect loaf.  Striving for improvement can yield improvement, but can also yield higher expectations.  The Earth is round; the horizon keeps receding.
  • The more I learn, the more I realize how little I know.
  • Bread tastes better when it's been well photographed and shared, and your friends ooh and ahh at it.


This weekend, I am making San Francisco Sourdough from Reinhart's Crust and Crumb.  This is the first time I have made something called "San Francisco Sourdough".  I have made 20 or 30 sourdough breads, mostly variations on Hamelman's Vermont Sourdough (including Brother David's San Joaquin and my own San Francisco Country).  But I love the sour flavor, the crispy crust and the moist, chewy crumb of classic San Francisco Sourdough, and I've lived in San Francisco and environs for most of my life.  So isn't it time? 

I have read the formula and all the commentary in the book, and I've looked at several TFL blog posts on this bread.  What I learned: my brother David really likes this bread (or at least he did in 2008-09 when he blogged many times about it).  I chose the formula from Crust and Crumb because (1) I have the book, (2) the formula won some whoop-de-doo award, (3) my brother David really likes this bread and he has good taste, and (4) it's a weekend when I can focus on this formula which takes several days of attention.  

In comparison with most of the other sourdoughs I've made, this formula calls for a firmer starter, considerable kneading, and a more passive fermentation approach.  There are no stretch and folds during the long (4 hour) primary ferment.  I am also--for the first time--making a sourdough with all white flour, and no rye or whole wheat.  I am using BRM enriched white flour, made--according to the bag--from high gluten hard red wheat.  

I can't say I am following Professor Reinhart's formula exactly (I rarely follow anything exactly).  I made a liquid starter from my stock starter, and let it ripen, then chill (but not as long as the formula prescribes).  I then made a firm starter from the liquid starter, and let it ripen, then chill (but not as long as the formula prescribes).  I suspect the shortened retardation time on the starters will make the bread less sour than it would have been, but I will get to finish the process in time to enjoy the bread before the end of the weekend.  Some day I will give this formula all the time it asks, and see if the result is sourer or otherwise different.

I mixed the firm starter, flour, water and salt with my fingers and a plastic scraper.  At least 90% of the dough ended up in the bowl at the end of the mixing.  I then kneaded it on my granite counter, sprinkled with flour.  What I learned. I like kneading dough (I sort of knew that from a few past kneading experiences); it gives immediate visual and tactile feedback on dough development.  Unlike stretching and folding over several hours, when you knead dough, you feel the strengthening of the gluten with every few turns.  Also, I like kneading on floured granite.  Seems like just the right amount of sticky friction.  The dough is now fermenting.  Giving me time to muse.  What I learned as I mused and watched the activity in my sunny courtyard: voles and sparrows will riotously gorge themselves on scattered birdseed, while totally ignoring each other.  The sparrows will chase each other away, but the sparrows don't even seem to acknowledge the voles, and vice versa.

Later 1/1/5/11.  I have now shaped the 1 pound dough pieces into boules.  What I learned. This dough is loose and silky though the hydration is fairly low.  Is it because the gluten develops less strength when the dough is not stretched and folded periodically?  Or because the all white flour absorbs less water than my usual dough which has 15-25% whole grain?  Or because the fermentation (and looseness) is enhanced by the high proportion of stiff levain?  I also learned that un-floured granite is an excellent surface for using the boule shaping technique that Brother David has famously video-recorded.  I strove for a really taut sheath, but the little blobs seem to think they're 75% water when they're more like 60%.  

Now the boules are in their bannetons in their plastic bags, proofing.  They will proof in the kitchen until they have once-and-a-halfled (half a doubling).  Then they will go in the refrigerator for the night.

Sunday 1/16/11.  90 minutes after being taken out of the refrigerator, the boules were gently flopped from their bannetons onto pieces of parchment, then placed on a cookie sheet and scored.  The oven, with baking stone, was pre-heated at 475 F for an hour steamed using Sylvia's magic towels and a cast iron skillet with lava rocks. In addition, contrary to my usual procedure, I misted the loaves with water when they were loaded and again after a couple minutes.  After 15 minutes, I removed the steaming apparati and reduced the temperature to 425 F on convection setting.  After 30 minutes total (and a 207 F internal loaf temperature), I turned the oven off and left the loaves on the stone with the door ajar for another 10 minutes.

The oven spring was very good, though not the mighty spring of some other sourdoughs I've baked.  The loaf scored with a star rose about 20% more than the one with the hash mark (is this a commentary on telephone keypads?). The crust is perfectly colored, deep caramel and quite even, shiny, with little crust bubbles here and there. What I learned.  Spritzing loaves seems to add to shine and crust bubbles.  The star scoring pattern seems to encourage upward spring.  Convection baking (in a good oven) seems to enhance evenness of crust color.  I love my North Coast oven.

IMG_2022

IMG_2027

As the loaves cool, I can take a few minutes to look off to sea, where a large group of grey whales are commuting South, presumably looking for real Wharf Bread.  They are spouting off and waving hello with their flukes.

Later 1/16/11.  The loaves are mostly cooled.  They spray crust crumbs widely as they are sliced.  The crumb is moist, airy but chewy.  Very much a classic SF sourdough.  The holes are mostly small, with a few bigger pockets, but not what you'd call an open crumb.  This is just as I like it.  The flavor is simple but good.  Mildly sour.  What I learned.  Maybe the longer retardation of the starters is key to stronger sourness.  The less open crumb may be linked to the passive bulk retardation (with no stretch-and-folds and thus less gluten strength to hold bigger bubbles). 

IMG_2031

IMG_2032

Update:  An hour later, the structure of the crumb has solidified and become a bit denser.  I'd say medium dense.  Good texture.  The flavor's also become a bit more sour.

All in all, this is a bread I'll make again, probably adding some stretch-and-folds and some whole grains.  And definitely trying the longer retardation of the starters that the recipe calls for. That would combine the more complex flavors, more gluten strength and the sourness I'm seeking.  I learned a lot from this bake.

Glenn


GSnyde's picture
GSnyde

I joined in the Dutch Oven craze with a Pain de Campagne bake a few weeks ago, and the outcome was fine, but I think I get my best results with Sylvia’s magic towel technique.  So, for my first try at a Tartine-like Country Bread, I baked two sloppy boules on the stone.

IMG_1998

I used the formula Brother David posted last week (http://www.thefreshloaf.com/node/21389/country-bread-freshmilled-flours, except I used professionally-milled flours rather than home-milled (since I don’t have a hackmesser of my own, nor a KitchenAid grinder attachment [which would not be very useful in that I don’t have a KitchenAid <geez, this sentence has lots of digressions>]).  I used my favored white flour, Central Milling Co.’s Organic Artisan Baker’s Craft, along with KAF Whole Wheat flour and BRM Whole Grain Spelt flour.  (This was the first time I’d used spelt flour and now I have a hankering to fry up some of those small Pacific surf fishes so I can have smelt on spelt.)

The 77% hydration dough was silky and malleable, but it was gumby-in-a-toaster-like to shape.  With a good deal of flour on the board and on my hands, I managed to form pretty tight boules.  I proofed one in the garage (52 F) so they could be baked in succession without the second one being overproofed.

As soon as they were gently plopped from the bannetons to the peel, they spread out.  But they did rise nicely in the oven.

IMG_1994

And there was much crust crazing.

IMG_2000

And this is kinda what I like the inside of my bread to look like.

IMG_2003

The texture is about ideal for me—very moist, tender and airy crumb, but with some chew to it.  The flavor is good, but not the most interesting.  Not quite sour enough and I miss the touch of rye I usually have in my Pain de Campagne.

I think the next test is to try to get the flavor of San Francisco Country Sourdough with the crumb texture of this loaf.  Maybe 70% white/20% whole wheat/10% rye with 75% hydration and a three hour primary ferment.

Of course, Tasha thinks I should forget about bread and learn to bake kitty treats.

IMG_2011

Glenn


Pages

Subscribe to RSS - GSnyde's blog