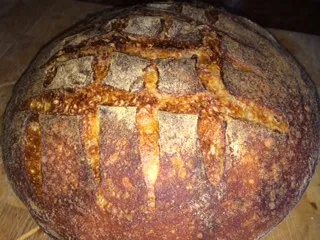
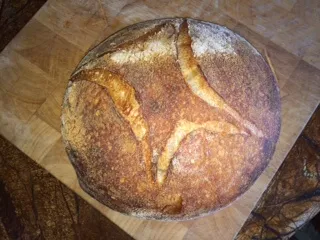
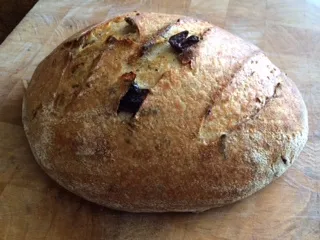
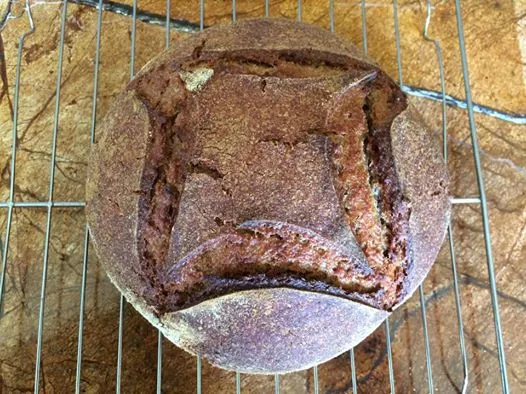
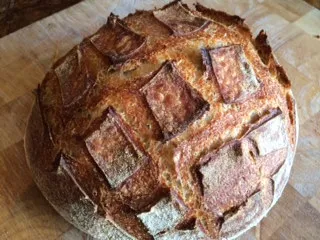
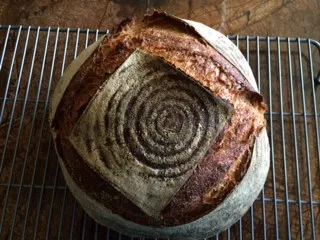
The Fresh Loaf

A Community of Amateur Bakers and Artisan Bread Enthusiasts.

CAphyl's blog

CAphyl's picture
CAphyl

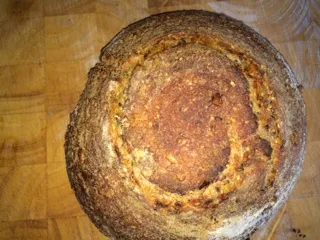
I wanted to try a seeded sourdough with a flax seed soaker, so i found the recipe below.  I made a number of variations along the way, due to preference and timing.  I noted the changes I made at the right of the original recipe.I wanted more of a whole wheat loaf, so I changed the recipe to add much more whole wheat and used a whole wheat starter. My husband and I really enjoyed the result.  It was crusty, but chewy, and the seeds inside really added a lot of tangy taste to the loaf. i tried a new scoring pattern on the top, but I think it's harder to see with a bread with seeds!

The recipe was adapted from Bread: A Baker’s Book of Techniques and Recipes by Jeffrey Hamelman and the Bread Experience (link below). 

http://breadmakingblog.breadexperience.com/2011/12/sourdough-seed-bread.html

Ingredients:

Liquid Levain Build

  • 4.8 oz (1 1/8 cups) bread flour
  • 6 oz (3/4 cup) water (I used 1 cup)
  • 1 oz (2 T) mature culture (liquid) (I used whole wheat)

Flaxseed Soaker

  • 2.2 oz (3/8 cup) Flaxseeds
  • 6.7 oz (3/4 cup) water (I used 1 cup)

Final Dough

  • 1 lb, 8.6 oz (5 5/8 cups) bread flour (I used 2-1/2 cups all purpose and 2 cups whole wheat)
  • 2.6 oz (5/8 cup) whole-rye flour
  • 2.5 oz sunflower seeds, toasted
  • 2.25 oz sesame seeds, toasted
  • 11.3 oz (1 3/8 cups) water, plus additional during mixing
  • .7 oz (1T + 1/2 tsp) salt
  • 8.9 oz soaker (all of above)
  • 10.8 oz liquid levain (all of above, less 2T) (I used it all)

Directions:

1)      Building the Liquid Levain:  Make the final build 12 to 16 hours before the final mix and let stand in a covered container at about 70 degrees F.

This is the liquid levain after about 16 hours.           

2) Flaxseed Soaker: Make a cold soaker with the flaxseeds and water at the same time you build the liquid levain. Cover the container with plastic and let it stand along with the liquid levain.

3) Mixing the Dough: Add all of the ingredients to the mixing bowl of a stand mixer and mix on first speed for 3 minutes, adjusting the hydration as necessary.  I found that the dough was so dry that I held out on adding all of the flour called for in the original recipe.

 The dough looked and smelled great coming together.

Mix on second speed for another 3 minutes or so. The dough should have moderate gluten development.

4) Bulk Fermentation: 5-7 hours.  I deviated from the original recipe here. I folded the dough every 45-50 minutes during this time.. I had to go out, so I put it in the refrigerator for four hours after all of the turn and folds.

5) Shaping: It was such a heavy dough that I was concerned it would not come up overnight in the fridge, so I took it out before I went to bed, divided into two large loaves and placed the large boule into a banneton coated with brown rice flour. I froze the other loaf, spraying a freezer zip back with cooking spray before popping the dough into the bag and then the freezer.

6) Final Proof:  Left the loaf on the counter overnight for about 9-10 hours for the final proof at a temperature of about 70 degrees.

It came up nicely overnight.

7)  Preparing to bake: In the morning, as I was using my LaCloche covered baker to bake the bread, I put the LaCloche in the oven, both top and bottom to preheat.  Set the oven temperature at 500 degrees (after you have placed the LaCloche inside).  If you don't have a LaCloche:   Preheat the oven to 450 degrees F., with a baking stone on the middle rack and a steam pan underneath.  Place the loaves on the hot baking stone.  Fill the steam pan with hot water and close the door of the oven.   Let the loaves bake for 40 to 45 minutes, until the loaves are golden brown.

Getting ready for the oven:  Be careful as both the top and bottom of the LaCloche have been in the oven and are very hot. You can see my Bordelaise scorer next to my well-used LaCloche covered baker.  I really love my scoring tool.  I got it in the internet for about $12; well worth it. I also recently purchased the large pizza stone that is underneath the LaCloche.  My plan is to use it for baguettes! We used it already on sourdough pizza, and it was fantastic, with a very even bake...better than our older round pizza stone.

8) Baking the bread:  Using heavy oven gloves, remove the lid from the LaCloche and take the preheated bottom from the oven as well.  Sprinkle the bottom with corn meal, pop the loaf out of the banneton onto the preheated stone bottom, score as desired.  Put the loaf in the LaCloche in the oven and place the dome over it.  Bake for 25-30 minutes with dome on.  Remove dome and bake for 10 more minutes or so until crust is brown and done to your desired taste.

9. Serving: Cool completely on wire rack before slicing. Enjoy!


CAphyl's picture
CAphyl

Baked another Tartine loaf with increased hydration, looking for the perfect crumb (which, of course, can never be achieved!)  We had this loaf for lunch with my husband's sister and her husband, Bob the baker from England.  They leave today, so we enjoyed lunch outside in the California sun.  Bob gave the bread passing marks. They return to Liverpool (and a bit of rain) this afternoon.  They did have rain here and in Las Vegas during their visit.

We enjoyed the bread, and I will continue my experiments in hydration. I believe I may try a WW recipe next.

CAphyl's picture
CAphyl

I am always trying to get bigger holes, so I experimented with a bit more hydration.  The stakes were high as my sister-in-law and brother-in-law are visiting from England, and Bob was a baker for more than 30 years!

They seemed to enjoy it.  We had lunch outside on the patio.  The crumb was good, but I am always looking to improve.

CAphyl's picture
CAphyl

I was inspired by John, Song of the Baker, and his recent post showcasing an olive bread with lemon zest and herbes. de Provence.  I used my usual Tartine recipe (below) that I found online, but took John's suggestion and added more lemon zest (I used the zest of a whole lemon), marinated kalamata olives and green olives and added a tablespoon of the Herbes de Provence.  I also used the juice from the olives that had garlic, olive oil and more herbs. i added the ingredients in step 3 below.  I used my LaCloche covered baker, rather than a Dutch oven, as suggested in the recipe.  I baked it in the LaCloche for 30 minutes on 500 degrees with the lid on, then lowered it to 450 degrees and baked the bread with the lid off for another 15 minutes.

We couldn't wait to cut it, so probably cut it before we should have, as it was still pretty warm.

I could taste the lemon zest in the first bite, but not so much after that.  I could also taste the herbs, but will add a bit more next time.  I would consider adding more olives as well.

Tartine Country Bread

Make the bread:

1. To make the leaven: Discard all but 1 tablespoon of the starter. Feed the remaining starter with 200 grams of warm water, 100 grams of whole wheat flour, and 100 grams of bread flour. Let the mixture rise overnight at room temperature. When it’s ready, the leaven should have risen slightly, float in room temperature water (test a small piece; you can still use this piece in the final dough), and smell like overripe fruit.

2. In a large (huge, actually) bowl, mix 700 grams of water and 200 grams of the leaven. (The remainder of the leaven is the starter that you’ll store and feed regularly.) Add 800 grams of bread flour and 200 grams of whole wheat flour; stir until the flour is evenly moistened. The dough won’t be smooth. Let it rest for 25 to 40 minutes while the gluten starts forming, the flour starts hydrating, and the flavor starts developing.

3. Add 20 grams of salt and 50 grams of water to the dough, and squeeze the dough to mix them in. This dough isn’t kneaded; instead, fold it a few times by using a dough scraper to scoop up one side of the dough and drape it over the rest of the dough.

4. Allow the dough to ferment for 3 to 4 hours and give it another few turns every 30 minutes. This takes the place of kneading. Be more gentle with the turning toward the end of the rising time. The dough is ready when it’s slightly increased in volume and is full of air bubbles (which will be visible on the sides if you’ve used a clear container).

5. Turn the dough out onto floured surface or a damp kitchen towel. Divide it into two portions. To shape each one into a round, cup your hands over the top of the dough and rotate the dough around on the counter. Cover the rounds with a damp towel and set them aside to rest for 20 to 30 minutes.

6. To increase the surface tension of the dough, ensuring that the bread rises up and not out in the oven, perform a series of folds. Working with one ball of dough at a time, stretch it out and fold it over several times, eventually ending up with a neat square. Cup your hands around the dough and rotate it on the counter to smooth the surface again.

7. Transfer each round to a floured towel-lined bowl or basket with the seam facing up. (Actually, I prefer to use an oiled bowl, covered with a damp towel. If you want to freeze the dough, transfer it to a ziptop bag sprayed with nonstick spray and store in the freezer. Let it defrost overnight in the refrigerator before continuing with the recipe.) Let rise for 2-4 hours at room temperature or, for maximum flavor, overnight in refrigerator.

8. Half an hour before you’re ready to bake the bread, remove the dough from the refrigerator. Place a Dutch oven and its lid on the middle rack in the oven and heat the oven to 500 degrees. When the oven is hot, turn the dough out of its bowl onto a floured work surface or a damp kitchen towel so that the seam is down. Use a very sharp or serrated knife to cut four intersecting ½-inch deep slashes in the dough, forming a square of cuts. Carefully place the dough into the heated Dutch oven; cover the pot with its lid and transfer it to the oven. Immediately reduce the oven temperature to 450 degrees. Bake 20 minutes, then remove the lid and bake 20-25 minutes longer, until the bread is deep golden brown and an instant read thermometer inserted into the center of the loaf reads about 205 degrees. Remove the bread from the pan and cool on a wire rack for an hour before serving.


CAphyl's picture
CAphyl

I usually don't make a lot of sweets, but I did so today. Cheated in that I did not make the pastry dough.  I did make the Tartine bread today, and that was from scratch!  The mini-pie tarts are stuffed with chocolate (Nutella) and cherry preserves and covered in a pink glaze with red sparkly sugar.  Very easy.

CAphyl's picture
CAphyl

Bread friends:  I am very excited about my second Tartine loaf.  As you may recall, my first one was nice, but I was disappointed with the crumb.  I just took this out of the oven, so will cut it later when it cools.  I actually started in on Wednesday and then forgot that I had to be out quite a lot yesterday, so I had my husband do a number of the turns for me.  Let's hope our joint effort is one to be proud of!  Phyllis

CAphyl's picture
CAphyl

I divided a Multi-Grain loaf and baked the first one and froze the other late last year.  This is the frozen loaf. I defrosted it and then did a series of stretch-and-folds, adding water along the way as the dough was dry. I have had a tendency to add more flour than I should when the dough feels too wet (I am working on this and getting better, but I made this bread and froze it before I learned my lesson....).  The loaf tasted good as my husband gave it the thumbs up, particularly for crustiness, but I was disappointed with the oven spring and the crumb.  Always learning!   Phyllis

CAphyl's picture
CAphyl

I just took this out of the oven, and hoping that

when we cut it for lunch I will see excellent crumb.  I was pleased that there was good oven spring on this one, so I do have my hopes up.  I experimented a bit on this loaf and used more white flour than wheat, as was called for in the recipe.  I also made enough for two loaves, so I froze this dough.

After defrosting in the fridge, I did a series of stretch and folds and  sprayed it with a little water, as I believe I haven't had high enough hydration in my doughs to get the crumb (and bigger holes) that I am looking for.  I returned it to the fridge to proof and then took it out right before I went to bed.


Fingers crossed that I make progress in my quest for the perfect crumb, which I am sure is difficult to ever achieve! Phyllis

p.s.  I finally figured out how to add more photos, but I will keep practicing on this as well to get better.  Thanks to all of you for the tips....I am using them all.


CAphyl's picture
CAphyl

Had to make some muffins today to share with friends.  I usually make them with sourdough, but didn't today.  It's a good recipe; I added the toasted almonds to it because I always love muffins with both fruit and nuts. I got the blood oranges from the farmer's market on Sunday.

CAphyl's picture
CAphyl

It is very exciting.  I have always wanted to bake a Tartine loaf and now I have done it. There certainly were trials along the way.  I weighed out the ingredients and just felt it was too much water.  The dough hydration seemed high, so I had to add some flour during the turn-and-folds.  It seemed to work out OK in the end.  I also did more turn-and-folds to get the dough to where I thought it would work. I am very anxious to see the crumb. I have to let it cool down, but can't wait to try it for lunch and see what rating my husband gives it.....I used the recipe below.

http://www.crumblycookie.net/2011/05/29/tartine-country-bread/

Pages

Subscribe to RSS - CAphyl's blog