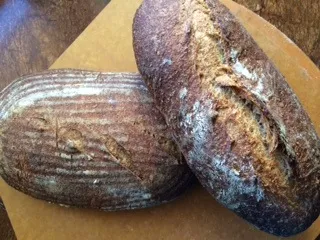
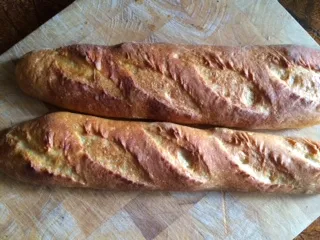
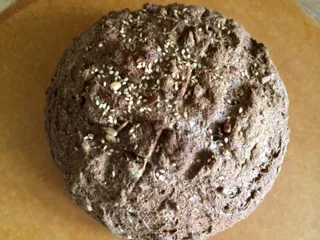
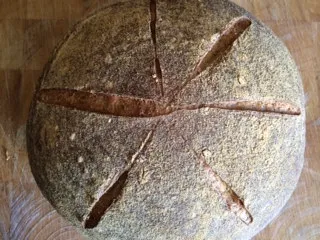
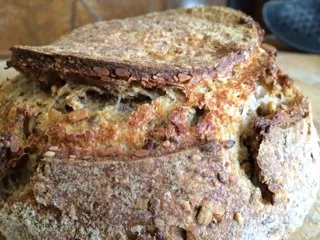
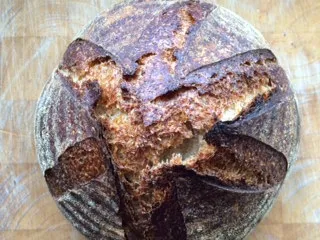
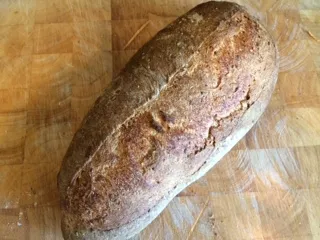
The Fresh Loaf

A Community of Amateur Bakers and Artisan Bread Enthusiasts.

CAphyl's blog

CAphyl's picture
CAphyl

My experiments continued this morning, as I baked another dough I had frozen very recently.  This was a variation of Khalid's recipe that I have made a couple of times.  I really enjoy this bread as it has lots of different grains in the soaker, and it is ready to go so quickly.  I defrosted the loaf yesterday in the fridge and took it out at 6 a.m. this morning.  (We had to get up early here in California to see the Liverpool-Chelsea game, as my husband is from Liverpool.  Unfortunately, their winning streak was snapped today, creating a shadow over their chance to win the league.....we are suffering along with our family and friends in Liverpool today.  It certainly was not the best start to the day.  Then, we saw that the wind knocked over our lime tree and broke its clay pot. And you know about the lime shortage right now!) Despite these setbacks, I pushed forward with my bread experiment.

I took the dough out of the fridge to warm up and did a preliminary shaping.  Khalid shared a nice illustration for batard shaping, link below.

 http://www.thefreshloaf.com/node/24865/shaping-batard

I used my LaCloche oblong covered baker, which I do not use as much as my round domed LaCloche.  I have to say that I think the crust turns out better in the LaCloche than when I use the heated stone and steam.

The bread I made today from frozen is on the left; the bread I made last week per the recipe (baked on the stone with steam) is on the right.  I am baking longer to get the bold crust, and I do think that makes a real difference. For whatever reason, the scoring worked a lot better today than last week as well.

I still struggle with the shaping and transfer of dough to the preheated baker.  I had to use parchment paper as the dough was quite sticky. It did not go into the oblong baker easily (that's probably why I don't use this one as much), and I was concerned that I botched it.  The day was certainly going that way....

I was pleased that the loaf looked good as I took the lid off.  I preheated the baker and lid at 500 degrees, and then baked it lid on for 30 minutes before lowering the temperature to 435 convention for another 20-25 minutes with the lid off.

Here is the crumb from the bake today with the frozen loaf.

This is the crumb from the loaf I baked fresh on the preheated stone with steam.

I would say the crumb is good in both, but perhaps just slightly better in the frozen loaf.  The taste of the frozen loaf was great, very tangy with crispy crust and moist interior.

We enjoyed our sandwiches for lunch.  I guess I will continue with my bread experiments, as my husband really enjoyed this loaf!

The original recipe I used is below.  Phyllis

Sourdough with Rye, Spelt and Soaker

Prefermented flour %

30%

Overall Recipe

Soaker


Bakers %

Weight


Bread flour

47%

450

grams

Coarse Corn Meal

30

grams

Whole Spelt flour

11%

106

grams

Couscous

30

grams

Whole Rye flour

26%

250

grams

Rolled Oats

60

grams

Coarse corn meal

5%

45

grams

Water

250

grams

Couscous

5%

45

grams

Salt

6

grams

Rolled Oats

6%

60

grams

Flax Seeds

25

grams

Water

84%

800

grams

Sesame Seeds

5

grams

Salt

2%

18

grams


Total

187%

1774

grams

Total

406

grams

Rye Sour

Final Dough

Whole Rye flour

60%

150

grams

Bread Flour

450

grams

 AP Flour

           40%

      100

grams

Whole Spelt Flour

106

grams

Water

100%

250

grams

Water

300

grams

Mixed Starter

10%

50

grams

Salt

12

grams

Total


550

grams

Rye Sour

550

grams


All Soaker

406

grams


Total

1824

grams

Prepare the rye sour by adding a tablespoon and a half of your active rye starter to the 250g water, and mix well to disperse. Add the flour, mix well, and let stand for 8-12 hours at room temperature. To prepare the soaker, weigh all soaker ingredients into a bowl, and then add the boiling water to the soaker. Mix well, cover, and let stand until overnight or until your rye sour is ready.

The next day, mix all ingredients using a stand mixer for 7-10 minutes. The dough will remain relatively sticky, so try to resist adding any flour at this stage. Shape as a round and let ferment in an oiled bowl for 2 hours at preferably 78 F, folding it using your scraper at the 1 hour mark. By the end of bulk fermentation, scrape your dough onto a heavily floured surface, pat the dough even, divide into the desired dough pieces, and round each piece leaving them to rest for 15- 20 min, covered. Shape your dough into a batard (see helpful videos on this). I did the final shaping and then placed the dough on parchment paper on a peel. You can also use your proofing basket.  Dust your basket with a mixture of all purpose flour and rice flour, and shape your dough and invert it smooth side down into the basket. The final fermentation will be only 45 minutes, but watch the dough NOT the clock. Preheat your oven at this stage with a stone in place to 500F.   Have your steaming apparatus in place. When ready, invert the dough on baking paper lined peel/ board and score it before placing on the baking stone. Place boiling water into steaming tray. Bake for 15 minutes with steam, and then remove the steaming tray and reduce the temperature to 450F for another 25-30  minutes or so. This last loaf turned out so big, so it needed a bit more baking time.  Be sure to adjust based on the size and the kind of crust you prefer. Remember, you can experiment with different ingredients in the soaker--that's the really fun part.

Cool on wire rack before slicing.

CAphyl's picture
CAphyl

I did another experiment.  A few weeks ago, I made my first Vermont sourdough.  I froze half the dough to bake later.  The photo at top is the loaf I made today with the frozen dough. (The dough was frozen after bulk fermentation).  I defrosted it in the refrigerator and took it out last night.  It was still pretty cold (with a small frozen center), so I let it warm up and did three stretch and folds and sprayed a little water on the dough as it was stiff. Then, before I went to bed, I put the shaped boule into the banneton, which was coated with brown rice flour.  It stayed on the counter for eight hours. I was concerned when I looked at it in the morning as it didn't pop up much overnight.

Then, I baked it at 500 degrees in my LaCloche baker for 30 minutes, and then took the lid off for another 25 minutes at 435 convection. It had some oven spring and did pop up nicely. I wanted a darker crust for the second loaf.

The photo on the left is the loaf from the frozen dough; the one on the right is the first one I made. Both were excellent, but quite different. I did not use the LaCloche on the the one on the right, using the recipe below, which called for steaming. It is not necessary to steam with the LaCloche covered baker.

This is the crumb from the frozen loaf baked in the covered LaCloche today. I think the water I sprayed on the dough last night helped the crumb.

This is the crumb from the first loaf, which was baked on a stone with steaming.

My husband enjoyed his sandwich with the loaf I baked today!

Here is the Hamelman recipe, thanks to David.

Vermont Sourdough with Increased Whole Grain, from Hamelman's "Bread”

By dmsnyder

OVERALL FORMULA


Bread flour

1 lb 11.2 oz.

85.00%

Whole Rye

4.8 oz

15.00%

Water

1 lb 4.8oz

65.00%

Salt

.6 oz

1.90%

TOTAL YIELD

3 lbs 5.4 oz

169.90%


LIQUID LEVAIN BUILD


Bread flour

6.4 oz

100.00%

Water

8 oz

125.00%

Mature culture (liquid)

1.3 oz

20.00%

TOTAL

15.7 oz.


FINAL DOUGH


Bread flour (I used 1.55)

1lb 8 oz

Whole Rye (I used 6.8)

4.8 oz

 Water

12.8 oz

Liquid levain

14.4 oz

(all less 3 T)

Salt

.6 oz

TOTAL

3 lbs 5.4 oz


METHOD

  1. The night before mixing the final dough, feed the liquid levain as above. Ferment at room temperature overnight.
  2. Mix the final dough. Place all ingredients except the salt in the bowl and mix to a shaggy mass.
  3. Cover the bowl and autolyse for 20-60 minutes.
  4. Sprinkle the salt over the dough and mix using the paddle of a stand mixer for 2 minutes at Speed 1. Add small amounts of water or flour as needed to achieve a medium consistency dough.
  5. Switch to the dough hook and mix at Speed 2 for 6-8 minutes. There should be a coarse window pane.
  6. Transfer the dough to a lightly oiled bowl and ferment for 2.5 hours with one stretch and fold at 1.25 hours.
  7. Divide the dough into two equal parts and form into rounds. Place seam side up on the board.
  8. Cover with plastic and allow the dough to rest for 20-30 minutes.
  9. Form into boules or bâtards and place in bannetons or en couch. Cover well with plastic-wrap or place in food safe plastic bags.
  10. Refrigerate for 12-18 hours.
  11. The next day, remove the loaves from the refrigerator.
  12. Pre-heat the oven at 500ºF with a baking stone and steaming apparatus in place.
  13. After 45-60 minutes, pre-steam the oven. Transfer the loaves to a peel. Score them.
  14. Load the loaves onto the stone and pour ½ cup boiling water into the steaming apparatus. Turn the oven down to 460ºF.
  15. After 15 minutes, if you have a convection oven, turn it to convection bake at 435ºF. If you don't, leave the oven at 460ºF. Bake for another 25 minutes.
  16. Remove the loaves to a cooling rack.
  17. Cool completely before slicing.


CAphyl's picture
CAphyl

I have had lots of fun tinkering with this recipe.  Today, I reduced the rye content again, added flax seeds and sprinkled in some sesame seeds.  Still working on my shaping, but the bread was tasty.  My husband really liked it. .

The crumb was quite good as I kept the hydration at higher levels, as compared to where I started. I know I will keep playing around with this recipe as it makes great bread.  Thanks again to Khalid for getting me going on this.

Sourdough with Rye, Spelt and Soaker

Prefermented flour %

30%

Overall Recipe

Soaker


Bakers %

Weight


Bread flour

47%

450

grams

Coarse Corn Meal

30

grams

Whole Spelt flour

11%

106

grams

Couscous

30

grams

Whole Rye flour

26%

250

grams

Rolled Oats

60

grams

Coarse corn meal

5%

45

grams

Water

250

grams

Couscous

5%

45

grams

Salt

6

grams

Rolled Oats

6%

60

grams

Flax Seeds

25

grams

Water

84%

800

grams

Sesame Seeds

5

grams

Salt

2%

18

grams


Total

187%

1774

grams

Total

406

grams

Rye Sour

Final Dough

Whole Rye flour

60%

150

grams

Bread Flour

450

grams

 AP Flour

           40%

      100

grams

Whole Spelt Flour

106

grams

Water

100%

250

grams

Water

300

grams

Mixed Starter

10%

50

grams

Salt

12

grams

Total


550

grams

Rye Sour

550

grams


All Soaker

406

grams


Total

1824

grams

Prepare the rye sour by adding a tablespoon and a half of your active rye starter to the 250g water, and mix well to disperse. Add the flour, mix well, and let stand for 8-12 hours at room temperature. To prepare the soaker, weigh all soaker ingredients into a bowl, and then add the boiling water to the soaker. Mix well, cover, and let stand until overnight or until your rye sour is ready.

The next day, mix all ingredients using a stand mixer for 7-10 minutes. The dough will remain relatively sticky, so try to resist adding any flour at this stage. Shape as a round and let ferment in an oiled bowl for 2 hours at preferably 78 F, folding it using your scraper at the 1 hour mark. By the end of bulk fermentation, scrape your dough onto a heavily floured surface, pat the dough even, divide into the desired dough pieces, and round each piece leaving them to rest for 15- 20 min, covered. Shape your dough into a batard (see helpful videos on this). I did the final shaping and then placed the dough on parchment paper on a peel. You can also use your proofing basket.  Dust your basket with a mixture of all purpose flour and rice flour, and shape your dough and invert it smooth side down into the basket. The final fermentation will be only 45 minutes, but watch the dough NOT the clock. Preheat your oven at this stage with a stone in place to 500F.   Have your steaming apparatus in place. When ready, invert the dough on baking paper lined peel/ board and score it before placing on the baking stone. Place boiling water into steaming tray. Bake for 15 minutes with steam, and then remove the steaming tray and reduce the temperature to 450F for another 25-30  minutes or so. This last loaf turned out so big, so it needed a bit more baking time.  Be sure to adjust based on the size and the kind of crust you prefer. Remember, you can experiment with different ingredients in the soaker--that's the really fun part.

Cool on wire rack before slicing.


CAphyl's picture
CAphyl

I have been wanting to try Khlaid's recipe for some time. This is a fantastic and fun bread to make.   I baked one loaf yesterday, with some modifications. I made just a few changes, most notably the inclusion of cous cous rather than the coarse semolina in his original recipe.  (The link to his original recipe is below).   I also reduced the rye by 50 grams in the final dough and increased the bread flour, added a bit more water and used course rather than fine corn meal. Instead of a rye starter in the recipe, I also used a "mixed" starter (80 AP/20WW/10R), but fed it per Khalid's recipe to produce a wonderful rye sour. 

It was hard to believe that the proofing times were so short, but Khalid was right on...this was one of the fastest rising sourdough breads I have made.   It tasted fantastic.  We just had some for lunch, and my husband really enjoyed it. I thought the crumb was excellent.  My experiment was on the second loaf:  I had to go out, so I put the other loaf to proof overnight and made it this morning. I know this was a real risk with such a fast-rising bread, but I wondered what would happen.  It did seem to retard the rise, but it doubled in size fairly quickly. I do think it was overproofed, and I really botched the scoring (didn't help that it was overproofed), but it looks like it might taste OK.

The loaf I baked per the recipe instructions is on the left; the one I proofed overnight in the fridge is on the right. I should also mention that I shaped them a bit differently, so they do not have the same shape at all.

I liked the crumb and texture.  These are all shots from the first bread as we haven't cut the other one yet.  It will be interesting to see how that crumb turned out.  Baking is also an adventure and a chance to learn.  Hopefully, it will be even better next time (but I don't think I will repeat this experiment!)  Phyllis

http://www.thefreshloaf.com/node/32972/rye-sourdough-spelt-and-soaker


CAphyl's picture
CAphyl

Well, I kind of screwed up today, but did my best to make up for it.  When I was making the Gluten-free Farmhouse bread earlier, i prepared too much yeast because I thought I really messed up the bread dough, but it turned out that I didn't!  As a result, I quickly found the most simple recipe for yeasted French bread and threw it together in minutes and baked it this afternoon.  It was really good!  My husband liked the crust.  I could have done a much better job on the shaping, however.  I'll do better next time.

The crumb was OK.  I always prefer to use my sourdough starter for bread, but this was a nice change.  I've included the link to the recipe below.

http://busycooks.about.com/od/yeastbreads/r/frenchbread.htm

CAphyl's picture
CAphyl

I am always looking for good gluten-free recipes, and I came across this one online by Ali and Tom of Whole Life Nutrition.  I did make a number of modifications to the recipe after the first time I made it, which I have listed below.  It is a very dense, heavy bread and uses ground chia seeds and psyllium husk as the gluten-like substances.

The loaf looked very good going into the oven (left) and came out well fully baked.  I found that it may take a little longer to bake than the recipe to be fully done.

The crumb is dense and heavy, but the taste of the bread is quite tasty and tangy.

Wet Ingredients:

2 ½ cups warm water (105 to 110 degrees F)

2 ¼ teaspoons active dry yeast (1 package)

1 tablespoon agave nectar (you can use maple syrup as a substitute)

2 tablespoons extra virgin olive oil

1/4 cup ground chia seeds

1/4 cup whole psyllium husks

Dry Ingredients:

1 cup teff flour

1-1/2 cup all purpose gluten-free baking flour (like Bob’s Red Mill—reserve some flour for kneading)

½ cup brown rice flour

1 cup gluten-free oat flour

1 ½ teaspoons sea salt

¼ cup flax seeds

Topping:

Olive oil spray (or olive oil)

Toasted sesame seeds

Toasted sunflower seeds

Place the warm water in a bowl or 4-cup liquid glass measure. Add the yeast and agave nectar, whisk together. Let rest for 5 to 10 minutes to activate the yeast. The mixture should get foamy or bubbly.

While the yeast is activating, mix together the dry ingredients in a large bowl.

After the yeast is activated whisk in the olive oil, ground chia seeds (it's best to grind them yourself), and psyllium husks into the water-yeast mixture. Let stand for 2 to 3 minutes (not any longer) to let the chia and psyllium release their gelatinous substances. Whisk again.


Pour the wet ingredients into the dry and mix together with a large wooden spoon until thick. Then knead the dough on a floured wooden board to fully incorporate the flour. Add more teff and all-purpose flours, a little at a time, until the dough holds together and isn’t too sticky (about ¼ to ½ cup total). Don’t add too much flour, otherwise the dough will become very dense; it should still be slightly sticky. Form dough into a ball, place back into the large bowl, and cover with a damp towel. Place in a warm spot to rise until it is doubled in size, about one hour.


After the dough has risen, place a pizza stone in your oven. Preheat the oven to 400 degrees F. Place a pan of water on the bottom rack of the oven (the one beneath the pizza stone).

Punch down the dough and turn out onto a lightly floured wooden board.  Stretch and fold the dough and then form into a round ball. Place on a square of parchment paper and score the dough with a shallow “tic-tac-toe” pattern on the top. Spray (or drizzle) with olive oil and sprinkle the seeds on top. Let rise for about 30 minutes in a warm place while the oven and stone are preheating.


Carefully lift the parchment paper with the risen loaf and place it onto the stone in the oven. Bake for about 40-45 minutes; if bottom is soft, bake for 10 more minutes. Remove from oven and let cool 30 to 60 minutes before cutting into it. The bread will be very gummy hot out of the oven.


CAphyl's picture
CAphyl

Before I joined this site,  I didn't realize how behind the curve I was as I had never made a Vermont Sourdough. I decided to get with it and make one today.  I have been schooled by the many wonderful bakers on this site and encouraged to try, so I did.  I used David's Hamelman's recipe, but altered it a bit by adding a bit more rye.  I was finishing a bag of bread flour and didn't have quite enough, and I thought the additional rye would add some nice flavor. Lately, I have been making lots of David's recipes, but the next one I would like to make is one of Khalid's....looking forward to trying that.

I was so impressed with this dough throughout the process. It proofed beautifully, the oven spring was really terrific, and the crumb was nice.

I am sure I will make some variations of this in the future. I followed the recipe pretty closely, but probably added a tad more water than called for in the recipe.

Here is the recipe I used (I made two changes to the original recipe, which I noted):

Vermont Sourdough with Increased Whole Grain, from Hamelman's "Bread”

By dmsnyder

OVERALL FORMULA


Bread flour

1 lb 11.2 oz.

85.00%

Whole Rye

4.8 oz

15.00%

Water

1 lb 4.8oz

65.00%

Salt

.6 oz

1.90%

TOTAL YIELD

3 lbs 5.4 oz

169.90%


LIQUID LEVAIN BUILD


Bread flour

6.4 oz

100.00%

Water

8 oz

125.00%

Mature culture (liquid)

1.3 oz

20.00%

TOTAL

15.7 oz.


FINAL DOUGH


Bread flour (I used 1.55)

1lb 8 oz

Whole Rye (I used 6.8)

4.8 oz

 Water

12.8 oz

Liquid levain

14.4 oz

(all less 3 T)

Salt

.6 oz

TOTAL

3 lbs 5.4 oz


METHOD

  1. The night before mixing the final dough, feed the liquid levain as above. Ferment at room temperature overnight.
  2. Mix the final dough. Place all ingredients except the salt in the bowl and mix to a shaggy mass.
  3. Cover the bowl and autolyse for 20-60 minutes.
  4. Sprinkle the salt over the dough and mix using the paddle of a stand mixer for 2 minutes at Speed 1. Add small amounts of water or flour as needed to achieve a medium consistency dough.
  5. Switch to the dough hook and mix at Speed 2 for 6-8 minutes. There should be a coarse window pane.
  6. Transfer the dough to a lightly oiled bowl and ferment for 2.5 hours with one stretch and fold at 1.25 hours.
  7. Divide the dough into two equal parts and form into rounds. Place seam side up on the board.
  8. Cover with plastic and allow the dough to rest for 20-30 minutes.
  9. Form into boules or bâtards and place in bannetons or en couch. Cover well with plasti-crap or place in food safe plastic bags.
  10. Refrigerate for 12-18 hours.
  11. The next day, remove the loaves from the refrigerator.
  12. Pre-heat the oven at 500ºF with a baking stone and steaming apparatus in place.
  13. After 45-60 minutes, pre-steam the oven. Transfer the loaves to a peel. Score them.
  14. Load the loaves onto the stone and pour ½ cup boiling water into the steaming apparatus. Turn the oven down to 460ºF.
  15. After 15 minutes, if you have a convection oven, turn it to convection bake at 435ºF. If you don't, leave the oven at 460ºF. Bake for another 25 minutes.
  16. Remove the loaves to a cooling rack.
  17. Cool completely before slicing.
CAphyl's picture
CAphyl

I have been thinking about making baguettes for some time, and I finally did it, using David's recipe.  I made SO many mistakes and learned a lot. I will do my best to do a better job next time.  I watched videos over and over to do the proper shaping and still did a pretty poor job.  I think I understand the error of my ways, so I can improve on my next attempt!

 I learned a lot going through the process. It was the first time for my using a French couche cloth.

I liked the crumb, and the crust was wonderful. My husband really enjoyed the bread.

Our baguette sandwiches were really wonderful.

I used David's recipe for the baguettes, making a few changes, including using the couche cloth instead of parchment paper.  I also didn't have any ice ready, so just used boiled water for the steam.  See recipe below:

Pain_de_Campagne

The formula for this bâtard is derived from that for Anis Bouabsa's baguettes, as shared with TFL by Janedo and then modified by David. His recipe follows:

Formula

Active starter ........................100 gms

KAF French Style Flour.......450 gms

Guisto's Rye Flour..................50 gms

Water......................................370 gms

Instant yeast............................1/4 tsp

Salt............................................10 gms

Mixing

In a large bowl, mix the active starter with the water to dissolve it. Add the flours and stir to form a shaggy mass. Cover tightly and let rest (autolyse) for 20 minutes.

Sprinkle the yeast over the dough and mix with a plastic scraper. Then sprinkle the salt over the dough and mix.

Using the plastic scraper, stretch and fold the dough 20 times, rotating the bowl 1/5 turn between each stroke. Cover tightly. Repeat this stretch and fold procedure 20 minutes later and, again, after another 20 minutes.

Fermentation

After the third series of stretches and folds, scape the dough into a lightly oiled 2 quart/2 liter container and cover tightly. (I use a 2 quart glass measuring pitcher with a tightly fitting plastic lid manufactured by Anchor Glass.) Immediately place in the refrigerator and leave it there for 21 hours. (In this time, my dough doubles in volume and is full of bubbles. YMMV.)

Dividing and Shaping

(I chose to make one very large bâtard, but you could divide the dough into 2 or 3 pieces and make smaller bâtards, boules or baguettes. Or, you could just cut the dough and not shape it further to make pains rustiques.)

Take the dough out of the refrigerator and scrape it gently onto a lightly floured work surface. Gently pat it into a rectangle. To pre-shape for  a bâtard, fold the near edge up just past the center of the dough and seal the edge by gently pressing the two layers together with the ulnar (little finger) edge of your hand or the heel of your hand, whichever works best for you. Then, bring the far edge of the dough gently just over the sealed edge and seal the new seam as described.

Cover the dough with plastic wrap and/or a kitchen towel and let it rest for 30-60 minutes, with the seams facing up. (The time will depend on ambient temperature and how active your starter is. The dough should have risen slightly, but not much.)

To shape a bâtard, fold the near edge of the dough and seal the edge, as before. Now, take the far edge of the dough and bring it towards you all the way to the work surface and seal the seam with the heel of your hand. Rotate the loaf gently toward you 1/4 turn so the last seam you formed is against the work surface and roll the loaf back and forth, with minimal downward pressure, to further seal the seam. Then, with the palms of both hands resting softly on the loaf, roll it back and forth to shape a bâtard. Start with both hands in the middle of the loaf and move them outward as you roll the loaf, slightly increasing the pressure as you move outward, so the bâtard ends up with the middle highest and the ends pointed .

Preheating the oven

Place a baking stone on the middle rack and both a cast iron skillet and a metal loaf pan (or equivalent receptacles of your choosing) on the bottom shelf.  Heat the oven to 500F. (I like to pre-heat the baking stone for an hour. I think I get better oven spring. Since I expected a 30 minute rest after pre-shaping and a 45 minute proofing, I turned on the oven 15 minutes after I had pre-shaped the loaf.) I put a kettle of water to boil 10 minutes before baking.

Proofing

After shaping the loaf, transfer it to parchment paper liberally dusted with semolina. Cover the loaf with plastic wrap and/or a kitchen towel. Proof until the loaf has expanded to about 1-1/2 times it's original size. (This turned out to be 30 minutes for me.) Do not over-proof, if you want good oven-spring and bloom!

Baking

Put about a cup full of ice cubes in the loaf pan on the bottom shelf of the oven and close the door.

Slip a peel or cookie sheet under the parchment paper holding the loaf. Uncover the loaf. Score it. (The bâtard was scored with a serrated tomato knife. The knife was held with its blade at about a 30 degree angle to the surface of the loaf. One swift end-to-end cut was made, about 1/2 inch deep.)

Transfer the loaf and parchment paper to the baking stone, pour one cup of boiling water into the skillet, and close the oven door. Turn the oven down to 460F.

After 15 minutes, remove the loaf pan and the skillet from the oven. Rotate the loaf 180 degrees, if it is browning unevenly. Close the oven door.

Bake for another 15 minutes, then remove the loaf and place on a cooling rack. Check for doneness. (Nice crust color. Internal temperature of at least 205F. Hollow sound when you thump the bottom of the loaf.) If necessary, return to loaf to the oven to bake longer.

Cooling

Cool on a rack for two hours before slicing.


CAphyl's picture
CAphyl

I made this tasty bread again after baking my first flax seed soaker loaf.  I had frozen half the dough from my first bake as it was too much for us, and I was really interested to see how this dough would respond to being frozen and defrosted.   I am always fooled by the consistency of this dough (very stiff), and I was concerned because it didn't seem to rise enough.  In the end, I got good oven spring and was pleased with the result .

I let the dough defrost, and then I did a series of stretch and folds before placing the dough in the banneton for several hours in the refrigerator.  Before going to bed, I took it out for about 8 hours at cool room temperature.

I baked the bread in my LaCloche covered baker at 500 degrees for 30 minutes with the lid on and and then for 15 minutes at 450 degrees with the lid off.

I am always apprehensive about the crumb, but I was pleased with the outcome. I added a touch more hydration to the dough after the defrost, and I think this really helped open up the crumb.

Here is the link to my original blog and the recipe I used:

http://www.thefreshloaf.com/node/37502/seeded-sourdough-variation-flax-seed-soaker

CAphyl's picture
CAphyl

I was inspired by David's San Francisco Sourdough Quest (see recipe link below) and set out to duplicate his fantastic loaves.  I stayed as close to the recipe as possible. I did follow his instructions for the starter and retarded it, as he described.  I was able to catch some of his suggested changes to the recipe that he amended later and added 10% whole wheat flour.  The loaves were a bit small, and I wondered if I didn't use enough flour, but I did weigh the ingredients per the recipe.  The dough was wonderful to work with throughout and really came up this morning during their room temperature proof after the overnight proof in the fridge.  The oven spring was really wonderful as well. The crust was excellent and very chewy.  My husband rated it very highly, so I will be making it again.  Thanks, David!

http://www.thefreshloaf.com/node/26956/my-san-francisco-sourdough-quest#comment-288993

Pages

Subscribe to RSS - CAphyl's blog