This Forum Topic will hopefully provide a location for those interested in all forms of Wild Yeast. While certainly most of us are well aware of the sourdough type of wild yeast, many may be unaware that there are countless other useful wild yeast. I was recently introduced to a impressively large group of other wild yeast - As Akiko explained "In Japanese, we call it " MIZU SHU" -水種 (水ーWater 種ーYeast)".
With the help, translations, and veteran comments of RobynNZ and Mini Oven I had captured, grown, and baked bread from an Apple Water Yeast in 4 (four) days.
My first introduction came when Daisy_A suggested I might find a 2 year old TFL thread of interest, and I did find it fascinating. Wao started the thread here on TFL, but also has a very informative website devoted to original yeast water. Whether you call it Yeast Water, or Water Yeast is unimportant, but the process is rich with possibilities for those interested in expanding their choices in home bread baking with a variety of wild yeast levain.
If any of this sounds interesting, you might wish to look at these links, for starters (no pun intended):
http://www.thefreshloaf.com/node/6012/baking-natural-wild-yeast-water-not-sourdough
http://originalyeast.blogspot.com/
and most recently, where I got pulled into this interest area:
http://www.thefreshloaf.com/node/20460/banana-saga-%E9%95%B7%E7%AF%87%E6%95%85%E4%BA%8B#comment-141821
It was thus that Yeasty 雛菊 Yeasty 亜希子 Yeasty 雷朗書家
..........that is Daisy, Akiko, and I, considered starting this Forum Topic.
Ron 雷朗
************ Update Warning ********** 101122
Akiko (teketeke) mentioned to me something that I thought I should warn anyone trying to make yeast waters levains about. Certain fruits should not be used for yeast waters intended for leavening bread. They are those fruits (or vegetables) that contain Actinidain (or actinidin) kiwi, pineapple, mango and papaya. This protease enzyme breaks down protein. If you make a yeast water from these fruits, you can still use it as a meat tenderize, but NOT in your bread dough.
************ Update For Details on methods READ postings below ********** 110222
Or, start here:
http://www.thefreshloaf.com/node/20693/culturing-growing-and-baking-range-wild-yeasts#comment-143857
Great job, Ron 雷朗!
I left this thread that I posted recently on " Banana Saga" but I think that it is difficult for everyone to follow . So I leave this thread here, too. So far, So good! :)
Feeding fresh fruit makes my yeast water or ( water yeast) more active. I found out that I don't like feeding 100% fruit juice because I taste of sweetness that I don't like. Feeding fresh fruit is little trouble but it comes out wonderful bread that has a lot of flavor.
I also found out that my fresh grapefruit yeast rises faster when I made OKIRAKU boule today. The levain rose 3.5 times volume in bulk.
" OKIRAKU" recipe, My formula will be like this below.
http://www2.memenet.or.jp/yukine/mokumoku/bread/bread_howto3.html
200g levain ( 100g fruit yeast, 100g bread flour)
440g bread flour ( OR 330g bread flour +55g whole wheat flour + 55g rye flour)
264g water
10g salt
Method:
the levain -( 12 hours) at 70F
Autolize-30 minutes----- Added salt
Bulk fermentation-1 hour 40 minutes ( 1 fold- interval 50 minutes)
Final proof - 1 hour
-Dutch oven method-Preheat 470F Bake 460F 10 minutes (when I put the loaf, I sprayed around the top of the pan), Decreased to 450F 10 minutes ( I took out the top of the pan), continued to bake 20 more minutes.
I gave one of my husband's co-worker whom I gave " SIMPLE WHEAT BREAD" that was posted by Daisy:) to. She was very happy to get the loaf.
I gave a half of the "OKIRAKU" boule to my neighbor yesterday, too. They all loved the bread. When I knocked at the door to gave another bread that was 5 grain bread with white starter plus grapefruit yeast to them, A son who is 9 years old opened the door, then he was smiling as soon as he saw the loaf. The mother said, " The bread ( okiraku) was really good!"
I am so glad to have my fruit yeast!
This is my dutch oven :)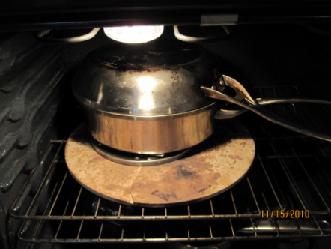
I am trying one of Wao's recipe today. :)
Akiko
Akiko, your Dutch Oven seems to do as good a job as my cast iron, so I think you really hit on a great compromise solution.
I am writing a consolidation of the AWY Loaf I showed in separate parts on Banana Saga. But, I am trying to add more details so it might serve as a help to others that may want to try Yeast Water, too.
The three different experimental yeast waters I started last night all have bubbles today. Not too many, but enough to see that all 3 are working with there separate jump-start approaches. I really find this all very interesting.
Happy Bubbles ;-)
Ron 雷朗
Thank you for your compliment!! Ron 雷朗!!
That will be very helpful to other members of TFL who want to try to make ther own yeast waters.
I will be very interested in your result of your three different experimental yeast waters Don't bite off more than you can chew, Ron! My plan of lemons + my original yeast water ( grapefruit + clementine) will be delayed. I am afraid of having a bread because the tart flavor that causes my lips to pucker. LOL I hope that your new yeast water goes well!
Happy Bubbles, too!
Akiko
Akiko, in your clementine yeast water, are you using the peel and all of the fruit? I am getting very robust activity in a test of just the juice from the clementine, but extremely poor activity with the whole fruit. I would not be surprised if the peel were sprayed, or otherwise treated somehow, that interferes with the yeast growth - at least in the box I bought.
The grape test is quite active, too, but not so active as the clementine juice alone, well with honey and water, of course.
Ron 雷朗
亜希子 aka Akiko,
There is only me to eat the breads, so that places limits on the baking end of the experiments. I still have nearly half a loaf of the last banana loaf to eat, That was a much larger loaf than I usually bake. Then there are the 2 additional doughs from the AWY loaf to bake and eat. My bread box run-ith over... LOL
But that does not stop me from learning more about these wild yeast waters. I have no doubt that all, or certainly most, of the successful leavening yeast are related in more ways than we are ever likely to know.
Ron 雷朗
Bread from Apples: Apple Water Yeast
I have just recently been shown how to capture a wide variety of wild yeast. Many of them producing leavening strengths greater that the typical sourdough. Do not get me wrong, I love my sourdough, but this offers addition opportunities in your bread creations. Different flavors, coloration, bouquet, and crumb textures can shift with the choice of the fruit, or herb, or even vegetable from which you capture your wild yeast. You can keep them, just as you would ordinary sourdough, but as you back-slope the initial characteristic are likely to shift. However, you can "jump-start" for different culture characteristics from a maintained source, and have a levain from a new source in as little as a day.
I am a complete novice at this. However, I had an excellent loaf with a great flavor and soft yellowish crumb six days after first reading about the method. What follows here, I hope, will permit any of you to do close to the same thing. I did have one advantage. Without that, it may have taken a couple of days longer for that first loaf.
For many months I have fed a culture that was called Potato Sourdough Starter, but now I think it is really a vegetable yeast water. It is maintained by 3 Tbs water, 2 Tbs sugar, and 1 Tbs of potato flakes, and it was anything but "sour". All that I've read so far on starting and maintaining a yeast water is just what I did to originally grow the potato culture. It is a very active culture after feeding. I tested it with a small batch of flour and it raised well, but I have never made bread with it. You can see where I got the idea for the initial Potato Sourdough Starter in a Youtube video - one in a series of about 7 or 8 videos. Here is a link to one of the first:
http://www.youtube.com/user/tnjeffofalltrades#p/search/5/XkZ-q6P-ioA
All the reading about yeast water sent me off to buy apples and try capturing yeast water from apples. I sliced 3 apples - all but apple cores and stems (which, I now know could have been included) and placed the pieces in a 1.5L jar. I then covered with just enough water to reach the top of the apples, and fed 1 tsp of honey. It was then that I decided to see if I could 'jump-start' the fermentation by adding 1/4 tsp of the Potato Starter's water to the apples. I sealed the jar and placed it in my homemade proofing box. The temperature was set for 80ºF (26.6º).
In figure 1, three sliced apples were placed in jar; Figure 2, They were just covered with water, and feed a tsp. of honey. Figure 3. A ¼ tsp. of yeast water from a potato water yeast was used to "kick-start" fermentation. Figure 4 the sealed jar was placed in my proofing box, set to 80ºF (26.6º). Call this Day 0, Hour 0.
By the next morning (Day 1 at 16 hours) there were bubbles, not a terrible lot, perhaps a couple dozen.
I was tempted to try a test of the levain strength of the water, but decided that was silly. I did the suggested steps of opening the jar so the the C02 could escape and stirred the contents to add oxygen in the fluid. It is suggested that one do this at least a couple time a day.
On the next morning, Day 2 - 40 hours from the start - I had many more bubbles and small streams of them from time to time. Opening the jar gave a noticeable pressure release and a rush of bubble to the surface. I was very pleased, as was the pleasant apple odor. Everyday, I did add a teaspoon of honey, but have read that you should not exceed 20% of the total volume with honey.
During that day, the bubbles seem to be increasing and I decided that even if it was silly, I would try to test the levain strength of the water solution in the jar. I mixed a small test. Before retiring. I took 20g of the water, and added 33g of AP Flour to it. That gave a nice knead-able lump of dough. I pushed it down into a 150ml beaker. I wrote down the level as 37ml on its scale and added a rubber band to visually mark the height in the beaker.
I intentionally left the covered beaker at room temperature which was 71ºF ( 21.8ºC ) and went to bed. That was at Day 2 and only 53 hours from my initial slicing of the apples in the beginning. The next morning, (Day 3 at 62 hours) the dough had risen, about 35%, it was now 50ml on the beaker's scale and the temperature was still at 71ºF ( 21.8ºC ). I transferred the beaker into the proofing box. During the next 3 hours at 80ºF (26.6º) the rise climbed to 82ml on the scale. Which would be about 116% rise, or more than doubling in a total of 12 hours.
With this encouraging sign that the levain was 'real', I set off to make a build 2 of the levain. I wanted about 200g of starter and some seed retained. I also wanted it at 100%HL. Adding 64g APF and 77g of the Apple Water Yeast would give 100%HL. That should be close enough.
Figure 10 is the just mixed Build 2 of the AWY (Apple Water Yeast) Levain. The build data is shown in Figure 11.
By midday of Day 3, bubble activity was impressive and opening the lid to discharge CO2 and resupply oxygen to the solution caused a rush of foam, not unlike popping the lid on a warm soda bottle. In the evening of the third day, the activity was some what less. And lots of small parts of apple had drifted like dust to the bottom of the jar. Of course, by this time I had good growth in the Build 2 of the levain and knew I wanted to "harvest" the Yeast Water on the next day.
Figure 12 gives some idea of the bubble activity about 64 hours from the the beginning of this process. In Figure 13, while there is still much activity, there seemed less and the apple slices were "ragged". Since I now planned to strain the the apple parts from the pure yeast water the next day, I decided to make more of the apple parts available to the feeding yeast.
So, Day 3, at 9 PM, I took a Cuisinart SmartStick 200-Watt Immersion Hand Blender and without removing the apples from the jar, I emulsified the remaining apple slices.
Figure 14 is shortly after the emulsification of the apple parts, while Figure 15 is 18 hours later, just before the straining of the mildly alcoholic apple sauce from the Yeast Water.
Just before ripping the apples into apple sauce, the Build 2 of the levain was almost doubled. Fearing it would advance too far before I was ready to use it, I removed it from the proofing box and placed it in the refrigerator at set for the about 34-37ºF ( 1-2º C ).
Figure 16 shows the Build 2 (194g @ 100%HL) as it was in the later part of Day 3. That was just before I emulsified the apples. It went into the fridge at that point. On Day 4 it was taken from the fridge and permitted to rise until I took it out to start the mixing of my first Yeast Water loaf - my AWY Loaf (Apple Water Loaf).
In Figure 18, I used a 'double screen' sieve to strain the apple parts from the Yeast Water. Initially, that yielded the 625 ml shown in Figure 19. After the additional drippings from the 'apple sauce', the quantity reached 700 ml.
And the 254g of pulp shown in Figure 20. By the way, I rather now enjoy a spoonful of this apple sauce, and it goes well in my sourdough waffles, as well.
Ready for use, the 194g of Apple Water Yeast. Figure 21 shows its condition as it was about to begin the dough mixing. The details of the loaf mixing procedure were posted before and can be found at [Link]
http://www.thefreshloaf.com/node/20460/banana-saga-%E9%95%B7%E7%AF%87%E6%95%85%E4%BA%8B#comment-143250
However, to permit this to serve a more complete methodology coverage, parts will repeat here.
My first fruit based wild yeast loaf, was a boule baked in a Dutch Oven. It is seen in Figure 23. You can see how softly yellow the crumb was in Figure 24.
Interestingly enough, while it had a great flavor, I could detect no actual apple flavor. I have now read the this is generally true, I am told from what I've read that this is even more true of the vegetable wild yeast sources.
I hope this gives a more or less complete overview of the capture, growing and use of wild yeast other than just from your sourdough culture.
Ron aka 雷朗書家
*********** Second Loaf Update 101121
This is the second loaf made from the Apple Water Yeast formula shown in Figure 22. That formula, appears to confuse some readers, and, therefore, I will restate it in the simplest of equivalent forms.
Figure 25 restates the AWY loaves' formula in the last column on the right. An examination will show it is just 9-1/2% smaller than the two other formulae, which are simply Flo Makanai's "1.2.3, An Easy Formula for Sourdough Bread".
See link:
http://www.thefreshloaf.com/node/9346/123-easy-formula-sourdough-bread
There is one slight difference. When I ran a bit short of of the 388g of yeast water, I substituted 77g of well water. Other than that, it is a 1-2-3 loaf.
To make a yeast water loaf, once you have made the yeast water, and confirmed that it is an active yeast, just replace every bit of water in your bread formula of choice with yeast water. That includes the water in the starter builds and in the body of the mix. There is no reduction in the gluten content, nor any change in the HL (Hydration Level) of the loaf.
Yesterday, I baked the 2nd loaf from the dough batch of AWY detailed above. It had been 6 days in retardation 1 or 2 degrees above freezing. The dough rose in 4 hours after being replaced in an 80ºF (26.6ºC) proofing box and baking done in a Dutch Oven, essentially as described above for the first loaf (above).
Figure 26 is the 6-day retarded, 2nd loaf from the AWY dough batch.
In Figure 27, the openness of the crumb and light golden yellow result can be seen.
I am very pleased with this experiment with wild yeast derived from fruit, in this case, apples. While there was no distinctive flavor of apples, there was a slightly different flavor, that I find excellent, although, there was not the slightest sourness, but perhaps the slightess sweetness. I believe that this bread will be one of my favorite favorites ;-)
The Third Loaf....
Today, I baked the third and final loaf from the Apple Water Yeast dough mixed a full 12 days ago. The first loaf was baked after an overnight retardation. The second was baked after a 6-day retard, and the loaf baked today was, of course, a 12-day retardation loaf. Over and above the fact that I can only eat so much bread in a day, I wanted to compare the effects of such periods of retardation. My sourdough, normally gets more sour the longer the dough is held in retardation. These 3, AWY loaves tasted - to my limited ability to discriminate - exactly the same. I could detect no sourness at all in any of them. Since I generally prefer sourness in my breads, that is not the greatest of outcomes. But these breads taste so good to me, that I have no complaints, whatsoever.
It looks as if my 45º scoring created an octopus on top of the boule ;-) These 3 loaves all exhibited rather large oven spring. All 3 were baked in Dutch Ovens of one type or another. Today's loaf was in my makeshift turkey pan/fry pan combo. If curious, you can find details at the conclusion of the Banana Sage at link:
http://www.thefreshloaf.com/node/20460/banana-saga-%E9%95%B7%E7%AF%87%E6%95%85%E4%BA%8B
There was still that very pale apple-flesh, orange-yellow, that mark the first two loaves, as well. Again, the flavor was not really "apple" but a pleasant, slightly sweet flavor. I cannot say how well the shelf life is, since none of them last more than the second day. But, as long as they did last, they remain slightly moist and quite enjoyable.
Try it, you might like it....
Ron 雷朗
****************** 101122 Next: My Darling Clementine Yeast Water
http://www.thefreshloaf.com/node/20693/culturing-growing-and-baking-range-wild-yeasts#comment-144440
Hi, Daisy-雛菊
I still have two loaves (unbaked) in the cold fridge, waiting to be baked when I finish that large banana bread. ;-o
But I have 3 small jars with little test brews working. I doubt I'll use them at anytime (soon at least) but they are fun to watch and would serve to jump-start anything I might want.... And I am learning things from the play.... Oh, yee of the cream-shaking-butter-making LOL
Ron 雷朗
Daisy_A 雛菊
There are so many baking topics one gets, or could get, involved with. I have a few friends that have difficulties with gluten. One of them is not only suffering from Celiac disorder, but lactose intolerant as well. I generally bake cookies once or twice a week, which are recipes I've come up with, or more often modified from older gluten base recipes and make G-F cookies for them. I spent about 3 months last spring trying to come up with a descent G-F bread, but finally gave up. G-F bread that taste like gluten breads seemed more like fantasies that realities - at least for the results of my efforts. Oh, I did get "breads", but nothing I would give to a friend as a decent alternative a gluten base bread.
Ron 雷朗
Daisy,
The closest attempts at G-F "bread" seem to try to use egg, or egg whites as the gluten replacement. It probably is the best substitute they have, but it is not gluten.
Of course, dinkle (spelt) is wheat. It was Franko's remark that his wife wanted spelt instead of wheat that set me off on the G-F train of thought, because it made no sense to me.
But different people can have different reactions to very slight differences in food types.
Ron 雷朗
Yes,Daisy. I think we are in vehement agreement ROFL...
I must have ten or more G-F flours at the moment. To get a decent G-F flour I general have a mix of 5 or 6 at least in the batch.
Here is an example. I usually mix this in a 5 cup batch. In a pinch it works for most cookies, too.
Ron 雷朗
When I read about fruit yeasts in the banana bread thread I was rather sceptical. But I like apples and have right now a lot of them, and your loaves look very nice. So I'll shake off my German "what the farmer doesn't know he won't eat" attitude and give it a try.
Karin
Hi Karin,
I have just stopped eating my first clementine yeast water bread. I thought it was even better than the Apple Water Yeast bread, and that is saying a lot for me. I will try to post it later this evening. It rose so fast that I feared it would overproof and rushed the baking a bit, so the crumb is tighter than I would have preferred but there was nothing wrong with taste and chewing texture. It did have some apple yeast water in it as well. I needed 166g of yeast water and came up 46g short after holding some back to keep the clementine yeast growing for a larger supply. So, I used 46g (28% of the total water in the 404g loaf) of the apple water yeast in the fridge. Well, if I keep running on, I will not need to post anything LOL
I am pleased you would want to try it. Since you have plenty of apples, that's the way to go. Please let me know how it goes, and if you have any questions about it, that I didn't cover in postings already, just ask.
Ron 雷朗
I just chopped a gigantic Macoun apple for the seed culture. My long suffering husband only shook his head - another odd baby to watch and nurture...
Let's see how it goes, I will report.
Karin
Karin, you could warn an old man before making him laugh with a mouthful of tea. Tell your husband the bubbles are more fun and those in sourdough. (º¿º)
Ron
Karin
Karin, do not try to use kiwi, pineapple, mango and papaya. These contain a protease enzyme that breaks down protein. See the update on the top posting.
Ron
My Darling Clementine Yeast Water
Yesterday afternoon I started making my first loaf of bread using another Yeast Water as the levain. To my surprise, it rose faster than my well cared for sourdough starters. It also wanted to rise higher, but I panicked and baked sooner than necessary. The result was a great tasting boule with a slightly more closed crumb than I had expected, but I have no complains. A very pale yellow and trace of sweetness added to the crumb from the clementine juice that I had used to grow the yeast water - and no doubt a bit of help from the small amount of honey that initially helped the juice along.
The crumb was moist, with a great taste just touched with a sweet suggestion of the clementine juice used to provide the leavening. Of course, the crumb was a bit tighter than necessary, due to my under proofing the final rise.
Even with the deep slashing, the oven spring seem to want more freedom to expand.
The Yeast Water in the starter was 100% clementine yeast water. It was made totally of clementine juice and less that teaspoon of raw honey and a ¼ tsp of an existing apple water yeast - See link:
http://www.thefreshloaf.com/node/20693/culturing-growing-and-baking-range-wild-yeasts#comment-143857
The additional 133g of Yeast Water in the body of the formula had a mix of clementine yeast water and 46g of the apple yeast water from the fridge.
Method:
1/ Levain was formed from 33g of AP flour and 33g of the active fermenting yeast water. It was placed in my proofing box set for 80ºF(26.6ºC). It doubled in 2-1/4 hours.
2/ While the levain was growing, the 200g of AP flour was split into 133g placed in a 3qt (2839 ml) SS bowl. And the 67g remainder was placed in a 1qt (946 ml) SS bowl, to which the 4g of fine sea salt was added and whisked.
3/ When the levain was ready, the 133g of yeast water (87g clementine yeast water and 46g of apple yeast water ) was combined with the levain, roughly mixed and then added to the 133g of AP flour in the SS bowl. The combination was mixed with a large silicon spatula, covered and allowed 20 minutes of autolysis.
4/ Following the autolysis, using a plastic scrapper, a very sticky mix was treated to a set of 30 Stretch & Folds in the 3 qt, SS bowl. The 67g flour-salt mix was used to dust the dough between each S&F. then covered and left rest 20 minutes.
5/ Repeated sets of S&F at 30 minute intervals (including the S&F and rest periods in the 30 minute periods). Continue the dusting between each S&F with the flour/salt mixture until the mix is exhausted.
6/ At the end of the 4th set of 30 S&Fs, it was close to a total of 2 hours (including autolysis time). Gave dough a 10 minute rest.
7/ On a lightly dusted work-surface, turned out the dough. Shaped into a boule and place in my preferred cloth-lined and flour bowl, cover with a "shower cap" bowl cover.
8/ The dough went into retardation fridge 44º-47ºF (7º-8ºC), where it stayed overnight.
9/ The dough was removed from the fridge and placed in the proofing box at 80ºF(26.6ºC)
10/ In under 2-1/2 hours it had risen enough that I feared over proofing. I started the Dutch Oven (DO) preheated 30 minutes to 450ºF(232ºC). Boule turned out into the preheated DO, slashed, and inside of rim of the DO sprayed and lid covered it at once, then returned to oven at 450ºF(232ºC). Since, all required steam is inside the DO, no external steaming method was used. That is the main reason I love a DO method some much.
11/ At 20 minutes, oven was reset to 425ºF ( 218º C), and DO lid removed.
12/ At 30 minutes, cracked oven door 1/2".
13/ At 40 minutes, it was removed from oven: Internal temperature = 209ºF / 98.3ºC and exiting hot weight = 368g (down from about 404g - 9% drop in weight. Cooled 1 hour on wire.
I am really enjoying these wild yeast water loaves. I suppose the grapes should be the next test... Yum ;-)
Ron 雷朗書家
I just want to say to thank you, Ron! You have had worked to update your great yeast water breads. It must take a long time to write up. I have a lot of pictures of my yeast water bread. Now it is difficult to distinguish which one which! LOL
Thank you again, Ron
Akiko
Last night, I updated the top posting to warn people not to use Kwiw, pineapple, etc.
I found a long time ago the unless I place photos in seperate folders - as soon as I download them - I will forget which is which, too. LOL
Off to a busy day....
Ron
Ron, I checked the warning that you updated already :) That will help some members of TFL who want to try fruit yeast water. I respect all your effort!
I realized that my caliculator has been wrong for a month since I dropped it. Sometimes it worked, Sometime it didn't. I was using it when I made sure that it was working. In this morning, It completely stopped working. I better buy a new one.
By the way, I made a measuring container like this when RobynNZ taught me this great idea. It is very useful.
Using a pyrex, I poured 250ml water in the pyrex in a container and I marked the line of it( 250ml), then again I poured another 250ml water in the container, then I marked the line -500ml, I repeated until the container was filled with water- 2250ml was the end.
Happy holiday!
Akiko
Yes, Akiko, Robyn's marking idea is a very useful one. I often do such markings, as well. If you have a "Sharpie" pen marker, you can mark glass very well, as well as plastic.
When finer measurements are needed, I sometimes print scales that I create in a graphics program, then cut the scale into a strip and use transparent tape to sick it on the side of a jar.
Ron 雷朗
My first apple yeast bread is rising in its basket, while I'm baking the breads for today's delivery (Sunflower Rye Sourdough, Multigrain Sourdough, Pain a l'Ancienne and Multigrain Pita).
The leftover slightly booze-y apple pulp went into delicious pancakes yesterday - no leftovers!
Karin
Hi Karin,
I am more than pleased to hear your news (^_^)
I have a boule about ready - another hour, or so, of rising and then into the oven. This one was a yeast water from prune juice - jump-started with a tiny bit of my pure banana levain. I wanted to see how dark it might make the crumb.
I found my mildly alcoholic "apple sauce" went very well in my waffles and am glad to hear you used yours in pancakes. "Waste not, want not" is what I say.
I will be interested to hear more about how your apple yeast bread comes out, too ;-)
Ron 雷朗
Fresh from the oven - the color is a bit too orangey in the artificial light - but it looks great. This is the first bread I ever baked in a Dutch oven, but everything worked just fine. Tomorrow, when I cut it, I'll make a daylight photo of the crumb.
Thanks for the inspiration, Ron!
Karin
Karin, that looks great, and if the flavor is anything like those I have eaten, you will be a happy camper, as well ;-)
My Prune Yeast Water Loaf came out well, too. I'll post that, as well, tonight. Yum....
Ron 雷朗
Prune Yeast Water Bread
What is Darker than Deli Rye, but lighter than Pumpernickel ? Why, of course, it is Prune Yeast Water Bread... Since, yeast seems to be on just about every fruit – although, some would be unsuitable for bread making – I though I would see how a dark fleshed fruit might color the crumb of a loaf. I choose the prune, for no other reason than a jar of prune juice was the first thing I saw. I filled an empty jar about 2/3 full of the prune juice, and then jump-started the yeast water growth with a bit of an existing yeast water that I had already cultivated. See; Bread from Apples: Apple Water Yeast link: http://www.thefreshloaf.com/node/20693/culturing-growing-and-baking-range-wild-yeasts#comment-143857 The jump-start cut the time down to about 2 days before the prune yeast water was ready to use. I say “about 2 days”, because I didn't see much activity – even on the third day, when I tried mixing 20g of the prune yeast water with 20g of AP flour. But, despite the lack of significant visual activity, the test levain doubled in less than 2 hours in my proof box at 80ºF/26.6ºC. The method essentially matches those given in detailed in “My First Apple Water Levain Loaf” posting at: http://www.thefreshloaf.com/node/20460/banana-saga-%E9%95%B7%E7%AF%87%E6%95%85%E4%BA%8B#comment-143250 The resultant boule can be seen below.
Boule Made From Prune Yeast Water Levain.
The crumb can be seen in the photo below.
Crumb of the Prune Yeast Water Loaf.
The loaf had a moderately tight crumb, especially considering that the hydration level (HL) was 71.2%HL.
The basic formula is the same as with the previous sited loaves, as was the method. The formula for this is given below, as well.
The 100%HL Prune Levain was built and 66g fed into the formula. An additional 133g of the prune yeast water was combined with the levain and 133g of AP flour. Then that mix underwent autolysis for 20 minutes.
The remaining 67g of AP flour and the 5g of salt were whisked together and added into the dough while also serving the dual function of being used to dust the sticky dough during the 3 series of In-the-bowl-S&H sets of 30 preformed during the first 3 hours. See Link:
http://thebackhomebakery.com/Tutorials/NoKnead.html
The dough was the shaped and placed in a well floured cloth-lined boule proofing form, lightly covered and retarded in the fridge overnight.
The following day, it was removed from the fridge and given 6 hours to rise in an 80ºF/26.6ºC proofing box. Then turned out, slashed and baked in a Dutch Oven for 20 minutes at 450ºF ( 232º C) then removed from the DO and bake on oven stones for the final 25 minutes.
When removed from the oven, the internal temperature was 208ºF ( 99.7ºC)
The crumb was as moist as the apple and clementine yeast water loaves had been, but lacked the very slight sweetness they had. However, just as those other two had lacked the taste of the fruit source of their yeast water, so to, this loaf had no prune taste.
If pushed for a preference, I would say I liked the clementine most followed by the apple and then the prune. However, I will be baking all three types frequently in the future, and of that, I am quite sure.
************ Update: Next Posting:
http://www.thefreshloaf.com/node/20693/culturing-growing-and-baking-range-wild-yeasts#comment-145327
Ron 雷朗
could not wait until next morning's daylight would allow for nicer photos, but cut into the apple yeast bread while it was still warm. Its smell had a hint of apple, and so freshly eaten, it had a hint of apple taste, too.
Today those traces of apple are not discernible anymore. The bread tastes good, with a great crust and nice open crumb. I used bread flour instead of AP for the dough.
Your prune yeast bread really looks like rye, Ron - why do you think the crumb is less open? Could it be the more concentrated sugars in the dried prunes? If you don't taste the original fruit, why do you like the clementine version best?
Karin
This is a daylight photo showing the real colors.
Apple Yeast Bread crumb
Karin,
Your loaf really came out well - love that crumb.
I imagine I am under proofing, but it may have something to do with my retardation of the dough. I'll have to try one without retarding.
There may be a higher sugar concentrate, but it wouldn't be from "dried" prunes - I used bottled prune juice.
Good question. Perhaps, I am getting a bit of the fruit flavor, but just changed enough that I do not identify it as the clementine - Sort of like you caught the apple taste the first time, but not the next morning. This is all quite new to me, and I confess to being a bit like a kid on the beach - jumping from one newest-best-shell to to the next LOL
Perhaps, after making repeated loaves, I may understand why, or even change my opinion and find it was just a random batch fluke.
Ron 雷朗
As a postscript - I would have to say that the apple yeast water is the least trouble to make, maintain, and has the least waste (assuming you use the "leftover slightly booze-y apple pulp") LOL
Your apple yeast bread looks good, Karin!
I made a apple sauce yeast water loaf using sourdough 123 yesterday, and I sliced them and saw the crumb was open crumb like yours. I am not a big fan of this loaf actually because it was too wet. Yeast water has less viscousity than sourdough culture from my experience so that when I make 1:1 yeast water levain, I will keep the water hydration around 65%-67%- bread flour ( that will be vary depends on the flour that I use). If I make a stiff yeast levain( 60%), The hydration will be around 71-77% -depends on the flour that I use.
I heard that prune yeast water rises quickly like rye.
Best wishes,
Akiko
I have a question for you experts - is it better to maintain a fruit yeast levain as mother starter or just the yeast water in the fridge? How often do you feed the yeast water?
Karin
Hi Karin
I treat my yeast water like sourdough culture. But I keep my yeast water in the refrigerator when it is fermented early before I make a levain. It doesn't get sour for a couple days so far from my experience.
If I don't use my yeast water, I simply keep it in the refrigerator. If I make yeast water bread everyday, I keep my yeast water at roomtemperature all day.
There is more details here. http://www.thefreshloaf.com/node/20460/banana-saga-%E9%95%B7%E7%AF%87%E6%95%85%E4%BA%8B#comment-142813
I do not recommend to feed stored 100% juice to your yeast water. I didn't like the kind of the bread. When I used Mott's 100% apple juice, I tasted weird flavor. When I used Tropicana 100% orange juice, The crumb was too sticky. Stored 100% fruit juice have no enzymes because they are killed by heat. Instead of that, they have a lot of sugar that may cause starchy crumb ( Apple juice was okay but not orange juice) Although it might be better if I used organic 100% apple juice.
I also think that Ron's loaves had fine crumb because he retarded for days.
I hope that will help you.
Happy bubbles :)
Akiko
Don't Ask, Can't Tell
I guess one could call this boule a "Red Grape Yeast Water & Alcoholic's Apple Sauce Bread". Unfortunately, there was no trace of grape, apple, or alcohol in the finished loaf, however, there is an undeniable redness to the loaf. One out of four is better than none, which is what I though it was going to be after 24 hours with no rising worth mentioning.
Red Grape Yeast Water & Alcoholic's Apple Sauce Bread
Don't ask what the formula is, I can't tell. I can and will tell you what it started out to be, and what and why things were done to it, but I doubt I could recreate it - nor would I care to do it the same way a second time.
Saturday, I baked a Prune Yeast Water Bread, and while trying to determine how best to describe its taste characteristics, I realized I had eaten over half of the still warm loaf, and still hadn't come to any conclusion on how to provide a verbal method to relay the flavor to my satisfaction. Worse still, I might be out of bread on Sunday.
That, of course, meant the more pressing problem was what to make next to minimize being without bread. I settled on a variation of one of Dan Lepard's loaves from HML. Originally it was his Mill Loaf, a pleasant, somewhat nutty flavored combination of White, Whole Wheat and Light Rye. To speed things up, I would make it as a straight method mix - just combine all the ingredients and knead. I had Red Grape Yeast Water in the fridge, and while I had not made a test levain with it, it had seemed active enough a few days earlier, when I'd strained the grape parts from the yeast water and placed it in the fridge. I did a quick replacement for the white levain @80%HL called for and added the water to the Yeast Water and the flour amount added in the White All-Purpose. The initial formula looked like this.
The Intended Red Grape Yeast Water Straight Method Mill Loaf Formula.
I mixed the dough, kneaded 3 sets of 30 S&F over a 2 hour period and then put a shaped boule into a floured cloth-lined boule proofing form, lightly covered and decided to hold it at 64ºF(17.8ºC) overnight because it hadn't shown much activity during the 2 hours I had been kneading it.
In the morning, it hadn't shown any rising overnight. Okay, perhaps a bit of coaxing - I put it in the proofing box at 80ºF/26.6ºC, and waited 6 hours, then 4 hours, then some hours more.... A full 20 hours from the initial mixing, I had a lump of 59.7%HL dough. I hate to throughout anything, and to even consider wasting a potential pound loaf was too painful to consider.
Earlier in the day, I had emulsified the remaining parts of 2 apples, which I'd used to refresh a batch of apple yeast water. I now strained off the parts, and without even considering measuring the amount, I turned out the lump of dough, hand flattened it, spread all the crushed, alcoholic apple sauce over the dough and letter folded in, and again, and... It took two plastic scrappers to lift into a large bowl.
It was about 24 hours since I had started, and I was back to the same 3 series of In-the-bowl-S&H sets of 30 preformed during the next few hours. See Link:
http://thebackhomebakery.com/Tutorials/NoKnead.html
Needless to say, I had to throw in more flour, also, without benefit of measurement. Finally, I shaped and placed the dough in a now, not so well floured cloth-lined boule proofing form, lightly covered and placed it, not in the fridge, but rather back into the proofing box for an overnight rise - I hoped.
This morning at a bit past 6 AM, I checked the proofing box. To my relief, it was ready to bake and I started the preheating of the oven. By 7 AM, the Dutch Oven lid was off and through the oven door I watched it turn into a nice red boule. And by 8 AM, I was eating a rather nutty, crust of a fine tasting bread. It started out to be a close crumb formula, at essentially 60% hydration. What the final HL was, Don't Ask, Can't Tell.
Sadly, there was no trace of grape, apple, or alcohol in the finished loaf, however, I do have bread - YUM
Ron 雷朗
you should have sneaked a bit of apple schnapps in it...:)
Karin
Of course, Karin, I would have had to have some to do that, and alas (ç¿ç) the cupboard was bare.
Ron
to me anymore, for more details see (and don't drink tea!):
http://hanseata.blogspot.com/2010/07/liquors-and-sneakers-sprituosen-und.html
Karin
Karin,
I think you may have something in that theses. LOL
Ron 雷朗
Making yogurt yeast is very easy. When you make this yogurt yeast, It will be already used as a levain. I used Okiraku lady's recipe http://www2.memenet.or.jp/yukine/mokumoku/bread/bread_howto3.html
Yogurt levain -
yeast water - 10g
Honey-9g
Whole wheat -36g
Plain yogurt- 145g( I used Dannon)
----Final dough---
200g yogurt levain
440g flour -330g AP, 55g whole wheat and 55g rye flour-( I used Gold medal AP flour, and I added 20-30g more flour while mixing.)
256g Water
10g Salt
Method:
1. The day before: Making the levain ( 12 hours)
2. Mix the all the ingredients except the salt
3. Autolize 30 minutes
4. Knead for 10 minutes by hand
5. Bulk fermentation ( 3 hours) S &F -1 time 90 minutes later
6. Preshape - make it a round ball and take a bench time for 30 minutes.
7. Shape
8. Proof 1 hours at 76F
9. Retard overnight
10. Bake - Preheated 460F for 1 hour. I used my Dutch oven method. Bake the loaf with steaming method ( SylviaH's hot towels in a loaf pan) for 10 minutes, decreased to 450F and bake 10 more minutes with the steaming method yet. Take the top of the pan and hot towel out of the oven then bake more 20 minutes. -- I need the hot towel to get some steam inside the my pans because my dutch oven has some space between the top pan and the bottom pan so that it can get some air and doesn't make much steam itself. Using this method, I can have very thin flaky crust and softer and more moist crumb. But the crust is crispy. YUM!
I scored 1mm deep that is very shallow at 30 degree. It didn't work for me using my dutch oven method. The loaf is softer and more moist like using milk and I didn't taste yogurt at all. I will make this yogurt yeast bread, again. I understand why so many Japanese home bakers make this yogurt yeast loaves.
This is my dutch oven :P
Happy baking
Akiko
Very nice Akiko. I think we both have the problem that RobynNZ calls TMBTLT (Too Many Breads, Too Little Time) ;-)
I will need to add that to my BWTT (Bake When There is Time) list.
Ron
nice bread and nice recipe, Akiko. I like yogurt, and will try it.
But did you really bake the bread at 450 F without reducing the heat any further?
Karin
Thank you for your compliments, Ron and Karin :)
Karin- Yes, I did. I really baked at 450F without reducing the heat any further. May be I don't use 500F ( highest heat) for preheating. I also place the outdoor toaster tin on the baking stone so that my bread's bottom get burned.
* Yogurt yeast doesn't rise like other wild yeast.
Here is the sign of the yogurt yeast fully fermented:
1.You will smell alcohol.
2. You can see a lot of bubbles like this picture above.
3. you can hear the bubbles popping out when you get close to the jar.
4.It looks viscous, but it is watery. ( Don't worry)
Ron- I am interested in Prune yeast water now :) Then I looked up how to make prune yeast bread.
I saw one of Japanese bakers's loaves crumb like yours. Take a look.
http://cookpad.com/recipe/1090869
And the another 's crumb
Then another Japanese home baker who made this prune yeast loaf said," I don't know why this crumb is so tight. I wonder if I should put more water in the dough. But the taste is good."
I saw the other who used prune yeast water to bake loaves took a long fermetation ( levain1 ( time-6-9 hours). levain-2 (. levain 3. levain4) then she kept it in the refrigerator for 24 hours.
http://plaza.rakuten.co.jp/panshokunin2003/diary/201009170000/
Unfortunately, she doesn't write her recipes. So I couldn't find the 4times levain way exactly.
I found the way By Okiraku laday who explained it a little bit. So ,I made an example below:
Levain1 - 50 g yeast water / 50 g flour (1 :1)
* You can make stiff dough, too but it will be chaged the levain 2-4's hydration that you achieve.
---6-9 hours or overnight----
Levain2 - 28 g water / 50g flour ( until doubleーtriple in bulk )
Levain3 - 28g water / 50g flour ( until double- triple in bulk)
Levain 4- 28g water/ 50g flour ( until double-triple in bulk)
Total 334g -- 134g water ( 67% hydration) 200g flour ( 100%)
---Keep it in the refrigerator for 24 hours → leave the levain at room temperature until the dough temperature reaches to the room temperature that you achieve. You made ”LEVAIN" FINALLY :)
* I think that It will have a good result to put the levain in a refrigerator without making levain step2.3.4.
This purpose is that we can taste more flavor, and it also will have more volume in the bread. * the bulk fermentaion and final proof time will be shorten.
Happy baking,
Akiko
Akiko,
Thank you for all the information. It sounds as if prune yeast water makes a tighter crumb than most others YW's do... Good to have my suspicions corroborated - thanks again.
Boxed was my 1st impression, but upon rereading, I am confused on the details and will message you for clarification.
With your expertise in Japanese, and your gracious translations, you certainly have made understand the Japanese yeast water method of bread making more understandable than of the other sources I've seen - thank you so much (^_^)
Ron
Thank you for your complement, Ron ( BLUSH back LOL- you use the word someimte.)
I can understand what you mean though! Exactly what okiraku woman does multi build levain with yeast water that have difficulty to deal with when it is mixed with the ingredients (flour and water and salt and so on)
Cheers,
Akiko
Hi Ron.
Thank you for telling me the point. It was very unclear. From levain 2 -4, You just add some water, NOT yeast water.
-------------------------------------------
I will leave this for just in case.
- How to calculate multi-levain method.-
Example: When I want to make 200g levain and 67% hydration in total.
200x1.1=220 ( It will have some loss when you scrape the dough from the bowl)
First levain - 220÷2=110 Yeast water : Flour = 1:1 = 55g : 55g
Fruit yeast water Flour
----------------------------------------------
1) 3x + 3Y = 110g
3(x+Y)=110
x+Y= 36.666
X=36.7-y
2) 3y + 55= 220 x 100/167 ( flour 100% / 100+67( the hydration that you want)
3y = 131.73-55
3Y = 76.73
Y=25.57884 Y=25.6g
3) X=36.7-25.6
x=11.1g -- 11g---
----Fruit yeast multi levain---
Fruit yeast / Flour
---------------------------
Total 88.3g / 131.8g = 220.1g
The levain hydration 88.3÷131.8 x 100= 66.9% ( 67%)
This is my way. If you have another way is easier, Please let me know. I rather baking than calculating...
Cheers,
Akiko
Akiko, do you have a copy of Open-Office?
If so, I'll send you a calculator that only requires you to enter 67 and 220 for that answer.
Ron
I have a trouble downloading it right now. I don't know why... I am trying though..
I will let you know when I get it.
Thank you so much, Ron!
Akiko
No problem, I sent you the Excel version, as well as an O-O format.
In addition to the multi-levain method:
From 2nd-4th levain, The dough should be like the final dough ( kind of stiff) that you want.
Ron
I reread other Japanese sites for looking for the multi-levain method.
They use water and also fruit yeast water for 2nd to 4th levain.
Thank you for telling me the point. It was very unclear. From levain 2 -4, You just add some water, NOT yeast water.----NO! They also use fruit yeat water and water for baguettes or just fruit yeast water for others that is vary.
I am using this method for my rice starter bread. It is very long way to make levain. My rice yeast levain rose double in bulk within 6 hours, but after I added the final dough into it, The dough didn't rise at all and I discarded after I waited 24 hours.
Akiko
Sorry, Akiko, for my being slow to respond.
It is still somewhat confusing, but assuming that levain-1 is done first and stored in fridge, followed in sequence by levains-2 through 4, each going into fridge as they double/triple, I can only think the intentions are for one of two reasons, or perhaps, both.[list]
[*]First, we all know that having mixed water with flour/grains the flavors start developing and they change as time passes. So, it may be for that reason, and each of the levains would be at different stages of flavor development.
[*]Second, just as the flavor changes, so does the population distributions of the yeast and bacteria in the flour/water (or flour/yeast water). These changes are indeed largely responsible for the flavor changes noted above. However, they will also contribute in different ways when they move into the final rise of the dough.
[*]So, either of these might be the intended reason for these procedures, but no mater what the intentions were, both of these will be part of the consequences of the procedures.
[*]There is another point, however, if they mean to use "plain H2O" with flour, they are going to wait one very long time to get their stated terminal condition of " ( until double- triple in bulk)". For this reason, I do believe that (even if not stated) all of the water in all 4 levains must be yeast water.[/list]
Ron 雷朗
Thank you for your research that is well explained expertly, Ron.
I, myself was confused with the multi-levain method. From my experience, I actually tried 1.2.3.4 step levain method, then it didn't rise from the 3rd levain when I used rice yeast. At the same time, I made rice and graded carrots and apple yeast bread ( I smashed them by a stand blender after I mix the cooked rice, graded carrots and sliced apples) using straight method. It rose properly and it came out Okay bread.( The flavor was too strong. I tasted carrot mostly like eating sweet carrot bread.) Now, I am making the same kind of yeast bread ( the rice and graded carrots and apples) using multi levain method. It went well until 2nd levain. and now, 3rd levain doesn't seem right. The 3rd levain dought is like wetty clay.
By the way, I didn't write up well when you should store in a refrigerator.
Levain1- levain2-levain3-levain4(After the dough rises double or triple in bulk) →Store it in a refrigerator for 24 hours.
*From others website, you can use the finished 4th levain dough right away, or you can keep the levain in a refrigerator until 24hours. I am not really sure which is better. There are too much different information.
@ -I wrote it before --- It will also have a better result ( having more volume in the bread or so) when you store the levain in a refrigerator after making levain( not using mutl-levain method) Now, I am not sure that. Because I am not doing well using multi-levain method!
That is a great point, Ron. Thank you! I agree with your first -third comment, too.
We can use just water/ yeat water + water / just yeast water for your muti-levain! Their fermention time will be vary. also flavor will be changed, too. When I reread Okiraku lady's recipe to translate it to English, I clearfied that we can adjust the amount of yeast water for the levain, or we can add more yeast water into the final dough instead of water if you want more the flavor of the fruit yeast into the bread.
How is your multi levain going, Ron? My experience is discouraging.
Thank you for all your work, Ron!
Akiko
Akiko, I am glad the points made sense to you, as well.
I may try the multi levain at some point, but right now the season is making unusual demands on my time, as it does for most people. I have an annual get together with a group of artist that I used to often paint with, so today I am baking Coconut Butter Cookies, rather than bread. (^_^) These cookies are so good that they must be sinful LOL
The Chia-Apple YW loaf came out tasting very nice and nutty, but it was a 12 hour final rise at 82ºF and came out with a tighter crumb, due to the way Chia Seed absorbs the water, but the taste makes up for the tighter crumb. I will post it with photos, but it may not be today, and might be a day or two before I get it posted.
I am also going into sourdough withdraw and may do some sourdough next.
Ron
I wanted to edit to add some picures of these above sentences but The "edit" botton was disappeared. Before I show the result of the failres, I will show you how I made rice yeast.
I saw some little buds.
These buds grew up around 2mm that should be smashed and to be fermented. ( Or, I should have waited one more day..) From the other rice yeast recipe, it sais, it will take 2-3days.
Next day-- I think that the rice yeast was not fully fermented yet....
----------------------------------------------------------------------
I made rice and graded carrots and apple yeast bread ( I smashed them by a stand blender after I mix the cooked rice, graded carrots and sliced apples) using straight method. It rose properly and it came out Okay bread.( The flavor was too strong. I tasted carrot mostly like eating sweet carrot bread.)
So this is the result of the rice mixture yeast.
I retarded it for overnight at 6℃ in a refrigerator after I proofed for 2 hours .
-----------------------------------------------------------------------
That I found out is what rice yeast rises very slowly from 2nd levain, or final proof.
Happy baking,
Akiko
That is very interesting, Akiko. I am sure it would make a good reference for anyone else that want to try that. One thing, though, in the multi levain you try at the end, you didn't say if you used yeast water and flour, or just water and flour in the "failed" 2nd and 3rd levains. If it wasn't yeast water, then I am not surprised that you had "wetty clay".
Thanks for great photos and details of your process.
Ron
Thank you, Ron
I used just yeast water and bread flour for 2nd -4th levains.
---- I will make rice yeast water bread using okiraku lady's recipe next time. Not mix rice or some kind of vegetables or fruit. So the rice yeast is going to be like other grapefruit or clementine or apple yeast water( liquid). It might be better.---
Thank you for your compliment, Ron
Akiko
I look forward, Akiko, to see how that comes out.
I started another bread experiment last night. I used a "normal" sourdough formula with 100%HL sourdough starter, but switched the plain water called for and used a red grape YW, instead. It is a very wet (70%HL) dough. I gave it sets of 30 "in the bowl" S&H and at 4 hours split it into 2 parts that went into retard at around 34-36ºF(1 to 2 ºC). It will be a couple of days before it do a final rise on the first one.
Ron
I am looking forward to hearing your result, Ron!
My Hamelman's bread of the combination of sourdough starter (20% that is "NORMAL") and yeast water came out less sour bread. I made the bread other day, that was not sour at all. I liked the both of breads. It has stronger gluten in the bread to compare to yeast water bread from my experience.
I have decided to keep raisin yeast water only. I can't take care of sourdough starter, rye starter and so on.. I will make sourdough starter when I want to eat, it may take a couple days before making the levain. Maintaining yeast water is much easier than sourdough starter. Especially raisins don't need honey for making yeast water, and also the raisin yeast bread comes out the mildest flavor among the yeast water breads that I have made so far ( Apples, Grapefruits, Clementine, Apple juice, Orange juice, Rice and carrots and apple mixture). My husband and my daughter prefer softer and sweeter bread and no paticular flavor from natural yeast to sour bread.
I love Hamelman's levain the best, I am going to take time to make the bread for me and my son sometimes using white starter ( Normal 20 %) plus yeast water instead of using water and not Instand dry yeast. :)
Happy baking,,
Akiko
Akiko, I am not sure what you meant by the "(20% that is "NORMAL")" statement"
I have yet to try the raisin YW, perhaps, I will make that after I try the orange YW - I bought the oranges, but they are in the fridge waiting their turn ;-). As for keeping sourdough, I find it both easy and necessary. The easy is that I maintain two batches, one in a 35F/2ºC fridge and only do a 1: 3: 3 refresh once a week, and a second that averages 2, 1:1:1 refreshes a day, but that is a small (10g:10g:10g) batch. Those two combined are all I need for my waffles every morning. When baking sourdough, it is very easy to draw on either of them for the fast creation of large amounts, using the 80ºF/26.7ºC proof box for speedy growth of the needed amounts. The small rye starter I maintain only gets one refresh a week, and it provides a nice shift in the waffle mix, for a day or so during the week. The pure banana levain has become a twice a day snack on the discarded amount from the small twice-a-day maintenance. If I were never to bake again, that banana levain would remain with me, I really like it as a snack.
But, by far, the easiest levain of all to keep was the potato YW, and it was a 1/4 tsp of that, which I used to kick start my first Apple Yeast Water. All it took was 3 Tbs water, 2 Tbs sugar and 1 Tbs of potato flakes (instant mash potato flakes). That could sit in the fridge for weeks, and was active in a few hours after a refresh.
Having now gone through so many variations of these wild yeasts, I certainly think I could be making bread from scratch in a three or four day period, if all of my cultures were lost. That makes me smile when I think of how much trouble making my first sourdough caused me - way back before Internet even existed LOL
Ron 雷朗
Hi, Ron
I use 20% white starter as to the levain flour that is from Hamelman's levain bread recipes when I make pain au levain or 5 grain.. So that is the same percentage when I made sourdough and yeast water mixture levain. I also use the yeast water instead of the water of the levain. that is depends on my yeast water's strenth though.
My sourdough starter was sourer when I kept it in a refrigerator, and more, the starter would be sourer when I use speedy growth ( such high temperature) How is your sourdough bread taste? I like Susan's pancake using dicarded 100% white starter were kept a couple days old in the refrigerator. ( More than 4-5 days old white starter came out weird flavor pancakes, We didn't like them) I wanted to make mild sourdough as much as I can. So, I fed 100% HL starter ( 2 times or 3 times a day) at 74-75F, and I calculate to make 60% stiff starter for levain when I make most kind of sourdough: Example exceptional 5 grain bread. I don't like Hamelman's Vermont sourdough that are too sour for me, but I love Hamelman's Pain au levain that are very mild.
I am interested in banana levain :) So many yeast, Yeasty Ron!
I broke a 8 years old waffle maker a couple years ago, I would like to make it when I get a waffle maker.. What kind of waffle recipe do you use?
Cheers,
Akiko
Akiko,
You said you liked Susan's Pancakes, so I just looked at them and they are very close to what I make.
I am loose in making my waffles. However, the only way sugars, syrups, honey, etc. get in the batter is if they were in the levains that were discarded. Before I started eating the Pure Banana Levain discards, they added their natural sugars, and so did the potato starter discards. I use syrups, etc. ON the finished waffles, but in the batter, it increases the chance of the waffle sticking on the griddle, so I do not include the "stickiness" in the batter. Of course, not including the sugars, means my waffles are usually not the classic darker browns that most people prefer. I do often add spices and herbs, but that is as the spirit moves me to do so, other than vanilla, which I always use.[list]
[*]200g to 300g starter discards
[*]1 large egg
[*]1Tbs Grape-seed oil
[*]1/4tsp salt
[*]1/2tsp Vanilla Extract
[*]1/2tsp Baking Power
[*]1/4tsp Baking Soda
[/list]
A 1/3 cup of batter makes 2 to 3 waffles.
As for the Pure Banana Levain, I started writing about that, and decided it would be easier to have a few photos, so you'll have to wait a bit for that...
Ron
Levain as Dessert
On a daily basis, I have my levain discard as a dessert, and love it. As for how I made it originally, that is well explained in the Banana Saga: Link http://www.thefreshloaf.com/node/20460/
But, since then I have discovered it is very simple to make, and maintain, Banana Levain - assuming that you have a Cuisinart SmartStick 200-Watt Immersion Hand Blender, and if you do not then any blender could serve, but it will mean a bit more mess and work for you to do so.
Let us start from scratch: buy at lease 5 or 6 bananas. The best ones are those you would choose to eat, the poorest are those you would put in a banana quick bread. Take a one quart plastic round container that has a lid, and then peel and slice the bananas crosswise, making round pieces, about 3 to 4 mm thick slices. Place the slices in the container, place the lid on it, and put the container with its sliced contents in the freezer or ice compartment until frozen solid - I do it for 24 hours. Next, remove the container from the freezer and place in the fridge to thaw, where they can remain until you want them. I usually let them have a couple of days, or longer to thaw slowly. They can remain thus for an extended period until you need to use them for refreshing an existing levain, or creating a new one. Freezing them does nothing to the flavor, but it weakens, or destroys most of the cell walls and fibrous parts of the banana. When I need a fresh batch to use for refreshing the levain, I first need to puree the once frozen slices. I use the Cuisinart SmartStick to puree the thawed banana slices directly in their plastic container in less than a minutes.
That puree is a great treat all by itself. If the bananas were still frozen, it makes an ice cream of pure banana, as well. Of course, I prefer it as a levain with a snappy bite to it.
To start a pure banana levain, simply take a small amount - I use 25g - of the puree and add a 1/4 tsp of ANY yeast water, or liquid sourdough starter. I have a yogurt maker that came with 7, 5oz. glasses with individual plastic caps. I use one of these, and blend the "seed" into the puree using a small battery powered hand whisk.
The powered whisk came with two tips - a normal whisk and a small tip called a drink foam-maker, or "foamer". The end of the foam-maker came with a spring coiled on its loop. The spring can be removed. If left in place it catches small fibrous parts and can be a pain to clean. I prefer it without the coiled spring.
I use this battery powered hand mixer to blend the seed with the puree banana refresh for the levain to get a more uniform rise from the levain.
Once a smooth mix is obtained, I smack the bottom of the glass once or twice to more or less level the surface. Then I add a rubber band as a visual indicator of the starting level of the levain. Then snap the lid on the glass.
From time to time I check back to see the growth progress.
I was using 5g seed and 25g refreshment, but the banana levain can become feisty, and on one occasion, it rose over 5 fold and blew the lid off - ejecting banana levain in a mild mess. So, after that, I have limited the total amount to 25g (5g seed and 20g refreshment).
Currently, with an ambient temperature around 70ºF/21ºC, I find it has tripled (or better) overnight, and once again before I am ready to retire. So, when I check and find the glass rather full, I remove the cap and place a clean glass on the digital scale. Then I transfer a 5g seed from the finish batch into the new start of the next feeding.
Of course, once the 5g seed has been "planted" for the next cycle, the remaining 20g is now discarded into my oral compactor. (+^_^+).
And thus, I have come full cycle. I go to the fridge and get the container of banana puree and feed 20g of the puree as the refresh to the levain and another snack starts to grow.
Ron
Great photos and write up, Ron!
Now, I can see how you make banana yeast and maintain your banana yeast clearly:) and Having such a lascious snack!
That is very good detail, Ron!! When I get a bunch of bananas, I will try it, too :)
Akiko
Akiko,
It is fun to maintain, AND it has served to kick-start a couple fruit YW cultures too. :-)
Did I see the same Cuisinart SmartStick, that I mentioned in this posting, sitting on your counter - in your pineapple yeast water photo? I mean in your Hamelman's Pain au levain de Raisin yeast water posting...
zÖ¿Öm Ron
Yes, I have the same stand blender as you have :) It is very good, isn't?
I am sure that I will enjoy banana yeast as much as you do. I love bananas, so does my daughter :) Banana pancakes Yum!
Akiko
After saying my waffles were usually light in color, because I seldom have a sugar content in the batter, this morning I added 3 Tbs of prune YW and had very brown waffles... LOL Good as usual, no noticeable flavor change.
zÖ¿Öm Ron
I found out that this one above is wrong. I didn't follow Okiraku lady's ratio.http://www.thefreshloaf.com/node/20693/culturing-growing-and-baking-range-wild-yeasts#comment-145766
Okiraku Ratio: Step2-4 28g water / 50g flour
28 ÷ 50 x100 = 56%
55 g ( flour ) x 56% =30.8g ( Step2-4 water )
Here is a correct one:
---------- Water / Flour
Step1 55g / 55g
Step2 30.8g / 55g
Step 3 30.8g / 55g
Step 4 30.8g / 55g
Total 147.4g / 220g Total hydration 67%
I am sorry !
Akiko
Akiko,
When you list what goes into the yogurt levain, your 1st item is "yeast water - 10g". Should I assume that any active yeast water will do?
Ron
Ron
Yes, Of course. I assume that any active yeast water will work.
Akiko
I just found out that I have a problem to use my dutch oven + Sylvia's hot steaming towels problem. Take a lood at these pictures of the loaves were baked by the method.
--------------------------------------------------------
By the way, I made Hamelman's Pain au levain with white starter (20% the same as the recipe) + my grapefruit yeast water instead of using water + flour ( the same amount flour as the recipe) for levain.
I made 2 loaves:
*I scored 3mm deep at 30degree. Success!
I scored 3mm deep at 90 degree. I don't know if it is good. Next time, I will score at 45 degree.
I like the one was retarded. But I didn't like the crust at all. Although both of two loaves are very tasty.
Happy baking,
Akiko
Akiko,
Perhaps, you would have better crust uniformity if you retard the dough as a ball with thin oil coating on its surface- inside a closed container. Then shape the loaf when you bring it out of retardation. In that way, the outer surface would be fresh dough at the start of the final rise.
On the other problem, that you mentioned you had with the steaming towels. I use steaming, as do most of us, but I do not use any oven steam if I am baking in a Dutch Oven. The steam is for the first several minutes, while the skin can still be held soft for a longer oven spring - as you know. But after those 10 to 15 minutes, most people would want to totally rid the oven of any moisture at all, to get a better crisp crust. Now, consider that in using a Dutch Oven, as long as the lid is on, any steam outside of the DO itself, is meaningless - it cannot help the loaf inside the closed DO. And, by the time the lid comes off of the DO, the loaf's crust is too hard to benefit from any "oven steam", and in fact, you want a dry oven from then until the end of the bake.
So, to my way of thinking, I can see nothing positive about using steam external to the DO, itself. All the moisture that can help the loaf's oven spring must be inside of the DO, or it will do no good - only harm by having a moist oven after the lid is removed from the DO. Perhaps, there is a flaw in my thinking on this subject, but if so, I certainly do not see it.
Ron 雷朗
Do you protect your shaped loaf in the banneton from drying out? I dust it heavily with flour if I use a willow basket - because I don't like spraying oil on my brotform - otherwise I would spray it with oil, before I close the lid of the container, or wrap it in plastic.
At my first trial with a Dutch oven - I have a large, heavy, cast iron oval one - I realized that spraying the hot inside with water wasn't that easy, most of the steam escaped at once. So I closed the lid except for a small opening just big enough to spray into it.
But, didn't you mention that your Dutch oven doesn't have a close fitting lid, Akiko?
Karin
Akiko,
The more I look at your loaf's "soft bottom" the more I suspect it has nothing to do with the steaming.
When you remove the DO "top", you have a loaf with the top half exposed to the oven's full heat, but the bottom halve's sides are sheltered by the pan (unless the loaf filled out to the point of touching the pan). It is much like placing an aluminum foil "tent" protecting the top - only it is a fry pan protecting the bottom third's sides. Next time, you could test this by removing the bread totally from the DO and replacing it back in the oven, directly on the oven stone, for the last 20 minutes of the baking.
Ron 雷朗
Thank you for helping, Ron!
I tried the method once. The bottom of the loaf was burned, but I didn't use Sylvia's steaming method at the time. I just sprayed water around the pans.
I will try it with Sylvia's method, Next time.
By the way, I didn't write about my Dutch oven doesn't close completely on the thread. Sorry, Ron. your first reply is very useful information for everyone! Your information will be handy When I get a real dutch oven or I can find the Dutch oven that close completely.
Thank you Ron!
Akiko
Thank you for the tip, Karin!
Oh I see.. It might be dried out... I will try your way! I don't like spraying oil on my banneton, either. I saw your comment on the other thread, and I agree with it.
Yes, I mentioned that my Dutch oven doesn't close completely. That is why I need some water to make steam.
Thank you for everything, Karin
Akiko
Prune-ish Rye
I actually enjoyed the "Red Grape Yeast Water & Alcoholic's Apple Sauce Bread" enough that I thought I give it another go, only including a test levain on this loaf (and all future yeast water levains). Wao says that straight methods are slow risers. If so, I am not sure I could say why that should be so?? Certainly, it turned out to be true when you start with a weak yeast - of any kind.
Technically, given the inclusion of 40g of the test levain, this would not be an example of the straight method. I chose to try the prune yeast water this time. Since, the initial loaf with prune yeast water had a crumb as dark any rye, I wanted to see what it would do with actual rye in the loaf. As it so often turns out with me, it was another unplanned experiment. I grabbed the wrong flour and instead of WW, I added another rye. Thus, this multigrain loaf had White HG, White AP, Light Rye, Dark Rye and Dry Malt diastatic. I also upped the HL from 59.7%HL to 62,1%HL - not that the 2% hydration increase was that noticeable.
Above is the formula, as it was used in the loaf.
Method:[list]
[*] Mix the 40g test levain, 3g of Dry Malt, and all 185g of Yeast Water. Once mixed, combine all other ingredients. Make sure the ingredients are thoroughly mixed, then cover bowl and let rest 1 hour.
[*] Over the next 2 hours brief (1 to 2 minutes) kneads , or letter folds, at 30 minute intervals.
[*] Now, at 3 hours, gently form into ball and place the smoothest side down in floured-cloth lined nest. Cover with a "shower cap" type bowl cover with plenty of clearance and either retard in fridge until you wish to complete the final rise,
[*] Or place the shaped dough directly in a proofing box for the final rise at this time, at about 80ºF(26,6ºC). I chose to place it in the proofing box at once.
[*] After 2 hours in the proofing box, it was rising, and would be over proofed by morning. So, I removed it to a 65ºF(18ºC) location for the overnight.
[*] After overnight at 65ºF(18ºC), little addition rising had occurred, and the dough was placed back in the proofing box at 6 AM to continue the final rise at about 80ºF(26,6ºC).
[*] 10 AM turned out the loaf on parchment over cornmeal, scored, added 100g boiling water to TPDO and covered DO.
[*] Placed TPDO in preheated 450ºF ( 232º C) and turned the broiler on for the first 5 minutes, which got the oven over the 500ºF ( 260º C) mark. Otherwise, my electric oven will not go above 460ºF ( 238º C).
[*] At 5 minutes the oven reset to 450ºF ( 232º C)
[*] At 20 minutes, the TPDO was removed from oven, uncovered, loaf still in fry pan replaced on oven stones and with oven door cracked 1/2" (6 mm) the oven set down to 425ºF ( 218º C).
[*] At 40 minutes, oven turned off, but loaf remain in pan on stones until 45 minutes.-
[*] Fresh out of oven: Internal = 199.9ºF(93ºC); Weight = 483g, down 58g or 11%
[*] Cooled 1 hour on wire rack.
[/list]
There was very little oven spring, but then the dough was stiff enough that the boule did not sag, either.
The crumb was tighter than I had expected. Of course, it was 29% rye, and only 62%HL. Then, too, the first prune yeast water loaf had come out tighter than expected. Only more loaves are likely to provide clues.
Another thing is that with that much rye, I suppose I might have been better off to have waited a day before cutting it, but it is good, not overly moist, so why wait?
So far, I have not made a single loaf with yeast water that didn't taste good, and not one has been sour in the slightest. I may have to make a good sourdough before I go into withdraw !!!
Ron
that waiting to cut it would have made much of a difference with the crumb, Ron. The bread really looks as if the rye content were much higher. Since you mention the stiff dough - probably a little more hydration would have been better?
Otherwise: taste rules!
Karin
Yes, Karin- I do agree. The reference to waiting was the crumb seem "clumpy" as I cut the first couple of slices. But two hours later that was no longer the case.
It does seem to work ;-)
Ron
Karin, a postscript on the rye.
That loaf was better today. It turned into a great "rye loaf" ;-)
Akiko reports that she found some Japanese baking websites that reported very tight crumb when using prune yeast water - Strange, but interesting.
I started a new loaf using apple yeast water (including the very fine apple parts that pass through a double screened strainer). It was rising nicely as I put it into 44ºF retardation a little while ago.
Ron
Chia and Apple Yeast Water Loaf
I have posted other loaves that had Chia seed as an ingredient.
=> Link: http://www.thefreshloaf.com/node/20032/1-little-2-little-3-little-chia-rye-loaves
Also, Shiao-Ping has posted with its use, indeed it was her post that first motivated to try it in baking.
=> Link: http://www.thefreshloaf.com/node/18407/chia-sourdough-two-ways
You can find a brief overview of it under Salvia hispanica on Wikipedia: http://en.wikipedia.org/wiki/Salvia_hispanica
Of course, a Google search of Chia Seed will provide many sources and all kinds of claims for its health benefits.
I confess that only two things interest me about it: its water holding capacity, and the interesting, nutty flavor it adds to the crust, and to a lessor extent, to the loaf in general.
I have read claims that it can hold up to 12 to 14% of its weight in water. I can personally attest that one spoonful of the seed will turn four spoonfuls of water into a jell-like mass. Of course, in bread dough that water is still water and once baked will either be released or add to the finished loaf's moistness. My experience has been it does both. Thus, it has the property of stiffening high hydration dough, but still adding moisture during the baking, as well as extending shelf life to the loaf. I though I would like to combine it in one of the wild fruit yeast I have been learning about, and picked Apple Yeast Water for this.
=> Link: http://www.thefreshloaf.com/node/20693/culturing-growing-and-baking-range-wild-yeasts#comment-143857
The first step was to make sure that the captured Apple Yeast Water (AYW) was active enough as a levain. To do this I simply made a 40g test proofed levain (35g of which was transferred into the loaf's mix.
The test levain rose nicely, nearly doubling in a few hours. So, with the reassurance that I still had an active yeast water, I was ready to incorporate 35g of the 40g test levain - while my calculations show the 5g remaining as "new seed", in this case, it really was allowance for the inevitable waste with such a small total amount.
So, the formula came out looking like this.
The Formula for a 541g loaf - One Pound Loaf after the estimated 13% loss I generally get.
The calculate percent hydration came out as 68.5%HL in the formula. That wasn't too high and I didn't want the Chia seed to interfere with the gluten development, so I choose to hold back on the Flaxseed Meal, Dark Rye Flour and the Chia seed initially.
I added the test levain into the total water of the formula. In this case that total water was 200g of Apple Yeast Water. I whisked the levain and AYW to distribute the levain in the AYW, and then added the 200g of KA High Gluten Bread Flour. Let's call it my preferment sponge, although, customarily somewhat less than the total water would go into a sponge.
Once this mixture was completed, the dough was covered and left for 3-1/2 hours. During that time I combined the remaining ingredients - all dry. I whisked the salt in with the Chia, Rye, and Flaxseed Meal.
The sponge mixing had been finished at 4:30 PM, and at 8 PM I turned out the preferment on a very heavily "dusted" portion of the dry mix of remaining ingredients. I had covered the work-surface in a Silpat sheet, and the dry mix and preferment were combined on the Silpat sheet in a combination of kneading and letter folding as was required at the moment. Once combined, it rested on the work-surface long enough for me to lightly oil (about 10 drops of grape-seed oil) 1L/1Qt. Snap-lid plastic doubler container. I then place the ball of dough into the oiled container, snapped the lid in place and moved the container and contents into a 35ºF/2ºC fridge for overnight retardation.
The next morning at 8 AM, the cold dough ball was turned out on lightly floured surface and shaped into a better ball shape. For boules in the one pound/ 500g range, my preferred final proofing dough form is a "birds nest', which I fashion from a combination one of Cambro's 1L/1Qt. (same as 1 of KAF's 1 qt. Starter Doubler Buckets), one of TMB Baking's small (7-3/4") liners , and a rubber band. The liner's elastic fits over the 1L.1Ot open top and two handles, the rubber band(s) additionally hold the liner's top below the handles of the container, and the liner's center drops down inside of the container, forming a suspended, hanging "bird's nest". The inside of the "nest" is floured and the boule shaped dough drops into the nest. I covered the top with a "shower-cap" type bowl cover, well peaked above the dough. This lets me easily judge the amount the dough has risen, just by looking through the glass top of my proofing box.
Thus, arranged, the bird's nest of boule was placed in the 80ºF/26.6ºC proof-box, where it went through a 12 hour rise. At the end of the rise, the boule's bottom (top when in the bird's nest) was spray with water and then gently inverted out of the bird's nest onto parchment paper placed in fry pan on bed of cornmeal. The fry pan is part of my combination Dutch Oven. Call it a TPFPDO - Turkey Pan, Fry Pan, Dutch Oven. The full details can be seen in the concluding part of the Banana Saga, at link: http://www.thefreshloaf.com/node/20460/banana-saga-%E9%95%B7%E7%AF%87%E6%95%85%E4%BA%8B#comment-143439
The boule was slashed and sprayed with water and the fry pan was placed inside and towards one end of the turkey pan. A half cup of boiling water was poured into the bottom of turkey pan - at the opposite end from the fry pan - the lid covered the assemblage at once.
The oven had been preheated to 450ºF(232ºC), and the TPFPDO went directly into the oven, centered on the oven stones. The oven set on broil, for the first 5 minutes of the baking. At the end of 5 minutes, the oven was 525ºF ( 274ºC) and was reset to 450ºF ( 232º C).
At 20 minutes into the baking, the temperature was set to 425ºF(218ºC). The TPFPDO was removed from the oven, opened and the fry pan with boule returned at once into the oven on the oven stones with the oven door held open to 1/2" (6 mm) to allow any residual steam to escape. The loaf baked thus, for 25 more minutes.
After a total baking time of 45 minutes, the loaf was removed from the oven. The boule's Internal temperature = 194ºF/90ºC, and its hot weight = 492g, down 53g, or 10% - 3% less than usual. It was cooled one hour on a wire rack before cutting.
The finished boule was well formed, nice color, but had less oven spring than might be expected from a 68.5%HL. This was consistent with what I had experienced with the previous use of Chia seed. The seed does not seem to release all of the water it absorbs. That was also in agreement with the loss on only 10% of the weight during the baking.
The first slices had a crumb that was initially more moist that one might wish, however, a few hours later, that was no longer true. The taste was the characteristic Chia nutty flavor, a flavor I rather enjoy. The crust initially was crunchy, but not too thick, also nutty and very good to my taste. By the next day, the crisp crunch was gone and the crust somewhat softer. Two days later it was still in excellent shape. The moisture not much less than it had been a few hours after being baked.
The morning of the second day I found I could repeatedly cut slices in the 3 to 4 mm range and the slices held together nicely and this continued through the next day, down to the final heel of crust.
I can think of only one thing I would try differently. I might try dropping the temperature after the first 20 minutes somewhat lower and extend the baking time to see if I can further reduce the moisture by the end of the baking. Alternatively, I think I would try holding off on the initial cutting for at least 6 hours, or longer, as one might do with a high percentage rye loaf. This loaf does have a baker's 31.5% of of Rye, Flaxseed, Chia, all capable of holding a fair amount of moisture, even after baking.
Ron
As if I could smell your loaf! Nutty flavor! I will use corn meal like you mentioned above next time. You told me that before, too. I like using dutch oven method!
When I used flaxseed meal instead of flax seeds for Hamelman's 5 grain levain bread, The crumb was tighter than usual. When I used oats that was more than the original recipe one day had the same result. It is healthy,though. :)
Happy bubbles and Great work, Ron
Akiko
Yes, Akiko. I am certain you are right, the flaxseed meal will hold more water than the flax seed still with its exterior intact.
Happy buggles, indeed LOL
Ron
I made Raisin yeast bread with alcoholic raisin + sesami and Hansjokim's rye bread with raisin yeast water today.
---Raisin yeast bread with alcoholic raisin + sesami--- I changed okiraku lady's recipe formula little bit. http://www.thefreshloaf.com/node/20693/culturing-growing-and-baking-range-wild-yeasts#comment-145882
200g levain ( 100g raisin yeast water / 100g Arthur King All purpose flour ( AKAP))
260g water + 50g oats +30g sesami ---Soaker-- Overnight---- 75F
-Final dough--
280g AKAP
55g Rye flour
55g whole wheat flour
* I didn't measured it-- alcoholic raisin that I strained from the rasin yeast water ( I used Sun-Maid Raisin 40g)
10g Salt
---Method---
1. Mix all the ingredients except the alcoholic raisins and salt.
2. Autolize for 30-40 minutes.
3. Added salt and knead for 15 minutes, then I added the alcoholic raisins then folded it gently until the dough was well combines and smooth.
4. Bulk fermentation 3 hours 30 minutes ( No S& F) 80F
5. Preshape ( make a round ball and bench rest for 30 minutes) 80F
6. Shape
7 Proof - 1 hour - 80F
8 preheated 1 hour befor baking ( 460F)
9. I used Sylvia's steaming method. Bake for 7 minutes at 460F with the steam. Decreased 450F and contiute to bake for 3 more minutes with the steam.
10. Taking the hot steaming towel with the pans and bake for 20 minutes at 400F. Shut off the oven then left it in the oven for 5 minutes.
I thought I should soaked the alcoholic raisin with sugar or honey to sweeten. I like this bread. When I toasted, I smell the raisin's sweeteness, It was very pleasant.
For crust- I like the crust when I used Dutch oven that is better ( thin and crispy crust) Also, Dutch oven is good because it is more likely I can have blooms and ears.
---- Hansjoakim's rye bread----
I really like all of his recipes. I just used grape yeast water instead of the water in his recipe.
http://www.thefreshloaf.com/node/18118/rye-and-macarons
http://www.thefreshloaf.com/files/u9564/40Rye_recipe.jpg
I tried " Natural Appearance" style even though this formula is not fitted to it. Anyway, It is like my head has a big bump.
Surprisingly, this bread tasted very similar to the rye sourdough culture's. I better try other recipes to compare.
Thank you, Hansjoakim!
Happy baking,
Akiko
Akiko,
This is very interesting. Great looking loaves and I love the crumb of the Hansjoakim rye! I never get that nice of a loaf's crumb with rye. Perhaps, I should try this, too.
Ron
Hi, Ron Yeah, You should try Hansjoakim's recipe! His rye bread recipes are awesome! I admire his pastry, too.
Today, I made Hamelman's Pain au levain using rasin yeast water. Again, I used my raisin yeast water instead of the water in the Hamelman's Pain au levain.
Levain
Rye flour- 12g
Raisin yeast water -112g
Arthur King All Purpose flour 174g
--------------------------------
Final dough
Arthur King All Purpose flour 966g
Rye flour -- 48g
Water - 668g
Salt-- 22g
--------------------
1 Stiff levain - Overnight 75F
2. Mixing- all the ingredients except the salt --- Autolize 50minutes ( Usually 30 minutes)- Add salt and knead for 10 minutes by hand ( I always knead by hand now)
3. Bulk fermentation 2 1/2 hours ( Fold the dough twice at 50 minutes interval) 80F
4. Dividing -- Bench rest for 30 minutes ( 80F)-- Shaping
5. Proof Oval loaf - 1 1/2 hours at 80F
Round loaf-2 1/2 hours at 74F
6. Bake (I used my dutch oven )
Oval loaf -
With Sylvia's steam, 460F for 10 minutes -- Decreased 450F for 10 minutes.
No steam, No Dutch oven- 450F for 5 minutes.-- Decreased 420F for 15minutes.
------
Round loaf-- With Sylvia's steam, 460F for 10 minutes - Decreased 450F for 10 minutes
No steam, No Dutch oven- 438F for 15 minutes -- Decreased 420F for 5 minutes.
* My dutch oven was updated: I use a round rack that is higer hight than the other one ( outdoor toaster pan)
I put my dutch oven onto the round rack when I bake with sylvia's steam.
--------------------------------------------------------------------
When I transfer the dough onto the parchment paper, The dough spread the side way a little bit. Taste? I think that it is very similar , again. It is not sour at all. My pain au levain with white starter was really mild. but I tasted a bit of sourness at the end when I had them. My daughter likes it. That is good news. My daughter and my husband's favortie are Hasjoakim's rye bread that I made yesterday.
--- Round one---
-- This loaf was kind of dry when I sliced it because I covered the bread witha plastic bag-- I should wrapped it withlinen cloth then put it in a plastic bag.) I can't compare the 2 loaves in this condition.
-----
By the way, I am using my old grapefruit yeast water to soften meat ( beef and chiken) It works very well. and now, I made pineapple yeast water to soften or tenderlize meat. :)
I also use my raisin starter as sherry wine :P I make teriyaki sauce with raisin yeast water. I use raisin water yeast as MIRIN ( Japanese sweet alcohol) It works. I can't buy such an expensive Japanese condiment. So that is great for me.
Other day, I made rice yeast water, then I drank some of them. It was exactly " AMAZAKE" Japanese sweet sake! I don't drink, but it was a nostalgic moment. :)
Happy baking,
Akiko
It looks as if you have mastered the use of your DO. Those loaves really look wonderful, and the crumb detail of the oval loaf makes me hungry just looking at it ;-)
You are baking so many loaves that you will soon be able to go into business, and take orders from your neighbors to make their breads, too. LOL
Ron
LOL That is funny, Ron! Baking and cooking should be always my hobby. I am very happy now because my husband and daughter like my raisin yeast water bread more than instand dry yeast bread.
Thanks to your suggetion of using corn meal helped me a lot, Ron. Thank you so much.
Now, I think that my rasin yeast is very strong enough to dilute with water to make levain. So, That is what I am going to do next LOL
By the way, I made a loaf of lemon yeast water bread few weeks ago, I just smell the lemon when I got to close to the loaf as soon as I finished baking. ( I used okiraku's recipe) When I ate a piece of it, I tasted a pinch of the lemon flavor at the end. It was not sour though. I felt refreshing after eating.
Cheers,
Akiko
Akiko,
>>Baking and cooking should be always my hobby.
I agree, totally !
You are more than welcome - I am very pleased the cornmeal helped.
>>I made a loaf of lemon yeast water bread few weeks ago,
Did you use the whole lemon - skin and all - or just juice? I could use a food that makes me fee refreshed after eating ;-)
zÖ¿Öm Ron
Hi, Daisy and Ron
Daisy- Oh yes, That is a good idea!! I like gazpacho that will be good to eat with the lemony bread :) I saw one Japanese woman made a baguette using lemon yeast.
http://blog.goo.ne.jp/rinrinmaman01/e/0bd7a2b440817bd8499e7f44351f3363
Isn't beautiful?
Ron- I didn't peel the lemon to make lemon yeast. Other Japanese also put whole lemon in the jar, too. One Japanese woman made " Lemon peel" like " Orange peel" after she fermented the lemon. That is interesting, isn't?
http://anniepan.blog104.fc2.com/?tag=%A5%EC%A5%E2%A5%F3%B9%DA%CA%EC
She was about to put the lemon peel in the lemon yeast bread, but She couldn't do that because the lemon yeast dough was already overproofed when the lemon peel was ready ( She said that the lemon peel was still hard even she simmered it twice.)
Happy baking,
Akiko
Akiko YUM on that crumb. I hope it tasted as good as it looks.
I bought oranges, but they are still in the fridge. Would you use the peel on the oranges, as well. My one try with citrus peel was the clementine and I threw that out. It was terrible, and I feared the peel might have been treated, some how. But clementine juice from the same box of fruit was as good a YW as anything I have tried.
Ronthe same c
It tasted good, Ron. I didn't taste bitter at all, even the lemon yeast water was not bitter. Because the lemon yeast was fresh, may be.
Oh I see, My grapefruit yeast water became very bitter and bitter , So the bitterness remained into the bread too I should feed only squeezed grapefruit or using the grapefruit are peeled.( cutting the skin off) We are using " jump-start" so that we don't need the skin ( enzymes)? we just need food for our yeast water?
That is a good point, Ron!
Akiko
Akiko, certainly the clementine tasted better without the peel. With the peel, it was terrible, without it was very nice. When I try the orange, I will peel it and use everything else, but no peel.
And yes, we have the main yeast from the jump-start and we want flavor and color from new fruit. At least it seems that way to me - just a thought.
R²
Hi, Daisy
What a great loaf you made!! Nice looking crumb, too! YUM! My first fruit yeast water bread was like a boo boo cushion LOL I am really glad that I tried raisin yeast water that is very stable poweful yeast!
Cheers,
Akiko
I didn't show you the result of 100% tropicana orange juice yeast bread, I made grapefruit yeast bread in the same time to compare.
Here are some photos of them. I used Okiraku recipe.
Both of them are 12 hours later after I fed.
---12 hours later--- Grape yeast levain rose more than the tropicana orange yeast levain.
The tropicana orange yeast bread looks good but the taste was weird to me. I think that I better use squeezed fresh clementine juice will have a good result. Ron liked the clementine yeast bread. Is it right, Ron?
I tasted the bitterness of grapefruit at the end when I had. I kept it for more than a couple weeks. It was getting bitter and bitter since I had... So, I quit keeping this yeast. It might be good to use up grapefruit yeast after I made " jump-start" grapefruit yeast ( feeding homemade fresh grapefruit juice )
Happy baking,
Akiko
I placed some clementine sections in a glass and used a muller to crush the juice out of the clementine sections. The muller has a rubber-like, diamond pattern on its end that holds the pieces being crushed. I feed the juice to the clementine YW, and feed myself the crushed remains Yum.
I cannot find the muller online, but bought it at Bed, Bath, and Beyond. I fine a muller is also called a pestle, ponder, pounder, but this is not a pounder, although the base has a similar diamond pattern. The end that mashes is about 3/4" in diameter, and the handle is about 9" long for a hand grip that would let you reach the bottom of that drinking glass to crush pieces of fruits, etc.
I will try to remember to take a photo sometime. But, before I had the muller, I used the flat end of a 3/4" hardwood dowel to mash the clementine sections.
zÖ¿Öm Ron
Hi, Ron
I think that I know what you are talking about " Muller" Is it like that?
http://store.shopping.yahoo.co.jp/inobun/003354.html
We call it " すり鉢". When we fine or paste sesame, we usually use it.
I found the suribachi in USA.
http://store.gourmetsleuth.com/suribachi-and-surikogi-set-P57.aspx
Yum Yum :)
Akiko
Akiko,
They are like a muller, but they have rounded ends.
My muller has a rounded metal end, but the "working" end is a hard rubber - it will not scratch glass.
But a hard wooded 3/4" dowel worked fine before I got the muller. Muller are mainly used by bartenders for mixed drink making - like crushing sugar cubes, etc.
Ron
Thank you, Ron
I put " muller" on the google search, I couldn't find it. then I looke up the word using my electric dictionary, again, I couldn't find it.
Now, I know what the muller is ! Thank you, Ron!!
Akiko
Akiko, see below the heading "Define & Definition". It was meant to be a reply to you, but I forgot to click on the "reply"
Ron
http://homepage3.nifty.com/plan100/p13.htm
Sorry, Akiko.... I am sure it is of great interest, but I couldn't read any of it LOL
Ron
Akiko,
When you can't fine it in Google by searching the word itself. try the word [space] define (or definition. Example muller define
It gave the 3 links below ( and many more the were people "Muller", etc.
http://www.answers.com/topic/muller
http://www.yourdictionary.com/muller
http://www.dictionary.net/muller
Ron
Oh I see, Thank you Ron!
Oh my goodness, I was about to post my result of rice yeast. then I hit the send button as soon as I pasted the link of the Japanese site.
After that, I wrote my rice yeast bread result with some pictures, then it disappeared all of sudden when I finished it !! Shock... T_T
Akiko
http://homepage3.nifty.com/plan100/p13.htm
How to make brown rice yeat
To ferment
( Rice : Honey : water= 1:1:5)
Method
----------------Here is my rice yeast water--------------
Next day, it is fully fermented. I saw a lot of bubble coming up when I shook it. This picure is 1 minute after I shook the jars.
-----------Baking -------------
I used Hasjoakim's Hamburger buns recipe.
http://www.thefreshloaf.com/files/u9564/burger_buns_recipe.jpg
I used 2 times levain too. Because okiraku lady recommend to use this. She said that it rises well. She failed sometime to make rice yeast bread. So I followed her suggetion. I assume that rice yeast is slow rise from second rise
-- Levain 1 ---
Ingredients
107g rice yeast water
107g bread flour
--Levain 2----
Ingredients
45g rye flour
87g bread flour
16g sugar
38g water
------Final levain----
268g bread flour
145g milk
33g butter
8g salt
---Punch down----
---Divide in 2 ----
---Preshape ( make 2 balls ) then bench rest for 30 minutes---
---Shape ----- then mold then in a loaf pan. I made a sandwich loaf instead of hamburgar buns.
---Proof---- 2 hours at 80F
--Bake----- 30 minutes at 438F
I haven't sliced it yet. I wrapped it with linen cloth this time, then put it in a plastic bag. I will post the photo of the crumb tomorrow. I smelled sweet and rice a little bit when I smelled freshly baked this bread.
I will finish all the rice yeast water instead of feeding the rice yeast that was a little trouble for me.
Happy baking,
Akiko
Akiko, will any whole rice grow that way? Or does one need to buy a special kind of rice.
Excellent inforamtion and great looking loaf you have made :)
Ron
This crumb is very moist. As Okiraku lady mentioned that rice yeast has mild flavor. I think that I didn't need much sugar for this loaf. Next time, I will decrease down to 15g or so. It tastes good! My daughter enjoys eating a piece of toasted buttery bread for breakfast today.
Ron- All Japanese use brown rice to make rice yeast. I think that we have to use brown rice or brown rice mix for only beginning, like when you make sourdough culture, we use whole wheat or rye for the beginning. then you can use any kind of flour.
Ron and Mini:
I used this one:
Happy baking,
Akiko
Akiko,
First off, let me say that the crumb looks more like a pastry crumb than a bread crumb - bet it does taste good. The color is wonderful, too.
When I asked what rice you used, I was interested in what rice would germinate - is it only the brown that will germinate? I realize that polished white rice cannot, but - for example, could wild rice germinate. too?
zÖ¿Öm Ron
Hi, Ron
Here are ingredients of the wild rice and whole grain brown rice pacage
I didn't check which kind of rice were germented carefully. I just checked out seeing the pictures that I took of rice yeast water.
It is very interesting :)
Akiko
Akiko, thanks for the info. I have so many different flours (most kept in freezer) from the Gluten-Free cookies, etc that I do for friends, but only brown rice in the full grain. I even have rice polish (rice bran) and sticky (glutenious) rice. I should think about trying some of those in my breads, as well.
Just a case of RobynNZ's TMBTLT LOL
Ron
In mentioning rice yeast, I have to remember back about 20 years in a laid back fishing village on a southern coast in Indonesia. One sunny lazy afternoon, one of the older women brought me a little bundle of fermented rice wrapped in a banana leaf. Some milky fluid with white rice. It smelled of ferment and young wine. She tried to explain I should do something with rice and water then add this to it and let it sit a few days. She giggled more like a teenager. I thanked her. We bowed politely and she went on her merry way. Passing around this fermented rice seemed to be making it's way all over the village like a frendship cake and the women were rather merry, merrier than usual for a few weeks. I can't remember what I did with it. I think I split it with my husband.
That was back in a time before I valued starters. I wonder now if I was supposed to make up a home brew and throw an afternoon tea party under the coconut trees. I wonder, Akiko, if your yeast water would be the same or similar.
I see you used wild rice and what looks like a decorative mixture of various rice grains. Is this mixture sold like this?
Mini
Mini, that is an interesting story. From your description of the young ladies behavior, one might almost wonder if it was meant as an aphrodisiac LOL
zÖ¿Öm Ron
What a wonderful story, Mini. I think that the merry waman suggested to make "amazake"(甘酒) which means Japanese sweet sake. Although honey is needed to make amazake besides white rice and water. I used to drink it when I had a cold. It warms you up, then make you sleepy.
<I wonder, Akiko, if your yeast water would be the same or similar.
It will be the same, if I feed cooked white rice into the rice yeast. Actually, I made the amazake at the first try. :) It was the same amazake that I had before. This white rice yeast was too weak to make bread when I tried. Or I didn't let it fully fermented.
Best wishes,
Akiko
Daisy, I have been thinking about to make panettone using alcoholic raisin since you mentioned, too. I might try to make it. Although I want to eat it without making :) I put some alcoholic raisins (I sprinkled some sugar over the raisins, then I kept them in a refrigerator) into the bread.
http://www.thefreshloaf.com/files/u9564/20101023_painaulevain_w_seeds_formula.jpg
I added the raisins (90f) and walnuts ( 30g) and the salt after I autolized it.
I tried other Dutch oven method that I didn't preheat, It came out flatten and disaster. I put the 2 pans on the baking stone over the round rack that has 4.5cm height. That was a big mistake. But I really like the crumb like Hamelman's 5 grain's.
I forgot to take a picture of the bread looks like. I was shocked a little bit. But it surely tastes good!
:)
Akiko
all I can say is...
WOW
this is an amazing thread. Totally blown away, my mind about sourdough and fermentation has instantly expanded.
thanks for sharing all of this information! I can't wait to make a fruit yeast now!
Thank you very much for sharing the recipe. It is inspired me. In Thailand I can't find organic raisin. I use fresh grapes instead, see how it works. I'll let you know the result.
Good luck on your effort. Grapes not treated with sprays of any kind should work very well.