The Fresh Loaf

A Community of Amateur Bakers and Artisan Bread Enthusiasts.

Most bookmarked

discusmb1's picture
discusmb1

Perlite vs Vermiculite

New to this site and forum. Thanks for having me. I am starting the process of building an Alan Scott wood fired oven. Foundation will be poured on Tuesday. I am researching certain things and wanted to know what people thought was a better insulation for the hearth and the outer dome. Vermiculite is almost double the cost of perlite but wasn't sure what the trade offs were. Also, if anyone has used either in their hearth floor, what are the measurements of insulation to concrete. I noticed in the Alan Scott book, they call for a 6 to 1 ratio. Are they talking weight, cubic feet or ?

Thanks in advance for any help and guidance.

Brian

dlassiter's picture
dlassiter

milk - to heat or not to heat?

Simple question here. If you use milk in yeast breads, which I do, do you need to heat treat it? I recall being told that you have to raise the temperature of the milk to near the boiling point to remove enzymes that interfere with the yeast action. Of course, once you do that heating, you have to cool the stuff off, and it becomes a timely process. Now, store-bought milk is pasteurized, which involves getting the stuff pretty hot, if not quite near the boiling point. So, it's a do-you or don't-you question. Will the quality of the bread suffer if the milk that is used in it is not heat-treated? I've always done it, but I'm becoming skeptical about the need.

estherc's picture
estherc

Hello from Portland OR

I've baked bread occasionally pretty much my whole life. Six months ago I decided to try making a sourdough starter and I haven't bought a loaf of bread since (except when on the road in our RV. No room or time for bread making there though I did try a no knead bread but my RV oven isn't even heating enough for a successful loaf.)

What got me interested in  sourdough was Beranbaum's The Bread Bible. Her technique for making the poolish and then putting the rest of the flour and yeast on top and letting it bubble through made bread far better than what I'd been doing. So I decided to take it to the next level with sourdough. 


I'm having fun experimenting with different recipes and techniques. I have my failures, many good loaves and the occasional perfect loaf. Found lots of advice and recipes here, thanks!

dabrownman's picture
dabrownman

4 Starter Sprouted 7 Whole Grain Sandwich Bread

Lucy was intrigues by David Snyder’s recent repost of his 2011 WW yeast bread from BBA using txfarmer’s intensive kneading technique.  We aren’t much into yeast breads or enriched yeast breads but any technique that might lighten the load of whole grain SD breads is worth a try. 

This bread will serve as the base line as my normal way to make whole grain sandwich breads that use a mix of natural starters, sprouted and whole grains with sprouted grain add ins.  We did a 4 starter combo levain using 2 SD, Witch Yeast and Cooked Potato Starter.  Lucy didn’t hold anything back with this formula.

The levain had a total of 20 g of starters and was fed the 15% bran extraction of the sprouted and whole 11 grain mix.  A little less than half the grain used was sprouted emmer, rye, wheat, oat Kamut, spelt and barley in equal amounts and these same grains were used for the non-sprouted whole grain portion of the flour.

The levain was built over 3 - 4 hour stages at 100% hydration and when it doubled after the last stage we retarded it for 24 hours.  We changed things up a bit this time, after the 2 hour autolyse of dough flour and water. We did get the levain out of the fridge, like normal, to warm up but instead of sprinkling the pink Himalayan sea salt on top of the dough ball for the autolyze, we reserved some water and the salt.

We then mixed in the levain and let it sit for 30 minutes before adding the salt and reserved water to the mix.  We did 1 set of 60 slap and folds to get everything incorporated and then did 2 more sets of 30 slap and folds – all on 15 minute intervals.  We then did 3 sets of stretch and folds and incorporated the 100 g (dry weight) of wheat sprouts during the first set.

All stretch and folds were done on 30 minute intervals.  Once finished we let the dough bulk ferment on the counter, in an oiled bowl, on a heating pad at 80 F for 2 hours – something we hardly ever do in the Arizona heat….. but it is winter time and the kitchen is only 65 F.

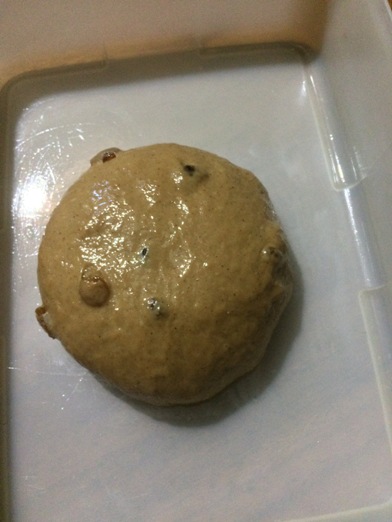
We then pre-shaped the dough into a loaf and 10 minutes later final shaped it and put it I a standard, non-stick sprayed, bread pan.  It was a bit small for the pan but we went ahead anyway since no other pan on hand would have been better.  We bagged it in a trash can liner and put it in the fridge for an 15 hour 38 F retard.


When we took the tin out of the fridge the next day we noticed that it has risen 100% in the cold we decided to bake it immediately.  We decided to bake the tin in a closed oval DO so that the possibility of steaming differently between the two breads would be minimized.

Yes... it is a real home made mince meat pie with real home made mnce meat that actually has meat oin it!

We fired the oven up to 450 F regular bake with the baking rack and the DO between the upper and lower stones.  Once Big Old Betsy beeps saying she was at temperature, we waited 15 minutes before loading the tin into the DO, added 1/8 c of water and baked it lid on at 425 F for 18 minutes before removing the tin from the DO and baking it directly on the rack for the next 22 minutes at 425 F convection.  When it tested 208 F in the middle, we remover the bread from the tin and moved it to the cooling rack.


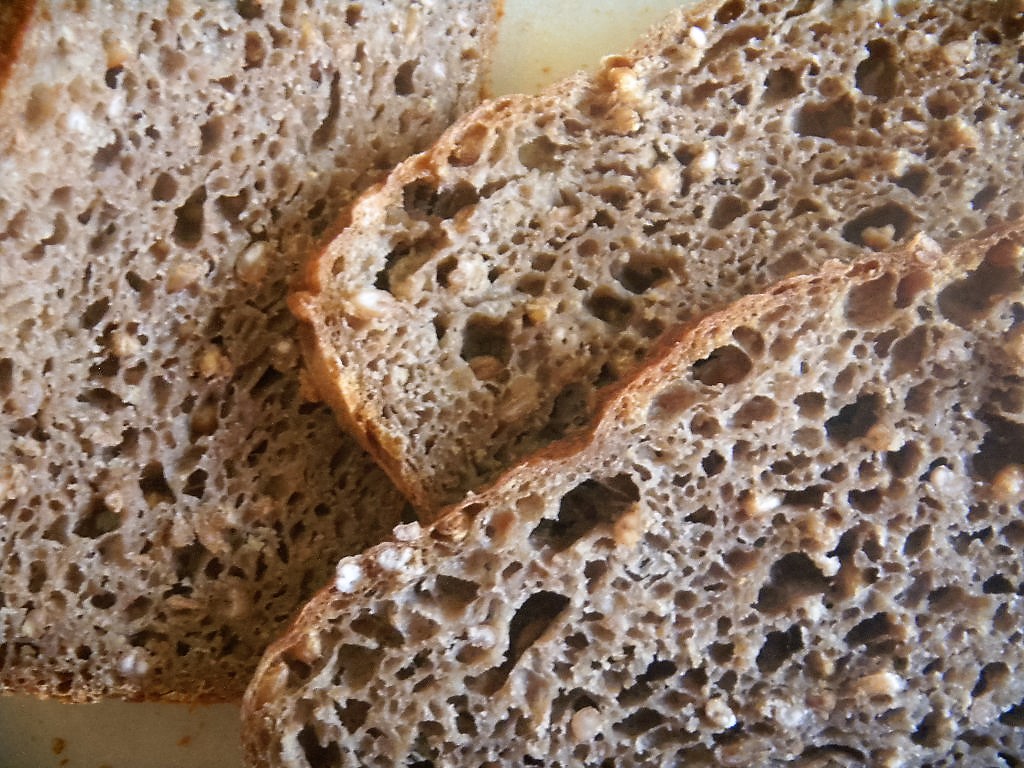
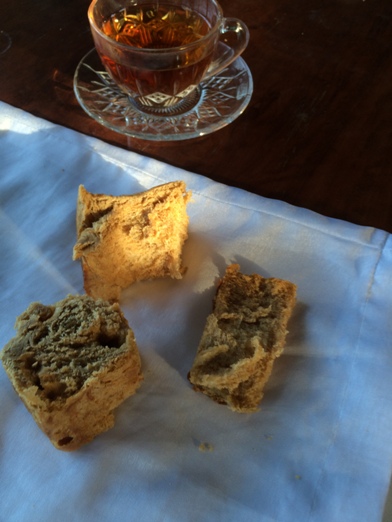
I just noticed that every large hole has a whole sprouted berry in it.

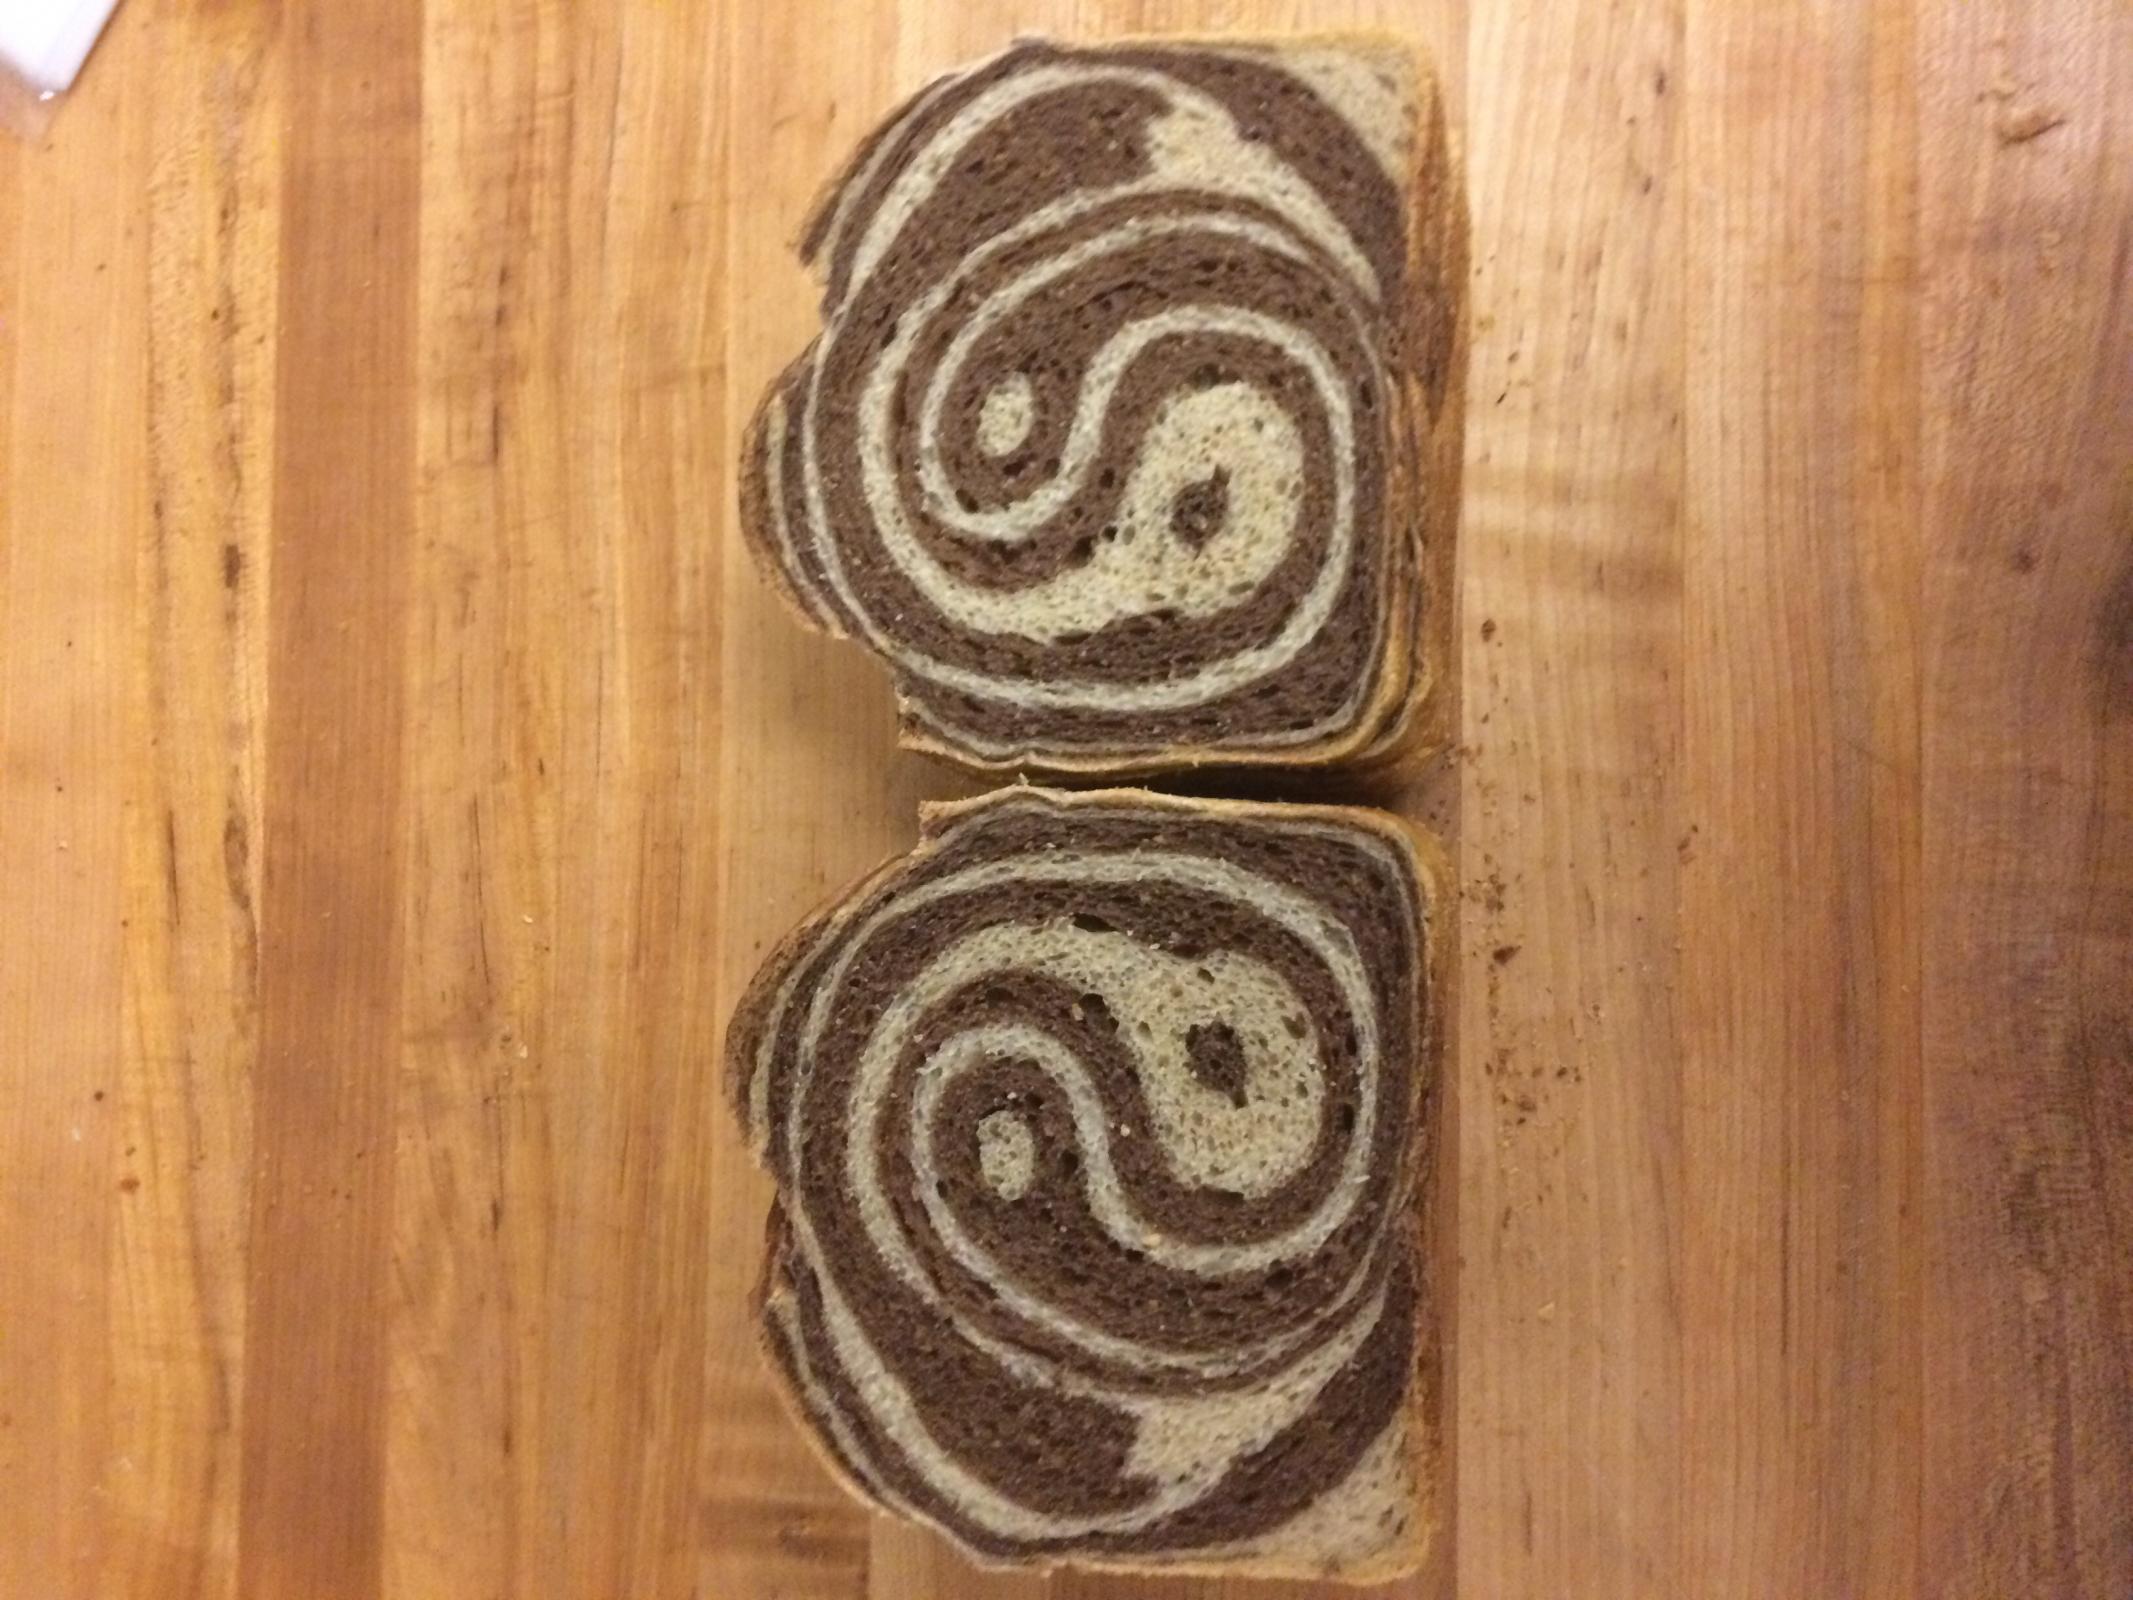
It didn’t spring at all but it thankfully didn’t collapse either.   It browned well but we will have to wait for the loaf to cool down for the crumb shot.  Since it didn’t collapse, we got as much of an open crumb as we could with this 100% whole grain loaf …..so the test will still be valid if the 2nd intensively mixed next loaf next Friday proofs 100% in the fridge like this one did.  This bread ended up fairly open for 100% whole grains, nearly half s[roiuted and the added in large amount of wheat sprouts.  It's best feature is the full flavored. hearty earthy taste.  Delicious!


.

SD Levain Build

Build 1

Build 2

 Build 3

Total

%

8 Week Retarded Rye Sour

5

0

0

5

1.16%

Witch Yeast

5

0

0

5

1.15%

Cooked Potato Starter

5

0

0

5

1.15%

2 Week AP / Rye Starter

5

0

0

5

1.15%

15% Extraxtion 7 Grain

0

8

24

32

7.34%

15% Extraction Sprouted 7 Grain

20

12

0

32

7.34%

Water

20

20

24

64

14.68%

Total

60

40

48

148

33.94%


Levain Totals


%


15 Ext. Half Sprouted 7 Grain

74

16.97%


Water

74

16.97%


Levain Hydration

100.00%


Dough Flour


%


85% Extraction 7 Grain

190

43.58%


85 % Extraction Sprouted 7 Grain

167

38.30%


Salt

8

1.86%


Water

315

72.25%


Dough Hydration

88.24%


Total Flour w/ Starters

431


Total Water

389


Red Malt

5

1.15%


Wheat Sprouts

100

22.94%


Hydration with Starter

90.26%


Total Weight

983


% Sprouted 7  Grain

47.48%


% Whole and Sprouted 7 Grain

100%


7 grain flour is equal amounts of: emmer , barley, spelt, Kamut, rye, wheat & oat


Don't forget that salad to go with that pie.  This bread made for a tasty bologna sandwich for lunch today.  The bread was a bit more dense the bottom 1/2"

Krusty1's picture
Krusty1

Marbled rye

I've been working on this for awhile now. Light rye with a 100% hydration liquid levain, and a dark rye with a 68% hydration stiff levain. The two doughs complement each other with different flavors and textures while being variations of the same grain. The dark rye has rye chops as well as coco powder.


fupjack's picture
fupjack

What's that smell?

I am trying to build up a starter for the first time in a while.  My starter's been growing for about 5 days, and smelling not too strong.  Last night I built some loaves using it, and fermented them overnight.

This morning, the loaves and the starter smelled... strong.  Not acidic like vinegar, but acidic like fresh vomit.  (I've got kids, I've encountered it plenty.)  I've had starter go bad before and turn sort of pink, but this looks normal.  Is there something else creeping in there?

kringle's picture
kringle

Hearty Sandwich Loaf

On America’s Test Kitchen they made what appears, a really good grilled cheese sandwich.  It calls for a hearty sandwich loaf.  I’m guessing they mean a tight crumb that will hold the cheese in place.  Can anyone recommend a recipe to me? 

Thanks,

John

PalwithnoovenP's picture
PalwithnoovenP

Pane Yaksik - Brown Sugar, Soy Sauce & Honey

This is my first bake for 2016 and it is my most outrageous bake to date!


Yaksik (藥食/약식) is a traditional Korean sweet dish made by steaming glutinous rice, honey, nuts and dried fruits. Yak (藥)  in Korean means medicine and Sik (食) means food so yaksik literally means medicinal food. Honey has been regarded for a long time as medicinal and from my research it is the reason why yaksik was called yaksik. Yaksik is usually seasoned with honey, brown sugar, and soy sauce further augmented by cinnamon and sesame oil; those flavors are the main inspiration of this bread. I don't have the "standard" yaksik mix of jujubes, pine nuts and chestnuts but I have golden raisins so that's what I used here as I think any dried fruit will do; the only important thing is there are some.


This is the glorious Yaksik seasoning sauce made with dark brown sugar, soy sauce, honey, cinnamon, sesame oil and cinnamon. It's very fragrant and enticing but don't try to taste it in its pure state as it is so intense that it might make you throw up like what almost happened to me!


This is the finished dough with the raisins already incorporated. I use strong flour because of all that gluten weakening sugars and used more yeast because I don't have osmotolerant yeast which is preferable for high sugar doughs. This is still the old me, baking without measuring. I planned a bulk rise at room temperature for an hour before it goes to the fridge but when I checked it, it hasn't grown so I let it go for another hour and when I checked again there is hardly any growth! Oh no! Various thoughts ran through my mind; Have I killed the yeast with the cinnamon and soy sauce? Is the amount of yeast I added too little and all of the sugars are slowing to the point that it's dead? I remember that the night is much colder than the nights I made bread before, I asked Siri about the temperature and she said it's 24°C. 24°C is considered (very) cold where I live so maybe it's the reason why the dough is slow to rise so instead of putting it in the fridge I left in outside near my bed for the bulk fermentation.


I was greeted by this beauty this (notice the difference in the light?) morning! She's alive! All those sugar, soy sauce and cinnamon did no harm to her!

 
This is my gift to myself for this year's baking, a pullman pan! For us with no ovens this is our best friend! For bread to be cooked evenly without an oven, I found out over the years that conduction is the best heat transfer method for even browning and cooking, convection and radiation are just to uneven and I always end up with an almost burnt bottom and a pale top. With a pullman pan, there is something that will support the structure of loaf  and regulate intense temperatures while cooking and you can turn the bread so all sides get a chance to face the heat source from the bottom. The result is an evenly browned and cooked loaf; still, more work and not as even as an oven does but a million times better that what I achieved before. I baked this in a frying pan over a wood fire because the pullman pan is too large for my clay pot.


The dough rose nicely in the pan indicating good gluten development, I compensated for the high amount of sugar by a lot of kneading and strong flour. I followed txfarmer's advice of letting the dough proof just 80% of the pullman pan for a perfect height with round corners of the finished loaf. Being high in sugar, the bread stuck on the lid of the pullman pan when it finished cooking despite a good amount of oil so the top crust was ripped but it's still pretty for us. Likewise the bottom crust stuck to the parchment paper and I have no choice but to peel it off. It is enough to be thankful that bread was not burnt since it's very easy to burn it. Those marks at the top are from the cooling rack.


It has a very interesting flavor, very different from the pure seasoning sauce. Coming out from the pan the aroma of peanut butter wafted in the air with hints of chocolate and cinnamon. The bread was not very sweet but has a strong flavor of molasses and a touch of honey. There is a slight saltiness with a savory note for you to know it's something different but not enough to reveal there's soy sauce in it. The juicy raisins complemented the other flavors well especially the cinnamon flavor that comes through last in the flavor profile, not that strong cinnamon flavor that you will think it's "cinnamon raisin bread" but just enough for a sense of familiarity and fragrance in this entirely unconventional treat. Definitely not a flavor for everyday snacking for me but nice to have to shake up the palate once in while!


The crust is very thin, soft and delicate. The crumb is very soft that it's very difficult to slice, it's easier to pull a chunk off the loaf or pull shreds to eat. It's like eating an intensely flavored cloud.


The color is not as intense as a real yaksik because the ratio of the seasoning sauce to the grain is lower but it's still there. For the record, I still haven't made or even tasted an authentic yaksik made with glutinous rice. I think a more robust whole wheat will stand up and complement more all the intense flavors of this bread. I will use more honey and less or even completely leave brown sugar out next time because honey should be the star sweetener as it was the reason why yaksik was called yaksik. Finally I will try to complete the traditional add-ins pine nuts, chestnuts and jujubes next time.

I wish you could try it! It goes very well with tea! Wait! Why is there always tea in the photos? Well, it's a preview for my next post that's still in theory. I hope you enjoyed this post, until next time!

Thank you very much!

Job


PY's picture
PY

Misadventure in Shaping

My misadventure in shaping my dough which was based on Hamelman's Vermont Sourdough with increased whole grain turned out looking like a bit of Ken Forkish's style. Not complaining.

Adapted from Hamelman's Vermont Sourdough with increased whole grain. Subbed the rye with freshly ground whole wheat. Instead of mixing with the mixer, I mixed by hand and gave the dough 3 additional folds that the recipe called for during bulk fermentation. I also added a cold bulk fermentation after the 3 folds, for about 4 hours, pre-shaped and benched and and final proofed for 1 hour after shaping.

Steam on for 15 minutes (wet towel on a hot baking pan) at 230C and then lowered to 220C for 48 minutes. Love the taste of freshly ground whole wheat which imparts a nice honey-ish taste.

Grenage's picture
Grenage

Incorporating potato

Good afternoon,

I've started varying my bakes a little; more specifically, adding sweet potato.  I've been sticking with my regular sourdough formulae (123), and the sweet potato was boiled.

I'd hitherto not boiled sweet potato, so was unprepared for the quantity of water that came through the ricer.  I had to add about 200g of flour when adding 250g of sweet potato in order to maintain my usual consistency; I believe 150g may have been sufficient, as it later firmed up.

Do you seasoned bakers normally roast potato, or do you simply factor in the increased water content?  I am considering boiling another batch and straining it, to try and get a rough idea of the water/potato ratio.

Russell.

Pages