The Fresh Loaf

A Community of Amateur Bakers and Artisan Bread Enthusiasts.

woodfiredkitchen.com

sortachef's picture
sortachef

Small fires over time make all the difference


Most woodfired oven owners only use their oven once a week or so to bake pizza or bread at fairly high temperatures. There's another level of cooking available, at lower and constant temperatures, which requires pulsing the oven with small fires. This is useful knowing about both to protect the oven from unnecessary cracking from cold firing and also to expand your cooking repertoire.

There was a time in the not-too-distant past when many home ovens were fueled with either wood or coal. These ovens were used every day, and never lost their warmth. My father remembers his mother stoking the fire at the crack of dawn to bake the daily bread. Even today, I hear through this website of people in Greek villages and Eastern European towns using wood or coal as their main source of cooking fuel.

In order to replicate this method of everyday cooking, you have to commit some time. In order to roast a chicken today, I had to find three different times yesterday - in amongst a busy schedule - to light and maintain fires. If you can find the time, however, the benefits are astounding. When I was ready to roast the chicken (see Woodfired Roast Chicken), my oven maintained a stable temperature in the 350º range for 2½ hours with no active flame throughout the cooking time. With this ability, all kinds of baked goods (including dinner rolls and pastries), casseroles, roasted meats and fish become possible.


Pulsing your oven: The trick is to 'pulse' your oven with small fires over time, in order to slowly heat all of the masonry components - the walls, the floor and the bed of sand beneath the floor. The operative word here is 'slowly'. After a cold spell in which your oven has lain dormant, this will prevent the components from cracking. For more normal cooking or baking operations, this will raise the temperature of your oven into the range of a conventional oven, with very little charring or direct smoke.

Here's what to do:

  • Use a piece of newspaper, a handful of kindling, 2 or 3 pieces of hardwood the thickness of your thumb and 2 thicker pieces of hardwood that weigh about 1 ½ pounds each (2 ½ inches thick) to build successive fires in the center of your oven. Maintain the fire for an hour, relighting and adding a bit more kindling if necessary.
  • After the hour of active fire, put the door in place as tightly as possible. You may have to put a wood wedge under the handle, as I do. Let the oven rest for 3 hours. This rest time can be variable in length.
  • Light another fire using the same amount of wood as above, and maintain for an hour. Let rest again.
  • With each subsequent fire, there will be more unburnt wood from the previous fire. Leave this in the oven and continue to add to it, building your fires on top.
  • Light a third fire in the early evening, maintain for an hour and let rest. During this rest period, you can move the coals to one side in order to cook beans or a casserole, if desired.
  • Close up the oven and let rest overnight.
  • On day 2, start a fire with the same amount of wood, maintain for an hour and let rest. By this time the parts of your oven are hot enough to maintain a temperature of about 350º. From here, you can safely and quickly take your oven much hotter (for pizza, say), or you can build another small fire to maintain low to moderate heat for roasting or baking.


Here are the temperatures I measured in my oven. As atmospheric conditions and your oven will likely be different, you will probably have different results, particularly during the first few fires.

Starting temperature: 52º, which was approximately the overnight low air temperature in Seattle (measured with an accurate thermometer).

After the first fire: 150º (measured with oven thermometer, as are all others)

After the second fire: 225º

After the third fire: 350º (I baked a pot of pinto beans for 2 ½ hours when fire was almost finished)

Starting temperature, 2nd day: 160º

After the fourth fire: 375º (I baked dinner rolls after this fire)

After the fifth fire: 425º (I let the oven cool to 350º and roasted a chicken. After 2 ½ hours, the oven temperature was 325º and the chicken was perfectly cooked.)


Final note: I just checked (10 a.m. on the third day) and, with no active fire since yesterday's noontime fire, the temperature of the oven is 160º. Hmm. I could just keep this whole thing going. Flame on!

sortachef's picture
sortachef


We make pizza nearly every week here at Chez Bullhog. When you have an outdoor pizza oven, it's hard not to: pizza has become an obsession. But, even without using the special oven, we've gotten pretty good at turning out a quality pizza. Here are some tips:


For half the flour in the dough, substitute Caputo flour. This flour (tipo 00), made by Antico Molino Caputo in Italy, is formulated to let pizza dough stretch out. Using it in a recipe will keep your shaped dough from springing back from the rim when you flatten it. Available in Seattle at Pacific Food Importers, or through several sites online.

Cut the yeast by 1/3, and let the dough rise longer. Many dough recipes have more yeast than necessary in order to decrease the proofing time. If you're not in a hurry, let your dough rise at 70º (or even cooler) for at least 4 hours. Pizza aficionados let their dough rise in the fridge overnight, and then let it sit at room temperature for a few hours before shaping and baking. See 'Pizza time Pizza with long-rise dough' for details.

Drizzle olive oil onto the blank pizza. Joe Fugere, owner of Tutta Bella in Seattle, told me that when his original restaurant was certified by the Neapolitans, he had to omit this step. I never put olive oil into the dough, but I find that a thin coating of good olive oil enhances the flavor and keeps the crust from getting soggy during baking.

Use vine-ripened tomatoes and make your own sauce. The best and sweetest tomatoes are vine ripened. When our tomatoes are ripe, we don't bother making sauce, we just slice them onto the pizzas. Otherwise, we make a sauce with ripe tomatoes, a bit of onion and garlic, and freeze or can it. Second best is a big can of San Marzano tomatoes turned into sauce. When making sauce from canned tomatoes, use a bit of sugar to brighten its flavor.

Seek out quality toppings. The best toppings make the best pizzas, and in many cases less is better. A little prosciutto, a few good olives, herbed mushrooms dotted here and there. Locally made sausage, some fresh arugula - well, you get the picture.

Try different cheeses. This can make such a difference to your pizza and, again, you don't need massive quantities. Some suggestions: well-drained buffalo mozzarella, truffle-infused pecorino, gruyere, cacciocavallo, or fresh mozzarella. You can top the whole thing with a handful of shredded mozzarella if you like.

Balance salty with savory or sweet. All of the components of pizza already have salt in them, so you can easily overdo it with salty toppings. On the other hand, a fresh Margherita pizza (fresh mozzarella, fresh tomatoes and basil) needs capers or a generous sprinkle of salt to balance it.

Learn to use a peel. There's a reason they use peels (wooden or metal paddles) in pizza places. A wooden peel gets a pizza into the oven safely; a metal one turns it halfway through baking and pulls it out when it's ready. While you can get the pizza out of the oven with a spatula or two, I'd recommend that anyone who wants to bake better pizza invest in a wooden peel. When the peel is topped with bread flour or semolina, your pizza will slide right off it and into the oven!

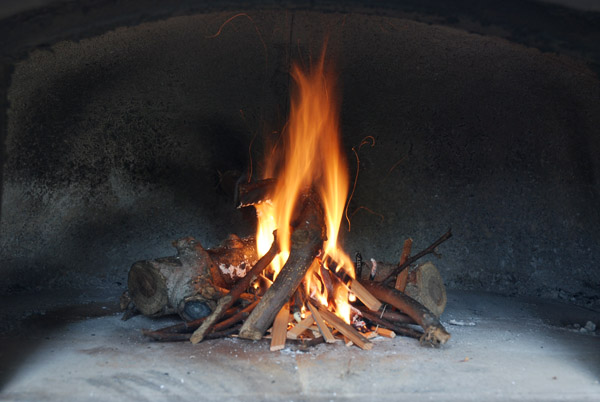
Make your oven hotter. My outdoor oven is at about 650º when we bake pizzas in it, and will turn out a pizza in 4 minutes. Admittedly, most ovens don't get that hot, but will go to 450º or more. At 450º, a 12-inch pizza bakes in 8 or 9 minutes.

Bake the pizza directly on a pizza stone or quarry tiles. I've saved the best for last. This simple addition to the center rack of your oven, even if you're baking your pizza in a pan, will instantly yield better pizza. Be sure to preheat your oven for a half hour before baking for best results. See 'Baking bread on Quarry Tiles' for more information on using quarry tiles.


One Final Note: Even as recently as last year, I would have included longer kneading on this list. Italians recommend 20 minutes of kneading the dough, which many Americans find excessive. As I play with some aspects of this, the list may evolve to include a 30 minute rest period - after mixing, but before kneading - which I am learning is nearly as critical for gluten development as the kneading itself. Stay tuned!


See original content for this and other bread and pizza recipes (woodfired and conventional methods) at www.woodfiredkitchen.com


Copyright © 2010 by Don Hogeland

Subscribe to RSS - woodfiredkitchen.com