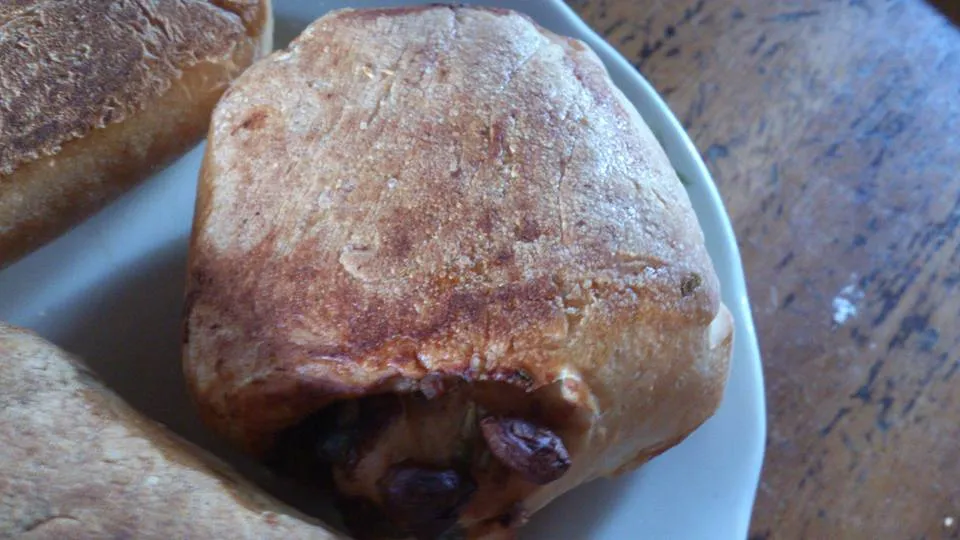
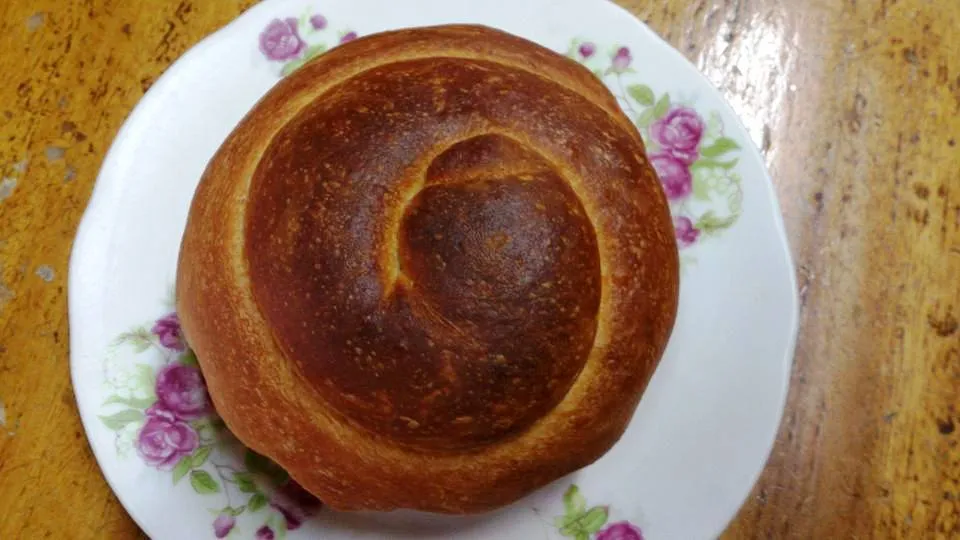
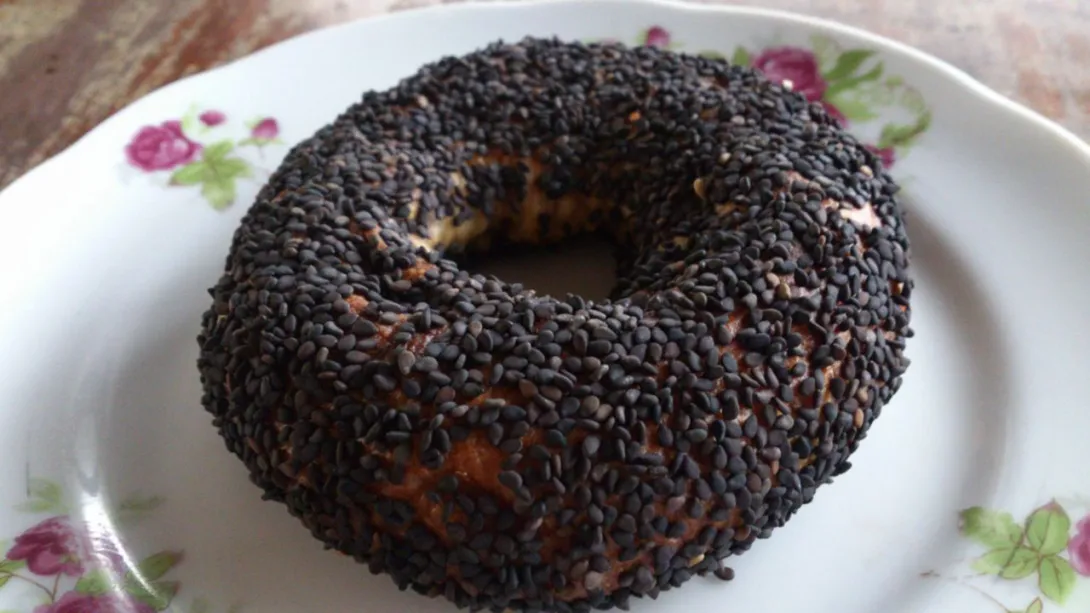
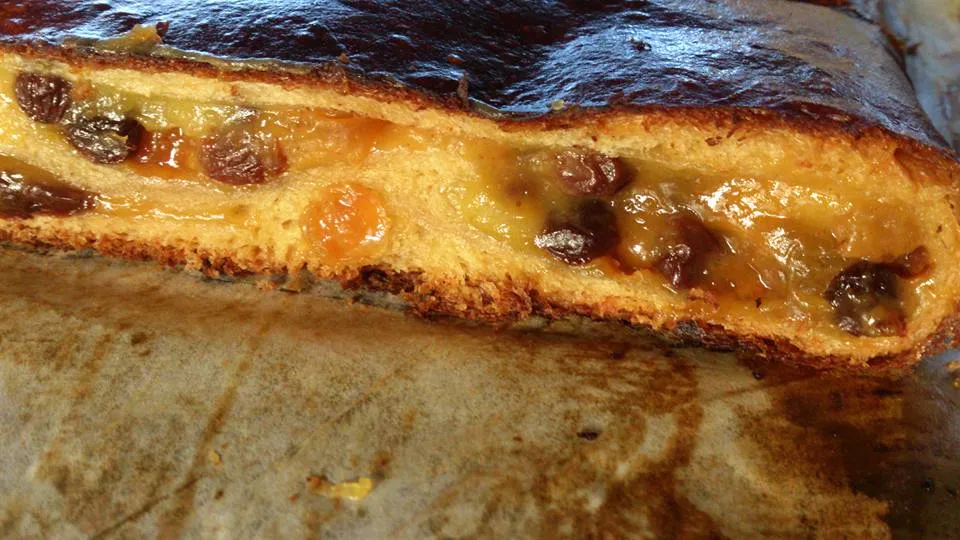
The Fresh Loaf

A Community of Amateur Bakers and Artisan Bread Enthusiasts.

PalwithnoovenP's blog

PalwithnoovenP's picture
PalwithnoovenP

I think I've just made my favorite cake! My first bake for 2020!

This was inspired by my torta, a modern cake on a cake traditionally made with lard, and a Spanish magdalena. I've been wanting to bake a magdalena ever since I saw it but it's only this time that I had the courage to try it, knowing how expensive olive oil can be and how I do not like it when I first tried it. The use of olive oil in it was so intriguing and interesting.

Knowing that most of the flavor will come from the olive oil, I made sure to use a high quality extra virgin Spanish olive oil. An arbequina was the choice for most magdalenas because of its sweet, fruity, and delicate flavor. I used something stronger so the flavor will shine through the cakes.

I used an olive oil made from a blend of picual (bitter and spicy) and hojiblanca (grassy and bitter). I tasted the oil straight up and it has a fruity smell reminiscent of banana.  It enters the palate smooth and sweet, followed by peppery notes, then a slight bitterness on the sides of the tongue and a spicy finish at the back of the throat.

In addition to flour, milk, eggs, salt, sugar, and olive oil, I flavored it with a local orange. What pairing is more classic than olive oil and citrus, most magdalenas are flavored with lemon zest. Our local orange has an intense unique fragrance not even close to lime, lemon, or classic orange. Compared to orange, the aroma is more mabagsik (sorry, I can't think of direct translation, intense? fierce?); I once candied it and the peels were still extremely bitter after three times of blanching. Even just the green rind, without the pit, it is already bitter. The skin was also very thin that it is difficult to get only the green zest without the bitter white pith. With its intensity, I only needed a small amount to perfume the cake, just a quarter teaspoon.


I never thought that sourdough would make a cake like this. I had a couple of more torta experiments (that I still have second thoughts of posting) before this and this is by far the best in terms of texture and flavor. This cake was purely raised by sourdough, no chemical or mechanical leavening. In my honest opinion, it was lighter, fluffier and more delicate that a traditional pound cake (that is, the one that is raised purely by air trapped in the batter during creaming).


Sorry for the weird angle! I just love how smooth and fine the sides of the cake are.

The cake had a very lovely flavor. The olive oil added an interesting savory note, if I did not know that there was olive oil, or if I were not familiar with it; I will be hard pressed to pinpoint were that flavor comes from. It tastes buttery despite the cake being made  solely with olive oil. It has nutty note too that if I also didn't know, I would think that there were almonds in it, probably due to the hojiblanca.

Like a classic olive oil cake, it has a thin crispy shell at the top and an interior so moist  almost to the point of being custardy. After a day, the crust turned shiny and soft and the crumb became moister and the flavor also developed to becoming more balanced and harmonious. This is a cake that really benefits with age.

If there is one word this cake is all about, it is subtlety. Subtly tangy, subtly sweet, subtly savory, subtly buttery, subtly nutty, subtly citrusy. This would go great with tea rather than coffee due to the delicate flavors.Earl grey if you want a tie of flavors; black tea for a classic palate cleanse between bites; or if you want something herby, tarragon tea will be nice.


I just love those sunlit photos! They have a more organic and mysterious feel. It feels as if I was really in the Mediterranean!


You can see in this photo the delicate and crispy top crust.

In a made-up history, during Spanish times it was a celebrated dish found only on the tables of the wealthy as only the upper class can afford excellent olive oil from the Mediterranean.


I became a litttle bit generous with the olive oil in the two molds and the oil floated on top of the batter. What a lovely pattern it created! Looks like a sunflower enhanced by the sunlight.

 I have never tasted a cake as sophisticated as this! 

I hope you enjoyed this olive oil cake. Until next time, thanks!

PalwithnoovenP's picture
PalwithnoovenP

Same as last year's, the only differences are I used the best butter I found and I already got hold of the traditional Edam Cheese (Queso de Bola) used for a Filipino Ensaymada. Of course, I served it with traditional Filipino hot chocolate.

My colleague makes the best cooked ham so I made a version with ham, similar to our province's style of making ensaymada—the only thing missing is salted egg. Queso de bola is also saltier and more pungent/flavorful than most cheeses so a sprinkling is all that is needed for both versions.

It is already just a few more minutes before 2020 here! I wish all of us a happier, healthier, and more blessed 2020!


Happy New Year!

PalwithnoovenP's picture
PalwithnoovenP

When I was a little kid, when parents want to show off how good their kids were in spelling (it's a double-edged sword actually for it is also often used when you want to give someone a hard time :D), they will make them spell "Czechoslovakia." Being so foreign sounding and with a peculiar arrangement of consonants for our eyes and ears, it was really difficult for kids in this side of the world to spell and really shows how good they were in actually "memorizing" letters for the correct spelling.

We only know the word but we really don't know what Czechoslovakia actually was. It was only in high school during geography class I finally knew that it was a country that has peacefully became two independent countries. While browsing bread videos, I randomly saw this cute little buns called buchty and was surprised that it came from those countries The memories just came rushing back. If you want to know more about it, here is an excellent information and recipe. It is also popular in neighboring countries and goes by many other names.

Here is my sourdough version. (Pardon for the rushed photos and lumpy icing sugar, I did not have my little sifter with me...)


I did not have plum butter so I filled them with a dark raisin jam. I did not have the chance to cut one bun in half (because they were demolished so quickly) but you can see the filling peeking in the lower right corner of the next photo.


I served the way it is served in Austria, with vanilla sauce. So delicious!

PalwithnoovenP's picture
PalwithnoovenP

Hello TFLers! I haven't posted for a long time because I was very busy. I just made it through my first year of practicing the noble profession of teaching so to celebrate it, I made a sourdough brioche. 100% sourdough, made with whole eggs and about 70% butter then baked in ensaymada style in ensaymada tins. I wish I have made a brioche à tête shape too given shape of the tins.Though simpler to make, it was still a labor of love; it took 36 hours from start to finish! The dough was wetter and richer in butter; I only kneaded by hand and it feels like baba dough which is usually made in a stand mixer. It was really worth it, so rich yet so light!


Crust was crisp and flaky and the crumb was so soft and light.The crumb was very shreddy and difficult to cut. I was lazy to get my serrated knife that's why crumb appears to be rough and non-uniform. I also used store-bought eggs (would you believe it? Our hens seldom lay eggs these days.) so it didn't have the nice color that I'm used to.

Fragrant and so buttery with a pronounced tang. It's less rich than my ensaymada but if you top this with butter, sugar and cheese; it will be a good ensaymada too. Not too sweet too because of less sugar and the absence of it in the topping. I chose to leave it plain and just eat with jam instead.


Served it with traditional hot chocolate just like the traditional ensaymada pairing. Perfect for this rainy day!

I hoped you enjoyed this post! See you next time!

PalwithnoovenP's picture
PalwithnoovenP

I was so busy the past week that I wanted to make something quick to celebrate Father's Day. Instead of making bread, I decided to make cookies. This is just my second time to bake cookies; I am slowly exploring quick breads in my oven. It was quick but not that easy because of a few components which was inspired by the cookie principle of Monsieur Albouze. I made 3 giant single serving cookies, though roughly the same but with a variation for each. To French speakers out there, sorry if I made a mistake with the name; it just came to my mind while thinking of a name for this cookie, je suis désolé !

Mangoes are our favorite fruit and it's mango season now so I thought of flavors that would go well with mangoes and make it into cookie form.


It starts with a rich, lightly salty, chewy cookie dough loaded with dried Philippine mangoes, roasted cashews and white chocolate disks. 


It was then stuffed with salted caramel in the middle then baked for 10 minutes at 180C. After 10 minutes, it was topped with more dried mangoes, white chocolate, homemade mango jam from slightly sour mangoes, and homemade caramelized cashews then baked again. After a further 10 minutes still at 180C, what you get is this fabulous cookie with intense but balanced flavors.

Here are the variations:

1. Exactly as the description above, stuffed with homemade soft and chewy salted caramel.


2. Yema, a Filipino candy made from reduced condensed milk replaces the salted caramel as filling.


3. Filled with Yema, topped with a slice of fresh mango in addition to the mango jam then finished with a sprinkling of dark chocolate. Our favorite!


It was so fragrant from all the add-ins in addition the butter and sugar. The nutty aroma can even be smelt outside the house while they were baking and when they were cooling. The chewy dried mango, crunchy nuts, gooey chocolate, sticky caramel, chunky jam, and soft and smooth mangoes make for a party of textures in the mouth; and the balance of flavors from the caramel, salt, tang from the fresh mango, sweetness form the dried mangoes and chocolate and the nuttiness from the cashews. So enjoyable to eat!


Look closely and you will see the caramel evenly distributed in the cookie.


Sorry if this was out of focus, I was in a hurry to eat it.

I had some beverages to pair with it but I found a glass of cold milk is the best! It really complements all of the flavors well. One more thing, how I wish I have filled all of them with my salted caramel, it really tastes way better with the mangoes than with the store bought candy (which I tried to see if making homemade is critical or just a waste of effort; if you can have an equal or better outcome using something store bought without effort, clearly the effort is worth it) and how I wish that it was the third variation that I have filled with the good stuff!


Happy Father's Day!

PalwithnoovenP's picture
PalwithnoovenP

Hi TFLers! Long time no hear! I've been very busy adjusting to my new career that I seldom bake and post. I hope you still remember me. I made this simple flatbread for my birthday and I paired it with homemade charcuterie (sausages in particular). It feels like a very European thing to do but since no one drinks wine or alcohol in our household, we just washed it down freshly squeezed calamansi juice and hot chocolate.

I do not know if I can call this foccacia or schicciata or pizza bianca so I just called it flat bread. It was inspired by the pizza dough made by a bakery in Rome that I watched in the pizza show. The dough is a simple one day sourdough made with AP flour, milk, salt, and a bit of sugar. The levain matured for 3 hours in the morning due to high temperatures then I made the main dough. I did 100 slap and folds for the initial gluten development. I gave the dough 3 sets of S&F's 1 hour apart during the bulk fermentation which took 4 hours.

The dough was very soft and bubbly at the end of the bulk rise. I divided it into 2 and flattened it into rectangular flatbreads. I immediately cooked them on skillet for 3 minutes over medium heat then broiled at 250C for five minutes until golden brown and a little charred.


I made a crisper thinner one and a softer thicker one. I brushed butter  in lieu of olive oil over half of the thinner one for more flavor albeit a softer crust.


One can make a pocket even in the thin one with just a little force. Sliced it in half and filled it with my homemade dry cured sausages inspired  by the pizza bianca with mortadella and the schicciata filled with cold cuts as italian street foods.


Filled with a sausage inspired by the flavors of Mortadella.


The softer and thicker flatbread.


Filled with a "Spanish Chorizo" inspired sausage.


In this simple combination of meat and bread, without cheese, veggies, spreads, or sauces arose a flavor so sublime. Unlike how the sandwiches in those streets with a lot of meat, one doesn't need much here. The cured meats were so flavorful that less is more.

The bread was soft on the inside, lightly chewy, substantial with a good bite and the crust was crispy with a charred aroma that adds to the experience, lightly bitter and plays well with the sweetness and that hint of tang of the crumb. The dough when raw has a tangy, buttery, cheesy aroma that intensified when it was baked. The texture really holds up to the meats. The sweetness and aroma or the milk was very pronounced and helped the crust get that lovely brown color. It really complimented the cured meats extremely well; they elevated each other.

I will now go into detail with the stuff  with which I stuffed my flatbread.

Yes, I added another thing to my arsenal/repertoire: charcuterie. The craft that mystified me for so long; I finally got the courage to try it even without proper equipment like a scale and accurate temperature and humidity controls. Dry cured sausage always carry the risk of botulism and listeria which are fatal so most people won't make it at home, why take the risk? I also only used salt and no nitrates because there is a higher risk of putting my health in danger for putting in too much nitrates than introducing bacteria to my body. But I'm relentless or stubborn maybe so I still went to do it. Again, I do not know if I will be called great or foolish for doing it.

I'm not used to eating raw meat, even though this meats are cured I still consider them raw because they did not go under heat so I cooked them so it eliminates the risk of listeria and botulism where the toxin is quickly destroyed at temperatures over 80C for 10 minutes. I slow cooked these for an hour until caramelized.

I really got confident when my first which was a cured meat from southern China became a huge success. Unlike western charcuterie, the one that I first made is very different through it's use of soy sauce and large amount of sugar. It also uses spices not commonly used in the west. I want to post it but I believe there will be a more fitting post for that one.

Western ones often has garlic which increased the risk of botulism that kept me from trying to make them but I took the plunge finally and I was surprised with results. I really like it even though there was no trace of sweetness, and the garlic was very nice whether applied lightly of heavily.

I originally planned to make hot sausages made with paprika but I decided to also make a more delicately flavored sausage like an old world salami or mortadella.

This one was flavored with garlic, pepper, juniper and bay. Light on the garlic and I included whole peppercorns which added a nice flavor and texture to the finished sausage. The center did not dry that well due to to low of a humidity level.


A "Spanish Chorizo" made with Spanish smoked paprika and garlic. I went heavy on the garlic and  I added cayenne to half to make a hot chorizo.


What aroma and flavor! Really beats most "chorizos" I had before by a mile.


The most decent chorizo that I can buy at the store.


My homemade one.

I learned a new skill this year! I plan to learn more. I am looking forward to learning how to smoke these meat beauties of mine. I think it will send them to another level!

I thank God for another year of life and blessing! God bless you all! See you next time.

PalwithnoovenP's picture
PalwithnoovenP

Torta depending on where you are in the Philippines can mean different things. Up to the day when I was just aware of one type, the only torta that I know is a savory dish made with eggplant and eggs that I often eat with ketchup. I do not know any other form of torta when actually, there are. Then, during my college years my dad introduced me to the torta of his childhood which is made from potatoes and eggs (I think there are tortas that are similar to this one in Spain and Latin America) that can be with or without meat depending on your budget :) and it has become a favorite for a cheap and filling dish to go with rice because the only thing that we have to buy are potatoes. Today, I am focusing on the torta of Cebu, a province in the central Islands of the Philippines where the Queen City of the South and Philippines’ oldest city lies – Torta Cebuana.

The best ones are said to come from the town of Argao in Cebu. It is a rich naturally leavened cake baked in fluted molds commonly made during the town’s festival. Torta Cebuana, the name alone strongly implies its Spanish roots. It must have come from Spanish Tarta/Torta which seems to be a cognate of the English Torte and Cebuana means something or someone with origins from Cebu in which this delicious cake comes from. It is a product of ingenuity or necessity from the locals in replicating the Spanish breads and cakes that the Spaniards brought with them that they sorely miss perhaps; many ingredient substitutions brought many delicious breads and cakes of the Philippines to life.

Authentic Torta Cebuana is made using a local toddy wine, egg yolks and lard, aged lard. It is then flavored with anise seeds which is very common in old world treats. Tradition states that the yeast in the wine should be the sole leavener of the cake and should be enriched with lard that is at least a year old rendered during the previous year’s festival then baked in a “wood-fired” oven that uses coconut shells and husks as fuel. The naturally occurring yeast and bacteria in the wine also imparts a special fragrance and flavor to the cake particularly tang and improves the shelf life; the lard also makes it very moist and gives it its unique flavor and aroma along with the touch of smoke that the wood-fired oven imparts. Here is a video of local artisanal Torta production in Argao, Cebu.


I really want to taste this interesting cake but I do not have access to the requisite wine and aged or even just good quality lard so I need to make sound substitutions so I did some research on recipes online. Many recipes for the sake of convenience and modernity call for baking powder and/or baking soda and right-off-the-bat I scrap them since it is not what this cake is all about. Some recipes call for instant yeast which seems to be a decent substitute but one thing that will be missed is the tangy flavor. I tasted the wine once and it has a nice fizziness and tang due to the live yeast and bacteria in it and I suddenly thought of sourdough which may be different in form but will more or less produce a similar flavor profile. It’s my first time to bake a cake without mechanical or chemical leavening in the form of baking powder so I was a bit skeptical if it will succeed. I made a lot of reading about yeasted cakes and then sourdough leavened cakes that I saw here on TFL. With the prerequisite knowledge complete, I proceeded with a plan.


With its characteristics: naturally leavened, with a pleasant tanginess, rich with egg yolks, moist and rich with lard; I made my own interpretation of the cake. Natural leavening and tanginess from sourdough, free-range egg yolks from our own chickens, flavor and aroma from butter and moistness from corn oil are the components of this cake and an addition of baking them in a modern electric oven; I wonder if baking them in my clay pot though not as efficient will make them taste a little bit more old-world. I flavored it with vanilla because I am not that big of a fan of anise, though I think some lime zest will be closer to traditional and local. It hardly resembles the traditional product and with that many modifications, I decided to call this cake Torta Cebuana Moderna; a modern take on this cake but with its essence still there.


The ingredients were very simple: flour,sourdough, egg yolks, sugar, salt, butter and oil. I built my sourdough starter in three stages using egg yolks as a liquid and AP flour with a thick batter consistency. The final build contained the salt, sugar, butter, oil and vanilla. I then let it rise overnight. There were some mishaps on the way such us some stubborn bits of batter that do not want to combine with the other ingredients. I should have started the SD builds with a thinner consistency but I was worried it would slow down when thinned down too quickly especially as it will be used in a high sugar high fat application. I strained it and salvaged what I can. Not wanting to waste anything, I still baked the lumps.

After an overnight rest, not much has happened in the fluid batter but there was clearly some growth in the lumps. I deposited the batters in greased 6-inch fluted molds and let them rise for 3 hours. I made 3 cakes from both batters. Again, it looks like not much has happened in the fluid batter but the lumps is over the rim of the pan.I baked them at 200°
for 5 minutes and lowered the temperature to 180°C and baked for another 15 minutes; 20 minutes total baking time and the results were surprising!

The lumps did not show much growth in the oven and burnt on top while the fluid batter rose nice and tall with a beautiful hump not dissimilar to a Madeleine’s. The lumps almost had no taste but have an overly yeasty aroma and excess tang. The ones from the fluid batter have a slightly yeasty but complex aroma, dense and very rich and moist with the perfect sweetness and tang and a very nice buttery flavor that complements the sourdough. If you look closely, its not that different from the traditional Torta Cebuana in terms of looks, my crumb might just a tad less fine and moister.


If you look at its ingredients, torta is not that different from ensaymada. It’s like ensaymada in batter or cake form. If desired, you can also brush the torta with softened butter and sprinkle with white granulated sugar just like an ensaymada. It also goes well with Filipino hot chocolate. I never knew sourdough would make a great cake like this. It's been a year since I took the Licensure Examination for Teachers and I am fully-fledged teacher now so maybe this is a celebration cake for that. I am really thankful for all the blessings!


Filipino style hot chocolate - made from pure chocolate liquor, with or without sugar
and/or evaporated milk according to your liking. Tortas and ensaymadas go super
well with it.

Speaking of ensaymadas, here are some that I made for my co-teachers. I woke up at 4:00 AM to deliver them as fresh as possible to my co-workers without having to come late to work. They loved every bit of it, saying how artisanal they look and taste and its their first time tasting something like that.

PalwithnoovenP's picture
PalwithnoovenP

Hello TFLers! I've been very busy this early in 2019, I almost have no time to post and check TFL. I'm glad I had a little time to post this. I baked this early this January but I'm only posting it now because, you know, teachers have a lot of paperwork aside from actual classroom teaching.

This bread was inspired by NYC.This is a remake of my Potato Onion Sourdough "Bagel-Crust" Squares but with minor differences; the inspiration came from Knishes which are also very famous in NY. In addition to baking it in an oven, I used sauteed onions instead of dehydrated onions which is how filling for knishes is commonly done.


I also added lots of freshly ground black pepper. Potato, onion, pepper; you know it's going to be delicious. It was so fragrant from the pepper.


Black pepper here as it clumped in one area of the raw bagel. I love how it looks.

I dunked half of them in black sesame seeds on both sides after boiling because I love a bagel with sesame like last time and its look.


I cut some into "squares"  just like last time because I just can't enough of it. :)


The ones without seeds stuck to the parchment paper. What if I want to make plain ones? Anyone who knows how to deal with this? 

The crumb. Potato really makes a huge difference.


Eat with a thick schmear of cream cheese.


My "schmearing skills" are not on point so it was not thick. No problem, dunk every bite in extra cream cheese!

Pardon the messy look of the following pictures. Cream cheese almost everywhere. :)


The crust was crispy and a little delicate that only boiled bagels can have. The crumb was softer than a plain bagel but chewier and tighter than my previous version. If you look at the crumb on my previous post you can see that it was a lot more open and softer, it was also moister probably due to the shape. The flavor was almost the same as I remember, like a good pizza with tang from the sourdough and sweetness from the sauteed onions but I like this one more because of the heat and fragrance of the black pepper. Really really good with the cream cheese!

-----------------------------------------------------------------------------------------------------------------------------------------------------------

I also made some wickedly good Chocolate Chip Cookies just like how a famous bakery in New York does it: gigantic and half-baked. It told you, I'm bringing a taste of NYC in our home. I used the best chocolate I can find because it is half the cookie. It's my first time to make cookies and I did not expect they would be that good.


How huge are they? They're as big as or even a touch bigger than my palm.


Look at the melty pockets of chocolate amidst the half baked dough with 3 perfect layers; a crispy craggly outer layer, a chewy middle layer; and a thick soft gooey center. Sorry if it was out of focus. I was in a hurry because I can't wait to eat it. :)


Perfect with a cold glass of milk. Enjoy!

PalwithnoovenP's picture
PalwithnoovenP

To start the year, I baked one of the most difficult yet luxurious Filipino breads, Ensaymada! It originated from the Mallorcan Ensaimada but the Filipino ones are very different from its ancestor that someone said they should go by a completely different name. The Ensaimada Mallorquina was more like a croissant, flaky and laminated with lard; the Filipino Ensaymada (Notice the use of a masculine adjective for a feminine noun and different adjective placement?) is brioche like, a soft rich bread. Our ancestors have really made it our own. Notice how the spelling changed to reflect Filipino orthography? Before WWII, when Spanish was still a prevalent lingua franca in the country, it was used to be spelled Ensaimada and made with lard (lard brioche, I can't imagine how good it was.) that clearly reflects its Spanish ancestry.


It is made with flour, milk, egg yolks, yeast, sugar, salt and butter—lots of butter! This is a bit more modern yet still traditional way of making them; remember lard was the traditional fat of choice. They are then coiled like a snail and placed in fluted molds then baked until rich brown. THEN, as if there was not enough butter and sugar already in the dough; it is brushed with more, (lots of) softened butter and sprinkled with sugar and occasionally cheese, aged cheese. I know, it sounds weird to put some cheese on top of butter and sugar but that's how we love it and as you know; Filipinos love the combination of salty-sweet/sweet-savory. Traditionally queso de bola, a local version of aged Edam cheese is the topping of choice but some dress theirs even more: people in the capital city of our province top them with salted egg and ham in addition to the cheese.

It goes well with Tsokolate de Batirol Filipino-style hot chocolate which I forgot to take a picture because we were in the moment of eating this ensaymada. It's the best we've had. We have never tasted anything like it before.


They are usually yeasted but I decided to make a sourdough version and it's my first time making this bread. Two breads immediately came to my mind; panettone and pand'oro, both super rich but naturally-leavened. I had a failed panettone earlier last year so I am challenged and determined to try make a similar bread and succeed. I followed the general outline of panettone recipes and combined it with the steps and ingredients of various Filipino ensaymada recipes. The difference between my ensaymada and panettone is mine is less rich in sugar and butter (the topping compensated for this :D) in the dough but definitely richer in egg yolks.

This one was made with three doughs before the bulk ferment. No additional water of milk, all of the hydration came from a ton of egg yolks. The only water came from the stock starter and the small levain build. My hands got soar the next day due the intensive kneading required but I was extremely pleased when I saw how strong the windowpane was after the last of the butter was completely absorbed! :)


Final proof was quick despite the high amount of sugar, only 4 hours at 24C, imagine how it would have went if it was a hot summer day! The dough was already more than doubled when I put it in the oven. I baked it at 190C for 25 minutes. Oven spring was non-stop for 15 minutes, I was a bit concerned that it might fall over due to it being unable to support its own weight but luckily it did not. The dough expanded 4-5 times in the oven all created by my starter. She is that strong now.


After cooling, I slathered the Ensaymada with a generous amount of softened butter and sprinkled it with white granulated sugar and grated a good amount of cheese right on top of it. I could not find the traditional cheese so this one had some sharp cheddar on it. Enjoy!


They were so tall and light, they collapsed a little bit after cooling. I should have went the panettone route and hanged them upside down to cool. I think they could have been lighter had they not collapsed a bit.

The Ensaymada was very rich yet light which makes it all the more addicting and dangerous. I could detect a slight slight tang but it was masked or actually played well with the rich, buttery, and sweet flavors. The saltiness and savoriness of the cheese balances the sweet flavor of the bread and the topping, and adds another dimension of richness.

The crust was a bit crispy and flaky. The rich brown hue to which it was baked adds to the overall flavor of the bread. The crumb has a rich golden yellow color from all of the free-range egg yolks from our own chickens. The high number of yolks also added a savory note to the bread. Ensaymada is a bread that harmoniously floats in the middle of the sweet-savory continuum; it's up to you to which direction to push it. The crumb is very shreddy, and feather light; I feel like it's the right crumb for a pand'oro or panettone and so I feel more empowered to make them in the future and I think I have a higher chance of success in making them which just a few more modifications. It's really lighter than air!

Unfortunately, my photography skills doesn't seem to capture the lightness of the Ensaymada. I don't know why the rich golden hue didn't show either in the photos. I'm sorry too, if most photos were out of focus. :) They just look better in real life.

Ensaymada Crumb


Happy New Year!!!

Happy Baking in 2019!!!

PalwithnoovenP's picture
PalwithnoovenP

As I am on a long holiday vacation now and school starts again just after the New Year, I decided to use this opportunity to make some viennoiseries before the year ends.

I made some sourdough pains au chocolat in my new oven to celebrate 2018 and the New Year. We are just minutes away from 2019 here! I have received so many blessings this year: from passing the board exam, becoming a licensed professional teacher, having a highly rewarding profession in many aspects, to having a new oven; I have so much to thank for and words are not enough to thank the Lord!

My posts are always wordy but I am going to keep this one short and sweet and just let the photos do the talking. :)


I will not roll them as thin during the final roll-out next time so the honeycomb structure will be bigger and more defined.


Doesn't look that far from my clay pot version. Right? :) I just did not put as much chocolate this time.


Clay Pot Pain au Chocolat May 2016


Oven Pain au Chocolat December 2018


I wish all of us a more blessed happier and healthier 2019!

Happy New Year!!!

Pages

Subscribe to RSS - PalwithnoovenP's blog