The Fresh Loaf

A Community of Amateur Bakers and Artisan Bread Enthusiasts.

Franko's blog

Franko's picture
Franko

In the latter part of October I was asked by Michael Taylor of Brod & Taylor, makers of the new Folding Proofer if I would be interested in being a tester for their new product. I had been reading the comments and recommendations posted by Eric Hanner and Sylvia regarding the proofer with a good deal of interest and had pretty much decided to purchase one for myself at some point in the New Year. Naturally, Michael’s offer was gratefully accepted and the proofer was shipped out to my address on Vancouver Island, arriving last week. Once I had it out of the box my first impression was how stylish it looked, considering it's basically just a plastic box with a heating plate attached to it. While I'm more interested in function than form I do appreciate that they've made it as attractive as it is. The set up is quick and easy with all the pieces slotting together nicely. Then it's just a matter of adding some water to the humidity tray, putting the lid on, plugging it in and selecting a desired temperature using the digital control panel. I'd decided before the proofer arrived that I'd run it initially over an extended period of time (almost 40 hours), 1- to see if it would keep a constant temperature for the duration, and 2- to see whether being on continuously for a lengthy time would cause it to fail in some way. The proofer did an excellent job of maintaining heat throughout the entire 40 hours. Even when I checked it at 2:00AM just before going to work one morning and with our house at it's coldest, it was just 2 degrees negative compared to the temp I'd set it at. I used a calibrated cable type meat thermometer to read the actual temp inside the box, and while I wouldn't swear it was 100% accurate 100% of the time it was close enough for something like this to satisfy me it was well within an acceptable temperature range. I'd set the cable thermometer at various levels and locations inside the proofer as well during this part of the testing to see if there were any significant cold spots. There were none that I could find. The proofer recovers it's heat within 3-4 minutes if the lid has been removed for any reason, so no prolonged heat loss to be concerned about. For a uninsulated plastic box this is pretty darn good, I thought at the time. Next up would be getting a levain going for a bake the next day.

After the initial testing I shut the proofer down for a few hours then started it up again shortly before going to bed, setting the temperature at 70F about 20 minutes before mixing a 100% rye levain. By the time the levain was ready for it's 14-16 hr fermentation the proofer was spot on at 70F. In the past whenever I've done this, particularly during our colder months, I've always known that the levain temperature will be lower than optimum by the time I get up the next morning. This time I was fairly confident I'd have a good strong batch of yeast cells to work with for a change. Sure enough next morning it was quite active and bubbly and far better than any previous efforts I've had at this time of year. I gave it the other half of it's feeding and left it for the remainder of it's 15 hour fermentation time. I think the levain was more ready to begin mixing than I was when the time came.

 I thought if I couldn't get a decent looking loaf of bread out of this mix it wouldn't be because the leaven wasn't strong enough. The bread I was making was inspired by Jeffrey Hamelman's 66% Sourdough Rye on pg 210 of his book 'Bread'. Although I added and altered a number of ingredients and percentages, I kept to his instructions as far as times and temperature for bulk and final fermentation were concerned. DDT for most of his rye breads is 80F, which is easy enough to achieve by adjusting the water temp, but maintaining that temp during bulk and final has often been a royal pain for me. Not so this time. When the levain was removed from the proofer for mixing I bumped the heat up to 80F in preparation for the bulk ferment and final proof and again it was at the correct temp by the time I needed to use it. How nice! Bulk ferment of 35 minutes, shape, slash, and back into the proofer for a final rise of 50 minutes. Baked at 500F for 10 minutes then 450F for 20 min. and 440F for 15 min. I think it turned out a good loaf with a respectable profile, an even crumb, and well coloured crust.

The next bread I mixed was another from Hamelman's 'Bread' but shifting from rye breads over to Chapter 5 on Levain Breads. I chose his Semolina Bread p -171 to mix, as the combination of durum flour and toasted sesame seeds is one I've enjoyed previously in the Tom Cat Filone from Maggie Gleezer's 'Artisan Baking'. Other than using mature rye starter for the levain build, increasing the percentage of sesame seeds, and a minor increase in hydration, I followed Hamelman's formula and procedure closely. Once again the proofer cooked up a very active levain to use in the mix as you'll see from the volume of the baked loaf in the photos below. The loaf was scored Fendu style.

 For a final test I decided to see how the proofer would do with a rich, laminated dough, in this case a danish pastry dough from 'Advanced Bread & Pastry' by Michel Suas. I wasn't really anticipating any problems doing danish in the proofer, I simply wanted to make a few for myself, as well as for my wife to take for some of her co-workers. The danish were proofed at 78F for around 90 minutes, coming out nicely expanded and slightly moist. They baked off with a good jump, even colour and tasted great.

It should be clear at this point that my overall impression of the Folding Proofer is quite positive, however there is some room for improvement that I’d like to see in future models.

  • The first issue is that the lid has no way for it to stay in an upright position without the user physically holding it up by hand. If you need both hands to remove something from it, the lid has to be removed entirely and placed elsewhere until you've removed the item from the proofer. It's a nuisance and something that could be easily and inexpensively resolved I'm sure.

  • Front loading would be preferable to top loading particularly if the user is stacking pans or bowls on 2 levels, and solves the first issue as well.

  • The inside length is just a 1/2” short of accommodating a fairly common sheet/jelly roll pan size of 15 1/2” x 10 1/2”. The inside width of the proofer is generous at 12 1/2” so it seems the dimensions are slightly off and need to be reconfigured.

    This next wish is intended for a deluxe model should Brod & Taylor ever make one, since I'm sure it would increase the production cost considerably. A user controlled humidity level would give the user another degree of control overall and could be used to compensate for various ambient conditions.

Because I bake professionally for a living and work in a well equipped shop I've become accustomed to having the proper tools in order to do my job in the best way possible. Having to rely on some sort of makeshift proofer set up for my home baking is something I've never been entirely happy or confident with. An easily controlled environment for fermentation is of far more value to me for home bread production than a mixer is when it comes right down to it. If I'd known a few months ago while I was shopping around for a new mixer that this home proofer would be coming on the market, I would have kept my money in my wallet and waited for it to become available, and have spent less than what I eventually paid out for the mixer. Much as I like a mixer for making cakes and pastry, etc, I don't need one for bread making as much as I need something with a reliably constant source of heat and moisture for bringing the dough to it's best potential. My feeling is that anything that can bring a higher degree of control to the process of home bread making such as the Brod & Taylor Folding Proofer does is worthy of the same serious consideration we use when purchasing a new mixer or oven. It's good product and it does what it's designed to do very well.

Happy baking,

Franko


Franko's picture
Franko

The first time I made and tasted a rye bread with toasted sunflower seeds I was hooked. It was based on Jeffrey Hamelman's 80% Sour Rye with a Rye Flour Soaker from his book 'Bread' . I adapted it slightly by adding some toasted seeds to the mix and ended up with one of the most delicious breads I've ever made. As much as I enjoy eating a high percentage rye bread it's not something I like having on a regular basis. With this bake I wanted to see if a 25%-30% rye would do as well as a high ratio rye in terms of complex flavours. I was happy to discover that this bread is every bit as flavorful as the 80% but with a lighter texture, making it more suitable for my everyday bread. Quite often now I find with lean breads such as this one, that Chad Robertson's 'Tartine' method for making his Country Bread gives me the kind of crust and crumb that I prefer. I don't always use a Dutch oven for the baking, but on this bake I did, hoping to maximize as much of the flavour from the toasted seeds as possible as well as have that lovely burnished crust typical of Dutch Oven bakes.

Procedure:

The hydration and salt percentages were kept close to Robertson's Tartine Country Rye however I changed everything else in the original formula, but basically kept to Robertson's procedure as much as possible. The dough was hand mixed, then bulk fermented @ 76F-78F over 3 hours with stretch and folds in the bowl done every 30 minutes for the first 2 hours. The last S&F was done on the counter before a 30 minute rest and eventual shaping. The final rise was done in a floured banneton over a 3 hour period and then baked in a 500F pre-heated Dutch Oven for the first ten minutes, then at 470F for the remaining 45 minutes bake time. After 30 minutes I took the loaf out of the DO and placed it on the baking stone for the last 15 minutes of the bake, then turned the oven off and propped the door open for an additional 20-30 minutes before removing it to rack for overnight cooling.


Evaluation:

The final proof was more than it needed by 20-30 minutes to give it a higher profile, but the crust is fine with a good crunch to it. The scoring is a bit wonky I'm afraid and I really have to remember to keep to a few straight slashes when the dough has a high percentage of seeds like this one. The blade simply catches on too many of them during slashing to get any good, clean cuts for an attractive pattern. Cosmetic sins aside, the crumb I like...a lot, and the flavour is wonderful with a long lasting medium sour tang and a rich nutty taste from the toasted seeds that goes well with everything I've pared it with so far.

 The bread matched particularly well with a smoked salmon and shrimp pate that I'd made the day before, one of the results of my new interest in charcuterie. To my surprise our normally aloof feline has suddenly become my new best friend when the salmon pate comes out of the fridge for a snack. I'm not sure which of us enjoys it more spread on a piece of the toasted bread, but I know our dog is not happy with this turn of events one little bit.

Formula below and a link to the spreadsheet for anyone who'd like to download a working copy for themselves.

https://docs.google.com/spreadsheet/ccc?key=0AjicIp92YPCTdHlSZm5nSEd4R1l4S1o0LUc2TXBRcnc

Cheers,

Franko

25 % Sour Rye Bread with Toasted Seeds%Kilos/Grams

 
Ingredients  
   
Levain  
Organic AP Flour50.00%29
Dark Rye Flour50.00%29
Mature Rye Starter -100%12.50%7
Water-75F100.00%58
Total weight212.50%124
DDT- 65-70F 12-16hrs  
   
Toasted Seed Mixture  
Sunflower Seeds80.00%77
Pumpkin Seeds20.00%19
Total weight100.00%97
   
Final Dough Weight
 1200
Final Dough 
Organic AP Flour75.0%403
Dark Rye Flour25.0%134
Levain23.0%124
Toasted Seed Mixture18.0%97
Sea Salt2.3%12
Water80.0%430
Total weight223.3%1200.00
DDT-75-78F BF- 2.5 hrs with 2-3 S&F  
   
Overall Formula Kilos/Grams
Total Flour100.00%596
Bread Flour72.56%432
Dark Rye Flour27.44%163
Mature Rye Starter-100%1.22%7
Toasted Seed Mixture12.99%97
Sea Salt2.08%12
Water81.95%488
Total weight 1200


Franko's picture
Franko

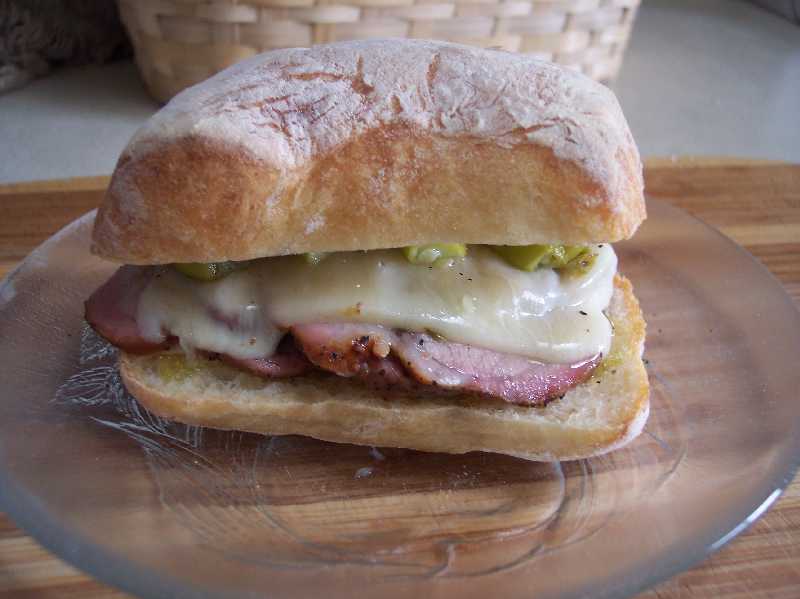
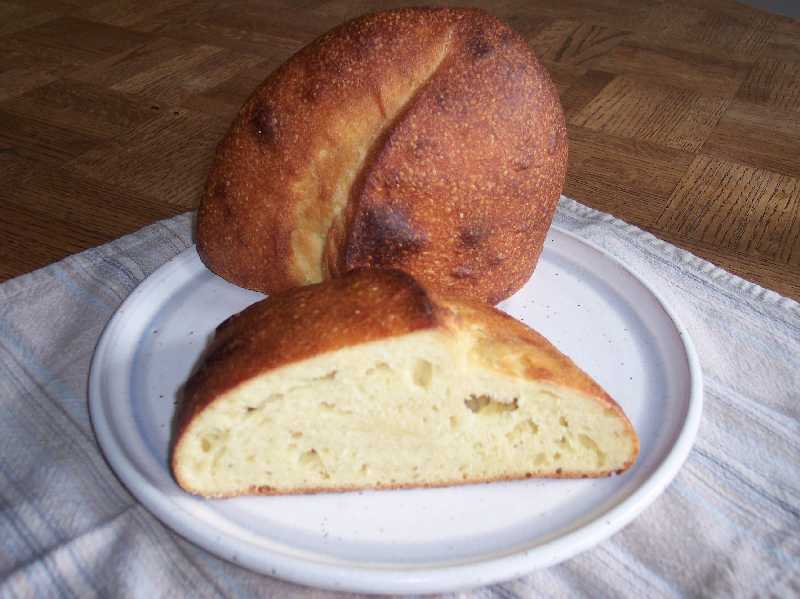
We don't see a lot of posts on sandwiches on this forum, which I'm sure is what most of use our daily bread for. I thought it'd be fun to do something a little different by including a procedure on the meat that went into this particular favourite sandwich of mine.

Yesterday morning I mixed ciabatta dough for ciabatta buns or ciabattini in order to make one of my all time favourite sandwiches, the porchetta sandwich. Ciabatta is a bread I seldom make for sandwiches but when I've have the time to make porchetta I can't think of another bread I'd rather put it on. Hamelman's Ciabatta with Biga was the formula used, scaling it out to make about a kilo of dough to work with. It's the first time I've used this formula for Ciabatta but certainly not the last as it makes a very nice dough that's relatively easy to handle, and has an excellent aroma and flavour once baked. The ciabattini were scaled at 105 grams per, the remainder of the dough was used for a smallish loaf that I'll use for a sub sandwich.

The crumb is soft and moist, with no large holes, perfect for soaking up the flavours of the lightly smoked porchetta and any other condiments I might add, which is usually a peperoncini or two, some thin slices of provolone and a drizzle of good olive oil.

Although this version of porchetta is not close to an authentic one where the pork shoulder is stuffed with a sausage type filling from other parts of the animal along with various other ingredients, it is quick and easy to prepare and has plenty of flavour.

The recipe I used as a reference point is Mario Battali's which can be found here , but I just made a blend of olive oil and the herbs and spices he suggests (and some he doesn't) in a food processor, rather than make the sausage type filling this time. The herb and oil paste is then spread over the pork that's been cut in such a way that it can laid flat and then be rolled up and tied.

Once rolled and tied it was rubbed with sea salt and a generous amount of black pepper, placed in a zip-lock bag and liberally doused with white wine. It marinated in the fridge for four days, being turned once a day to ensure all of it was exposed to the wine over the course of marination. The day before cooking it was removed from the marinade and dried off, then wrapped in a double layer of cheese cloth and put back in the fridge to dry overnight. The next day the meat was cooked in a hot smoker for two hours at 220F using a very light smoke of oak wood. It's not essential that the meat be smoked. It can be made with just a conventional oven, but a bit of smoke adds a lot to the overall flavour.

Before going to the oven after initial 2 hour smoking

After that it went into the oven for 2 more hours at 250F or until the internal temperature read 170F. After 5-10 minutes out of the oven it was wrapped in saran and allowed to cool down slowly before being placed in the fridge overnight. The meat is savoury and succulent with a bit of crunch from the fat that has turned to cracklings over the long cooking time. Redolent of garlic, fennel seed and rosemary, with some heat from the black pepper and a few chili flakes that were included in the seasoning, it packs an incredible amount of flavour into the 2 or 3 slices I used to make the sandwich in the photos below.

The sandwich is best if the meat and bread are warmed first before it's eaten and I'll usually put the cheese on the meat while its warming to melt it slightly. While it's not a true porchetta or porchetta sandwich in the authentic sense , it does make a very satisfying lunchtime snack.

Happy eating,

Franko


Franko's picture
Franko

 Last week I posted on a bake I did of a bread called Le Pavé d’Autrefois that didn't turn out the way I'd hoped it would , particularly the crumb. Click on the link for all the grisly details and graphic images. http://www.thefreshloaf.com/node/25171/le-pav%C3%A9-d%E2%80%99autrefois-and-multigrain-pain-au-levain Even though last weeks bread was under fermented, it held the promise of great flavour if a few procedural changes on my part were made. By allowing myself more time and having better control over temperatures during the bulk fermentation and final proof, I was confident I could produce something a little closer to what Alan/asfolks was able to achieve when he posted on this bread back in August. http://www.thefreshloaf.com/node/24581/le-pavé-d’autrefois

This bread does need a lot of time. I began at 6:00AM by mixing the flour soaker of all purpose, whole wheat, rye and buckwheat which then sat covered until 10:00 AM when I began the final mix. By the time bulk ferment, resting/shaping, proofing and baking were finished it was almost 5:30PM. I realize this amount of time for a single loaf might sound slightly mad to folks who don't bake these types of breads, my wife being a good example, but I was on a mission of sorts that I'm sure many TFL'rs can relate to. As it was, I had a few other non bread projects going on in the kitchen as well, so for me it was time well spent. However...next time I make this bread I'll try doing it with an overnight retard just to see if there is anything to be gained from it other than an extra hour or two of sleep.

This session yielded what I feel is a much improved loaf, with a more open, though not even, crumb. The crumb on Alan's Pave is the benchmark for me, and this one is still a ways off that, but it's getting there. The flavour of this loaf is much better as well. With a proper fermentation the flavours of the various grains are more balanced and without the 'green' or raw taste of under fermented dough. I think the best thing you could pair with this bread is a favourite cheese and a good glass of wine or beer. Just on it's own it has more than enough deep flavour to satisfy any sourdough or multigrain lover. Generally I'm happy with the results, not entirely satisfied yet, but closer to the mark this time around.

Le pavé d’autrefois


Ingredients

%

Kg

Levain


Mature Rye Starter-100%

24.8

35

Whole Rye Flour-Rogers

100

141

Water

100

141

Total Weight

224

317


Soaker


Organic AP Flour

55.85

315

Whole Wheat Flour-Sloping Hills Farm

18.97

107

Medium Rye Flour-bulk generic

12.5

71

Buckwheat Flour-Nunweiler's

12.5

71

Water

100

564

Total Weight

199.82

1128


Final Dough


Organic AP flour

100

286

Soaker

394.4

1128

Levain

30

317

Sea Salt-Sel Gris

2

20

Water

13.9

40

Total Weight

540.3

1791


Total Flour

100

1008

Total Hydration

75.5

762

DDT-78-80F


PROCEDURE:

Mix levain 14 hours prior to mix with 2 feedings, and ferment at 70°-75F. Mix the soaker ingredients 4 hours previous to the final mix

Mix Levain, Soaker, Final 286g of AP flour and salt. Cover with plastic and begin the bulk ferment.

Stretch and fold 4 times during a 4 hour bulk ferment. Turn out dough onto heavily floured surface and fold over on itself. Rest 30 minutes. Spread out dough by lightly dimpling with fingertips, being careful not to degas the dough. Cut into rectangular slabs roughly 1/3rd longer than the width, place on floured linen for a final rise of 45-90 minutes. Bake on a 500°F preheated stone for 10 minutes, with steam system in place. After 10 minutes reduce the temperature to 475F, remove steam, unblock the vent, and rotate the loaf for even colouring. Continue baking for 20-30 minutes. Check for an internal temperature of 210F , then leave in a cooling oven with the door slightly ajar for 15-20 minutes. Wrap in linen and cool on racks for 8 hours or overnight before slicing.


The other loaf pictured is a Francese, the formula from Advanced Bread & Pastry by Michel Suas. Back around the weekend of March 18/19 of this year I'd planned to do a bake of this bread and coincidentally it turned out, so had David Snyder, posting his usual meticulous writeup along with photos of his excellent Pan Francese.

http://www.thefreshloaf.com/node/22757/pan-francese-advanced-bread-amp-pastry

For anyone wanting to make this bread David has provided the full formula and procedure in the link above.

I thought OK, no problem, I'll stick with the plan and make mine on Sunday to post on Monday. If I recall correctly I was email chatting with breadsong that evening and discovered she was so taken with Davids loaf that she decided to do one as well. Breadsong's loaf is posted a little further down in David's post and it's gorgeous! Well now I'm thinking do I really want to add a third Francese to the mix when two of the best bakers on the site have contributed stunning examples of the loaf already. I decided to make something else and do the Francese at another time. Six months have passed since then and I thought maybe it was time to finally have a go at it. Like David and breadsong I just followed the formula and procedure from AB&P, but only making a single loaf. In terms of flavour I don't know that I prefer this to a baquette, but I do prefer it to baking a baquette in my home oven. The stone I have isn't long enough to accomodate a decent size baquette so I don't make them, but the Francese works just fine. It's a good bread, with lots of crunch and chew to it, and relatively easy to make since there's no molding to speak of involved. It needs a minor tweak in the flavour profile but I can't put my finger on just what it is yet. My guess is it's probably rye or sour...likely both.

Cheers,

Franko


Franko's picture
Franko


Back in early August asfolks/Alan posted on a bread called Le pavé d’artefois http://www.thefreshloaf.com/node/24581/le-pavé-d’autrefois that I've been wanting to try since first seeing it. Alan's bread caught my eye not only for it's rustic appearance and lovely open crumb, but as well for the fact it uses the majority of the total flour as a soaker. That it incorporates rye and buckwheat along with wheat flour, I thought would make it a bread with some interesting and complex flavours, particularly if it was made using a rye sour leaven. Alan's version had such a gorgeous crumb to it, I hoped my own would be somewhere in the same ballpark. Alas, it was not to be with this attempt at it, not even close, but I was right about the taste being complex. Even the small percentage of rye and buckwheat in the formula contribute a great deal of flavour to the loaf. The problem I ran into was the soaker itself, since all the water for the final mix is provided by the soaker. The soaker used had been left overnight and part of the next day out of trying to manage it into my workday schedule. Local temperatures overnight and the next morning were down around 10C/50F and we keep our house cool at night and while at work. Trying to reach a warm enough temp for proper fermentation was problematic to say the least, despite my best efforts and the time I had available, it remained in the low 70F range. From outward appearances the dough seemed like it was doing OK and had a good jump in the oven, so I was somewhat surprised when I cut it the next day to find the result that I did. In hindsight I should probably have put it in the fridge overnight and let it ferment slowly rather than try to push it towards something it wasn't ready for, and as you can see from the photo below the fermentation was incomplete. The large holes being 'big enough for a mouse" to quote Hamelman. Even with this under-fermented loaf, the flavour is very good and certainly worth doing another mix of it in the very near future, but with a few procedural adjustments.


Well because my success rate on making a new bread for the 1st time is about 50/50 I thought it might be a good idea to mix another dough following the Pave... just in case.

My insurance bread was a Multigrain Pain au Levain that I've baked several times over the last month and have had consistently good results with it. It's sour, chewy, has a nice moist crumb to it, and a crunchy crust. If I only had one choice of a bread to eat from here on, this would likely be it. The formula and procedure I put together is influenced by both Jeffrey Hamelman and Chad Robertson. Primarily Hamelman's Five Grain Levain, which I've made and enjoyed tremendously, and Robertson's method of overnight retardation and baking in a Dutch oven for greater crust caramelization. This bread had roughly a 24 hour retarded fermentation, slightly longer than I would have preferred, again because of work schedules, but it didn't seem to suffer too much because of that.  I wound up with a sort of Maltese Cross scoring effect that I wasn't expecting, but rather like the look of.

Procedure:

DDT-76F

  1. Mix the levain 16-18 hours previous to the final mix. Note: I fed the levain twice over this time using 50% increments of the white flour.

  2. Mix the grain soaker at the same time as levain.

  3. Combine the flours, leaven and water for a 1 hr autolyse.

  4. Mix on 1st speed for 4 minutes, add salt and continue mixing for 2-3 minutes longer or until there is slight dough development.

  5. Mix on 2nd speed until the dough is near medium development and add the grain soaker.

  6. Continue on 2nd speed (or by hand) until the dough is cohesive and the grains are thoroughly distributed in the dough.

  7. Bulk ferment for 2-2 1/2 hours with a full stretch and fold after 60 minutes and 120 minutes.

  8. Round the dough lightly and allow to relax for 15-20 minutes.

  9. Shape as desired, place in a floured banneton or brotform, cover and leave overnight in refrigerator.

  10. After the dough has come to room temp or close, place in preheated 500F Dutch Oven, turn the heat to 460 and bake for 20 minutes. Remove the DO lid and continue baking for 10-15 minutes depending on dough size. Check for an internal temperature of 210F before removing from oven. Note: Once I'd removed the loaf from the DO it was placed on a baking stone for the last 5-10 minutes of baking.

  11. Cool on a rack, covered with linen, for 8 hours or longer before slicing.

Link to spreadsheet formula:

https://docs.google.com/spreadsheet/ccc?key=0AjicIp92YPCTdDFSZFhNSHJuaXNrcGlsOTJfaV9JZ1E&hl=en_US

Best Wishes,

Franko


Franko's picture
Franko

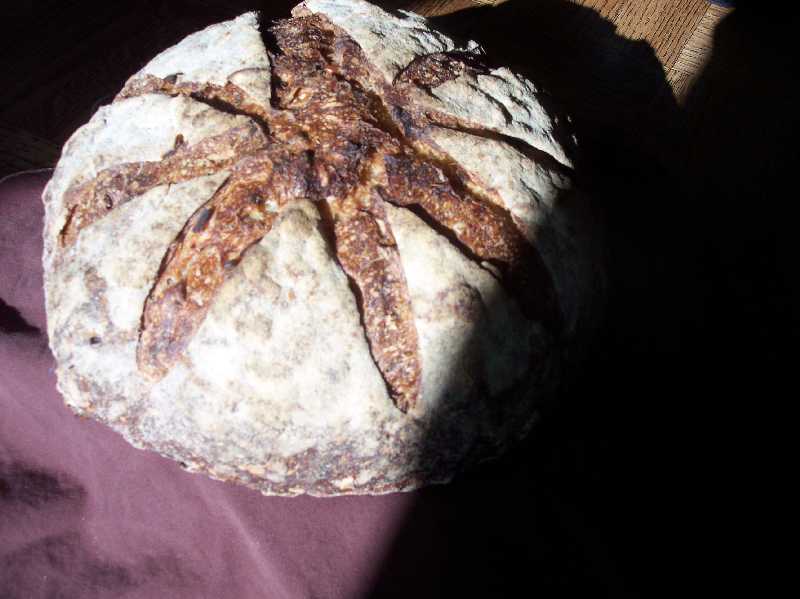
Pain au Levain with Red Fife 75% Sifted

Last week I posted a bake of this bread, http://www.thefreshloaf.com/node/24636/sweet-amp-sour that although a good loaf, I wasn't entirely happy with it because of it's close crumb and slight under baking. The finished loaf however resulted in a flavourful combination of the three different flours used in the mix, which I felt had good potential for an even greater flavour profile. One of the things I wanted to change from the last bake was the level of sour flavour, which was not as strong as I like. Since then I've been building my starter to a fairly stiff consistency to bring more acidity to it. With the warm temperatures we've been having here on Vancouver Island recently it's become a very active and tangy community of yeast cells. The mix, bulk ferment and final rise for Pain au Levain went well, giving me enough dough for two 800 gram loaves, one of which was shaped as a boule and placed in a brotform, and the other as a batard of sorts. I'd lined a wicker bread basket with linen and very clumsily sewn it into the basket to make a brotform, all the while suffering through stabbing myself repeatedly with the needle and hearing the occasional burst of laughter from across the room. It's not a thing of beauty but it does the trick, giving the dough a shape that's somewhere between a boule and a batard, or as David Snyder called a similar one of his, a 'boutard'. Both loaves went into a 500F oven turned down to 460F after 5 minutes and baked for 35-40 minutes with steam system in place during the first 5 minutes. With this bake I didn't have to rush off to a golf game, so the breads had a thorough bake, checking the internal temps for a 210F reading before I removed them to cooling racks and wrapped in linen. The loaves have a more pronounced flavour this time and a good sour tang that stays on the palate after eating. The crumb is more open than the previous loaf and with a bit of gelatinization as well. A good result for both loaves that I'm satisfied with.


Attamura Loaf

Somewhere along the way during the 3 builds of the levain I over- scaled and wound up with more levain than I needed for the Pain au Levain mix I was doing. Hmmm... Well rather than return the excess to the starter, I decided to try making an Altamura type bread using Atta flour, or Attamura, a project that Varda http://www.thefreshloaf.com/user/vhaimo has been working on over the last few weeks with some good results to show for her efforts.

The mix was made almost entirely with Golden Temple durum Atta flour except for the standard wheat flours and rye in the levain, roughly 67 grams total or 13.4% The levain was 27% of the mix, hydration was 70% (not counting the levain) and the salt at 2% for 500 grams of Atta flour. I did the mix using my new toy, a Bosh Compact, as it has a very gentle folding action when used on 1st speed that I felt would be just right for slowly developing the fragile gluten of the durum flour. The dough came together almost identically to ones that I've made previously using Extra Fancy finely milled durum flour, making a very smooth and supple dough. The dough had a temperature of 79.3F going into a 2 hour bulk fermentation and stayed in the mid 70'sF range throughout. Stretch and folds were done every 30 minutes and it was clear that the dough was gaining strength and fermenting well at each of these intervals. After the last S&F the dough was rested for 20 minutes and then shaped in a cap style by pressing the dough into a disk and folding it to almost meet the opposing side of the disk. The shaped loaf was placed fold down on floured linen and covered with another piece of floured linen for a final rise of 2 hours, then tipped on to a parchment covered peel and slid into a 450F oven on a stone.

So far so good, this might actually work I thought. The door of the oven was left open for the 1st 15 minutes, then closed for the duration of a 40 minute bake. No steam was used during the bake. After checking the loaf for an internal temperature of 210F, I left the loaf on the stone, turned the oven off and propped the door ajar to allow the loaf to cool gradually over the next hour.

 The final result of this bake is something that looks like an Altamura type bread but has a deeper flavour than the one I made with Extra fancy durum flour a few weeks back. I actually prefer the flavour of the durum Atta flour over the X Fancy, which works out well as it's considerably less expensive and readily available here in B.C. I think two of the key factors in the success of this loaf was the high level of acidity contributed by the levain, as well as steady temperature during the bulk fermentation phase. Both Hamelman and Suas mention in their books 'Bread' and 'Advanced Bread & Pastry' respectively, that increased acidity and use of preferments will help strengthen the fragile gluten network of high ratio durum mixes. I'm satisfied now that a reasonably good loaf can be made using 100% (or very close to) Atta flour keeping these two factors in mind as critical to success.

Formulas and photos below.

Best wishes,

Franko

Pain au Levain with Red Fife 75% sifted


Ingredients

%

Kg


Levain


Central Milling Artisan White Malted

94

100

Nunweiler Dark Rye Flour

6

6

Mature Starter-stiff

20

21

Water

60

64


191

Final Dough


Central Milling Artisan White Malted

43.76

365

All Purpose Organic White

31.17

260

Medium Rye Flour

5.03

42

True Grain Bakery & Mill Red Fife 75% sifted

20.02

167

Levain

22.9

191

Water

70

616

Sea Salt

2

18

Total Percentage &Weight

194.88

1659

Total Hydration

73.8

690.5

Total Prefermented Flour

13.9

116.5

Desired Dough Temperature-78F/25.5C

PROCEDURE:

Mix the flours, levain, and water till all the flour is evenly saturated and autolyse for 1 hour.


After autolyse is complete mix the dough on 1st speed for 6-7 minutes, or by hand until the dough is smooth and cohesive with medium gluten development. Place in a bowl and cover with plastic for a 2 hour bulk ferment.


Stretch and fold the dough in the bowl every 40 minutes over 2 hours. Ambient temperature for this bulk ferment was 71-72F/21.6-22.2C . After bulk ferment is complete, divide the dough into desired weights and round lightly. Cover the pieces with cloth or plastic and rest for 15-20 minutes.


Shape the dough pieces into batards or boules, using brotforms, or free-shaping as desired.


Final proof of 1.45 to 2 hours depending on ambient temperature and scoring considerations. Tip the loaves onto a parchment/semolina lined peel and allow to air dry for 5-10 minutes before scoring. For the batard, a slightly shorter proof is needed to achieve the ear effect, which is done at a 30 degree angle not quite end to end.

The boule can be slashed as desired, but for the side slash pattern of the loaf pictured, it was allowed to proof marginally longer to avoid it blowing out above the side scoring.


Bake in a 500F/260C preheated oven, on a baking stone, with preferred steaming method in place. Bake for 5 minutes at 500F/260C, then lower the heat to 460F/237C, remove the steam system and continue baking for 35-40 minutes, rotating the loaves midway through the bake for even colouration. Check for an internal temperature of 210F/98.8 before finally removing the loaf to cool. Cool on a rack, wrapped in linen, for a minimum 5 hours, or overnight before slicing.


Attamura Bread


Ingredients

%

Kg/Grams

Levain


All Purpose flour

100

100

Water

50

50

Mature Starter-stiff

20

20

Total Weight


170


Final Dough


Golden Temple Durum Atta Flour

100

500

Water

60

300

Levain

27

135

Sea salt

2

10

Total Percentage & Weight

189

945

Total Hydration

70


Total Prefermented Flour

22


DDT of 78F-79F


PROCEDURE:

Levain

Build the levain over 12-16 hrs using 3 feedings in increments of the total flour indicated for the levain.


Final Dough

Mix the flour, water, and levain until all the flour is saturated and autolyse for 40 minutes. Adding the salt, mix on 1st speed for 4-5 minutes, or by hand until the dough is uniform and of a medium soft consistency.

Bulk ferment for 2 hrs, doing stretch and folds in the bowl every 30 minutes. The dough should become slighty more developed with each S&F.

Shape as desired, or press the dough into a thick disc 9 inches/22.86cm in diameter, relax the dough for 5 minutes and fold the disc over to almost meet the other edge of the dough. Place fold down on floured linen and final proof for 2 hours. Flip the dough on to a parchment lined peel so that the fold is right side up. Slide the dough into a preheated 450F oven and stone and leave the oven door ajar for the 1st 15 minutes. No steam is neccesary. Close the door and bake for 35-40 minutes. Check for an internal temperature of 210F before turning off the heat and propping the door open. Leave the loaf in the oven for an hour to cool gradually then remove to a cooling rack and wrap in linen. Allow to cool overnight before slicing


Franko's picture
Franko


 Fellow TFL'rs,

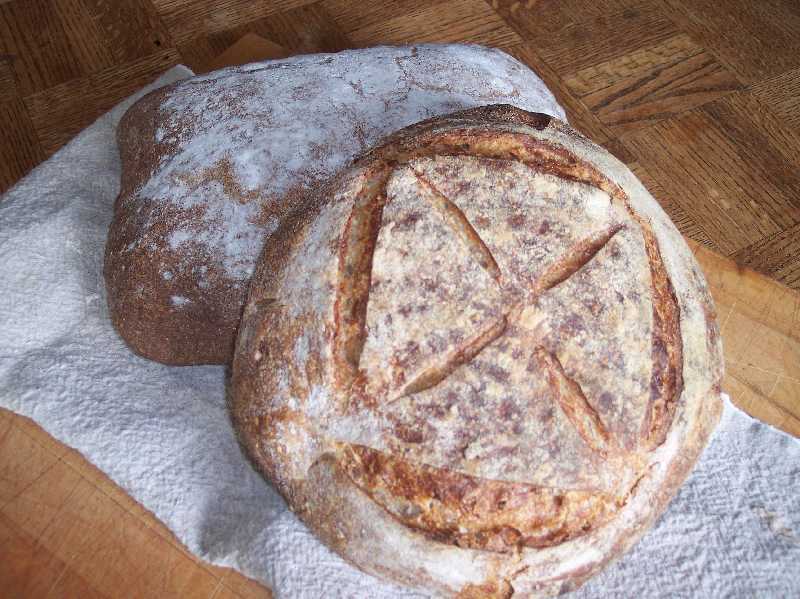
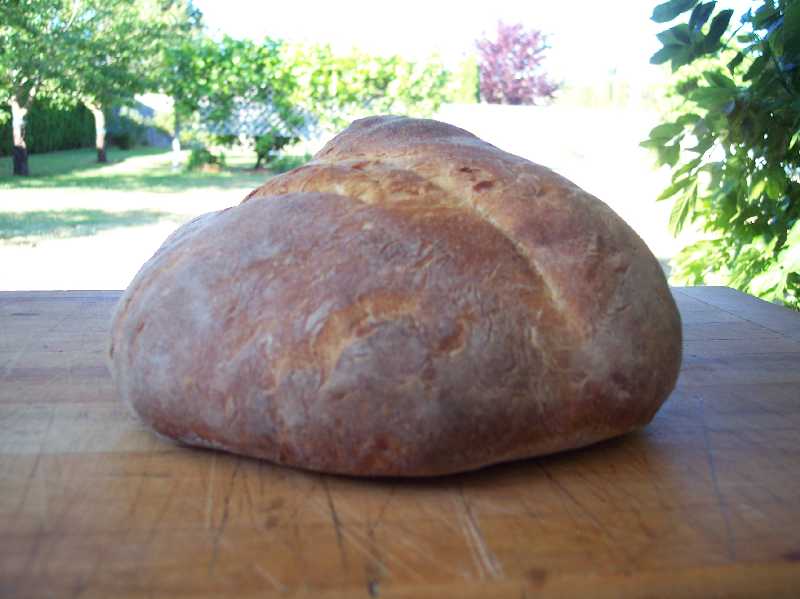
Just to let you know this blog entry covers 4 different bakes and is a bit longer than I would normally like to post, but hopefully some of you will enjoy it, or find something of interest along the way.

First the sweet stuff.

With the warm sunny weather we've had on Vancouver Island the last few weeks our two blueberry bushes have been producing lovely ripe berries so quickly it's been hard to pick them fast enough before new ones appear. My step-son and his wife both love blueberries and were coming over the next day to pick a few so I thought I'd make them a simple blueberry tart that they could take home with them. I had some pate sucree in the freezer which I thawed and rolled out to line a 22.8cm/9inch tart pan which then went in the fridge to relax while I made a blueberry filling. The filling consisted of about 1 1/2 cups of fresh blueberries and 2 tbsp of water brought to a simmer on medium heat until the berries began to break up, thickened with a sugar and cornstarch blend, and left to simmer slowly for 10-20 minutes then set to cool in the fridge. A few fresh berries were folded into the filling after it had cooled. The tart shell was blind baked in a 350F oven for 20 minutes and set on a rack to cool. Once both the shell and filling were cool the bottom of the tart was glazed to seal it with melted red currant jelly that had been thinned out with simple syrup , then the filling went into the partially baked shell, filling it about 3/4's to the top. Back into the 350F oven for another 10-15 minutes or until the filling was just beginning to bubble. Once the tart was completely cool it was topped as evenly as possible with fresh blue berries and with a few raspberries in the middle for contrast. Finally it was top glazed with the red currant jelly. I haven't had a verdict back yet but the two of them seemed quite pleased with it and hopefully they enjoyed it.


The next 2 items on the sweet side are pecan sticky buns and a Loganberry coffee cake, both of which were meant as gifts. My wife's assistant at the college where she works sent her home last week with 2 beautiful Spring salmon she and her husband had caught the day before. The salmon were a gift to me (my wife is vegetarian) for some of the breads and pastries I've sent her over the last few months. What the heck I thought, I'll make a dozen sticky buns and send some to her to say thanks for the nice fish... and keep a few for myself as well. The coffee cake was made for our next door neighbour who'd brought us over a pail brimming with perfectly ripe Loganberries from his backyard, along with yellow zucchinis, cucumbers and 2 big bulbs of garlic. My idea was to make the coffee cake with the loganberries as a thank you to our good neighbours, but when I went to deliver it the next day I discovered they'd packed up the RV that morning and gone camping. Lucky for me it turns out I like loganberry coffee cake...a lot! The reason I decided on making the sticky buns and coffee cake is that I could make both using a single mix of sweet bun dough. Having just acquired a new Bosch Compact mixer I thought a good first test for it would be to see how it coped with this rich buttery dough. A little bit more later on about my first impressions of the machine.

Sticky Buns:

The only change I made was to use a levain as it's primary source of leavening, although I did use a scant amount of instant yeast to hedge my bets. I knew I would need to leave the dough in the fridge for an extended length of time and didn't want to come home and find it had passed it's prime. Fortunately by the time I was ready to roll it out it was in the pink of health. The roll-out was done from a 1.100 K piece of sweet dough, then brushed with a thin egg wash on all but the bottom 4-5 cm/2 inches, liberally topped with cinnamon sugar and sprinkled with chopped pecans and jumbo Thompson seedless raisins. The sheet was rolled up in a string roll and divided into 12 portions of roughly 125-130 grams per piece. These were placed on a standard sheet pan lined with parchment that had been smeared with sticky glaze and a cake frame placed around the pan. Final proof of 60-70 min at 73F and bake for 40 minutes @ 350F. Press in the center of the pan (firm to the touch) to ensure the buns are fully baked. Remove the pan to a cooling rack and allow to cool slightly for 3-4 minutes. Place a sheet of parchment to cover the buns and take a similar size or larger sheet pan and invert it over the paper and buns. Holding both pans with oven mitts flip them over so that the top pan is now on the bottom and the sticky glaze on the bottom pan is now on the top. *Be careful of the hot sugar* Allow the buns to cool before removing the frame if you're using one. These buns can also be done in any cake pan.


Coffee Cake with Loganberry filling and Oatmeal Pecan Struesal

While the sticky buns were rising I rolled out the remaining dough in a rectangle about 1/2/ cm-1/4 in thick and spread Loganberry filling( use procedure for blueberry filling) and whole berries on the top half of the dough leaving a 2 cm/1/2in border around the perimeter of the dough. Brush the border with egg wash and fold the bottom half over the top and seal the edges. Brush the dough with egg wash, then take a bench scraper or knife and make two parallel slashes 4 cm apart on the top, trying not to cut through the bottom of the dough. I remembered I had some oatmeal pecan struesal in the freezer, so this was sprinkled on as a top dressing.

Final proof of 30-45 minutes, bake @350F for 20-25 minutes. The coffee cake can be dusted with confectioner's sugar, or drizzled with finger icing/fondant if desired.


Re: Struesal Topping

If anyone needs a recipe for struesal topping a good one can be found here on Debbe 1's post from last year.

http://www.thefreshloaf.com/node/19248/ultimate-sour-cream-coffee-cake


Note: this formula is larger than the one I used. Scale according to desired final weight.


Sweet Bun Dough with Levain


Ingredients

%

Kg

Levain


All Purpose Organic White flour

100

100

Water

100

100

Mature White Starter -liquid

10

20

Total


220


Bread flour

80

600

Pastry flour

20

120

Sugar

20

144

Eggs

15

108

Butter- room temp,cubed

30

216

Salt

2

14

Milk -70-74F

50

300

Levain

30

220

Yeast-instant

0.7

0.5

Total Weight


1722.05

DDT 72F-77F


PROCEDURE:

Mix the bread flour, 44 grams of the sugar, the levain, and the warmed milk till a cohesive dough is formed. Cover and leave at room temp for 45 minutes.


On 1st speed blend in the pastry flour, eggs, then salt, and gradually add the sugar. If the dough is too dry at this point add more milk until the dough is smooth and forming a ball in the mixing bowl. Add the cubes of butter gradually, until fully incorporated , then finish mixing on 2nd speed for 4-5 minutes. Depending on your mixer you may need to finish the mixing by hand on the counter to fully develop the dough to a 'window pane' stage. Slap and fold kneading is recommended. Bulk ferment at room temp 67-70F for an hour, punch down and refrigerate for at least an hour. The dough will need to be punched down 1-2 times during this period. After 1-2 hours in the fridge the dough can now be handled easily and rolled out or molded as desired. Bake at 350F. Baking times will vary depending on unit size.


Sticky Bun Glaze


Ingredients

%

Kg

Brown Sugar

100.00%

200.00

Butter

56.67%

113.00

Salt

0.83%

1.66

Honey

38.33%

77.00

Vanilla or Rum extract

2.50%

5.00

Powdered Cinnamon or Ginger

0.8%

1.60

Total

199.13%

398.26


PROCEDURE:

Procedure:

Cream butter and sugar till smooth.

Add remaining ingredients and mix till light and creamy.


The Sour

Pain au Levain with Red Fife Flour


A few months back my friend breadsong http://www.thefreshloaf.com/user/breadsong contacted me, asking if while she was down in California attending a 2 day workshop at SFBI, would I like her to pick up some flour from Central Milling that we could share. How thoughtful of her! I've heard so much about this mills products from posts of David and Glen Snyder's, as well as others and I've been wanting to try it out, but the shipping is crazy expensive. Naturally I jumped at breadsong's generous offer and a week or so later picked up a box of several different CM flours she'd mailed over to me. Thank you very much breadsong!! :^) Since then a lot of things have happened such as vacations, our son's wedding, out of town family visiting etc, as well as other uncompleted baking projects needing to be finished. I'd almost forgotten I had the flour until the other day when I decided to make some bread and was rooting around in my flour storage bin looking for inspiration and there was a nice bag of CM Artisan White Malted staring me in the face. I'd already settled on making a Pain au Levain of some kind, so this should be just the perfect flour to use. I thought as long as I'm using a US flour maybe I should add a little Canadian Red Fife to the mix, in the spirit of international harmony...... or something along that line. The formula I used was Jeffrey Hamelman's Pain au Levain from 'Bread ' adapted with 75% CM Artisan Malted , 5% medium rye, and 25% Red Fife- 75% sifted from True Grain Bakery and Mill in Cowichan Bay.

Normally I wouldn't use a mixer for a 1.200 K mix such as this but wanted to see how the new mixer would handle the dough and become more familiar with it's operation as well. It took a while for the mix to come together, longer than I would have expected, but eventually it did begin to develop. Most of the mixing was done on first speed which these machines do quite well I feel compared to a KA. The mixing action is very gentle and does a much better job of not only picking up the dough, but folding it over on itself more efficiently than I've seen with other small domestic mixers. The total hydration of the dough was a medium 66% , not terribly wet, but I found I still needed to finish the development by hand to get the dough feel that I wanted. Perhaps when I've done a few more mixes with the machine this won't be necessary, but likely I'll always rely on my hands to bring the dough to where I want it.

The one major area where I deviated from Hamelman's procedure was to retard the dough overnight, simply out of scheduling necessities (read as need for sleep). After bulk ferment the dough was rested, shaped and placed in a floured banneton in the fridge for 7 hrs. The next morning it came to room temp over 2 hours before being slashed, steamed and baked at 450F for 45 minutes. The loaf could have used another 5-10 minutes but I had a 20 minute drive ahead of me to make a t-time for my weekly round of golf in 25 minutes. Reluctantly the oven was turned off and the door propped open slightly, hoping the residual heat in the stone would complete the baking. Almost but not quite, as it turned out. You may notice from the crumb shot a slight bit of under-bake on the top and bottom. Luckily it's not enough to affect the eating quality, which is quite good, however I would have preferred a bit more open crumb and a harder crust. Overall I think it's a good but not great loaf of bread that has greater potential than I was able to achieve with this loaf. The 3 different flours and percentages match up nicely for balanced flavour, and had they had a longer, bolder, bake would have made a significant difference to the final flavour. A loaf worth doing again over the next few bakes I think.


Cheers,

Franko

Franko's picture
Franko

Since posting my last effort at making the Pane Tipo Altamura http://www.thefreshloaf.com/node/24102/pane-di-altamuramy-ongoing-project it's been an unexpected pleasure to have received so much interest and support for this project from so many TFL members. Thanks to everyone who's responded with new information, tips and suggestions, videos, etc, but especially to David Snyder for taking enough interest in the project to do his own bake of the bread. http://www.thefreshloaf.com/node/24139/pane-tipo-di-altamura-quotlocal-breadsquot

It's always a bonus when you have David's insight and scrupulously well taken notes to refer to. I found them very instructive before beginning this latest bake. Thanks David!

Although I strayed slightly from some of the criteria outlined in the Altamura DOP document, http://eur-lex.europa.eu/LexUriServ/LexUriServ.do?uri=OJ:L:2003:181:0012:0019:EN:PDF I feel I could have stayed within the criteria and produced a bread of similar quality and attributes as this latest effort. Something I'll endeavor for future bakes now that I have a much better understanding of the process.

The most significant difference between the DOP regs and what this mix included is the percentage of preferment. The DOP calls for 20% of preferment and I used 24.25%. Overall hydration (not counting that of the starter) was slightly higher than 60% regulation at 62% . Other than that it stayed reasonably close to what was outlined in the DOP.

The differences between this dough and the last one were like night and day in terms of the texture and fermentation. The preferment was considerably stronger, and why I'm sure that had I used only 20% instead of the 24%, I would have achieved very similar results. The lower hydration of this dough also made a world of difference to the crust and crumb.The crust is crackly, with a good chew to it, and a rich, toasty flavour.The crumb is wonderfully moist, almost spongy, with a medium level sour background that lasts on the palate well after eating. It's not so strong that it wouldn't compliment anything within reason on the sweet side, and pretty much everything on the savory. Very tasty stuff indeed!

Taking this bread out of the oven last night was one of those classic whooohooo! moments I know all of us have from time to time in our baking pursuits. It's been a while since I've had one of those, and the first I've had since starting this endeavor, so it's a genuine pleasure to be able to share what I regard as a first success of the project with everyone here on TFL.

Formula, procedure and photos below.


Best Wishes,

Franko


Pane Tipo Altamura


Ingredients

%

Kg/Grams

Preferment


Semolina flour starter

32

32

Duram flour

100

81

Water

100

81

Total


194


Final Dough


Durum flour

100

800

Water

59.2

474

Preferment

24.2

194

Sea salt

1.9

17

Total weight


1.49

Total Hydration

62.9


PROCEDURE:

Semolina flour starter;

Mix equal portions of semolina flour and tepid water and keep covered at 65-70F. Refresh daily over the course of 3 days. Reduce the water by 50% on the last feeding to thicken the starter and build acidity.


Preferment;

Build the preferment over 24 hours in 3 stages using equal increments of the total flour and water indicated in the formula. Keep covered at 70F.


Final Dough; Hand Mix- DDT 76-79F Oven temperature of 450F


Combine the flour, water, and preferment and autolyse for 30-40 minutes. Add the salt and adjust the hydration slightly if needed to form a medium firm dough. Knead the dough on the counter for 3-4 minutes until the dough is smooth and cohesive.

NOTE: throughout the kneading and the stretch and folds to come be aware of any signs of tearing on the dough surface. When this starts to show, stop working the dough and let it rest.

Place the dough in a bowl and cover with linen or plastic wrap and begin the 2 1/2 hr bulk ferment.

Stretch and fold the dough in the bowl every 30 minutes during the course of the bulk ferment. The S&F's can be done several times (8) before tearing begins to show depending on the individual tolerance of the dough at hand.

After the last S&F allow the dough to rest for 15-20 minutes then round and rest a further 15minutes. On a well dusted counter press the dough into a thick disc. Fold the bottom half of the dough to almost meet the edge of the top half, or approximately an inch back from the edge.

Place the dough on well floured piece of linen, cover with another piece of floured linen and begin the final rise of 1 to 1-1/2 hours. When the dough is not quite fully proofed slide a peel under the dough and transfer it to a 450F preheated oven and stone. Leave the door ajar and the vents unblocked for the first 10 minutes. Note: No steam is used.

Close the door and bake for 15 minutes before rotating the bread for even colouring. Continue baking for 10 minutes before lowering the temperature to 430F with a further 15-20 minutes of bake time. Lower the temperature to 300F, prop the door ajar and bake for 10minutes. Tap the bottom of the loaf for a hollow sound to ensure complete baking.Turn the heat off and leave in the oven for ten minutes then remove to a wire rack and cover with linen. When the bread has cooled for 6 hours or more dust off the excess flour before slicing.

Franko's picture
Franko

Carol Field's 'Italian Baker' is the oldest book in my ever growing collection of books on bread and pastry making, and still one my stand-bys that I refer to often. One of the breads included in her chapter on regional and rustic breads is the Altamura bread from the town of the same name in the region of Puglia. The bread is one I've wanted to make for many years but have never run across a local source for the type of durum flour needed to make it. Finally this Spring, as some folks may remember from previous posts to this blog, I was able to have some shipped from Giusto's in San Francisco to my home on Vancouver Island. A bit of an indulgence as far as the shipping costs involved and not one I'll be repeating anytime soon.


While I was waiting for the flour to arrive I began doing some online research on Pane di Altamura, as well as putting in some queries to Nico/nicodvb and Andy/ananda , both of whom kindly responded with lots of useful information from their own experiences with the bread. Many thanks to both of them for sharing their knowledge with me! One of the things I wasn't aware of, and that Andy mentioned in our correspondence is that Altamura bread has protected or 'DOP' status in the EU. "The bread of Altamura is 'officially the first product in Europe to bear the DOP in the category''Bread and bakery products.'' http://translate.google.co.uk/translate?hl=en&sl=it&u=http://www.panedialtamura.net/&ei=z8ypTaaxK5CahQe2kdzFCQ&sa=X&oi=translate&ct=result&resnum=11&sqi=2&ved=0CHQQ7gEwCg&prev=/search%3Fq%3Dpane%2Baltamura%26hl%3Den%26rlz%3D1R2ADFA_en%26site%3Dwebhp%26prmd%3Divnscm


With further searching I found the EU document proclaiming the status and historical background of the bread, along with information outlining the material and methods used to produce authentic Pane di Altamura, here; http://eur-lex.europa.eu/LexUriServ/LexUriServ.do?uri=OJ:L:2003:181:0012:0019:EN:PD


After reading through this document I decided to try and follow the authentic formula as much as possible rather than using Ms Field's recipe, which she describes as an "Altamura type" that uses a biga instead of the traditional natural leaven called for in the DOP formula outline. Developing an active durum/semolina flour starter from scratch takes a little less than 48 hours I discovered. Natural yeast just gobbles up the available nutrients of durum at a rate I've never seen before with other grains. This fact has been the biggest obstacle to me in trying to achieve a reasonably acceptable loaf, simply because the starter or the leaven was reaching it's peak long before my sleep and work schedules permitted me the time needed get a mix going. The first mix I made was pretty much a disaster and needed to be rescued with baker's yeast, the second and third attempts had slightly better results but still not great. This last attempt, while not a home-run by any means, is the best to date in terms of the final shape. This one has a much better flavour than the last three as well, but the crumb is not as open as I think it could be and the crust is not at all crusty. The original formula indicates a 60% hydration level, however I increased this by 9% as the dough was a little stiff for my liking. This, along with the fact I used steam instead of baking with the oven door open for the first 15 minutes as indicated in the DOP procedure,was likely a critical error on my part towards achieving a proper crust. Old habits die hard, so I've highlighted that part of the procedure in my notes for the next attempt.

Regardless of the fact I've only had what I'd call marginal results with this project so far, I am enjoying the challenge of trying to reproduce this ancient and venerable bread.

Best Wishes,

Franko

Franko's picture
Franko

This past Monday my wife and I arrived home from our very first visit to Europe where we spent 3 nights in Prague, then 8 full days cruising the Danube from Germany, through Austria, Slovakia, and finally disembarking in Budapest. It was a marvelous trip which we enjoyed immensely, but as always it's good to get back home, especially after spending 10 + hours flying, transferring, waiting to fly, then transferring twice more before landing back on Vancouver Island.


By the time we got in the door neither of us were hungry, which was good since we'd used up as many of the perishable items stocked in our fridge as possible, including the last of the bread, before we left on our trip. Too exhausted to do anything but crawl into bed, I thought I'd start some sort of a poolish the next day for a bake on the following day. Tuesday evening when I was mixing the poolish I really didn't have a concrete plan of what I'd eventually do with it until I remembered that I had some rye starter left in the fridge. The starter of course was dead as a doornail, but I added some to the poolish thinking if nothing else it should add a little tang to the finished loaf. The poolish went in the fridge overnight to do it's thing, while I decided what sort of bread I wanted to use it in. Pane de Campagne has long been a favourite of mine for it's mild rye flavour that seems to go with just about anything from meat, fish, cheese, to toast and jam. This particular loaf may not be what some would consider a true version of the bread, but it's close enough that I don't have a problem calling it one. The poolish itself wasn't really a poolish in the typical sense as didn't rise up the way a normal one will, probably because the high pH starter killed off most of the scant amount of baker's yeast I used in it, but it had a nice aroma to it and in it went to the final mix. The dough mixed up easily by hand and then a few minutes of work up on the counter to develop the dough a bit. One stretch and fold in the bowl after 30 minutes of bulk ferment, then another 50-60 minutes BF before the intermediate proof of 15 minutes. Shaping, then 30-40 minutes of final proof, followed by the slash, steam, bake routine. No surprises, no ghastly blow-outs, just a decent and very tasty loaf of country style bread to tide me over till I get back to working on a bread project I started before we left on our vacation. More on that at a later date... but not too much later I hope. Formula and procedure used can be found below.

Cheers,

Franko

Pane de Campagne


Ingredients

%

Kg/grams

Starter/Poolish


Dormant rye starter

46

30

AP Flour

100

65

Water-75F

100

65

Yeast-instant

4

3

Total


163


Final Dough


Starter/Poolish

25

150

AP Flour

83

500

Light Rye Flour

11

70

40% Whole Wheat Flour

5

30

Sea Salt-null Gris

2

14

Yeast-instant

2

14

Water

73

438

Total Weight


1216

Total Flour

100

680

Total Hydration

76

518

PROCEDURE:


Starter/Poolish:

Combine the starter/poolish ingredients 12-14 hrs before the final mix and keep in the refrigerator until ready to use.


Final Dough: DDT of 75-78F


Heat 50 grams of the water and add the salt, stirring to dissolve it as much as possible. Set aside.

Combine the remaining ingredients, mixing either by hand or machine to a shaggy stage. Add the salt solution and continue mixing till thoroughly combined and the mixture forms a cohesive mass. Knead the dough conventionally or use the slap and fold method if mixing by hand for 3-4 minutes or until moderate gluten development occurs. Times will vary if mixing by machine so monitor the dough closely that it doesn't overdevelop. The dough should be slightly sticky and not fully developed at this stage. Place the dough in lightly floured bowl, cover and begin the bulk ferment. After 30 minutes do a thorough stretch and fold in the bowl, cover and continue the bulk ferment for an additional 50-60 minutes. Remove the dough and round lightly, cover and allow to rest for 15 minutes before shaping.

Preheat the oven and stone to 480F.

Shape as desired into a moderately tight form, cover and begin the final rise of 35-40 minutes on a parchment lined peel.

When the dough is not quite fully proofed dust it lightly with either AP or light rye flour and slash as desired, keeping the slashes shallow. Spray the oven 4-5 times with water and bake for 3 minutes then spray again. Bake for 15 min and reduce the heat to 450F. Bake for 10 minutes and remove the parchment paper , rotating the loaf on the stone for even coloration. Continue baking for 15-20 minutes or until the loaf is evenly coloured and has a hollow sound when tapped on the bottom. Turn the oven off and leave the door ajar, allowing the loaf to cool gradually in the oven for 15 minutes before placing on a wire rack for 5-6 hours before slicing.

Pages

Subscribe to RSS - Franko's blog