SUSAN'S SIMPLE SOURDOUGH CHALLENGE - TAKE TWO
On October 4th, ehanner's blog presented Susan's Simple Small Sourdough Challenge. Eric's challenge was simple - make Susan's bread and report back. My first attempt at Susan's bread was posted to Susan's Simple Sourdough Challenge - Take One on November 7, 2009. I was so enthralled with her bread I made it a second time a few days later.
Susan's basic recipe and method can be found on her blog post of April 17, 2008. I would also recommend you check out Susan's Blog for variations and lots of great photos of her bread.
The ingredients are straightforward: sourdough starter, unbleached bread flour (either regular or high gluten), whole grain flour, water and salt. Dough hydration is 70%.
What really makes this bread special is her method (minimal kneading and periodic stretch-and-folds, a long bulk fermentation and, after shaping, an overnight proof in the refrigerator). The only change I made to her method was to add a one hour autolyse at the very beginning (combine all the flour and water, roughly mix and let rest, covered, at room temperature, for one hour). After the autolyse, the starter and salt were mixed in and from that point I followed her instructions.
The dough can be shaped as a boule or a batard. Susan usually shapes it as a boule and covers the dough with a heat-proof metal bowl for the first 15 minutes of the bake. (If shaped as a batard, she suggests using the lid of a turkey roaster). Covered baking eliminates the need to steam the oven and results in great oven spring.
For this trial, I used my 100% hydration sourdough starter, unbleached bread flour, rye flour (home milled), ordinary tap water and sea salt. I shaped the dough as a batard (I prefer this shape) and used the bottom of an enameled metal turkey roaster as the cover.
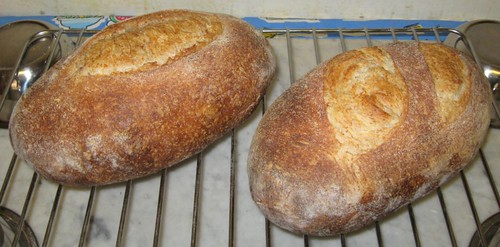
This is a wonderful bread. A nice sourdough flavor, open crumb, crispy crust. Here are photos...
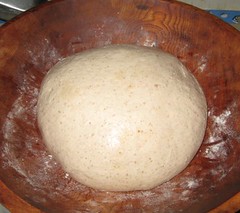
Kneaded Dough Ready for Bulk Ferment
My Rising Container - a plastic basket lined with a cotton tea towel rubbed with rice flour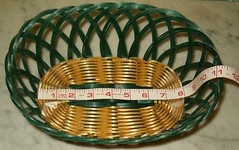
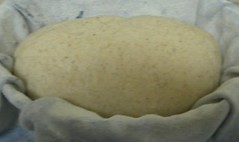
Risen Dough Ready to be Baked.
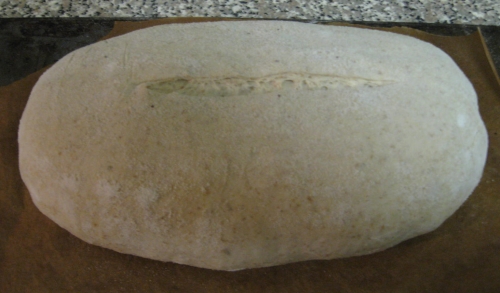
On the Peel (a cookie sheet) and Slashed
Cooling After the Bake
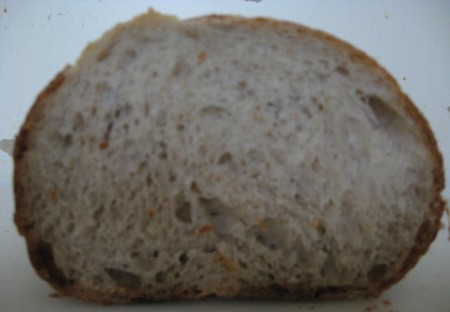
Crumb (photo is a little blurry - sorry!)
And your bread looks beautiful. I've been playing with the 1-hour flour-water autolyse and later salt addition, too.
Love your bread bowl! I need to pull mine out of the pantry and start using it. A cookie sheet is what I use for a peel in Prescott, here I use a small piece of stiff cardboard. Just goes to show you don't need a lot of fancy equipment to make good bread.
Your photos really show how it's done!
Susan from San Diego
The compliment you gave me [i]belongs to you[/i]. I am an avid follower of your TFL blog, but, I will confess, until Eric's challenge, I only paid attention to your "magic bowl" baking method and neglected your slow fermentation method. I stand corrected.
You are a home baker and so am I. Your blog is excellent and your reputation well deserved. Thank you for taking my bread baking to another level.
I always look forward to your posts.
You mention stretch and fold, then relax, then banneton. You also mention repeat. My question is do you do the stretch and fold, relax, then stretch and fold, relax until it is ready and then put it in the banneton or do you do the stretch and fold, relax, banneton for 3 or 4 hours and then stretch and fold, relax, banneton for 3 or 4 hours again until dough is ready. I assume you don't put it in the banneton until you are through with all the stretch and fold but I thought I would just check first. Really looks good and I am due to start my next batch tomorrow. This looks like the one i will try.
Yes. All the stretch & folds are done before putting the dough in the banneton. Thanks for asking. Have fun!
Susan from San Diego
I am in the process of making this bread. Sadly, I was trying to go by memory and I forgot a few steps. Plus trying to fit it in around my work schedule.
Here is where I am; yesterday afternoon I mixed 1 ounce of my 100% hydration starter with 2 ounces of flour and 1 ounce of water to make a 60% firm starter. When I went home at lunch today it had risen nicely so I added 5 1/2 ounces of flour and 4 ounces of water to make a 68-69 % dough. I forgot to put the salt in until after the dough was a ball so I kneaded it in. total kneading time was about 30 seconds.
I put the dough in a colander lined with the floured cloth. Now I'm back at work until 5.30.
If it has risen by the time I get home I may just put it in the oven. Should I do the folding thing instead? I WILL be in bed by 10.30 pm, no matter what the bread is doing.
I have to report another huge sourdough fail. I'm going to get better at baking with yeast before I try again. Maybe it will do better this summer when the house is warmer.
Very nice SF. They just keep getting better. The thing I like about Susan's method is that it is simple to do. The idea of having a great daily bread you can make in your sleep is fantastic. Once you understand the timing and venture into additions like seeds or herbs, you be baking artisan style breads like a pro.
Glad to see you are having a good time with this.
Eric
I had to try this--it looked simple enough. I have a firm sourdough starter and thought it would be a fun bread to try.
My first try was a disaster! This bread takes TIME and it turns out, starting it Saturday evening was not enough time. I got it mixed, rested, and through the three stretch and folds, but at that point it was late at night and I decided to refrigerate, thinking I would do the bulk fermentation to doubling in the morning if it didn't rise enough in the fridge. It rose not at all during the night's retardation in the fridge, and not very much the next day outside the fridge in as warm a spot as I could find for more than 4 hours. Sensing disaster was at hand, I baked it anyway, and was justly rewarded with a brick. A pretty brick, but a brick nonetheless.
So this time I started much earlier. I began around noon on Saturday. I was skeptical because the dough was pretty lumpy, but it began to behave with the first stretch and fold. It was smooth and silky by the third S&F and the dough felt much more promising. I was using my crockpot to cook a brisket, so I tucked the dough in a little corner behind the crockpot where it was toasty warm to double (76 degrees according to the thermometer). When I finished with the crockpot at 6, it still hadn't doubled, so I made a proofing box by heating water in the microwave and set it in there. It still took until 10 p.m. to finally double, the last 4 hours in an environment of around 80 degrees (I checked). Sheesh! Maybe in the summer . . .
This had a nice refrigeration retard overnight and perked up nicely in the morning (again, I kept it extra warm once out of the fridge). It was ready to bake in about 2 1/2 hours. I used my clay baker and got a nice amount of oven spring, and crisp, crackly, "singing" crust.
I'm looking forward to seeing the crumb and tasting this bread.
Bottom line is that it is a beautiful bread, but the time involved in making it is more than I can realistically do on a regular basis while I have to work outside the home for a living! Even though the actual time to do the mixing, stretch and fold, shaping, etc. aren't excessive, this bread takes a lot of time because I have to be home and paying attention for 3 1/2 hours just to get through the stretch and folds. Then the doubling must be monitored, and more time the next morning to get it proofed to the baking point.
Unless the crumb and flavor of this bread transcends all of my expectations, it's just not worth the time committment to me. I can create equally lovely and breads that are presumably as tasty with much less time committment.
Anyway, I enjoyed the challenge. It's nice to know I CAN do it and the process was fun. I think this is my first "all stretch and fold" bread, though I have been using S&F technique along with my kneaded and no-knead doughs.
Thanks to Susan and the posters who set this challenge.
And if the crumb is as pretty, I know you will enjoy it. Thanks for participating in Eric's challenge.
Susan from San Diego
Yes, the crumb was great! (Sorry it is not so clear from this picture taken by my phone). The flavor was good, nothing spectacular, but nothing to complain about either. I don't maintain a very sour culture, because I don't really like it sour.
Thank you so much, Eric and Susan. It was fun!