The Fresh Loaf

A Community of Amateur Bakers and Artisan Bread Enthusiasts.

Catomi's blog

Catomi's picture
Catomi

Awhile ago I bought a screen for bolting flour. I'd done a bit of reading and it sounded like nothing but a good thing; you get the nutritional and flavor benefits of whole grain, with the structure of white flour. I made several loaves using Bob's Red Mill flour, shaking it through the screen to produce maybe 1/4 cup of chaff for the 500 g of flour I needed for my recipe. I couldn't really tell if it was making a difference (I should really do a comparison bake, but frankly my time is limited and I'd want to have plenty of flexibility for a project like that), but I did it anyway. Then last week, at a grocery store that specializes in locally produced foods, I found a bag of Ernst Farms stone ground flour. Exciting! I had no idea what type of flour it was, but still, exciting! And earlier this week, I made bread with it. I used the same recipe I've been primarily making, Tartine's Ode to Bourdin (100% whole wheat sourdough). 
 The first thing I noticed was that the flour was much coarser than BRM. Using the same screen, in order to produce 500 g of bolted flour I generated 355 g chaff. Here's a photo of the bolted flour next to the chaff.  And here's one showing all the flours I used. The base is the bolted Ernst Farms flour. Then clockwise from top left are wheat germ, unbolted Ernst Farms flour, and King Arthur white whole wheat flour.  

The flour seemed wetter when I was mixing the autolyse and leaven. I found myself wondering if acting more like white flour meant that bolted flour also absorbs less water, since I know whole wheat tends to be thirstier than white flour. At this point I should have engaged brain and left out the additional 50 g of water called for in the recipe, but I had been using it to dissolve the leaven and make it easier to incorporate into the autolyse so that's what I did. Oh well, this would be extra practice handling wet doughs. 

 The dough also seemed stretchier during stretch and folds. I don't know if there's a standard of measure for stretchiness - how far you can stretch a given volume of dough before it tears? - but it seemed like I was raising my hands pretty high before reaching that point. Things got more entertaining when it was time to shape the dough. I had been planning to deflate pretty thoroughly and expect it to take a long time during the final fermentation. As it turns out, I didn't have a choice. The dough was wet, gloppy (my three year old's new favorite word), and very, very friendly. It attempted first to eat my hands, and then when I'd managed to separate it into two roughly round forms, the rounds went looking for each other and tried to meet up again in the middle. I did my final shaping and deposited them, roughly seam side up (though they were attempting to eat my hands again, despite them being quite wet, so I felt like I was creating new seams every time I touched them), in bowls lined with a very generous quantity of the bran I winnowed out of the flour. Then I stuck them in the fridge overnight in the hope that they would be better behaved, cold, in the morning.  In the morning they seemed rather flatter than I might have expected, and still spread a little in the time it took me to invert them onto parchment paper, slash them and get them in the preheated cast iron pots. That said, I did a finger poke test on both of them and they still seemed rather springy, so I figured at worst they were underproofed and I'd get great oven spring (total time in the fridge for final ferment was 12 hours). I steamed them at 500 degrees F for 20 minutes, then 425 degrees for 10 minutes. Then I took the lids off, rotated the pots and finished baking for 10 minutes at 425 degrees. Internal temps were 210 and 212 degrees F. Here is one just before going in the oven: The loaves were flatter than I expected. There was little to no oven spring, and they were paler than I might have expected. Both loaves:

Crumb shot. Nice and open, moist, chewy. Not a very complex flavor, mild, no real sourdough tang. 

 So now I'm wondering whether I got my hands on some green flour (there's no date on the bag to indicate when it was milled), or if my dough was just overhydrated. I'm leaning towards overhydrated because the flatness and poor oven spring are the only markers of green flour that I see (the others are dense crumb and tough crust - all that I know about green flour I learned here: http://tartine-bread.blogspot.com/2014/02/sidebar-sunday-michette.html). I don't know if overhydration would affect oven spring, though, and my searches aren't turning up info on overhydration and oven spring.  

Thoughts?

Catomi's picture
Catomi

So life got busy, it got hot outside, and I got lazy about updating. Here's the last several weeks, roughly condensed into one blog post.

FWSY's Overnight Country Brown. I made this as a bit of a lark, as I needed to return the book to the library and wanted to try something out of it first. This was my ugliest loaf so far; it spread quite a bit while proofing (I need to learn how to contain a high hydration loaf with towels) and transferring it to the oven created a flat, lumpy thing. When it was done baking, the crust was tough enough that my three year old pretty much gave up on it (I also need to figure out if there's anything I can do to bake artisan loaves with a less tough crust without fundamentally altering the recipe). That said, it was my tastiest loaf to date by far. It had a nice sourdough tang, with a more complex underlying flavor that was delicious. For some reason, the only picture I took was of the proofing dough.

Sourdough bread from The Nourished Kitchen. This recipe called for ingredients measured by volume, not weight. I don't know if there was a problem there, or if I made a mistake, but this baked a brick.  I seriously believe I could have broken a window with this loaf.  I was a little sad, since I used the last of my delicious spelt flour for it, but such is the price of experimentation. No picture.

Tartine's Ode to Bourdin.  I'm still working on this, and have had a recurrence of the cavernous central holes. I'm OK with that, though, since I think I finally figured out something that is probably obvious to everyone else. I tried to shape it gently to avoid deflating it (as per the recipe), and was surprised when it seemed ready to bake significantly sooner than expected (according to the finger poke test). After baking and finding the large holes, I realized that if I had failed to remove that air, then of course the dough would seem ready faster.  Next time I'm going to deflate thoroughly and see a) if it takes significantly longer to rise, and b) whether or not that defeats the holes.

Barley cheddar cheese sables, also from Tartine No. 3. I measured ingredients by weight and I'm glad I did; if I was going off of volume I would have had a lot less cheese in these.  I rolled them in sesame seeds and cumin seeds only, chilled for an hour and sliced with a freshly sharpened knife.  Next time, I will try to form the roll more tightly and chill for longer, perhaps even partially freezing the roll.  I was not able to slice them as thinly as I wanted.  These were delicious, and netted the following comments from my husband:

"These are good.  Can we have these for dinner?" (I explained that I'd baked them to send some to my brother as an extremely belated birthday present.) "How many do you need?"  And then later, "These are diabolically good." So I will be making them again for sure. Highly recommended.

Canal House chocolate chip cookies. I made these to send some to my brother as well. My usual chocolate chip cookies are full of oatmeal and much thicker, so these were a big departure. Aside from ignoring the instructions to place them on the baking sheet 4" apart and getting to carve my own cookies from the sheet of cookie that resulted (which was clearly my fault), these were great.  Chewy, chocolate-y, with a nice caramel-y flavor. I did sub white whole wheat flour, since I don't keep all purpose around. Recipe here: http://www.alexandracooks.com/2013/07/10/canal-house-chocolate-chip-cookies/  And here is a picture of the one circular cookie I got:

And then I took a break from artisan loaves and baked something from my childhood.  I made a few loaves of my mom's whole wheat sandwich bread. My husband's first comment when trying it was, "this is different than what I've been eating lately," and it sure is. It's pretty enriched, much lighter, has a tender crust, is not sourdough, doesn't take multiple days to make, and bakes in a loaf pan. I had some fun making the dough with the three year old. We did some observations of the yeast while it was proofing. We watched it soak up liquid and sink to the bottom (a glass bowl was handy for watching yeast sinking/rising). We watched it rise again, looking different this time.  Bob, my sourdough culture, was handy for talking about why the yeast was rising, since it's easy to see the bubbles on the sides of the jar and in the airlock. The proofing yeast formed a bumpy island (my son said it looked like land), and smelled differently than in the beginning.  It also made crackly noises when we disturbed the yeast cake and popped bubbles. And then he helped me stir in the flour and knead the dough, which is an excellent activity for blowing off preschooler energy.  He makes a good assistant baker. Yeast island (with a maraca in the background, baking with children is fun):

With my mom's permission, here is her recipe (with my notes on what I tweaked at the end):

Warm 1.5 cups buttermilk to 120 degrees. Add 1.5 cups warm water, 1-2 T instant yeast and 1/8 cup sugar.  Allow to proof. Add 1.5 T salt and 1/4-1/2 cup margarine.

Stir in 4 cups whole wheat flour (1 cup at a time). Stir in at least 3 cups of white hard wheat bread flour (add flour until the dough becomes hard to stir and is pulling away from the sides of the bowl). Let rise 30 min. Stir down and let rise another 30 min. Knead (will need lots of flour) and let rise about 1 hour. Shape into four loaves, place into well greased loaf pans and let rise until doubled, about 1 hour. Brush with egg white and sprinkle with sesame seeds, if desired. Bake in a 375 degree oven for 35 min. Turn out promptly.

My loaves: I used 1 T yeast, and I used butter since we don't allow margarine in this house. We only have whole wheat flour, so I used 4 cups of BRM whole wheat and 2 cups of KA white whole wheat (which seemed to be all that it needed at the time); I did add a bit less than 1/4 cup vital wheat gluten to compensate for not using bread flour. I greased the heck out of the loaf pans, since my first batch stuck. I also only made two loaves, since I like having nice tall loaves and otherwise they seem kinda small. Just before going in the oven:

End result:

Next up, I need to figure out what to do with this lovely, which I found at a grocery that specializes in locally grown foods. I'm not sure what yet, but it'll probably be good.

Catomi's picture
Catomi

In my last couple of blog posts, I had some questions and difficulties. People were very helpful with suggestions, and this week's baking was much more successful. Thank you!

First, the bread. This is the white-wheat blend (Ode to Bourdin) from Tartine 3; I've decided to stick with baking this until I've got it down. Last time I had some unexpected large holes in the middle of my loaves. Based on suggestions, I allowed them to proof a while longer in their final loaf forms, and I used almost no flour for shaping (I was absolutely convinced this would cause a sticky mess, and was so surprised that it didn't; actually, it worked quite well!). 

I did have some issues with getting one of the loaves in the dutch oven. I only had enough parchment paper for one loaf, so I had to scoop and dump the other by hand into the dutchie. This, combined with using a larger bowl for that loaf for the final proof (I swear I have another small one around somewhere, and am convinced my husband has hidden it on me), resulted in a much flatter loaf. No big central holes so far, though! I am amused by the difference in shape between my two loaves (the perkier one was gently inverted onto a parchment paper-lined peel and slid into the combo cooker):


Here is a pic showing crumb:


I also made a fresh batch of grilled pIzza. My last batch was based on the Cook's Illustrated recipe, and on the advice of isand66 I tried Peter Reinhart's recipe instead. Holy schlamoley, what a difference. The CI recipe was gluteny and gloppy and I had difficulty transferring it from the cookie sheet to the grill without massive changes in shape. The Reinhart recipe was more like a firm flatbread. It maintained form, I could lift it easily, and it held up well to the large quantities of toppings I used. The Reinhart crust was a little less bubbly, but it had a nice wheaty taste, and I think I could get it thinner than I did. I was erroring on the side of caution due to my previous experiences. I did use white whole wheat flour, as I keep that around and rarely have all purpose. It worked just fine. Bonus, I have dough for three more pizzas in my freezer. 

Here are the three pizzas I made. Clockwise from top, a pesto tomato mozzarella pizza, a chicken and peppers with mozzarella and fontina pizza, and a spinach, onions and mozzarella pizza. All were brushed with garlic/red pepper flake olive oil before toppings were added. They were really good. 


I also made another batch of sourdough English muffins (no picture this time). I rolled these thinner, since the first batch did rise quite a bit during baking. I like them better this way (and I discovered that if I roll them on a cookie sheet, the edge of the sheet limits my rolling them out to just about 1/2" - perfect! I love when I find a lazy solution). 

So overall this week has felt very successful, in large part to the suggestions I've received here. I hope everyone else is having a good week, too!

(edited for clarity)

Catomi's picture
Catomi

This was Take 2 of Tartine's Ode to Bourdin (white-wheat blend), and the first time that I tried using bolted flour (the previous loaves used bread flour in place of the bolted wheat flour). So this was actually 100% whole wheat, just with some if the bran sifted out and applied to the outside during proofing. 

The loaves looked fine coming out of the oven; perhaps a bit dark, one of them slid into the dutch oven crooked (but actually I might not be able to tell unless I knew), and the parchment paper stuck to the bottoms, which is annoying but easily fixed next time. However, when I cut into the first loaf I discovered a sizeable pocket right in the middle of the loaf. See below:

This is the loaf that went in crooked:


Whoops! Big 'ol pocket:


I was thinking that this was likely due to my not shaping it properly. Does that seem likely? Details are as follows:

I did an overnight autolyse, adding salt in the morning (probably should have added it at the beginning of the autolyse, but as with previous loaves I set my dough up and then went and read about the technique I was trying). Leaven passed the float test in 6 hours, so I mixed it in with the last 50 g of water and basically kneaded it into the autolyse. I did notice when I went to mix everything together that there was a little bit of liquid at the edges of the autolyse, making it look like the flour had lost some absorptive capacity - not sure if this was a product of me adding salt part way through autolyse, or something else. I was concerned about gluten breakdown, but to my non-expert eyes/hands the dough seemed just fine (stretched instead of tore).

I did a 3 hour bulk fermentation (room temp around 75 degrees F), shaped, bench rested for 30 min and did a final shaping. The loaves proofed in bran-dusted kitchen towel-lined glass bowls at room temp for 3 hours, then were baked in cast iron to 210 degrees F according to Robertson's directions. 

I'm still very much learning how to handle and shape dough, so I assume that I did something inappropriate during shaping to cause the pocket. (The second loaf remains unsliced as of yet, so no idea if it has a similar pocket.) Any ideas what that could be, and what I could do to avoid it in future? My husband reports that it tasted great with olive oil, but most of our bread goes to toast/sandwiches and that's more easily accomplished without giant holes. Also, it makes me wonder if my thermometer reading was accurate; would it be off if I accidentally stuck it through into the hole? I can't decide. I must need more coffee. 

Thanks!

Catomi's picture
Catomi

I made these from the following post by kjknits: http://www.thefreshloaf.com/node/3241/sourdough-english-muffins


I used:

almost 1/2 cup of starter (needed to reserve some to propagate)

2 cups white whole wheat flour (the closest I had to all-purpose)

1 c whole milk

Mixed and left the dough, covered, at room temp overnight. I estimate room temp was probably about 70 degrees.  

In the morning the dough did not seem to look much different undisturbed, though it had acquired a distinct sour smell. I added:

1 T granulated sugar

3/4 t Morton coarse kosher salt (the recipe did not specify type and I thought they might be under-salted, but they taste fine to me)

1 t baking soda

I also measured out the additional 3/4 c of flour, but wound up only using some of it during kneading and rolling. I mixed them well (lots of air bubbles when I peeled the dough out of the bowl) and kneaded for about 4 min, then rolled out to somewhere between 1/2-3/4 inch thick. Older Child and I cut them with a 3 3/8 inch biscuit cutter. We wound up with 6 muffins and a tiny bit of scrap (I'm sure I could have just smooshed on the remaining dough, but Older Child would have been very upset). They were placed on cornmeal-dusted parchment paper and allowed to rise 45 min, then cooked on a cast iron skillet brushed with oil. The first side cooked on medium heat in about 8 min. The second side overcooked on just over medium heat in less than 6 min (I'm still getting used to my new cast iron skillet). 

Here is half of one biscuit with another for reference (OC had already made off with the other half), cunningly arranged on a stylish rocket ship plate. Yummy. Tender, wheaty, not really sour. I'll make these again. 

Catomi's picture
Catomi

When it starts getting hot and muggy out, my husband and I start grilling more. Today was hot and muggy for sure. Grilled pizzas sounded like just the thing. I've fixed the Cook's Illustrated version several times before, usually with white whole wheat flour (that being what I had). Today I had the bread flour the recipe called for, so I went ahead and used it. I'm blaming the difficulties I had on that change in flours. 

Here is the dough after I mixed it up, plus what was stuck to my oiled hand. 


The dough seemed pretty wet and sticky to me, but it's always a bit of a pain, and besides, I've been getting a tiny bit of experience with high hydration doughs. How bad could it be? Unfortunately I forgot to take into account that I can handle my loaf doughs with parchment paper, but the pizza dough would need to be picked up and put directly on the grate. It's a good thing my son wasn't outside riding his bike while I cooked, he might have picked up some choice words. 

I mixed the dough together, "kneaded" with a spoon for about a minute, and attempted some folds. Then I poured it into an enthusiastically oiled bowl (forgot I was oiling a bowl and not starting a stir fry) and allowed to rise at room temp of 80 degrees for about 2 hours. Then the dough was divided into four parts and shaped into approximately 10-12" ameboids. 

During the last 20 min of rise I started a full chimney of coals. Once they were going well I poured them evenly over half the grill, leaving half bare. I heated and cleaned the grate and was ready to go. Each piece of dough was carefully detached from the parchment paper and transferred to the grill surface directly over the coals. During this process, the dough generally acquired a significantly different shape. It was grilled until the bottom was done, by which I mean anywhere from "cooked through enough to handle" to "extra crispy." Then each piece was transferred, cooked side up, back off the heat to have toppings added. 

The pizzas were brushed with olive oil flavored with crushed garlic and Aleppo pepper. Then they were topped with tomatoes (chopped, tossed with salt and drained in a strainer for 30 min or so to keep them from making the crust soggy), a mix of fontina and pecorino romano cheeses, and fresh basil (added after cooking). They went back on the cooler side of the grill, with the lid on, to melt the cheese and finish cooking the crust. The addition of toppings did hide some of the minor irregularities, but there was no hiding some holes. Pizzas were served with tabbouleh and a grilled ratatouille salad, and consumed with gusto by my family. 

This being my first grilled pizza venture of the summer, I found it a bit stressful. I had to remind myself of the number 2 rule of making grilled pizzas, "go easy on yourself."  The number one rule is, of course, "have a place for everything to go, and everything in its place." Things move quickly once the dough hits the grate. 

Here are some finished pizzas. These weren't the best, and weren't the worst. 


How I made them: (amounts are from CI, but I tweaked the technique slightly)

Mix: 260 g warm tap water

22 g olive oil

4 g active dry yeast

10 g sugar

Allow yeast to foam (I did this because mine was old and I wanted to make sure it was active). Meanwhile, mix:

312 g KA bread flour

15 g white whole wheat flour

12 g table salt

Add the yeast mixture when ready and stir thoroughly to combine. "Knead" (stir) for about 1 minute. Transfer to an oiled bowl, cover and let rise until doubled (mine may have overrisen). Divide into four balls, flatten slightly and let rest 10 min. Shape (using lots of extra flour) and transfer to the grill to cook as above. 

Crust: soft and chewy in parts. Crunchy and cracker-like in others. A few holes charred straight through. 


Up next, I may have to try baking bread in the dutch oven on the grill. My husband successfully roasted a chicken in there over the weekend, and I get tired very quickly of heating the house when it's already warm out. Has anyone tried this?

Catomi's picture
Catomi


Today I baked two loaves of oatmeal porridge bread, about 12 hours apart. The plan was to bake them one after the other (I bake in my cast iron dutch oven and only have the one, so simultaneous baking is out). However, I wound up needing to run an extra errand this morning so the second loaf of bread was left in the fridge all day, until I had time to bake it and it had cooled off enough that I felt OK cranking the oven to 500 degrees. 

The recipe I used was from Tartine No. 3. The texture of this dough during folding was very different than previous loaves; almost stringy, and it felt lumpy during shaping. Perhaps I didn't distribute the oatmeal as well as I should have. 

Here is a pic taken 2 hours into bulk fermentation:


Both loaves were proofed overnight in the fridge. Loaf #1 was baked after a 14 hour proof. Here it is just before going in the oven:


And after coming out:


Crumb:


We had some with lunch. The crumb was moist, the crust chewy. It was tasty, but mild. No noticeable sourdough tang, especially compared to the spelt-wheat bread (I did a toast off, because why not?). Both were good, though I preferred the spelt-wheat for toast. I think the oatmeal might be better for sandwiches, especially PBJs where someone who will remain nameless might not appreciate tangy bread. 

Here is Loaf #2 just before going in, after a 26 hour proof:


And after baking (I used the same slash pattern because I was curious if they would get similar oven spring; since we already ate some of Loaf #1 it shouldn't be hard to tell them apart):

I'll edit to add crumb pics and flavor notes when I slice it. Right now it's cooling. 

Edit: here's a crumb pic. The inside is very moist, almost tacky. I must not have baked it long enough. :(   It will make good toast, though. Flavor is indeed more tangy. The flavor is quite good, though the texture leaves something to be desired. Oh, and I clearly need to brush excess flour off my loaves before baking. 


Catomi's picture
Catomi

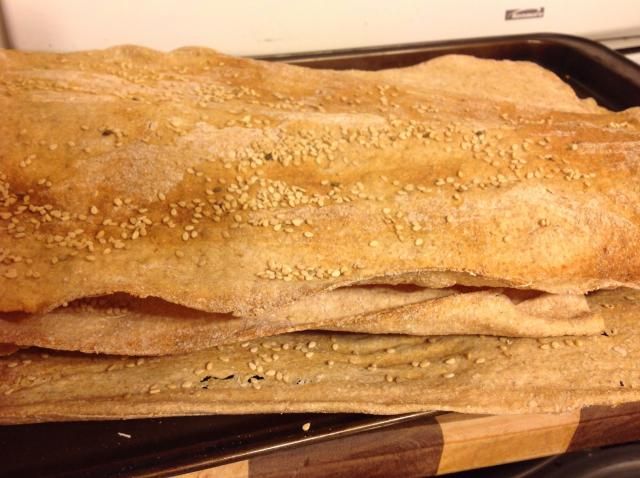
In Tartine No. 3, Robertson says that all of the bread recipes (with the exception of the Rene-style loaves, which are too seedy) can be adapted for crispbreads simply by decreasing hydration to 50-60%. I decided to try this with the brown rice porridge bread, as I think rice crackers are tasty. I added some sesame seeds on top of most of them.

I wound up using:

250 g BRM whole wheat flour 

250 g KA bread flour

35 g wheat germ (from Whole Foods bulk bins)

13 g Morton coarse kosher salt

75 g starter (I use 100% rye, 100% hydration)

250 g distilled water (to get 50% hydration, unless I screwed up the math)

350 g cooked brown rice

The brown rice was rinsed three times and then cooked in 2x tap water. Unfortunately, I got distracted by Youngest Child right as the rice was coming to a boil. Husband said that quite a bit of water had boiled off, so he added an unspecified amount of water and set my timer for me. When the rice was done, it was rather sticky. I cooled it to room temp and coarsely chopped it in a grinder. I mixed all my ingredients (unlike my last batch of crispbreads, the dough was VERY sticky), covered with plastic wrap and set in the fridge overnight. 

Approximately 8 hours later, I removed it from the fridge and rolled it out with the pasta maker. I rolled the first ball to the #6 setting on the pasta maker, with the copious addition of more flour (I didn't measure exactly, but it seemed like i used about 1/4 cup for each 1/5 of the total dough). Sticky, sticky stuff. Rolling it to #6 was too thin to handle, so the rest were rolled to #5. Most were brushed with water and coated with sesame seeds, which ultimately mostly fell off. 

The #6 crispbreads were baked (on parchment paper) for 5-6 minutes at 425 degrees F, until they were starting to brown. The #5 crispbreads were baked for 7-8 minutes. They were all removed from the oven and allowed to cool while we ran an errand. On our return I baked them at 200 degrees F with a wooden spoon propping the oven door open, until they were dry and crisp. 


Now that I've actually compared to one of the crispbread recipes in the book, it's obvious that I used way too much water. Also, my recipe was much larger, which explains why I feel like I had neverending crispbreads. Next time I'll double check BEFORE actually mixing my ingredients. Oh well, this was an interesting experiment. 


Edit because I forgot to add flavor notes: tasty. Not quite as nutty as rice crackers I've bought commercially, but quite good. It will be tricky to stash these until our trip. I think I would either skip the sesame seeds next time, or make more of a point to press them into the dough. Most fell off. 

Catomi's picture
Catomi

I just bought and started experimenting with Tartine Book No. 3. I don't have the others, but I did some reading online (especially tartine-bread.blogspot.com, now girlmeetsrye.blogspot.com). Based on her recommendation, I'm working with a 100% rye, 100% hydration starter that I started at the end of May. So far I've made 3 recipes from Book No. 3, and decided to sign up here in order to start a record of my loaves where I can relate photos to recipes.  I have a handy dandy notebook to put down any notes as I go, but I know I'm not going to get around to printing out photos and taping them in.

My first recipe was actually a crispbread, the oatmeal porridge crispbread. I would not attempt making it without my pasta maker, but with the pasta maker it was actually pretty easy. The three year old did most of the handle turning for me. I found I could fit 1/5 of the dough, rolled to the thinnest setting, on one baking sheet (I had to cut it in two to handle it). The crispbreads seemed kind of bland to me, but my family is eating them very happily. They stand up to hummus and peanut butter, as long as you're gentle. 

My second recipe was the white wheat blend (Ode to Bourdon). I decided for purposes of timing to do a simultaneous leaven and autolyse, so mixed the leaven in the morning, and also mixed the autolyse (minus salt). I forgot to add the additional 50 g water when mixing the leaven and autolyse. Oops. I also needed to rotate the loaves halfway through; the first one was unevenly browned. Texture was fine. Flavor to me seemed unexceptional, but I'm using store bought flour and it's possible it's older. Again, the family is eating it quite quickly and happily. 

Here is the white wheat blend:

I found some spelt flour, so my third recipe was the spelt-wheat bread. Again, I did a simultaneous leaven and autolyse. Once the leaven was ready I mixed the two together, added the salt and additional 50 g water recommended by Robertson, and started my bulk ferment. Then I went online and read about how spelt doesn't absorb water as much as other flours, and that decreased hydration is recommended. Whoops. Sure enough, it was a very wet, sticky dough. Shaping was extremely difficult for my inexperienced hands. I gave it my best shot and let the dough do the final rise overnight in the fridge. When I baked it the next morning, even though it was cold it was still quite soft. It baked up OK, though I should have checked temp. The crumb of loaf #1 was very moist, almost a little tacky. It makes excellent toast, though.

The spelt wheat bread is the main photo for this post, as I couldn't figure out how to resize pics on an ipad and the main photo is allowed to be larger. 


Up next, I want to try turning the brown rice porridge bread into crispbreads and slathering them in sesame seeds. Robertson says this is a simple matter of decreasing the hydration to 50-60% (and cutting the recipe in half, so as to not wind up with a ridiculous number of crispbreads). We'll see. I may also try making the oatmeal porridge bread, as I'd like to get a couple more loaves baked before we go out of town for a week. 

Subscribe to RSS - Catomi's blog