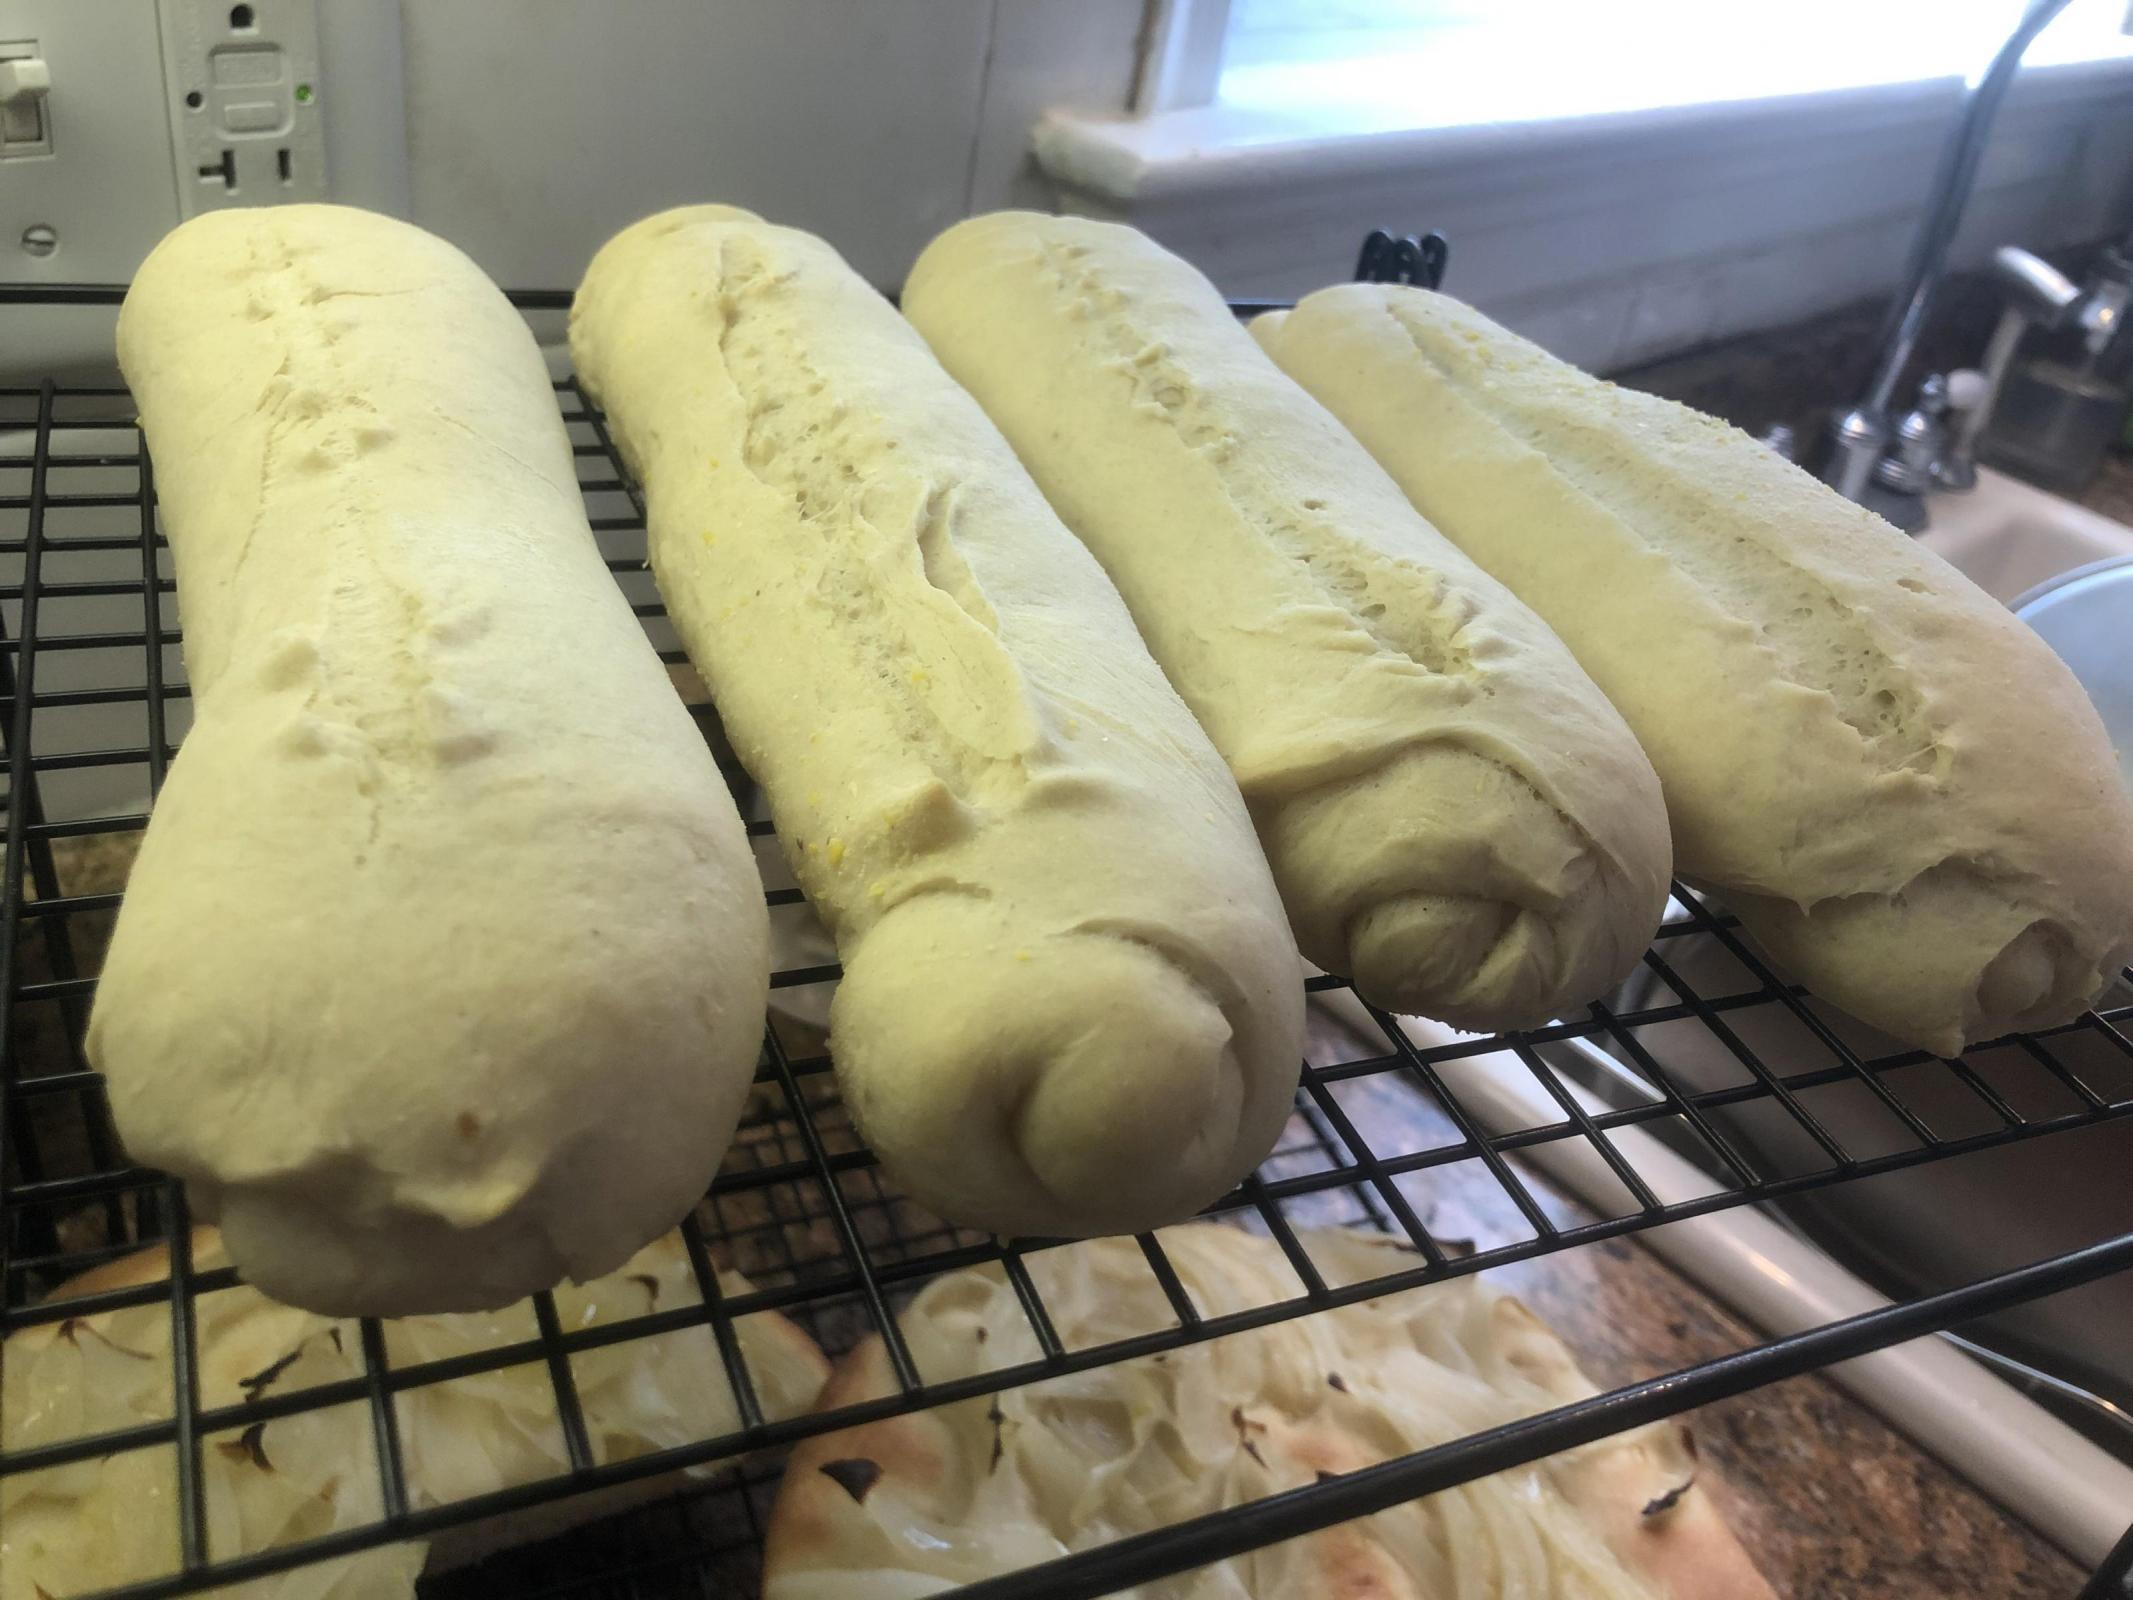
I've been struggling to get hoagie rolls to rise in the oven and I'm just failing miserably. I've tried a few recipes, most recently Ethan Chlebowski's. I'm getting no oven spring. The rolls basically rise a tiny bit in the oven and then stop.
A few notes:
- I follow the recipes to the T, including Chlebowski's, although with one edit: I did 350º convection instead of 375º static. That always works for me with other bakes. I also didn't do the egg wash because I was in a hurry and skipped it, though I can't imagine that would affect the rise.
- The oven temp is correct. I measured it empty with my probe. The bread also hits the desired internal temp (200º) exactly when it should, after about 15-20 mins.
- The yeast is fine. Both the bulk ferment and the shaped loaves rose very nicely. Plus, I baked a couple of schiacciata with the same yeast about an hour before and those rose fine in the oven (you can see them partly in the photo below).
Thank you for any help you can give!
Raw dough or baked?
It's baked. No egg wash.
without egg wash. Have you tried baking longer? If they are not browning when baked longer, perhaps they have been fermenting too long? This might explain the lack in oven spring. Tell us more about the rising. How many rises, how long, how high, temps. The more detail the better. I got this feeling they should be shaped sooner.
Is it possible that you warmed the milk too much and killed a lot of yeast?
Also, they look under baked. Did you use Diastatic Malt?
Mini, these look baked to me. But just barely.
Yeast is 1.5%.
- I thought about the possibility that I killed the yeast. But as I wrote, both the bulk ferment and the final proof exhibited strong rises---the bulk ferment in particular. Would that occur if the yeast were mostly dead? It doesn't seem like it to me but I could be wrong.
- Fermentation is 1hr bulk; the dough doubles in size. Final proof is about 45 minutes; I would say the rolls get about 50% bigger, maybe a little tiny bit more. Ambient temperature of about 75 degrees.
- I didn't use any malt as I did not have any.
fast and shaping should start earlier, around 45 min. Really knock the dough down, "punch it" or my favourite : drop the dough bowl firmly on the work bench sending a shock wave thru the dough. :) Divide dough and shape quickly. If shaping is taking too long, the sizes seem to vary too much as the dough rises, you might try spreading out all the dough at the same time into a big rectangle, let it rest 10 min. to relax and then cut into 4 pieces to quickly roll up into logs. Pinch shut and allow to rise seam side down under a smooth towel.
Let them bake a little bit longer and when you think they are ready, heck, give em a few minutes more. :)
Ever brush a baked roll with whole milk while hot? Try it for a softer crust.
Thank you so much for this. Can you clarify: You say that the bulk rise went too fast, but you also suggest I should shape at around 45min---which would be 15 minutes *sooner* than I did it this past time. So I'm not quite sure which one I should do!
The bulk rise fermentaion is going too fast so shape sooner. Don't wait the full hour because it sounds like the yeast is very active. The recipe says 45 to 60 min bulk. Choose the fast version or 45 minutes for your conditions. (Warm dough, maybe warm room, warm hands etc.)
(If you want a longer bulk rise reduce the amount of yeast or use cooler liquids or cooler room temps.)
Out of curiosity, Exactly which yeast is being used in the bread? Yeast products can vary.
The bread looked interesting so I gave it a shot. For a first attempt they came out very well. The flavor is nice and the bite seems right. The bread was nice and soft and not chewy (tough) at all. This bread is substantial, and I think this is as it should be. These should elevate any po-boy type sandwich. I live close to New Orleans, thus the po-boy reference.
A very nice bread that can be made in 4 hours from start to finish.
I think if I were to bake these again, that 2 changes would be made.
1. The hydration seemed a little dry to me. I posted another post asking the opinions of others. HERE is the LINK to that post.
2. I would decrease the yeast by at least 0.33% because the dough rose so fast. After the first hour the dough had more than tripled at room temp. The estimated room temp was 74F. Because they rose so quickly shaping was more challenging. Notice the air pockets in the top loaf pictured below. Decreasing the yeast would increase the fermentation time. And that should produce even more flavor.
Here are the formula with Baker’s Percentages in case anyone is interested.
Hoagies
https://www.ethanchlebowski.com/cooking-techniques-recipes/hoagie-rolls
INGREDIENTS (Four 10" rolls)
*Note: You could use a liquid mixture of equal parts whole milk and water. I prefer using all skim or 1% milk.
METHOD
My husband and I have noticed that when this type of bread is cut open, and a "V" cut is used instead of a "---" straight cut, the sandwich holds itself together better while holding and eating. Subtle but effective.
I also prefer light brown sugar to honey and as substitute for lack of active malt. I add the same weight as the yeast. For a sweeter bread, increase the sugar.
Mini, are you cutting a wedge out of the center of the bread? Not sure I understand the “V” cut.
When you use the prescribed amount of yeast, how would you describe the fermentation?
Well...maybe not as deep as a V, and no wedge is removed. A shallow V but made from one long side starting a little higher than middle and angled toward the bottom. After reaching about half way, pull up slightly on the upper already cut bread to make room for the knife as it is tilted upward to finish the V cut. Stop cutting before completely separating the bun if you want a hinge on one side.
When you use the prescribed amount of yeast, how would you describe the fermentation?
Pretty darn fast! (Especially if you normally bake only sourdough. Set a timer!!!)
I would degas the dough as best I could, flip the dough out top side down (bubbly side up) on lightly oiled or floured surface, spread out the dough with fingers, maybe a rolling pin. If it was fighting my stretching give it a rest and spread some more. Whip out my trusty pizza cutter wheel or big kitchen scissors (bench knife, whatever I find first) and cut the dough into loaf length portions. Dust off any flour and roll up* tightly and seal the seam. Roll logs a bit and shape ends if I want a torpedo or submarine shape (not needed if very hungry) space them a bit apart on parchment covered baking sheet and cover with a towel. Then adjust oven shelves, set temp and turn on the oven etc. to preheat so oven is ready when the buns are puffy with just a little tiny bit of resistance.
If I want seeds on the bread, I brush with water or milk and roll in or sprinkle on before the dough goes thru a final rise because the seeds will then spread out so nicely.
* roll up. This is a good place to add some special additions before rolling up. I can think of all kinds of goodies.
Great idea for cutting sandwich bread!
This link will take you straight to the “V” cut.
https://youtu.be/8PsoJJpQVIM?t=31
Dan, "Subway" brand restaurants do the V cut that Mini describes.
Do they still do that? Where I am they've stopped doing that a long time ago (maybe 5 years or so, possibly 10).
At my two usual locations here in indy.
At least they used to. If they stopped at some point, I did not take notice.
Reminds me of the Subway bread (roll, bun, whatever) copycat recipe from last year.
https://www.thefreshloaf.com/node/65459/overpowered-subway-bread-recipe-open-source-original
I had an idea on why the buns (in the OP) didn't brown.
The yeast may have eaten up all the sugar.
With no malt powder to make more sugar out of starch, maybe... the yeast ate all the sugar, and none was left to create browning.
Dave these things ferment so fast, I doubt all of the sugars from the starch and also the honey or sugar was depleted.
I have no idea what happened.
@Dan, Unless he used unmalted flour. (Devil in the details.)
If you look at the copycat recipe I linked above, that has diastatic malt powder AND honey/sugar, and still just -barely- browns. The author of that recipe even says that all the sugar gets eaten up and the bread is not sweet.
_Because_ this recipe here on this thread has so much yeast, it needs the DMP to slowly make sugar so there is enough after the 2nd rise.
The DMP is not really "optional" in this recipe, IMNSHO.
And/or, perhaps the baker used unmalted flour, such as from Central Milling which sells some. The OP doesn't specify _exactly_ what flour they used.
--
Update: I just watched Ethan's video. The DMP and egg wash aren't really optional. That, and your and Mini's suggestion to ferment less, seem good solutions.
Update #2: There may also be a problem using convection mode for this recipe. You guys know I have a bugaboo about using convection mode for a recipe that was designed for non-convection. (And before you commercial bakers remind me that commercial baking ovens are often convection, please remember that home-convection ovens are designed differently and work differently than commercial convection ovens.
The best hoagie rolls are available at Wawa, based in Philadelphia. They are locally known as "Italian rolls". I'm surprise they haven't been mentioned in this thread. There are Wawa locations in other regions, but the home-market products are the real deal.
Does anyone hail from Phila-south NJ-Delaware on this board? These type of rolls are everywhere. And good.
I don't have a recipe or method to offer, hopefully someone with knowledge and experience can chime in.