Hi.
My name is Olga and I'm new to TFL. I recently started to bake sourdough bread and constantly running into an issue of not getting nice open crumb and sufficient oven rise. I read a lot and tried a lot of things, but the result is always quite the same no matter what I do. I will bring my recent bake as an example, though there were some things done differently than I usually do (for example this time I used more leaven). Maybe someone here can help me indentify the problem as I start running out of thoughts and motivtion to bake.
Starter
My starter is fed white bread flour at 100% hydration, usually in 1:4:4 to 1:5:5 proportions. I keep it at the room temperature and feed every 12h to 24h. It usually doubles to triples in volume within 8h- 10h if I out water at room temperature. Warmer water would speed up the cycle. This time I fed starter last 11h before making a leaven.
Leaven
I made leaven with white bread flour at 100% hydration in 1:5:5 ratio. I used warm water 32C (around 90F) and out it into warm place aronud 28C (82F). In 5 hours it was almost tripled in volume, nice and bubbly.
Formula
This time I aimed 1:2:3 proportions and left out any other flour rather then white bread flour. So I used:
495 g white bread flour (14g protein)
5 g diastatic malt
333 g water
166 g leaven
10 g salt
Autolyse
I autolysed flour, malt and water for 4 hours. Long, I know, I wanted to try a long autolyse, because no luck with shorter ones. Dough after autolys was beautiful, stretchy, very manageble with great windowpane sign.
Mixing
I added leaven, mixed a little by hand in a bowl, then sprinkled with salt and spritzed with 2g of water. Mixed by hand in a bowl, then did slap and folds on a counter for about 15 min total. Dough was manageble and stretchy, quite good-looking after minimum mixing. In the end of mixing it still looked good and was maybe even more stretchy. I put a dough sample into a little and marked a baseline to track volume increse. Covered the bowl and put both bowl and jar into oven with only light on.
Bulk and stretch and folds
I bulked for 4 hours and did 3 set of stretch and folds with about 40 min intervals. In the end of bulk fermentation dough had incresed in volume by more then 2x. It was light and airy, so I finished bulk fearing I would overproof if push further
.
Shaping
I pre-shaped boule folding dough and rolling over itself. It held shape quite good. It had bench rest arounf 25 min. Then I turned it over, repeated folding an rollid, then shaped with hands in half-circular motion (How much am I supposed to shape? How I know it's time to stop?). Then I dipped dough into sesame seeds and put into floured banneton. I shaped it a little stitching together inside a banneton too.
Final proof
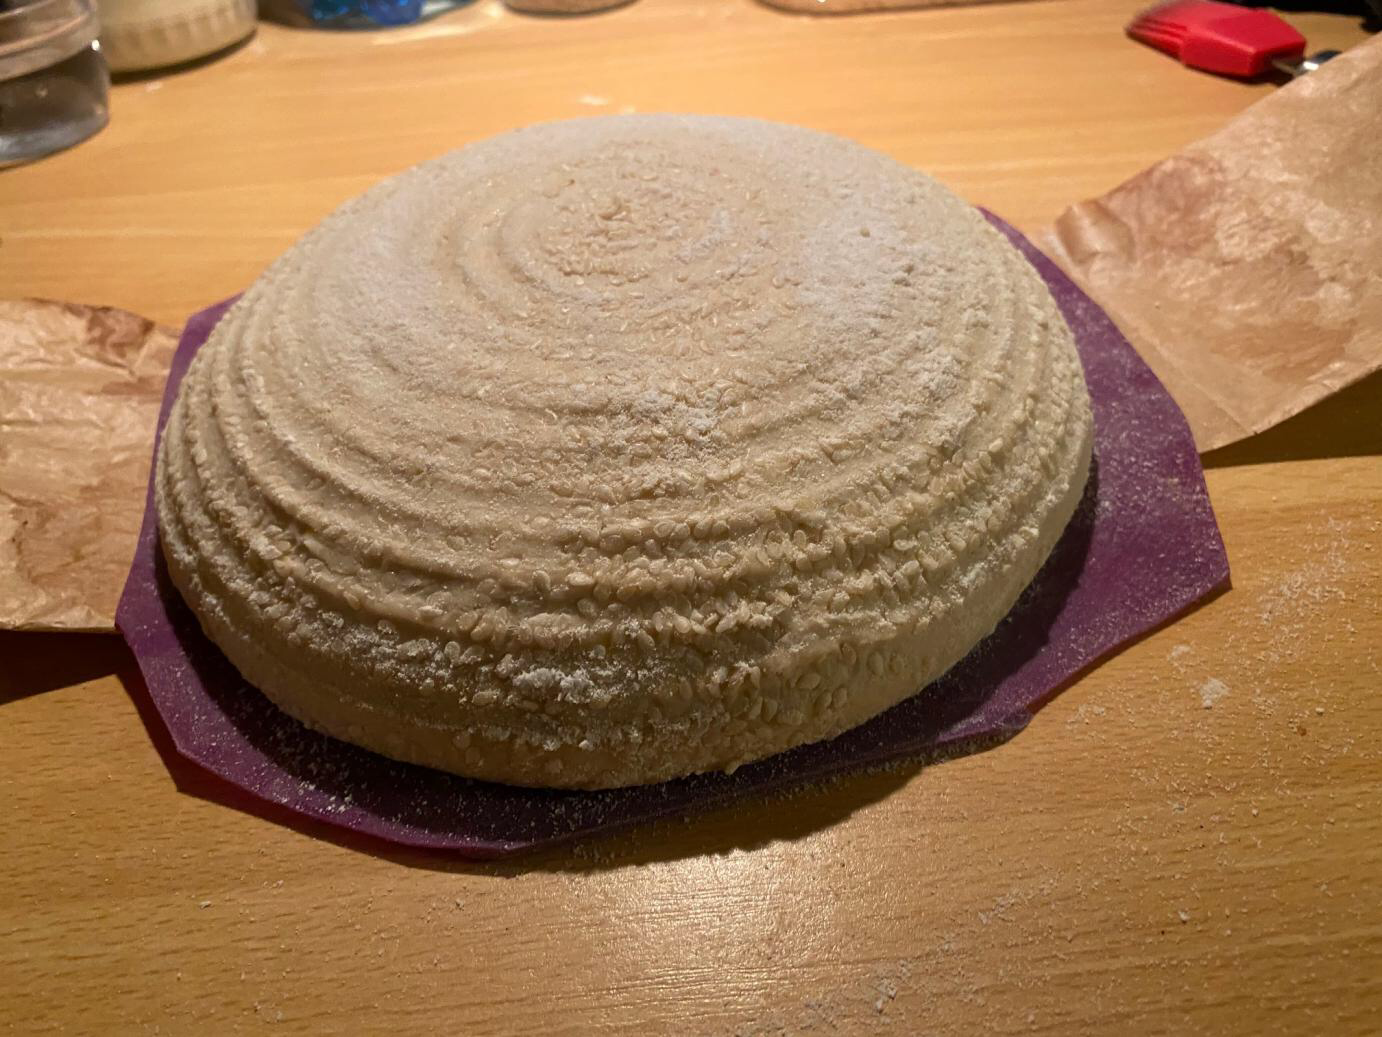
I final proofed at room temperature, because I used so much leaven and leaving it overnight would make bread too sour for my boyfriends taste. So it proofed around 2h on the counter. It had some rise inside banneton and during poke test was soft, spinging gently back but not all the way back. Then I put it into the fridge to ease the scoring while heating the oven.
Bake
I bake in a cast iron pot. I pre-heat pot with lid on to 230 C (446 F). I scored the loaf and put in into pot, than sprayed some water over it. Covered the lid and put in the oven.
I bake by Vanessa Kimbells books recomendation 1h at 180C (356F) with lid and 5 min without lid. I've tried higher temps, shorter overall time and longer time without lid, but then the crust get too hard and I have sensitive gums that just start to bleed while eating this bread.
I add some pictures too.


Hi Olga, welcome to TFL!
First off. You are being waaay to hard on yourself. Keep in mind the beautiful loaves that you are viewing were probably baked by those that have been at it for years. They are the results of hundreds of bakes.
For someone new to sourdough, your results are impressive.
My suggestion is to focus on fermenting a little less.
In the last year or so, many of us have been fermenting until a 50% rise. A lot of us are bulk fermenting to as low as 20-30% rise! HERE is a LINK pertaining to the use of an Aliquot jar to determine the rise of a dough.
You may find something of interest HERE. It is the discovery that most helped me with oven spring and ears
BTW - the image of your proofed bread looks great!
Also, upon zoomed observation, the cell walls in the crumb are thin and the crumb is lacy. A great thing.
Thank you for your kind words!
I will try ferment less and will see if it helps with the oven spring. I see next commentator thinks, that I should proof dough for even longer...
I think, once I have time (maybe even tomorrow), I'll try both. I would make dough, ferment it until 30-50% increase in volume, than shape one half and let the other half ferment futher until doubled or just below that. Than final proof for similar time, bake under same conditions and see what happens.
I also got some specimen containers from work for aliquot jar method. I'll give it a try!
Good idea to test both theories! Please photograph and let us know your findings. We can all learn from each other.
You wrote, “ In the end of bulk fermentation dough had increased in volume by more then 2x”
Your future test said BF 1 bread to 30-50% and the other to just less than 100%. You wrote that your last baked BF until 2X or 100%. If you want to test under/over fermented, why not BF to ~30% and the other 150- 200% (1.5-2X)? Then in order to reduce the variables, don’t proof at room temp. After shaping and without any RT proofing cover the dough with plastics bags and put them in the refrigerator overnight. Next morning preheat oven and slash and bake dough cold.
Another suggestion -
Instead of cutting your dough in half, after the first dough has BF, cut and weigh each dough before the BF begins. BF them in separate vessels. That way you don’t disturb the longest fermenting dough. A single aliquot jar will work for both doughs.
I realize the 30% BF can be scary, but many of us terminate the BF that early. It is not easy to “have faith in the oven spring” :-)
Danny
Ok, Danny, I will do as you suggest. I can't do retard tomorrow, because I have a shift on Sunday. So I'll make dough on Monday and bake Tuesday morning I think. Then I will post results.
Today I'm baking too. I stopped bulk at 40% volume increase, preshaped, gave a bench rest for 20 min and then proofed at room temperature. I wasn't sure how far should I push this final proof. I wasn't going for a retard, as I wanted to bake tonight. At around 70% jar rise I put it into freezer to wait untill the oven is ready.
I have no idea what I am doing :D :D
Looking forward to your results. Your plan sounds fine. Be careful to not over proof. Bake early instead of late
Hmm, I think your advice had a positive effect on oven spring. It still ain't massive and crumb is denser towards the middle, but bread is taller and softer and in general crumb seems more open.
I bulked until 40% increase, than pre-shape and bench rest, shape and proof at room and it went into freezer at 70% at the jar. The dough is 70% hydration, white bread flour and 25% leaven.
What do you think of the result?
Thank you so much for your advice! I think now I can see which way to go...
Olga, you are headed in the right direction. Very explosive oven spring.
I am concerned about the cracked crust in the top of the loaf. Imagine how much more the loaf could have expanded IF the crust remained intact and contained ALL of the gas produced! IMO, this should become your second focus.
Cracked Crust -
Thank you for driving attention to that.
As I am at the begining of learning curve, I use only white bread flour in order to make my life easier. That particular bread was baked of flour with 12,5gr protein. Now I have one finnish white bread flour, that contains 14gr protein per 100gr.
I believe that gluten was developed quite well, as dough was nice, extensible and stretchy. I did a long autolyse and mixed well.
There may be an issue with the way I bake. I pre-heat a cast iron pot with a lid on to about 240C (464F), put a loaf with a silicon matt underneath it in, spray with some water, put the lid on and put it into the oven then reduce temperature. This time I baked 20 min at 220C (428F) and 20 min at 200C (392 F). Oven was heating from the top and bottom and no convection was used.
Maybe next time then I won't pre-heat the lid. And maybe even use only heating from bottom?
Olga, I was thinking the same thing about not preheating the lid. BUT if you can turn off the top element I think your problem will be solved with the cracked crust.
Also, check your bread after 30 minutes to see if the bottom sounds hollow when tapped. Your bread may be thoroughly baked in less time than the recipe indicates.
Ovens are fickle, mine sure is. My oven will thoroughly bake a 650 gram loaf in 20 minutes, while others report the same weight loaf taking 40-45 in theirs. Test fore doneness earlier in the bake.
Lastly, are you scoring deeper than 1/2 inch? 1/4 to 3/8” is plenty.
Hi, Danny.
I baked today with high-protein flour (14gr), I made almost 80% hydration dough taking into account water from starter, made sure I autolysed and mixed well to develope gluten, Bulked it till 40% increase, then pre-shaped, gave it a bench rest for 30 min, shaped (I have some incident during shaping and had to let it rest a little and reshape) and put into fridge directly after shaping. Loaf looked super flat before going into oven. I do not score deeper than 1/2 inch for sure.
I used only bottom heating in oven and pre-heated pot without lid.
I got a considerable oven spring and crust wasn't cracked as much as in my recent loaf. But the crumb is cavernous with large irregular air pockets and it looks underprofed to me (?) . Should I bulk or proof longer? Or is it some shaping issue?
Yes a little more fermentation will help even out the holes.
Are you still using the same formula?
What is your hydration counting the levain?
You might experimenting by reducing the temp a little. The bottom is a tad dark.
Is the cast iron pot sitting on a baking stone?
Maybe raise the pot a little to get it away from the bottom heating element.
These are the types of things that you can adjust until to dial the bake in. It gets easier as you gain experience.
OH! A Biggie...
If your hydration is high I suggest to reduce it. 68 - 70% is a good palace to start with white flour. Make it easy on yourself. Simplify your bakes until you master them, then slowly raise the bar. Nothing builds confidence like success.
Thanks for a great advice once again! Today I’m on shift and not baking, but will try to apply your recommendations tomorrow.
You have saved me soooo much time, nerves and failed attempts! I’m beyond grateful ?
I’ll go for a lower hydration next time, I’ll settle for 70% counting the leaven then.
In order to even out the crumb should I push the bulk fermentation further or should I final proof for longer? I don’t entirely get the concept ?
This time I did put the cast iron pot on top of a baking stone (usually I don’t), but I didn’t use a silicone matt. It prevented bottom from burning well, I think I gonna use it next time.
I cannot raise the pot any further - it’s kinda tall and the lid knob wouldn’t go through the oven door if lifted.
“ In order to even out the crumb should I push the bulk fermentation further or should I final proof for longer? I don’t entirely get the concept”
Easiest method is to push the BF a little longer and retard the dough overnight, then bake cold in the morning. Many, maybe most bakers choose this method. It eliminates the difficulty of evaluating the Final Proof, among other things that are beneficial, such as flavor, blisters and scoring.
This is my current thought, although it may be revised as I learn more.
BUT this is what I am unsure of -
Is the gas produced during oven spring a result of the yeast as they warm up or is it the expansion of the gas already contained in the dough. I think, probably both. But not sure.
You really don’t need a baking stone when using a covered cast iron vessel.
Rapid expansion during baking is mostly due to expansion of gas because of heating, and coming of gases out of solution in the dough - and expanding. I remember a few months back someone posted a link to a bakers magazine with a schematic - I think contribution of yeast activity was something like 3% there, which makes sense - yeast can't inflate the dough with the speed anything resembling how quickly bread springs in the oven.
It seems logical. As I know, gases solubility in water reduce with increasing temperature. So when the temperature rises, less CO2 molecules can stay in solute and they start to escape into the atmosphere, where they get trapped by dough structure forming alveoli.
What isn’t clear to me is why underproofed dough (like my last one here) creates those large gas caverns and some less aerated crumb around, while optimally fermented one is evenly aerated throughout the crumb.
That makes perfect sense. So the small amount of gas produced by metabolizing yeast are negligible, how do we get around those blasted large bubbles. My perfect crumb would have evenly distributed pencil sized alveoli with thin and lacy cell walls.
Experience leads me to believe that more fermentation rather than less produces my desired crumb.
Bread is such a mystery...
I am not sure why the oven spring in underproofed bread is explosive.
But I have a hypothesis why large bubbles appear in that case. I think rapid evaporation of gas from the dough preferentially occurs at the interface with the gas phase. I.e. only (or mostly) preexisting gas bubbles expand during baking. The logic is, it's much "easier" to expand a gas bubble, than to create one. Therefore, when there are very few bubbles in under-fermented dough, the bread ends up having few huge bubbles.
Similar idea to crystallization: it occurs much more readily when there is a primer (is that the right word?), ideally a tiny crystal of the dissolved compound, or at least some other solid.
So a focus gas leads to aggregation of multiple foci of gas bubbles and thus into a large bubble as it expands with heating.
I think multiple bubbles fuse in case of overproofed bread, when gluten is too degraded to hold them apart, and that why they also tend to end up on top of the loaf... In this case what I am thinking is the actual evaporation of dissolved gas happens at the edge of a bubble, and since there are so few bubbles in underfermented dough, they end up being huge. It's just a hypothesis though.
The literature indicates that all alveoli originate during wetting and mixing of water and flour. Physics does not support the spontaneous generation of bubbles as they require infinite pressure to overcome the surface tension of a bubble with radius of zero. Initial bubble sizes are quite small, microns in diameter, and may be simply air trapped by irregularly shaped flour particles as they get surrounded by water.
Irrespective of their origins, they are enlarged by diffusion of CO2 at the surface from the CO2-saturated liquid phase of the dough. Getting from initial mix to the beginning of dough volume expansion due to trapped CO2 takes some time while the yeast (using the more energy efficient mechanism of respiration) consumes the residual dissolved O2 in the dough, then switches over to fermentation as the energy source of growth. Even then it takes a while for the liquid phase of the dough to become saturated with CO2 and until then, there is very little driving force to inflate the alveoli.
There is a photo from a 1941 technical paper on pg-80 of Bread Science (and other places) showing what happened when the initial mix of flour and water were combined and mixed under a hard vacuum. The resulting bread has very few alveoli and doesn't rise properly.
With respect to when and why alveoli merge (the claimed mechanism for getting large holes in bread) small alveoli are very stable (like soap foam or whipped cream or meringue) but as they grow become less so. My sense is that manual manipulation is the principle mechanism for cell merger, when the dough is stretched and folded, the alveoli are elongated and flattened (larger alveoli more so than smaller ones) which introduces forces that destabilize the structure (run a spoon through a dish of soap bubbles after they have been sitting for a while and watch them consolidate/self destruct).
Shaping is the other process step that subjects the dough to mechanical distortion and facilitates cell mergers. You can see it happen when you stretch the dough as you roll it up into a baguette. If the dough is well developed the bubbles will be strong enough to retain their wall ingegrity and as you roll it up, the larger bubbles are embedded into the center of the loaf. As you roll the baguette to length, you get what seems to be a combination of further cell mergers and cell collapse which leaves behind big holes and the more stable small alveoli. The bubbles deep in the crumb are protected from directly leaking to the ourside by multiple layers of surrounding alveoli and thus are more inclined to just grow larger rather than they are to deflate.
So the conditions are set by a lot of factors, from flour choice, to hydration, to mixing intensity, to manipulation during bulk fermentation, all before you even divide the dough into pieces appropriate to your intended use. Then you have pre-shaping and shaping that gives you a final opportunity to screw it up.
So how hard can this be?
Thanks for that contribution Doc. Can you explain the huge holes and tunnels that develop in a baked underfermented bread? What is their origin and developement?
From you you describe I guess that they develop from trapped air during mixing, kneading and folds. But then how to they get so large?
benny
When shaping, you may get consolidation of bubbles introduced by folding which you then bury as you round up and cinch the loaf. The result is a few very large holes randomly distributed in the middle of the loaf. I have seen the same thing in the rare case where my starter was used too soon and was not fully active - which produces an under-fermented batch if you let the clock govern when to shape. But I am not in the habit of trying to reproduce poor results just to understand which of my many bad behaviors is causing me the problem.
The size is what leads me to suspect folding as the root cause. Any bubble with a lot of surface area will tend to accumumlate a lot of CO2 during proof since the pressue is inversely proportional to the surface area and diffusion will always run along the local pressure gradient. Small holes have very high pressure so don't grow very fast by that mechanism. Big bubbles get bigger because the adjacent small bubbles lose gas to the larger ones. The small ones are very close, so CO2 moves rapidly, shrinking the little ones as the gas moves toward the giant low pressure one next door.
Doc, what is necessary to produce a crumb that has uniform, evenly distributed alveoli that are mostly no larger than the diameter of a pencil eraser?
This bread was baked by a lady on Instagram called ‘chompmom’. I’ve begged her to do a CB but so far she has not committed.
Danny - I am just guessing, but the design point I would start with would be all white flour, 65% hydration, 15% pff, total mix time in your Famag (1000g batch size) should be about 4 min @ speed 0 to get the flour wet, 30 min autolyse, 4 min @ speed 0 to incorporate salt, then 6 to 8 min @speed 4 to develop the gluten; BF to 30% volume increase with only a couple of folds. Deflate the dough by rolling it out to 3/4" thick to get rid of any large bubbles, then shape it from there. It looks like a fairly thick crust, but you know your oven better than anybody so use your standard timing to get a nice color rather than anything else.
Then if the holes are too small, repeat and be more gentle in shaping. If the holes are still too big, step the hydration down in 2% steps until you get what you want.
If baked cold, don't, and/or proof longer. Enjoy!
fermentation in the original post as being too long waiting until 2-3 times the original volume before final shaping. I think The last loaf with it's vertical tunnels the bulk was too short. So I agree with you, Olga.
I think when the original posted loaf was "2x, light and airy" that was the time to bake it. Try combining your later folding with shaping so that when it looks ready to bake, you don't have to wait and shape it again. Does that make sense? Just reduce the bulking time a bit, folding earlier. Because of the ongoing folding of fermenting sourdough, it is often hard to separate the bulking and final proof into two distinct phases.
The diastatic malt. In a separate bake, I might drop it back to half the amount, especially if the flour may be already malted. It depends on the texture of the crumb. A little active malt is good but a tad too much reverses the desired effect and might be giving you a harder crust. Something to consider down the road. A brushing of water, milk, or cream can soften up the crust fast while loaf is still hot from the oven. Play around to find your favourite.
Wow, what a great discussion!
DanAyo, Ilya, Benito, Doc and Mini Oven thank you for your contribution! It really was a good reading!
Now I recovered from my shift, gave it a thought and even baked some bread. I did a little experiment with bulk fermentation time, but didn't feel like letting my dough hopelessly overproof, so I adjusted my idea to be more practical. Instead of comparing two extremes, I decided to go for two points in the optimal range and see which one works best for me.
So I made a 70% hydration (counting leaven, which was 20% of total flour weight) white flour dough - man, it was stiff! I usually mixed by hand, but this one was a ball from a very strart. So I put it into mixer for 3 + 3 min. Then it bulked until 40% volume increase in a jar. During bulk I gave it two sets of folds, but it might be really unnecessary as dough was really elastic. Then I divided the dough, pre-shaped one half and let another bulk until 60% volume increase in a jar. Both pieces got pre-shaped, then bench rest for 30 min, shaped and retarded in a fridge. Then I baked 40% loaf first and 60% loaf second. Baked in a cast iron pot pre-heated without a lid.
Results
Both loaves got a nice oven spring. DanAyo thank you one more time for all the tips! Interestingly it was slightly better for a loaf that had longer bulk fermentation time! Same loaf also had more open crumb. I can't exclude the effect of my handling during a shaping phase, as I have little experience and might just ruined a good loaf without even noticing.
Pictures
Loaf bulk fermented until 40% volume increase in a jar
Loaf fermented until 60% volume increase in a jar.
Overall my loafs are much more round and puffy since I first posted here. So you guys take it as a compliment =)
Olga, you wrote, “ So I made a 70% hydration (counting leaven, which was 20% of total flour weight) white flour dough - man, it was stiff!”
That is not making sense to me. White flour, such as refined all purpose or bread flour and 70% water should never be a stiff dough. Something doesn’t sound right. In my experience white flour and 60% or less would make a stiff dough.
Regardless, your breads are looking great...
I don't know, maybe it is that high protein finnish flour...
I was intended to do 65% hydration dough, but after initial mixing I increased to 70% based on the dough's consistency. I did the math myself, but as I was tired after sleepless night, I double checked with two different online calculators, because dough seemed suprisingly stiff... They both gave me same numbers:
895g of flour, 595g of water, 210g of levain (100% hydration, 10.5% pff) and 20g of salt
The crumb looks too dark for a white wheat flour, more like a mixture of flour types. Something in there is soaking up water like crazy. Packaged in paper or plastic?
Loaves look pretty darn good.