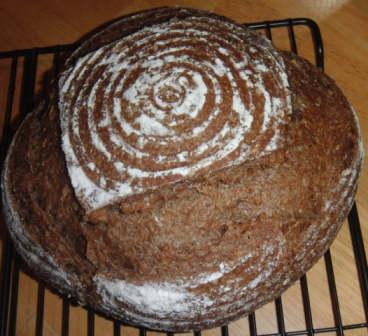
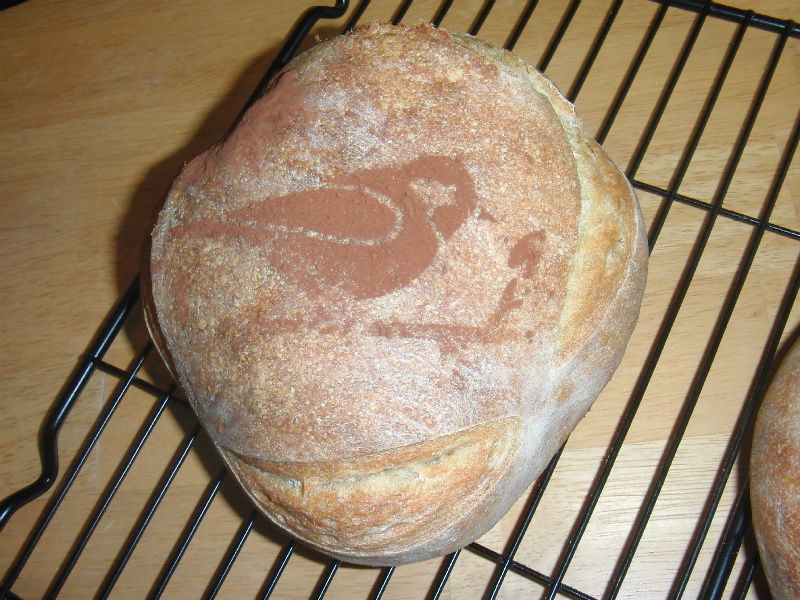
The Fresh Loaf

A Community of Amateur Bakers and Artisan Bread Enthusiasts.

hungryscholar's blog

hungryscholar's picture
hungryscholar

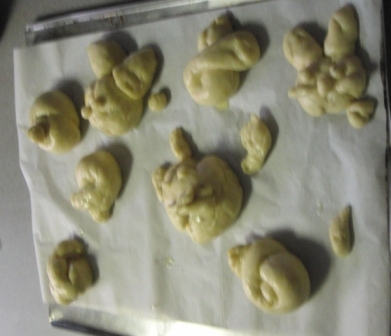
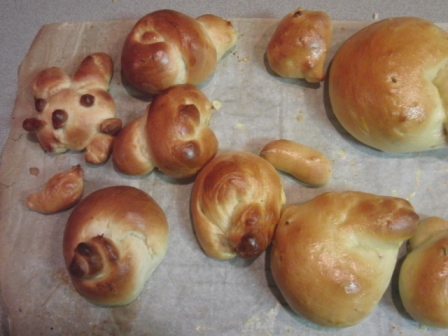
Made some Italian Easter bread and everybody helped shape it. I'll have to check on revealing the carefully saved family recipe from a likely long out of print cookbook. I can reveal that it has a nice mix of fennel seeds and lemon zest that I haven't seen in other Easter bread recipes making the rounds.

Easter was great visiting with family, but I got home and there was a washer to be fixed and plenty of clothes to be washed. Since I wanted to watch the washer while running a test load I made sure I had everything I needed to pass the time, fresh coffee, and a copy of Clayton's Breads, recently snagged at a library book sale:

hungryscholar's picture
hungryscholar

I am getting kind of stuck in a sourdough boule sort of rut and given the various possibilities I could be stuck here permanently and yet I'm hankering to be able to make a decent baguette. Hence, I've been wandering about this site and seeing some tasty looking recipes that play into my desire to let the dough do a lot of the work. Thanks to all these fine bakers for sharing their methods! But I was getting confused trying to keep the variations straight, so I put them into a table so I could try and see what was going on. So many routes to tasty bread to try out depending on how the mood strikes:


I changed it to an image so I could post it, this should be the PDF version on Google Docs

I put together some dough according to Bouabsa, but shaped and proofed according to Fromartz. Alas my slashing and shaping need some work in baguette form, but I'm pretty happy with the crumb:

hungryscholar's picture
hungryscholar

So, my wife let it slip that pepperjack is her favorite bread so we picked up some cheese at the grocery store and I diced it and folded it into the dough with the stretch & folds. Somehow I made myself put all that delicious cheese in the bread (nearly 50% of the flour by weight), I guess that's love for you. I had about 80g of stiff levain chilling in the fridge that was left over after refreshing my starter, so I used all of it here.

Pepperjack sourdough

80g stiff levain

20g whole wheat flour

280g KA all purpose

200g water

145g pepper jack cheese

6 g salt

Bulk ferment was around 4 hours at around 80 F, with S&F every 30 minutes for the first 1 1/2 hours to develop dough and incorporate the cheese. I shaped it and proofed it for around 1 1/2 hours at about 86 F. Preheat to 500 and baked in dutch oven at 425 F, 20 min cover on, 25 min. cover off.


hungryscholar's picture
hungryscholar

Having grown up in San Jose, CA, SF sourdough is what I think of when I think sourdough and thanks to many posts on this site, especially the ones concerning Larraburu, such as this one: http://www.thefreshloaf.com/node/17730/divine-inspirationfor-me-it-way-larraburu-brother039s-sf-sd-what-was-it-you have given me a lot of inspiration and I feel like I'm getting closer to being able to get the sour I want without having it taste like whole wheat or rye. I've been keeping the mother starter at room temp and feeding it 1 part starter : 1 part water : 1 part AP : 1 part WW. I still don't have any clear flour, which seems to be what's providing the necessary ash content in the Larraburu formula, so I've been adding a portion of WW as a placeholder of sorts.

SFish Sourdough

50g stiff levain (refrigerated after refreshing the mother starter)

25 g whole wheat

275g KA all purpose

180g warm water (170g + 10g after 5-10 min. autolyze)

6g salt

I mixed everything but the salt and 10g of water and let it rest for 5-10 min. and then added the remaining ingredients and hand kneaded ( 5 minutes?) to combine. I let it rise in ther oven, aiming to keep temp around 86 F by alternating oven light on/off. After about 5 hours I did a few S&Fs, preshaped and rested for 5 minutes, and then shaped as a boule and proofed in a towel lined bowl back in the oven at the same temp for an additional 4.5 hours. Then I preheated oven and ceramic baking dish to 500 F. When I added the dough I dropped the oven to 425 F. Steamed for 20 minutes lid on and an additional 15-20 min. with the lid off.

The flavor was more or less spot on with what I was looking for, definitely sour without being too sour, and it still had good shape. I didn't use steam during proofing and the outside of the loaf got dry so that may have helped it keep the shape during the long proof.

Since there doesn't appear to be a poke test equivelant for pH or TTA, I'll confess I tried a tiny bit of the dough a few times as it was proofing. And I also tried out the method of putting a small piece of dough in water to see when it would be light enough to float. I also added some corn oil to try and gauge further change over a longer proofing time. For a while I thought it wouldn't work, but sure enough, soon after I had shaped the loaf the dough ball started to float. Strange dough blob in action photos below:

Start:

5 Hours:

6 Hours:

7 Hours:

8 Hours:

Still looking for a handheld TTA meter though...

hungryscholar's picture
hungryscholar

My plans to make green bread started before St Paddy's with me deciding to try and make bread in the artichoke shape I saw at the back of the Village Baker and then saw on video here: http://www.archivesaudiovisuelles.fr/FR/_video.asp?id=1690&ress=5424&video=120392&format=69#22065

Since I can't seem to make anything without changing too many variables at once, I made a 65% hydration sourdough with 400g AP and added 2-3 tsp of matcha, which later turned out to be far too little to get a good color, but did result in a nice flavor combination with the sourdough. I think I might try even lower hydration if I go for this shape again with sourdough, as it was a bit, floppy? Anyway, it was a fun experiment, but I'd definitely change things up the next time. (What am I saying, I nearly always change things, even if I am happy with the first iteration.):

Doesn't it look green? :)

In any case, St Paddy's rolls around and I decide to make some cinnamon rolls and get green the good old fashioned way: with flourescent green food coloring. Instead of cinnamon I used 5 spice powder, which may explain why my daughter preferred making them to eating them.

hungryscholar's picture
hungryscholar

This is so far my favorite of all the pumpernickels I have made. While I am now aware that there is another kind of pumpernickel bread that I have yet to bake, this my version of the kind of bread that I liked to have for my sandwiches growing up. I called it American pumpernickel in hopes of mollifying any pumpernickel purists. It's not quite as dark as I imagine I could get it with caramel color, but I can't quite bring myself to do that, even though I've added food coloring to plenty of deserts before. So I used two of the other often suggested options, cocoa powder and coffee. The coffee really seems to go well with the rye and fennel seeds which I also added. I used brewed coffee because I figured the rule about only cooking with wine you'd drink ought to apply to coffee. Or... there was enough coffee left over in the pot the next morning.

Ingredients350 g all-purpose flour150 g pumpernickel rye350 g coffee (brewed)1 T cocoa powder1 T fennel seeds100 g stiff levain (~50% hydration)10 g salt
As for method, I doubt I would do it the same way the next time, but this time it started out in my bread machine on the dough cycle, because lately I've been using it to knead the dough for my daughter's weekly sandwich loaf. So, I put everything into my bread machine but the salt(because I forgot about it). Once I remembered I paused the machine for about 20 min., added the salt and restarted it. I also paused it and did some S&F every 30-45 minutes through the machine's cycle, because I was afraid I was going to end up with glop instead of dough. When the dough cycle was done I let the dough proof in my oven with the light on at around 85 F for about 90 min to bring the total time from the start of mixing up to about 3 hours.
Then I took it out of the pan, preshaped as a boule and let it rest for 15 min. and then did a final shape and let it rise in a floured brotform for about 3 hours before slashing and baking on a stone with a bowl on top. I preheated the oven to 450 F or so and dropped the temperature to 400 F once the bread was in the oven. I left the bowl on for 20 min and then baked for an additional 20 after removing the bowl. This is about when I realized it was a lot harder to judge crust browning when it's already so brown at the start of the bake, so I decided to take it out after 40-45 min total.

Submitted to YeastSpotting

hungryscholar's picture
hungryscholar

While I've recently revived a sourdough starter and have been keeping it going on my counter, I've also thought that it should be possible to have a ready to use product similar to instant yeast. Perhaps I'm spoiled by the homebrew shop where I can buy dozens of different yeast packets and even some lactobacillus for making sour beers. So when I saw packages of Seitenbacher sourdough on Amazon I bought a box and have now tried out making some bread using it directly, rather than trying to build a culture with it. This is what the company intends, but so far it's not been smooth sailing.

The first go round I mixed up a batch of wheat dough at somewhere around 65% hydration and tossed in the contents of  the 2.65 oz package. I mixed up the dough and let it hang out overnight for 12 hours. I then shaped and proofed it for something like 8 hours at 85-90 F. What I wound up with after baking at around 450 F for 40 minutes or so was a flat disc with a very gummy center. So- not enough gas, but I'm not sure if it was over/underproofed, or if the beasties in the packet objected to being required to work on wheat instead of rye, or if should have baked it longer & lower to try and bake the crumb before the crust burns. So many variables!

On the off chance that it was a shaping issue I put the other half of the dough in the fridge for 24 hrs or so before taking in out and warming it an oven at around 85-90 degrees. I did some stretch and folds and then shaped and did the final rise in a colander lined with a floured towel, again at around 85-90 degrees. The total time between coming out of the fridge and baking was about 8 hours. This time the shape was dandy, but the crust still gummy(and I could swear it sound hollow when thumped.)

So, deciding that when all else fails, read the recipe, I used the recipe for Farmers Bread from the sourdough package, which calls for some rye flour and instant yeast as well as the sourdough. The result was fine, but not up to par with bread made with my continuously maintained starter.

As folks have used this product to build a sourdough starter it should be possible to use it to make good bread without adding instant yeast, but I haven't figured it out yet. The package instructions do say to warm the packet to 100 F before using, but not how long it should be kept warm, maybe that's where I'll look next. For now I'm having better success with my existing starter.


hungryscholar's picture
hungryscholar

Visiting the arts & crafts store with my wife and daughter I picked up a stencil and on the second try got a design that I was quite happy with.:


The Ciril Hitz video that gave me the idea and illustrates the method is here: www.youtube.com/watch?v=OZt1WWSAj6M. I spritzed the dough with water before stencilling and I think that helped, but I still found myself hold the stencil in place with one hand.


Pages

Subscribe to RSS - hungryscholar's blog