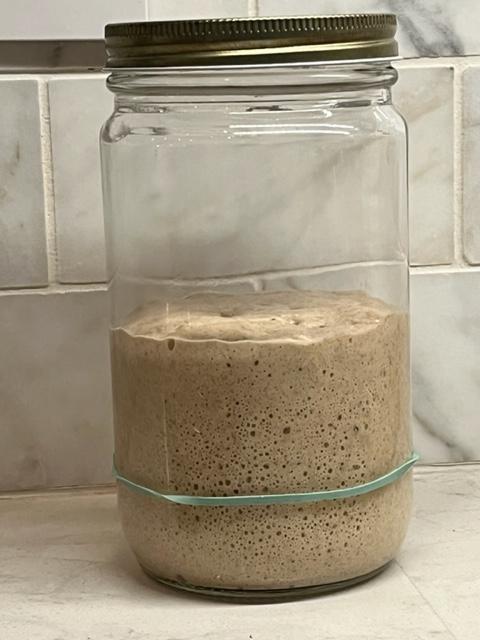
I started my first yeast water culture last weekend with a mix of dried fruit (raisins, dates and apricots...mostly raisins). I didn't really know what to expect. After four days, it looked like most of the fruit was floating and I had good fizz. Some of the larger pieces of apricots and dates were still on the bottom but I had read that was to be expected (and made sense). The 'test' starter was mixed up that evening and left in the cold oven with the light on over night. It had nice activity by morning, having nearly tripled, so I mixed up a full levain that morning. Three hours later it had tripled so I decided it was OK to bake with.
Wanted to make a 'normal loaf' bake first. I used my 'standard' loaf recipe so I could evaluate everything fairly. But, instead of using just 50% YW in the dough (subbed in for the called-for water) I went with 100% for some reason. The final dough had a strange consistency, almost lumpy (mentioned in other posts here), resisted sticking together during shaping and was too sweet for a plain loaf. The crumb was nothing special either. It was a different kind of bake. Not much aroma coming from the oven or the final bread, although the crumb was very tender, but almost too much so. I'm assuming the heavy hand with the YW addition all played into this significantly. Probably true with YW as with traditional sourdough starter...they should improve with age. Evaluation of this inaugural bake: meh. But, I'll try again next weekend with less YW subbed in for the water and see what happens.
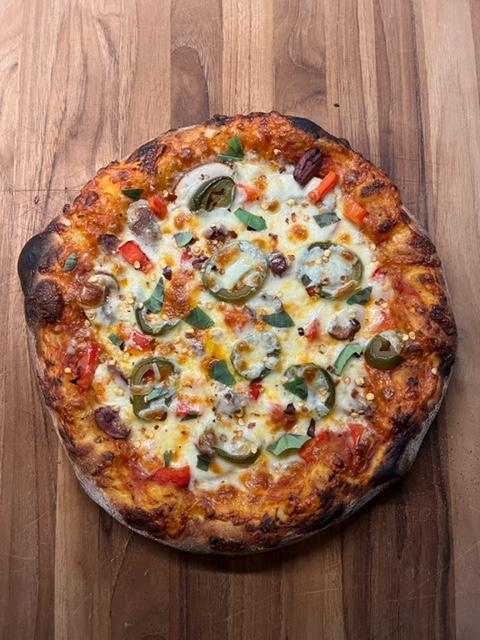
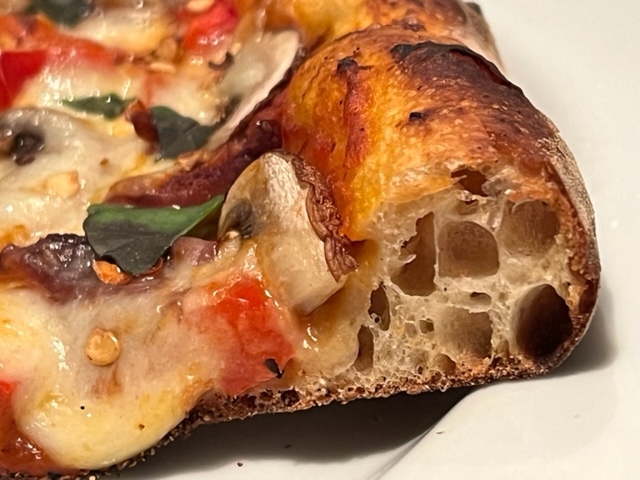
However, the YW pizza dough experiment was much more successful! I used the YW starter and only used 50% YW in the dough. Used my usual pizza dough formula, let it cold proof for 48 hours, rounded off portions, rest at room temp for around 1.5 to 2 hours, shape and bake. The dough was very extensible and stretchy but still delicate. It baked up lovely. We all agreed it was probably the best pizza crust yet--thin but not floppy on the base, and soft, pillowy and puffy cornicione at the edge, with just the right amount of chew. I will continue to cultivate the YW just for my pizza dough (if nothing else). It was fantastic!
Sharing my adventures here since there seemed to be a some ongoing interest in YW. Starting it was simple and maintaining it seems straight forward enough. Thanks to all the info posted here by Jon, TrailRunner, et al...immensely helpful!
Strained yeast water:

YW starter:
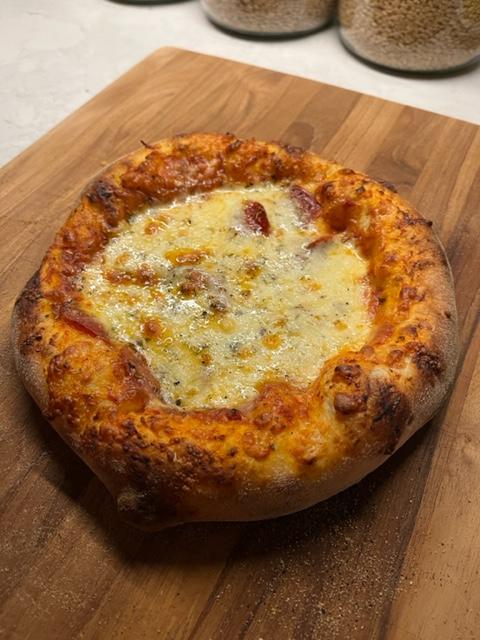
YW Pizza! (was a little heavy handed with the cheese)
- naturaleigh's Blog
- Log in or register to post comments
Wow Leigh that pizza does look amazing, the cornicione is perfect.
Benny
Thanks, Benny! I was really happy with how it turned out, especially after the kind of mediocre experience I had using the YW in the regular bread loaf ^^. I should probably make pizza again within the next couple of weeks to make sure I can replicate the results...all in the name of science of course ;-)
That's a great looking crust, just right. I have never made pizza dough (WHAT???) but my daughter got me a pizza oven that sits on the grill, so I guess be making some soon. I'll be happy if it come out half as nice as this.
Thank you!! I had always wanted to make pizza at home but never had either, until I gifted myself a ceramic pizza stone that goes directly on the gas grill. I've found the best results for my dough and this set up is cooking at about 650 F for about 5-6 minutes, depending on desired degree of 'doneness'.
I am envious of your pizza oven though! I imagine you can get to even higher temps with that! I'm sure you will have great success with your pizza making adventures. I was amazed how good it was, even compared to 'upscale' pizza joints. You will be hooked once you start cooking it at home too, I am sure!
Happy to share my sourdough recipe if you want it...just let me know. It's super easy. I will say using Tipo 00 pizza flour really does make a big difference.
What a superb looking pizza, taking notes here, 48 hour cold proof, and how hydrated was the dough?
Thank you, Jon! That is very generous. Well, I use a modified version of the Patrick Ryan sourdough pizza dough recipe, which uses a large amount of olive oil, so I'm not sure how much that influences the overall hydration percentage. It's late in the day, after working all day, so fingers crossed my math is correct, but I think it is a 65% hydration recipe, not counting any moisture from the olive oil. I'll just post the recipe here, and you can check my math, LOL. I'm including the process too in case you are interested, although there are so many great ways out there for cooking pizza.
Formula:
200 g starter (used a YW/flour starter this time...could use a traditional sourdough starter at peak)
400 g Tipo 00 pizza flour (Guistos and Molino Grassi are a couple favorites)
100 g Janie’s Mill pizza flour (which seems to be a light WW)...have also used sifted spelt with success
50 g ground durum or semolina (I use sifted durum)
325 g warm water (which I divided 50/50 water and YW, warmed carefully in the microwave)
50 g olive oil
15 g salt
Pinch of IDY, approximately .3 to .5 g
Starter:
YW starter initially fed the night before, then larger feed again in the early AM, ready for the dough about 3.5 hours later.
Dough: 200 g of peaked YW starter, loosened with 325 g 50/50 mix of warm water and YW, then mix in / 400 g Tipo 00 pizza flour / 100 g Janie's Mill pizza flour (essentially a light whole wheat) / 50 g ground durum flour / 50 g olive oil / 15 g salt / healthy pinch of IDY (about .3 to .5 g). Mix everything together until all the flour is incorporated, rest 30-60 minutes, then do a series of 4 S&Fs once every 30 minutes. Bulk ferment for about 2-3 more hours or until the dough doubles, is puffy/jiggly, and the surface has nice bubbles. Gently drizzle some olive oil over the surface and smooth it out with your fingers, cover and cold proof in the fridge for 48 hours (I use our basement fridge which is about 38F/3.3C).
Evening of bake (48 hours later): take the dough out of the fridge, loosen the edge from the bowl with a flexible scraper and gently tip out onto a generously floured surface. Divide into 6 portions (scale or not), pat off the excess flour, then shape into rounds, making sure to pinch the bottom seam closed, 'round' them on the counter with a cupped hand, then do the spin/pull/spin/pull or whatever maneuver you like to create some good surface tension. Place each round seam side down in a floured container or surface, sprinkle flour on top and in between each round, and bag for approximately 1.5 to 2 hours so that they expand a bit and come up to room temp.
Shaping/Topping/Transfer: Tip each round over, onto a floured surface and press down with the fingers of both hands, moving from the center towards the edge and rotate, but don't press all the way to the edge...this is the future cornicione! Flip over and then lift the round up over both hands and gently stretch out the dough, slowly rotating the dough as you go, stretching and rotating. I usually hold this up towards the light when I do this so I can see if I have any thin spots, which I try to avoid or be extra careful with when stretching so as not to tear the dough. Once stretched out, place on a peel or cutting board liberally sprinkled with durum (I mill my own, so it's nice and gritty). Top with sauce and toppings of choice (brushing the dough first with some garlic oil is an especially tasty addition and also supposedly helps with keeping the final crust more crisp). You can stretch out the dough a little bit more after placing the toppings, being careful to slip your fingers under the edge, in front of the cornicione, and stretching without deflating it. Load the pizza onto/into a screaming hot oven or grill with a pizza stone. 650F at 5-6 minutes seems to be the sweet spot for my set up (pre-heated pizza stone, gas grill, my dough, etc). I've tried parchment paper in the past, but I get better crust results with the durum and the hot stone. You could use cornmeal too.
So long as you don't load up the pizza, the crust comes out super thin in the center but still holds its shape and won't flop. Apologies...brevity is not my strongest point...obviously.
Brevity shmevity, I'm here for the detailed recipe, thanks Leigh for typing that all up.
Looks so yummy! Great pizzas, Leigh. Congrats!
100% yeast water contains too much dead yeast and other dead microorgansms which thrive in there initially, before baker's yeast multiplies and takes over, so it affects gluten negatively. It is best to use only a portion of all liquid as YW and have one or even two consecutive levains prepared. Hamelman shows best how to work with yeast water in his Swiss Farmhouse bread recipe. In a 70%hydration dough only 10% come from YW.
Hi Mariana! Thanks for the nice comments and helpful info too. I must've been distracted by the excitement of 'success' of my first YW actually raising the starter that I got distracted and absent-mindedly added the whole amount for the water in the dough for the bread, but it was too late! That explains the weird result with the bread.
However, for the pizza dough experiment, I went with the YW starter and 50% YW (for the total called for hydration) and it seemed to work great, which was much more than 10%--could be different for a pizza recipe as opposed to a loaf formula...? I'm curious if I'll be able to replicate the pizza dough results with refreshed YW in the coming weeks.
I appreciate your timely comments and will definitely dial back the YW hydration in any future YW bread recipes...thank you!!
A YW pizza crust was already on my next list so thanks for breaking the trail and showing me the way. Building a levain with the YW is what seems to work best for me but a just a little more in the dough may give it a boost.
Don
Happy to help ;-) and hope you will report back on your pizza adventures as well! I'm going to try another regular loaf on Friday with a YW levain and am learning that I need to cut back on the amount subbed in for the water in the main dough...but then curious about the leavening power and if I need to also use some 'regular' starter so it doesn't take ages to finish bulk fermenting...? Not sure what the best approach is.