This Community Bake will feature Jeffry Hamelman's Five-Grain Levain. The formula and instructions are taken from his very popular book, "Bread: A Baker's Book of Techniques and Recipes". Many bakers consider this bread a favorite of theirs and I am in that group. The portion of whole grain along with the seeds makes this bread stand out among the best. The book can be Seen HERE.
For those not familiar with our Community Bakes see THIS LINK. The idea of a Community Bake is for those interested in baking and learning to bake with us and post the results. This way we can all learn together. This is not a bread baking competition, everyone wins!
I chose to post the bake today in order to give everyone time to gather the ingredients since there are 4 grains and/or seed add ins. It is not necessary to go out of your way to get the specified seeds or grains. I substitute all of the time and the bread is always great. Hopefully the bake will get into full swing by next weekend, but feel free to start right away.

I've included an additional image of the spreadsheet for those that want to bake a smaller batch. The formula is for 1000 grams, but you could easily divide each ingredient by 2 in order to make a 500 gram loaf.
Here are the instructions from Hamelman's book. If you don't already own the book, I suggest you give it some consideration.
Five-Grain Levain
by Jeffrey Hamelman
Resource --- Bread: A Baker’s Book of Techniques and Recipes Pages 182 - 183
1. Liquid Levain --- Make the final build 12 to 16 hours before the final mix and let stand in a covered container at about 70°F. Mix Levain and Soaker at the same time.
2. Soaker --- Pour the boiling water over the grain blend and salt, mix thoroughly, and cover with plastic to prevent evaporation. Make the soaker at the same time as the final build of the levain and let stand at room temperature. If grains that don't require a hot soaker are used (such as rye chops in lieu of the cracked rye listed here), a cold soaker will absorb less water, and therefore it's likely that slightly less water will be needed in the final dough.
3. Mixing --- Add all ingredients to the mixing bowl. In a spiral mixer, mix on first speed for 3 minutes, adjusting the hydration as necessary. Mix on second speed for 3 to 3 1/2 minutes. The dough should have a moderate gluten development. Desire dough temperature 76°F.
4. Bulk Fermentation --- 1 to 1 1/2 hours (if yeast (.008%) is used). Otherwise see Step 7 for clarification.
5. Folding --- the bulk fermentation should be 2 hours with 1 fold
6. Dividing and Shaping --- Divide the dough into 1.5 pound pieces; shape round or oblong. Large loaves of several pounds are also a beautiful sight. And good rolls can be made from this dough. NOTE – I like to make 3 pound boules and place them into the Dutch Ovens and then refrigerate. After they are shaped I place the ball upside down on a water soaked towel and then put the wet side on a towel that is floured and filled with pumpkin seeds. This gives the bread an excellent flavor and also makes it more attractive.
7. Final Fermentation --- The dough can be retarded for several hours or overnight, in which case the bulk fermentation should be 2 hours with 1 fold and the yeast should be left out of the mix.
8. Baking --- With normal steam, 460°F for 40 to 45 minutes. There is a great deal of water retention in this bread, so be sure to bake it thoroughly.
Danny
Recommended accompanying beverage: A nice Belgian-style Amber Ale from North Coast Brewery in Fort Bragg, CA
Bon appetite!
David
Now you're talking!
Cheers
I can’t keep up, but want to I have learnt a lot from you all, wonderful stuff.
thank you every one of you for taking part!
Look forward to any further bakes and posts - high light of my day.
Leslie
Just found a small stash of the stuff. Could I use that in place of cracked rye on he next bake?
Carole, I think we would be hard pressed to find a cracked grain or seed that wouldn’t work with this formula. Through the years I have made many substitutions. All of the Five-Grain breads have tasted outstanding.
Not once can I recall when this formula tasted bad.
Dan
I think you had a stroke of inspiration in proposing this bake. I'll give it a go!
Less flavour and less texture compared to cracked rye, but certainly won't ruin anything.
Considering that I can't get cracked rye and swapped in bulgur for the first bake, i ve nothing to lose, right?
Thanks for confirming that it should work.
Keep on baking.
Carole .
one of the times i made a version of this and it was perfect! So have no fear in using that. ?
I have used bulgur in the soaker rather than cracked rye more often than not. It works fine. I might actually prefer it to the cracked rye.
David
I started out making this bread using bulgur, too. It was based on this post. It is also quite good and, as you say, the ingredients are easier to get.
-Brad
Yes, I agree that the bulgur works just fine in place of the cracked rye, was just wondering about pearl barley, since I've never done anything with it but stick it in the oven with vegetables…
Merci beaucoup!
Keep on baking,
Carole
even better when toasted! I've used it lots of times and it's never been a problem.
I took a chance and tossed them into the soaker, but without toasting. Will remember that for next time. Thanks for the info.
Don't worry--I had a carrot and a Persian cucumber first.
Here is my attempt, I didn't have all the grains, so I substituted liberally, and forgot to add the salt to the soaker. I almost never use anything but whole wheat, so it was a bit of a learning experience. As to Dan and over mixing, I have an older model DLX with 3 speed bars - I followed the timing in Bread to the T - the low speed being one, and midway being two, and I don't think it was overmixed, if anything it was a little undermixed. I then misread the bulk ferment instructions ( again I was reading from the book, not the instructions here) and forgot to stretch and fold mid way through the bulk ferment. I did a stretch and fold near the end, and it showed good strength. In the end, it came out fine, though I am sure the taste would be much improved if I had the grains called for.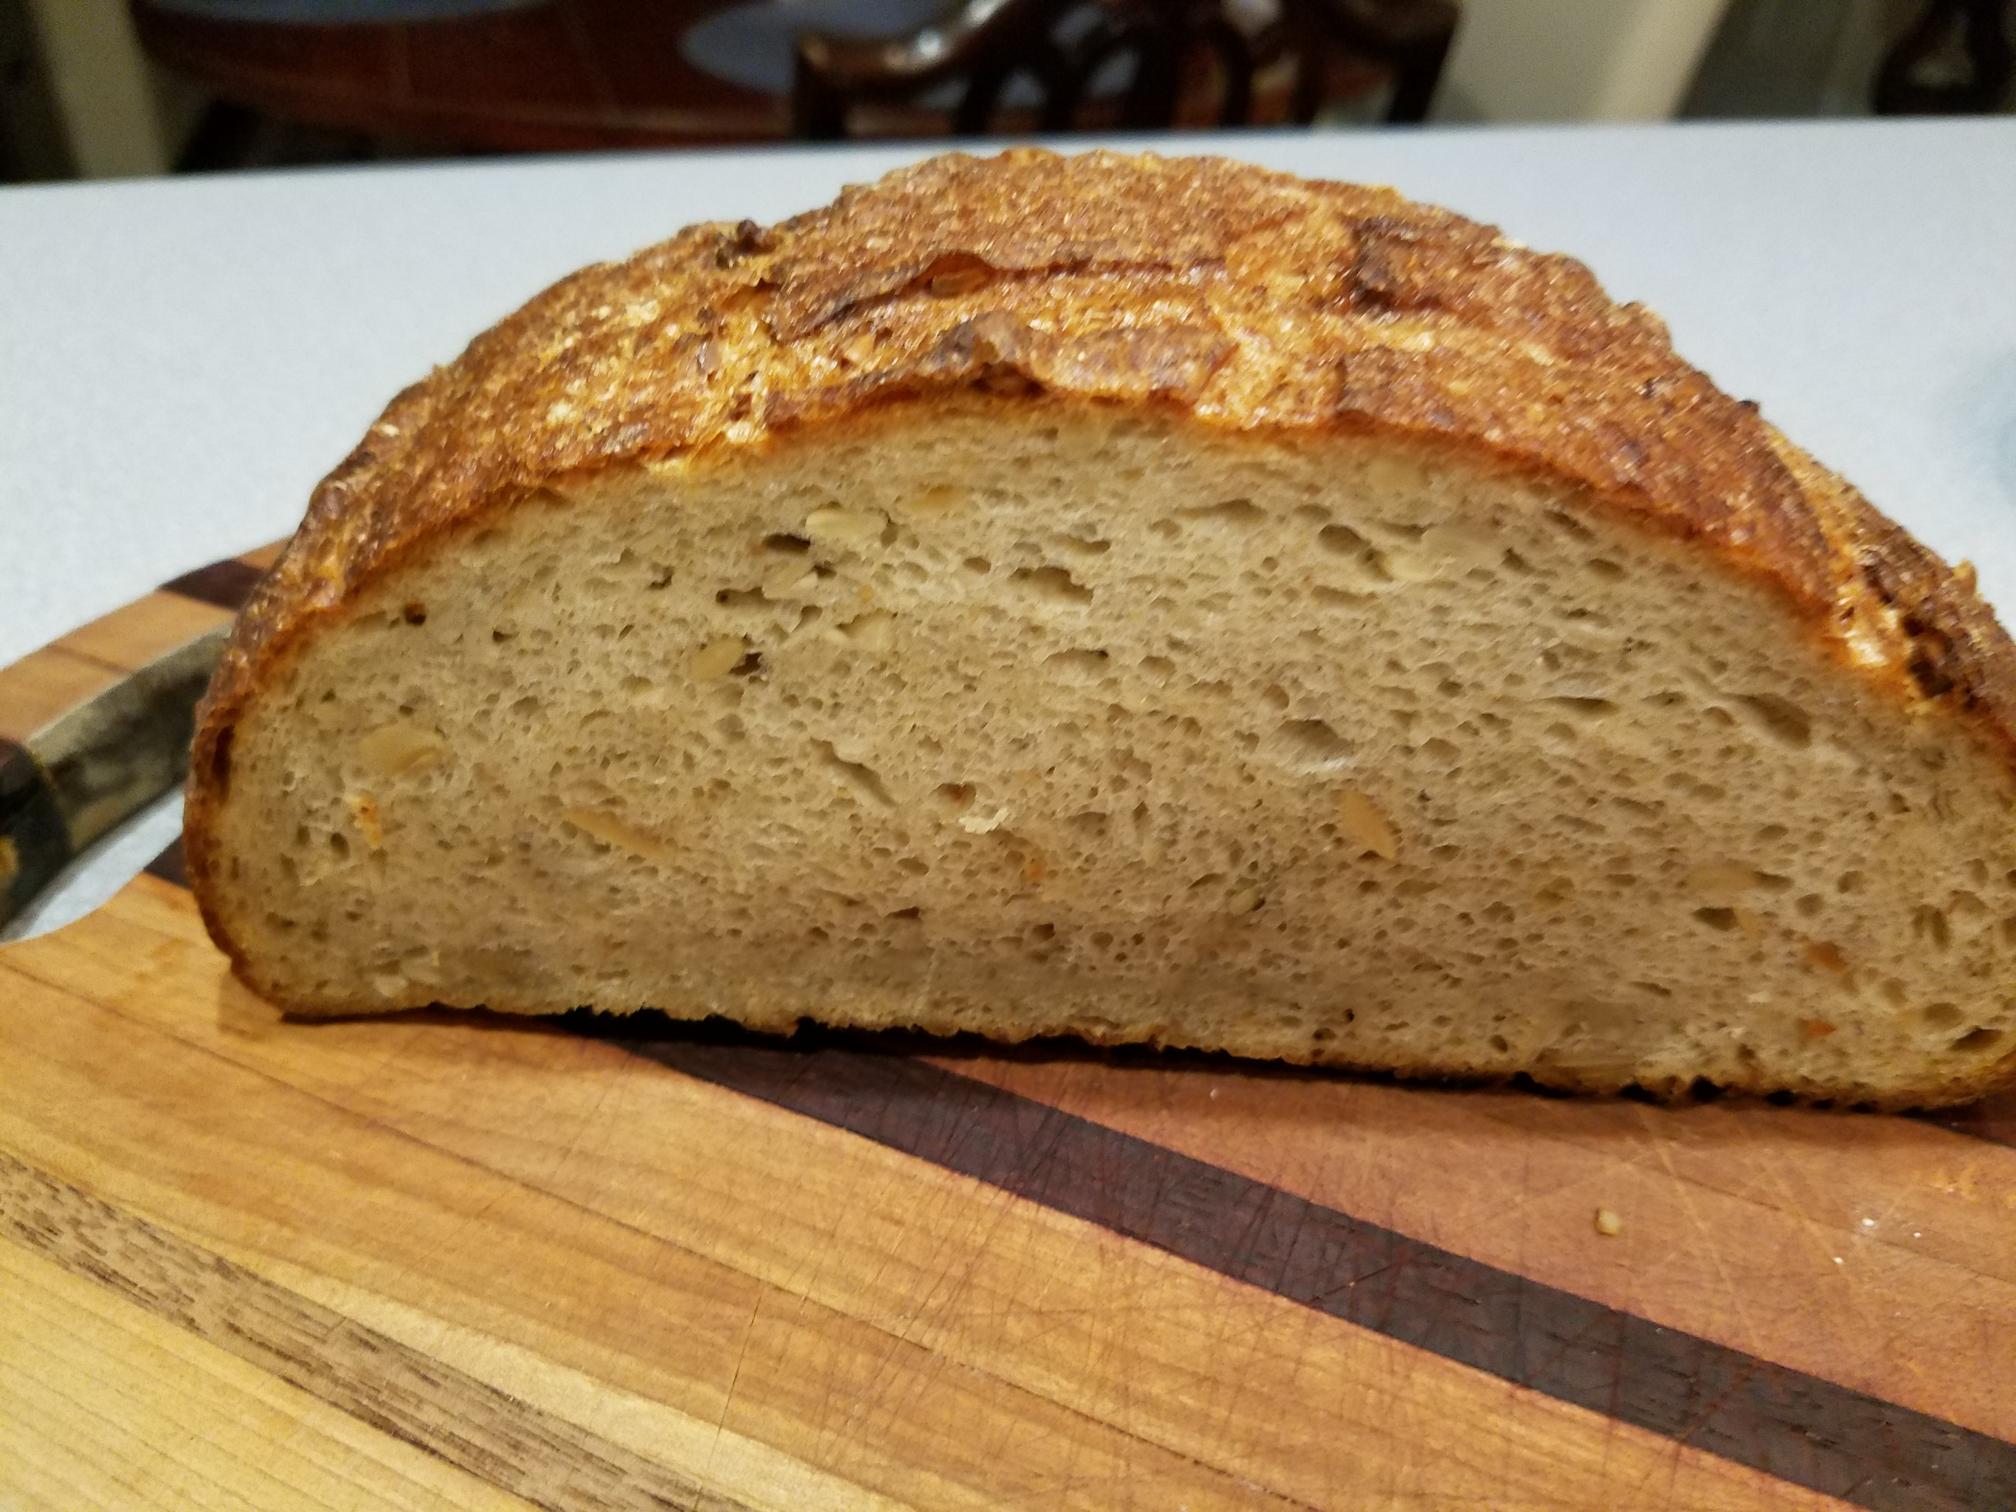
It looks great. Surprisingly open for a loaf so heavily loaded with soaker contents.
For once, I slavishly followed the recipe - unusual for me! Even the 125% levain, a big change from my normal 56% - soup as Gérard Rubaud would have called it; I wonder if that was potage or consommé?
I went for the yeasted version as I was concerned that the retarded levain-only version might overproof in my fridge. The dough was a bit strange to work with, as someone has already commented: firm but sticky. Incidentally, I reckon what I would call the true hydration, including adjuncts and seeds, is 73.2%.
The bake went OK, but I am currently cursed by lack of ears in many of my loaves (I am currently trying to work out why) and the crumb was tighter than I would have liked. Nevertheless, a great flavour and a good excercise - thank you, Dan - and Jeffrey!
By the way, the coating on the loaf is chia seeds.
Lance
Lance, your crumb is very good! This is about as open as I’ve seen for the Five-Grain Levain. Forget about large gaping holes on this bread. Next time forget the yeast. I think you will find the bread taste even better without it.
It seems a contradiction to claim a dough as dry and sticky. I think the seeds in the soaker make this dough sticky.
Great Job! I’d be thrilled with your bake.
Dan
Yes, I might try the levain only version next time; it would be interesting to compare the two.
Lance
Lovely looking crumb!
Bon appétit.
Carole
I have been retarding the bulk fermentation to avoid exactly overproofing the final shaped loaf. Very nice results Lance.
How much ambient time are you giving it before retarding?
Lance
Last time I left bulk fermenting for more than 4 hours before retarding. The room temperature was around 18 degrees Celsius. Usually I let it ferment outside until some signs of fermentation are clear such as some small air bubbles, but I will not push bulk fermentation too far. After retarding for few hours in the fridge I will shape it and proof the dough on the counter for about 1 to 1.5 hours before baking. I have been using a cold oven to start baking, so the dough will still proof in the oven. Retarding after bulk fermentation has help me to avoid overproofing since my fridge is not so cold.
What do you mean about using a cold oven to start baking?
Lately I have not preheated my oven and the baking pot or the dutch oven. It is working fine, and it is convenient with good results. It works also if you do the standard preheating of oven and dutch oven. I think the baking part is the most straightforward process and can be done in so many different ways. My real issue is with overproofing the dough. I have had a lot of flops already and it is very frustrating to load a nice loaf into the oven just to find it flat after baking.
You put the loaf in an unheated oven, and turn the oven on? Will you please describe what happens at which time intervals? I’ve never heard of this approach.
Correct
I load a cold pot or dutch oven with the dough and turn the oven on, setting the temperature to 230 degree Celsius. If I bake straight from the fridge, I will bake for 55 min, but if I proof on the counter after retarding the bulk fermentation in the fridge, then I will bake for 50 min. I do not even remove the lid and the color and crust are good. Typically my oven takes 25 min to preheat with the pot inside, so 50 to 55 min is enough time to bake if I start with a cold oven. This is all done for a counter top small oven, so for a larger home oven this process would have to be tweaked a bit.
Pul, I had a thought while reading your post. You wrote, “I have had a lot of flops already and it is very frustrating to load a nice loaf into the oven just to find it flat after baking.” Maybe the loaf is about over proofing during the long preheat in the cold oven and pot. To compensate for that you could try under proofing the dough in anticipation of an extended warm preheat stage.
Dan
Dan, yes the loaf will still proof in the oven if not preheated. Due to my schedule I can only bake in the evening or early morning, so retarding in a fridge that is not so cold usually results in over proofing. I have had flops if baking in a preheated or non preheated oven. So now I am doing exactly what you said, which is baking a slightly under proofed dough that was retarded during bulk fermentation. I think I have better control over my schedule in this way. For your information, this has worked in both preheated and non preheated oven.
I'd love to see a side by side comparison with one loaf cooked cold and the next cooked hot. I thought oven spring (1) needed a hot oven at the initial stage, and (2) was noticeably aided by steam in most breads. Apparently this is not true. Did you think of this on your own?
with much experimentation : http://www.thefreshloaf.com/search/node/cold%20oven%20vs%20preheated
And I am still too chicken to try it!
Keep on baking!
Carole
Thanks. I was aware of the cold v. preheated DO, but not cold v. hot oven. I too am not anxious to try it, but I love the way Pul has managed to find the schedule that works best for Pul. That's my favorite part of Tartine. Chad would approve.
with hot cold, cold cold and so on.
http://www.thefreshloaf.com/node/54855/longest-dough-prep-ever-and-few-experimental-trials
That is perfect, Danni. With such large bakes, do you mostly sell, give away, or trade?
my posts that explain why I bake 12 loaves each weekend. I bake one for us, 3 for a local soup kitchen and the rest go to friends who give me a $5 donation. All of that money goes to the soup kitchen. I just got a tax receipt for 2018 and it was for $1536.00!!! So I get to indulge my hobby, my friends and the soup kitchen get great bread and the soup kitchen benefits. A win win in my book!
How satisfying that must be! True, I did not know that, despite being an ardent admirer of your work. I have not found a way expand my capacity yet, but I really want to.
When I make a multi-grain loaf, I have found that I prefer to not soak the oily seeds since they don't really need hydration as much as the grains do, and I use cracked wheat and steel cut oats instead of cracked rye and use rolled rye in place of rolled oats to get the rye flavor. The oat bran provides water holding capacity. The seeds get incorporated along with the soaker contents but without any additional liquid. I think there is a good argument in favor of crushing the flax seed by running it through a roller mill like you are making rolled oats, adjusting the roller gap appropriately. I have tried ground flax seed but in the process lost the texture of the flax all together. The millet needs to be soaked as there is not enough oil in it to call it an oily seed and it stays dry and crunchy if you don't soak it. The soaker and oil seed quantities below are scaled for a 1170g batch of dough and I tend to go with no yeast and 5% pre-fermented flour. The openness of the crumb is better if you use less (no) whole wheat flour and go to 80% high gluten white with up to 20% of T85 to enhance the flavor and darken the crumb while providing enough strength to get a relatively open crumb. The sunflower seeds can be toasted in a hot air popcorn popper but the flax is too fine for that and needs ~15 min on a jelly roll pan in a 350°F oven with a minimum of convection. Of course if you are going to crank up the oven to toast the flax, you might as well toast the sunflower seeds at the same time.
Dough:
40 g starter
220 g water
384g soaker
100g seeds
314 g high gluten white
100g T85
15 g salt
Soaker (384g net):
6T (74g) millet
4T (38g) steel cut oats
4T (34g) oat bran
4T (22g) rolled rye
3T (26g) cracked wheat
190 g water
Seeds:
30 g toasted golden flax seed
70 g roasted sunflower seeds
Sorry I can't participate in this bake as it would be both fun and tasty.
Doc
Your soaker information is interesting. In the case of Hamelman’s formula, how do you suggest the soaker be handled using oats, flax seeds, seasame seeds, and cracked rye. I am thinkng that the oats, because they are dry, and the cracked rye should be hot soaked. Seasame put into the dough as is. And the flaxseeds crushed or cracked and added to the dough as is. Toasting optional.
Here is a question of great interest . This dough is described by many as both dry and sticky. That seems to be a contradiction of terms. I imagine that something, maybe oils brought in from the seeds are giving the somewhat dry dough a very sticky feeling. What would you attribute The stickiness to?
Thanks for commenting on this bake. Your input always garners great interest.
Dan
Sesame is an oil seed so it doesn't need soaking, and the oats are a grain that just needs to be hydrated before it goes into the dough. I put the rolled rye into the soaker and let them sit overnight, but I suppose they don't need all that time in the water to get saturated. Hot soaking will speed things up somewhat but the heat doesn't last long and then you are soon soaking in room temperature water. The objective is to get the grains to be soft; if they are not, then let them soak longer.
As for sticky dough - I don't know what makes it too sticky, but I suspect that if you have exactly the right amount of water in the soaked grain and the right amount of water in with the flour, then after you either let it sit long enough or mix it well enough to develop the gluten, then you will have a less sticky dough. Gluten is insoluble so that it acts like a waterproof sheet around the other things you have let fall into your bowl. But until the gluten has fully encapsulated all of the bits and pieces, there will be sticky bits exposed. One possible reason (imho, unsupported by experimental evidence) is that the baker has not put the water where it needs to be and the stickiness is just a symptom that the water has not yet settled down - so there is a wet flour dough surrounding dry grain. If this is correct, then the soaker should have more of the water and should be left until it is fully absorbed. I have had tacky multi-grain dough but I don't remember really sticky dough. Some high gluten flour (and/or perhaps a little fat) should help fix it if it is a late discovery.
I'd be interested to know if people who find this dough sticky are accustomed to working with 25% or higher WW or whole grain breads and soakers. I love using my mill and the flavor whole grains add, so my standard bake is Hamelman's WW multigrain, which is 50% WW or whole grain with a considerably smaller soaker. So this bake was right in my comfort zone. I hope the next community bake takes me out of it.
Pre- and final shaping is always a bit stressful for me with these breads due to the stickiness, my only average skill at shaping, and having a limited surface area. SD is sticky anyway, and whole grains seem to make it stickier. Perhaps soakers do as well. Awhile back I made the Vermont SD recipe after not making any mostly white flour recipes for quite some time, and the dough was really easy to handle by comparison.
As to the stiffness, grains vary, so I always have extra water in hand during mixing, and sometimes add extra water to my soaker if it needs it. I'm trying test my skill, but also want the bread to last longer, which higher hydration seems to help with.
I put it down to the Polysaccharide mucilage on the flax seeds. After all, we know how sticky and slimy they are after soaking in water. And also perhaps some stickiness from the pentosans in the hot soaked rolled oats and cracked rye.
The stickiness of the dough didn't make shaping difficult for me - it just seemed unusual in a firm dough.
Lance
Good points. But I find doughs with high percentage whole grains to be sticky even without flax or any soakers.
Lance,
I have always attributed the sticky/tacky nature of the dough to the soaked flax and oats as well. It is not at all difficult to work with with a bit extra flour on the bench.
-Brad
Keeping your hands wet enough to assure a film of water on the surface of the dough is another way to beat sticky. You can work it with a dough knife and a wet hand and then return it to a polypropylene (Cambro) tub or put a little flour on it when you have to set it down. This is especially valuable if you are working on marble, granite, or Corian (any surface that is impervious to water). I would not attempt it on wood, tile, or on a silicone mat (Silpat or equivalent).
I have used wet counters with rye doughs and have found it to be quite helpful. I have yet to try with wheat doughs, but always worth a try.
-Brad
I pretty much followed the same procedures and formula that was used for the 2nd bake. I did sift the bran from the whole wheat flour and used it in the soaker. AND I managed to make a giant mistake AGAIN. For some reason I tend to get the ingredient weights from the left hand column (Total Dough weights) of my spreadsheet. I have done this on other occasions and I always get so upset with myself. Because of this, I added 284g of water too much. This brought the total hydration, including the soaker water to 128.6%. So an experiment was born...
I decided to approach the total hydration is a completely opposite method than normal. I added flour until the hydration seemed good. The final total hydration ended up slightly over 105% and the dough was kneaded by hand using the Slap and Fold method. For those interested I published a NEW POST on the subject so as to not dilute this one. The accompanying video on the new post is very interesting, IMO.
Here are the images detailing the results of this wild goose chase. I think I pulled a rabbit out of the hat!
I sincerely appreciate everyone that has and will participate in the Community Bake. I know the thread gets long and unruly, but the information is worthwhile. I know that I learn so very much from these endeavors. I always end up baking better bread because of the input that I learn from others. Thanks so much!
Dan
A very nice result, Dan.
-Brad
I am diggin’ the diagonal slashes. I am thrilled to score in such a way that the slice is round.
Did you notice the crust (heavily blistered and shiny brown)? I used your instructions and proofed free standing in an air tight bag.
Thanks for 2 great tips!
Dan
Pretty soon you'll be taking my job (fortunately I'm not a professional baker) ;~)
-Brad
Dan,
I PM'ed you about trying the Abel Sierra "ziggy" cut since you are having a ball with Brad's sausage cut. Here is my take on it.
I think that it is pretty clear by now that the 5-Grain is not one that takes a bloom easily and the most successful of those, by and large, have been batards which had one longitudinal score from tip to toe. And even then there are only a handful from our 5-Grain gallery here that bloomed as well as we'd like.
My previous ziggy scores have had a significantly better bloom on them, particularly the sesame semolina, but then again it was with 2 distinctly different doughs. A bit disappointed in not seeing a better oven spring, but knowing the terrain before taking the dive I'm not surprised that the bloom was less dramatic as my prior attempts.
The view from above...
and from the broadside...
An interior view of the dang thang...
And a snail's eye view...
To perform this type of cut I keep the curved razor blade in the drawer, instead opting for a ceramic knife.
I felt as though I should have pushed the oven time a few minutes further and garnered a darker surface, but I'll still call this one a successful bake. And a fun scoring pattern to keep around for fun and games. Thanks to good ol' Abel.
650g x 1
alan
Alan, your richly browned crust are equally iconic to your beautifully scored baguettes! Your breads are unique and highly identifiable. The traits of a master.
I imagine you would opt to not work that hard, but you would have made a master commercial baker.
You have been a great help to me in the past, and you can be sure I’ll be knocking on your door in the future.
Thanks...
Danny
that the bakes always look a little bit redder than they really are likely due to the incandescent light overhead. And probably combined with the way that my phone camera interprets the image. I'll also guess that as the surface oxidizes (or whatever it does) the color is lessened by a shade over time.
Some folks have suggested that I either 1. get a job in a bakery or 2. open my own.
My wife's uncle says to open a bakery. I asked him to advance me a quarter of a million to cover the lease, equipment etc. All I hear from him is a loud "gulp".
I may hang a sign on my door knocker reading "Gone Fishing" - something you could well relate to ;-) .
Thanks for the kind words as it keep me from the doldrums.
alan
PS I do like the idea that my breads are identifiable from the looks. I've heard that before too. Consistency is something that I do strive for. Makes me happy and feeling accomplished in something other than my skills at re-arranging the sock drawer.
By far your best result yet. You are one determined baker! I'm jealous that you have the time to bake this often. Consider using the bran in the levain next time, because the levain loves it. I take the remaining sifted flour, weigh it, and add white flour to make up for whatever weight is missing from the sifted bits.
Do you plan to do slap and fold from now on? It's messy, and I wonder if it over-oxidizes the dough. I must say your dough looked amazing at the end of the slap and fold.
Phil, I often use the bran in the levain. But JH calls for a 1 to 5 starter to flour ratio @ 125% for 12 - 16 hours. I think the bran would cause the levain to over ferment.
I use Slap & Folds quite a lot. But the question regarding over oxidating the dough is a good one. I hope others with knowledge on the subject can enlighten us.
Dan
That might explain why my dough was on a path to over-fermenting in the fridge. The last time I made this I was not using bran levains. Rarely, though, is a levain all bran. I think this one was less than 50% bran.
BTW, given the Tartine method of using young levain, I vary the levain fermentation times pretty much. I've mixed these Hamelman levains as early as 6 hours. Sometimes this makes for a longer ferment, but not by much.
a beauty Danny! the bakers percent will be a little different now but wow, you nailed it
Leslie
Thats an awesome crumb and an amazing save! Well done!
Here is the second loaf from the 3rd bake. Hydration was 105.4%.
For those that prefer dark bakes, this one fills the bill. A tad dark for me, though.
It ssems that the extra water (totaling 105% hydration) gives the crumb a noticeably softer texture and chew. All loaves in this bake were retarded free formed in a couche. I retarded in a sealed plastic bag. This is responsible for the blisters and also the shiny crust. <A special thanks to BreadForFun for the tip.>
Danny
it is getting better with each bake! beautiful crumb!
Leslie
You should see the breads at Josey Baker. They love to bake them until they're ALMOST burnt. It comes across as daring and exciting. Excellent bread, too.
You can see what I'm talking about on Yelp: https://www.yelp.com/biz/josey-baker-bread-san-francisco
Well practice does make perfect. I have learned so much from this thread.
and the latest loaves are just amazing Dan!!! WoW...I have not been much on the site recently but could not resist to have a look at the community bake and I can see that you have been busy and with amazing results!!!! Beautiful loaves! Kat
Both the save and the end result -- not to mention your calm in the face of a major hitch!
Congrats on a beautiful bake.
Is your floor in yet?
Carole
Carole the flooring is scheduled for next month.
This bake went so well! It will be hard to top it.
Hi Danny, sorry to have missed this community bake - although I might try it next week. Life has been hectic - but I am totally impressed by everyone's results. Thanks Dan for putting this together and thank all of you for participating. It's so much fun to see everyone's hard work and inspirations.
Sharon
Sharon, please post your results. I believe that people will visit this bake long after the dust settles. I may bake the Five-Grain in the next week or so. If I do, I plan to post the bake here.
I have baked way over 100 loaves of this bread, and I can say for sure that I have learned a lot by seeing and reading the results of bakers on this post.
It is never too late to join in on the bake. Years down the road all participants should be notified each time there is a new post on this bake.
Danny
You've given me the encouragement to try this for sure. I will definitely post results!
Again - very nice Danny.
and impressive! Surely only an insouciant Frenchman would sling dough around wearing a black shirt.:D EDIT: this is after watching the link to Bertinet.
I watched and copied the moves as best I could with a Champlain and a Maurizio dough. True confession; they never became resilient, smooth balls, though the texture improved. I lost count somewhere in the seventies. I found bits of dough in my eyebrows and stuck to the kitchen window over the sink. They turned out okay -
Image

Thanks for the link!
Just a heads-up for anyone who enjoyed the flavour of the Five-grain Levain that they baked: check out @mrjeffmccarthy's Seed Monster Sourdough
Less grains, more seeds and an excellent tasting loaf!
Lance
Hamelman’s Five-Grain Levain
There was no bench time (ambient temp fermentation) for this process
All ingredients, including the soaker was mixed at the same time. Wet (Levain, soaker, water) in one bowl and dry (flour, salt) in another. Then mixed together until dry ingredients were wetted. Rested for 30 minutes and remixed to fully incorporate, then did 75 slap & folds. Rested 20 minutes, and finished up with 25 gentle slap & folds. NOTE - dough entered the retarder @ 68F.
Retarded at 52F for 12 hours (dough increased about 75%, then shaped cold (no preshape), put on parchment free formed, and bagged tightly. Retarded for 12 hours @ 38F. Slashed one dough diagonally and baked (covered on stone) @ 485F for 20 minutes. Then removed cover and baked 20 minutes @ 465 convection. NOTE - I tented with foil towards the end of the bake because I didn’t want the bread to over brown.
NOTES - Followed the formula almost exactly. Hydration remained the same. I did sift the whole what and used the bran in the Levain. Used steel cut oats, he didn’t specify. All fermentation was done cold, no real bench time. Baked a little hotter, wanted max spring and bloom.
I am really diggin’ dem diagonal slashes.
Danny
The loaf expands during oven spring at right angles to the scoring. So, to get the roundest cross section possible, score at right angles to the long axis of the loaf. Note: If you score a boules with parallel cuts, the baked loaf with be oval, not round.
For more details, see my Scoring Tutorial in the TFL handbook, or such search for it.
David
I can’t tell you how many times I’ve studied your tutorials! And I think something is learned every time. Today’s take away is the need to score much more shallow. 1/4” is not very deep! That seems counter intuitive. A shallow scores produces a larger ear, but your explanation makes sense. This principle provides a better understanding of Doc’s VIDEO.
It appears, from the image above, that those scores are probably 5/8” deep. Wouldn’t it be great if the shallower score produced the consistent ears that I’ve worked for years to achieve?
I have thought for some time that the lack of ears were result of improperly developed gluten. I thought, if I scored Alan’s or your dough, the ears would be gorgeous. Would love to find out I was completely wrong :-D
I always appreciate your information and help.
Danny
Really nice job on these loaves, Danny. Scoring is one place to get creative with breads, so experiment.
-Brad
Really nice!
Sorry I missed this community bake of one of my favorite breads. I happened to be making it this weekend and the saw this post.
I usually hand mix my bread but for this is one I used my Bosch Universal mixer to get better results and less mess on my hands from the seed soaker. I did an half hour auotlyse in the mixer without the salt mixed on first speed for about three minutes then added the seeds until incorporated. The recipe was followed using KAF bread flour and fresh ground 5% sifted WW except my levain was 100% and I sprouted the rye berries before chopping them with a knife which is easier than cutting the dry berries. The water in the soaker was reduced to account for the previously soaked and sprouted rye and this was added back in along with the water not used in the levin which was added to the final dough to end up with the same amount as the recipe. I baked it on a stone with a roasting pan covered for 20 minutes at 500 and 25 minutes at 450 uncovered.
Thanks everyone for sharing your inspirational bakes and I thank you Jeffrey for my favorite bread book not just for the recipes and techniques but the stories from a life in bread baking that accompany it are worth it alone.
Hey MT, it’s never too late to join in on this or anyother Community Bake. Thanks to Floyd, we are sent notifications when ever a new post is added. Many of us will happily join in and reply.
Your bread looks absolutely perfect to me. Thanks for posting...
What a gift Jeffrey Hamelman presented the bread baking world when he published his book!
Danny
Wow, excellent work!
She's at it again! Some progress this time, write-up and pix here.
Keep on baking,
Carole
As this was to be my first attempt at the five grain levain bake I thought I would stick closely to the original formula, although oats and cracked rye weren't locally available so I used pinhead oatmeal, and after several unsuccessful attempts to crack rye, just the rye grains. Also I noticed in Jeffrey Hamelman's book "Bread" that under the heading of"Dividing and shaping", he comments that "large loaves of several pounds are also a beautiful sight" so as someone who likes a large loaf and appreciates a beautiful sight, I scaled up the "Home" formula to produce about 3Kg (6.6Lbs) of dough.
When I mixed the final dough on day two, it seemed to be far too dry and I measured out an extra 50 grams of water. Luckily I didn't add it before I had rested the mix for 30 minutes, by which time it had become very sticky and certainly didn't need extra water. I machine mixed it for about five minutes and then stretch and folded several times before leaving it to bulk ferment, with S and F's every 30 mins.
J H suggests that bulk fermentation without the added yeast should be about 2 hours. I can only guess that my liquid levain which had looked very fizzy and ready to go after the overnight growth in a comfortable proofer was not yet strong enough for the task ahead, because after three and a half hours there wasn't much sign that bulk fermentation was complete. However I had run out of time so I divided and shaped the two loaves and put them in the fridge in the hope that inspiration would come to me overnight.
Next day nothing had arrived during the night so I decided to try warming the loaves for a couple of hours in the proofer and then allowing a further two hours proofing.
Well that did the trick. the dough now looked more rosy cheeked and wobbly so I heated up the oven and baked them.
I was never more relieved when I removed the dutch oven lids after thirty minutes to see that there had been decent oven spring rather than deflated balloons.
Here's the crumb. Not quite as open as I would like.
So I will certainly try this again but first I will have to figure out why my levain took so long to wake the dough.
a beautiful sight!
Congratulations, enjoy them and keep on baking,
Carole
Alan, I think most of us bulk fermented longer than 2 hours. Im guessing more like 3 or 3 1/2.
What are you using for the green background in your images? It looks really nice.
Danny
Doesn’t the bread taste great?
Hi Danny. Yes it is a very tasty loaf which I'm looking forward making again, should be a lot easier with what I've learned this time.
The green background is actually a cotton tablecloth, kindly offered by my wife when I was looking around for a darker background than the bare wooden bread board.
Alan
work out in the crumb? I'm curious, since I can't find cracked rye either, but was too afraid to use them whole.
Thanks for your lights!
Carole
Well I was worried about using the whole berries but having spent a lot of time trying a small electric coffee/spice mill which produced a little gritty flour and a lot of undamaged berries smelling of curry, followed by an old hand cranked meat mincer which passed the grains through undamaged and finally a mortar and pestle which left me having to sweep up a load of rye berries from the floor, I had a "what the hell" moment and just threw the whole berries into the soak.
So it was very much luck rather than judgement and to answer your question, the boiling water and the 12+ hour soak softened up the berries just enough to leave a bit of bite and add some texture to the bread.
I will use whole berries again next time and hope it will work as well.
By the way I'm a little bit puzzled by " Thanks for your lights "
Alan
that's good news -- about just giving them a long, hot soak, I mean. I'm sure I'd have burnt out my herb chopper!
Sorry about the "lights": bad translation from a colloquial expression. Basically, "thank you for enlightening me", or "thank you for shedding light on the matter".
Enjoy this delicious bread and keep on baking!
Carole
DanAyo asked me to post a link to my blog about baking this bread. Here it is:
http://www.thefreshloaf.com/node/59521/hamelmans-fivegrain-my-bake
Ok, I decided to do the bake. I went with rye flakes, rolled oats, flax seeds, chia seeds and sunflower seeds. For the flour I used KA bread flour(purchased when I went home, and KA white whole wheat).
Used my KA mixer after the autolyse and added the soakers with the levain, water, flours and salt. Mixed for about 6 minutes total then did a couple of S & F by hand and let it BF for two hours, with one s & f after 60 minutes. I did the BF in my oven with the light on.
Pre-shaped into two loaves and let rest 20 minutes, then shaped and into the fridge. After 9 hours, late last night I baked the first loaf, at 450 F for 20 minutes, lid on, then 25 minutes, lid off. I used my Staub DO and put two sheets of parchment under the dough, and a pizza stone on the rack below the rack the DO was on. I gave a quick mist to the dough and inside the lid but that was it.
The second one was baked this morning - after a 19 hour retard, and this time after I removed the lid, I dropped the temperature to 425 and turned on the convection. It's cooling as we speak.
Image

Image

This a very delicious but filling bread!
Here is a shot of the second bake which is looking equally delish! Thanks Danny and to all for this community bake!
Big success. Good oven spring, lovely crumb and looks delicious. So glad you got to try it in the end. I'm sure you'll be returning to this recipe.
I've been wondering where you've been.
Great bake, congrats! Isn't this one yummy?
Your crust and crumb and scoring are terrific.
Keep on baking!
Carole
Carole, I have been off the grid recently so making this bread was a bit nerve wracking. That said, this bread is terrific! Could eat the whole thing myself..
The second bake could take first place at the county fair. I love the bloom and score.
I hope JH comes back to this post for a visit. I can’t imagine how gratifying it must be to know that countless bakers the world over place this bread at the top of their bread list. For me and Hester it is number one. I bet many others would agree.
As of this time there has been 348 posted replies to Community Bake! A giant THANKS to Jeffrey Hamelman...
Danny
This bread also stales well. I discovered four slices in my car. they were several weeks old , mold free. and made an excellent car snack.
I am about to make a 4th batch but is there a definitive answer on roasting the seeds before the soak?
I use the seeds both ways, toasted and not. I have even made this bread by adding the dry seeds and add ins (no cracked grain) to the intial dough mix without a soaker. They all bake well, IMO. BUT, I think the general consensus is that toasting the add ins provide more flavor.
Try it both ways and let us know which method you like best.
Dan
>>This bread also stales well. I discovered four slices in my car. they were several weeks old , mold free. and made an excellent car snack.
A true Freshloafian you are, clearly.
Danny, your push made me do it. Abe, as always, made it clearer to me. I downloaded Hamelman's book - and his recipes are way above my level of baking, but this one really is special, and I also hope he pays another visit.
This has been a great community bake!
Here are photos pre-bake:
It looks wonderful, both pre and post bake!
Abe and Danni, I aspire to be like you when I grow up lol! Actually, there are so many fabulous bakers on this site. And when I see all the different variations and wonderful breads, sometimes it can get a bit scary but this bake went much better than antipated. Greatly appreciate everyone’s input and knowledge. I must say, this is a bake I’m really happy with!
The fact I’ve managed to keep my starter alive after 2 years is nothing short of a miracle! Love this bread!
I must say that I prefer the crust on this one, where I lowered the temperature and put on the convection bake. But both delish!
Image

When I think the oven spring has finished and it's 95% baked I'll stop the steam and finish off with the fan for a nice crust. Try toasting this bread for great favour. Nice start to the week Sharon.
Bon Appetit.
Thanks, Abe. I think I like the idea of using the convection. I was really hesitant but it worked beautifully with this bread...
I just purchased the book on amazon tonight. It should be here Saturday.
I have some questions. There are a lot of comments on this thread and if my question is answered in here I am sorry. I am also at work and I am unable to download the files to see if my answer lies in there.
I have a starter culture and would like to make this recipe. But I was wondering when making the Levain how much starter do I add to the flour and water? Other recipes I have used call for a small amount like 25g or 50g of starter to be added.
I do not own a mixer. I mix by hand. Will this be ok?
I appreciate any other direction and maybe my questions will be answered when I get home and download the files or I receive the book on Saturday.
Jeramiah, if you scroll up a little you will see my post that contains a link to the blog where I described my bake of this bread. The post includes quantities for all of the ingredients (scaled for two loaves.) I mixed by hand, and that will work, but be ready for a sticky messy dough (keep a dough scraper handy).
Happy baking.
Ted
Thank You. Figured I gave up to early.
I've had this one bookmarked for a long time and finally got to try it this weekend. This is definitely one for me to improve on, but I think it will take great toasted. I followed the recipe, but replaced the cracked rye with spelt (hard for me to source cracked rye) and the flaxseed with poppy and sesame seeds. I needed to up the hydration by about 30g. I added the seeds through lamination which worked okay, but I think given the quantity of seeds that lamination may not have been the best choice in this case. The seeds never incorporated as evenly as I would have liked. I definitely underproofed my bakes this weekend, but I wanted to get to bed!
the other is a polenta bread
Ilene, you have baked an outstanding Five-Grain! It is a super favorite of mine. I can almost taste it, buy looking at the pictures :D
JH gave a gift to the world, when he shared that one. It is out of sight toasted...
Danny
OH! Mixing the seeds during the initial mix works well.
I plan to bake a version of this at the end of the week. I cannot find cracked rye but was thinking I'd do a combination of sesame seeds, flax seeds, sunflower seeds and rolled oats. I'm not planning on using my KA to mix so I'll see how hand mixing goes. I'll also need to decide when and how to add the seeds which I will toast and do the soak.
I've been enjoying Kristen's lamination process lately as it really does build gluten well, but having only used it twice, I think I'll use this bake to try it again hopefully my technique will improve each time I use it.
Benny
Hi Benny,
Enjoy! It's a fun recipe to try. I added the seeds during lamination for this one and while I wouldn't discourage it, I felt that the huge volume of seeds make it a bit hard to fully incorporate through lamination. When it came to shaping there were patches with tons of seeds making it difficult to form a skin on the dough. That said, I just pre-shaped first (haven't been doing this lately) and then it seemed to shape up fine.
Mixing by hand seemed to work out perfectly fine, but I think the dough would have benefited from more water.
No cracked rye, no problem. Substitutions work well.
Adding the seeds in the initial mix, as instructed, works as well as any method, IMO.
Benny, you are going to be blown away with the flavor. This is my favorite bread...
Dan
Having not seen this recipe before I was very interested in it because I love the flavour from seeds in breads. And based on everyone's reports from their bakes, this has excellent flavour so I'm really looking forward to this bake since it is new to me and has reviewed so well. Thank you for putting this CB up last year and thank you for whomever brought it back to life recently.
Benny
Lamination was never going to happen, the dough is super sticky. I’m working on bulk fermentation and have done a combination of slap and folds, stretch and folds and now coil folds. I think I’ll do one last set of coil folds and leave the dough to complete bulk fermentation before shaping and cold retarding in the fridge. So sticky.
For what it is worth, in this bread I put in the soaked seeds at the start, and used lamination to build strength in the wet , sticky dough. I just wet the counter top, stretched out the dough(easy to do) and folded it up like a letter going into an envelope. Gives a lot of strength.
In hindsight, I should have just tried the lamination, but the dough was so sticky that I chickened out. I'm not confident that I built enough structure for this dough. We'll see tomorrow after the cold retardation overnight.
Benny
I have had good luck with sprouting the rye berries and then chopping them up. This is one of the recipes that I prefer to use a mixer for because of the difficulty of incorporating the slimy seed mixture into a stiff dough. Looking forward to seeing your bread. These are from last weekend. It's good winter time bread.
Hi Fellow Bakers and Bakerinas,
May I urge you, or at least mildly suggest, that it's best to add the seeds at the outset. Yes, because of the slight puncturing effect on the gluten from the seeds, it will take a bit longer (maybe one minute) to achieve adequate gluten strength. That said, if your mixing style is not aggressive, an extra minute will not have a negative effect on flavor. And if you are thinking "well, that extra minute will oxidize some of the carotenoids and that's a bad thing since it will impair the flavor," keep in mind that this is not a baguette or a ciabatta, where you want to minimize oxidation of carotenoids, since they are so very important for maximizing flavor. In the Five Seed, so much of the flavor comes from the soaker ingredients, from the levain, and from the long fermentation. A further option would be to add the soaker at the outset but hold back some of the final dough water, maybe 10% (the bassinage technique). In that slightly drier environment, gluten development will be quicker. Once the dough feels strong enough, drizzle in the bassinage water on slow speed until it's just incorporated. This is by far one of my personal favorite breads, and like anything I do well in the baking world, mostly I want to pass it along to as many people as possible to spread the enjoyment and the skill and the nourishment.
All the best,
Jeffrey
This is my first posting on this forum and the bakes here looked so good, I had to try baking this bread for the first time. All the sourdough and I used the recipe without adding any commercial yeast.
Super nice bread, George. The crumb is great for this type of heavily seeded bread. How do you like the taste?
Glad you joined the gang!
Danny
Hi Danny!
The taste is really wonderful and I used the mixture of seeds as you used in the posting.
I found out about this forum from a youtube of yours on overfermenting bread.
The last time we met was from the back of your boat and you provided sandwiches made from your bread; I remember the bread as well as the great time I had !
What a great gang to join!!!
George Q
I’ve been retired from Charter Fishing for a couple of years now. I’ve shared a lot of sourdough on my boat.
As I think about it, I was introduced to The Fresh Loaf by a fellow fly fisherman on a charter trip somewhere around 15 years ago.
Glad you joined the forum and thrilled to hear you baked the Five-Grain. IMO, for flavor, it can’t easily be beat. Your bread is beautiful!
Danny
Yes Danny the Five-Grain bread is one of the most flavorful loaves I've had. I am impressed by Mr. Hamelman's formula as the directions are so clear that it invites variations and modifications. I would not be surprised if there isn't a 10-Grain variant that someone claims as their own. In other words, a formula good enough to steal!!
The problem I ran into is my starter was roaring into high gear when I mixed it and it was overproofing as I watched. I threw it into the refrigerator immediately after shaping and it kept growing. As problems go, it is a good one to have but next time I'll use a bit less starter and the kitchen was around 66 degrees too. Not very warm!
I'm learning a lot just from this thread and I've got so much to learn!!
George
So not my best work. I think I should have stuck with my original plan to add the overnight soaked seeds and oats during lamination. Instead I added them during mix and the resultant dough was very sticky to say the least! I didn’t use a mixer and did it all by hand and really never achieved good structure. I think either using the mixer to mix to get some structure or doing the lamination would have helped. I didn’t get great oven spring because of the lack of structure, when I took the dough out of the banneton after the long cold retardation, it slowly started to spread. You can see from the profile of the loaf that it spread during baking as well.
Hopefully the crumb and flavour will be great though. When I eventually bake this again, I need to ensure that I achieve better structure.
Benny, you may be expecting too much of this type of bread. You shouldn’t have the same expectations for this bread and you might have for a bread like Kristen’s Basic Open Crumb. They are entirely different in every way. But if taste is king, the Five-Grain will give anything a run for it’s money, IMO. Keep in mind the formula calls for ~34% seeds and cracked grain. Debra taught me that it is not so much that the sharp edges of seeds and grains tear the gluten, but it is the physical size of these items that hinder the ability of the gluten to form around them.
Try to think about it this way. Say you have 1000 super thin sheets of latex. If they are wetted and placed on top of one another they will stick together very well. Now think about those same sheets, but this time we put a large number of marbles in between each of the sheets. The adhesion will not be nearly as good. NOTE - the example is mine, not Debra’s, but I think it makes sense.
Jeffrey wrote into the Community Bake recently and he stands by mixing the seeds and grains as originally instructed. After trying a number of ways to incorporate those add-ins, I completely agree.
It is commonly believed that the sharp edges of the add-ins tear the gluten. Debra has investigated this under the microscope. If sharp edges tear the gluten, how can a food processor with sharp blades be used to produce a dough with highly developed gluten?
The above is my understanding, and as always I stand to be corrected, if any of it is incorrect. I live by the statement, “the truth will set you free”.
Sticky Dough
The stickiness of this particular dough is not so much because of excess hydration. It is caused for the most part by the “gel” produced by the soaker. I think this same gel is also a major contributor to the lacy crumb that this formula produces. At least this is what I think at this time.
This video may interest you. I like hands on and touching the dough, so Slap and Folds (French Folds) are frequently used when not machine mixing.
Danny
For a dough where it is difficult to develop the gluten because of some unusual ingredient or essential condition, I have found that picking an appropriate water to wheat flour ratio and developing the gluten first before adding the things that otherwise make it difficult (a lot of water, massive amounts of whole grains as in this formula, even corn flour which absorbs a lot of water without contributing much to the dough structure) can create a success where it is otherwise absent or occasional. This is something I learned when trying to recreate a very old (16th century) Portuguese bread that adds corn flour (new to Europe at the time) to a basic wheat dough which was probably pretty rough as well. If the gluten is not well developed before adding the pre-hydrated corn flour (masa in my case rather than polenta) I found it impossible to get enough usable structure to hold the crumb together. But once the gluten is developed, you can incorporate the corn flour to get a very nice loaf. More recently I have used this approach to make a 25% rye loaf with a more open crumb than I have achieved in the past so it has become a tool to be used as needed.
So spreading the add ins on the laminated dough would have helped achieved this potentially.
Hey Benny,
Not just for this Five Grain formula, but for any dough that is sticky or loose-textured by nature--don't underestimate the value of bassinage. Hold back 10% or so of the final dough water and this will make the mixing and gluten development much easier. Once you are satisfied with the structure of the mix, slowly add the held back water. It can make all the difference particularly if mixing either by hand or in a stand/planetary mixer.
~Jeffrey Hamelman
Hi Jeffrey and Dan
Yes perhaps I was expecting too much, you’re right of course the add ins will affect the structure.
I haven’t been making a habit of using bassinage and again you’re right, I’m sure holding back some of the water and later adding it should make gluten development easier. I will definitely keep that in mind for my next bake of this recipe. I will post crumbs shots once I’ve cut into this amazing smelling but still warm bread.
Thanks for all the guidance.
Benny
Benny, let us know the experience of your first bite. Try to describe it in detail.
Dan
Wow, this bread is awesome in flavour. I love the nuttiness of it, I’m not good at describing what I taste, only that I do love this bread. I’m very happy with the fermentation that I got with this, very happy with the crumb.
I love that crumb. I'll bet it tastes just as good as it looks. One of my favorite things about this bread is that the crust is always light and thin but crispy. The flax and oats must have something to do with that because Hammelman's seed bread has a similar crust. Try it sometime with the rye chops, I think it is a big part of the flavor profile.
My partner and I just ate half the loaf for lunch it was that good. You’re right about the crust, considering how long it was baked for I would have expected it to be thicker, but instead it is relatively thin and crispy. Yumm.
Benny
I was wondering why the top was darker whereas mine end up much lighter in color in the bloom area. You may want to lower your oven rack.
Interesting that you noticed the top being dark. I have been baking on the second lowest rack so that I could put a cookie tray on the lowest rack to shield the dough from the direct heat of the bottom elements. I thought that in baking mode the upper elements should be off but the top did darken a bit more than I would have liked.
In my non convection oven only the bottom is on for baking. I have the same problem when I use a countertop oven. A piece of foil loosely over the top prevents that. Although I do like the taste of that bit of burnt ear in each slice.
Hey Benny, I was browsing past CBs and came across the image below that you posted during Kristen’s CB. If you are plagued with over browned crust you can place a piece of aluminum foil over the top of the loaf once it attains the color you want. All further browning will cease once the aluminum is in place. Not sure if you know that or not.
Danny
Yes the aluminum foil trick to prevent over browning, I don’t know why I didn’t think of it since I do that for pies, but thanks for the reminders Dan and MTloaf.
I'm just thinking about this now, but I wonder if when I remove the lid of the dutch oven, since it is oval, would I get the same protective effect by putting it back on after being turned 90*. I would still allow the steam to escape but would over most of the baking bread.
Your bread came out really super. I hope you no longer regret not doing the lamination for the seeds! I really don't think the crumb can be much better for this type of bread.
Thank you Ilene, that is kind of you to say. I was very happy with the crumb and the flavour, my partner and I actually ate the whole loaf yesterday which has never happened before. ? I would still have preferred to have achieved better structure and hope that I can next time.
Benny
To Jeffrey, Benito and Dan, I have made this bread a few times, and honestly, I don't remember the need to do a lamination with it, or stretch and folds. Yes it's sticky but it holds - I followed Jeffrey's instructions and even when I mixed by hand, I did not do stretch and folds, only the one after 45 minutes or an hour, and shaped after two hours and popped it into the fridge. The first time I made this bread it was challenging, but honestly, it doesn't need a lot of work. I worried that too much handling would degrade the dough with all the seeds. And the seeds are best added in the beginning. JMO
Sharon
I'm a real amateur but this is one delicious bread. A favorite frankly!
Bassinage - “It can make all the difference particularly if mixing either by hand or in a stand/planetary mixer.”
I never considered bassinage for mixing by hand. Sounds like a good idea, especially with a dough with sticky and wet characteristics like this.
I'm sooooooooooooo late to this party. Is there any way to get a copy of the spreadsheet provided originally with this post? I have JH's book, but my math skills are pretty paltry and anything to help would, well, help.
Thanks!
Send your email address to my PM.
kvenick@cinci.rr.com
Thanks!
Sent it, Kven
I had another go at this bake, but made a few mistakes right at the start. Rather than using the recommended 214 g of bread flour and 109 g of water for the final dough, I accidentally use 321 g bread flour and 243 g of water which I reduced to 236 from the total formula column, yikes. Other changes I made include reducing the soaker water to 150 g.
I’m quite happy with the end product considering the accidental changes I made. This was the largest loaf of bread I’ve made to date and it kind of overflowed my banneton which is better sized for 750 g loaves. So taking that into consideration I’m pleased.
Benny, you sure have been baking great breads! The crumb shot makes me want to eat. And I’m on a diet.
Danny
Thanks Danny. Aren’t we all on a diet. Baking all this delicious bread is super dangerous. This bread really is quite good, hard to just eat one slice.
I hope that the insides of mine look as nice as yours!
Kind of you to say Danni your breads are so consistently great. I hope to become more consistent over time.
Benny
I wanted to make a loaf for a healthy friend and I thought this would be the perfect gift (and of course I also made a second for myself). I followed the instructions this time and added the seeds in the beginning instead of during lamination like last time. I think the crumb is modestly better this time and the incorporation was certainly easier. The distribution of seeds in the loaf was also better.
My kitchen was only about 64 degrees and I had an unexpected appointment so the bulk ended up going from 7am to 3pm (8 hours!), but I don't think it was too overproofed as the loaves had nice oven spring.
Everything about the bread looks great. The crumb is as expected. Any bread with a whopping ~34% add in seeds and cracked grain will have a less open crumb.
I’m on a diet at the moment, BUT I’d eat that... Don’t think I could resist it :D
Danny
My friend was very happy with her loaf so I'm very pleased! What a wonderful recipe. Thank you for sharing. I know I'll come back to this one again and again.
Ilene, great looking bread, really good oven spring and nice crumb. Much better oven spring than mine had.
Benny
The Community Bake ended over a year and a half ago, but I’m still baking this outstanding bread!
I used the “Simplified Pan Method” for this loaf. After the BF the dough was shaped and put in a pan, then retarded overnight and baked cold the following morning. The Total Dough Weight was 1550g and was placed in a 4x4x13” open pullman pan. What an easy way to bake your daily eating bread. “Easy Peasy”.
Below the bread was sliced and spread out on a cooling rack thta will be placed in the freezer for ~1/2 hr to flash freeze. After this it will be put in a ZipLok freezer bag for use throughout the week. Because of this they will not be stuck together when needed later on.
This recipe is definitely one of my all time favorites. I look forward to making it again. Thanks for introducing me!
Thanks for reminding me of this recipe, I baked it three times with various results. I should give it another go, I do remember how delicious it was. What a great loaf you made there Dan.
It was about a year ago that I baked this bread I think three times and although I loved the flavour I wasn’t that happy with my baking. So I thought I should give it a go again as everyone loves this bread and after a year more experience baking sourdough I am hoping that my improved skills will bring a good bake.
I changed the flours to replace the whole wheat with a 2:1 ratio of whole spelt and whole rye. The seeds I used were white sesame, poppy and flax seeds. Finally a made a porridge with oats so that makes it a six grain levain bread. Using my aliquot jar I waited until it showed a 60% rise to end bulk and do final shaping. I then allowed another 1 hour of room temperature rest during which time the aliquot jar was around 75-80% rise. I’m hoping for a more open crumb but given the inclusions and the porridge I don’t expect miracles.
This bake definitely had a better oven spring than my previous attempts. I’ll post the crumb tomorrow when this is sliced.
I haven’t made that in while either but really like it. look forward to seeing the crumb
B ake happy Benny
Leslie
Thank you Leslie, although it had good oven spring the blood was strangely poor. I’d say the crumb will be on the tight side of things. I’ll post crumb photos when sliced tomorrow at lunch.
Bake happy Leslie
Benny
Nice looking loaf with some oven spring. I like the colour. I think that swapping the whole-wheat flour for 2:1 spelt and rye would result in a denser crumb, but full of flavour. The result will be in the eating.
Cheers,
Gavin.
Thanks Gavin, you’re right maybe the change in flour was the cause, although I would have guessed that the extensibility of spelt might have helped open up the crumb.
Benny
I've never made this bread but I plan to and have looked over the recipe. That's a pretty impressive rise! Can't wait to see the crumb.
I ordered some rye chops so I can make it exactly as written (which I always try to do the first time) and they just came yesterday. Right now I'm pretty baguette-focused, but am looking forward to giving this one a whirl.
Nice work as always, Benny.
Thanks AG, I can understand being baguette focused I was like that all summer and part way into the fall as well. They are kind of addictive to try to perfect, there are always things you can think of to improve upon. I’m looking forward to your bake of this bread and also your baguettes.
Benny
I am cursed with this bread, I definitely made a transcription error, which I’ll correct in my blog, in that the soaker water should have been 174 g and not 125 g. This has resulted in he closed crumb that I have on this loaf. Fortunately it is still delicious but doesn’t have the texture I was hoping for. I guess I’ll have to wait for number five to achieve what I expect of this formula.
That closeup crumb shot would be beautiful on an IMax screen!
LOL thanks Dan.
Fabulous, Benny!
Thank you Portus, much appreciated.
I like the crumb of this loaf, not being a fan of the wide-open crumbs that are the current fad. While I can admire the skill that it takes to produce lacy crumbs, I find eating bread with a crumb like you achieved with this bread to be much more enjoyable and practical.
Thumbs up!
Paul
Hi Paul, thanks for your comments. I too prefer a relatively more even crumb, but this one turned out a bit tighter than I usually like. Not to say that it doesn’t taste good, it does for sure, but it is a bit denser than I would prefer. Again, I think it was partially due to my error and I will try to get it right eventually.
Thanks, happy baking
Benny
I quite like the crumb. Don't be too hard on yourself, Benny.
Cheers
Gavin
Thanks Gavin, I’ll get over it, the bread tastes great.
The rye chops finally came over the weekend and when my plans for Tuesday were canceled late Monday, I found myself mixing a levain and soaker at midnight. I wasn't sure how far to take the mix in my Ankarsrum and may have overshot the mark a bit. Also, it was cold in house and, even in the proofer, the dough took a while to come up to temp. I probably should have bulked it longer, but the dough felt lighter than expected so I called it at 2 hours. I'll remember for next time because, despite my errors, this stuff is delicious and there will be a next time.
The dough was slightly over-mixed and under-proofed, but the thing that almost killed it was that it was under-baked. This is my third bake in a row that was underdone. I have a new Anova steam oven and the learning curve is steeper than expected. The first few loaves came out alright, but now they're all coming out with doughy innards – even skinny little baguettes! Beginner's luck is over. Arrrrgh! I will say this though: figuring I couldn't ruin the bread more than it already was, I put the two halves back together and heated it for 20 minutes at 400°F (no steam) and, amazingly, it seems to have done the trick: The bread finished baking with no real ill-effects. Perhaps ever so slightly drier than would have been otherwise, but there is so much moisture in the loaf that it didn't turn out bad at all.
Despite your difficulties AB the final bread you’ve baked looks outstanding. It has a wonderful oven spring and bloom and the crumb look awesome, more open than what I baked. You’ll get your oven figured out with more baking with it I am sure, you certainly compensated with this bake and turned out a great bread. You got the seal of approval from the author of the recipe himself!!
Benny
Nice loaf and would taste great. You're well on the way to figuring out your mixer and oven. One needs to bake to be better. I loved Jeffrey Hamelman's comment; the voice of experience is gold.
Cheers,
Gavin.
To Another Girl,
The bread looks great, and you can overcome the issues with underbaking pretty easily (spell check said "undertaking," I'm glad I reread this!). Often, bakers get "distracted," and rather than rely on their hands and senses, they might be tempted to take Internal temperatures to ascertain doneness, which is entirely inaccurate (I can elaborate on experiments if anyone is interested). Thumping, squeezing--gradually these easy things to do give us a baseline of doneness for each type of bread we are making. A highly seeded, highly hydrated bread will give you different signs of doneness with thumps and squeezes compared to a baguette, for instance. But gradually a sort of hand database will develop. Another very good way to tell doneness is to hold a loaf in both hands and ascertain its lightness. If it feels heavier than you think it should, it's likely not done. And with this test too you'll gradually build a database. Trust your hands. And you might also want to crank that new oven of yours to 500F or so and leave it there for 1/4 or 1/3 of the bake; that may help too. Above all, of course, just keep on bakin'.
~Jeffrey
I just returned home and saw your post. I gasped right out loud – but I caught my breath quickly and, thankfully, no undertaking will be required :-)
You are, of course, exactly right. I did use a thermometer despite knowing that I should rely on my senses to check for doneness. Technology can be a bit of a crutch sometimes and this is a clear example of that. Thank you for graciously reminding me to take the time to develop my own best tools. I can hardly wait to get back in the kitchen!
I hope you won't mind if I also thank you for generously sharing your lifetime of knowledge and experience... and for all the great bread!
“ I can elaborate on experiments if anyone is interested”. Please do, Jeff. I have heard you and Martin discussing the proper way to judge when a bread is done baking. Neither of you were advocates of testing with an internal thermometer.
I would like to hear more.
Hamelman’s Five-Grain Levain bread is worth the entire price of the book, “Bread: A Baker's Book of Techniques and Recipes”.
This one formula is well worth the price of the book. In my opinion, for nutrition and taste this bread can’t be beat!
Just baked 2 large USA Pullmans. 64 slices frozen and ready for eating...
The crumb is gorgeous Dan, love the swirling vortex of seeds.
Absolutely agree. I've baked this four times since New Year and gave one to a friend who is a grain bread-nut, who rates this as the best ever. Hamelman is correct by saying, “This is one of the most delectable breads I have ever eaten”.
Your Pullman pan rendition looks perfect.
Cheers,
Gavin.
I was a latecomer to this bread, having baked it for the first time at your encouragement just a month ago. But I became devoted to it very quickly and have made it twice more since then. Thanks for the nudge on this one, Dan. It looks great as a pan bread. Enjoy!
-AG
Many times in the past the seeds were added during lamination. This dough was mixed by adding all ingredients at once and mixing in a machine. The seeds didn’t have a negative affect on the gluten as far as I can tell.
One loaf was baked without retard and the other was retarded overnight for a comparative taste test. As expected, the retarded loaf was a little more complex.
The most difficult part of making this bread is getting/keeping the various seeds on hand. For anyone who hasn’t eaten this bread before, please bake one and do so. Conversion is guaranteed :-)
Each and every bite is a gastronomic delight...
Hello all, this loaf is beautiful and I made a “ bastardised” version based on my usual technique from River Cottage, which involves 4 folds, punching down, fermentation ( 2-3 hours at room temperature then overnight in fridge). My question is , does anyone punch this bread down or do you follow the instructions precisely which unless I’m misunderstanding, does not involve punching down? Thank you.
“Punching down” generally deflates the dough by breaking and expelling the larger bubbles. This leaves only the smaller holes and results in a more uniform crumb without holes above some size that you set by how aggressively you deflate it when you “punch down”. To some extent I suspect you can get there by folding more often during bulk fermentation.
Hello Missmoneypenny,
Folding dough and punching dough down both effectively de-gas dough, so whenever you fold dough you can consider that it has also been, in a sense, punched down. The main difference between the two is that folding, unlike punching, also increases dough strength, often dramatically, so it is a highly valuable and effective tool.
As for your question about following the instructions "precisely," I've always approached that topic like this: if I encounter a new formula that I want to make, I first crunch the percentages, and if they look right, I follow the overall process as closely as possible to how it was written. So if it calls for a firm levain, I don't use a liquid one; if it calls for pâte fermentée I don't use poolish. But I try to be attentive to each step and make mental notes. At last, time to assess the finished product, both visually and taste-wise. This is when I decide if I want to make changes in subsequent batches, maybe an extra fold, maybe more or less hydration, that sort of thing. Making changes doesn't denigrate the original formula, it simply personalizes the recipe to suit the kinds of results one is looking for.
I understand why this thread is called "Hamelman's" Five-Grain Levain, since the formula came from the book that I wrote. But in truth, after almost 45 years doing this incredible and soulful work of baking, there is very, very little that I feel deserves to have my name associated with it. Yes, there are plenty of bakers who add an extra 2 grams of salt to someone's printed formula so they can call it their own, but that's just an ego trip. I'm very good at combining our relatively short list of bread ingredients in certain proportions to come up with good results, but I don't think that necessarily means my name should be attached to things. Anything I have written is, so to speak, in the "public domain." So make this (and all) breads in the way that gives you the results that please you most; it is your formula as much as mine.
Cheers,
Jeffrey
Thanks for taking the time to post DocDough. So to clarify, there’s no punching down but the folds achieve the same thing?
I wanted a fairly uniform crumb, so the dough was moderately degassed before rolling to shape.
I am truly honoured to have a reply from Jeffry Hamelman, even though I am a novice on this forum I do not underestimate my luck in receiving such comprehensive and thoughtful feedback. Thank you, and I shall be analysing and making notes from all you have said, to inform my baking, which has become a little automatic lately. Indeed ongoing reflection, correction and improvement are a big part of the satisfactions of this type of baking. It’s this mixture of intellect and involvement of all 5 senses which makes sourdough baking so satisfying. Thank you again, and to all who have generously answered my question.
The worth of any system is the sum of its components and the value that it provides - let me get this out.
TFL, established by our web host Floyd, has become perhaps the #1 English Language go-to site for amateur as well as some professional bakers over its life. Dan created and fostered the Community Bake to become exactly what you see here - and interactive sandbox and learning/sharing environment. It is what is available across all of TFL, but filtered down in the CB to focus on one aspect of the craft at a time.
Perhaps because it has created its own tiny ecosystem, it has come to the attention and attracted a few individuals over time that otherwise we would never have the opportunity to interact with. Dan had invited Mr. Hamelman to the forum a few CBs ago.
Although he is not a regular contributor, and certainly not nearly as regular as we would like ;-) , his "checking in" and attention to these must be more frequent than his comments. I'm not sure, by any stretch, whether this is somewhat unique to TFL, but Mr. Hamelman's presence here is certainly a testimony to the value that this "system" has created.
(okay, I'm done..). And welcome to the party!
Well said and thanks Alfanso!
I just can’t seem to get my hydration for Swedes loaves correct. 65% on the base dough but the grains and seeds I do about 120%. Especially the flax seeds I like em well hydrated. Meant to make batards but ended up having to put them in loaf pans. Turned out great!
500g Lancelot, 250g bread flour, 50g coarse rye, 100g einkorn, 100g bread flour.
160g flax seed, 80g pumpkin seed, 50g black sesame, 50g white sesame, 80g poppy seed, 80g thick oats which completely disappeared
Looks great James. It makes a great pan loaf as well as a hearth loaf. It really is a delicious bread that I have probably made 2nd most times in various forms.
They look great! Nice and uniform crumb. I like the blend of flours and grains you used. Sounds very good.
finally got decent hydration on this bread. I did 650g water to the 1kg mixed flour. Plus 200g starter. Cold soaked the flaxseed with 200% water. (100g flax with 200g water). Once it soaks up the water I add the sesame and poppy seed into the same container with no additional water. The pumpkin seeds are just added in dry during lamination.
Image

Love the sesame smell when I cut this loaf open.
previous attempt was so wet I had to put it to a loaf pan. This turned out well.
James, now that is just perfect, gorgeous crumb and crust. It is such a great loaf of bread isn’t it? Well done.
Benny
I am quite happy with this one. Also, i've switched to KA AP flour for the last few bakes from my Harvest King 12% unbleached bread flour. I am noticing a softer crumb. i like it very much. I was able to find 25# bags at a local Smart and Final store for $17 (vs $13 for 50# Harvest King). Though double the price, i think a good upgrade and a more manageable size.
-James
Dup removed
My first attempt at Five-Grain Levain. Details in my blog post.
Beautiful crumb Troy, really well done. How do you like the flavour of this bread, it really is quite delicious and customizable to your tastes.
Benny
The taste is very good. Not too sour, but definitely there. It was great with my eggs this morning. :-)
I used a substitution of Turkey Red for all the AP flour in the original recipe and is a 100% whole grain bread:


What does "made as a mash" mean? Thx.
Instead of a soaker, the seeds and some flour are mixed with hot water and added diastatic barley and held at 150 degrees F for 3 -4 hours, cooled, then added to levain and flours and water and salt. The mash turns dark and sweet and slack from the process. I used 10g of diastatic malted rye instead of barley. You can find a few recipes in Reinhart's book on whole grains as well as the process. The result is a creamy, sweet sour flavor to the bread. Used extensively in Russian rye recipes.
Both of these loaves look really great George, wonderful crumb especially for 100% whole grain.
Benny
Thanks Benny! Both of these loaves are whole grains and I used 100% Turkey Red with both of them and used a firm levian in both-around 66% hydration. The one made as a mash has a distinctly different taste because of the mash-more of a sweet+sour flavor-than a sour note.
Great idea George. I think I’ll have to give that a try. Never did think to deviate from the 75/25% used in the original formula. I have some Hard Red Spring Wheat that is high in gluten. We’ll see...
I’ve been baking more and more in bread pans for my bread stash and preferring the profile to free form.
So I finally got to baking this bread. Didn't have any cracked rye or anything similar, so used crystal rye malt what I crushed by hand. Also I didn't realize I had very little sunflower seeds left, so added some sesame seeds to top up the amount.
Here is the formula: https://fgbc.dk/1cen As you can see there, I added extra water, as it appears pretty much everyone has done here. I had zero liquid in the soaker left (it actually got absorbed really quickly - I used hot water). But after adding the last bit of this extra water I actually immediately regretted it, since the dough suddenly became just a little too sticky for my preference, and didn't really lose this during fermentation. Did a short fermentolyse without salt and seeds, mixed them in, 3x30 min stretch&folds, 1 hour bulk at 24C after that, shaped, coated in pumpkin seeds as recommended, and retarded overnight. All the way I thought the dough felt strange - it held its shape well, but had very little extensibility. I guess all the seeds get in the way of that. Anyway, it baked up nicely and tastes great!
[url=https://ibb.co/5L99JQN] [/url]
 [/url]
 [/url]
[url=https://ibb.co/rmn4DMy]
[url=https://ibb.co/zXjBZXB]
So next time I'd add only half of that extra water, that's the only thing probably.
I like the look of this loaf. Nutritious and tasty looking. Cheers, Gavin.
Thanks Gavin! Very full of seeds, so must be very nutritious indeed. And tasty, of course.
I agree with Gavin, that is a handsome loaf Ilya, well done. I like the exterior coating of seeds in particular and the rich colour of the crumb. Do you like the flavour?
Benny
Thanks Benny! Pumpkin seeds stuck surprisingly well, when I used them for coating previously they fell off very easily. Flavour is great, very rich with all the seeds. My girlfriend says it is one of her favorite breads that I've made. While I joke that it's like bird food :)
Ilya, with 34% seeds this dough should feel strange. many of us added the seeds during lamination, but they also mix well in a mixer when added with all other ingredients. Often, I am a fan of lower protein white flour, but for this one high protein white flour is beneficial, IMO. The flavor has a lot to do with the seeds...
Various seed selections have all worked well.
Question - was the crystal rye malt diastatic?
I tend to use the same bread flour for all bakes (I got a big 16kg bag of it, so until it's used up I'm not using anything else as the main white flour). I tried to stick to the recommended seed selection first time baking this, but had to adapt a little to what I had on hand.
Crystal malt is not diastatic - it's a kind of roasted malt. Originally I was using it as a substitute for red rye malt, but now I've got the real deal, so I just add crystal malt berries, whole or roughly crushed, for texture and flavour to some breads.
I have made a blog entry for this bake at:
5-Grain Levain | The Fresh Loaf
This is wonderful bread and now my favourite.
I currently maintain a stiff whole wheat starter, so I figured I could make the refreshment larger and use the discard in the morning to leaven this dough. So basically all of the whole wheat flour in the formula is prefermented.
Mixed it by hand and no matter what the dough was really shaggy. It was also surprisingly stiff. I considered adding water, but then decided to just dump it in the bowl and see what would come out in the end. It did become smooth after a few folds, but felt really stiff all the way to the end of bulk fermentation. The loaves kept their shapes really well in the bannetons and rose higher than usual, at which point I decided to bake them. Aaand of course they collapsed in the oven.
The crumb is a lot moister than one would expect.
Not sure how I like the taste, I only got one slice. This is a tricky dough, I have to make this again.
the recipe for next week’s bake. Although with the amount of changes I’ve done, I don’t think I can call it Hamelman’s 5 grain levain anymore. I guess it’s more than just a tweak.... I added a whole pile more seeds keeping the amount the same and varied the flours included. So I’m calling it Seeded Multigrain Sourdough. ??♀️
Something to consider for this 5-grain bread: My starter is rye 85% hydration and is a total of 47-grams. After I fed it I have 37-grams left over that I use to convert to a white levain over two feeds. By the next morning, I have elaborated enough levain for the day's baking at home. I think that your whole wheat starter would behave the same and be very active. I hand mix also and for this bread, I don't autolyse. I stretch and fold for 15 minutes. By careful attention to temperatures 25C, I can bulk ferment over 1 1/2 hours (one fold at 45 minutes), shape and bench rest 10 minutes, then final proof one hour. The dough holds its shape when moved to the peel and scored. Hope this helps.
Cheers,
Gavin.
Gavin, 1.5 hr BF?
Are you using CY also?
Yes. I overlooked that. 0.3% IDY. I don't retard the final proof.
Gavin, many bakers, including myself, have noted that the flavor is best when the CY is omitted and the dough is fermented longer. Have you baked it without CY? If so, did you notice a taste difference?
No, I haven't tried that yet. David (dmsnyder) recommended a cold retard also in another thread. I'm aware of Hamelman's instructions for the cold final proof and will give it a try soon. The flavour of this bread is exceptional and I've been really happy with it. How long do you retard the final proof and at what temperature?
Finally got around to revisiting this one. My first attempt turned out OK, but I struggled with hydration. Had to add water. Added too much. Had to add flour. In the end, wasn't sure where I ended up.
Started this bake at 65% hydration for the final dough, and it worked well. Rather than a levain, I chose to go with a small inoculation and a long ferment. Because of the inclusion, I used a shot glass for an aliquot instead of my narrower, straight sided aliquot tubes. It was tough to read because the graduations were so small. I should have taken a larger piece of dough for the aliquot. But, it gave me some indication of how things were progressing.
Decided to go with seam side down for the final proof. Seemed like the right look for that loaf, and I'm happy with how it came out. Photo doesn't do the crust color justice. It's a deep reddish brown. Looks like decent oven spring, and the loaf seems to have uniform spring. It plumped up nice in all directions. Proof will be in the crumb, and I'll be slicing it in a few hours. Earlier than I want to, but this one's slated to be eaten this afternoon!
EDIT: I am liking this method more and more for making loaves with a sandwich bread type crumb.
That looks great Troy, do you like the flavor of this bread without the sourdough tang?
Benny, It’s SD. Rather than using a levain, I did a 4% inoculation with a 12 hour bulk and a 3 hour final proof. Will be trying it in a little bit, but it smells good!
Also, the first time I made this I kind of botched it. So, I don’t really have a good comparison. 😁
OK, when I looked at your spreadsheet I saw the raisin water and nothing in the preferment columns so thought it wasn’t sourdough, my bad.
Benny
No worries! 😁
I’ve been using a YW/SD combo on just about all of my bakes. It gives me that extra bit of confidence that I’ll get good leavening, and it adds another layer of flavor. I have a blueberry YW fermenting now and will try it next weekend.
Your YW experiments are interesting as well. It will be fun to see what the blueberry one does from a flavor perspective.
Mary
Thank you Mary. It will be interesting to see if I notice a difference, but my guess is I won't. Not sure if I have a refined enough palate. :-)
I used a portion of my RYW to kick off the BBYW and cut down the required fermentation time. I'll keep the BBYW going separately now to see how boxed California raisins compare with locally grown and frozen blueberries from last summer. If nothing else, the color is different. :-)
I'm going to give it a try this weekend :-)
I know I'm late in this challenge, but can somebody tell me what kind of rise I should aim for during the bulk fermentation (30%-50%..??) and then during the last rise (70...80%..??? ? Thanks!
Never too late!
For mine, I did my last set of bowl kneading (which fully degassed the dough and serves as my preshape) at 25% in the aliquot and then let final proof go to 75-80% before going into overnight cold retard.
Thanks a lot for sharing!
I would be very grateful if someone could tell me where I could find the spreadsheet, please...
Thanks !
I've PM you a link to my dropbox. Change your desired dough weight (grams) in cell E4.
Download the file before you play with it, please.
I struggled a lot to knead the dough by hand...In retrospect, I might have been able to get a nicer gluten development using my Kitchen Aid
I followed the no yeast / overnight retard option:
30mn autolyse with levain
Mix with soaked seeds (sunflower + flaxseeds + oats + cracked ryes) and salt + 5g of water
I kneaded by hand 3mn, then rest for 10mn, then kneaded again for 3 mn, then 10mn rest again, then again 3mn of kneading, rest for 10, then S&F
Bulk at 27-29°C for 3h with 1 S&F after 1 hour
Shaped in a boule, then rest 1h at 28°C
Fridge at 3°C for 9h
Baked in a cocotte for 25mn at 230° + 20mn without lid
Result: barely any oven spring.... crumb very dense...but really delicious!!
Thanks for all the tips and tricks this community bake provided me during this bake, especially as a newbie it's invaluable!
Well done, I love the ❤️ score on top too, nice touch.
Benny
Haha! Thank you, Benito, I wanted to have a bit of fun...I would be very grateful if you could tell me what you think of the crumb, please... I would love to know what I should work on the next time to get a less dense crumb, apart from the initial kneading I guess...Thank you!
I think that this style of bread isn’t going to have a hugely open crumb. There are a lot of inclusions which weigh the dough down and then also the porridge. I struggle to get anything open with the addition of porridge. As you’ll see in this thread there really aren’t many examples of a more open crumb for this loaf. I think that the even crumb is characteristic of this style of bread and you’ve done well. Hope you’re enjoying the flavor of it, it is really a delicious bread.
Benny
You are absolutely right, of course, Benito! I just like to know what could be improved so I can learn from my experience...This bread is absolutely delicious, that's for sure!!! I am going to do it again, but this time I will try to knead using my Kitchen Aid mixer, just to see if it makes any difference. Thanks!
Gaëlle
Haha! Thank you, Benito, I wanted to have a bit of fun...I would be very grateful if you could tell me what you think of the crumb, please... I would love to know what I should work on the next time to get a less dense crumb, apart from the initial kneading I guess...Thank you!
Gail,
I think the openness (if that’s a word) of your crumb looks great for this bread. I actually prefer that nice, even crumb that you have in this loaf.
When you say dense, do you mean the tighter crumb of this loaf, or is it “heavy”? This bread has a fair amount of water in it with the soaker and takes a little extra baking time.
Great first 5-grain bake!
Troy
Actually, I said dense but it's not what I really meant...the crumb is pretty ''closed'' but at the same time soft, light and airy..In fact, I think I like it this way! But I am still going to re-bake this bread as soon as possible to compare hand kneading versus kitchen aid; I'm usually not a fan of kneading with a mixer, but this time I'm really curious to see if it would change anything for this particular bread
Thanks a lot for your feedback Troy, I really appreciate it and again, I am really looking for any constructive critic or advice to improve my baking, so please do not hesitate! ;-)
Gaëlle
Gaëlle,
The first time I made this bread, I followed the formula, but found the dough to be very dry and stiff. Almost unworkable by hand. I kept track of the extra water I added and ended up at 65% hydration versus the 57.5% in the recipe. The last two times I made it, I started at 65% hydration, and the dough was very easy to work.
Not sure where you were at with hydration, but that may also be something to look at too.
Troy