So I thought I’d like to try this hydration test: 6, 7 and 8 teaspoons of water added to 1/2 cup of flour, mix, cover, let sit for an hour then see how it stretches. Here are photos...
6 TEASPOONS OF WATER:
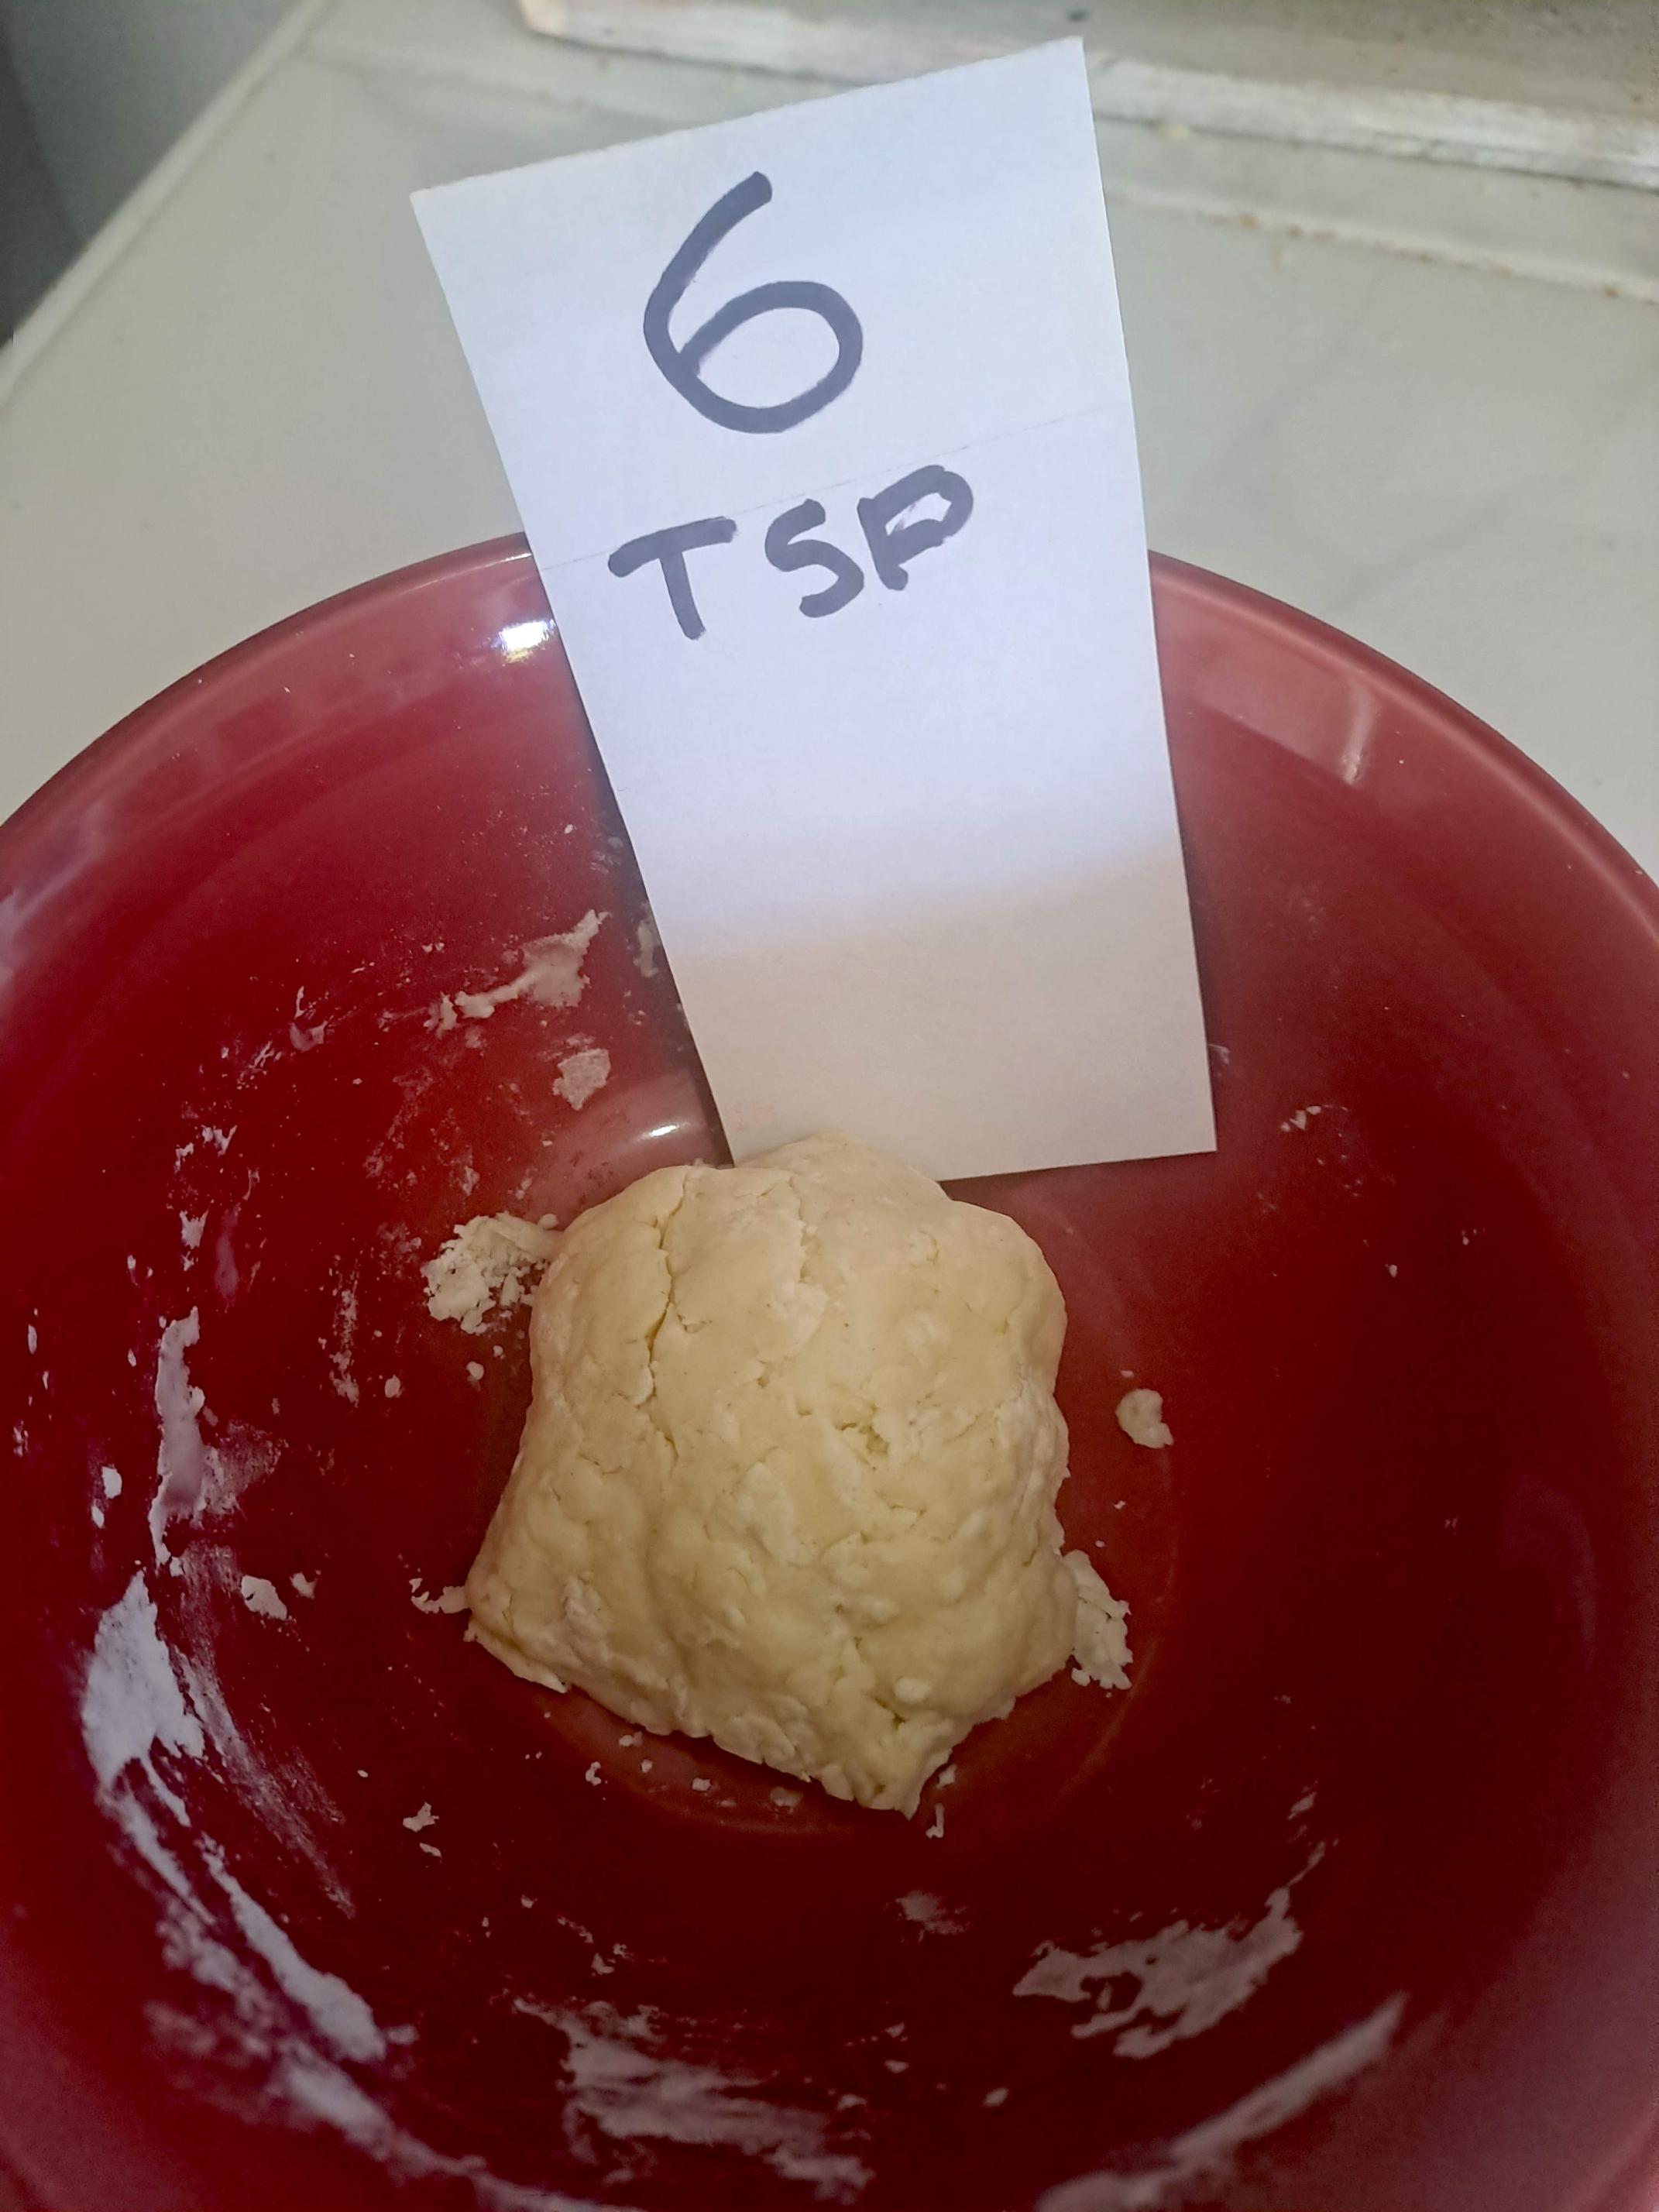
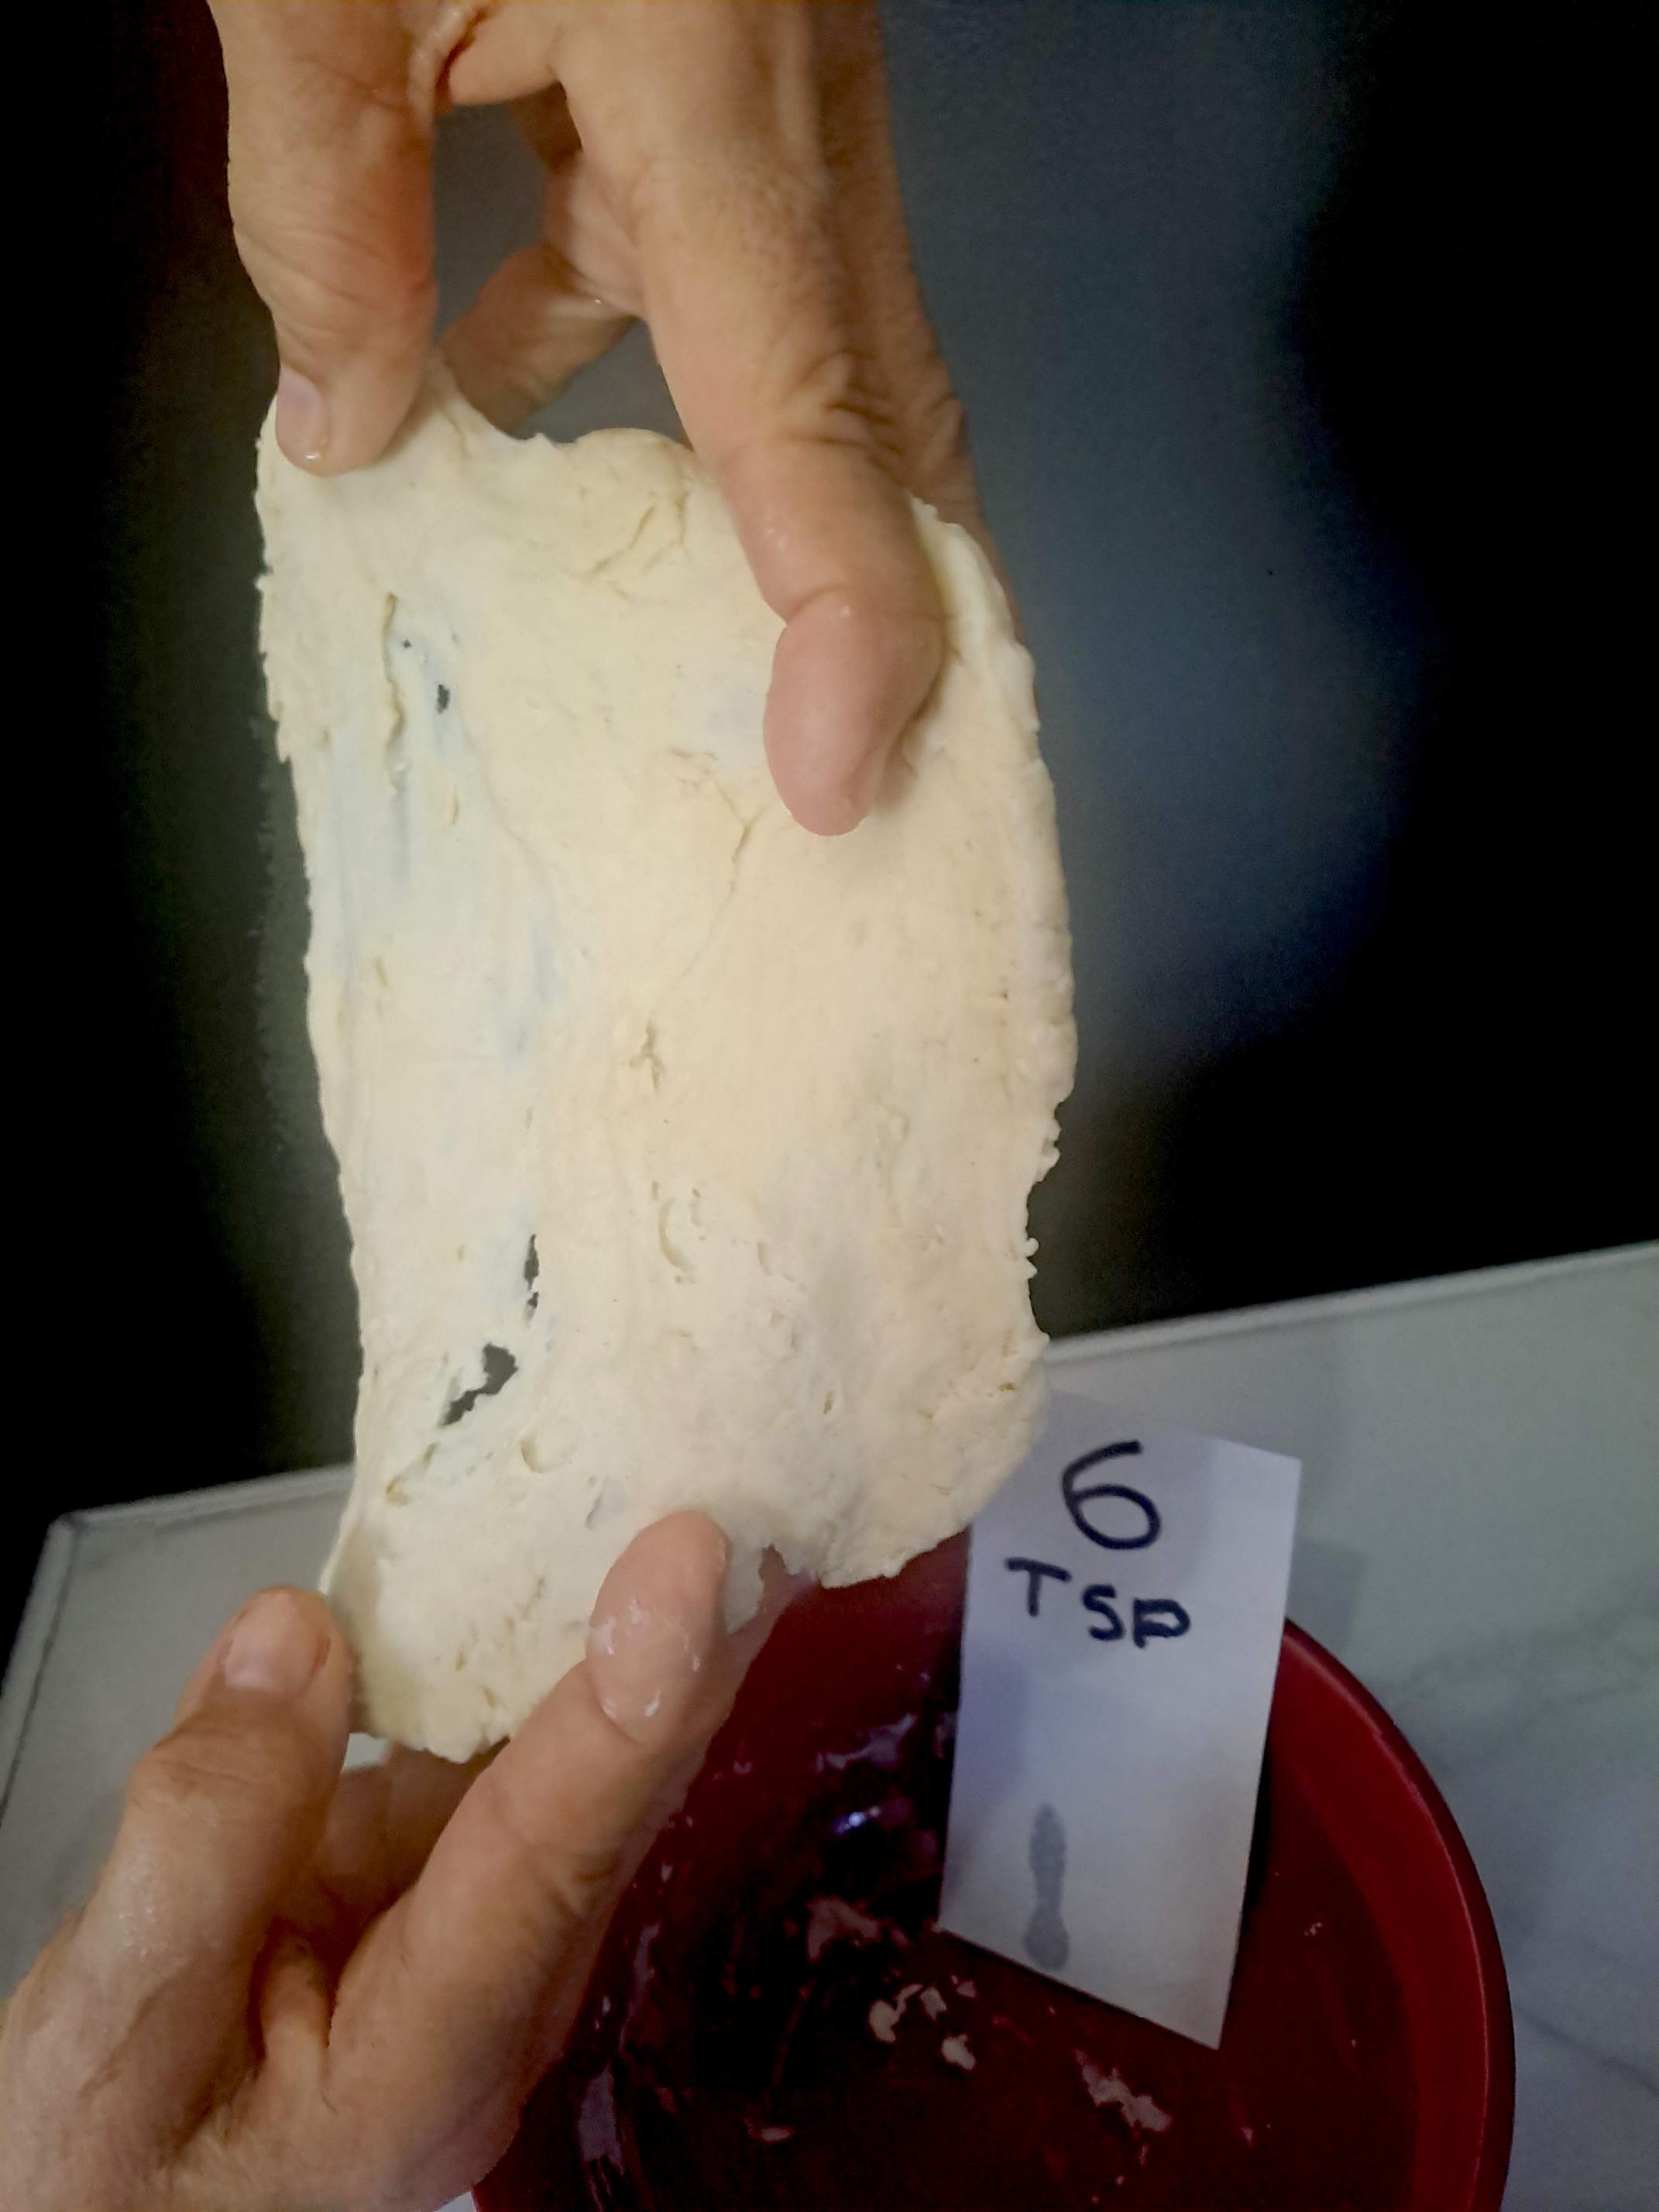
It was so dry, I couldn’t really call it dough. I had to mix with my fingers but managed to ball it up. Here are photos taken after one hour. The ball was, I thought, surprisingly smooth considering how dry it was starting out. The ball had a tacky feel to the surface.
7 TEASPOONS OF WATER:
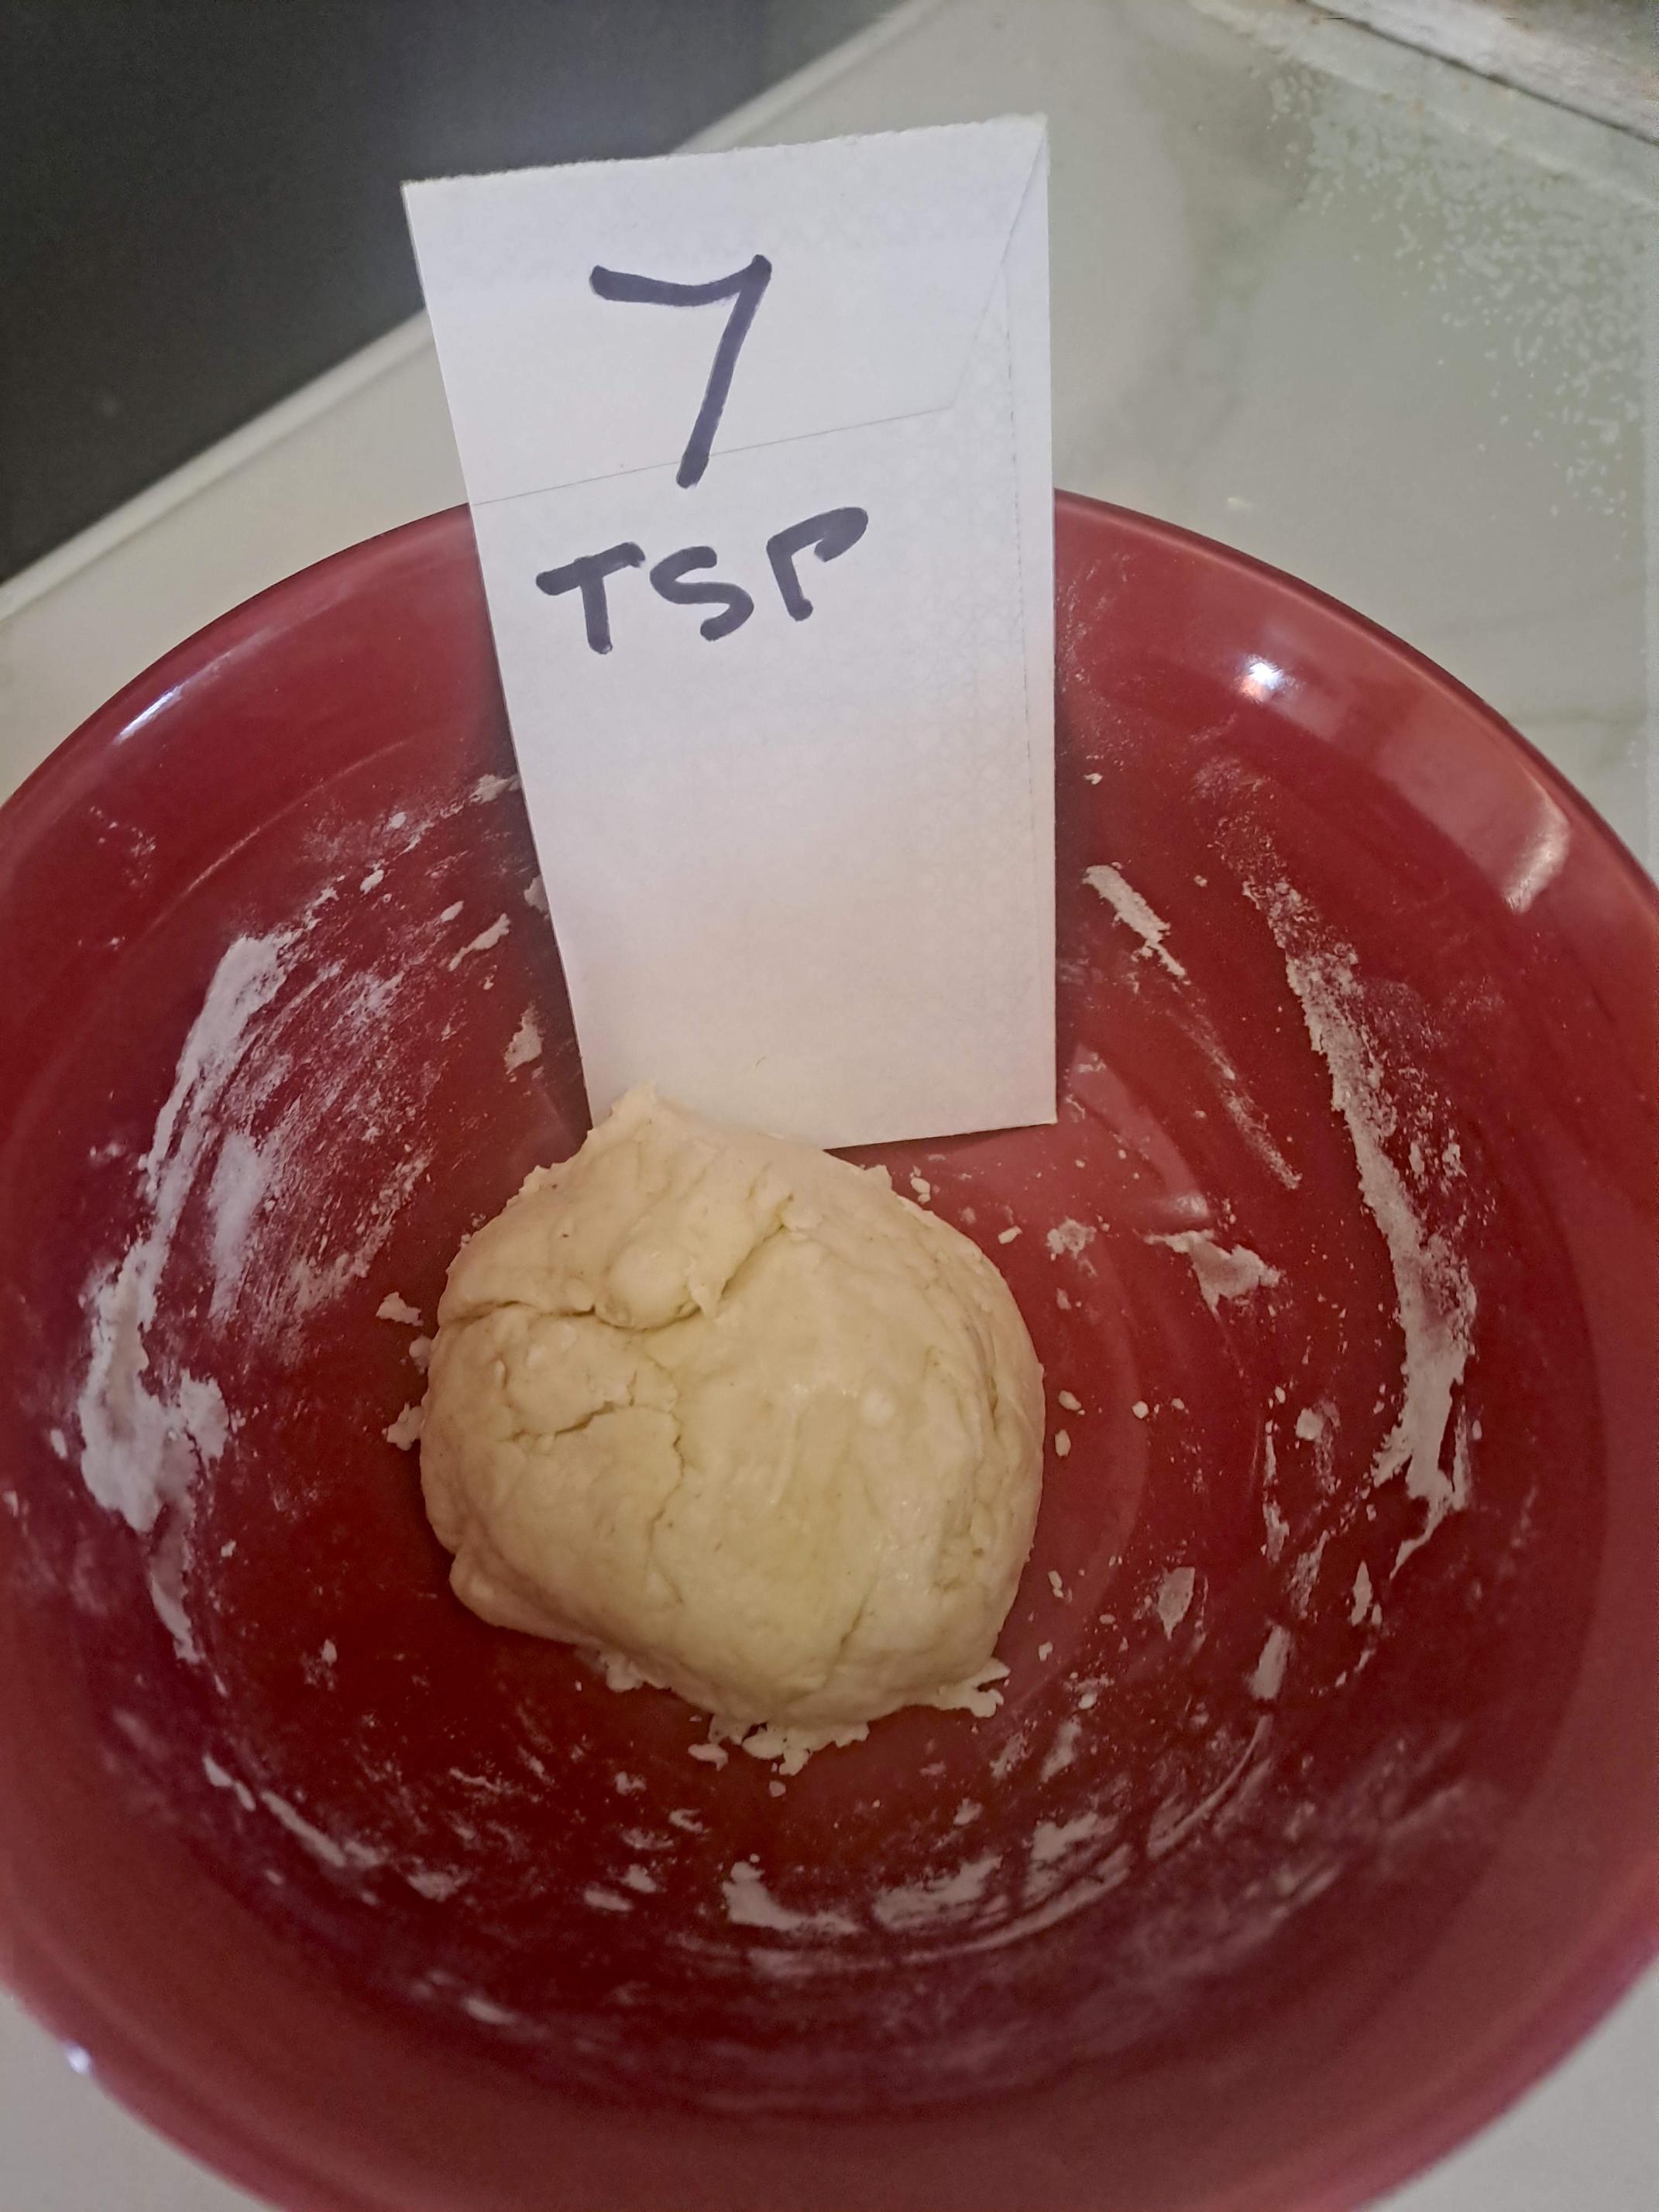
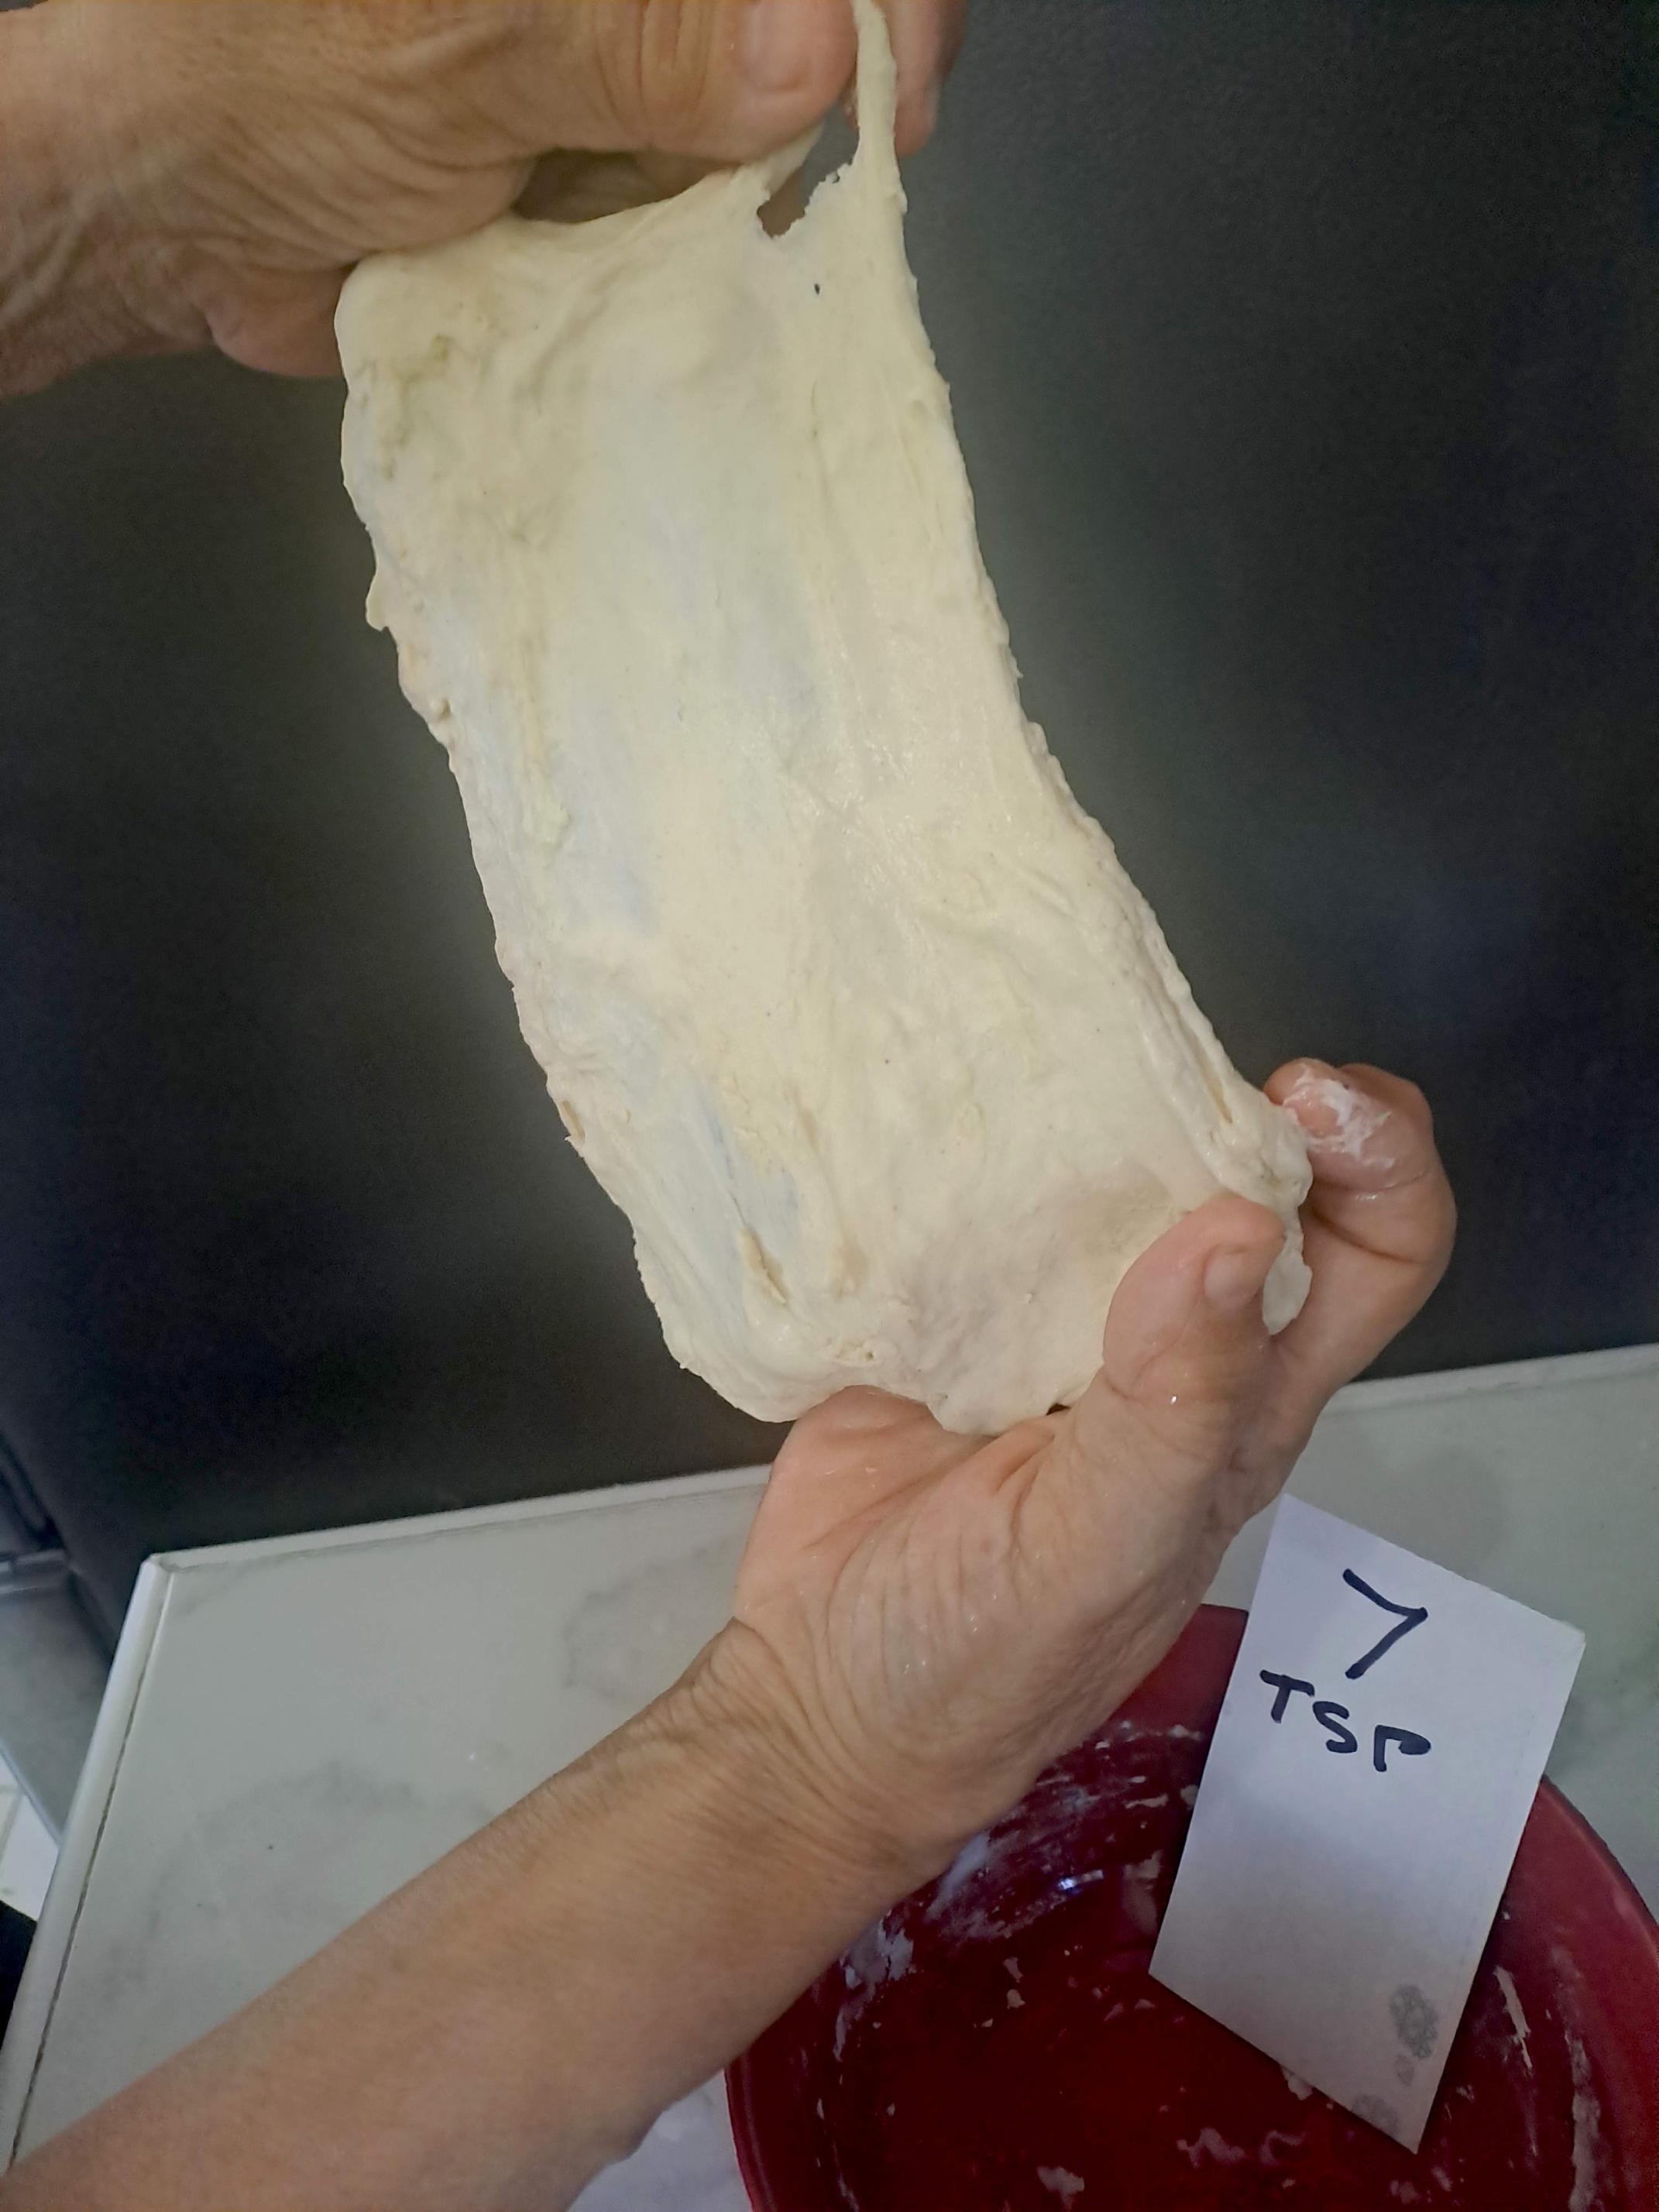
Again, very dry and I ended up using my fingers to do a final mix. After an hour the dough felt sticky and very elastic.
8 TEASPOONS OF WATER:
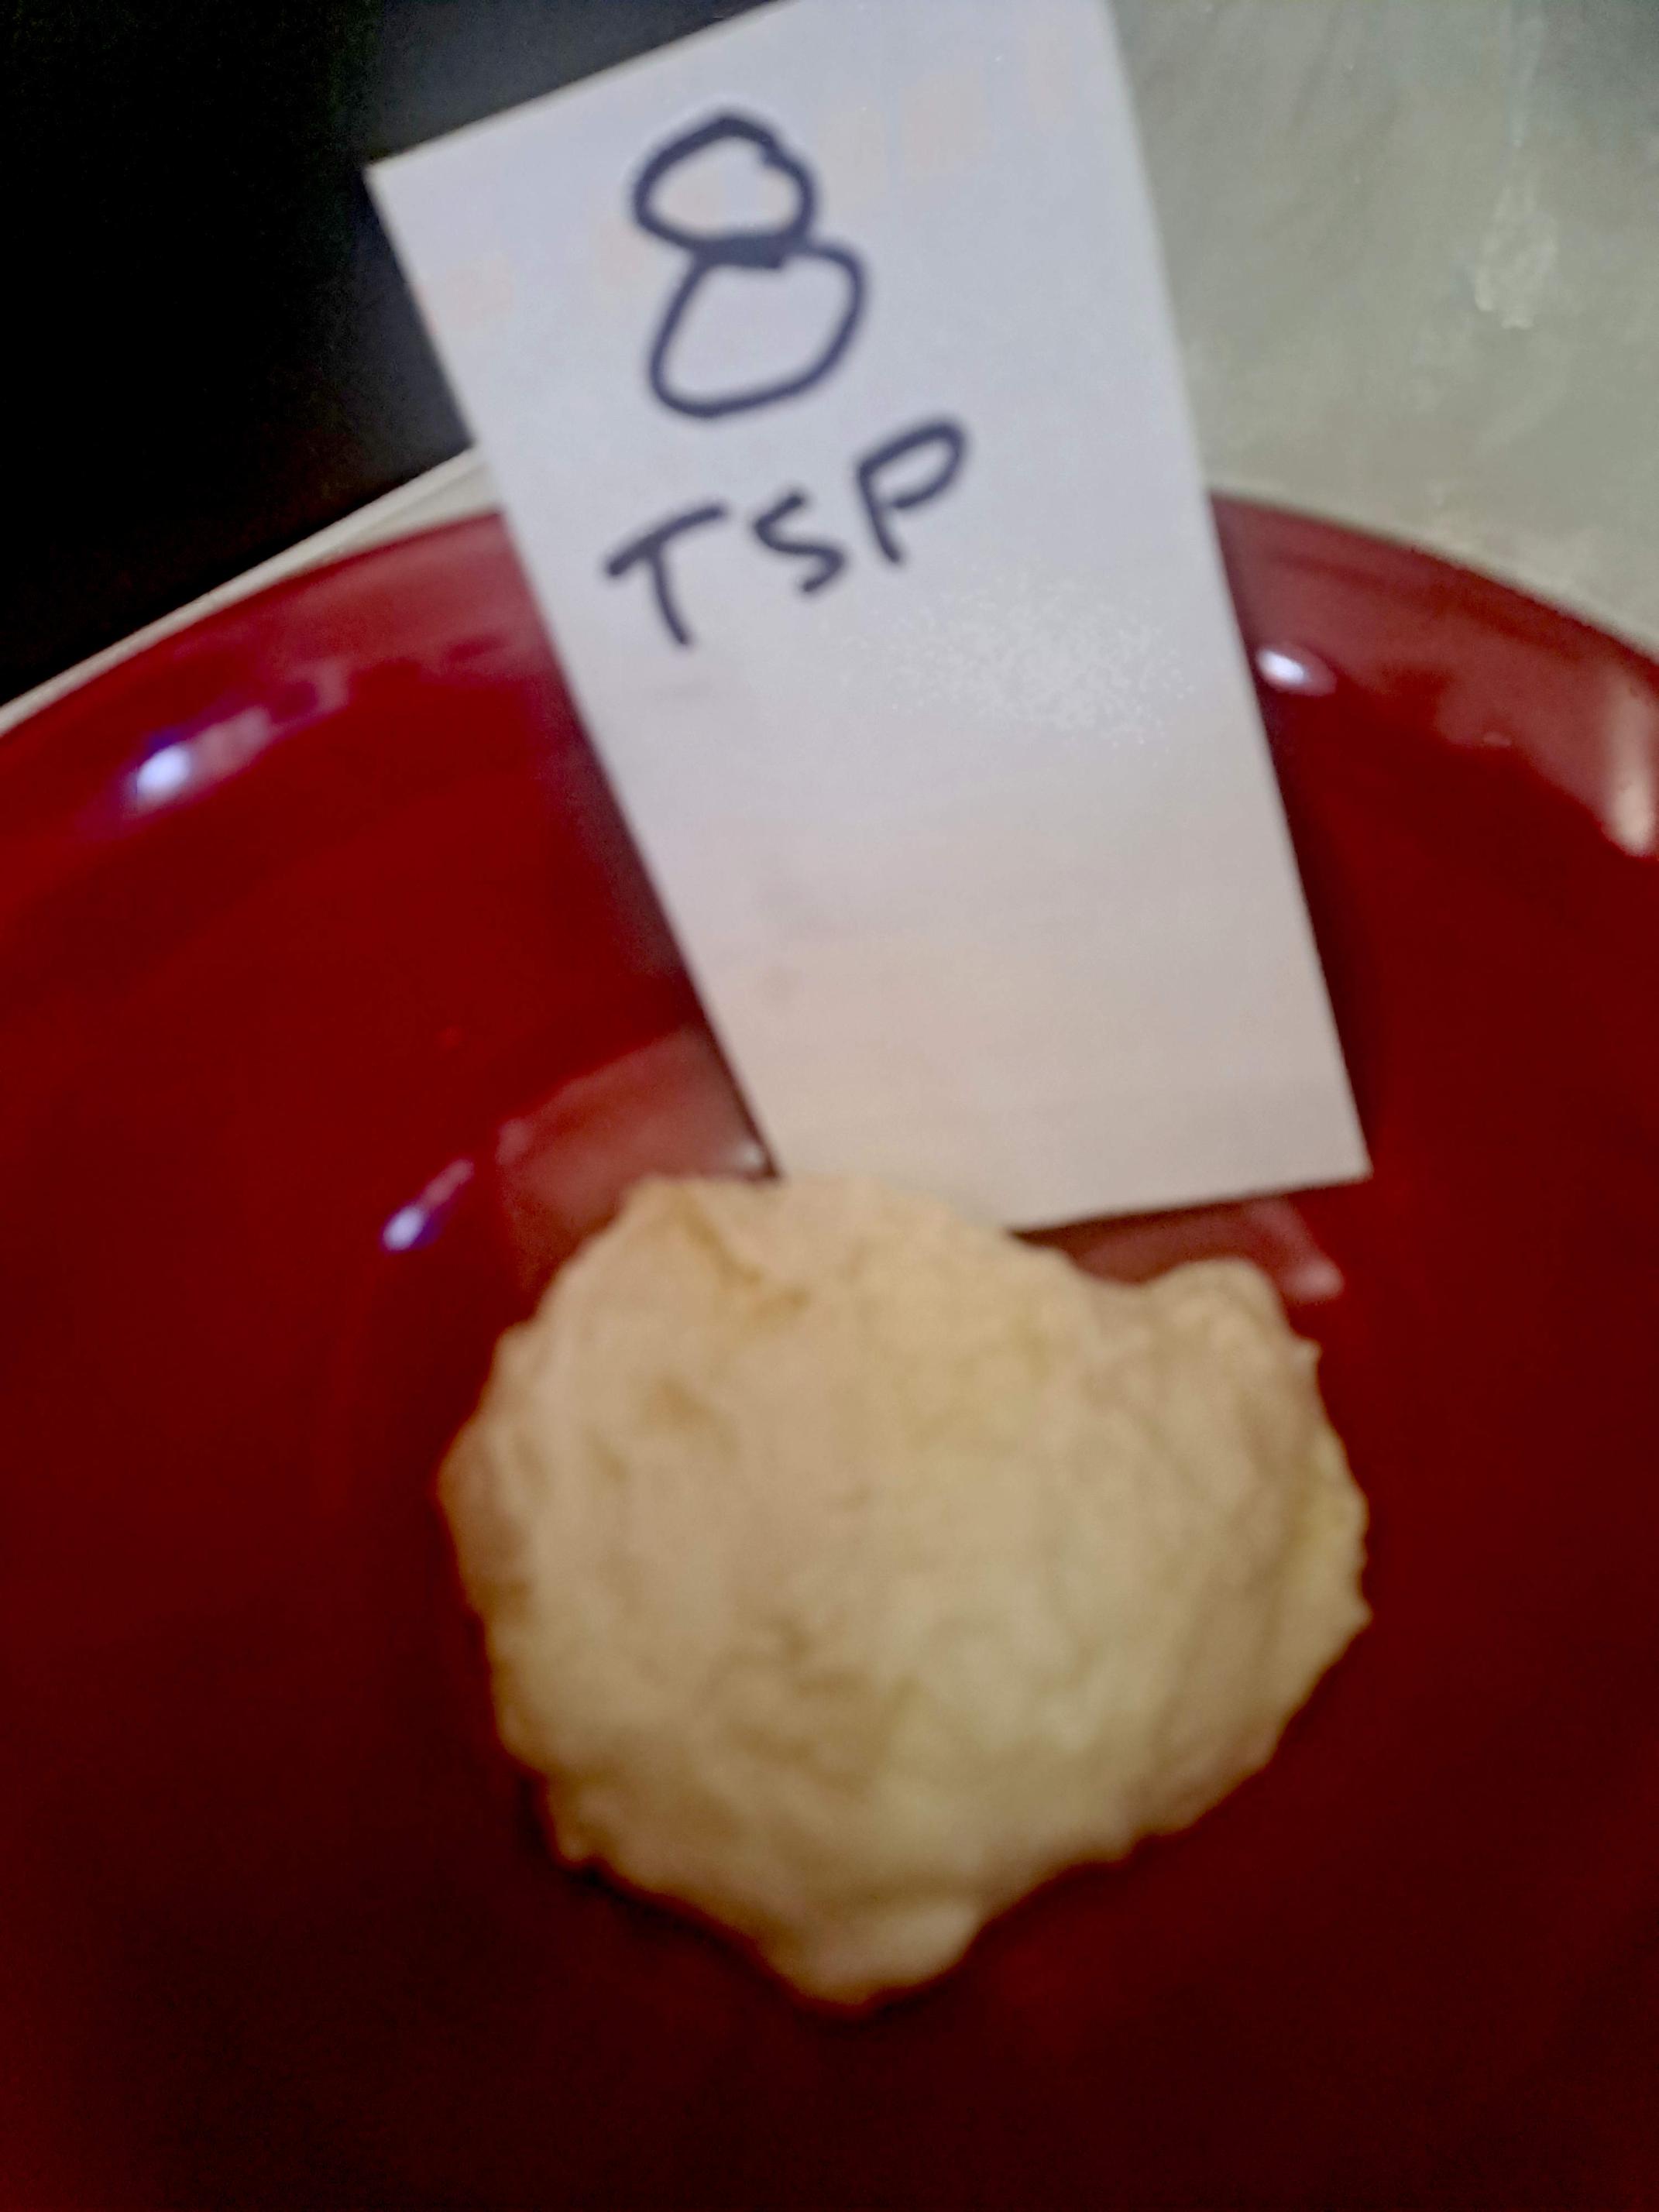
Smooth dough and I was able to do the complete mix with a spoon. After an hour, it had slumped in the bottom of the bowl, was gooey and stuck to everything.
Anyone care to comment?
Thanks... Katie
I think these tests fit right in with what you've been reporting. Here is the hydration of the doughs, assuming 125g/cup:
water, tsp hydration
6 46%
7 53%
8 60%
With most flours, 60% hydration would not seem so wet. The fact that the last sample spread out after an hour doesn't necessarily mean anything "bad", but that it got gooey and stuck to everything does indicate that the hydration is just too high for the flour. The touchy flour I have mentioned before was good at 58%, not good at 62%, and turned to goo any higher than that. I think you could try 7 1/2 tsp of water. I bet that will make a good dough. Somewhere between 7 and 7 1/2, anyway.
TomP
I browsed the Harina Blanquita website and there are a few bread recipes. The white bread and bagel recipes are at 60% hydration, the pita recipe is at 56%, and a flatbread recipe is at 85%. I also calculate the protein content at 10.7% (3.2 g per 30 g flour), which isn't too far off from US all-purpose flour.
I think your hydration experiments are consistent with the bread recipes above. The humid climate you're in probably contributes a fair amount of moisture to the flour so 60% hydration is really higher because of the higher moisture content of the flour. In your experiments described here, did you cover the bowls after mixing? If not, the flour may have continued to absorb some moisture from the humid air and may be why it gets sticky after 1 hour.
I think Paul's idea has been very informative.
It's normal for most any dough to start out dry when mixing - it can be a common mistake to overhydrate initially - the consistency after resting is more telling. All three are workable doughs as far as I can see. And any stickiness observed is normal too.
Next step is to practice kneading them until smooth.
When gluten is more developed it will become less sticky and easier to handle.
One of the things that I have encountered with students that are new to making bread is a tendency to overreact to dough stickiness. Their usual tactic is to add more flour until the dough isn’t sticky anymore. That, of course leads to another set of problems.
Part of what you are encountering is a combination of the flour's characteristics and your local environment. Part is also learning how to handle the dough at different levels of hydration. You are gaining experience, you are persistent, and you are open to learning new things. All of those will serve you well as you continue to develop your baking skills.
So, embrace the stickiness. Somewhere down the line, you’ll look back and realize that you’ve become comfortable with doughs that you thought were impossible to handle at this stage of your journey.
Paul
Thanks everyone for your support.
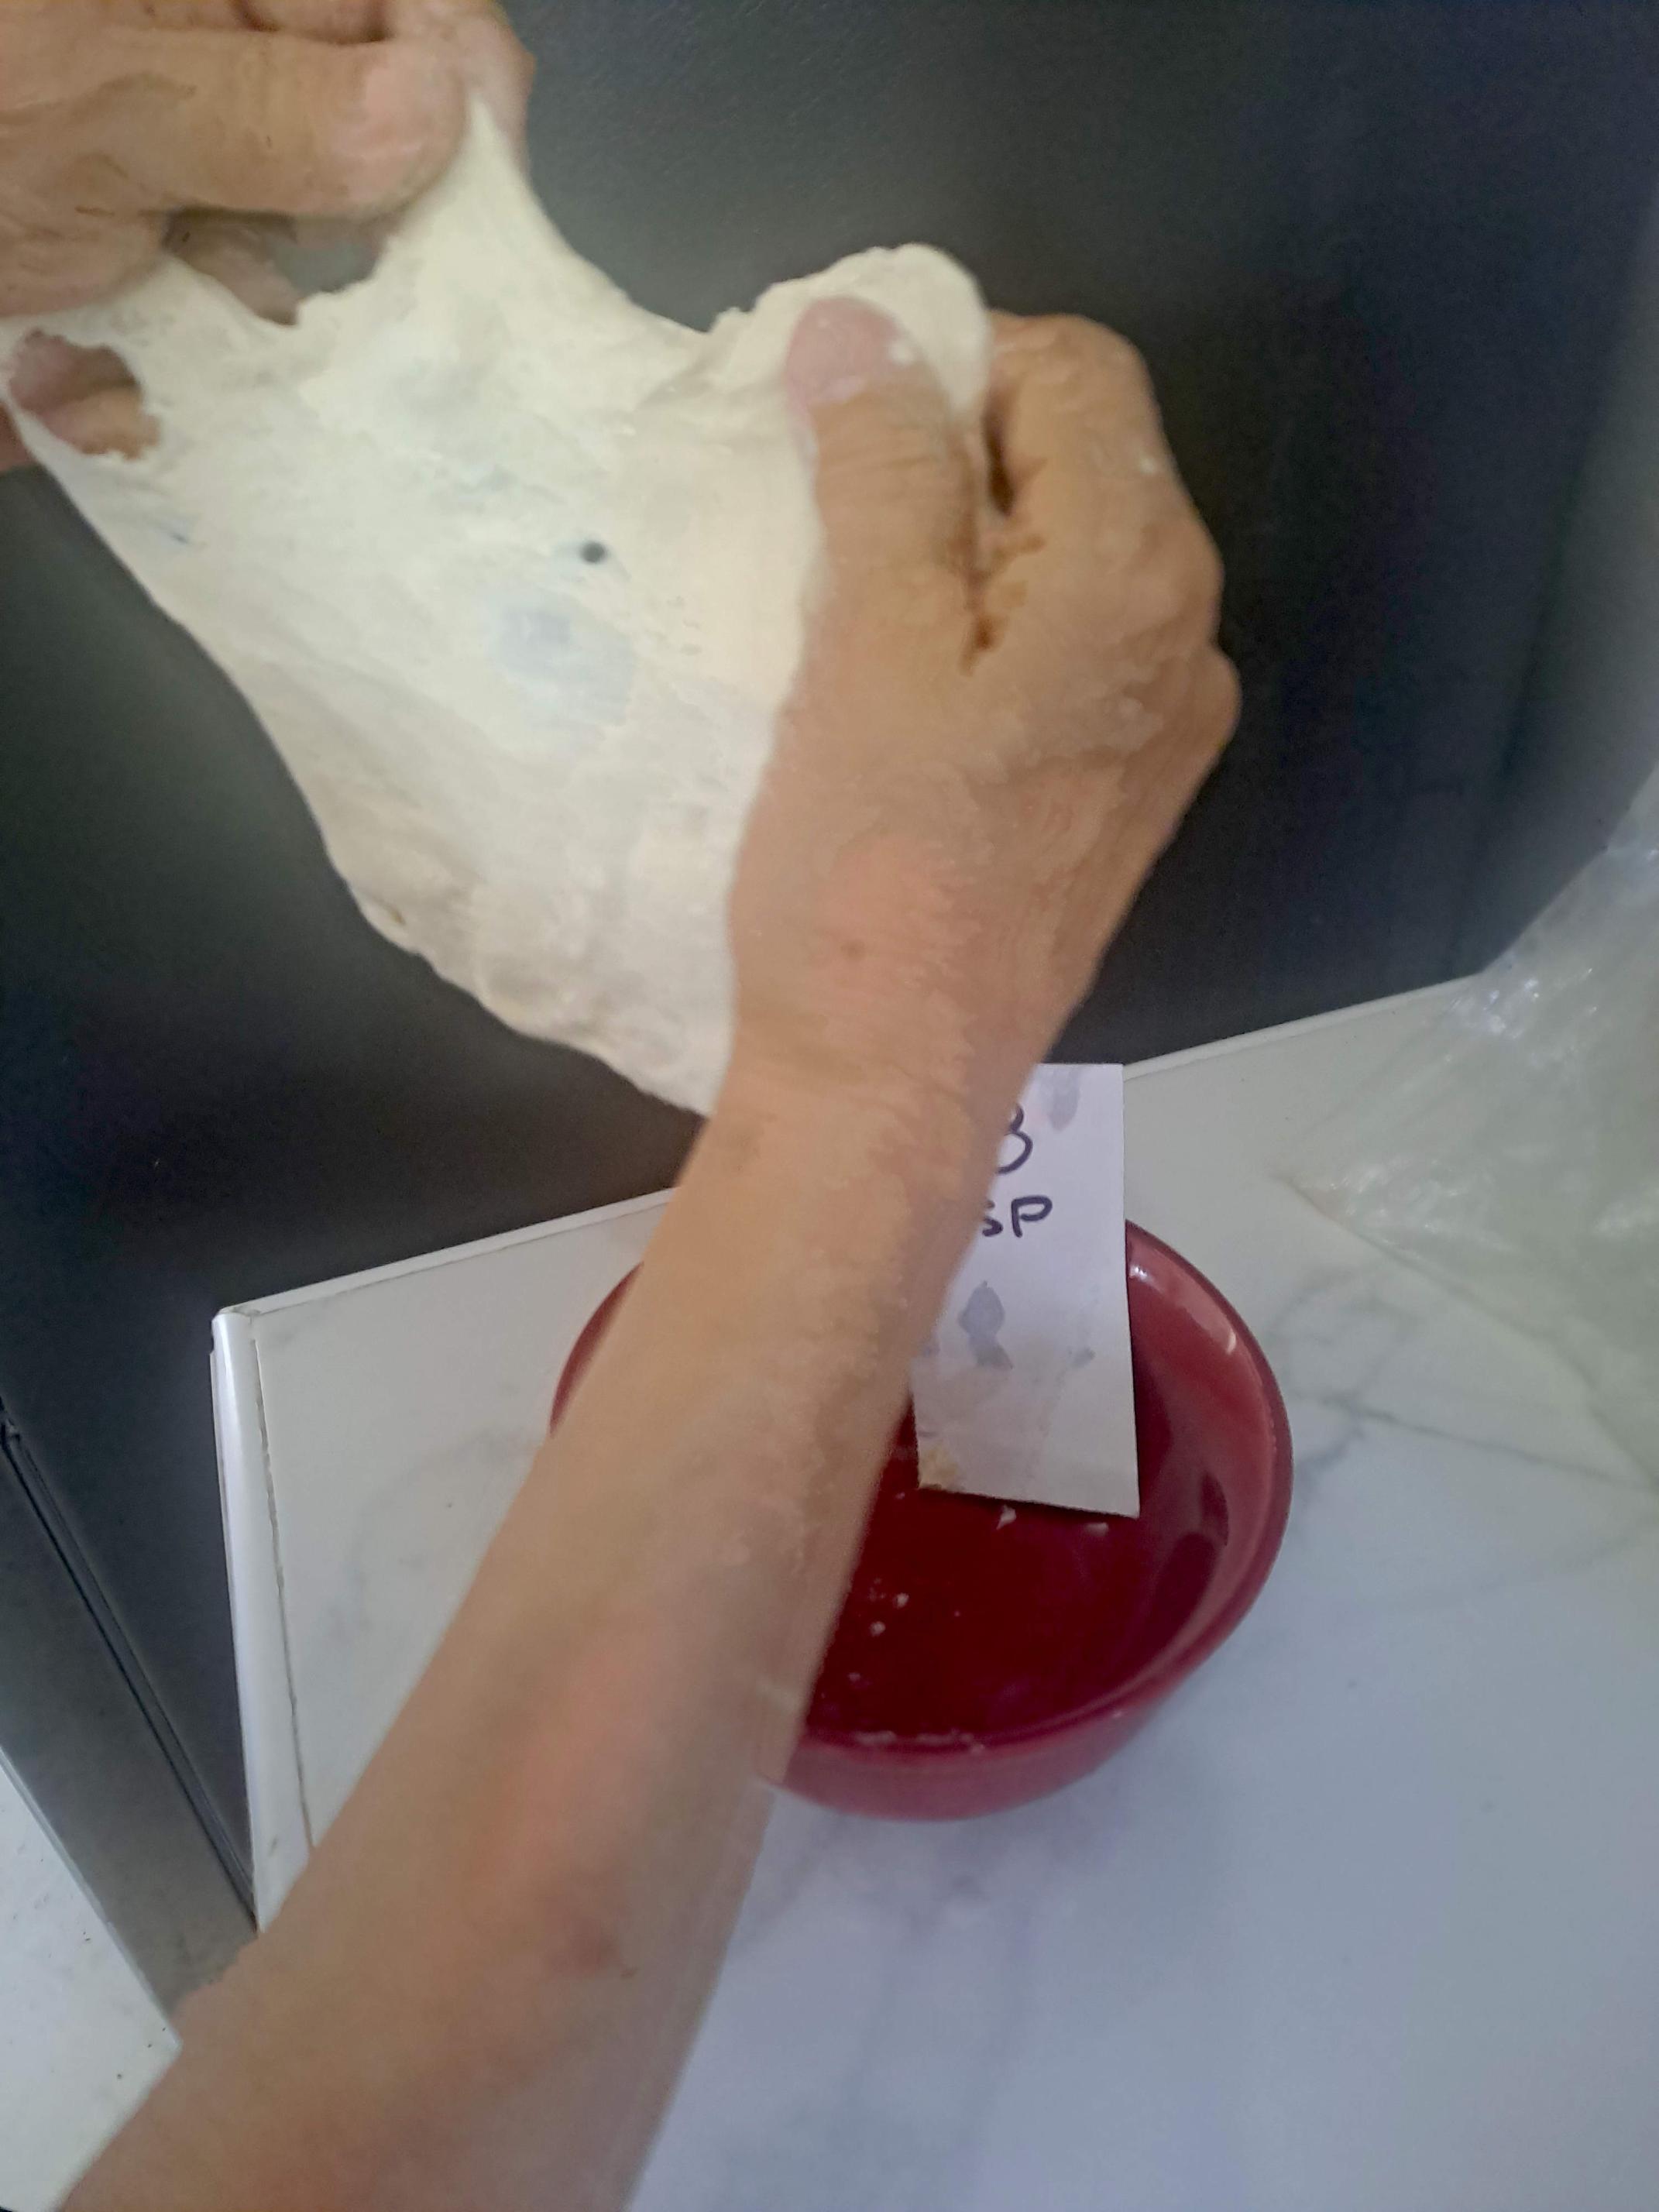
Okay... 7-1/2 teaspoons of water to 1/2 cup of flour.
Here’s the initial mix...
I started mixing with a spoon but had to revert to using my fingers to get all of the flour incorporated and to form a tight ball.
Then, after sitting covered for an hour, the ball of dough looked much the same but was softer to the touch and sticky, but not to the point of sticking to my fingers. The ball hadn’t slumped, but seemed on the verge and I don’t know if a larger ball would hang together.
And finally some stretching to test for strength. If you look closely, you can see the side of my fridge through the dough.
By my calculations, 7-1/2 teaspoons equates to 8-3/4 fluid oz of liquid for 3-1/2 cups of flour. Up from the original 7 fluid oz. That sound about right to you? I could start with 8 fluid oz and work up from there, but I say “go-fer-it.”
My main concern now is getting more air into the crumb. And I still think the shell-like crust is inhibiting expansion of the dough. I was thrilled to see a brown loaf come out of the oven last time, incorporating the egg white into the dough mix. But still not clear on covering the dough with a pot. Does crust browning increase with cover-time? And how does cover-time affect the crust: soft vs crispy vs brittle? Right now I’ve got the dough covered for 30-minutes of a 40-minute total bake time @ 450F. Is that too long? Or too short? Is there a definitive answer...
Much thanks, Katie
I would go with 7 1/2 tsp. Reduce the yeast since the dough should be able to hold together for a longer time. During that longer time perform one or two more stretch-and-fold sessions to improve the dough's qualities. If the dough starts deteriorating too much, next time reduce the water a little.
After some handling, like kneading or S&F sessions, the dough will start to relax and spread out. This is normal and you are looking for a balance between holding a tight shape and spreading out too much. That means a balance between elasticity (the ability to spring back) and extensibility (the ability to be pulled out further and further without breaking).
I think that comments about the dough picking up moisture from the high humidity are probably on point. Also, a warm dough will have more tendency to slump and relax than a cooler one, and I assume your work area is fairly warm from what you have written. So you should probably favor elasticity ever extensibility as best you can. The window pane test you pictured showed fairly good extensibility but there was some tearing going on. Another S&F session or two would help with that and make the dough smoother and softer.
TomP
I'm glad by how baking questions from members can turn into impromptu community project 😆 TFL is alive!
Jay
Yes, it’s great when people work together. The world would be a better place if we were all trying to bake a loaf of bread.
My Activated Yeast comes in little packets of 7 grams. Maybe use 1/2 a packet?
And I would really appreciate a comment or two about covering the dough in the oven with a pot in lieu of a dutch oven.
Katie
Hi Katie (kay-dee) -- I've been impressed at how your breads have improved. Congratulations! I hope you are enjoying the process.
Two thoughts regarding your questions:
Rob
Yes, try 1/2 packet. You are trying to extend the fermentation so you can perform more S&Fs to improve the dough's structure. If the dough holds up, that should improve the final loaf. If it doesn't, then a small reduction in the water should be all that's needed.
I haven't tried a separate cover myself, but they have been discussed here on TFL. IIRC, the upshot is that the cover has to seal fairly well or too much moisture will leak out. Some TFLers use a light weight enameled roasting pan that comes with its own cover. They say it can work as well as a Dutch Oven. This kind of pot is sometimes called "Graniteware". I ran in internet search for "graniteware site:thefreshloaf.com" and here are a few of the hits:
https://www.thefreshloaf.com/node/56171/good-result-granite-ware-round-roaster
https://www.thefreshloaf.com/node/67571/100-whole-wheat-small-graniteware-roaster
https://www.thefreshloaf.com/node/56822/cast-iron-cooker-vs-graniteware-thermal-data
1/2 packet is imo still way too much. Assuming 125g flour, 1g dry yeast is usually ~2.5-3g fresh yeast (depending on brand), with 3.5g dry yeast (1/2 packet) you have the equivalent of ~7-8% fresh yeast in the recipe. With a high ambient temp the fermentation is still pretty fust. Way too fast for the how under-mixed / under-kneaded the dough looks on some of the pictures.
Anyway, would be interesting to know, how warm the dough really is.
Katie wrote that the last loaf used 3 1/2 cups of flour, which would be about 440g. A 7 gram yeast packet would be 1.6% yeast, right in line with the usual recommendations. See her post:
https://www.thefreshloaf.com/node/78878/toms-instructions
It seems too much because the fermentation went so fast, around an hour, which could well be because of the warm temperatures at her work area.
Since Katie's earlier tries had the dough deteriorating after longer times, I'm suggesting halving the yeast to get a modestly longer ferment without stressing the dough too much. If the dough holds up, then I would suggest halving the yeast once more. I don't know if a really long yeasted fermentation would be such a good idea in a warm climate, if only from the food safety point of view. Acidified dough would be a different story, of course. Someone else will know much more about that than me.
the usual recommendations... of using too much yeast!
For a lean dough, 1-2% fresh yeast is enough. Assuming a 0.33 conversion factor, that's .33 - .66% instant. Half a packet (3.5g) will give a very quick rise but more than that is definitely excessive, in the grand scheme of things.
From the link, pictures show a huge volume increase in just 15 minutes. Clearly too much yeast!
The fast rising is getting in the way of dough development. Hence "alligator skin"...
I've never used a Dutch oven but have used a graniteware roaster for a few quick bread bakes. I get a good plume of steam when removing the cover after ~30 min of baking.
It does need to go on a sheet pan, as someone has pointed out somewhere on this site (possibly in one of those threads!)
Been following from the sidelines, but wanted to say well done to all involved for helping Katie find her way through these difficult steps to the first successful loaf. We have all been through that. I remember how dispiriting it was to not be ablet to have that elusive first loaf that was how I imagined it should be, bake-after-bake.
My own 10 pence worth on Katie's travails:
I can't wait to see Katie's progress with the help of her very capable tutors! If/when you make a good loaf with such weak flour Katie, you will be able to bake any kind of bread with ease! Plus you will have that feeling of the the first good loaf which is one of the best feelings ever. So keep at it. You are nearly there!
I normally bake using a baking steel and steam pan. Most of the steam escapes from the oven very fast but enough moisture remains to help with rise and crust appearance. The times I have tried baking without steam, I've ended up with a gray loaf that doesn't look very appealing, and has a thicker crust. I would like to try baking with the steam lasting longer, and I may get a graniteware type roasting pan to try out.
Katie has shown real grit and determination up to now. She can't get better flour nor vital wheat gluten locally and she's baking in a hot humid environment, so let's all help her get the best results possible with what she's got. Everyone has already been very generous sharing their experience!
I'll only do this once - to this user anyway;
You really should decrease the water. Just remember "shaggy" - toss the rest. I should note - 4 can be skipped in certain cases. Enjoy!