I have two teenagers, needed a sourdough that was tasty, that I'd want to eat, but that is also a sandwich bread that freezes well and fits in the toaster.
I culled from Tartine, Girl Meets Rye, The Perfect Loaf and this site, and came up with this, with detailed steps for people who like such things.
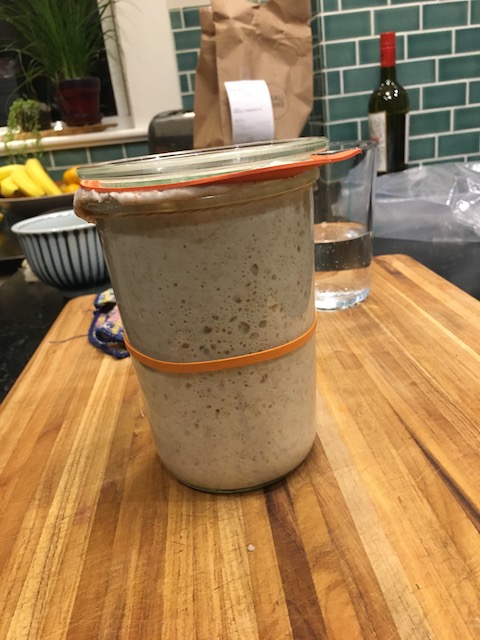
If you don't already have a starter, here's how I made mine: 50/50 white/whole wheat, 1.25kg of each To 455g lukewarm water in a medium bowl, add 315g flour, mix, cover with towel, let rest in a cool, dark place until bubbles form on the surface, about 2 days. With each feeding, remove 75g; discard remainder of starter. Feed with 150g flour blend and 100g warm water. Repeat every day at the same time for 15 to 20 days. I transfer the starter to a jar. I use a Weck canning jar, since it has a nice wide top for easy stirring. Since it’s glass, it’s easy to see the bubbles, and I keep an elastic around it to mark where it starts, which makes progress easier to measure. Once it’s up and running, Maintain starter, prep for baking Store in fridge with a loose lid on top (to let gas escape). The Weck jars are great for this I just leave it sitting there. Five days before baking, I remove the starter from the fridge, discard half of it, and feed it with warm (80 degrees) water and enough 50/50 flour to bring it up to the same level. That’s about 3 heaping TBSP of flour and enough water to make it into a thick toothpaste type texture. I do this every day, leaving it on the counter the whole time. I use a spatula to clean the walls of the container so I can see it rising and falling, and when I first started doing this, I used an elastic to mark the start position, so I could see it rising and falling. This was another thing it took me a while to realize was important - having a nice, active starter goes a long way to success.
 The night before you want to bake, make the leaven To a new, clean jar, add 1 TBSP of the starter and 200 grams 50/50 flour and 200g warm waterPut the remaining starter in the fridge for next time. Cover with lid, rest in a cool place overnight If my starter’s doing well, it will overflow my container, I take this as a good sign The next morning, make dough Remove top rack in oven Pour 3 cups of boiling water into a pyrex baking dish on the bottom rack of the oven Close oven (this will be my proofing box, I have found that keeping things warm, a dough temp around 80 degrees, and moist, has helped. Temperature was one thing it took me a long time to realize was so vital to success here!) In a large bowl, add 700g warm water200g leaven (Note, since for the longest time I did not, that you've got 400 grams of leaven here, which is enough to make a full other batch of bread, right now. So, you could make two batches, or find a friend who likes to bake roughly the same time as you to pass it along to!) Mix well so there are no lumps. I use my fingers for this. In a separate bowl, mix 700g all purpose, 300g whole wheat (I have done 80/20, which is great, and 60/40 ratio, which also works well too, though needs a bit more water) As you're stirring with your fingers, add the flour to the water mixture, mix until fully incorporated. For me, this involves squishing it in my fingers, and I also use a plastic scraper to fold things in and scrape the side of the bowl. Make sure there are no dry bits on the side of the bowl, since these WILL make it into your dough if not incorporated!
 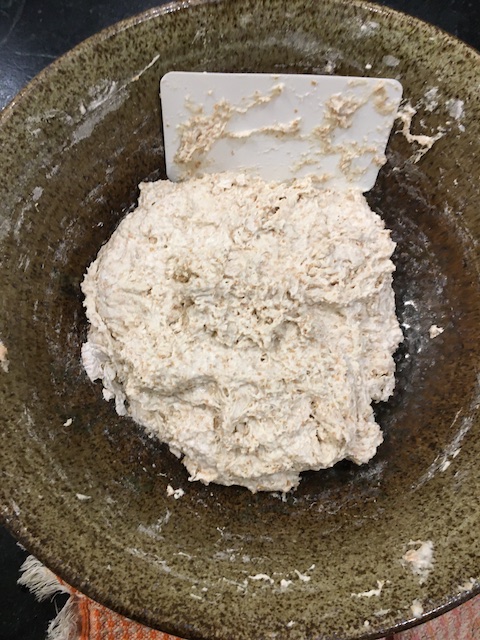 Cover with towel, put in your now-warm oven, rest for 60 mins and let the flour do its autolyse/relaxing Add 20g salt to 50g warm water, mix, then really mix this into the dough with your hands Return to oven for 30 minutes Remove and fold dough: pulling up on the top part of the dough and gentling folding it over to the opposite side, rotate bowl 90 degrees and repeat until you’ve gone around 2 full turns/ 8 folds total. Return bowl to oven for 30 minutes Repeat folding Return bowl to oven for 30 minutes Fold one last time Your dough at this point should be noticeably larger, more aerated. Transfer dough to a lightly floured surface. (I actually don't put flour on mine any longer, now that I've got a good feel for how to deal with sticky dough - a combo of wet hands, a scraper and confidence!) Cut into two pieces. Wet one of your hands and grab the dough scraper. Shape into a round by tucking in the edges of the dough under with the scraper, and nudging it into shape with your hand. You want the surface tension to build up here. Cover the two balls of dough with mixing bowls. Some people flour these and cover with towel, but I don't like adding extra flour and dealing with floured towels! Let rest for another 30 mins Use the scraper to flip rounds over. Shape into loaves like so Place in oiled baking pans. (I use steel pans, which I find give a nice surface, smeared inside with a tiny bit of canola oil, and coat the baking pans using old butter wrappers that I keep folded up in the fridge - the combo of fats is nice!) Cover with plastic bags - make sure the bags aren't touching the surface - overnight in fridge
 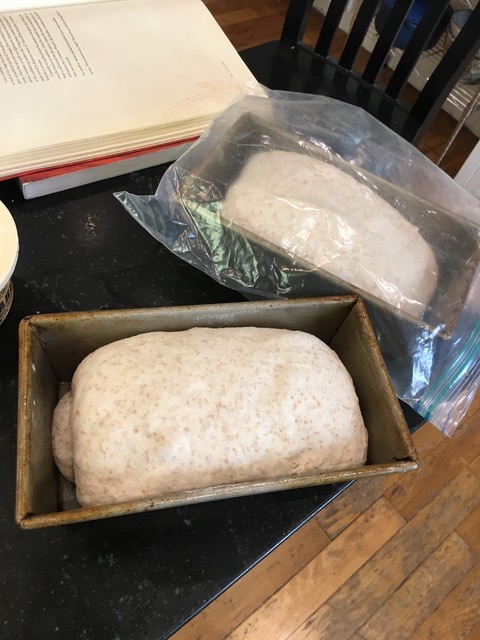 The next morning, remove from fridge, let warm for 1-2 hours The next day, bake the bread 40 mins before baking, put a large rectangular roasting pan into the oven and preheat to 500. We do not use convection, as I find this dries the bread out when the lid comes off. Boil about a cup of water just before you're ready to go Reduce the stove to 445 Slash the loaves with a sharp razor. We made a homemade lame using a metal chopstick and a razor blade.
 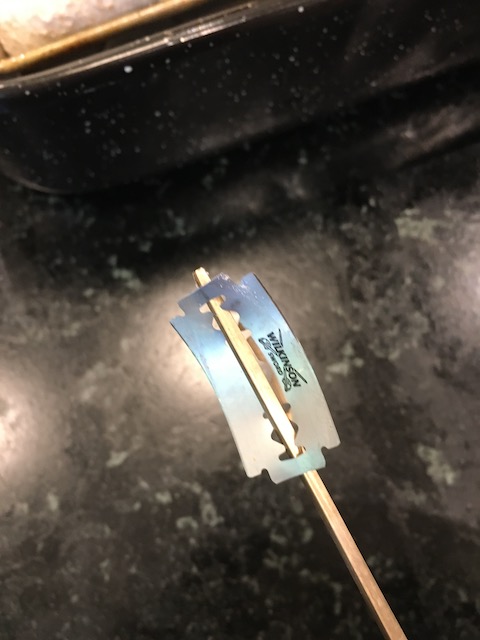 I find wetting the razor a bit and only using one edge per loaf helps. Make sure you've sliced it enough for the loaf to expand. Ask me how I know this... Place the two loaves into the roasting pan, and a glass pyrex - we use those snap-lok containers in between them. (note, the loaves in this picture are WAY overproofed and not yet slashed, but the only pic I have of the loaves with the pyrex between them...)
 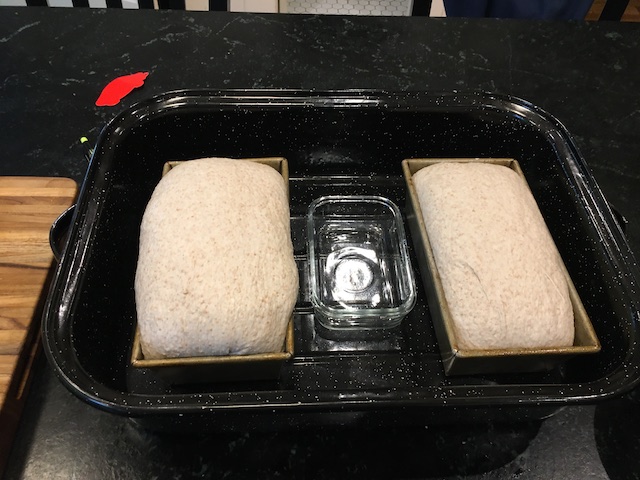 Carefully fill the pyrex dish pretty close to the top (you'll see why in a second) with boiling water and replace the lid on the roasting pan. The next part was a happy accident, and you'll want to experiment: As you're carefully putting the roasting pan in the oven, 'accidentally' spill a bit of the water in the pyrex dish inside by giving the pan a slight shake. You'll hear some steam - don't overdo this, or it'll poach the bread - but if you get it right, it's a perfect amount of steam for a shiny, crisp crust.
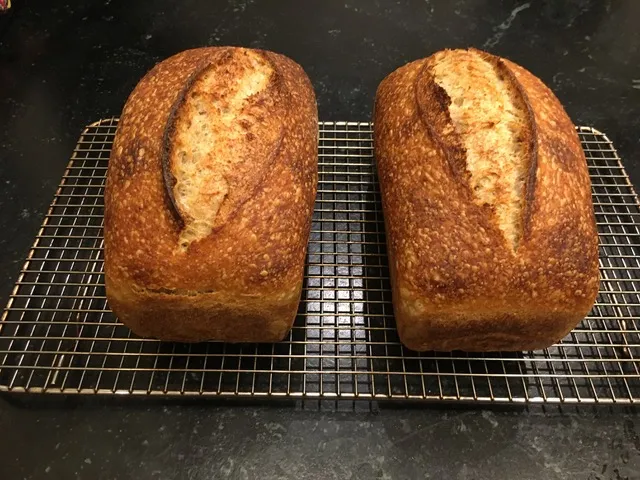
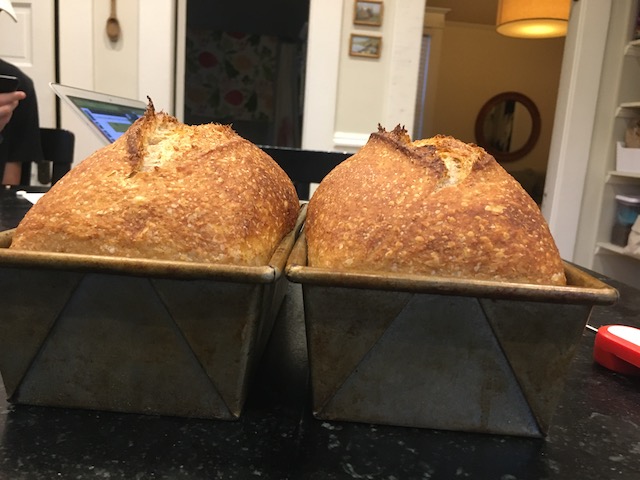
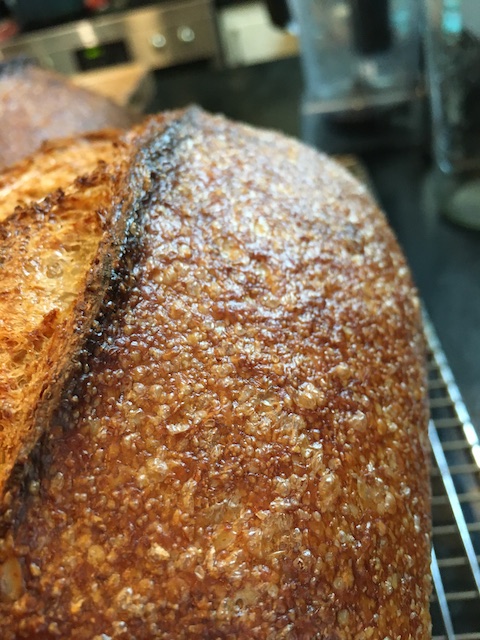
 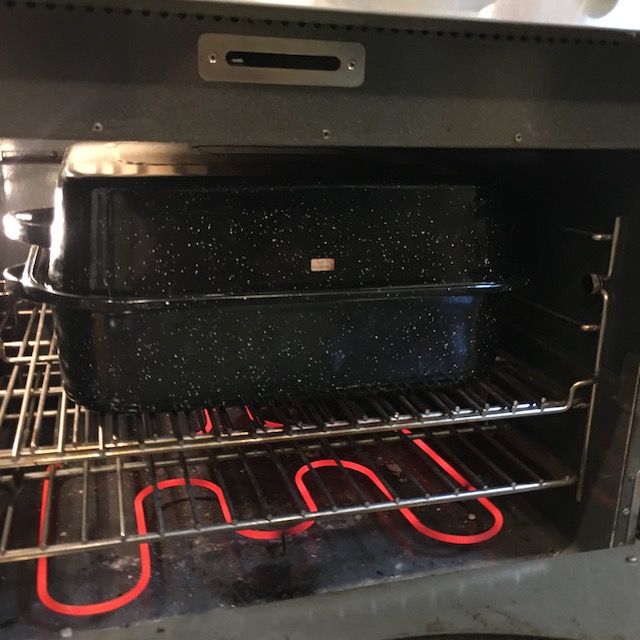 Bake for 20 minutes, remove the lid, bake for another 20-25 minutes or so, until the crust looks great. I find I prefer it fairly dark - this is a wet loaf, and you want to make sure you're baking the inside enough. Feel free to pull a loaf out and check the bottom - the loaves should slide out if you've greased it properly. Should sound hollow (whatever that means) A few samples from various bakes, some better than others:
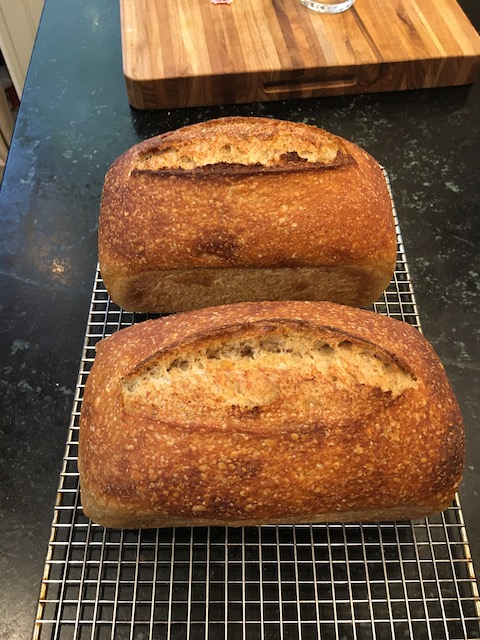
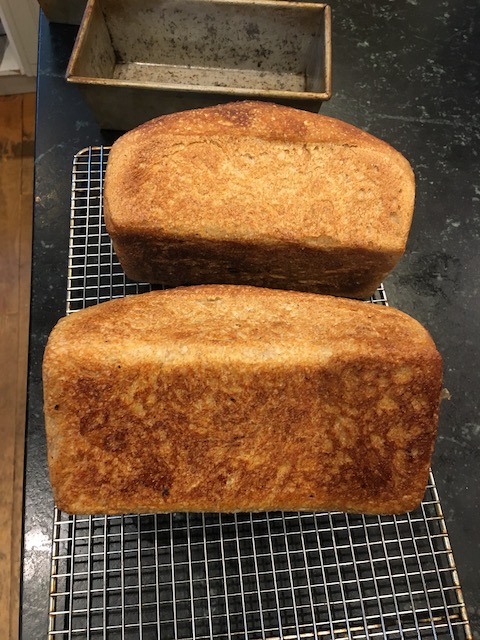 Let them rest on a rack until fully cool. This is important too. Resist the urge or you'll end up with gummy bread. We enjoy some of the bread that day, then usually slice it up after it has been sitting on the counter for 6 hours or so, freeze it 8 slices to a ziplock bag, and then we toast it when we want some.
 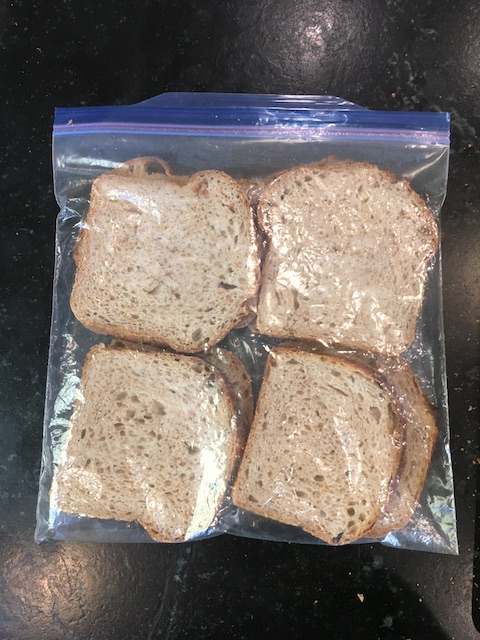 Hope this helps someone else who is looking for a yummy loaf pan recipe. Enjoy! p.s. for folks who prefer a printed copy, here's a shortened version
I've become a pan loaf fan myself over the past couple of years. Thanks for the detailed post!
Dave
Your loaves look perfect!
thanks!
I like your idea of putting the steam pan inside the Graniteware.
Will need to give this a try...
I bake 2 large USA Pullmans at a time, then freeze the individual slices. The bread taste fresh baked even 2 months later.
https://www.thefreshloaf.com/node/62257/tip-frozen-bread-individual-slices
this is a terrific idea
Those are stunning loaves you baked there. I also love baking this style of pan loaves probably more than hearth loaves now. I like your idea of baking your pan loaves inside a big covered roaster!
Benny
Love the "Magic Baking Technique" as well as its name :-) The glossy blistered crust is beautiful and unexpected on pan bread. I'll definitely be trying some magic on my next bake. Thanks!
These look fabulous!!! Thanks for sharing all the details and photos!