This is my first bake using my new Ankarsrum Assistent to develop the dough. What they say is true, there is definitely a learning curve and I am at the beginning of that slope. This would usually take 30 mins from start of mix to the end of kneading in the KA mixer, not that I could safely do two loaves though. With my being totally new to this mixer and wanting to try both the dough hook and the roller, it took me 60 mins! Much of it was me f’ing around though so I can’t blame the Ankarsrum Assistent. In the end, the dough was lovely silky and had a great windowpane.
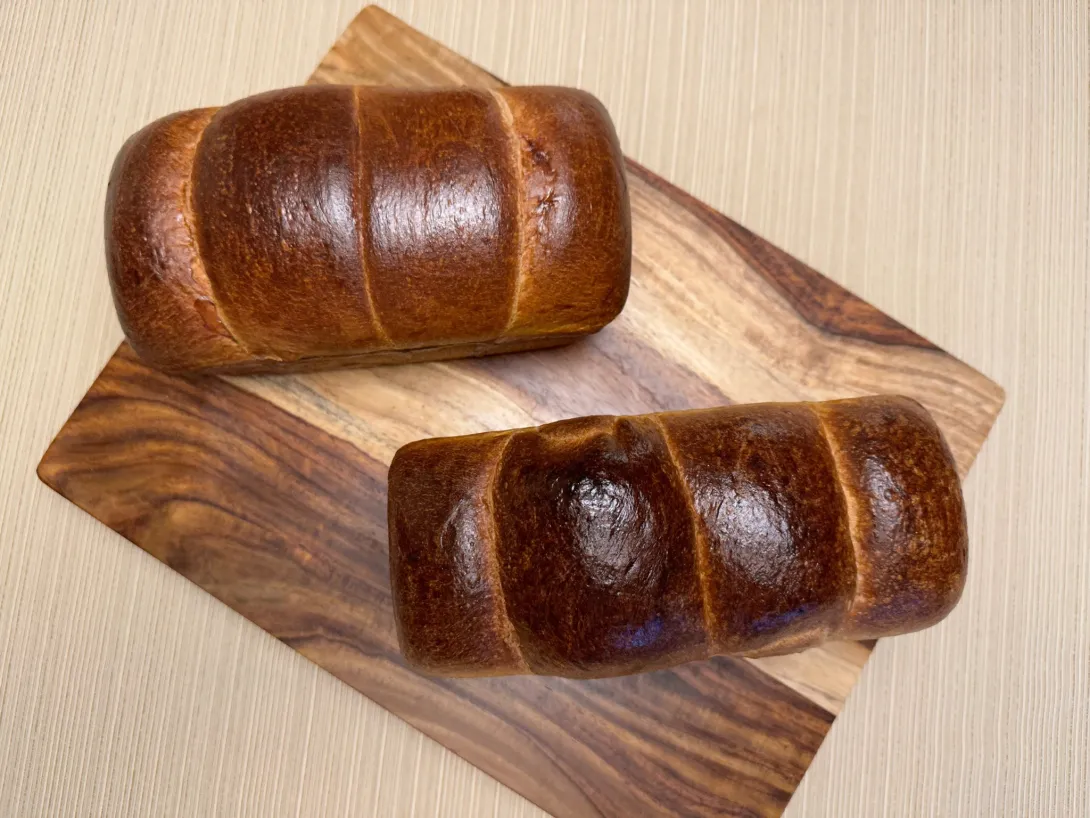
I wanted to bake two loaves as gifts and wanted to bake something I’m quite familiar with, so it had to be a Hokkaido milk bread. However, since they’re gifts you never know how much whole wheat the recipients might like or not, so I decided that 30% is a good amount for that extra wheat goodness without going all the way.
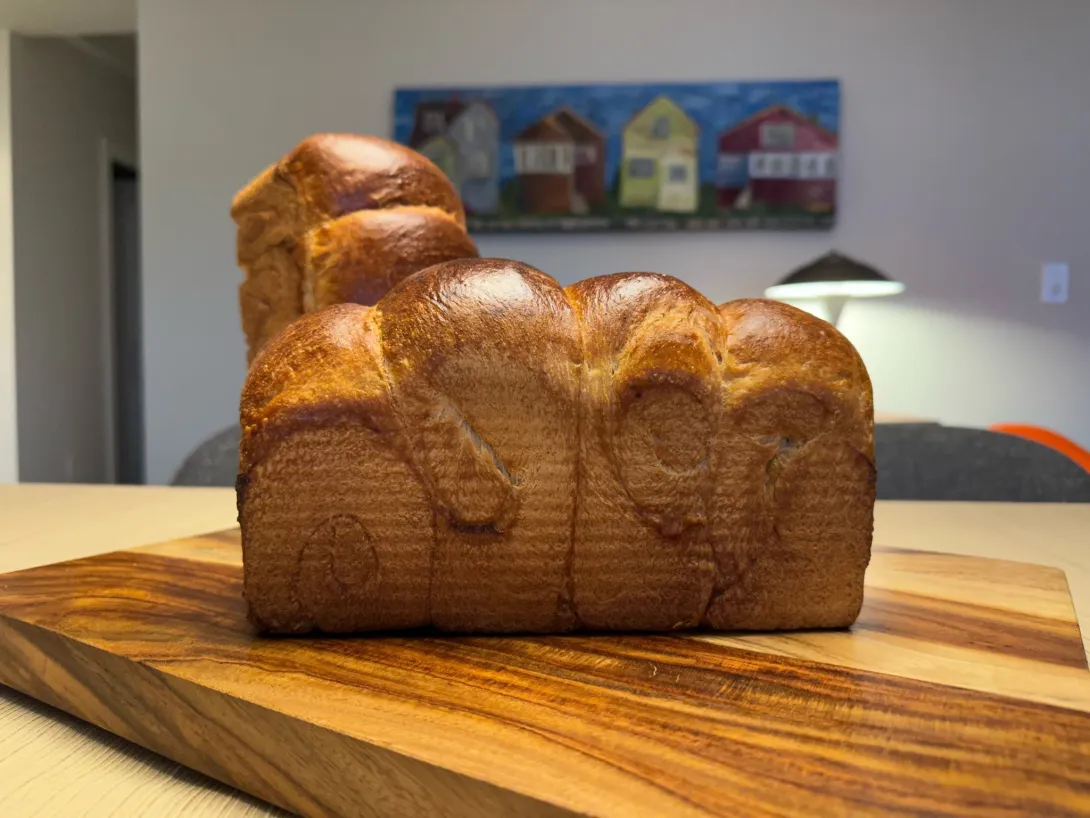
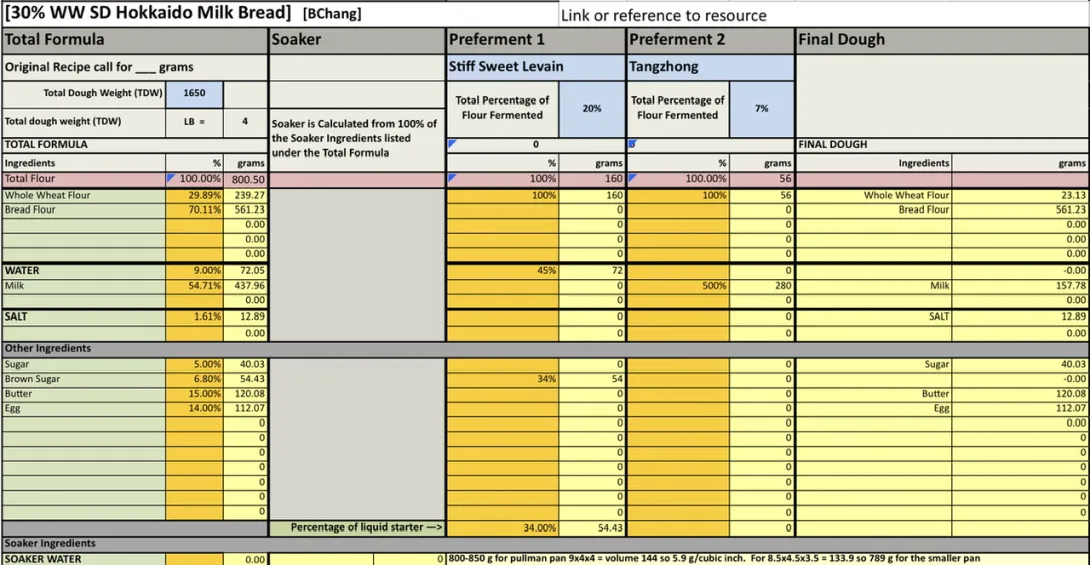
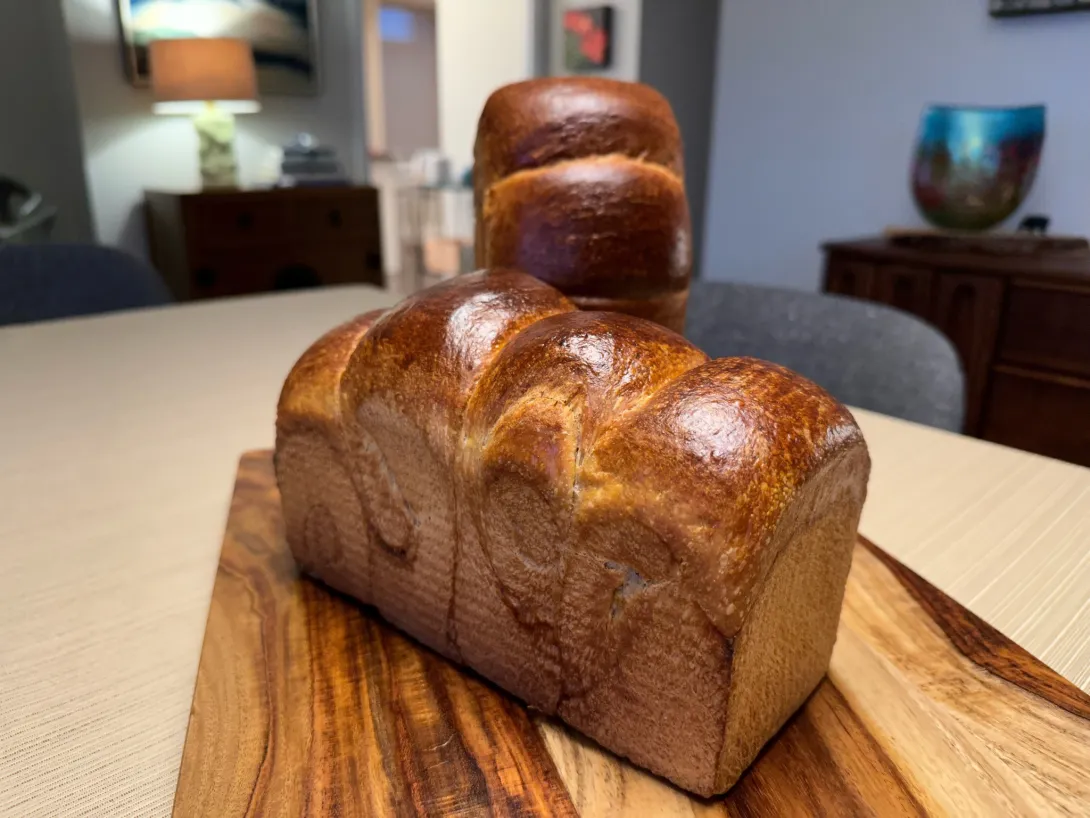
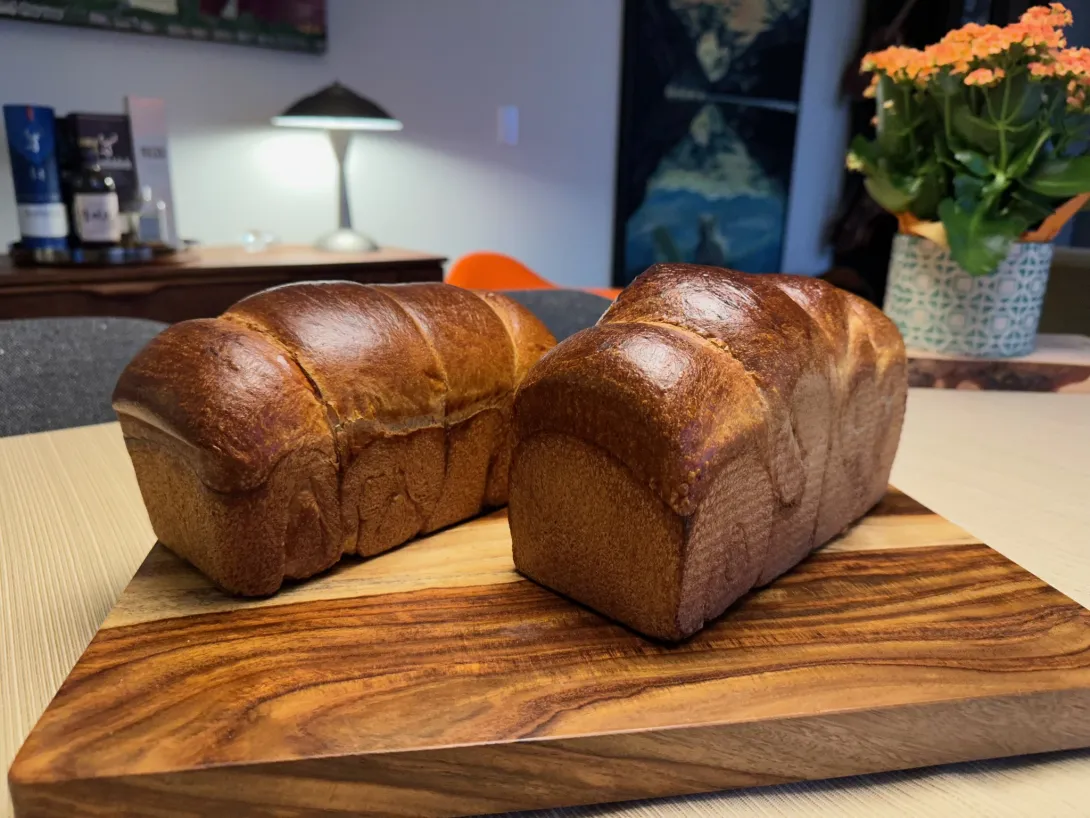
For two loaves, one in a 9x4x4” and the other in a 8.5x4.5x3” pan.
Levain
Mix the levain ingredients in a jar or pyrex container with space for at least 50% growth.
Press down with your knuckles to create a uniform surface and to push out air.
At room temperature, it typically takes 7-9 hours for this sweet stiff levain to be at peak.
Tangzhong
In a sauce pan set on med heat with about 1.5 cm of water, place the bowl of your stand mixer creating a Bain Marie, whisk the milk and flour until blended. Then cook for several minutes until thickened, stirring regularly with a spoon or heat-resistant spatula. Let cool.
Dough
In the bowl of a stand mixer, add the milk (consider holding back 5 g of milk and adding later if this is the first time you’re making this), egg, tangzhong, salt, sugar, diastatic malt and levain. Mix and then break up the levain into many smaller pieces. Next add the flour and vital wheat gluten. I like to use my spatula to mix until there aren’t many dry areas. Allow the flour to hydrate (fermentolyse) for 20-30 minutes. Mix on low speed and then medium speed until moderate gluten development this may take 5-10 mins. You may want to scrape the sides of the bowl during the first 5 minutes of mixing. Next add room temperature butter one pat at a time. The dough may come apart, be patient, continue to mix until it comes together before drizzling or adding in more butter. Once all the butter has been added and incorporated increase the speed gradually to medium. Mix at medium speed until the gluten is well developed, approximately 10 mins. You will want to check gluten development by windowpane during this time and stop mixing when you get a good windowpane. You should be able to pull a good windowpane, not quite as good as a white flour because the bran will interrupt the windowpane somewhat. This is a good time to add inclusions such as my favorite black sesame seeds, that way they do not interfere with the gluten development. If you add inclusions mix until they are well incorporated in the dough.
On the counter, shape the dough into a tight ball, cover in the bowl and ferment for 2.5-3.5 hours at 82ºF. There may be some rise visible at this stage.
You can next place the dough into the fridge to chill the dough for about 1.5 hours, this makes rolling the dough easier to shape. Remember, if you do so the final proof will take longer. Alternatively, you can do a cold retard in the fridge overnight, however, you may find that this increases the tang in your bread.
Prepare your pans by greasing them or line with parchment paper.
For baking as rolls
Lightly flour the top of the dough. Scrape the dough out onto a clean counter top and divide it into 12. Shape each tightly into boules, allow to rest 5 mins. Using a rolling pin roll each ball out and then shape tightly into boules. Place them into your prepared pan.
For baking as a loaf
Prepare your pans by greasing them with butter or line with parchment paper.
Lightly flour the top of the dough. Scrape the dough out onto a clean counter top and divide it into four. I like to weigh them to have equal sized lobes. Shape each tightly into a boule, allow to rest 5 mins. Using a rolling pin roll each ball out and then letterfold. Turn 90* and using a rolling pin roll each out to at least 8”. Letterfold again from the sides so you have a long narrow dough. Then using a rolling pin, roll flatter but keeping the dough relatively narrow. The reason to do this extra letterfold is that the shorter fatter rolls when placed in the pan will not touch the sides of the pan. This allows the swirled ends to rise during final proof, this is only done for appearance sake and is not necessary. Next roll each into a tight roll with some tension. Arrange the rolls of dough inside your lined pan alternating the direction of the swirls. This should allow a greater rise during proof and in the oven.
Cover and let proof for 6-8 hours at a warm temperature. I proof at 82°F. You will need longer than 3-4 hours if you chilled your dough for shaping. Proof until the dough passes the finger poke test. For a loaf the dough should reach within 1 cm of the rim of the pullman pan.
Preheat the oven to 350F and brush the dough with the egg-milk wash. Just prior to baking brush with the egg-milk wash again.
Bake the rolls for 30-35 minutes or until the internal temperature is at least 190F. Shield your buns if they get brown early in the baking process. You can brush the top of the buns with butter if you wish at this point while the buns are still hot and sprinkle with flaked salt.
For baking loaves, bake for a total of 50 mins at 350°F, remove the loaves from their pans and bake directly on the rack for an additional 5-10 mins.
- Benito's Blog
- Log in or register to post comments
There won’t be a crumb photo since these are to be gifted.
My index of bakes.
Beautiful loaves! I'm sure the recipients will be delighted.
I look forward to your progress with the Ankarsrum. Who knows, you may be the one to finally convince me that I need one!
Dave
Thank you Dave, what mixer to you have currently or do you mix completely by hand? I used to mix everything by hand even enriched doughs like this milk bread. But I have since switched to developing enriched doughs by machine but lean doughs by hand.
Maybe I’ll be a convert with the Ankarsrum Assistent and develop dough only with the Ank.
Benny
Benny, I've been using an older model Bosch that I bought used from a cooking school in 2001. A very efficient mixer and still going strong.
The only doughs that I take to full gluten development are enriched doughs, I learned to use a short mix when I was a kid working in a commercial bakery in the late 1950's and have stuck with it. For my regular doughs I usually use a pre-ferment and then a short mix with the Bosch of about three minutes. I then give a series of four (aggressive) stretch and folds over an hour period. Then into the 'fridge for an overnight bulk ferment with a couple of de-gassings during the overnight period. I've done it so often that I can do it in my sleep, which is lucky because my dough comes out of the 'fridge usually around 3AM for it's warm up and pre-shaping.
Dave
Good to see that these good quality well designed machines can stand the test of time and regular use.
Your breads are always stunning, Benito! I have yet to get as good a rise with this type of bread and starter, but I will keep trying! I couldn’t tell if your spreadsheet showed he total dough weight for your loaves so I can scale it for my own pan. I won’t be baking for a while, though, since I have quite a collection of bread in my freezer already.
Thank you very kindly Caryn, that is sweet of you to say. To get a good rise you really need to have fully developed the gluten by the end of mix. I always check for windowpane at the end and if the dough is mostly bread flour then it should have an excellent windowpane. For doughs with mostly wholegrain, the bran will of course interfere with the windowpane but you should still get a good one.
The spreadsheet posted was scaled for the two loaves. 850 g for the 9x4x4” pullman pan and 789 g for the 8.5x4.5x3.5” pan.
Benny
So, if I want to make one smaller pan like yours, I would multiply all of your weights by 789 divided by the total which is 1639 or 48%, correct?
Yes multiply everything by 0.48 and you’ll scale for the 8.5x4.5x3.5” pan.
Looks great Benny. I love new baking tool day! Looks like you're off to a good start!
Thank you Troy, I was so excited to use the Ank. The dough was probably fully developed before I realized it. I’ll need more experience with it though to figure it out.
You will get the hang of it quickly. I use the roller 99% of the time. It just takes some practice and it will become second nature. What’s nice is you can set the timer and walk away once you are comfortable with what you’re doing so even if the mixing time is longer than in the kitchenaid you won’t mind.
Thank you Ian. What you say is very true, I don’t have to babysit this mixer like I did with the KA. It is so stable and doesn’t bounce around or walk on the counter so I can do other tasks while this is mixing. I think I will start by using the roller to get used to it. At a later time I might explore the hook.
Benny