I'm confident you'll all enjoy this bake. A bit different from previous community bakes and there's room for your own interpretations. This is a naturally fermented fermented buckwheat bread which has no yeast nor starter. It is a fascinating process with lovely results. Here is a very good version of this recipe but there are many out there all a variation on the same theme. I've been baking this type of bread for quite a while and have settled on my own method which suits me best. Don't really measure for this bread as it's a very good recipe for going by feel, once you have the hang of it. I'll post what I think is a good video to learn from and then i'll explain my own tweaks.
Now for my method:
- I wash the raw organic groats (this can either be done in a sieve or in a bowl and carefully pouring out the water). This is because i've noticed that while soaking unwashed groats it attains this purple colour which is harmless but aesthetically more pleasing when washed. Sometimes i'll soak the groats for about an hour and then pour off the excess liquid and rinse a few times.
- Then i'll pour in water but just enough to cover the groats. After about an hour or two i'll check them and add in more water as they will soak it up. Just enough to cover them once again.
- Soak for 12-24 hours. When they've softened, maybe just started to sprout and the water is now like a gel then you can move on.
- Then i'll blend the groats into a paste but won't add anymore water. Prefer a thicker batter. After which i'll add about 2tsp salt (I like it with more salt) and stir it in thoroughly.
- Cover and leave in warm place for another 12-24 until the mixture has risen, is very bubbly and will have a fermented aroma. Sometimes it'll have a bit of a funky smell but don't worry.
- Once it's risen and bubbly (usually for me it takes around 12 hours but it will vary - i've never had any issues) then i'll gently stir in a seed mix - pumpkin, flaxseed, sunflower and sesame. No measuring.
- Pour it out into a prepared loaf pan. I suggest a 1.5 litre or 1.5 lbs pan.
- While many recipes bake it straight away i'll leave it for about an hour before baking.
- Bake. 350F for about 80 minutes.
This is a delicious bread which is healthy, light on the stomach, delicious and fantastic toasted.
P.s. There are many videos and webpages with similar techniques for this bread. Some do all buckwheat and others mix up the grains a bit and might add in quinoa too. I suggest you watch a few to get some ideas. A hand held blender is really useful as it can all be done in one bowl. I bought one specifically for this type of bread. Found a food processor to be too finicky and messy. I look forward to seeing what you all come up with. Also, see here and here for Mariana's and Mini's excellent advice on how to score a batter bread. I always get an excellent rise from this bread but it leaves a flying crust. I didn't think a batter bread could be scored but Mariana explained how it could be done. Perhaps mine rises more than the bread in the video because I do make a more thick batter. Many videos show a more modest rise but they often have a much thinner batter. Again, it's all up to you - I just happen to like the results, crumb and texture wise, doing it with my own tweaks.
Mariana found a very good video and posted it in a comment below. However I thought it'd be good to also post it here. Thank you Mariana.
As you can see, a slightly different method with very good results.
Great idea for a CB! I’m in. Should be able to get to it this weekend.
Right up your street. Looking forward to seeing your take on this bread which you're already very familiar with.
I was thinking of posting a big "THANK YOU!" to you,Abe, for your buckwheat postings. It is my new favorite bread. I just had it toasted this am. I use instant yeast for my loaf (just made yeasterday) and I use buckwheat to satisfy my rye craving as rye flour is prohibitvely expensive for me. Buckwheat is still expensive but less than rye and I can buy buckwht locally. Since Hodgsen Mills went under, I have no local source of rye flour. Bakers do not knpow what they are missing.
Anyways, I add diced dates,toasted walnuts and breadspice to mine. Delicious toasted!
I will follow this thread and see if I can jump in. Once again I am preparing for a cross country move to go home to a warmer climate.
Caroline
It took them a while to get back up an running after the pandemic and the transition.
https://www.hodgsonmill.com/products/rye-flour
Glad to hear that Hodgsen Mill still produces rye flour but I can no longer find a local store (even big names) that carry it. Their link to local stores does not work, you can only order online or thru a catalog. It looks like they are set up for more wholesale supplying right now.
I appreciate the link but take a look at what it costs and you will understand why I say it is "prohibitively expensive".
If I order from them online and have it shipped:
5# bag whole rye flour: $4.99
SHIPPING (US east coast to Florida) : $17.79
TOTAL: $22.78 for 5# rye flour!! YIKES! $4.40/lb total!
My only hope will be to check with a local small bakery and see if I can buy some flour from them.
Buckwheat flour is expensive but not prohibitively so. I can buy it locally for under $3/lb, sometimes less.
As a reference: AP flour is as low as .50/lb for store brand, .70/lb for Gold Medal,or up to $1/lb for KA.
________________________________________________________________________________________
Sorry for the hi-jack but I just had to respond about the cost. If anyone wants to continue the discussion, either message me or let's make another post.
__________________________________________________________________________________________
I really encourage everyone to try a 100% buckwheat loaf. It is astonishing how tasty it can be. My recipe is more of a batter and because my starters are currently asleep for a trip, I used instant yeast. Still delicious! I have found that BW does not get the same fermentation nuanced flavor as other flours but I think of it as a blank slate and build my flavors with herbs,spices,fruit and nuts.I have used Vegemite in my GF loaves if I want a yeasty flavor (there is a GF version, if needed) My absolute fav is honey, date, toasted nuts or seeds and Broetgevurz (bread spice-heavy on the coriander). Great with cheese, ham, nut butter, jam, butter, toasted or plain. Slices are moist and springy so no crumbling when you bite.
MY RECIPE HERE
Bake some delicious fun!
You might want to consider Azure Standard. They have two shipping options one is regular shipping, and the other is a local drop site for a tractor-trailer that meets their customers at a local site and delivers en-mass. I've found their prices and shipping (I use the drop site) very reasonable. They have some hard to find grains.
Buckwheat is underrated on The Fresh Loaf, I think. Hopefully this Community Bake will bring it more into the spotlight. Toasted Buckwheat Bread is absolutely delicious and this process is very fascinating too.
I'm sure once people try it they will join us in being buckwheat bread fans.
Hope you can source some buckwheat groats and join us. Best of luck in your move. Follow that sun!
Buckwheat is the grain that saved many people in the cities of Japan from beriberi. It is rich in thiamine as well as several other key nutrients. For vegetarians ( not me ) it provides a complete protein as well. Don't know if I will participate in this bake right now ( busy with other projects ) but it is on the list.
2 hours into the first 12 hour soak…. Blend it tomorrow and bake on Sunday!
Looking forward, Troy.
I think cinnamon needs some sweetness. Do you think honey might also be a nice addition? But then again you do have the raisins.
You might be right. Did not think about that. I won’t add it until Sunday morning before I load the pans, so have some time to decide. Maybe I’ll add a little brown sugar to the rum while I’m soaking the raisins. 😁
don's forget the little sugar bombs. Chop them up if you want to. Dates? Other dried fruit?
https://www.bonappetit.com/story/types-of-cinnamon
On the perfect loaf isn’t sweetened (except for the raisins) and I really like it. Only problem is that my sourdough starter does not seem to enjoy cinnamon at all. No issue with the flavor, though!
https://www.ncbi.nlm.nih.gov/pmc/articles/PMC4586554/
I have to cut down the quantity of cinnamon and make sure I don’t mix it in too thoroughly.
It's best to increase the yeast or the levain when doing a sourdough. The higher amount you pre-ferment the better it'll do. And of course it's a good idea to find you the ideal amount of cinnamon to put into a dough.
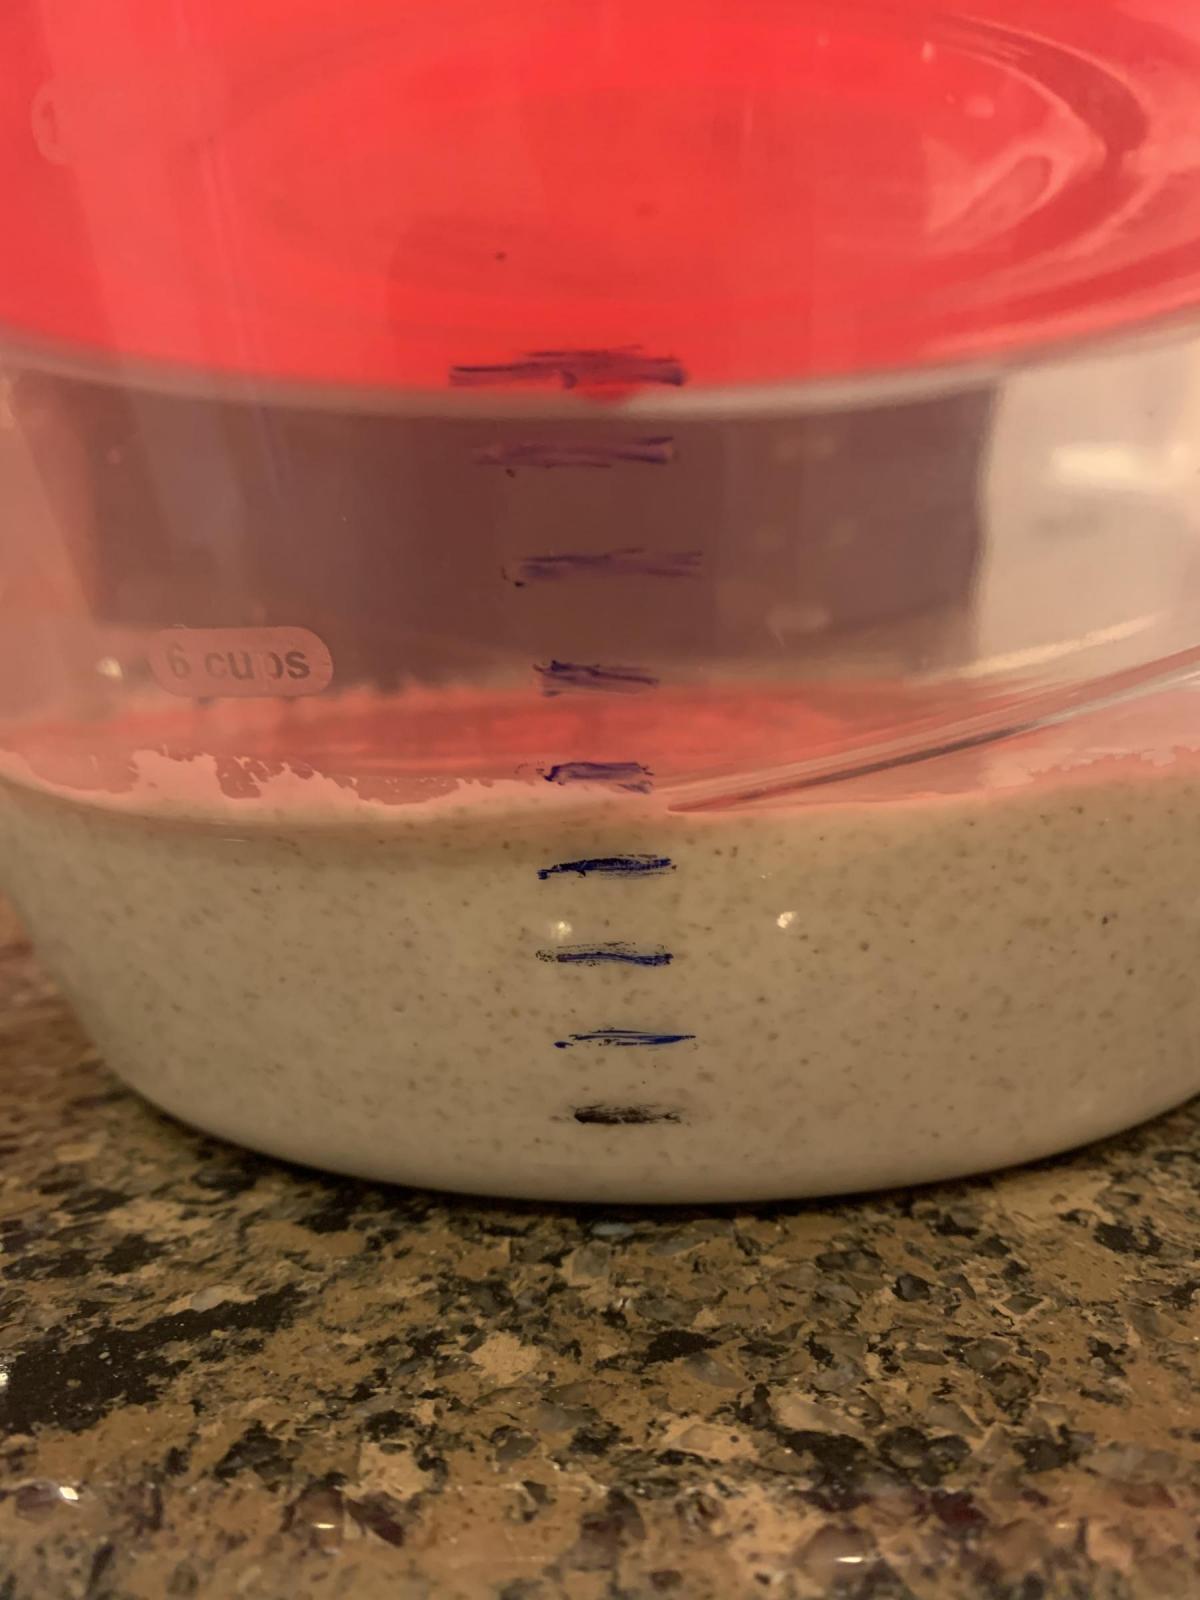
500g groats soaked in 650g water for 12 hours. Rinsed. Blended with 250g water and 50g yeast water.
Here’s a short video of the batter consistency …
https://youtube.com/shorts/ULr1cTFqSBQ?feature=share
in the soaking water have more flavour yet less chemical influence?
1) 36 hours before bake... Soak 500g groats in 650g water at room temp for 12 hours
2) 24 hours before bake... Drain and rinse groats. Blend groats with 250g water and 50g yeast water. Place in bowl and ferment at 76 deg for 24 hours.
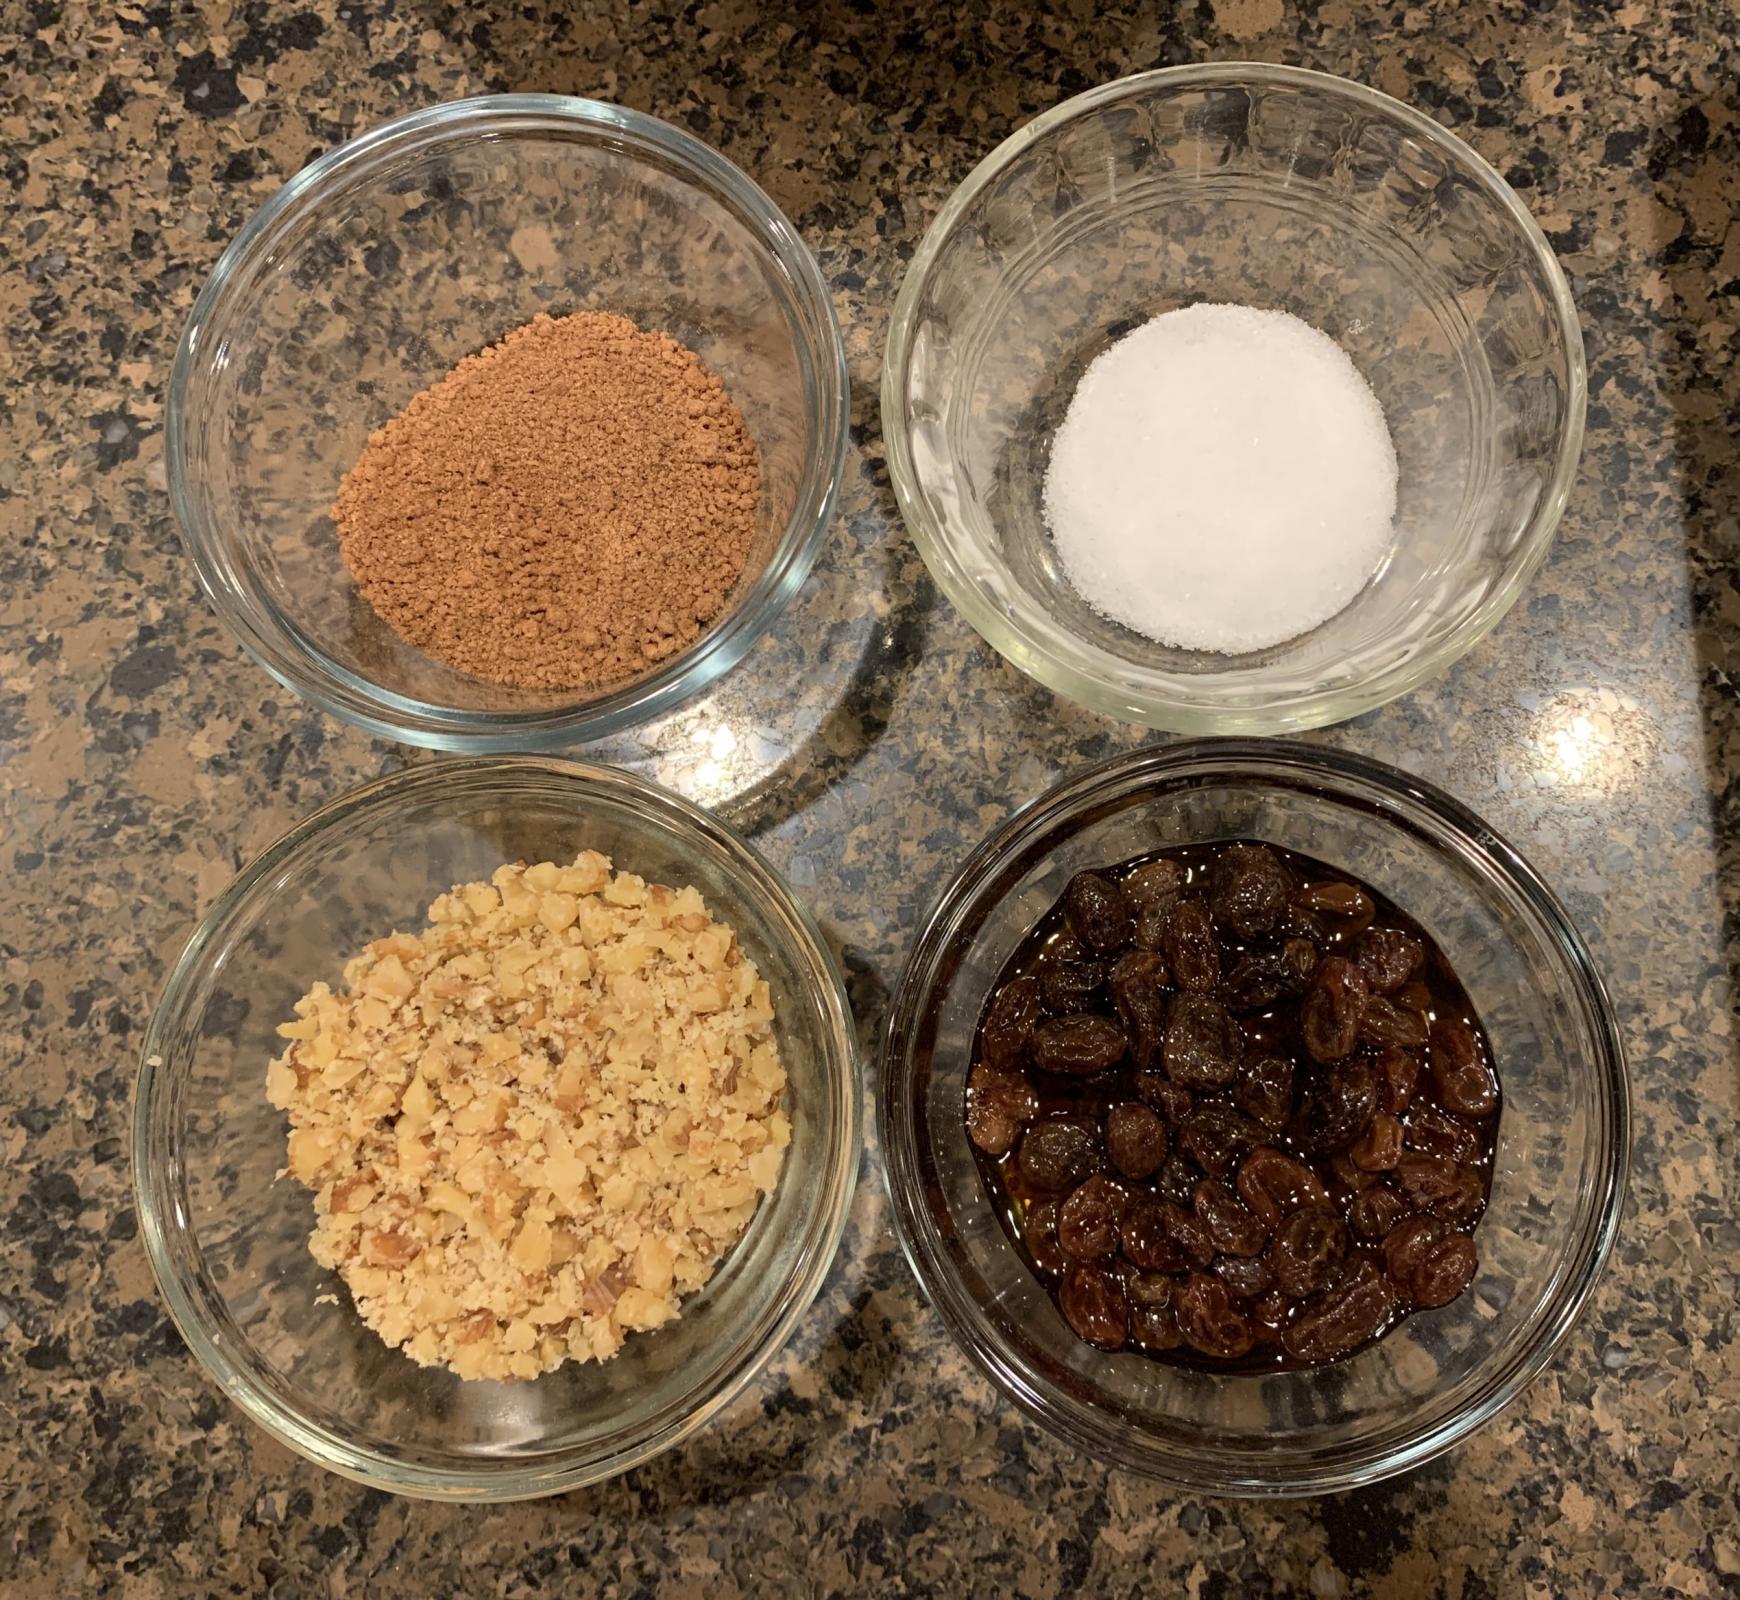
3) Butter 8.5" x 4.5" bread pan liberally. Gently stir in ad ins (if any) into fermented groat batter. Batter will smell earthy but not foul. For this bake, my ad ins were: 50g raisins soaked in 50g Bacardi Gold rum and 10g brown sugar (24 hours), 37.5g chopped walnuts, 10g brown sugar, 1.5 tsp cinammon, 1.5 tsp cardamom, 12.5g sea salt.
4) Pour batter in pan and cover. Let raise for 60-90 minutes. It may not rise much depending on batter thickness.
5) Place baking stone in oven and preheat for 1 hour at 450 deg F. Oven should be set up for steam.
6) Place uncovered pan in oven and add steam. Turn off oven and let sit for 30 minutes.
7) Bake at 325 deg F for 30 minutes.
8) Bake for 75 minutes at 350 deg F. Internal temp target of 206+ deg F. This dough is very wet and sticky.
9) Turn off oven and leave loaf in cooling oven with door cracked for 20 minutes.
A couple of things about this bake...
A) I used the batter scoring method described by marianna and mini. After putting batter into the loaf pan, I butter both sides of a knife and ran it the length of the pan about 1/4" - 1/2" deep. You could barely make out the line after the loaf had proofed for 90 minutes. Still bloomed right along that line!
B) My batter was a little thin to begin with, and adding the rum that didn't soak into the raisins made in thinner. But hey... can't go wrong with a little rum in the bread. :-) But... There was very little visible rise. Just a slight doming after 90 minutes.
C) Rather than a typical loaf pan setup, I tried something a little different. I put my baking stone in and set up oven like a typical hearth loaf. The thought... Get the stone good and hot and then shut off the oven when the pan goes in. Keep the majority of the heat coming into the loaf pan from the bottom up to cause a bloom rather than a flattening effect. I think that worked!
D) The next thought was to cook it low and slow to keep the crust from getting really thick and hard. Not sure that worked well at all. After 60 minutes, the internal temp was only up to 174 deg F and was very sticky on the temp probe. Increased oven temp to 350 deg F and it was up to 201 internal after 30 minutes. Still very sticky. Only went to 205 deg after another 30 minutes. Still quite sticky. Up to 206 deg F after another 15 minutes. Still sticky. Removed loaf and left directly on stone with oven door cracked for 20 minutes. I'm concerned that the 30 minutes at 325 was too low and the dough was in prime amylase temp range for too long. The probe reminded me of starch attack and really gummy/sticky. Next time, I would still do the high temp preheat with oven off for steaming, but then I would go back to 375-400 deg F.
This loaf smells great! Smells like an earthy cinnamon raisin bread. It should make great toast with butter, toast with raspberry jam, or I think it may also be good French Toast. Just hoping it cures well and isn't too gummy.
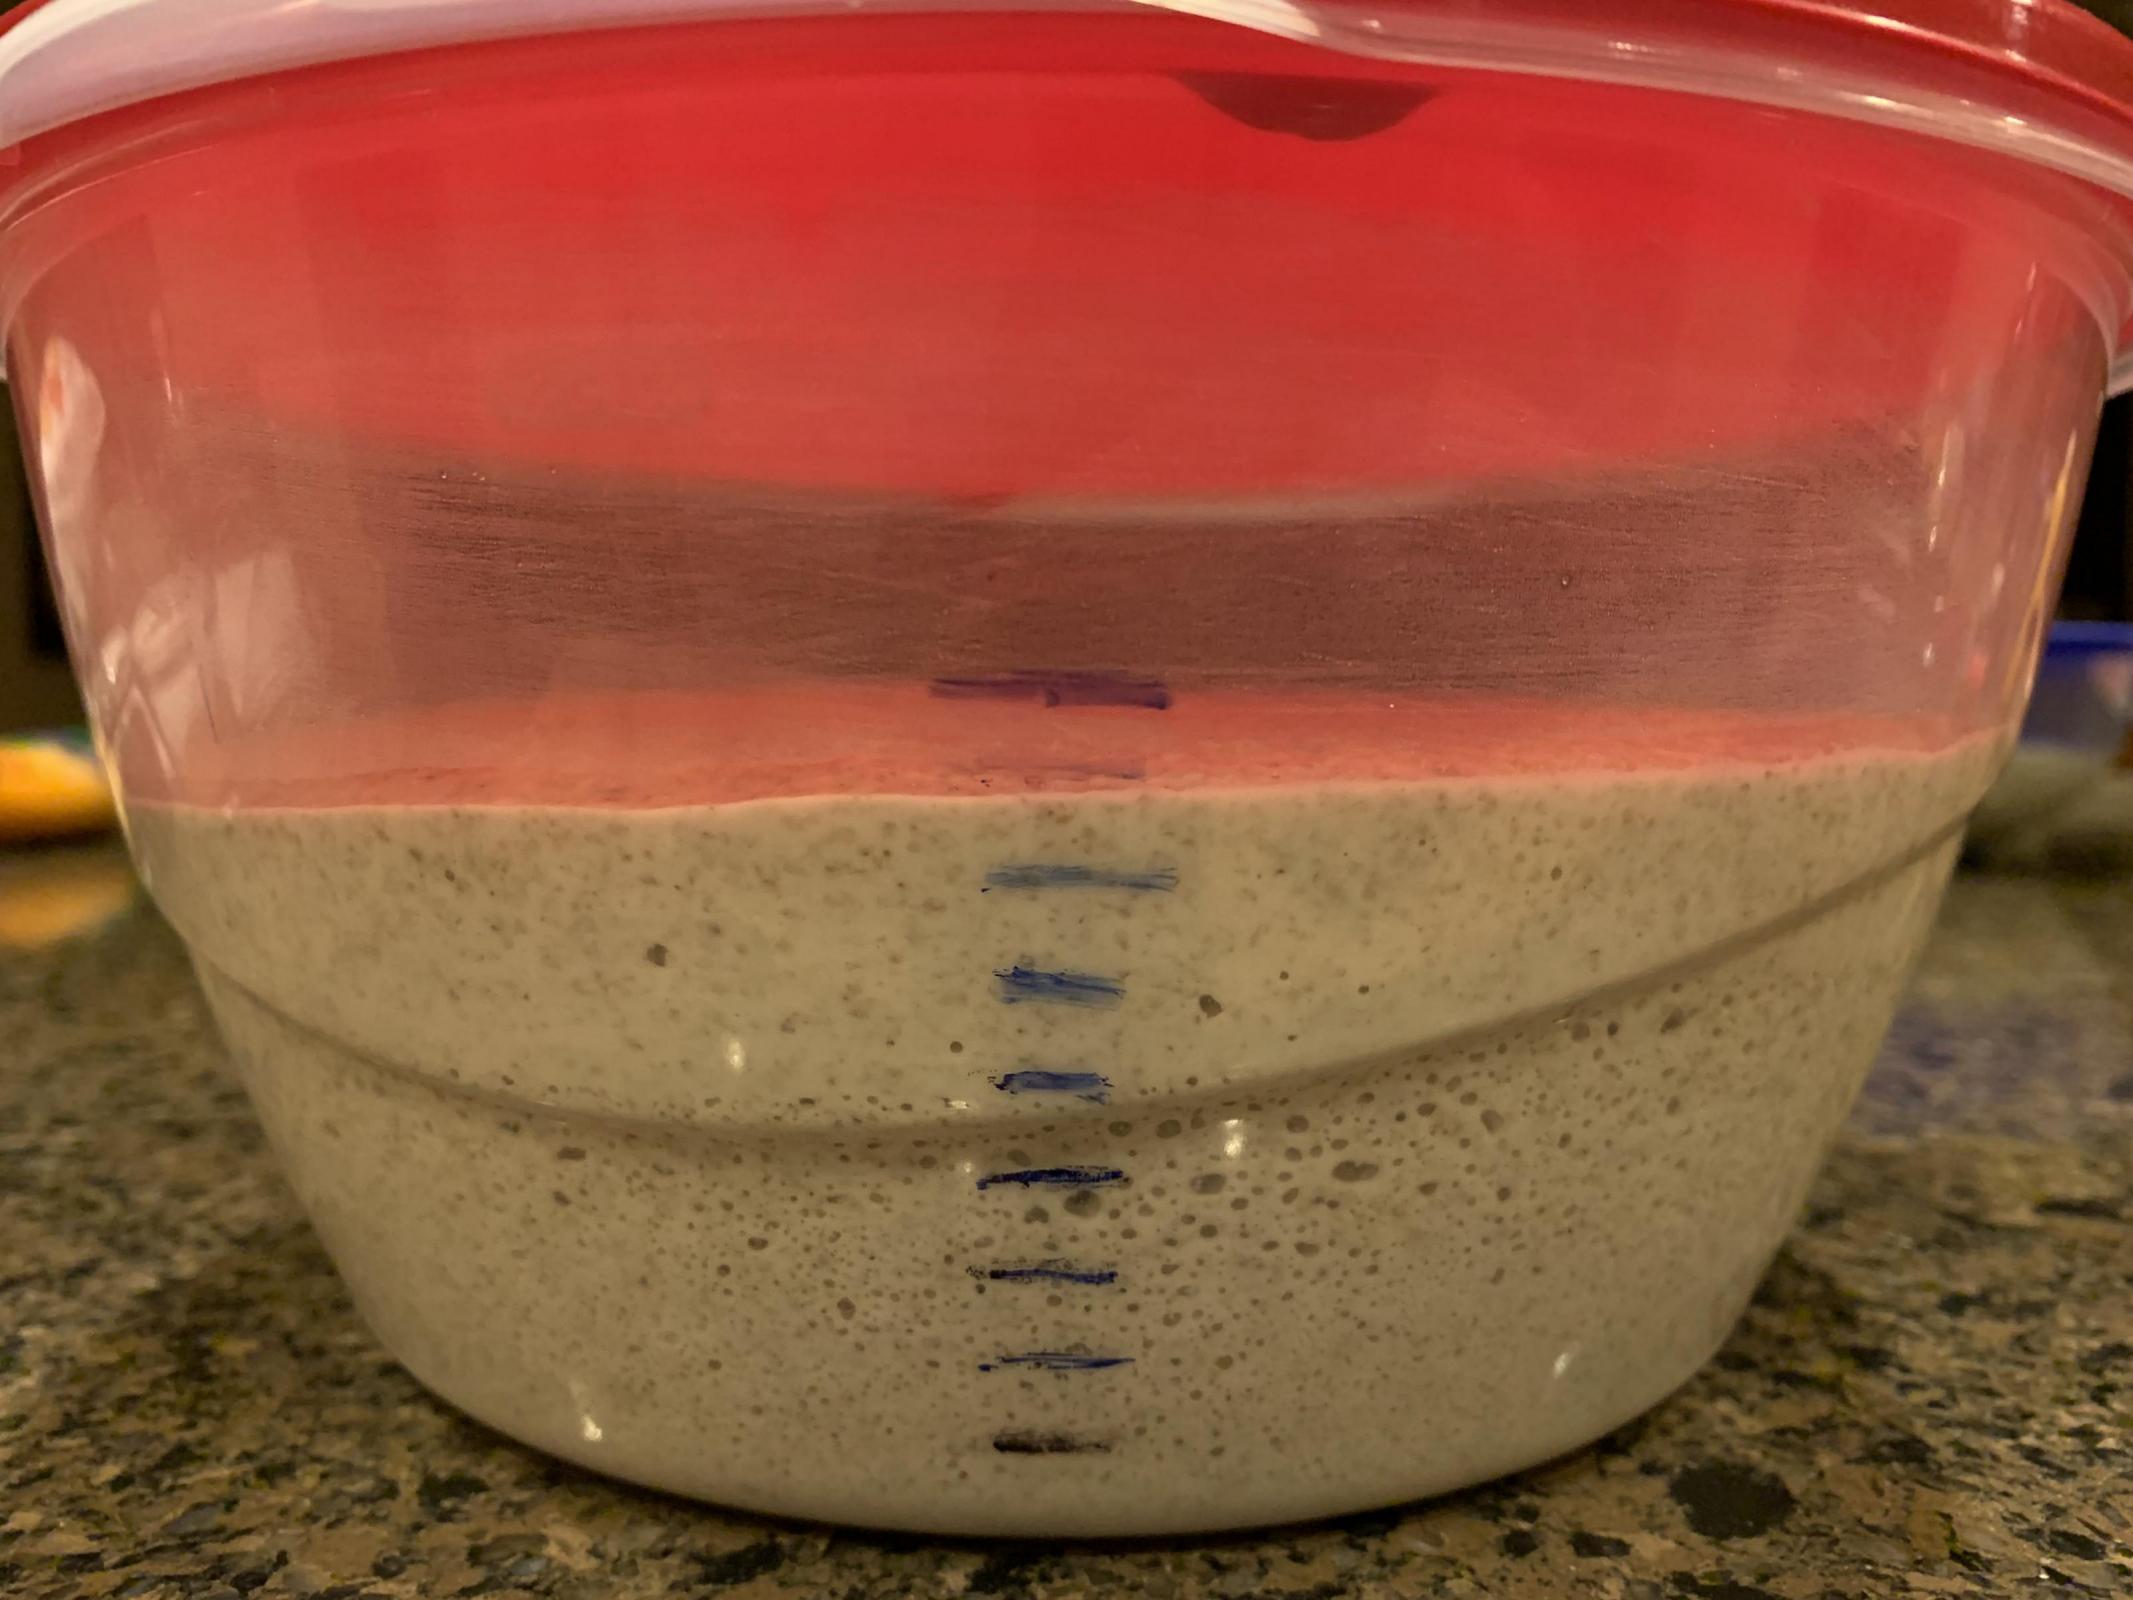
After blending
After fermenting
Ad Ins
Stirring in ad ins
https://youtube.com/shorts/s0U9ILeo7JA?feature=share
Loaded pan
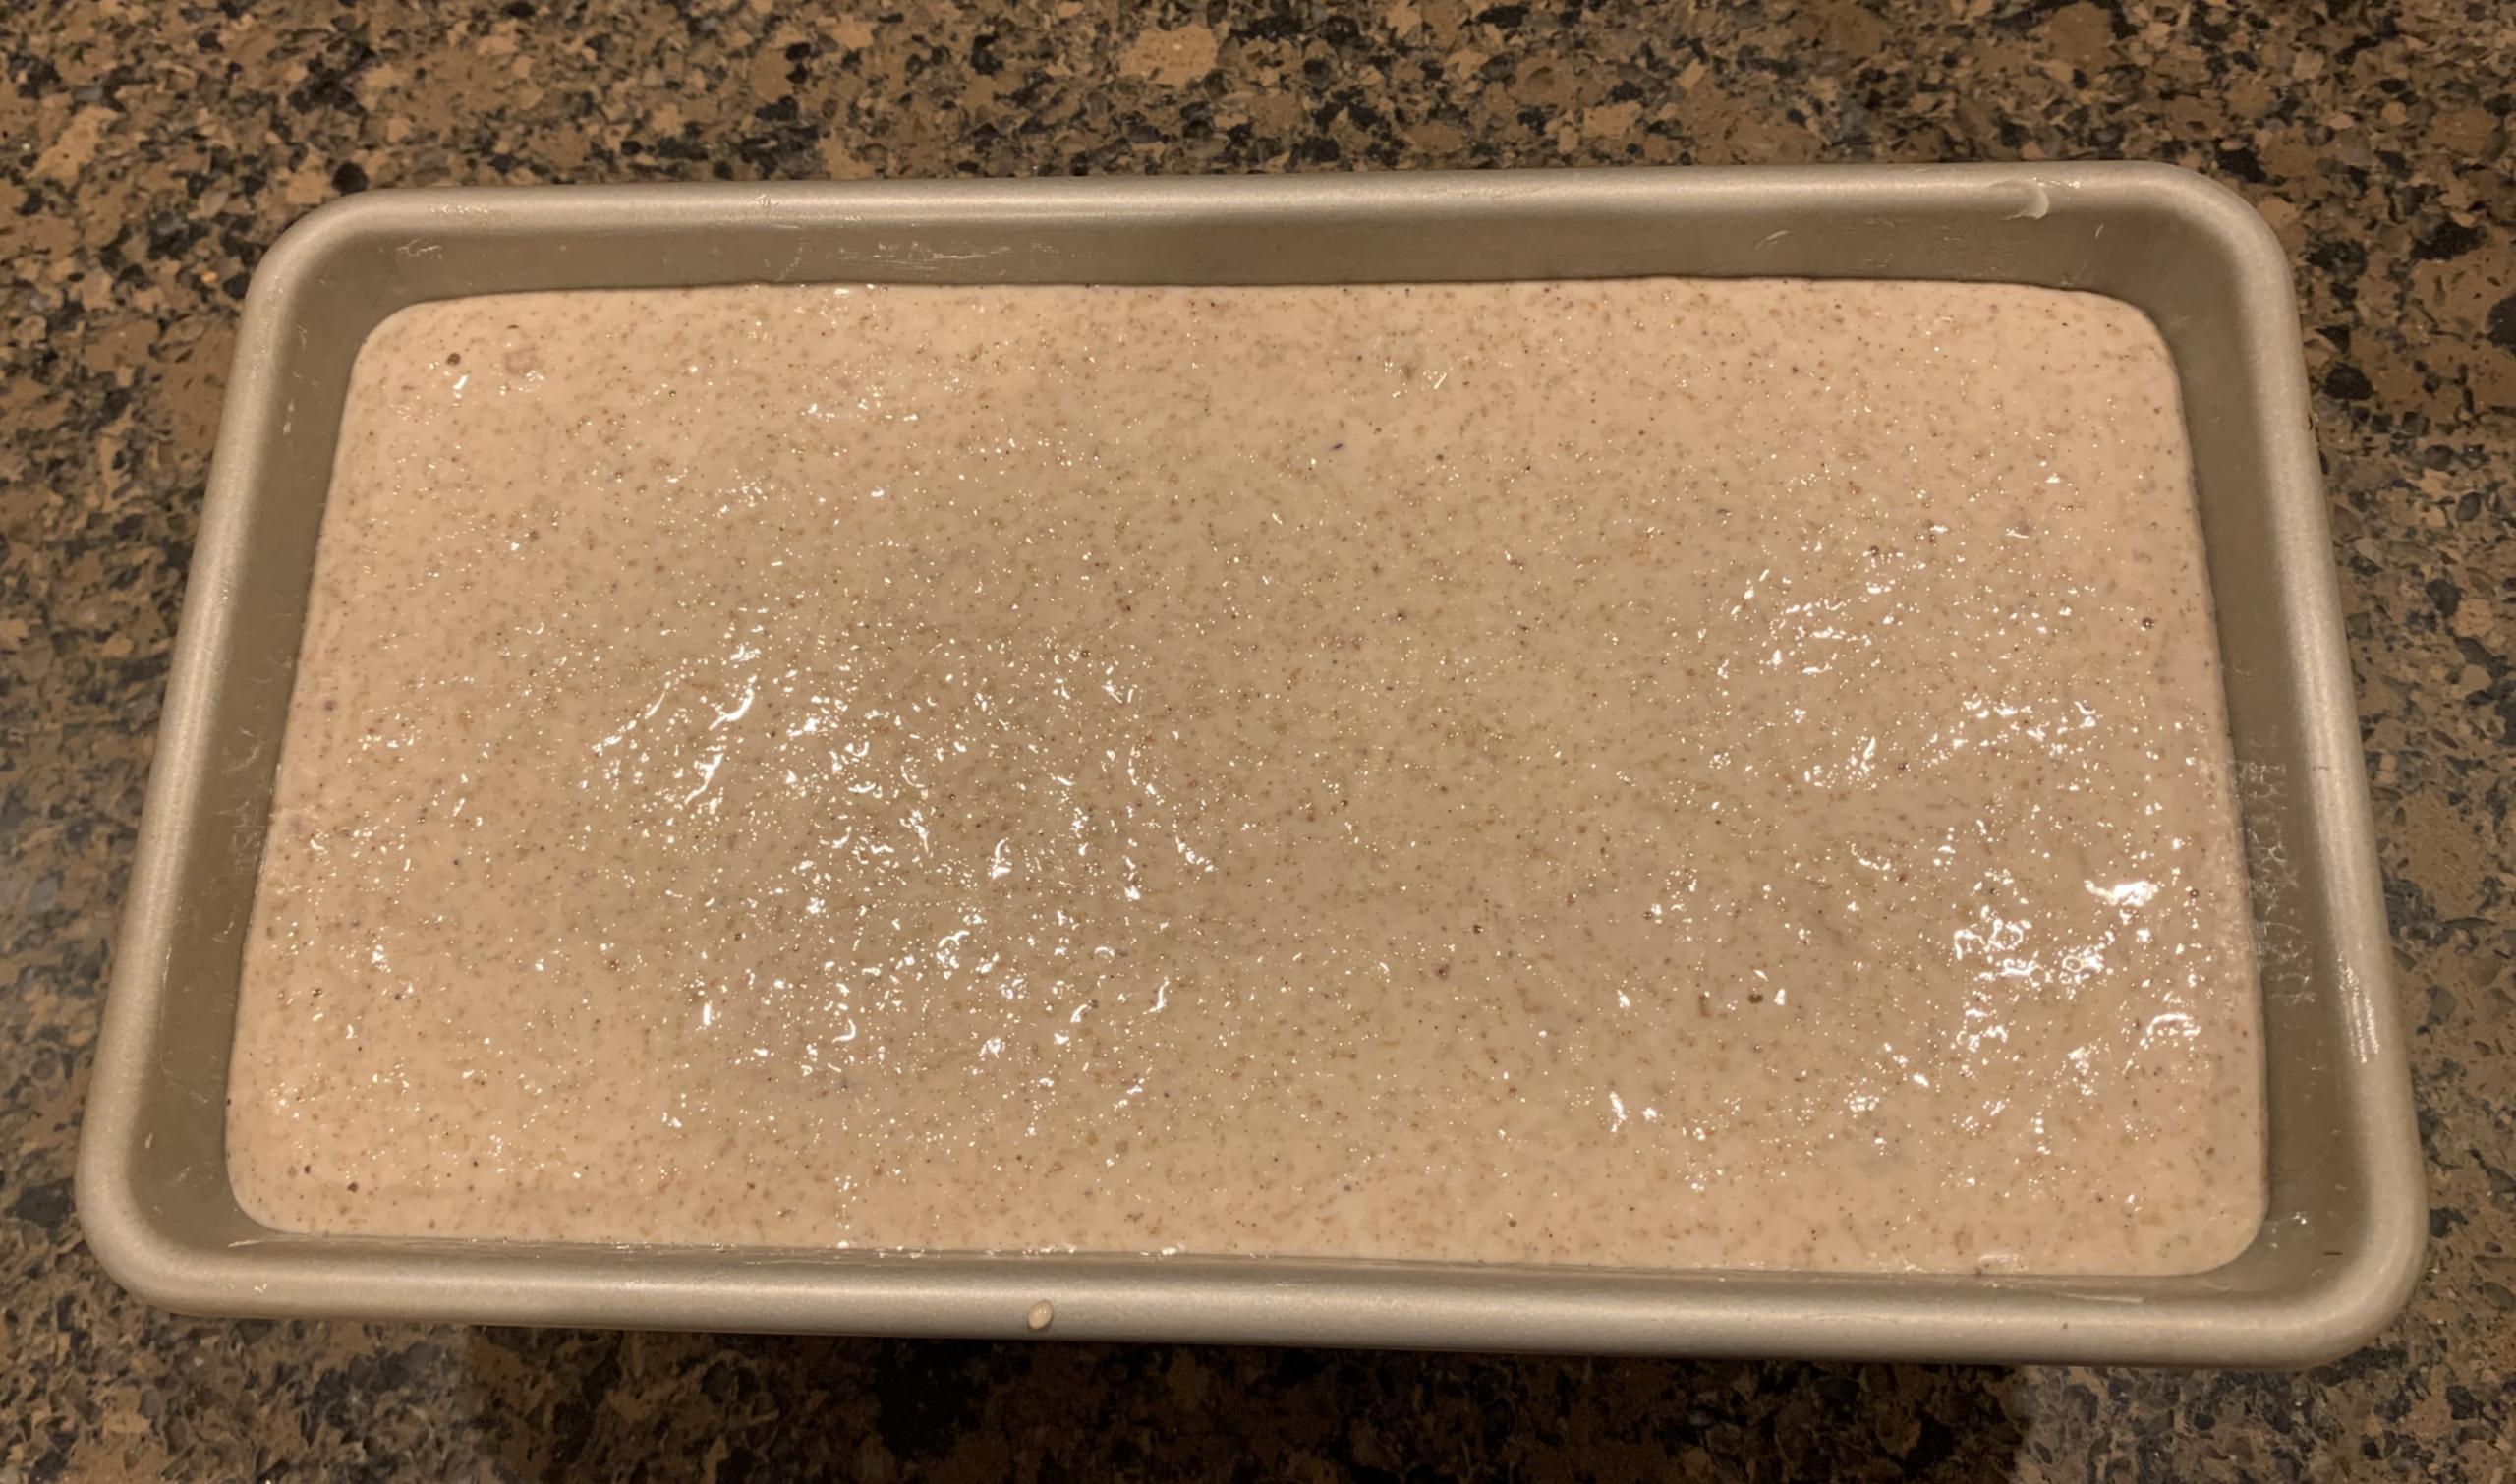
Proofed batter (just a slight dome)

Spring after steaming
Final Loaf
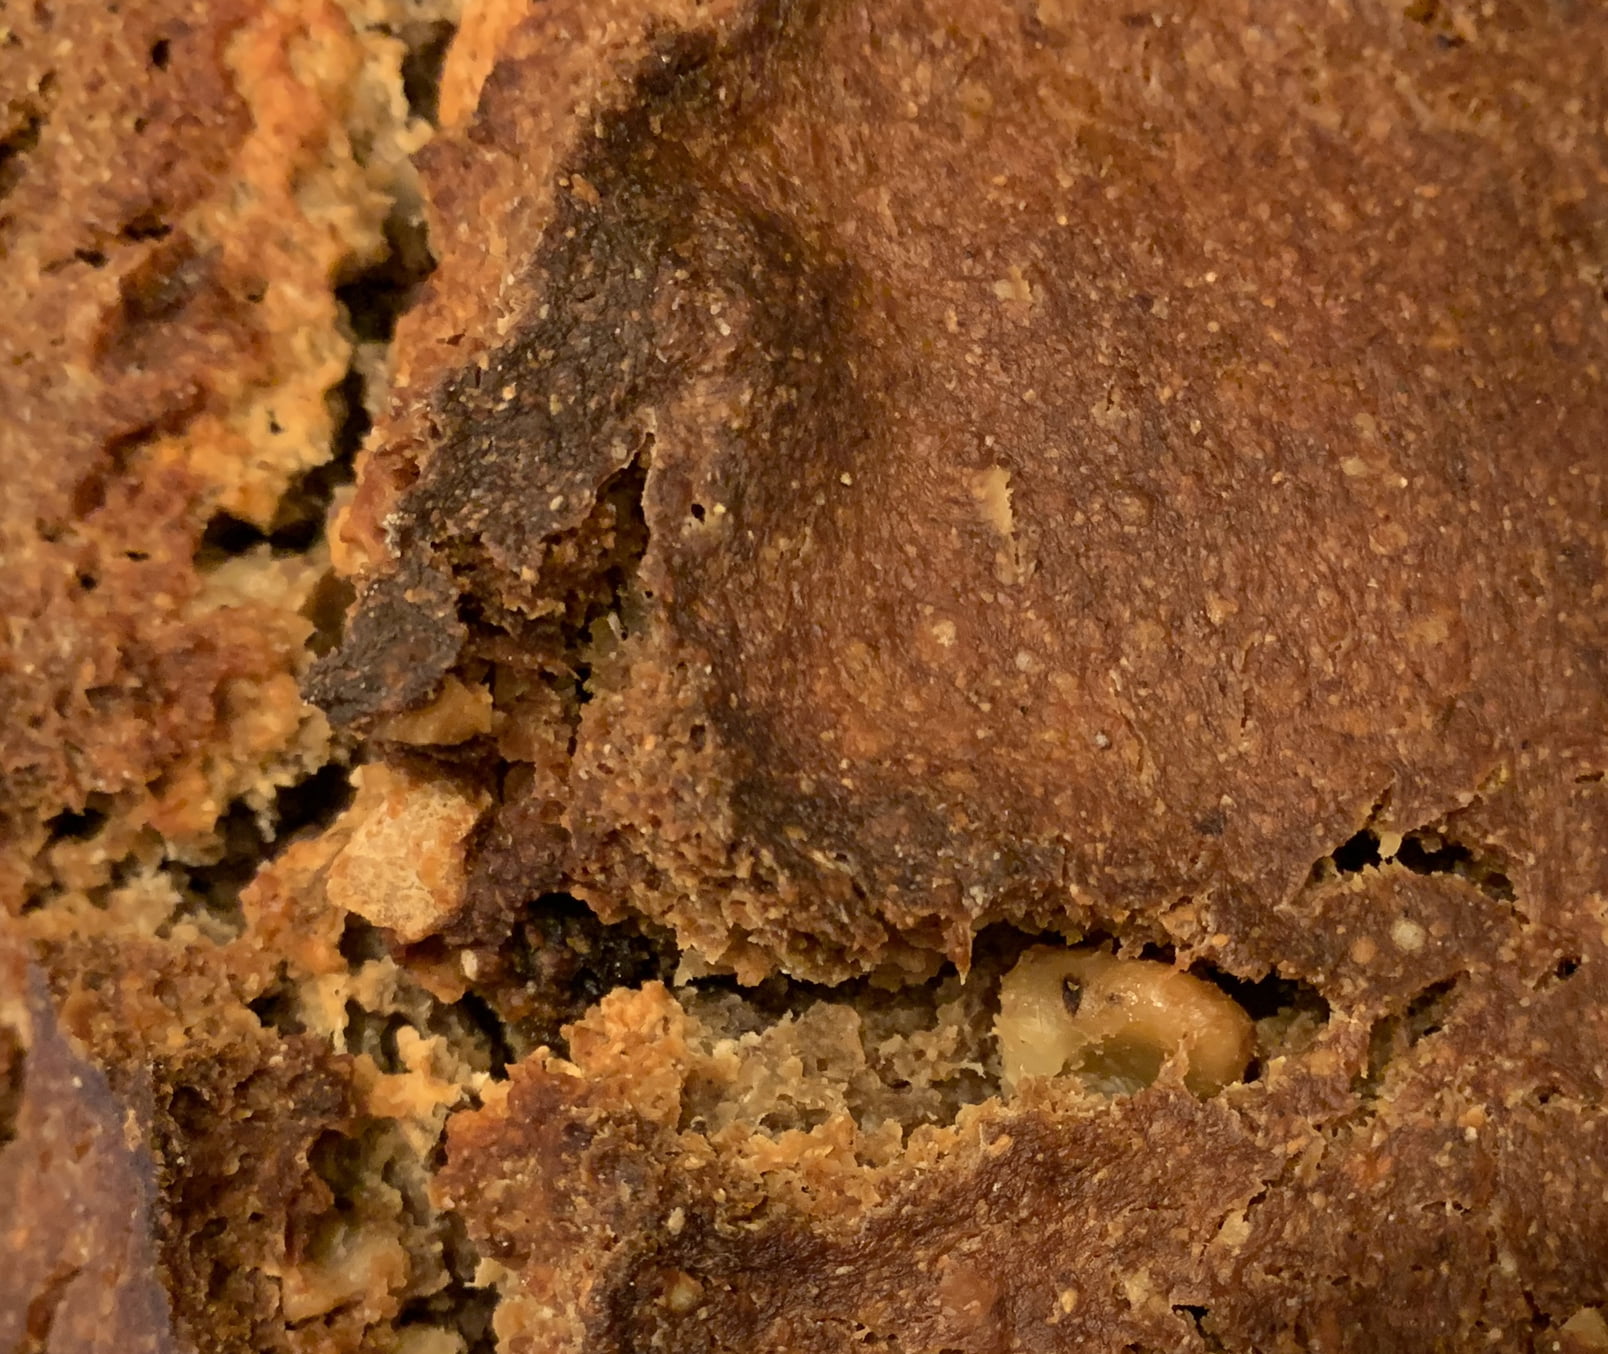
Walnut just under the crust
Couldn’t wait till breakfast…. Has been wrapped in a towel for 12 hours. Very moist but not gummy. Makes good toast (takes 3x in the toaster). Would bump the cinnamon and cardamom to 2.5-3 tsp each next time.
You've beaten the rest of us to it, Troy. I'm finishing off my last bake before I venture onto anything else.
That's a really lovely loaf. Walnuts, Raisins, Cinnamon and Cardamom. No wonder you couldn't wait. Nice idea for a bake like this.
Enjoy!
Thanks Abe. I was shocked how moist it still is after over 2 hours in the oven. Granted temps were a little low for 30 minutes, but wow…. Really happy it’s not gummy!
And go stale in a few days. If it's moist, but not gummy, that may work in your favour in a few days time. But then again you might not have anything left of the loaf by then.
Buckwheat bread is best when toasted so it's not going to matter anyway.
This bread has aged very well, and is actually much better today than Day 1. As it’s aged, the cinnamon and cardamom have become more prominent. Texture and moisture has remained stable. Maybe 3 or 4 slices left…
I propose to use 300 grams of groats scaling from your 1.5 liter pan. I may go with the plan from Mariana's second video and use 130 grams of water in the final dough (after soaking and rinsing).
Does that sound about right?
Then in keeping with the video scale using that recipe. Don't mix two methods expecially for your first time.
They don't specify the size of the pan.
Your 1.5 liter suggestion for 500 grams of buckwheat is the only size specification I have seen.
Then 1 litre = 333g
It also depends on how many additions you put it. I put in a lot. Bear in mind they take up space as well. If you're keeping it relatively plain without too many additions then 350 - 400g should be the right amount. Closer to 350g if you add in more and closer to 400g if you add in less.
Gary, I was browsing videos on that bread and its variations and I found one that shows how to skip spontaneous bulk fermentation and proof stages and go directly for depositing freshly mixed buckwheat dough from your blender or food processor into pans and letting it rise there naturally as it begins to ferment spontaneously and then bake it. This video has English subtitles, so it is easy to understand its instructions.
Regarding the bread volume vs pan size, I also found a video on the "buckwheat method" mistakes and it says not to let it rise too much as it spontaneously ferments, or it will become unpleasantly acidic and maybe too smelly. They recommend to never go for the max volume during bulk fermentation stage, just letting it rise 30-40% and then pan it and proof it and bake it.
It makes sense, since that one-step sourdough is not refreshed, so we have to either keep it as "green', "young sourdough", before it becomes stinky, or keep it fermenting way longer, until aromatic sourdough microflora replaces the stinky one, but by then it might become way too acidic to taste.
Best wishes,
m.
And I have never had it become smelly at any stage. Of course this method works and I know people who do it. I just thought for the first time doing it in two stages it enables one to control it more and not having to keep an eye on it might be a better approach.
It's not really two stages as such. Some people bake it straight away and others allow it to rest a little to replace any gas lost but it's still quite quick. The difference in ferment is the difference between a six and two threes. However this never produces a tangy bread.
I agree with everything you said, Abe. You watched that video and modified its formula and method to your own preferences, other bakers did the same. So we can have our choices and our questions answered by people like you who baked it more than once and can lead the way. Thank you for sharing your experiences with us, Abe.
By now we know that
Washing the grain before soaking it and not washing it works. Sometimes it is very dirty, sometimes it is not, who knows. You also explained to us that washing it, soaking it for an hour and then changing water for a longer soak works if you want to avoid the purple hue and darker crumb.
Soaking it in a small amount of water, barely covered with water and in abundant water works
Soaking it for 1hr, 3hrs, overnight (8-12hrs), or for 24 hrs works. The outcome is different of course, because 12-24 hr soak activates the grain, it begins to sprout so the bread will be choke full of vitamins and enzymes.
Washing the gel off in five waters or keeping it works.
Bulk fermentation before proof or no bulk fermentation works
A 24hrs total and 48hrs total method both work.
Pretty much everyone adds salt and most people add sugar, but no sugar and no salt for those who are on a no salt diet will work too, especially, if the batter is slightly acidic and has tasty and flavorful add ins.
Thin and thick batters work
You can add other leaveners (soda, baking powder, yeast) or not, both ways work.
Washed, Soaked, Blended, Fermented and Baked forms a good base for this bread. Everything else is frills.
You have the right idea Mariana :)
This recipe is very flexible so I suggest to everyone to pick a recipe that appeals to them the best and try it once. It's as good a place to start as any! Then once they have tried it then they can make adjustments.
Thank you for your latest video Mariana. That one appeals to me and I think i'll try that one next. The resulting loaf looks very inviting. Just bought 500g of raw buckwheat groats. Have to finish off my last loaf first though.
But realized I only had cracked buckwheat. Have ordered some groats so I can participate.
I think I’ve been hesitant to try gluten-free bread because I had a few gluten-free failures years ago when a close friend was gluten free. (She’s still a close friend, just not gluten free anymore.) But this recipe is really intriguing.
Might still work. A bigger issue would be toasted buckwheat as that kills off the natural yeast and bacteria. I can't see how cracking the groats would have the sane effect. Its worth a try as long as they're raw and preferably organic.
Funny, when I first heard of this recipe, the thought that it was gluten-free never crossed my mind. It just sounded like a really simple recipe for an interesting bread.
Corn bread is (can be) gluten-free, never gave that any thought either (until now).
Best (perhaps) to just think of it as a science experiment you can eat ;•0
Yes, it's gluten free and a good option for those with coeliac disease but it can be appreciated in it's own right. A very tasty bread using an interesting method and a "new grain" (for some).
I mostly eat my bread toasted. Toasting always improves a bread. And while all breads do benefit from toasting this buckwheat bread really suits it. Nothing quite like a thinly sliced buckwheat bread, using this method, toasted.
Please take a look. It looks like a very nice version of this recipe/method. Thank you Mariana.
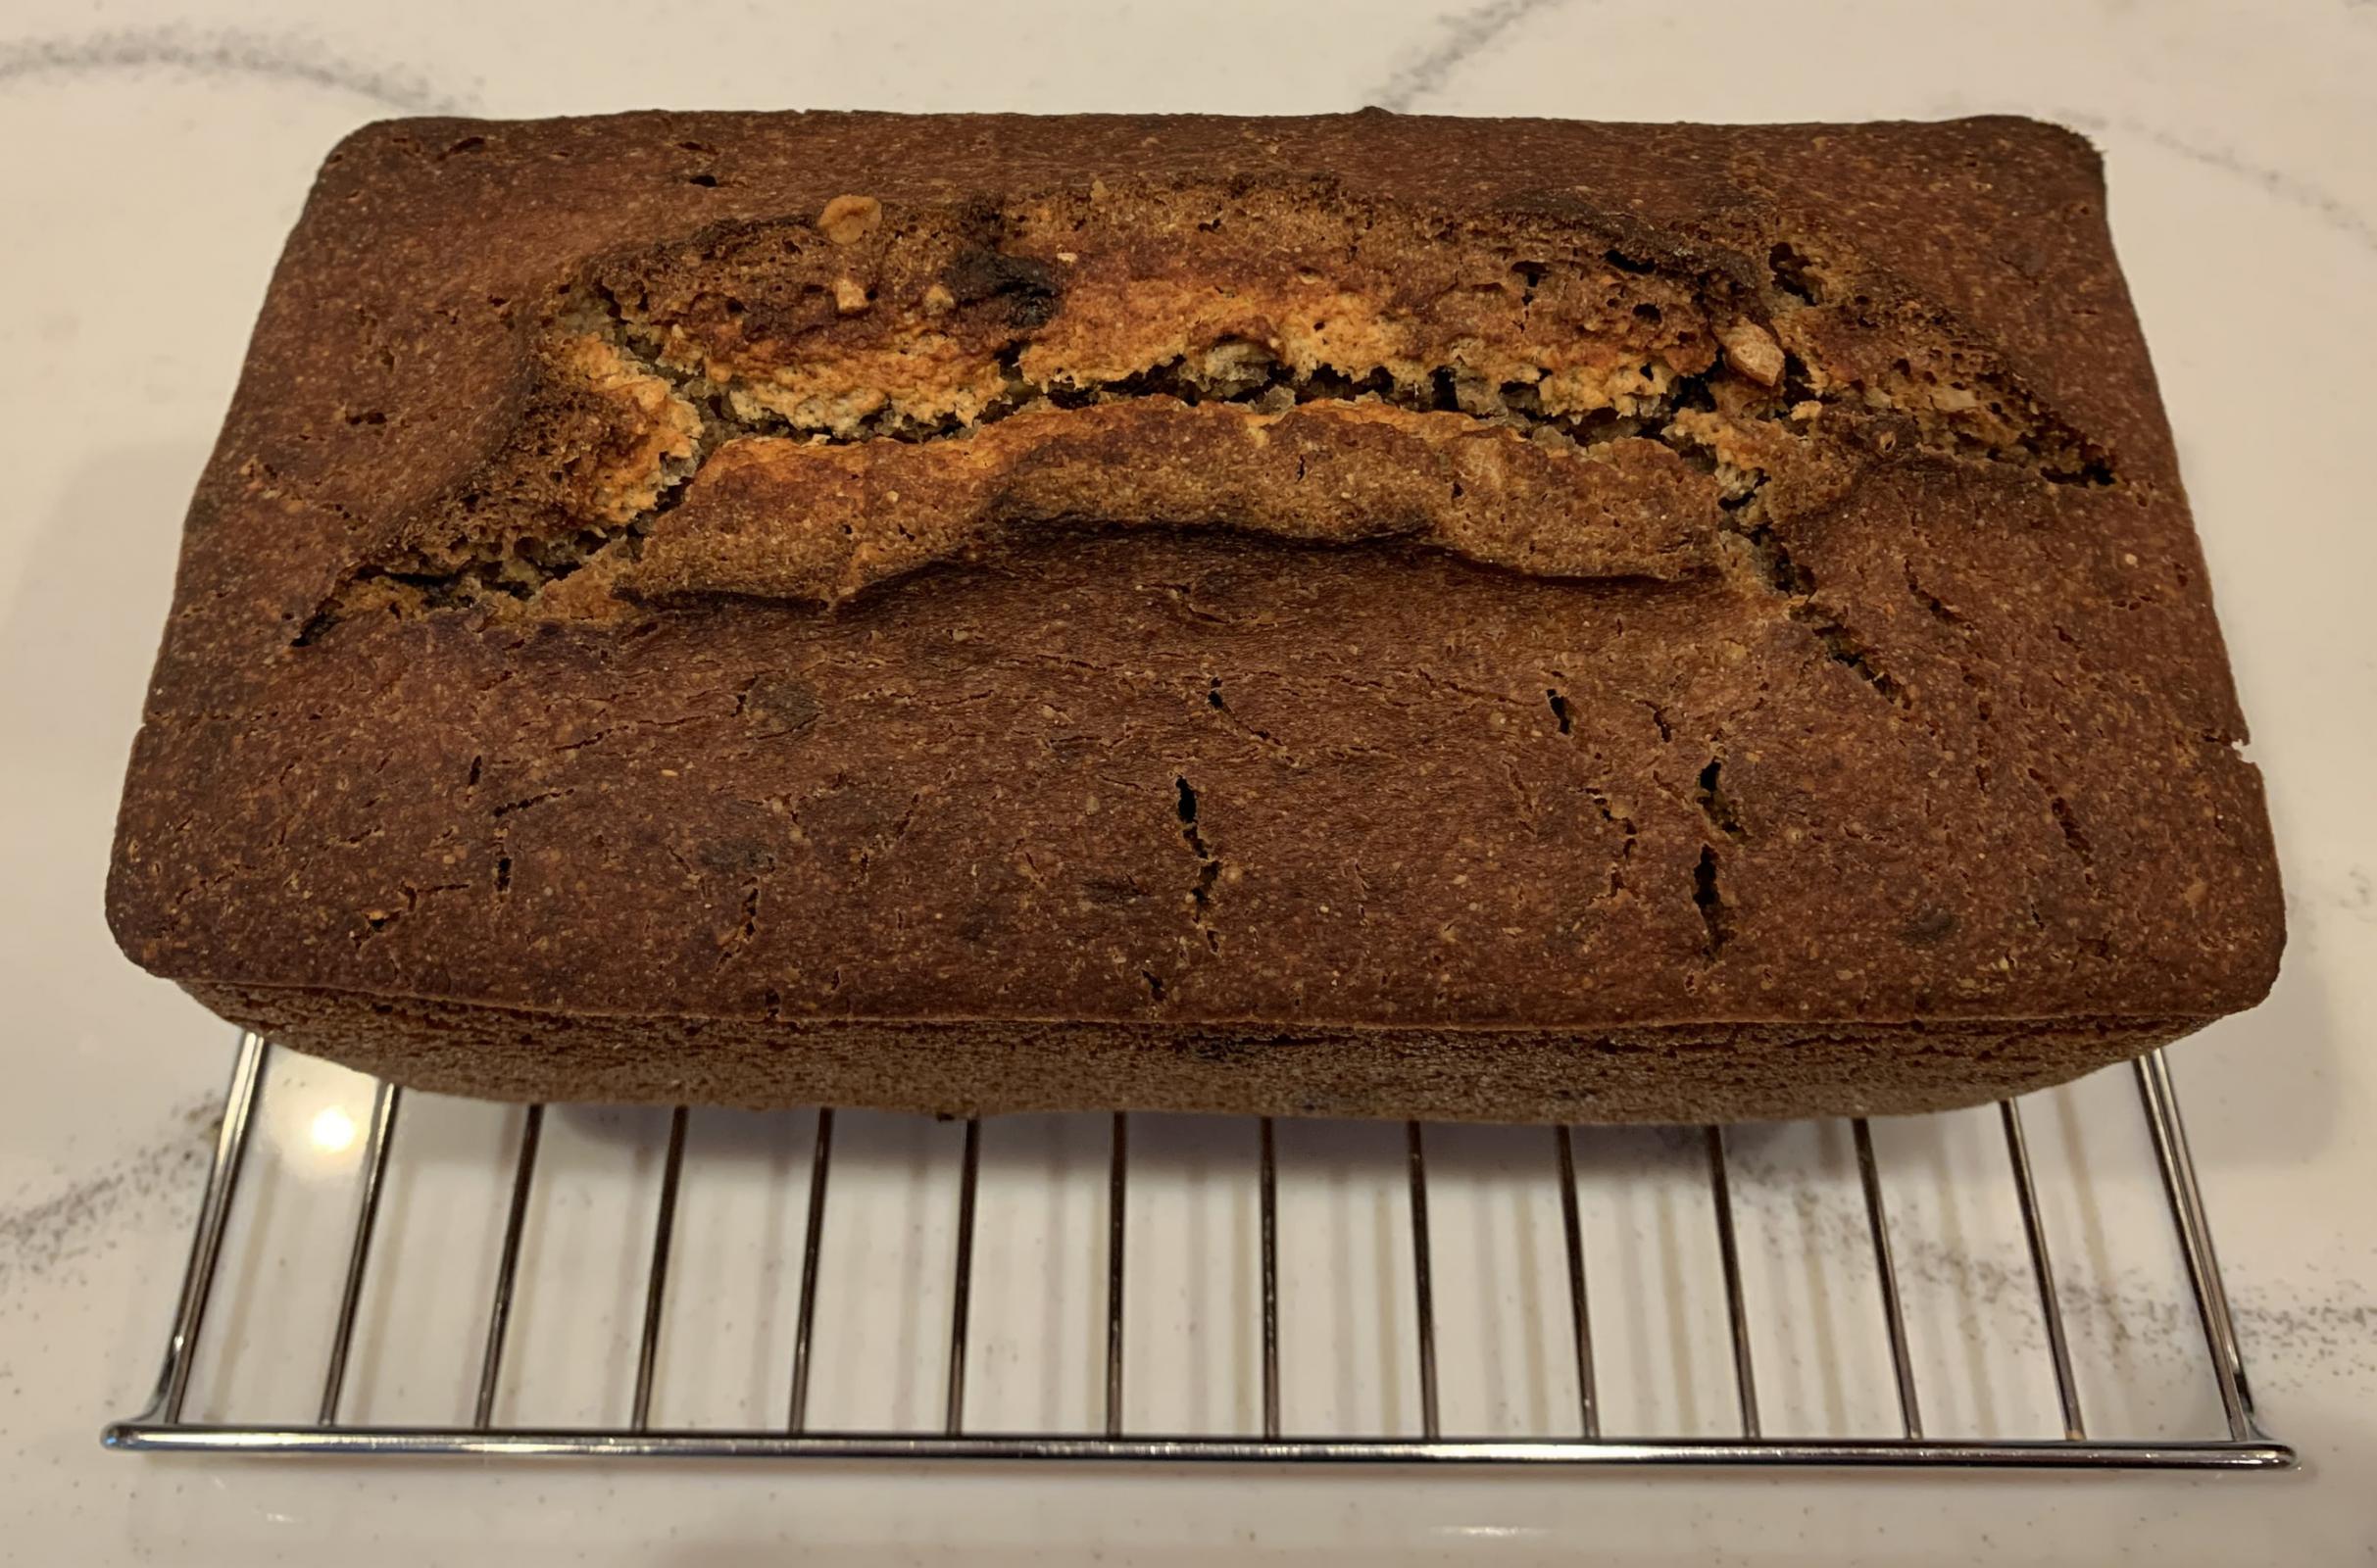
I followed the instructions in the video Mariana found by Culinary school SAMOVAR.
I used 333 grams of buckwheat soaked in just enough water to cover them for 8 hours (life got in the way), then blended with 100 grams of added water, mixed with 5.5 grams of salt and 15 grams of sugar (I failed to scale the sugar) and poured into my 1 liter pan. It filled the pan about 80%. I left it on the counter at 73F for 19 hours and saw no signs of rising so I moved it into the oven with the light on. After 4 more hours it neared the top of the pan. I baked it at 350F convection from a cold start. At 45 minutes it was only 162F inside so I baked for 20 more minutes until it reached 207F inside.
The lighter color at the top is where it pulled away from the pan. The brown lower parts are likely the result of the butter I used on the pan.
I'll try it in the morning and report.
Awesome Gary! Hope you like it. Mine actually improved after a day and the cinnamon and cardamom came through more.
Looks like a straight forward method that makes a nice loaf! 👍
It is edible and a decent carrier of a jelly but the flavor of the bread seems very bland. The crust is hard and the middle is dense and soft, not gummy. It has a nice light lavender color. I don't detect any sour notes.
Some add-ins would help for sure but I wanted to go with the plain approach to taste the baked buckwheat.
I have about 120 grams left from this 454 gram package. I'm thinking I might try making a hybrid loaf with whole wheat flour.
I enjoyed the experiment.
How much salt is in the recipe? Have you tried it toasted?
This method is also quite a short ferment. Straight into the pan and it's baked within a few hours. I typically do a longer ferment.
1.6% salt, it could use a more. Yes, I tried it toasted with salted butter and topped with muscadine jelly.
My ferment was 23 hours total. When I typed it up last night I mistyped the 19 hour wait for anything to happen before I put it in the oven with the light on.
I judged the time based on the rise from 80% to 100% of the pan.
Take my report with a grain of salt because I'm old and don't have the taster that I once had.
Because this is a batter bread there's a lot more water. 1.6% salt of the groats alone where the water is more than the weight of the groats themselves isn't very much. Less then that of a normal bread where it's typically 1.8 - 2% of the flour which makes up the bulk of the recipe.
Sounds like the method used for this bread isn't as good as the one i've devised for myself.
That did not occur to be. I usually put in LESS salt than most recipes call for (no more than 1%) but this loaf is bland so I usually add more.
I made a sad observation this am. I have noticed that BW bread is a lot more porous than most other breads. The melted butter and honey ooze right through! Delicious! (That isn't the sad part). Sadly, my loaf went 1 day too long on the counter and it got moldy. The sad observation is that with a BW loaf, the mold is through and through-not just on the surface. My intent was to slice and freeze but I've been just too busy here, I kept putting it off til later. However, I enjoyed most of the loaf-lost about 1/4.
When I get back home (if there is a home after Ian), I really want to find some BW groats and try your method. I use Bob's Red Mill whole BW flour (bread turns pretty dark). Do you think it would work with the already ground whole groat flour? That is easiest for me to source.
That go very easy on the salt. But it makes sense to me with so much water in relation to the groats the salt can be increased. I do about two tsp for a 1.5 litre loaf batter and I do a very active ferment. My buckwheat breads can last a week but by days 3-4 it begins to dry out. Always good toasted though. I'm not sure if the flour will have quite the sane affect as the whole groats using this method. Here's hoping hurricane Ian passes without much damage.
.
Nothing ventured. Nothing gained. 😁
Sorry it turned out bland. Maybe the extra salt will help. I love using buckwheat with whole wheat. I usually toast the groats before I grind them when combining them with other flours.
Before work. Hopefully the batter doesn’t get over-fermented by then.
This recipe reminded me of making idlis: soaking, grinding, waiting for natural fermentation. That makes me wonder whether this bread could be steamed in idli moulds or something similar.
Looking forward to hearing how it turns out!
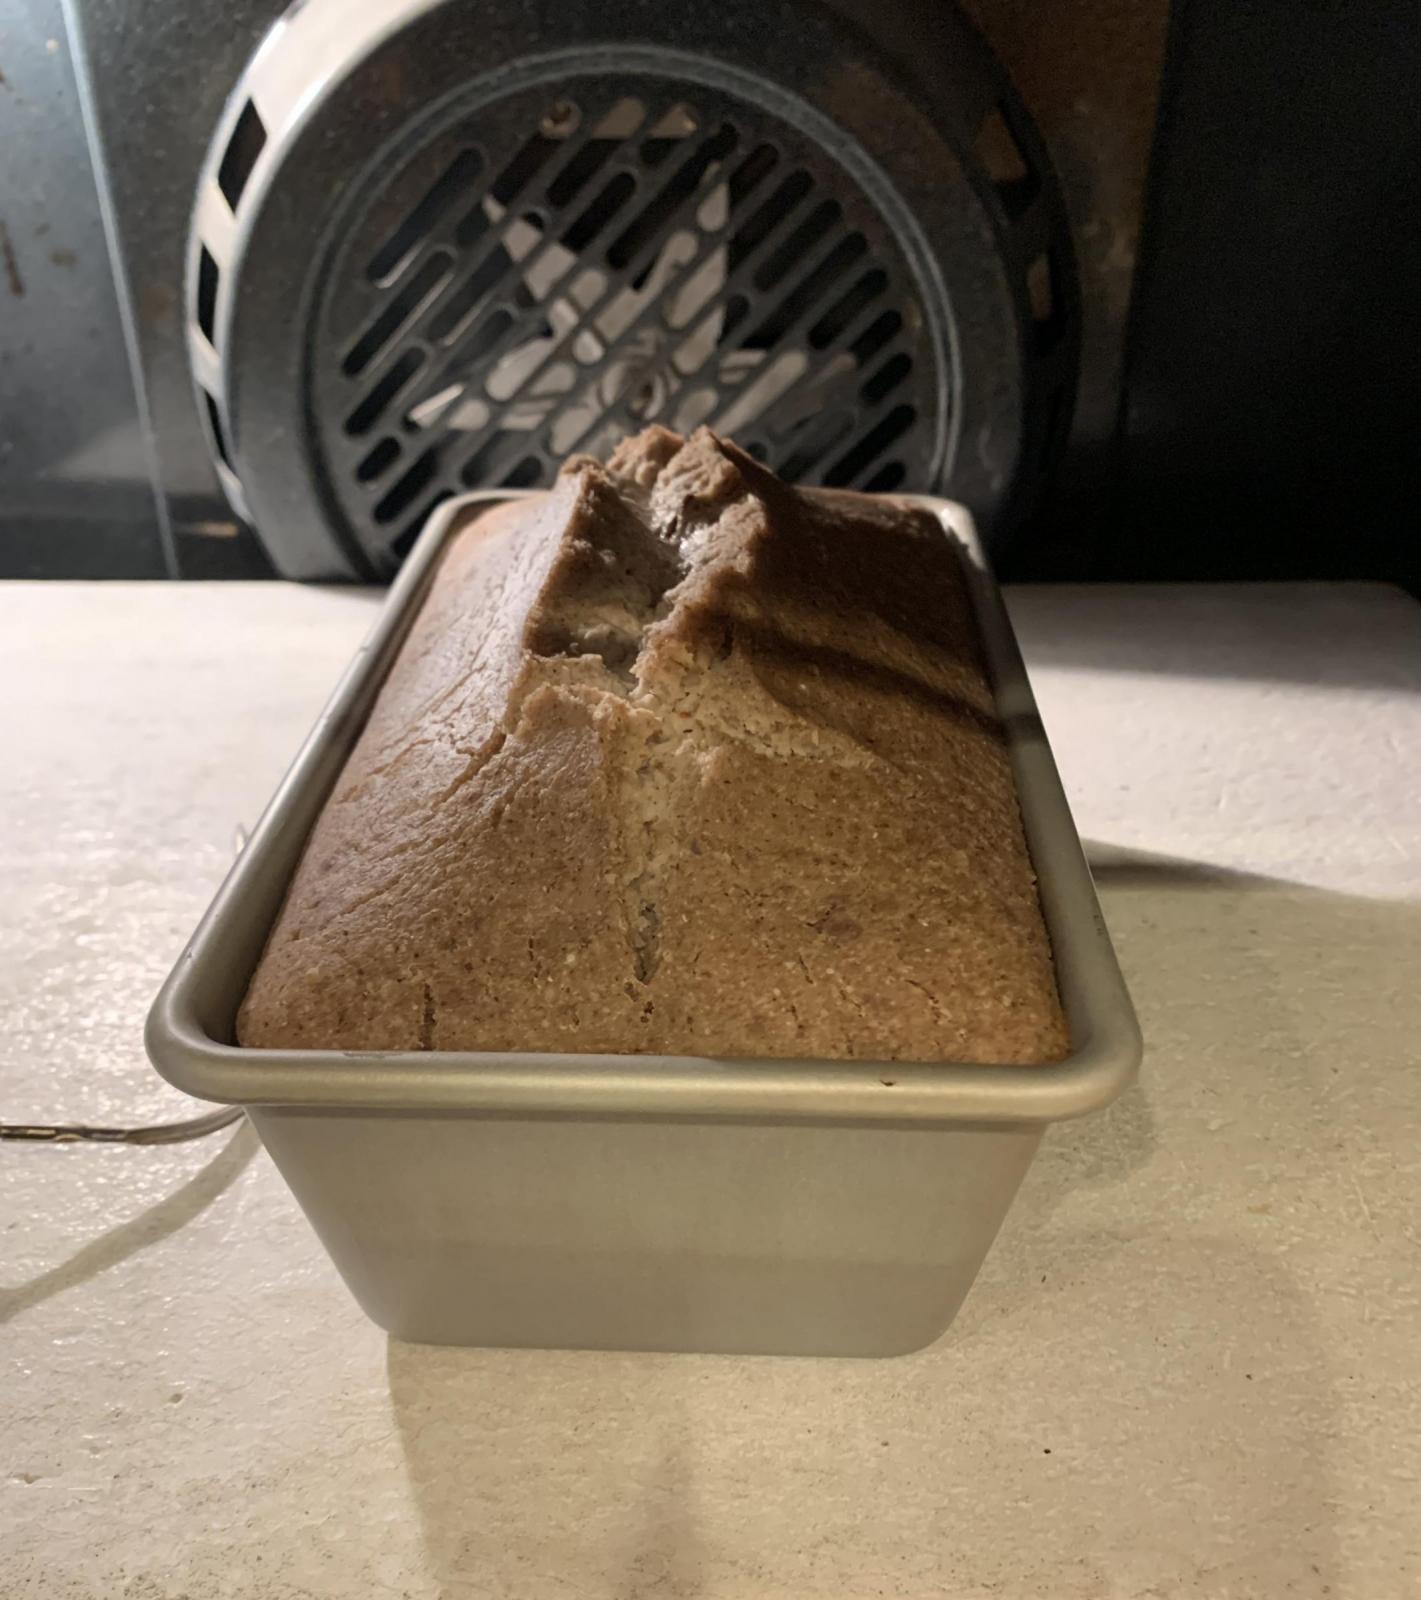
Looks like a white fruitcake. I followed Abe’s method (500g groats, 650g water). 2tsp salt added at the end with currants, walnuts, sunflower and pumpkin seeds. Batter ended up fermenting a bit under 24 hours due to schedule. As someone else observed, smelled earthy but not unpleasant.
Image

Looking forward to when you cut into it.
Agreed! Funky is the wrong word. Smells fermented and has a similar but stronger aroma.
Nice combo and I think you'll appreciate it with the salt % you followed. Many forget the water is more than the groats but keep with salt in relation to groats only.
It’s good! Definitely best toasted. Plenty of buckwheat flavor even with all the add-ins. I do think the 2tsp of salt helped.
Perfect for this type of bread. And with all those add ins even better! I imagine this toasts up a treat. Toasted and topped with hard cheese or spread with peanut butter is very nice.
Very nice bake indeed.
introducing us to this technique. I recommended it to my mom, who likes good bread but doesn’t want to take on the commitment of being a regular bread baker.
Glad i've introduced something to you that is new and you enjoy. That's what a community bake is all about. Bon Appetit.
Now you have the method make it your own. Experiment.
This is a really nice loaf and welcome to the buckwheat bread club! 🤣
The add ins look great and I think I made a mistake chopping my walnuts so fine. Biting into a big piece of toasted walnut like you have would be much better.
Well done!
Like banana bread I usually just break the nuts up a bit with my hands, so I did the same here. Yours sounded delicious as well!
I cut it into thin slices, the better for toasting, but I keep coming back for another little sliver. Of course it doesn’t have the sourness, but it has plenty of other flavor.
There is something addictive about this bread. Toasted buckwheat has a lot of flavour. It does lack the sourness but that's not the only flavour for fermented bread. Glad you're enjoying it.
The sour seems like something that can be adjusted by adding LAB to the ferment. I know this is a free-form ferment using the naturally occurring yeast and bacteria on the grain, but if we are looking for sour, why not add something we know should lower the PH? Unless, of course, you think it would disturb the balance and crash the CO2 party.
But you bring up an interesting theory.... Are the natural yeast and bacteria we're dealing with in this type of ferment more at home in a neutral pH balance?
That’s exactly what I did. I used 50g of yeast water as part of my hydration (16.7%) not necessarily for the leavening but to also get a little head start on the pH drop. I didn’t want to start with too much and not knowing how it would impact the flavor. I think I would bump it up to 30% next time.
While I am sure yeast water contains quite a bit of LAB, I was thinking more like a sour starter or CLAS fermented above 80 degrees to max out the sour.
Yep…. If the target is sour, then I agree. CLAS (or maybe even a bit of SD starter) would be a good addition. With the yeast water, I was thinking more along the lines of helping get the pH down (my yeast water has a pH below 4) before any of the beasties that give a foul odor develop.
The yeast Water may have enough LAB, may only need a higher temperature to give it a chance to acidify the dough. Perhaps 100 F?
I would be concerned about killing off the yeast and not leavening the buckwheat batter at that temp.
is comfortable at those temps, no idea about wild strains.
Agreed, but now you're really deviating from the base method. As a first step, I would inoculate with 3-4% CLAS and ferment at 80-82 deg F. Still warm enough to keep the LABs nice and happy but low enough for the wild yeast to prosper too. Make changes from there... You might find that even 3-4% and 82 deg F is too much sour for this bread. I don't know how a buckwheat flavor profile changes with acidity and sourness. Not sure if it's like a rye or not. It may be. I've never experimented with it.
Let us know what you find!
Before starting this project, but when I do, I'll most likely do two loaves—one a control - the other using CLAS to add a sour. If it doesn't work? I keep a compost pile behind my garage to fertilize my berry garden ;0)
Buckwheat and spontaneous ferment is the crux of this Community Bake. Appreciating the qualities of buckwheat itself as supposed to adding in yeast, sourdough or CLAS. I meant it as a means to introduce everyone to other techniques and flavours. So while a CLAS version will be welcomed the controlled one will fit into the Community Bake more so.
Hopefully everyone will walk away from this with another type ferment to add to their repertoire.
When you do try this bread I suggest you do two teaspoons of salt per 500g of buckwheat groats. The water exceeds the buckwheat and yet the recipes ask for much less salt even though the batter is greater then that of an equivalent wheat yeast/sourdough bread. Then if you like it you can adjust up or down for your next loaf.
Any questions don't hesitate to ask.
Just heard several posters suggesting a sour would aid the taste and my natural instinct was to seek a solution. I typically don’t like the taste of salt in my breads. Does two tablespoons bring out the flavor of the BW or can you actually taste the additional salt?
Not two tablespoons. We wouldn't want you to poison yourself.
I find two teaspoons for 500g buckwheat, and all that water, is enough to bring out the flavour of the buckwheat but not overpower it.
But by all means go for less. This is just my findings. You've gotta do what suits you best.
Sometimes I think this Ipad has a mind of its own meant teaspoons, thanks!
But I had to say something :)
Couldn't let you use two tablespoons on the small chance it wasn't a typo. I'd prefer to make a fool of myself then let you poison yourself.
intention appreciated.
The loaves pictured have all been made with whole groats, if I understand correctly, and they are relatively light colored. This is interesting because when I make my BW loaf with whole grain BW flour, my loaf turns out really dark brown. Are there different types/varieties of buckwheat groats?
This BW loaf is one of my favorite breads and the interesting thing is that it tastes nothing like my childhood memories of buckwheat pancakes. In my memory, BW had a really distinctive flavor and I knew I didn't like it. My mom used to try to disguise it but I always knew when she used BW flour. This BW flour does not taste anything like I remember. More mature tastebuds?
Groats used to make flour and hulled groats used for these loaves, I think.
Apparently groats are by definition hulled, so “unhulled groats” doesn’t make sense.
And just thought i'd be more mindful of the aromas going on while making this spontaneous fermented bread. Now because it is a truly wild ferment I would think the aromas might differ quite often but out of interest here's what i'm getting...
So far i've washed the groats, soaked them for an hour or two, drained and washed them again, then soaked them for about 16 hours. I've just blended them, this time not too finely for more texture, added two teaspoons of salt and some honey. Mixed thoroughly. It's now fermenting till tomorrow.
Aromas so far... Imagine a basket of leafy green vegetables, earthy with hints of grass in a nice way, but (and this is a first for me) with added spring onions (I believe you call them green onions). This is after the soak and some are just beginning to show signs of sprouting [splitting].
We'll see what it's like after the ferment.
I’ll have to look closer on the next one I make. I don’t think I’ve seen a sprouted groat yet. I must not be going long enough on the initial soak.
But beginning to split. Sometimes if left for a full 24 hours quite a few have little shoots just beginning to appear. I have seen some people, after the initial soak, drain the groats in a sieve and leave them covered with a towel for another 12 - 24 hours to sprout a bit more. Then they blend with fresh water and ferment.
People were afraid of the "funk" smell (which is the wrong word as when they ferment they don't smell bad - or shouldn't smell bad) so I thought i'd report my findings.
Got it. Thanks for the report out.
The batter has been fermenting for 24 hours and it actually has a lovely aroma. The hint of spring onions has gone. Trying to put my finger on the aroma. No funk smell at all. Actually smells like vegetables with some herbs. Something like a green smoothie. Made it quite a thick batter and didn't blend the groats so fine. Was going to add in some walnuts but have chosen to leave it plain. Never done a buckwheat bread this way without any add-ins. It's all about the buckwheat today.
If folks are looking for something else to do with buckwheat groats after they finish this community bake, The Perfect Loaf has a recipe for a hearth loaf with a small percentage of buckwheat flour and some sprouted buckwheat groats. I made it over the weekend and am enjoying it.
https://www.theperfectloaf.com/sprouted-buckwheat-sourdough/
I have made Breadtopia's Buckwheat Porridge bread and it was delicious. Yours looks amazing and it's definitely on my to-do list in the near future.
Something new... This ended up being akin to a fermented baked porridge. While it seems to have gone ok I do having a nagging doubt that this style of naturally fermented buckwheat might needed the very high hydration otherwise the crumb will be far too dense. It's a spontaneous ferment and might not be strong enough, like a starter, to rise a thicker batter. But it's done now and so far it seems to have gone very well.
The soak: About 16 hours
Blended: Not too smooth so as to give it more bite instead of adding any seeds.
Fermented: About 24 hours. Like a porridge. No funky smell. Very pleasant actually.
Baked: Lovely golden colour with a slightly sweet aroma. I scored this one using Mariana's advice of coating the knife in oil. Ended up using the Pullman loaf pan, with a lid, to counteract the fan in the oven which I can't turn off. It was a bit too big for the batter so got more spread than rise. Had I used a narrower deeper pan I could have gotten a taller loaf. Thought it was worth it and I think it baked far better.
It does look and smell good i'm just thinking i might have gone too far in keeping the hydration quite low. We'll see...
Very happy. Turned out exactly like a fermented porridge bread. Lovely nutty buckwheat crumb (after toasting) with a slightly sweet crust. Photo doesn't do it justice. The crumb looks better.
It looks great Abe! I’m optimistic you’ll have a reasonably open crumb with the dome on the loaf. Hoping it turns out the way you like.
What was the batter consistency as compared to normal for you? Polenta vs cake batter?
Did you notice a difference in the fermentation or baker aromas?
Hopefully it'll be fine but if it is very dense it can always be enjoyed sliced thinly, like a traditional pumpernickel, and toasted. If it's baked all the way through it can be eaten.
The consistency was somewhere between polenta and cake batter. More like a slightly more watery porridge. The fermentation aromas were very nice. It's familiar to me but couldn't put my finger on it. Vegetables, greens and herby. No off aromas at all. There's a store in London called Neal's Yard which sells things like aromatherapy oils and lots of different dried herbs/spices etc. You get a complex aroma which hits you when you walk in. Something like that. The baked bread has a slightly sweet smell to it. It browned very nicely so I think that's malliard reaction.
Hi! I just made this since I have a surplus of buckwheat groats. I more-or-less followed the process outlined in the videos and Abe's post, added millet, sesame, sunflower, and pumpkin seeds. Some notes that might be of interest:
The resulting bread tastes like fermented buckwheat. I suppose this is an acquired taste? Almost like a very grassy, green rye, without the brown notes. The flavor certainly improves with heavy toasting, especially if there are seeds/nuts mixed in. It does have that rejuvelac twang (rejuvelac is made by fermenting sprouted grains) and aroma.
I'm not quite sure what to eat the bread with. It was okay with butter and salt, tried cucmbers, too, but was clashing. Not good with honey or jam. It might be interesting using a little duckfat instead of butter, and maybe some smoked salmon?
Since I have quite a bit of buckwheat groats, I'll try again once done with this loaf. I wonder what the resulting bread would taste like if beer were used instead of water. Thoughts?
Changes for next time: use 700g groats, won't blend to smooth, will try to use beer, may try other seeds/nuts, and will keep closer watch on fermentation.
Interesting…. Mine was perfect with butter or jam. I wonder if the freeze drying prevented it from getting acidic enough during bulk and changed the flavor profile? If you have any, trying using some yeast water (15-20%) to help drop the pH initially. I know what you mean about the grassy flavor. I had that the first time I made the bread. This time, I did the initial spike with a little yeast water and I baked it far longer and lower than before. You can see my notes earlier in this Community Bake.
Good luck on the second bake!
I think mine was acidic enough - I instinctively licked the spoon after pouring the batter into the loaf pan and it was sour and tasted like fermented, raw buckwheat. This is not recommended hahah. If anything, the freezing likely stopped the groats from sprouting, but unlikely to prevent any spontaneous fermentation. The whole point of freezing and vac sealing the groats was to help them last longer and prevent weavils/bugs. I've had that issue with longer-term storage of grains and seeds, found this can mitigate the issue.
I read your notes earlier in this thread, perhaps having cinnamon and other things in your bread help with the tastes, though I'm not a fan of cinnamon. Yeast water is something new to me, will do some homework to see what it's all about.
Still having trouble finding foods to go with this bread. Tried some with some with onion and pickled herring. Nope, that was pretty awful haha. Also goat cheese and jam, even worse.
My guess is this flavor is more of an acquired taste. Perhaps I'll pick up some fresh buckwheat groats just to rule out the whole freezing situation.
Looks good to me. I happen to really like buckwheat and this method always gives me a tasty loaf especially when toasted. I think a lot of things go well with it. Often i'll dip it into olive oil or have some hard cheese on top like leerdammer or cheddar. Sprouting of the groats isn't necessary. Just happened to mention they might begin to split (the beginning of sprouting). I'd be very wary of tasting this mixture. It is a spontaneous ferment and unlike a sourdough starter, which has been maintained in such a way that it's full of good yeast and bacteria, you don't know what has taken up home in this style of ferment.
As others have said it does continue to to improve overtime, like a rye, and i'm sure you'll get a taste for it.
You may like the flavor more over time. I thought the first slice I cut was all right. In the end, my husband and I finished the whole loaf without having to freeze any. I do think the nuts and currants helped a lot though.
I saw a recipe that was 100% buckwheat flour and bananas. biggest difference was chemical leavening and eggs!
I am late to the party but finally settled in to my new location and acquired some organic buckwheat groats. I watched the video Mariana referenced and pretty much followed that recipe with my own additions to flavor the loaf how I like. A simple dough-just takes a while.
Buckwheat groats (whole,organic,skinned) 500g (2 ¾ cup)
Wash thoroughly, keep covered with water for 12 hours, drain and wash again.
Blenderize (I used a blender) to a smooth, thick batter. I ended up adding just a few tablespoons of water to keep it the correct consistency. It didn't flow off the spoon-more in globs that flattened out in the pan.
Weight of groats before soaking 500g. Weight after soaked & blenderized-739g.
Salt : 1 ½ tsp salt (12g) (or to taste)(Definitely needed 2 tsp)
OPTIONAL ADDITIONS:
2 TBSP Honey (30g)
3 TBSP Pepitas (30g)
6 pitted dates-diced (48g) (Double this amount next time)
1 tsp Bread Spice (2g) (Equal parts-Coriander,cardamom,fennel and caraway) (Needs more)
1 tsp Coriander (1g)
Mix additions well into batter
Place thick batter in well-prepared bread pan:
Baker’s choice: Oil and coat with flaked oatmeal (worked well) or cornmeal or use oiled parchment paper.
Let ferment in pan 12-24 hrs until slightly risen and bubbly. (Mine took 22 hrs) (Spray top with a little water and cover lightly to prevent a dry skin from forming during the long fermentation)
Abe, I see what you meant in trying to describe the smell-definitely NOT yeasty but not funky-it tasted a little acidic but smelled more like weeds I’ve pulled in the garden than grassy. Who knows, I’ve probably pulled buckwheat in some of the thousands of weeds I’ve dealt with in my yards!
BAKE:
Place in preheated 450 oven and immediately turn down to 400
Bake for 20 min at 400F and turn down to 350
Bake at 350 for 20 min (Internal temp-160F)
(add 20 min-internal temp 190F) (add 10 min-internal temp 200F)
Bread is done when internal temp is 200F. (mine took 70 min to reach 200F)
There is no oven spring and this long bake is definitely needed on this dense, moist loaf.
It browned up nicely with that prolonged bake but, like a high percentage rye, I’m going to wait a bit to slice into it…..if I can.
EDITS AFTER THE BAKE ARE BOLD/ITALIC. SEE ADDITIONAL COMMENT WITH PICS BELOW ON THIS INTERESTING LOAF
Has a nice dome to it. You're brave to taste the mixture. I'm reluctant to do so. It's a spontaneous ferment, unlike a nurtured sourdough bread using starter, and it's possible not all the bacteria are friendly, I would think.
Lovely add-ins which i'm sure will compliment the buckwheat.
Looking forward to the crumb shot and hearing what you think of the taste.
THIS BAKE:
FOR THIS BAKE:
Well, I only waited a few hours and quickly learned that the loaf needed at least 24 hours. After 24 hrs, it was still a dense,chewy crumb but a little drier. The flavor was more mellow,also,like any high rye.
This is definitely a unique loaf and I am on the fence about whether I’d repeat the bake. I really liked the simplicity of soaking, blending, self fermenting and baking. I wonder if this technique is transferable to other grains?
About my loaf. Because of the 70 minute bake, the crust was nicely browned but a bit tough. The long fermentation also tended to dry out the top of the batter. After a few hours, I spritzed it with water and covered it lightly for the rest of the ferment. The crumb is very thick and moist-not gummy but very dense. I wonder if I had made the batter a bit thinner if it would have been a little airier?
The flavor was surprising. I had read Abe’s comments about needing a surprising higher amount of salt because of the high hydration. (another comment about that next). I put in ½ tsp MORE salt than I usually add to a 500g loaf and it probably needed at least another ½ tsp.for the full 2 tsp measure. Same with the bread spice and coriander and dates. I believe any additions need to be very generous in amount for this loaf for their flavor to come through. The BW flavor is very bland and inoffensive with a slight green,maybe sulfury taste. Reminds me of egg yolk flavor but there are no eggs in it.
About the hydration….I did not measure the water directly. I weighed the 500g of groats and added water to cover and let it absorb. It was drained,rinsed and then blended with just enough water to attain a thick,slightly pourable batter. When I was done blending, I weighed the batter and was very surprised that it showed 239g of water was used. I checked and re-checked my notes as it is hard to believe. My handwriting is clear, maybe my eyes misbehaved.
“500g BW groats,739 total dough weight= 239g water.”
If I was evaluating this loaf as a GF loaf, I would say it lacked enough structural ingredients like psyllium/xantham/flax gum, eggs,and dairy. These ingredients are necessary to expand and develop a little more airy crumb in a GF loaf. As a result, the crumb was dense but not gummy. It had good flavor and chew. The crust-despite being sprayed to keep it moist while fermenting- was a little too chewy for my taste.
I have another recipe using commercial whole BW flour and Brown rice flour (because I didn’t have enough BW flour) that I prefer. The crumb is less dense and there is a little more flavor. Of course, it is a more traditional recipe with whole Bob’s Red Mill BW flour (imparts a lovely dark brown color), yeast, egg & psyllium for structure and oil for a little tenderness. The recipe is posted higher in the post and also below.
**********************************************************************************************************
PREVIOUS BAKE WITH THE RECIPE HERE :
Compare to BW Br Rice loaf made with Bob's Red Mill whole BW flour and yeast/psyllium/egg:
This 2nd (darker) crumb shot is a different bake and the link to that recipe and post is provided.
The crumb is drier and less dense with better "bread" structure.
***********************************************************************************************************************************
A BIG thanks to Abe for calling for this Community Bake on a really interesting loaf. BW is my new GF favorite bread and I will continue to experiment both as GF and as an additive to wheat based breads.
The way i've homed in on my way of doing it with the many tweaks i've made over time. I've gotten it down to a good consistency with lovely results. The video with single rise seems to be lacking in flavour and/or leaves a big variable for the timing.
I think this way of baking buckwheat bread can result in a very tasty loaf. You just have to repeat it a few times to get the feel for it. I don't measure the ingredients anymore. Got better results going by feel. Whatever the crumb is like I get such lovely flavour especially when toasted. With or without add-ins. Structure is just as good, if not better, than a gluten free bread with binders.
I think you can get a better crumb then that. One very similar to the second bake you did. It's just a matter of hydration, how it's handled and timing. It's worth repeating. Slice thinly and toast generously.
Glad you enjoyed the process, hope you try it again and very lovely previous bake. That looks fantastic.
Really glad I tried this one and the idea of 'bread all in one' with the raising agent being intrinsic to the seeds an intriguing concept.
The seeds had sprouted after 24 hours prior to blending).
Made this following Abe's method. It has a bit of a strange and strong smoky flavour it picked up during fermentation, which definitely smelt 'funky'. Since I know buckwheat bread can have a sour aftertaste actually did a taste comparison with a loaf of commercially bought bread, and definitely this flavour is something my loaf has that the commercial one doesn't and I think it came from the fermentation with the funky smell to it.
(comparison of toast made from my loaf on the left with a bought loaf of a buckwheat seeded bread on the right).
So, if I was to repeat I'd say that it is necessary to wash the sprouted buckwheat and replace with clean water before using the stick blender as the funky smell was already present when I blended. And also think that it might encourage a better microbial composition if it was kept at a cooler temp than the 25°C that I kept it at.
Thanks for the bake idea, it sure was interesting.
I get that too. As if it's the mineral content of the buckwheat being very forward when fermented. The funky aroma is more like an earthy grassy smell but not unpleasant. That looks like a good amount of sprouting when soaked for 24 hours.
Very nice bake and glad you enjoyed the process. This recipe is very forgiving and when you try it again make tweaks. You might want less water or more water. Same goes for salt. Then there's the timing.
Seems to be the mantra of what I learn first whenever I start something new.
I bought two bags of Buckwheat, Groats and whole seeds. I soaked both and left the groats out at room temperature (around 70F:21C) and put the whole seeds in my proofing box at 84F:29C. After about 4 hours the seeds were starting to sprout, but the groats, not so much. Left them overnight and the seeds had roots longer than the seeds and the groats were just starting to show signs of sprouting.
I don't ferment anything without adding in something to make the environment inhospitable for all the nasties out there, so I added a TBL of sour from my fridge (non-leavening) it was either that or some yogurt: Whipped out my trusty electric hand blender which made quick work of the groats.
I then went to work on my seeds but had to stop when the blender started to smoke and smelled of burnt plastic.
Not deterred, I took out my food processor, added a bit more water and after about 15 minutes had a reasonable-looking batter.
Covered both and put them in the proofer @ 85F:29.5C for the night.
This morning both had risen nicely so I mixed in the salt ( oops, forgot to put it in earlier ) and went with a pure unflavored bread first, to see what the base was so I would know what might compliment that flavor.
After tasting the whole seed batter it was clear that the husks had not been ground nearly small enough for human consumption so, even though the taste was excellent - I had to toss it for textural reasons.
The Groats are fermenting in a seasoned cast iron loaf pan and will be baked in another hour or so.
Baked with steam for quite a while, still cooling, I cut off a bit to taste. Has a mildly tart/nutty taste with a hint of grassy overtones. Not bad at all. It would go well with a touch of caraway, some walnuts, and perhaps almonds. It is a savory taste that would go well with sharp cheese. While sweet dried fruit wouldn't clash, I don't think I would ever add it to this recipe. Toasting will have to wait till tomorrow, but IMO it doesn't seem to knead (snicker) toasting.
Got a good rise from it and hopefully a nice crumb. You have described the tasting notes very well. If you think it is tasty as it is just wait till you toast it.
Glad you've enjoyed the process and have had a successful bake. Another natural ferment technique.
After it cooled I took it over to my neighbor's house (they love dense flavorful bread) and left without the bread :0).
I'm thinking I'd like to resume your attempt at a fermented malt. After reading your account I think the solution is to add some sour after sprouting to prevent it from going bad before it can get started. BW seems to be a lot more active(fermentable) than rye, so I may start the 140 saccharification a little sooner as well, I'll play it by ear (taste) and get back to you in the next few weeks.
I followed Tom's version of making the bread and it turned out delicious - so pleased with the bread -
added bagel flavoring, dried coriander leaves, crushed garlic
thank you Tom