Hansjoakim was a regular contributor to thefreshloaf for a long time, He was a physics graduate student at the time, as I recall, and an amazingly adventurous and talented chef and baker. In September, 2009 he posted what he called his "favorite 70% rye." I asked him for the formula and baked it myself a week later. It was easy to see why it was a favorite. It was an easy dough to handle for a 70% rye, and it was delicious to eat.
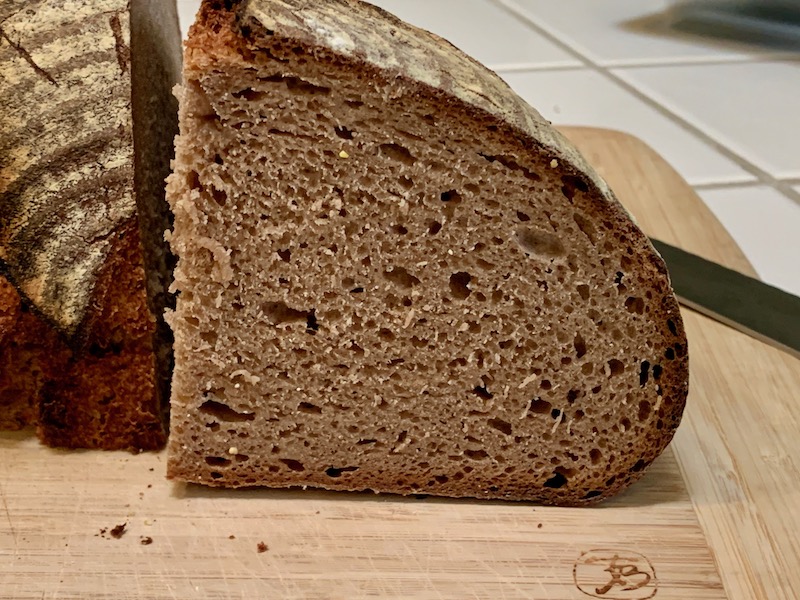
Over the intervening years, I have made this bread a few times. Every time I make it, I wonder why I have let so much time pass since the last bake. This week, I baked it again, and it is as wonderful as ever. I baked it yesterday. Let it rest wrapped in baker's linen overnight and had some with butter and smoked salmon for breakfast. Seriously yummy stuff!
Looking at my write-up from 2009, I found it could stand re-formatting and editing. So, here it is ...
Total Dough | Wt (g) | Baker’s % |
Medium rye flour | 441.5 | 70 |
AP flour | 187 | 30 |
Water | 472.5 | 75 |
Salt | 11 | 1.8 |
Total | 1112 | 176.8 |
55% of flour is pre-fermented.
Rye sour final build | Wt (g) | Baker’s % |
Medium rye flour | 218 | 100 |
Water | 218 | 100 |
Ripe rye sour | 11 | 5 |
Total | 447 | 205 |
Mix the rye sour final build the day before you plan to bake. Mix all the ingredients in a medium bowl and cover tightly. Ferment for 14-16 hours at room temperature. For example, if you plan on making the bread in the morning, you can mix the rye sour the night before.
Final dough | Wt (g) |
Medium rye flour | 218 |
AP flour | 187 |
Water | 249 |
Salt | 11 |
Rye sour (all of above) | 447 |
Total | 1112 |
Procedure
- Dissolve the rye sour in the water in a large bowl or the bowl of a stand mixer.
- In a medium bowl, whisk together the flours and the salt.
- Add the flours and salt to the large bowl and mix thoroughly. If mixing in a stand mixer, mix with the paddle at Speed 1 for 3 minutes. Switch to the dough hook, and mix at Speed 2 for 3-5 minutes. You may need to scrape down the bowl once or twice during mixing. The dough should form a loose ball but remain a thick paste with little dough strength.
- Transfer the dough to an oiled bowl and cover it tightly. Ferment for 1 hour at 78-80ºF. It won't expand much if at all.
- Transfer the dough to a floured board and pre-shape into a round. Cover and let rest for 5-10 minutes.
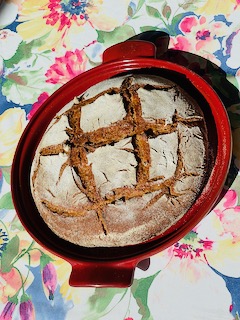
- Shape into a round and place in a floured banneton/brotform. Note: If you want to dock the loaf (make lots of holes in the top to release steam), put it in the basket seam side up. If you want the folds to open chaotically, place it in the basket seam side down.
- Cover the loaf with a towel or place the banneton/brotform in a food-safe plastic bag and seal it.
- Proof for about 2 hours. (Mine usually proofs in about 1 hour, 45 minutes). The loaf will expand by 50% or so.
- One hour before baking, pre-heat the oven to 480ºF with a baking stone and steaming apparatus of choice in place.
- Dust the bottom of the loaf with corn meal or semolina. Transfer it to a peel. Steam the oven and transfer the loaf to the baking stone. Turn the oven down to 460ºF.
- Bake at 460ºF with steam for 15 minutes. Then, remove the steaming apparatus and turn the oven down to 440ºF.
- Bake at 440ºF for 20 minutes, then turn the oven down to 400ºF. Bake for another 15-20 minutes. Note: If the crust is getting too dark, you can turn the oven down further for the last 5-10 minutes.
- The loaf is fully baked when the crust is firm, the bottom of the loaf sounds hollow when thumped and the internal temperature of the loaf is at least 205ºF.
- When the loaf is fully baked, remove it to a cooling rack. Let it cool completely (2-3 hours), then wrap it well in baker’s linen or a tea towel, and let it rest for 18-24 hours before slicing.

Happy baking!
David
- dmsnyder's Blog
- Log in or register to post comments
Nice to see you David. That’s a lovely bread and I haven’t made it in a long time! I always love the chaotic cracks as well. Hope you are doing well. c
Thanks for your comment. I haven't made this in a long time either. A mistake. ;-)
I'm well. Vaccinated and boosted to the max and planning on seeing family for the first time in 3 years!
I hope you and yours are as well, as well.
David
David, that is fine looking loaf, and the oven spring is impressive. Before posting this comment I looked back at my blog following my bake of this bread in July 2018 (yikes, four years ago -- was it that long ago?). My loaf turned out fairly flat with a height of perhaps three inches. You have inspired me to try this bread again.
Great to see any post from you, and I am glad to hear that you and your family are doing well. (By the way, your posting on BBGA about baker's math was superb.)
Happy baking.
Ted
I have found that proofing high-hydration loaves and high-rye loaves in brotformen smaller than you would expect for the loaf's weight results in a higher loaf after baking. So, this 1100g loaf was proofed in a brotform ordinarily used for 500-700g boules. Hope that makes sense.
Happy baking!
David
Beautiful loaf and one I'll have to try. I love your Jewish Sour Rye recipe and will definitely take your suggestion that this is one to put on the baking list!
Happy baking!
David
This is such an incredible loaf for 70% rye David. Great tip you shared about using a smaller banneton than usual to get more height out of the bake. I’ll have to try this the next time I feel like having a rye loaf.
Benny
If you try using a smaller brotform than normal, please let me know what you think of the result. I started doing this after baking a 90% rye that spread out more than I liked. I've practiced this technique about 10 times so far with uniformly good results.
David
I had to try this as well. Thanks to your excellent description It was easy to follow the recipe. I made two changes: (1) I added 1 g of salt to the rye sour. I tried to follow the deliberations of the well known German blogger and author Lutz, see here: https://www.baeckerlatein.de/monheimer-salzsauer-verfahren/. This is probably worth another discussion. Regardless, the claim is that adding a portion of the salt to the rye preferment is beneficial to the taste and outcome. (2) I used my cloche to bake the bread. It turned out nicely. It remained relatively flat, however, similar to what Ted had commented on. I have only one banneton, one size fits all. It may not be as small a s the one that you described. I like the taste a lot. Thanks, Tom.