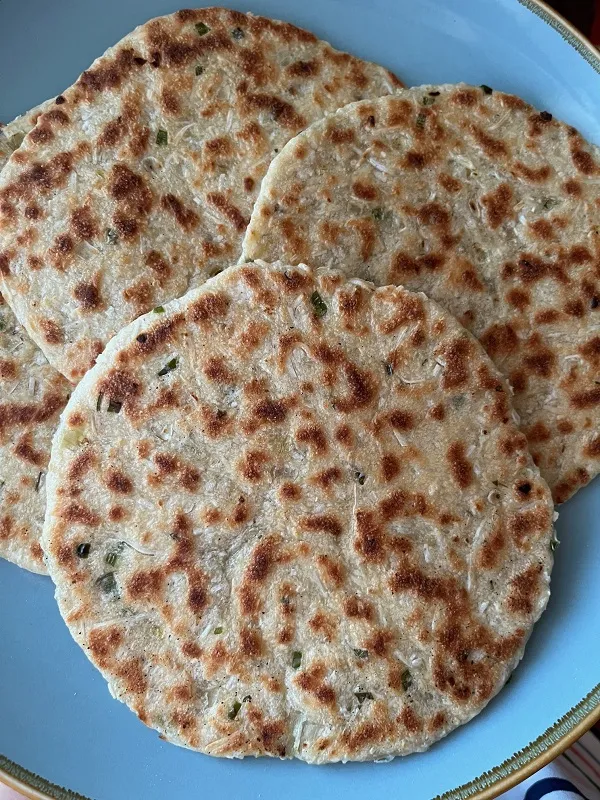
Here's a fancier, takes longer to make, savory and smells-oh-so-good flatbread: Pol roti (coconut roti)!
I've had this on my "To-make list" since mid-2021. Fresh chilis are only in my shopping list when I make chimichurri sauce. This time, I bought extras to add them into this recipe. Chimichurri is something I use everyday because it's actually a high antioxidant condiment. Even though this bread needs no leavening, I chose to use sourdough discard and Sharbati atta flour in my version of pol roti. The dough gets slightly puffy during the long resting period and extra uncooked rotis are kept in the freezer instead of the fridge. The atta flour produced a softer roti with a lovely flavor that I enjoy.
Pol roti with sd discard & chimichurri
Adapted from https://hungrylankan.com/recipes/the-best-sri-lankan-coconut-roti/
https://www.theflavorbender.com/sri-lankan-pol-roti-coconut-roti/
240g all purpose flour
120g Sharbati atta flour (or whole wheat flour)
8g salt
100g unsweetened desiccated coconut
120g coconut milk (I used full fat canned)
80 to 100g water
120g sourdough discard
10 to 15g chimichurri sauce, chopped version (recipe below)
90 - 100g onion, chopped (approx 1 large onion)
2 green chilis, halved lengthwise, de-seeded* and chopped
Optional (but totally worth it): 10-20 5 to 10 curry leaves, sliced thinly or chopped
*Be sure to avoid touching your face when handling spicy green chilis. De-seeding is optional, it helps reduce spiciness. Keep them in if you like spicy roti.
Chimichurri
Adapted from https://cafedelites.com/authentic-chimichurri-uruguay-argentina/
1/2 cup virgin olive oil
2 tablespoons rice wine vinegar / lemon juice
1/2 cup parsley, flat leafed, chopped
6 to 8 cloves garlic, finely chopped or minced
1 tsp dried chili flakes
1/2 tsp dried oregano
1/4 tsp ground cumin
1/4 tsp ground turmeric
1/2 to 1 tsp salt, to taste
1/4 tsp ground black pepper, to taste
In a large mixing bowl, soak desiccated coconut and curry leaves (if using) in coconut milk for 45 minutes to 1 hour. Then, stir in 80g of water, sourdough discard and chimichurri, chopped onion and green chilis.
In a medium bowl, whisk together the flours and salt. Add this to the wet ingredients. Mix by hand or with a spatula until a dough forms, adding 10-20g of water, if needed, to make a slightly sticky dough, with no dry bits of flour. 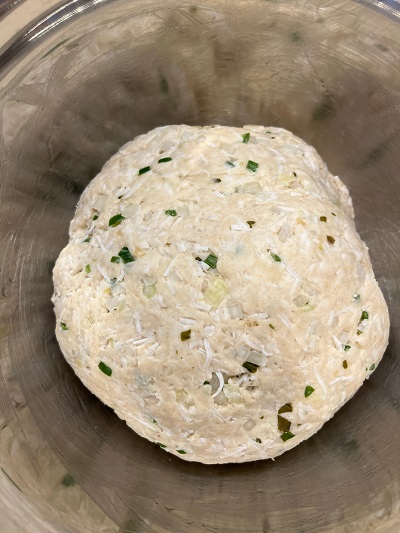
Shape the dough into a ball (in the bowl or on a lightly greased counter), lightly greasing the dough surface with olive oil. Cover and let the dough rest for 4 - 6 hours at room temperature or up to 24 hours in the fridge.
After resting, gently deflate and shape the roti dough into a log or disc. Divide into 10 to 12 pieces, weighing about 75 to 95g each. Fold and roll each piece into a ball. Lightly grease each dough ball with oil, cover and let them rest for 15 to 20 minutes. 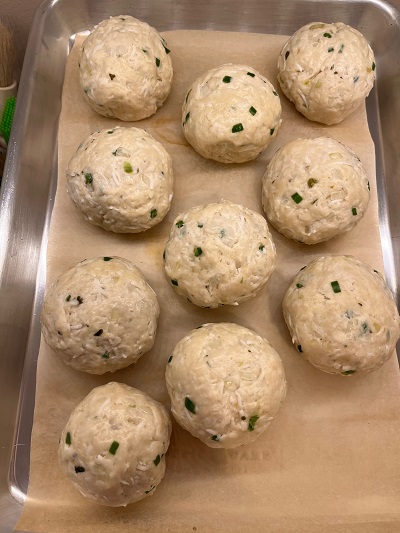
Flatten a ball into a disc and roll into a circle of about 3 to 6mm (1/8 to 1/4 inch) thick. Transfer to a parchment or silicon lined bake sheet.
Cover the rolled out roti with a damp tea towel to prevent drying and keeping a piece of parchment between each piece to prevent sticking. Roll out the rest of the roti dough.
At this point, extra rolled out roti may be frozen for cooking later. Simply stack the pieces of roti between parchment paper and double wrap tightly in clingfilm. Then, place them in a resealable bag and freeze for up to a month. Thaw them slightly on the counter for about 15 minutes before cooking.
Preheat a frying pan, skillet or tawa over medium heat. When the pan is heated, transfer a roti onto the skillet and cook for about 3 to 4 minutes, until the brown spots begin to develop all over the base of the roti. Flip the roti and cook the other side for 3 to 4 minutes, until brown spots appear as well. 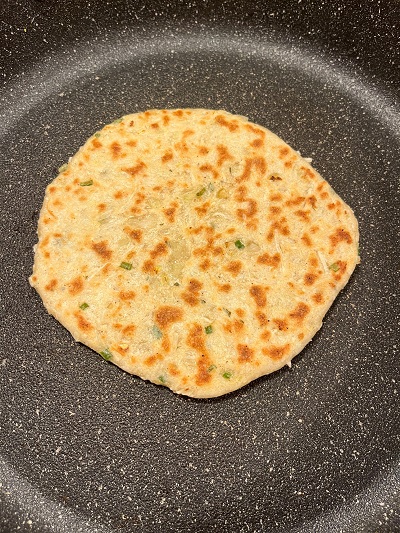
For thicker roti (6mm or more in thickness), cook on medium low heat instead - 4 to 5 minutes on each side.
Transfer the cooked roti to a rack to cool slightly before serving. Cover with a tea towel while cooking the rest of the roti. Serve these rotis warm. :)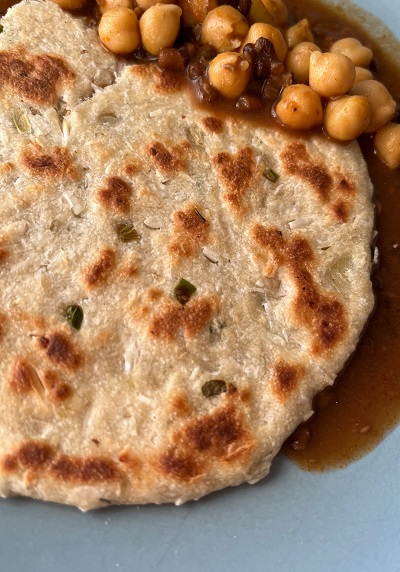
The next bake happened because of leftover eggnog. Since making the small pastries in my last post, I prepared a batch of dough to freeze and of course, to use up eggnog! The initial plan was to make a loaf of bread but I split them in two and made them into two batches of pastries. They aren't as rich but the subtle notes of nutmeg and cinnamon from the eggnog were worth it. And using eggnog in the Tangzhong sure made these buns soft and yummy!
Eggnog bread / buns
Tangzhong
100g eggnog
20g all purpose flour
Dough
All of the Tangzhong
160g eggnog
3g instant yeast
1 large egg
20g sugar
3g lemon zest
130g Kamut flour
280g all purpose flour
6g salt
40g unsalted butter
Fillings
Chocolate
50g dark chocolate (70%), melted
15g unsalted butter, melted
5g cocoa powder
20g chocolate hazelnut spread
A pinch of salt
Citrus sugar
30g sugar
20g lemon and orange zest
A pinch of salt
30-50g unsalted butter, for lamination
Egg wash
1 large egg
1 tbsp eggnog or milk / cream
A pinch of salt
Once the dough is fully developed, let it proof at 25-26°C for 1 hour. Then, divide the dough into smaller batches (if not using all 800-ish grams of it).
For same day bake: Cover/wrap the dough, freeze it for 1 hour followed by 30 minutes in the refrigerator.
For a later bake: Cover/wrap the dough, freeze it. Remove to the refrigerator the night before bake-day.
Tip: to prevent shaped buns from tipping or falling apart too much during the final proof or during the bake, use paper muffin cups. Flatten or widen each muffin cups a few minutes before rolling out the dough.
01042022 here are some fridge buddies to show you how the muffin cups are used:
For chocolate swirl buns
Mix the filling ingredients and set aside to cool. Roll out the dough, spread the filling with an offset spatula. Next, either letter-fold, fold in two or roll the dough up into a log.
Spreading the dough on opposite sides and then rolling both ends toward the middle will produce something these (these were filled with masala sugar):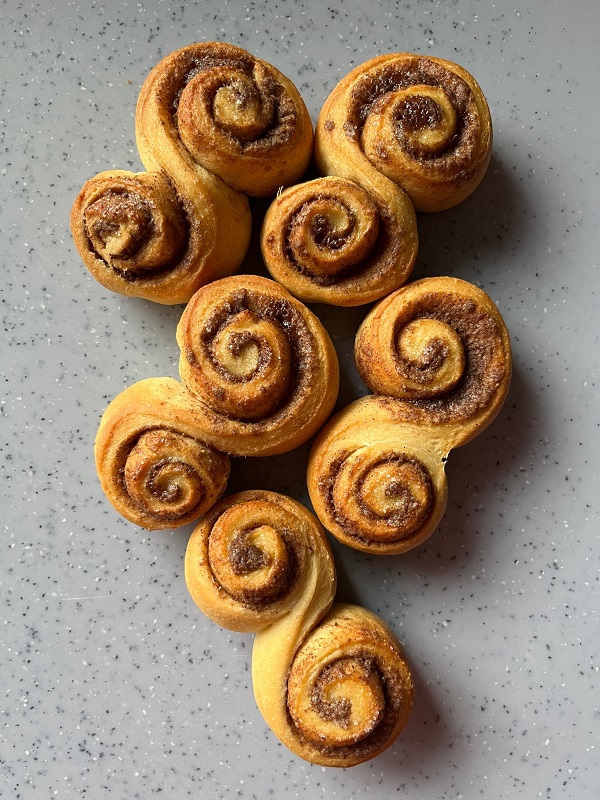
Letterfold or fold in two, slice and then braiding the dough will produce the braided buns in the top row. Rolling one way or from opposite ends toward the middle will produce the buns on the bottom row (chocolatey fillings here): 
For citrus morning buns (middle row), spread softened butter on 2/3 of the rolled out dough. Then, letter-fold the dough. For more layers, use remaining butter and fold the dough in two (there are other ways to incorporate layers of butter here but it would require lots of writing... so it's obvious I made a lazy version here). Cover or wrap the dough and chill it for 15-20 minutes (not too long otherwise the butter will become too hard).
Once chilled, roll the dough to flatten it to about 6 to 8mm thick, making sure to keep the rectangle in shape. Brush a thin layer of egg wash and sprinkle the citrus sugar all over the egg wash, keeping a 1" edge free of filling. Start rolling the dough from the opposite end of this edge. Roll the dough snugly (not too tight as the middle might rise during the bake) until the edge with only egg wash. This will help seal the dough log. Let the dough rest over the seam for 5 minutes before slicing into rolls.
Place shaped buns/pastries on the paper cups and let them proof at room temperature (22-24°C) for 45 to 60 minutes. Brush egg wash halfway through the final proof or just before baking.
Bake at 180°C for 15 to 20 minutes until the buns/pastries are golden brown and cooked through.
Until next moon, happy baking everyone :)
- Christi
- Kistida's Blog
- Log in or register to post comments
I always learn something from your posts. Today it is the rolling up from each end and using masala sugar!
Thank you
-Jon
And glad to share them! I continue to learn so much from all the experts here :)
- Christi
So beatiful! Thanks for sharing.
Thank you for sharing your wonderful ideas and recipes too! :)
- Christi
Spicy coconut roti... nice. Do you get the flavour coming through?
I made "flatbreads" this week too...
Here are some puffy air fryer "naan" reheating for butter chicken. I've given up on rolling out flatbreads and this time tried stretching them.
But now I'm thinking about coconut :)
Your shaping skills are amazing. So much more inviting than a simple roll-up!
I've never tried air fryer-anything before (been living under some rock). Those naan look so tasty! One thing I learned time and time again is to leave the balls of dough to rest a bit before any shaping. For flatbreads, after a bit of rest it's easier to flatten them with my hands and using fingertips to stretch/push them out. Then, I roll them a lil. I never get proper circles whenever I try to make larger flatbreads but it doesn't matter as long as you get a good roti at the end :)
As for the heat from the chilis I used for the pol roti, the HEAT came through even after I de-seeded it and my fingers were "warm" for a long time. Having mixed in the dough, a hint of it can be tasted and combined with onions, coconut and that little bit of chimichurri, I was quite happy with this bread. My husband who's been avoiding breads/cakes/cookies actually ate a few of these (hehehe)
- Christi
Christi, your bakes are always exciting and creative, the buns are amazing as always. Bet they are all delicious.
Benny
I'm looking forward to making some buns for Easter next! Happy weekend! :)
- Christi