Sourdough Bread for Zojirushi Dual-Paddle Bread Machines
(and other bread machines with a user-programmable cycle, sometimes called "Home Made Cycle")
Version 3.4
23 February 2022
(by troglodyte)
Introduction
This is a recipe to make sourdough bread in a Zojirushi double-paddle bread machine. It has been tested on Zojirushi models BBCC-V20 "Home Bakery Traditional" and BB-PDC20BA "Virtuoso Plus". It should work on other bread machines with a 2 pound capacity and a user-programmable cycle. The user-programmable cycle feature is essential for long rise times.
This is a recipe of convenience. It makes good sourdough sandwich bread. It does not make "artisan" bread. The benefit is consistent, tasty bread with a minimum of effort and time. It is sized to be suitable for a toaster or sandwiches. It has a good sourdough flavor.
This recipe relies on the wild yeast in your sourdough starter as the leavening for your bread. It does not use commercial yeast. Be sure your sourdough starter is fresh and active. See the last page for sourdough starter preparation instructions and a suggestion for how to make your sourdough bread "extra sour." You can obtain free sourdough starter from here: http://www.carlsfriends.net/
Ingredients
1-1/2 teaspoons olive oil
1 cup bread flour (= 4.7 ounces by weight. This is the first of two cups.)
1 teaspoon salt
1 teaspoon sugar
1 Tablespoon butter or margarine
1 cup bread flour (= 4.7 ounces by weight. This is the second of two cups.)
2 cups sourdough starter (See page 3 for sourdough starter instructions.)
Recommended but optional: 1/4 teaspoon powdered dry milk mixed with 1/2 teaspoon water ... or ... 1/2 teaspoon milk
(Especially helpful for bread machines without a heating element in the lid)
Directions
1. Measure the extra virgin olive oil. Dip your fingers in the measuring spoon and lightly coat the sides of the pan. Put any remaining olive oil in the pan.
2. Distribute the first cup of bread flour over the bottom of the pan.
3. Sprinkle the salt and sugar over the top of the flour in the pan.
4. Cut the butter into small chunks and distribute in the pan.
5. Add the second cup of bread flour. Use it to cover the salt, sugar, and butter to separate them from direct contact with the sourdough starter before the mix cycle begins.
6. Pour the sourdough starter over the other ingredients.
7. Start the bread machine on the Home Made cycle. NOTE: See the cycle times listed below.
8. At start time: Note the total time and subtract 70 minutes (1 hour 10 minutes) from it. Set a separate kitchen timer.
9. Recommended: Once or twice during the long rise period, check the rising loaf. If you notice any large bubbles forming at the top of the loaf, pop and collapse them gently with a razor blade, a bread lamé, a very sharp pin, or a very sharp knife.
10. When the kitchen timer sounds, the loaf will be nearly done with the rise. Open the lid on the bread machine. You have 8 minutes before the bread machine switches to the bake cycle.
11. If there are large bubbles at the top of the loaf, pop and collapse them gently with a razor blade, a bread lamé, a very sharp pin, or a very sharp knife.
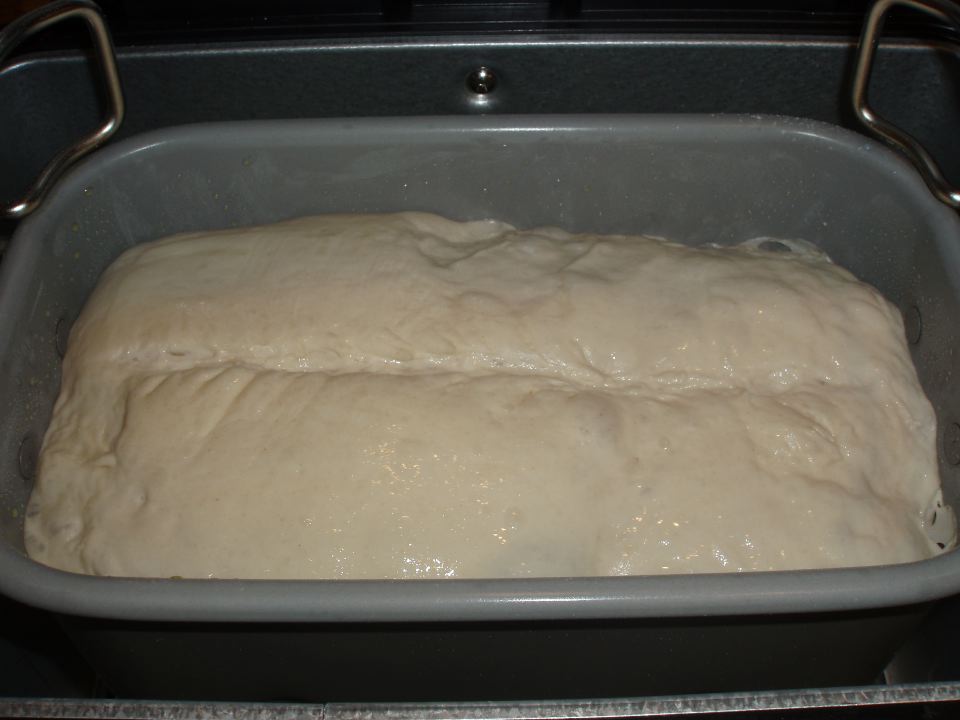
12. Slash the top of the loaf from end to end along the long axis using with a razor blade or bread lamé. This will allow the crust to expand without cracking during "oven spring."
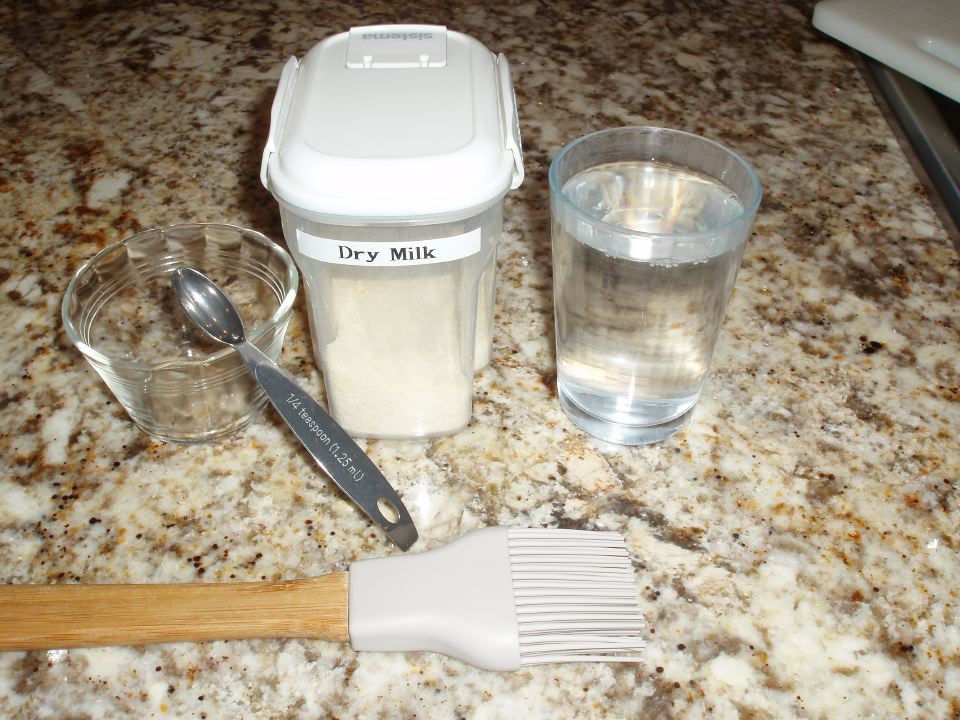
13. Recommended but optional: Gently brush the milk to coat the top of the loaf. The milk helps brown the crust, especially for bread machines without a heating element in the lid.
14. Close the lid. The bake cycle will start soon.
15. When baking completes, remove the pan from the bread machine and allow it to cool for 15-30 minutes.
16. As soon as practical, remove the warm loaf from the pan and allow it to rest on a cooling rack for at least two hours before slicing and serving.
Zojirushi Home Made Bread Cycle Times for Sourdough Bread Recipe
Pre-heat: 30 minutes
Knead: 18 minutes
Rise 1: 1 hour, 30 minutes (= 90 minutes)
Rise 2: 1 hour, 30 minutes (= 90 minutes)
Rise 3: 1 hour, 30 minutes (= 90 minutes)
Bake: 1 hour, 2 minutes (= 62 minutes)
Keep Warm: Off
Total Time: 6 hours, 20 minutes.
Kitchen timer setting for Sourdough Bread Recipe:
(See Directions, Step 8, above): 6 hours, 20 minutes minus 70 minutes = 5 hours, 10 minutes
Set your kitchen timer for 5 hours, 10 minutes. When the timer sounds, you have approximately 8 minutes for crust preparation, steps 8 through 14. You will pop any bubbles on top, slash the loaf, and (recommended) brush the top of the loaf with milk.
Sourdough Starter
You can obtain free sourdough starter here:
http://www.carlsfriends.net
Follow the "How to Revive Your Start" directions on the website to get your sourdough starter going.
Once you have an active sourdough starter, here is the method that I use to prepare and maintain the sourdough starter after that. I learned it from my uncle, who was an expert:
The day before:
1. Mix 2-1/2 cups bread flour with 2 cups water. (I asked my uncle, and he said to use bread flour. If you can’t get bread flour for your starter, all purpose flour works okay.)
2. Use a plastic whisk or a large non-metal spoon. Stir slowly at first to avoid a mess, then faster once it is blended to mix in some air.
3. Press or stir out the big lumps. A few small lumps are okay. It does not have to be lump-free.
4. Take your 1 cup of sourdough starter "seed" from the refrigerator, and stir it thoroughly into the mixture, including the liquid "hooch" on top. Stir slowly at first so the hooch doesn’t splash out.
5. Cover and allow the starter to bubble on the counter at least 4-6 hours. Longer (e.g., 8-10 hours or more) is fine. When the starter is foamy, it is ready.
6. Take 1 cup of starter and put it in a non-metal container in the refrigerator. This will be your sourdough starter "seed" for the next time.
7. The remaining sourdough starter can be used for baking.
Every two weeks:
- Repeat at least every two weeks. More often is better. Maximum: One month, and don’t let it go for a month too often or your sourdough strain will lose its activity, and possibly die.
Sourdough Starter Notes
- You can make sourdough starter as often as you like. Bakeries make batches of sourdough several times a day.
- Leave a note in your calendar when you "turn over" the sourdough starter. It helps remember how long it has been since the previous time and to plan for the next time.
- The sourdough starter can get too thick if you make it frequently. Usually the hooch on top keeps the liquid/flour in balance. Reduce flour or add water if it gets too thick.
- Do not allow metal to touch your sourdough starter. No metal spoons, bowls, or containers. When you are baking bread, a metal bread pan is fine, no problem there.
Helpful Hint to Get a Strong Sourdough Flavor from Your Sourdough Bread
For a stronger "extra sour" sourdough flavor, store the sourdough starter for your bread in the refrigerator for an extra day or two before making the bread. (Remember to separate your sourdough starter "seed" first, so you can use that seed make more sourdough starter the next time.) The rest of the sourdough starter continues to ferment (culture) slowly in the refrigerator, creating a deeper, more complex, delicious sourdough flavor.
Additional Notes (added for The Fresh Loaf, not in my recipe file):
This bread is a family favorite and I make it often. It is designed to make right-size, right-shaped, good tasting sourdough bread that fits in the toaster or a fold-top sandwich bag. It does not yield "artisanal" bread. This is a recipe of convenience, but it still requires human intervention with the bread machine. It helps to check it once or twice during the rise cycles to pop large bubbles. In addition, the recipe calls for you to slash and coat the top of the loaf with milk just before the bake cycle begins.
Caution:
If you omit slashing the bread as instructed, then the loaf may pop or "burst" unexpectedly. What typically happens is a hard shell crust forms on top, then it cracks along the sides, and finally it separates from the rest of the loaf as it bakes. If you try to slice it, the top comes off each slice. That is why the slashing step is important, even though you are using a bread machine.
Work began on the original version of this sourdough bread recipe in 1978. I keep notes and adjust the recipe, testing variations and updating the file accordingly. Over time, the goals of this recipe evolved into the following:
- Leavened with sourdough starter only; no commercial yeast.
- Convenient and easy to prepare in a bread machine, albeit one that has user programmable cycle times.
- Zojirushi has made user-programmable models for over 20 years, and those are the ones I have used. Breville also makes a user-programmable model; I have not tried it.
- Tastes as good or better than store bought "extra sour" sourdough bread.
- The target for flavor comparison is the "San Luis Sourdough" brand of sourdough bread that is sold where we live. If our sourdough bread is as good or better than theirs, then it is a win for the family.
- The recipe is reliable and repeatable.
I weigh flour ingredients at 1 cup = 4.70 ounces (= 133 grams). It a personal standard that I chose a long time ago. There were no common flour weight measuring standards long ago. There does not appear to be a common standard today, either.
The recipe was originally constrained by the 90 - 120 minute limits on rise cycle times for older Zojirushi bread machine models. A few months ago, we purchased a Zojirushi BB-PDC20BA "Virtuoso Plus" and have been using it. Our BBCC-V20 "Home Bakery Traditional" is still going strong after over 20 years, but now it serves as our "backup" bread machine.
I have used three different sourdough starters with this recipe. For the last decade or so, I have used Carl Griffith's 1847 Oregon Trail Sourdough Starter, which you can obtain at no charge. See this webpage:
http://www.carlsfriends.net.
Regarding that "extra sour" flavor that we like:
The directions are accurate, but what I actually do is more complicated. When I make this bread, there is a small amount of leftover sourdough starter. I keep the leftover sourdough starter in the refrigerator, separate from the "seed starter". When I need two cups of sourdough starter to make this sourdough bread, I use whatever leftover starter remains from the previous loaf first. Yeah, it may have aged in the refrigerator for a week or two. After using up the old starter, I "top it off" to two cups using the freshly made starter. (The "freshly made" starter itself may have "aged" in the refrigerator for a day or two as suggested in the directions.) Whatever new starter remains becomes the new "leftover starter" for the next loaf. Eventually the leftover starter builds up to two cups. When that happens, I make a loaf using the two cups of leftovers, without bothering to refresh the starter.
- troglodyte's Blog
- Log in or register to post comments
Thank you for sharing!
Yippee
Yay! Thanks for posting. This is a beautiful post and loaf!
It would be a big help to me if you could weigh the starter before you add it next time. It is hard to work with volume measurements of starter because the volume changes so much with activity.
It appears to me that you maintain your starter at 136% hydration = 16 / (2.5 * 4.7).
You say that you have a small amount of starter left over. You must bake more than this loaf, correct? I say that because you added 2.5 cups of flour to 2 cups of water, let it get foamy and then took out 2 cups. I'm guessing that leaves quite a bit of starter. What am I missing?
Again, thanks for posting. You clearly put a lot of work into explaining this.
I got the same question about the weight of starter and its exact hydration, Gary, and concluded from the text that it was 333g flour+454g water, approximately 800g starter, approximately 140%hydration. Such starter won't rise too much, if the flour is moist, in humid weather, but it will become very foamy.
It's because this starter (or leaven) is inoculated with one cup of starter from the fridge and one cup is later returned to the fridge.
Responses to Questions and Comments - Hydration, Weights, etc.
First and foremost, thanks to everyone for their encouragement, comments, and questions. I made sourdough starter yesterday. There is another loaf of bread rising in the bread machine as of this writing. I took careful measurements as I worked.
The hydration level of the sourdough starter is approximately 150 percent. See the calculations below.
The sourdough starter has the consistency of very thick batter. I would call it "gloopy." During fermentation, a thick foam forms on top. It does not expand like dough, but it can overflow its container if left out at room temperature. It won't overflow in the refrigerator if you leave an extra 3/4 inch (2 cm) of expansion space at the top.
How I Make and Use Sourdough
I keep approximately 1-1/3 cups of sourdough seed in an old ceramic "cheese spread" crock in the refrigerator. When I make sourdough starter, I measure the flour and water and mix them in a large glass bowl with a plastic whisk. Next, I add all of the seed from the crock and whisk until it is relatively smooth. I make sure that the "hooch" and the rubbery, elastic gluten in the seed is well mixed and spread throughout.
Next, I cover it with plastic and let it ferment for 6-8 hours on the counter. It will bubble and form a foamy top. When done, I give it a good stir. I transfer 1-1/3 cups to the crock for the next seed. I put the crock (with the seed) and the remaining sourdough starter in the refrigerator.
If you take out 2 cups of fresh starter, then you will have around 3/4 cup of extra starter remaining. I store that leftover starter in separate small square Corning Ware containers in the refrigerator and use it the next time I bake sourdough bread.
To make sourdough bread from this recipe, you need 2 cups of sourdough starter. First I put all of the leftover starter (from the Corning Ware) in a 2 cup measuring cup. After that, I take the freshly made starter and "top it off" until the measuring cup reads 2 cups of total sourdough starter. It is a mix of leftover and fresh starter. Using the old leftover starter reduces waste and adds a stronger "sour" flavor to the bread.
Eventually the leftover starter builds up to the point where you have 2 cups of it. In that case, you can skip the step where you make fresh starter and just use the leftover starter alone.
In case anyone cares, this morning I used about 1-1/2 cups of leftover starter and 1/2 cup of fresh starter to make the bread. The rest of the fresh starter becomes the leftover starter for the next sourdough bread, probably next week.
You can find a summary of my measurements below. I will use a separate post to deliver the full data in CSV format so you can copy and paste it into your own spreadsheet.
Summary Data
Sourdough Starter (28 March 2022)
Bread Flour 2-1/2 cups by weight at 4.7 oz per cup: 11.75 oz = 335 g
Water 2 cups measured by volume in Pyrex 2 cup: 17.35 oz = 494 g
Starter Seed (weighed): 9.15 oz = 260 g
(Note: The starter seed in the crock was slightly less than usual, not that it matters.)
Hydration = (Added Water Weight / Added Flour Weight) x 100
Example from these measurements: (17.35 / 11.75) x 100 = 148%
Rounding: Sourdough Hydration = 150%
(Note: Computed from fresh flour and fresh water ONLY. The starter seed from the previous fermentation was not included in this hydration calculation.)
Today's Loaf of Sourdough Bread (29 March 2022)
Flour (1+1 = 2 cups) measured by weight at 4.7 oz per cup - 9.40 oz = 266 g
Sourdough Starter - 18.45 oz = 522 g
(Measured by volume at slightly over 2 cups in Pyrex 2 Cup, then weighed)
Sugar = 1 teaspoon
Salt = 1 teaspoon
Stick Margarine = 1 Tablespoon
Lessons Learned
My 2 cup Pyrex measuring cup is approximately 4 percent high. When measuring liquids, I put the bottom of the meniscus on the 2 cup line.
-> Unless you are really, truly interested in the "raw data", skip this post.
Here are my measurements in CSV format. You can copy and paste the text below into a spreadsheet program (e.g., Excel). It should appear as four columns. If it pastes into a single column, then select that first column and choose Data -> Text to Columns with "comma" as the delimiter.
Sourdough Weights,29-Mar-22,,
,,,
Item,Scale Weight oz,Scale Weight g,Comment
Flour 1,4.70,134,
Flour 2,4.70,134,
Flour 3,2.35,67,
Total Flour,11.75,335,
,,,
Pyrex Measuring 2 Cup Clean and Dry,21.55,611,
2 cups Water (tare weighing),17.35,494,
Pyrex 2 Cup with Water,38.90,1103,
,,,
Glass Bowl Empty,52.45,1488,
Glass Bowl with 2-1/2 cups Flour by Weight (4.7 oz / cup),64.20,1821,
Glass Bowl with Flour and 2 cups Water by Measure before Mixing,81.60,2314,
Glass Bowl with Flour and Water after Mixing,81.40,2309,
,,,
Crock with Seed (from previous sourdough starter),30.40,863,
Crock after Dumping Seed into Glass Bowl before Cleaning,21.25,603,
Crock Empty after Cleaning,21.20,602,
,,,
Glass Bowl after Mixing in Seed,90.55,2569,
Glass Bowl after Mixing in Seed and Covered with Plastic Wrap,90.65,2570,
Glass Bowl with Cover after Fermentation,90.60,2568,
,,,
Crock Clean and Dry,21.15,601,
Crock with Water (Use this value to estimate seed volume),32.95,935,Measured: 1-1/3 cups
Crock with Fresh Seed,32.30,916,
,,,
Glass Bowl with Remaining Sourdough after Seed Extracted,79.05,2242,
Glass Bowl with Remaining Sourdough after Overnight in Refrigerator,79.00,2241,
Glass Bowl Minus Seed and Minus 2 Cups of Fresh Starter (for bread),59.50,1687,
,,,
Pyrex 2 Cup Clean and Dry,21.50,610,
Pyrex 2 Cup with 2 cups Fresh Starter for measurement,40.60,1152,
Pyrex 2 Cup after Scraping Out Fresh Starter,21.65,615,
Pyrex 2 Cup Clean and Dry,21.50,610,
,,,
Pyrex 1 Cup Clean and Dry,12.75,362,
Pyrex 1 Cup with Remainder of Fresh Starter (from Glass Bowl),19.45,552,Remainder: < 7/8 cup = < 200 ml
Glass Bowl after Scraping Remainder of Fresh Starter,52.80,1498,
,,,
Corning 1 with Leftover Starter,24.30,690,
Corning 1 After Leftover Starter Scraped into Pyrex 2 Cup,14.25,404,Yield: 1-1/3 cup = > 300 ml
Corning 1 Clean and Dry,14.05,399,
,,,
Corning 2 with Leftover Starter,17.40,494,
Corning 2 After Leftover Starter Scraped into Pyrex 2 Cup,13.55,385,Yield: 1/3 cup = < 100 ml
Corning 2 Clean and Dry,13.25,382,
,,,
Pyrex 2 Cup Full with Mixed Leftover and Fresh Starter,40.10,1137,Just over 2 cups
Pyrex 2 Cup Scraped (into bread pan),21.65,615,
Pyrex 2 Cup Clean and Dry,21.50,610,
Thank you! Wow. Very detailed. I appreciate the hard work you put into this.
I'm going to try making a tiny version.
Here is a link to a Google Sheet that attempts to encode this wisdom into baker's percentages.
Someone please give it a look and see if I've made any errors.
Troglodyte's bread machine sourdough
Here is a static paste of it.
On the Zoji, do those 3 rise cycles end with a punch down?
Also, I assume the rise cycles are heated. Any idea of the temperature?
No, the three rise cycles do not end in a punch down. There is a punch down between Rise 1 and Rise 2, and a punch down between Rise 2 and Rise 3. At the end of Rise 3, the Bake cycle starts without any physical action. This is true for both models of dual-paddle Zojirushi bread machines we have owned.
A long time ago, Zojirushi provided me with detailed cycle times and the other specifications about their bread machines. I wanted them to use as reference models for my home made (programmed) bread cycles. When we purchased the BB-PDC20 "Virtuoso Plus" model last Fall (2021), I wrote to Zojirushi to request the same information for it. Zojirushi refused, saying that it is now "proprietary information." That includes rise temperatures.
Our Zojirushi BBCC-V20 "Home Bakery Traditional" uses the following temperatures, according to the user manual:
Preheat: 82.4 F (28 C)
Rise 1: 82.4 F
Rise 2: 82.4 F
Rise 3: 100.4 F (38 C)
Bake: 254 - 290 F (123 - 143 C)
Keep Warm (not used in this recipe): 194 F (90 C)
Excellent! Just what I needed. Thanks.
"Proprietary information" is a joke. Anyone with a thermometer and a timer could work them all out and post them for all to see. Like their competitors haven't already done that.
I would love to see pictures after Rise 1, 2 and 3
Hi,
Thanks for the tip on the 1/2 t powdered milk and 1/2 t milk wash to brown the loaf.
I always use it now and what a difference in appearance it makes!
Picture Request (@gomike):
I saw the request for pictures and will post photos the next time I make the sourdough bread in the bread machine. Lately, I have been making sourdough baguettes in the oven instead of the bread machine. Please be patient, but I will get around to it. Anyway, I will try to take photos the next time, I promise!
Milk (@jo_en):
Thank you for the compliment. I felt the same way after I tried it myself. I was looking for something, but not as dark as an egg wash or cornstarch glaze. The powdered milk is in the cabinet just over the flour canisters. I tried it first and never looked back.
About my presence here:
I am gone from this site. It was made clear to me that my posts in other threads were not welcome here. I receive notifications when someone comments in one of the recipe blogs/threads and will try to help or respond to them. It is nice to know that people find and try the recipes I posted here.
@gomike asked for photos after Rise 1, Rise 2, and Rise 3. I made sourdough bread in the bread machine and took photos for Mike. There are differences in what I did and the recipe above, here are the details:
* Sourdough Starter Process: I followed my standard sourdough process of 2-1/2 cups flour, 2 cups water, and all of the seed from the crock in the refrigerator. The flour is weighed at 4.7 ounces per cup (total: 11.75 ounces). The water is measured in a standard 2 cup pyrex measuring cup, with the meniscus at the 2 cup line. The seed is approximately 1-1/3 cups of the previous fermented sourdough mixture from the refrigerator. After it ferments for 4-8 hours (around 6 hours this time), I reserve ~1-1/3 cups and put the crock back in the refrigerator. The rest of the sourdough starter remained in the plastic-covered bowl and also went back in the refrigerator. NOTE: This is a very "wet" starter, with a 148% hydration level. All I can say is that it was the way I was taught, many years ago, and it works for me.
* Sourdough Starter Flour: I bought a bag of unbleached high-gluten flour from a 50 pound bag I bought at Costco. This has been a problem. It is too strong - the excessive gluten makes everything too rubbery and stretchy. I have been mixing it roughly 50/50 with bleached all purpose flour from Walmart to make "bread flour". It works okay, not great. For sourdough starter, I weigh out 6 ounces of high-gluten flour and 5.75 ounces of all purpose flour to yield the 11.75 ounces (2-1/2 cups) of "bread flour".
* Sourdough Starter Refrigeration Time: I typically refrigerate the sourdough starter for 2 or 3 days before using it, to get the best flavor. NOTE: This particular starter stayed in the refrigerator for 5 or 6 days. That is too long. I prefer fresher starter (no more than 3 days old), but I am frugal. There was more hooch than usual, and the wild yeast is weaker than usual. I've done it before and it works for me. See the photos. Remember, this is a very wet (high hydration) starter.
* Bread Ingredient Notes: The ingredients list is a varient of the published recipe. I added a little extra salt and flour, to compensate for using up the old starter. The starter filled the measuring cup, rather than stopping at the 2 cup line. (I took out the 2 cup and 1 cup pyrex measuring cups, filled the 2 cup beyond the line to the pour spout like the starter was, then decanted the excess into the 1 cup. When the water reached the 2 cup line, there was 5/8 cup in the 1 cup measuring cup. I also had to compensate for that too-high-gluten flour. Here is what I used, added to the Zojirushi bread pan in order:
* Ingredients:
- 1/2 Tablespoon extra virgin olive oil, rubbed around with fingers to coat the pan, spindles, and paddles. Some will pool on the bottom when you're done.
- 1 cup high gluten flour, measured on the kitchen scale at 4.7 ounces.
- 1-1/4 teaspoons salt
- 1 teaspoon sugar
- 1 Tablespoon stick margarine
- 1-1/2 cups all purpose flour, measured on the kitchen scale at 4.7 ounces, plus an additional 2.35 ounces.
- Approx. 2-5/8 cups sourdough starter (a 2 cup Pyrex measuring cup up to the pour spout. See Bread Ingredients note above).
* Cycles:
- Rest: 30 minutes
- Knead: 18 minutes
- Shape: Off
- Rise 1: 1 hour, 30 minute (90 minutes)
- Rise 2: 1 hour, 30 minute (90 minutes)
- Rise 3: 1 hour, 30 minute (90 minutes)
- Bake: 1 hour, 6 minutes (66 minutes)
- Keep Warm: 1 hour
* High Hydration Dough: The dough is usually wet, but this was wetter than usual. Unfortunately, I was not there to observe the start of the kneading cycle to add a little flour at the beginning. I got there just after the first rise cycle started. By then, it was too late, so I let it go. I knew from experience that it would turn out okay. Because of the higher than normal hydration, more bubbles appeared than usual. I popped them as always, but the crust was "lumpier" than normal. It did not matter. The flavor of baked loaf was very very good.
* Rise and Stir Downs: There were 3 rise cycles of 90 minutes each. The stir downs are pulses of the paddles in alternating directions. There were 30 pulses between Rise 1 and Rise 2. There were 21 pulses between Rise 2 and Rise 3. There was no stir down after Rise 3, of course.
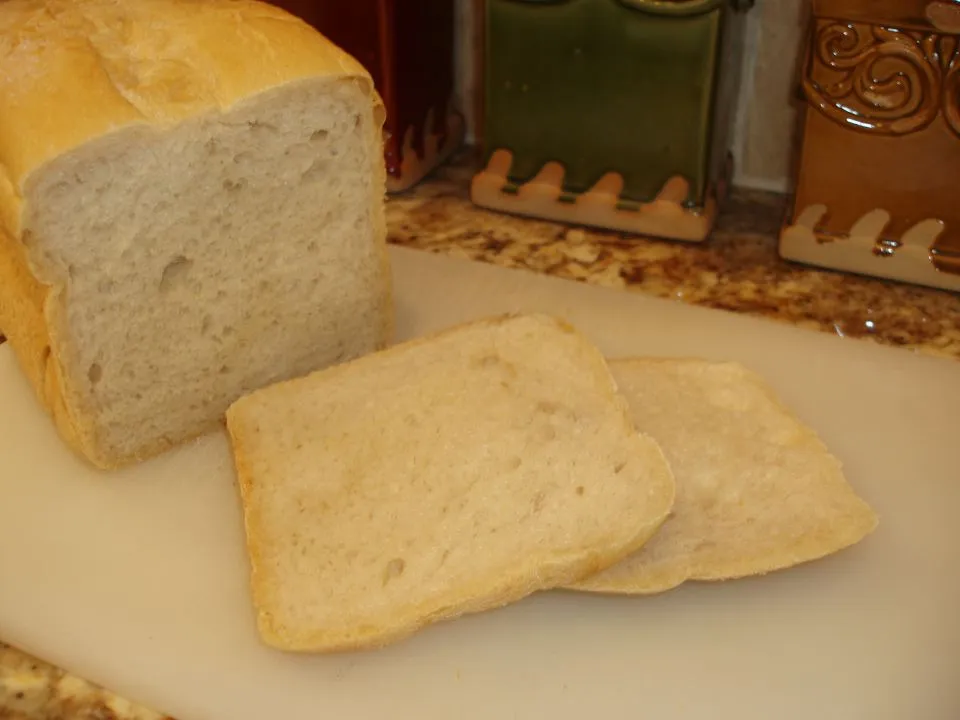
* Final Results: The crust was not pretty. It was very lumpy because of wet dough causing more than the usual amount of large bubbles. The crumb and flavor of the bread were very good. Remember, this is a recipe of convenience, not "artisan bread." It makes great sandwiches and never lasts long. Use it for BLT or BLTA (bacon, lettuce, tomato ... and avocado!) sandwiches and you will be a hero in your family.
* List of Photos:
Note: Some photos were taken with flash, others not. The color variations reflect the difference in lighting between the two. I chose whichever photos were sharpest or best demonstrated the individual step.
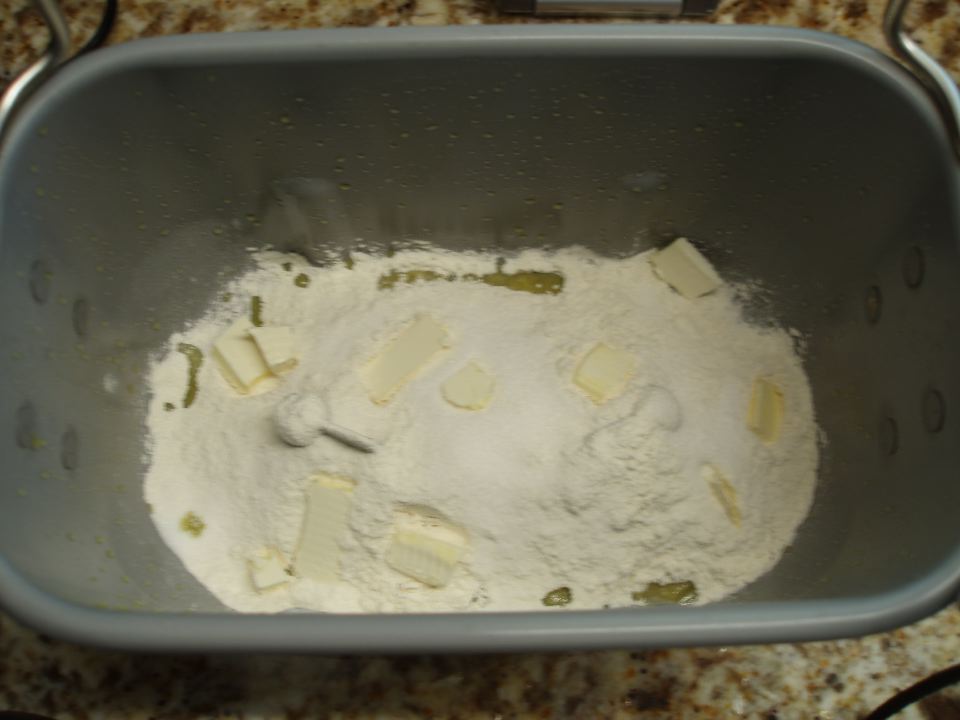
01 Partial Ingredients - Shows 1st cup of flour with salt, sugar, and margarine, before adding more flour and sourdough starter
02 Sourdough Starter from Refrigerator
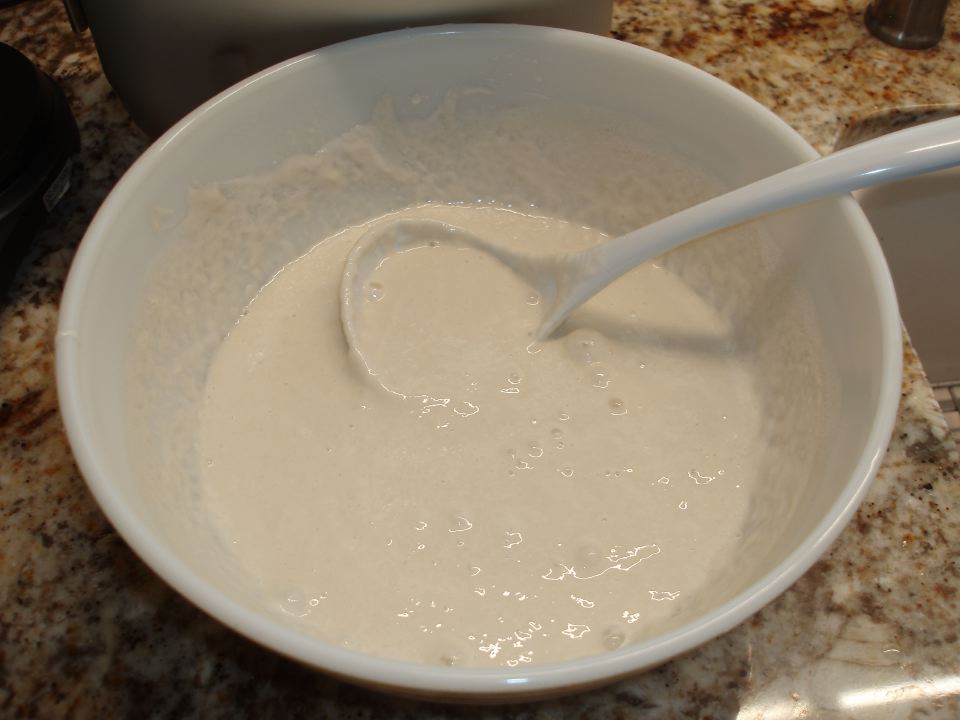
03 Sourdough Starter after Stirring
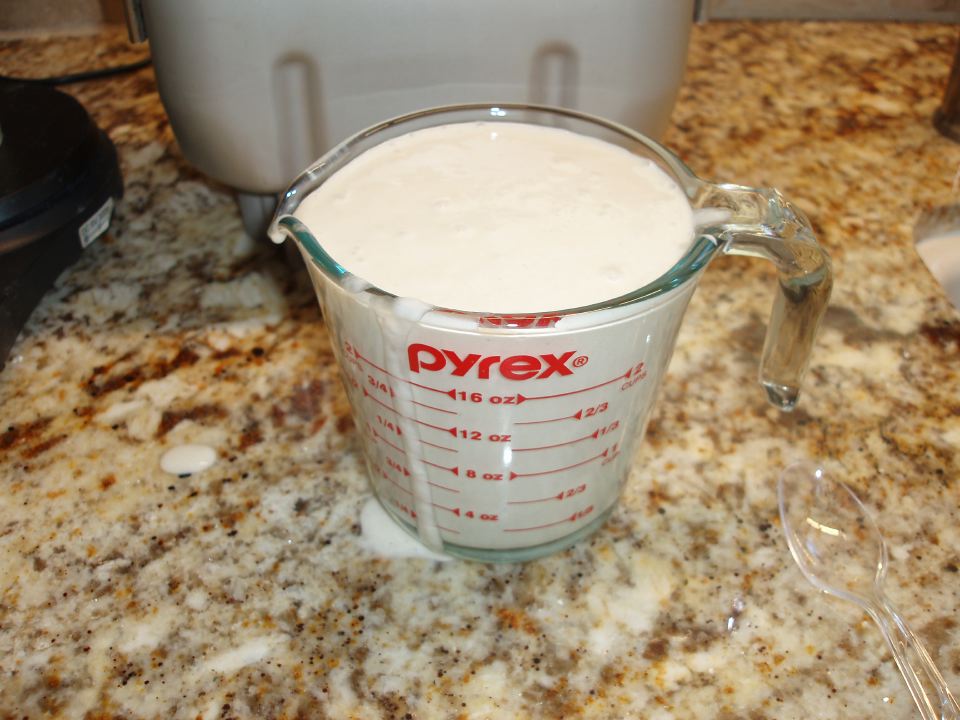
04 Measuring Cup with Sourdough Starter - Shows measuring cup filled to pour spout. Estimate: 2-5/8 cups of sourdough starter.
05 After Kneading before Rise 1
06 After Rise 1
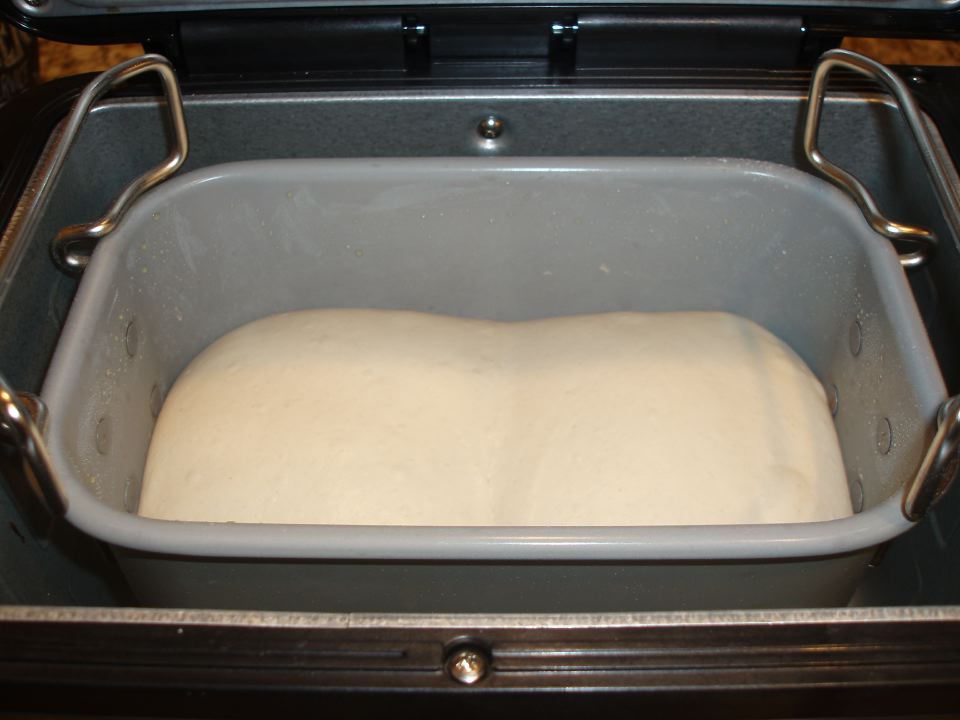
07 Before Rise 2 after Stir Down
08 After Rise 2
09 Before Rise 3 after Stir Down
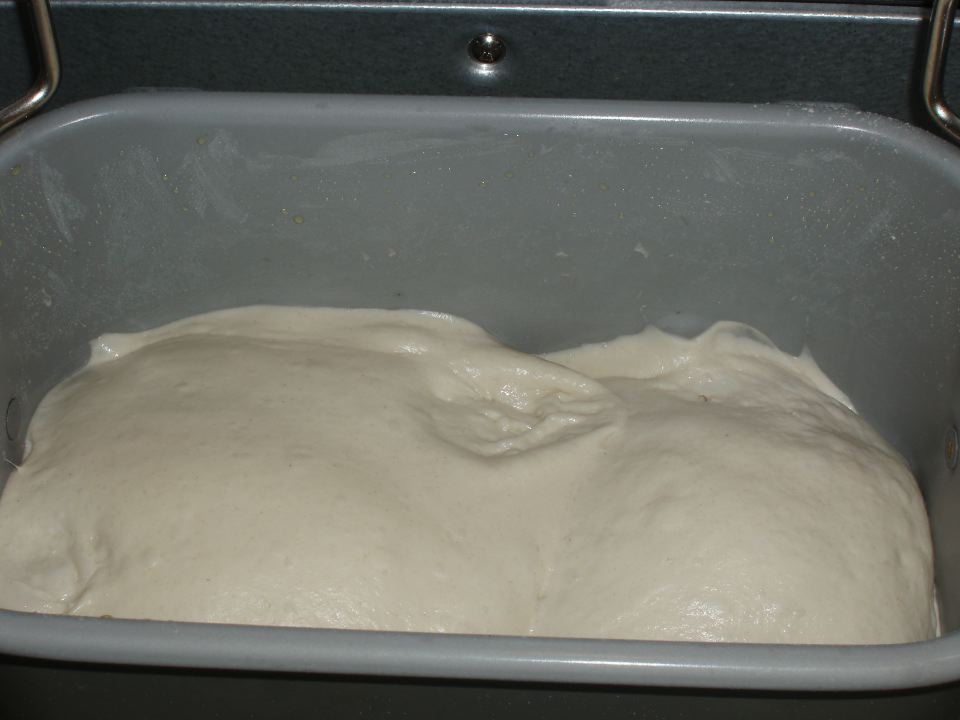
10 Before Rise 3 after Popping Bubbles
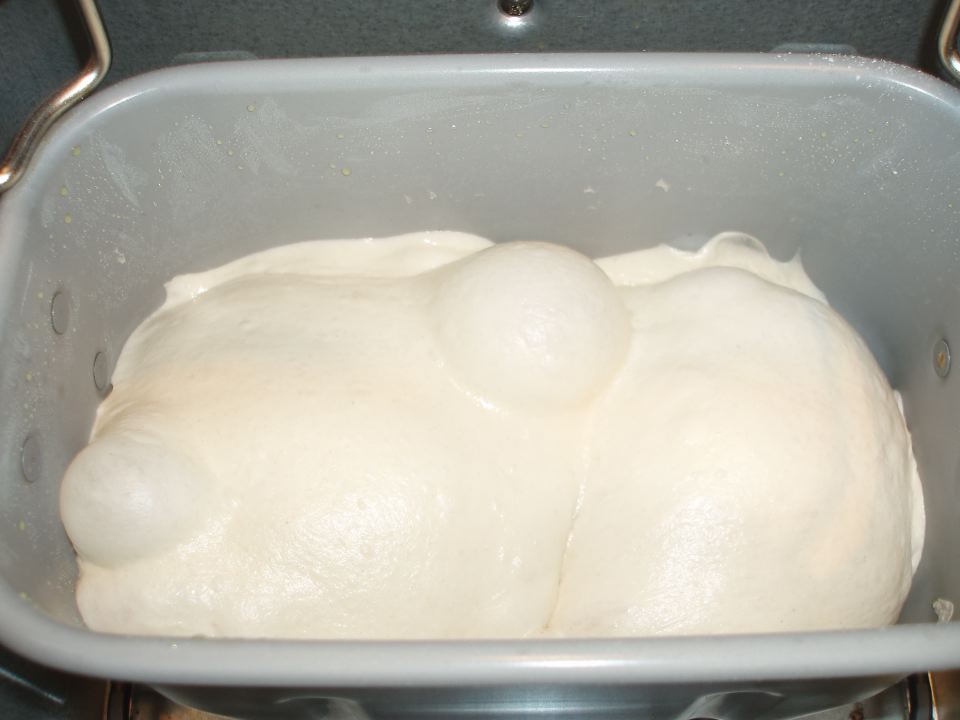
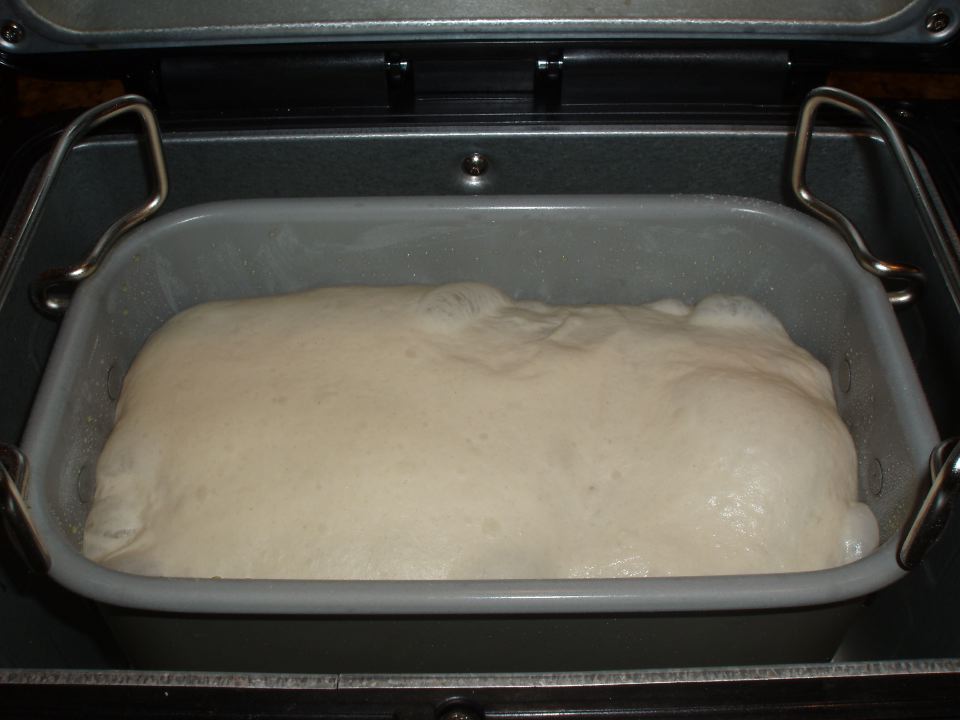
11 After Rise 3
12 Milk for Crust
13 After Popping More Bubbles, Slashing and Coating Crust
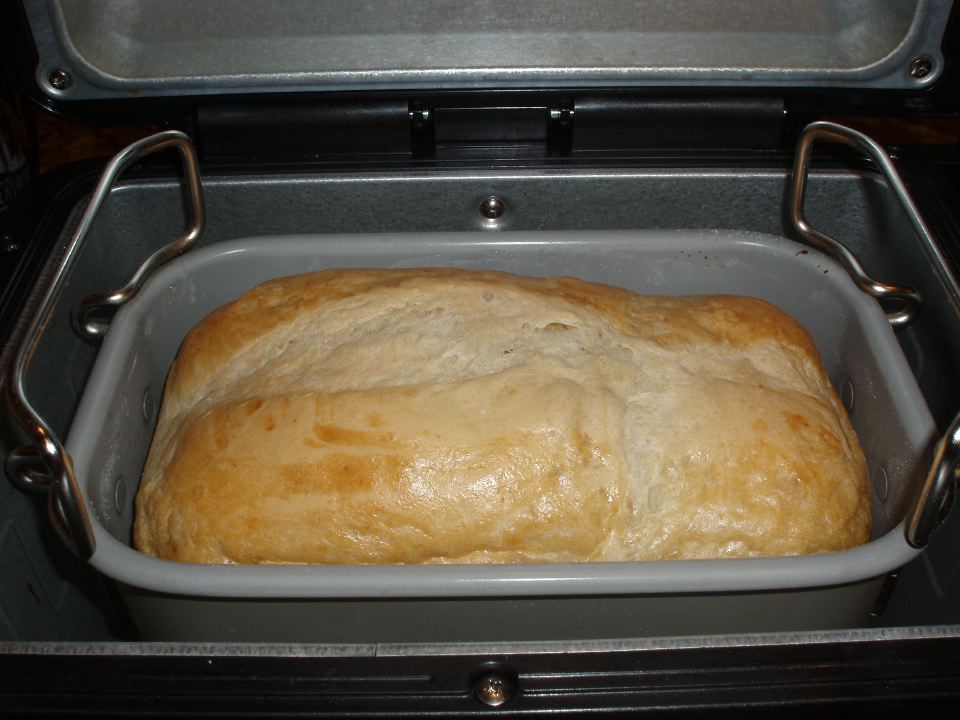
14 After Bake and Keep Warm
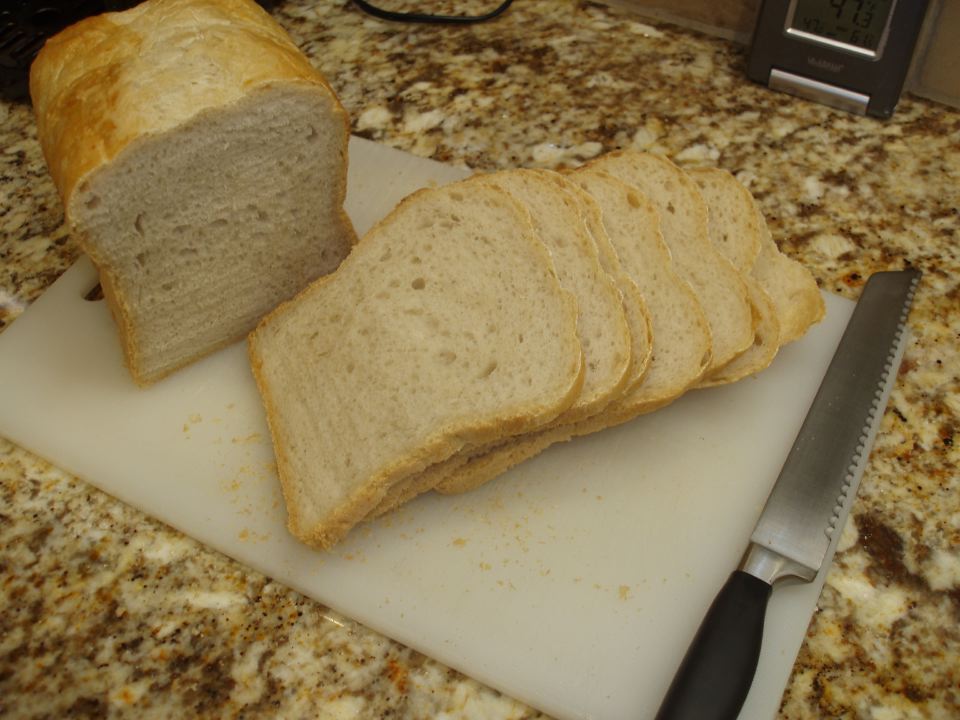
15 Final Results and Crumb
01 Partial Ingredients - Shows 1st cup of flour with salt, sugar, and margarine, before adding more flour and sourdough starter:
02 Sourdough Starter from Refrigerator:

03 Sourdough Starter after Stirring:
04 Measuring Cup with Sourdough Starter - Shows measuring cup filled to pour spout. Estimate: 2-5/8 cups of sourdough starter:
05 After Kneading before Rise 1:
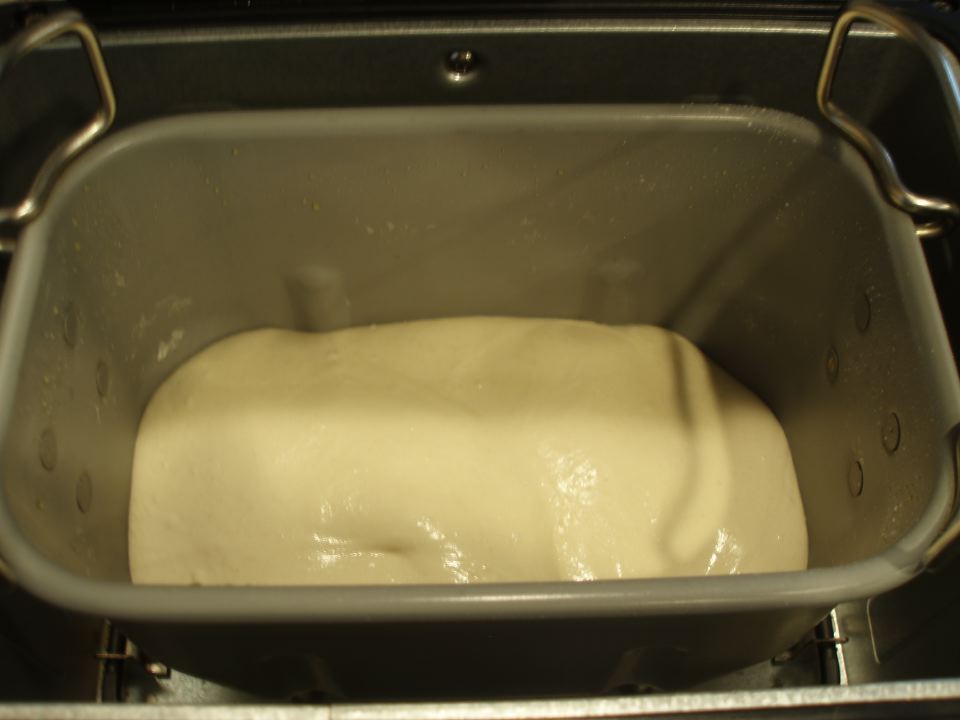
06 After Rise 1:

07 Before Rise 2 after Stir Down:
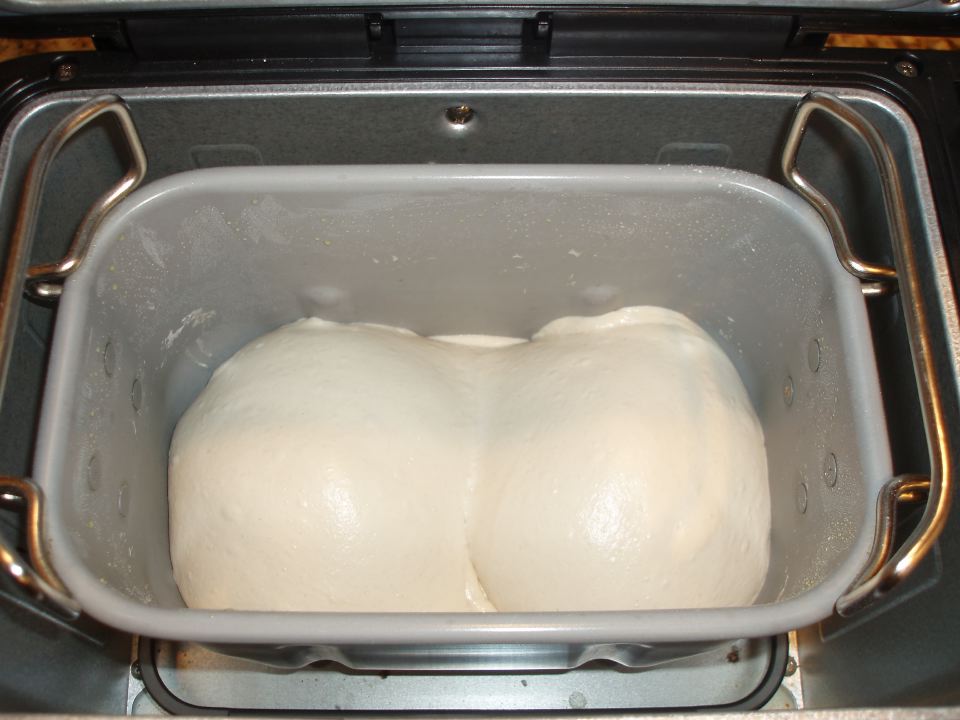
08 After Rise 2:
09 Before Rise 3 after Stir Down:
10 Before Rise 3 after Popping Bubbles:
11 After Rise 3:
12 Milk for Crust:
13 After Popping More Bubbles, Slashing, and Coating Crust:
14 After Bake and Keep Warm:
15 Final Results and Crumb:
I hope this helps.
A Personal Note:
I came to TheFreshLoaf to share two of my bread recipes. I wanted to post them online for others to find and TheFreshLoaf seemed to be the best place for them. I am isolated from the bread making world, playing "mad scientist in the lab." I keep careful notes and have refined my bread recipes over many decades. (I tried to participate in the community here, but a long time member made it clear that my posts were counterproductive and not welcome ... and yeah, it hurt. Today my only function on TheFreshLoaf is to respond to questions in the two recipe blogs. I get an email if someone posts in them. This is one of those responses.)
That is a really attractive loaf! I will read your process carefully.
thank you for the write up!
Thank you Troglodyte for this incredibly detailed technique. The sequence of photos is also hugely helpful. You've inspired me to finally try out the home made setting of my Zoji and use my starter more frequently
Patsy