The Fresh Loaf

A Community of Amateur Bakers and Artisan Bread Enthusiasts.

troglodyte's blog

troglodyte's picture
troglodyte

Sourdough Bread for Zojirushi Dual-Paddle Bread Machines
(and other bread machines with a user-programmable cycle, sometimes called "Home Made Cycle")

Version 3.4
23 February 2022
(by troglodyte)

Introduction

This is a recipe to make sourdough bread in a Zojirushi double-paddle bread machine. It has been tested on Zojirushi models BBCC-V20 "Home Bakery Traditional" and BB-PDC20BA "Virtuoso Plus". It should work on other bread machines with a 2 pound capacity and a user-programmable cycle. The user-programmable cycle feature is essential for long rise times.

This is a recipe of convenience. It makes good sourdough sandwich bread.  It does not make "artisan" bread. The benefit is consistent, tasty bread with a minimum of effort and time. It is sized to be suitable for a toaster or sandwiches. It has a good sourdough flavor. 

This recipe relies on the wild yeast in your sourdough starter as the leavening for your bread. It does not use commercial yeast. Be sure your sourdough starter is fresh and active. See the last page for sourdough starter preparation instructions and a suggestion for how to make your sourdough bread "extra sour." You can obtain free sourdough starter from here: http://www.carlsfriends.net/

Ingredients

1-1/2 teaspoons olive oil
1 cup bread flour (= 4.7 ounces by weight. This is the first of two cups.)
1 teaspoon salt
1 teaspoon sugar
1 Tablespoon butter or margarine
1 cup bread flour (= 4.7 ounces by weight. This is the second of two cups.)
2 cups sourdough starter  (See page 3 for sourdough starter instructions.)
Recommended but optional: 1/4 teaspoon powdered dry milk mixed with 1/2 teaspoon water ... or ... 1/2 teaspoon milk
(Especially helpful for bread machines without a heating element in the lid)

Directions

1. Measure the extra virgin olive oil. Dip your fingers in the measuring spoon and lightly coat the sides of the pan. Put any remaining olive oil in the pan.
2. Distribute the first cup of bread flour over the bottom of the pan.
3. Sprinkle the salt and sugar over the top of the flour in the pan.
4. Cut the butter into small chunks and distribute in the pan.
5. Add the second cup of bread flour. Use it to cover the salt, sugar, and butter to separate them from direct contact with the sourdough starter before the mix cycle begins.
6. Pour the sourdough starter over the other ingredients.
7. Start the bread machine on the Home Made cycle. NOTE: See the cycle times listed below.
8. At start time: Note the total time and subtract 70 minutes (1 hour 10 minutes) from it. Set a separate kitchen timer.
9. Recommended: Once or twice during the long rise period, check the rising loaf. If you notice any large bubbles forming at the top of the loaf, pop and collapse them gently with a razor blade, a bread lamé, a very sharp pin, or a very sharp knife.
10. When the kitchen timer sounds, the loaf will be nearly done with the rise. Open the lid on the bread machine. You have 8 minutes before the bread machine switches to the bake cycle.
11. If there are large bubbles at the top of the loaf, pop and collapse them gently with a razor blade, a bread lamé, a very sharp pin, or a very sharp knife.
12. Slash the top of the loaf from end to end along the long axis using with a razor blade or bread lamé. This will allow the crust to expand without cracking during "oven spring."
13. Recommended but optional: Gently brush the milk to coat the top of the loaf. The milk helps brown the crust, especially for bread machines without a heating element in the lid.
14. Close the lid. The bake cycle will start soon.
15. When baking completes, remove the pan from the bread machine and allow it to cool for 15-30 minutes.
16. As soon as practical, remove the warm loaf from the pan and allow it to rest on a cooling rack for at least two hours before slicing and serving. 

Zojirushi Home Made Bread Cycle Times for Sourdough Bread Recipe

Pre-heat: 30 minutes
Knead: 18 minutes
Rise 1: 1 hour, 30 minutes (= 90 minutes)
Rise 2: 1 hour, 30 minutes (= 90 minutes)
Rise 3: 1 hour, 30 minutes (= 90 minutes)
Bake: 1 hour, 2 minutes (= 62 minutes)
Keep Warm: Off

Total Time: 6 hours, 20 minutes. 

Kitchen timer setting for Sourdough Bread Recipe:

(See Directions, Step 8, above): 6 hours, 20 minutes minus 70 minutes = 5 hours, 10 minutes 

Set your kitchen timer for 5 hours, 10 minutes. When the timer sounds, you have approximately 8 minutes for crust preparation, steps 8 through 14. You will pop any bubbles on top, slash the loaf, and (recommended) brush the top of the loaf with milk. 

Sourdough Starter

You can obtain free sourdough starter here:
http://www.carlsfriends.net

Follow the "How to Revive Your Start" directions on the website to get your sourdough starter going. 

Once you have an active sourdough starter, here is the method that I use to prepare and maintain the sourdough starter after that. I learned it from my uncle, who was an expert:

The day before:

1. Mix 2-1/2 cups bread flour with 2 cups water. (I asked my uncle, and he said to use bread flour. If you can’t get bread flour for your starter, all purpose flour works okay.)
2. Use a plastic whisk or a large non-metal spoon. Stir slowly at first to avoid a mess, then faster once it is blended to mix in some air.
3. Press or stir out the big lumps. A few small lumps are okay. It does not have to be lump-free.
4. Take your 1 cup of sourdough starter "seed" from the refrigerator, and stir it thoroughly into the mixture, including the liquid "hooch" on top. Stir slowly at first so the hooch doesn’t splash out.
5. Cover and allow the starter to bubble on the counter at least 4-6 hours. Longer (e.g., 8-10 hours or more) is fine. When the starter is foamy, it is ready.
6. Take 1 cup of starter and put it in a non-metal container in the refrigerator. This will be your sourdough starter "seed" for the next time.
7. The remaining sourdough starter can be used for baking. 

Every two weeks:

  • Repeat at least every two weeks. More often is better. Maximum: One month, and don’t let it go for a month too often or your sourdough strain will lose its activity, and possibly die. 

Sourdough Starter Notes

  • You can make sourdough starter as often as you like. Bakeries make batches of sourdough several times a day.
  • Leave a note in your calendar when you "turn over" the sourdough starter. It helps remember how long it has been since the previous time and to plan for the next time.
  • The sourdough starter can get too thick if you make it frequently. Usually the hooch on top keeps the liquid/flour in balance. Reduce flour or add water if it gets too thick.
  • Do not allow metal to touch your sourdough starter. No metal spoons, bowls, or containers. When you are baking bread, a metal bread pan is fine, no problem there. 

Helpful Hint to Get a Strong Sourdough Flavor from Your Sourdough Bread

For a stronger "extra sour" sourdough flavor, store the sourdough starter for your bread in the refrigerator for an extra day or two before making the bread. (Remember to separate your sourdough starter "seed" first, so you can use that seed make more sourdough starter the next time.) The rest of the sourdough starter continues to ferment (culture) slowly in the refrigerator, creating a deeper, more complex, delicious sourdough flavor. 


Additional Notes (added for The Fresh Loaf, not in my recipe file):

This bread is a family favorite and I make it often. It is designed to make right-size, right-shaped, good tasting sourdough bread that fits in the toaster or a fold-top sandwich bag. It does not yield "artisanal" bread. This is a recipe of convenience, but it still requires human intervention with the bread machine. It helps to check it once or twice during the rise cycles to pop large bubbles. In addition, the recipe calls for you to slash and coat the top of the loaf with milk just before the bake cycle begins. 

Caution:
If you omit slashing the bread as instructed, then the loaf may pop or "burst" unexpectedly. What typically happens is a hard  shell crust forms on top, then it cracks along the sides, and finally it separates from the rest of the loaf as it bakes. If you try to slice it, the top comes off each slice. That is why the slashing step is important, even though you are using a bread machine.

Work began on the original version of this sourdough bread recipe in 1978. I keep notes and adjust the recipe, testing variations and updating the file accordingly. Over time, the goals of this recipe evolved into the following:

  • Leavened with sourdough starter only; no commercial yeast.
  • Convenient and easy to prepare in a bread machine, albeit one that has user programmable cycle times.
    • Zojirushi has made user-programmable models for over 20 years, and those are the ones I have used. Breville also makes a user-programmable model; I have not tried it.
  • Tastes as good or better than store bought "extra sour" sourdough bread. 
    • The target for flavor comparison is the "San Luis Sourdough" brand of sourdough bread that is sold where we live. If our sourdough bread is as good or better than theirs, then it is a win for the family.
  • The recipe is reliable and repeatable.

I weigh flour ingredients at 1 cup = 4.70 ounces (= 133 grams). It a personal standard that I chose a long time ago. There were no common flour weight measuring standards long ago. There does not appear to be a common standard today, either.

The recipe was originally constrained by the 90 - 120 minute limits on rise cycle times for older Zojirushi bread machine models. A few months ago, we purchased a Zojirushi BB-PDC20BA "Virtuoso Plus" and have been using it. Our BBCC-V20 "Home Bakery Traditional" is still going strong after over 20 years, but now it serves as our "backup" bread machine.  

I have used three different sourdough starters with this recipe. For the last decade or so, I have used Carl Griffith's 1847 Oregon Trail Sourdough Starter, which you can obtain at no charge. See this webpage:

http://www.carlsfriends.net. 

Regarding that "extra sour" flavor that we like:

The directions are accurate, but what I actually do is more complicated. When I make this bread, there is a small amount of leftover sourdough starter. I keep the leftover sourdough starter in the refrigerator, separate from the "seed starter". When I need two cups of sourdough starter to make this sourdough bread, I use whatever leftover starter remains from the previous loaf first. Yeah, it may have aged in the refrigerator for a week or two. After using up the old starter, I "top it off" to two cups using the freshly made starter. (The "freshly made" starter itself may have "aged" in the refrigerator for a day or two as suggested in the directions.) Whatever new starter remains becomes the new "leftover starter" for the next loaf. Eventually the leftover starter builds up to two cups. When that happens, I make a loaf using the two cups of leftovers, without bothering to refresh the starter.  

troglodyte's picture
troglodyte

Sweet Rye Bread for Bread Machines

Version 2.0.3
3 February 2022
(by troglodyte)

Introduction

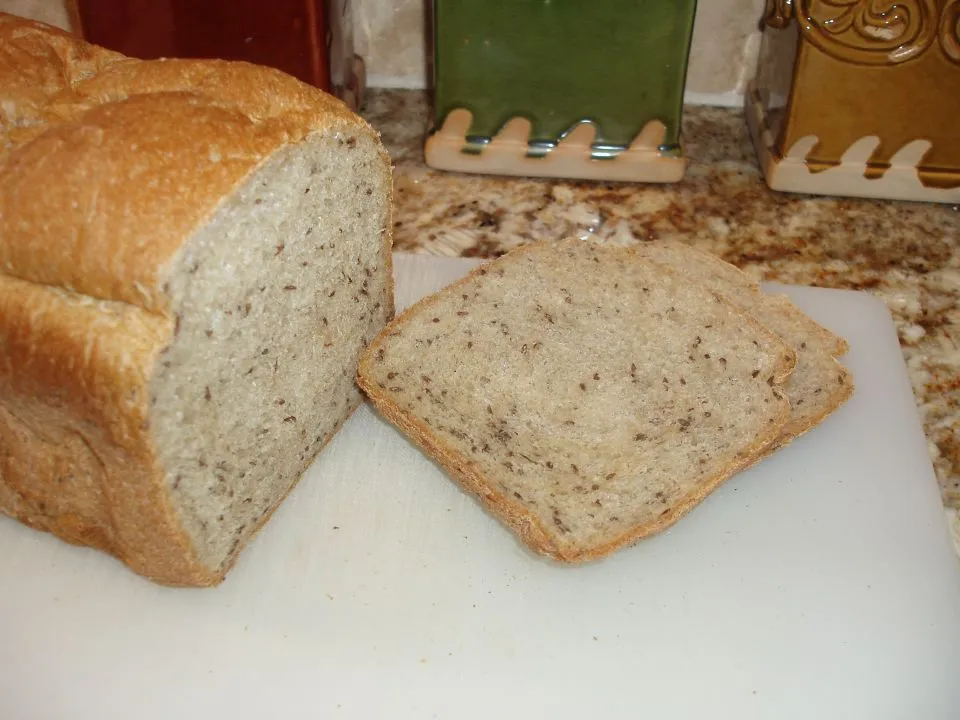
This rye bread recipe is designed to yield a quick and easy Jewish deli style rye sandwich bread from a two-pound bread machine, such as the dual-paddle Zojirushi models. This recipe may be used with the delay timer if you follow the instructions. You can bake it in loaf pans in the oven, too.

Ingredients

First Ingredients:

1 Tablespoon extra virgin olive oil
1-1/4 cups water
1-1/2 teaspoons salt
3 Tablespoons sugar
1/8 teaspoon vitamin C crystals (powder)

Dry Ingredients:

2-7/8 cups bread flour ≈ 4.70 + 4.70 + 4.00 ounces by weight
1/3 cup white (light) rye flour ≈ 1.70 ounces by weight 
2 Tablespoons (1/8 cup) gluten ≈ 0.60 ounces by weight
2-1/2 Tablespoons caraway seeds = 2 Tablespoons + 1 teaspoon + 1/2 teaspoon

Last Ingredients:

1-1/4 teaspoons Red Star brand active dry yeast
Optional: 1-1/2 teaspoons to 1 Tablespoon powdered dry milk (See Important Notes, below)
3/4 teaspoon soy lecithin granules

Instructions

  1. Measure the extra virgin olive oil. Dip your fingers in the measuring spoon and lightly coat the sides of the pan. Put any remaining oil in the pan.
  2. Add the remaining First Ingredients in the bread pan in the order listed.
  3. Weigh and gently add the Dry Ingredients so they “float” on top.
  4. Make depressions in the top of the dry ingredients. 
  5. Put the yeast and (optional) dry milk in the depressions to keep them dry until the bread machine starts.
  6. Sprinkle the soy lecithin on top. (Saved for last. It can make measuring spoons sticky.)
  7. Put the bread pan in the bread machine. If desired, set the delay timer. Select the Basic Bread cycle with a medium crust (the default settings) and press Start.
  8. When the bake cycle is finished, skip the "keep warm" cycle and remove the bread pan from the machine immediately. Give the loaf 15-20 minutes to cool, then remove the loaf and place on a cooling rack. Give the loaf time to set (Preferred: 2 hours or more) before slicing with a bread knife.

Important Notes

  • Weigh the flour ingredients. This recipe is based on 1 cup flour = ~4.70 ounces by weight. 
  • Use real gluten, sometimes called vital wheat gluten. (Gluten flour is not the same.)
  • The dry milk helps the crust brown. The Zojirushi Virtuoso Plus (BB-PDC20BA) has a heating element in the lid that helps brown the crust. For that machine, you may want to cut the dry milk in half (1-1/2 teaspoons) or omit the dry milk altogether.
  • Buy caraway seeds in bulk. The small spice jars are too expensive. A few stores may have bulk bins, but you can also find caraway seeds on the internet.
  • Specialty ingredients can be found at Sprouts, Whole Foods, health food stores, or the internet.

Additional Notes (added for The Fresh Loaf, not in my recipe file):

This bread is a family favorite and I make it often. It is designed to make right-size, right-shaped, good tasting rye bread that fits in the toaster or a fold-top sandwich bag. It does not yield "artisanal" bread. This is a recipe of convenience - once the ingredients are loaded in the proper order in the bread machine, there are no further interruptions until it is time to remove the bread pan.

I started working on this recipe in 1998. The original basis was an older bread recipe of mine, which has its own long story. I still keep notes and adjust the recipe, testing variations and updating the file accordingly. 

I weigh flour ingredients at 1 cup = 4.70 ounces (= 133 grams). It a personal standard that I chose a long time ago. There were no common flour weight measuring standards long ago. There does not appear to be a common standard today, either.)

I store the following ingredients in the freezer: Rye Flour, Gluten, Active Dry Yeast, and Soy Lecithin.
-> I take the container out of the freezer just long enough to measure what I need, then put it back in the freezer immediately. 

I use Red Star brand active dry yeast because that is what my mother and uncle used. It appears to keep indefinitely in the freezer. For this recipe, I add it dry so that the bread machine delay timer may be used. 


Subscribe to RSS - troglodyte's blog