
Hi All,
Please forgive the very basic questions I am completely new to making bread!
I have tried to follow this recipe: https://www.bakewithjack.co.uk/blog-1/simple-loaf-recipe
Two minor adjustments:
- Half all quantities
- Dutch Oven in an oven at 230C rather than bread tin
I scored the dough immediately before putting into the oven but, as can be seen from this picture, the loaf didn't spring so much as swell a bit :-D
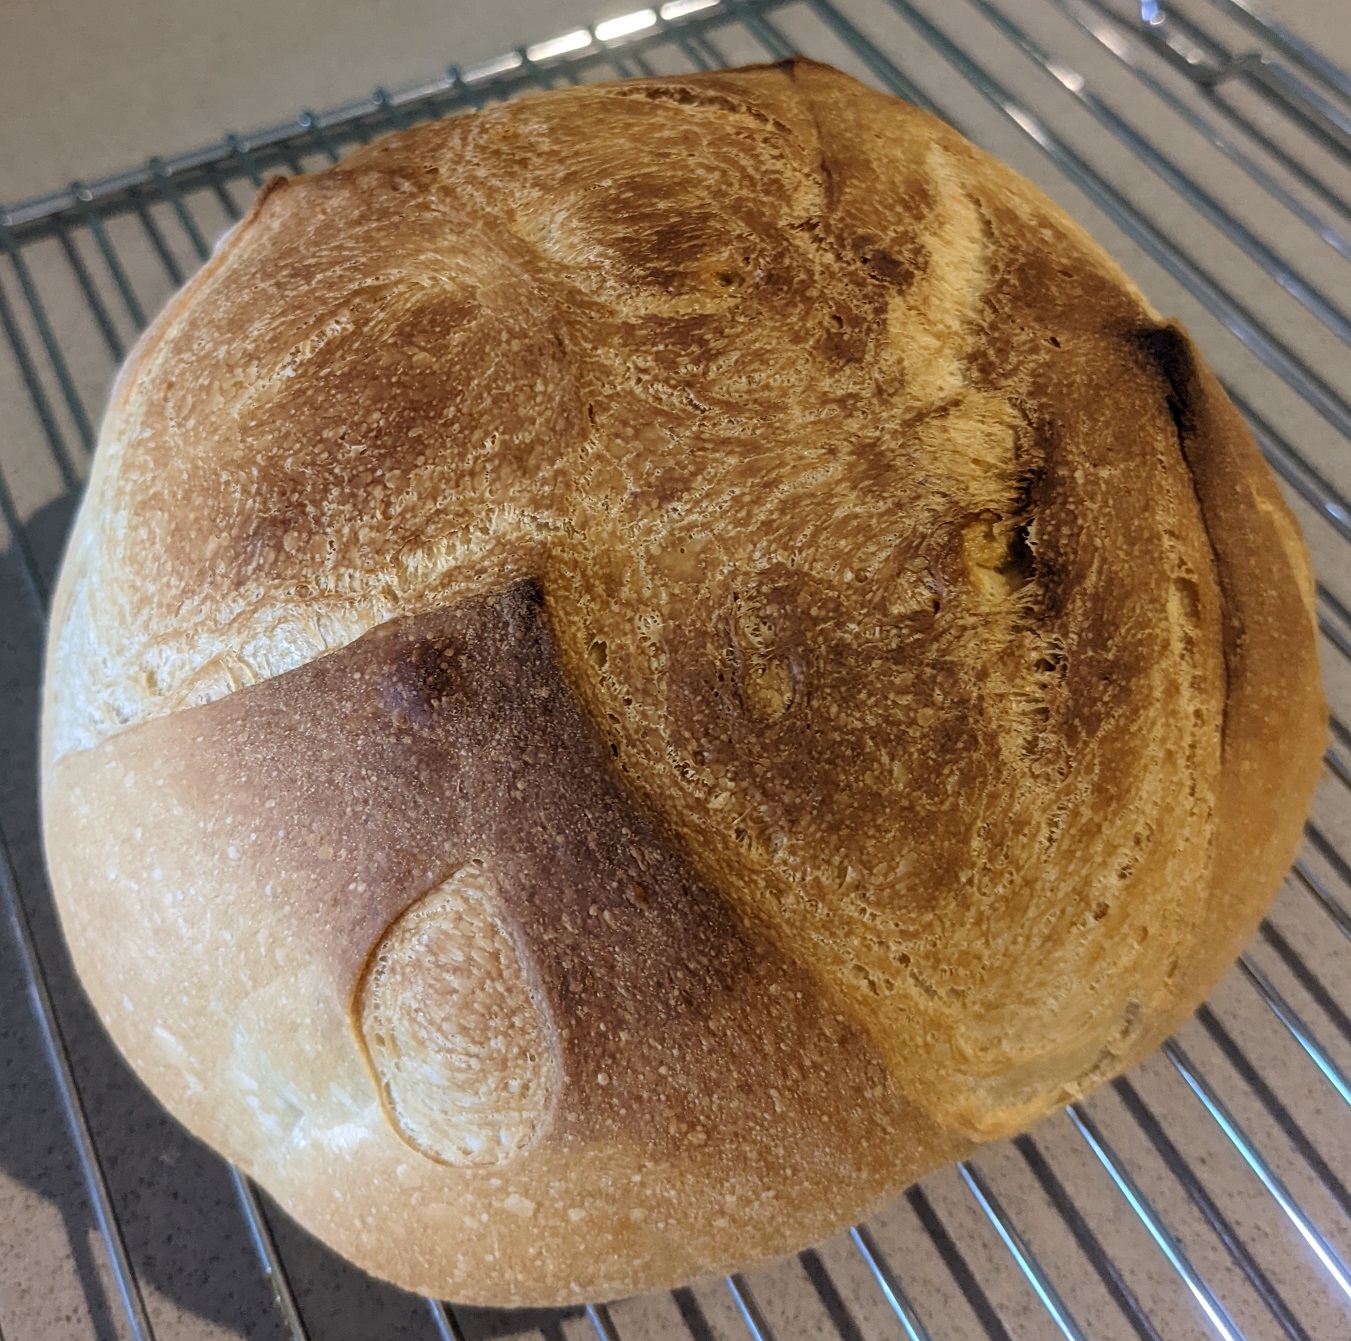
Also, and again as per the picture, the crust was very hard but the insides very gooey and undercooked.
I'm not sure what the problem(s) was/were.
Why didn't I get a nice spring? (Not scoring deeply enough? Underkneading? Underproofing?)
And why the well done outside but undercooked inside? (Too hot oven? Removed from oven too soon?)
Again, apologies for asking about what I'm sure must be very basic errors. But any help much appreciated!
Also, any recipe suggestions if the recipe I was following is not ideal for an absolute beginner (although it seemed good to me!).
Thanks :)
The referenced recipe says that the author's Room Temperature is 21C. Is your room temperature the same, cooler, or warmer?
The water used is to be at Room Temperature (21C). Was your water the same, cooler, or warmer?
The recipe specifies an oven temperature of 200C, with the note to reduce the temperature to 180C if the bread is browning too fast. You used an oven temperature of 230C, which is substantially hotter. Was that temperature maintained for the entire bake?
Was the Dutch Oven preheated? Was the DO covered after the loaf was placed in the DO? If the DO was covered, was the lid left in place for the entire bake or was it removed at some point? If the lid was removed, how long was the loaf baked while covered and how long uncovered?
Did you introduce another source of steam in the oven as directed by the recipe, or did you rely on covering the DO as a means of retaining steam?
Did you check the internal temperature of the loaf before removing it from the oven?
Was the loaf fully cooled to Room Temperature before you cut or tore it?
My first guess, based on the information you provided, is that the oven wa too hot. There is evidence of oven spring but the higher temperature may have caused the crust to form too fast, which limited the amount of oven spring. The too-rapid crust formation and browning could have misled you to think that the loaf was fully baked before the crumb was baked through.
However, there are too many questions to answer before a solid diagnosis can be given.
Paul
Hi Paul,
Thanks very much for taking the time to reply :)
Apologies for the missing information. Here are the answers to your questions:
Thanks again for you help. I appreciate you taking the time :)
Tom
Since your RT is warmer than the recipe writer's, your dough will proof faster than the recipe would suggest. That could lead to full proof, or even a degree of over-proofing, before the bread goes into the oven which, in turn, would reduce the amount of oven-spring. Keep an eye on the dough next time and aim to put it in the oven be for loaf has doubled in volume.
The too-high baking temperature would favor faster crust setting, which will also limit oven-spring. Next time, try baking at the recommended temperature and compare that result with this bake.
Finally, I can’t imagine that the bread was under-baked. Since you cut it before it cooled, you also cut it before it had finished baking. Sounds counterintuitive, I know, but the starches need to cool before they firm up. If they aren’t given the chance, the bread will seem too damp and too squishy; almost as if it hadn’t baked enough.
When you adjust for what went askew with this bake, the next one should be stellar.
Paul
Hi Paul,
Thanks for your advice!
I tried again today reducing the resting times by about 50%, with the correct oven temperatures according to the recipe (200C) and resisted the urge to cut into the loaf before it cooled to room temperature.
Disappointingly I got more or less the same result :-D
I wonder if I am not kneading the dough correctly or pressing too much of the bubbles out after each rest/before shaping.
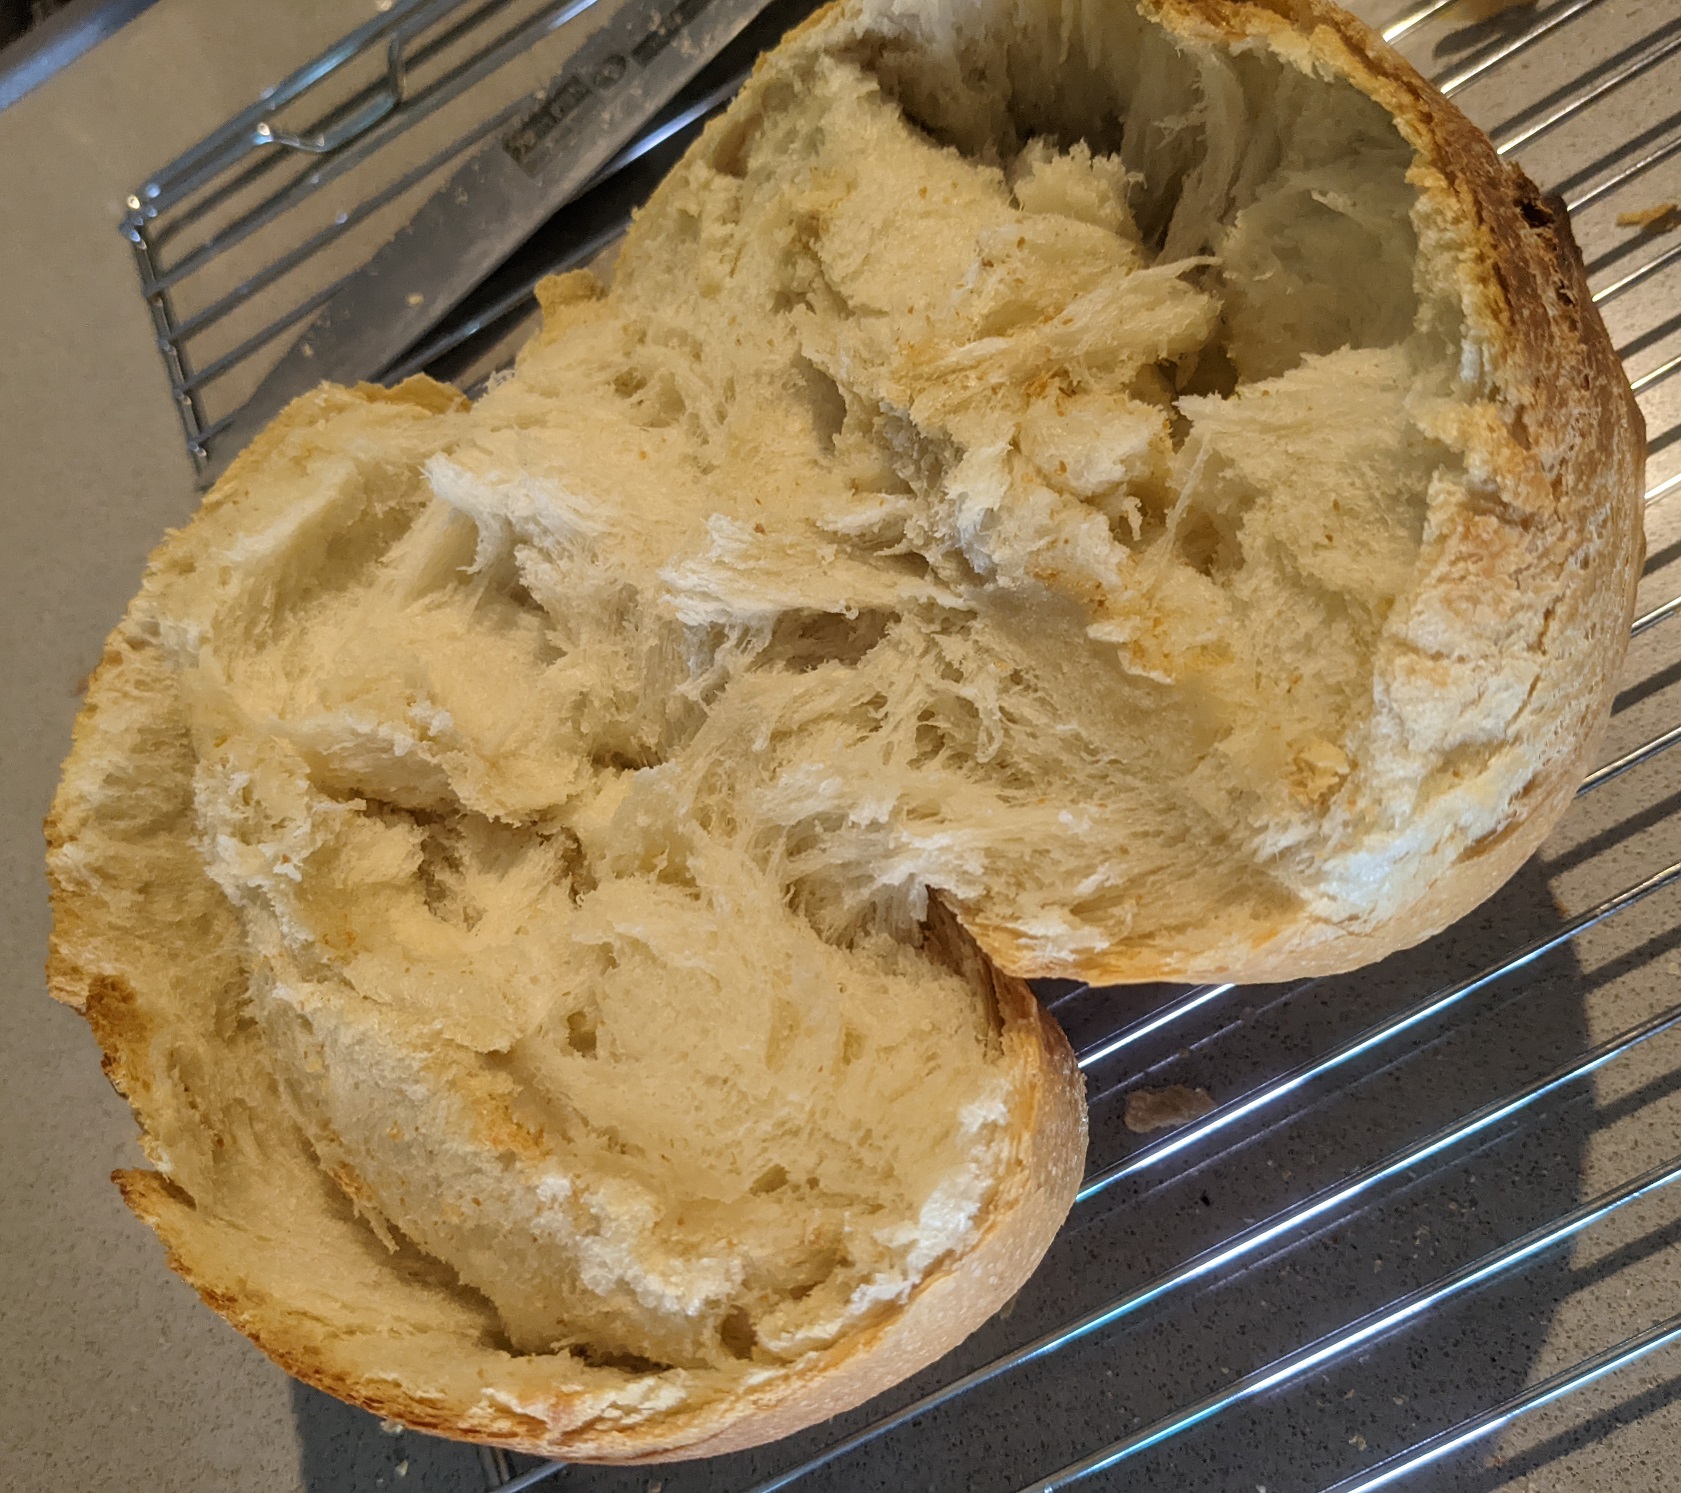
The dough increases in volume considerably during the two rests but by the time I come to shape it, before scoring it and putting it in the oven, it doesn't seem very elastic as - you can perhaps see from the pictures below.
It's frustrating because I don't know what it should look and feel like at each stage! Anyway, I will keep trying. But please do let me know if you have any further thoughts!
Cheers,
Tom
Scored and about to be put in the oven (200C) in a closed Dutch Oven (with some water sprayed inside before closing the lid).
After 20 minutes the lid was removed (maybe I should have left it on for longer?).
After a further 40 minutes I removed from the oven and left to cool.
Again, a little chewy inside, small crumb and little spring.
If the loaf had expanded any more, the scores would have torn open. As it is, they have been stretched to the maximum. That's a win for the lower temperature bake inside a steamy DO.
If you look closely at the image just after removing the DO lid, you'll see that virtually all of the oven-spring has already occurred. So, there’s no value in leaving the loaf covered for a longer time.
One thing I’m not clear on from your description. It sounds as though you mean 1) Mix/knead, 2) Rest (ferment), 3) Degas, 4) Rest (ferment), 5) Shape, 6) Slash, 7) Bake; where 5, 6, and 7 happen in rapid succession. A more typical progression would be 1) Mix/knead, 2) Bulk ferment, 3) Shape, 4) Final ferment, 5) Slash, 6) Bake with 6 happening immediately after 5. Or have I misunderstood your description? Shaping does tend to degas the dough to some extent (depending on forcefully we handle the dough), which is why we wait for final fermentation to reinflate the loaf before it is slashed and baked.
I don’t know if you've checked to see if the oven's real temperature is close to the selected temperature. If you can get your hands on an inexpensive oven thermometer, you can either confirm that all is as it should be or that your oven runs hotter/cooler than expected. While I don’t suspect that there is a problem, it's nice for peace of mind.
Since you are feeling your way in bread baking, it wouldn’t surprise me if there are improvements you can make in handling and shaping the dough. You are off to a good start, so it’s a matter of continuing improvement. There are plenty of videos on line that can provide some very helpful tips and demonstrations.
It seems you may be comparing your bread to some of those IG glamour shots that feature wide-open, lacy crumbs. That's not necessarily a bad thing to have as an inspiration but it doesn’t mean that your bread is somehow deficient just because it has a tighter crumb. My own preference is that my bread doesn’t drip mustard or preserves onto my lap and that it taste good. Big holes are, by definition, leaky and they have absolutely no flavor. Consequently, they aren’t my measure of success for the breads I make.
Out of curiosity, what sort of knife are you using to cut the bread? The picture seems to show evidence of tearing while slicing.
It's nice to see you making progress from bake to bake. Keep baking and you’ll begin to see some patterns emerge, as well as developing your chops as a baker.
Paul
Hi Paul,
The process I followed on the last trial was as follows:
I don't have an oven thermometer or a proper breadknife. Both are surprisingly hard to find where I am. However, I will get hold of both eventually.
Thanks for your help and encouragement. I will persevere!
Tom
The recipe steps are:
In the recipe's process, some degassing will occur during preshaping but note the author's use of the word “gently” to describe handling the dough. The more gas you knock out of the dough, the tighter the crumb in the finished bread. There really shouldn’t be any further degassing in the shaping step, since that step focuses more on establishing a taut loaf in the desired shape. You've added a degassing step that isn’t part of the original process.
I'm curious about the timings you mention for each of the steps. Are you going strictly by the clock? Are you monitoring the dough for some change in its characteristics? While I expect that your dough will ferment faster than the recipe suggests (because of your warmer Room Temperature), I'm left with the impression that perhaps you are giving more weight to the timings than you are to what the dough is telling you. If you been reading here on TFL for very long, you’ve probably seen the adage “Watch the dough, not the clock.” That is more important than many beginning bread bakers realize. The dough, or the yeast in it, is alive. It operates by its own rules and knows nothing about schedules. You have to pay attention to what it needs and respond accordingly. Recipe timings are simply guidelines, not rules. When the dough is ready, it's ready; not sooner, not later.
One other thought. When I work with a recipe that I have not used previously, I read through it to see whether it has any fatal errors. (It appears that the recipe you selected is a reliable one.) If there aren’t any apparent errors, I will follow the recipe as written. That lets me understand the recipe writer's intent. Depending on the outcome, I may make adjustments in my next bake. Those will, hopefully, address any differences between the writer's environment and my own, which could include ingredients, climate, equipment, etc. I suggest you do the same for the next bake, excepting that you use your DO.
Paul
Thanks Paul.
My problem is largely lack of experience I think. For lack of any feel or instinct I have been forced to follow the clock. Hopefully, the more I experiment, the more I will come to know what looks and feels right and what doesn't.
I appreciate your time and advice!
Cheers!
We all start out knowing nothing and progress from there. You, too, will gain experience and be able to read the dough. Enjoy the process.
Paul