I’ve been gradually making adjustments to my formula and in this case I’ve increased the hydration via increasing the proportion of flour in the tangzhong from 5% to 7.5% keeping the ratio of flour to milk in this tangzhong to 1:5. The resulting dough is a bit stickier to work with, however, I’m hoping that the crumb will be even more soft and tender yet still shreddable. You probably have noticed that I love black sesame seeds so that was always going to be a good inclusion for this bread. The honey that I used is special, it came from a friend’s hives so I’m hoping that the honey brings a special sweetness to this bread.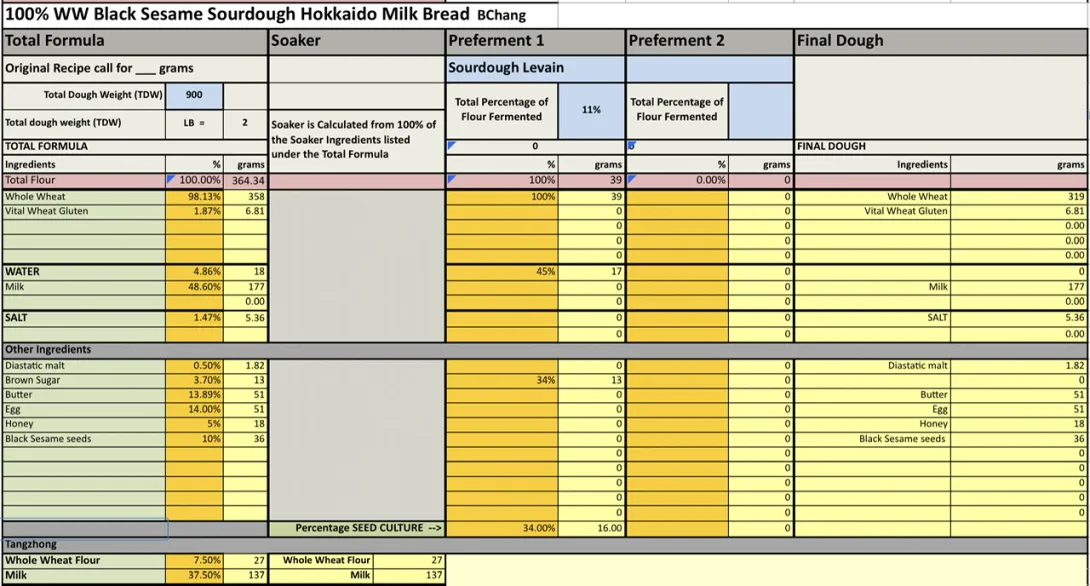
Pre-bake Wash
• 1 egg beaten
• 1 Tbsp milk
Post-bake Wash
• 1 Tbsp butter (optional)
Instructions
Levain
Mix the levain ingredients in a jar or pyrex container with space for at least 300% growth.
Press down with your knuckles or silicone spatula to create a uniform surface and to push out air.
At a temperature of 76ºF, it typically takes up to 10-12 hours for this sweet stiff levain to be at peak. For my starter I typically see 3-3.5 times increase in size at peak. The levain will smell sweet with only a mild tang.
Tangzhong
In a sauce pan set on medium heat, stir the milk and flour until blended. Then cook for several minutes until well thickened, stirring regularly with a spoon or heat-resistant spatula. Let cool in the pan or, for faster results, in a new bowl. Theoretically it should reach 65ºC (149ºF) but I don’t find I need to measure the temperature as the tangzhong gelatinizes at this temperature. You can prepare this the night before and refrigerate it, ensure that it is covered to prevent it from drying out.
Dough
In the bowl of a stand mixer, add the milk, egg, tangzhong, salt, sugar, diastatic malt and levain. Mix and then break up the levain into many smaller pieces. Next add the flour and vital wheat gluten. I like to use my spatula to mix until there aren’t many dry areas. Allow the flour to hydrate (fermentolyse) for 20-30 minutes. Mix on low speed and then medium speed until moderate gluten development this may take 5-10 mins. Next drizzle in the melted butter a little at a time. Slow the mixer down to avoid splashing the butter at you. The dough may come apart, be patient, continue to mix until it comes together before drizzling in more butter. Once all the butter has been added and incorporated increase the speed gradually to medium. Mix at medium until the gluten is well developed, approximately 10 mins. You can consider resting the dough intermittently during this time You should be able to pull a good windowpane, not quite as good as a white flour because the bran will interrupt the windowpane somewhat. This is a good time to add inclusions such as my favorite black sesame seeds, that way they do not interfere with the gluten development. If you add inclusions mix until they are well incorporated in the dough.
On the counter, shape the dough into a tight ball, cover in the bowl and ferment for 2.5-3.5 hours at 82ºF. There may be some rise visible at this stage.
You can next place the dough into the fridge to chill the dough for about 1.5 hours, this makes rolling the dough easier to shape. Remember, if you do so the final proof will take longer. Alternatively, you can do a cold retard in the fridge overnight, however, you may find that this increases the tang in your bread.
Prepare your pans by greasing them or line with parchment paper.
Lightly flour the top of the dough. Scrape the dough out onto a clean counter top and divide it into four. I like to weigh them to have equal sized lobes. Shape each tightly into a boule, allow to rest 5 mins. Using a rolling pin roll each ball out and then letterfold. Turn 90* and using a rolling pin roll each out to at least 8”. Letterfold again from the sides so you have a long narrow dough. Then using a rolling pin, roll flatter but keeping the dough relatively narrow. The reason to do this extra letterfold is that the shorter fatter rolls when placed in the pan will not touch the sides of the pan. This allows the swirled ends to rise during final proof, this is only done for appearance sake and is not necessary. Next roll each into a tight roll with some tension. Arrange the rolls of dough inside your lined pan alternating the direction of the swirls. This should allow a greater rise during proof and in the oven.
Cover and let proof for 6-8 hours, longer time if you chilled your dough for shaping. I proof until the top of the dough comes to within 1 cm of the top edge of the pan.
Preheat the oven to 350F and brush the dough with the egg-milk wash. Just prior to baking brush with the egg-milk wash again.
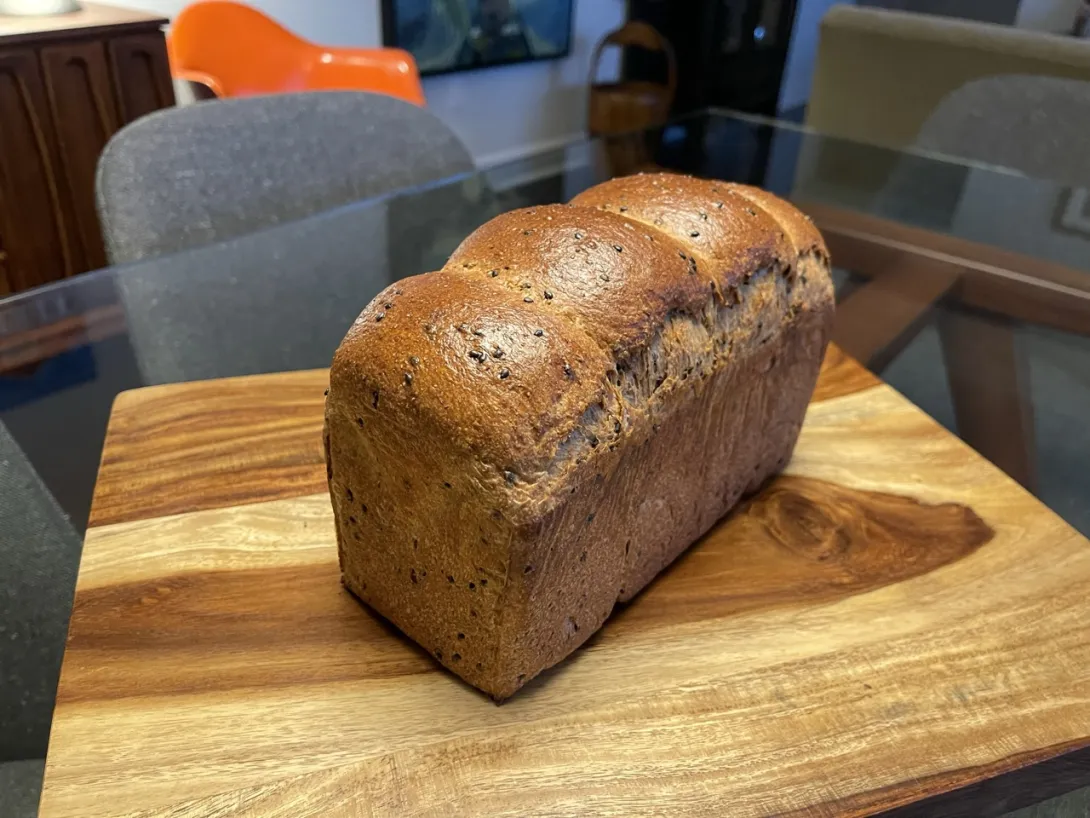
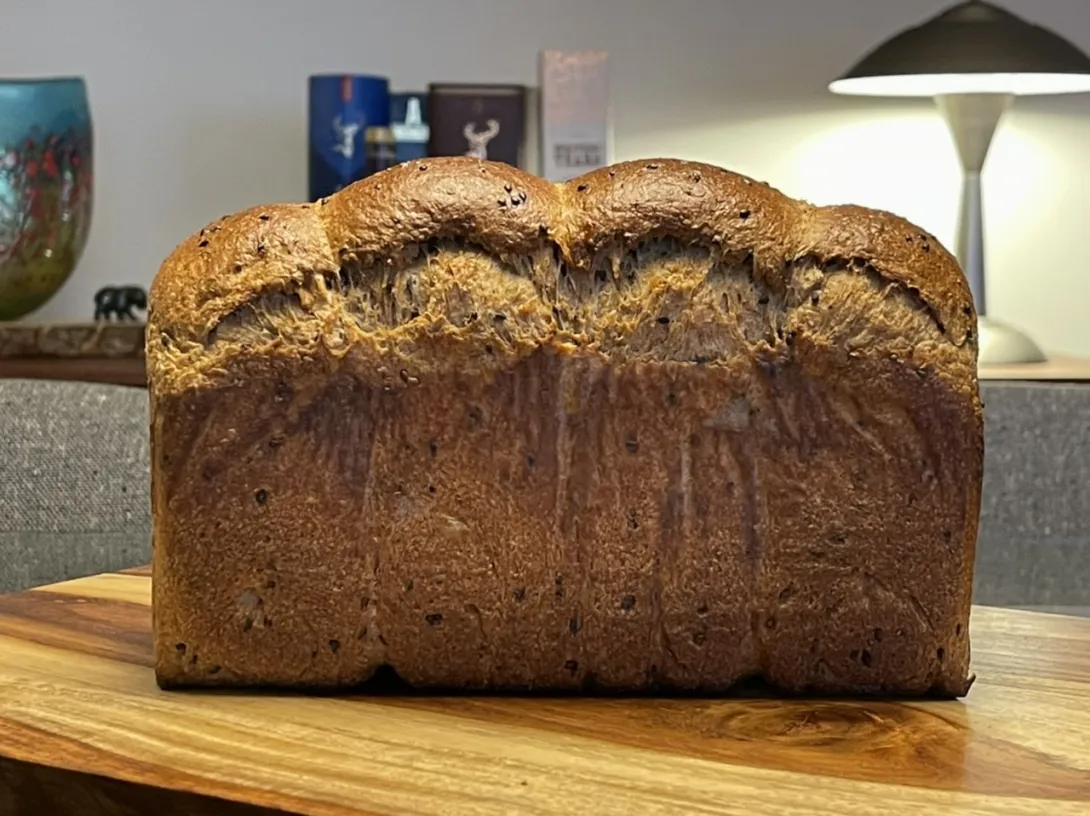
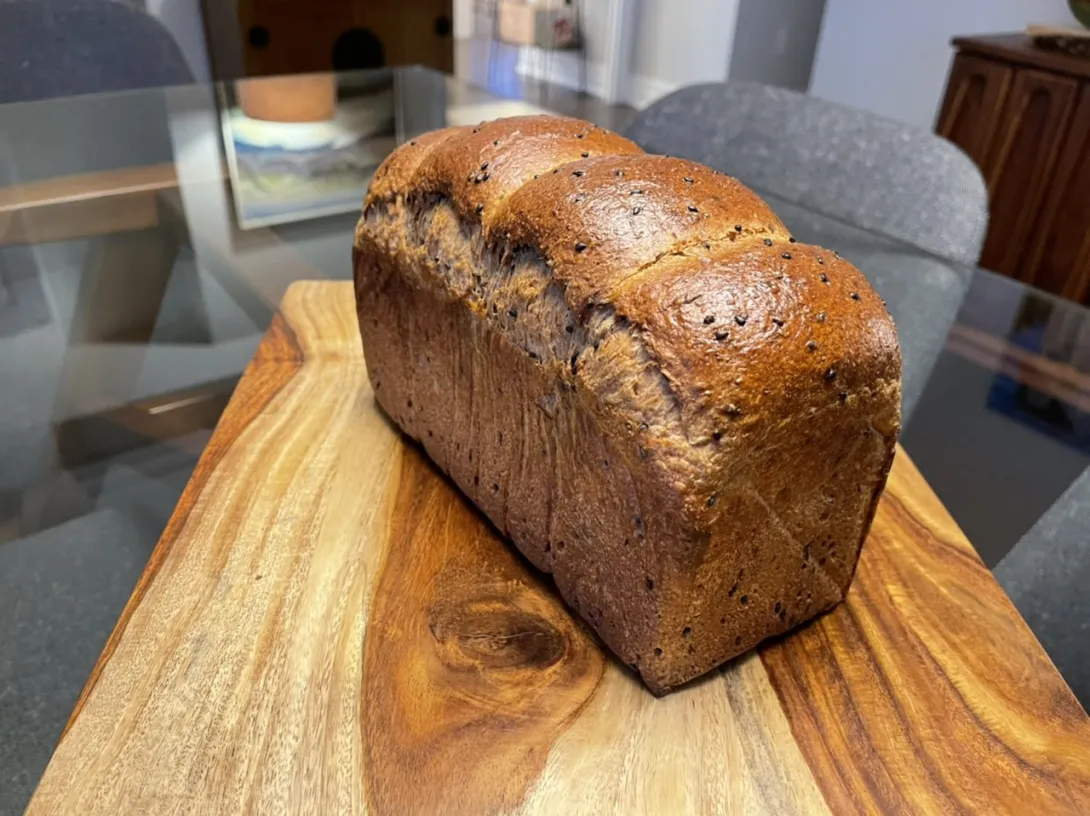
Bake the loaves for 50 minutes or until the internal temperature is at least 190ºF, rotating as needed to get even browning. Shield your loaf if it gets brown early in the baking process. After 50 mins remove the bread from the pan and bake a further 5-10 mins by placing the loaf directly in the oven on the rack with the oven turned down to 325ºF. You can brush the top of the loaf with butter if you wish at this point while the bread is still hot to keep the top crust soft.
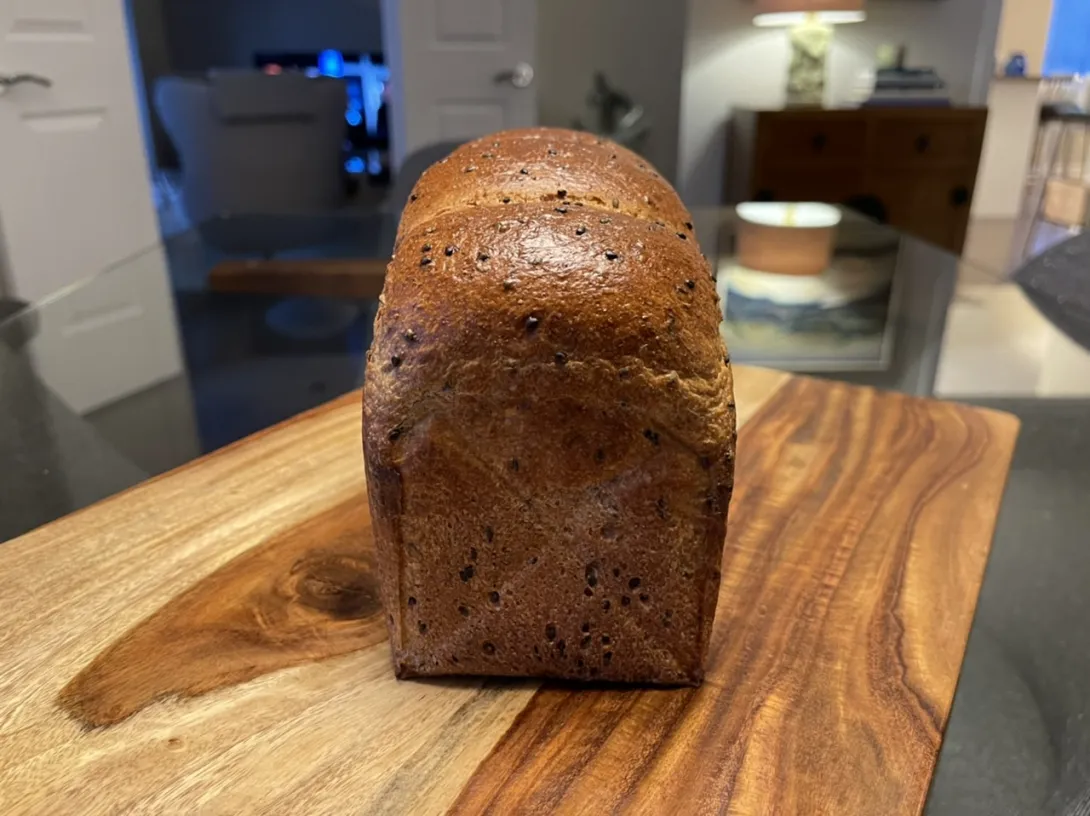
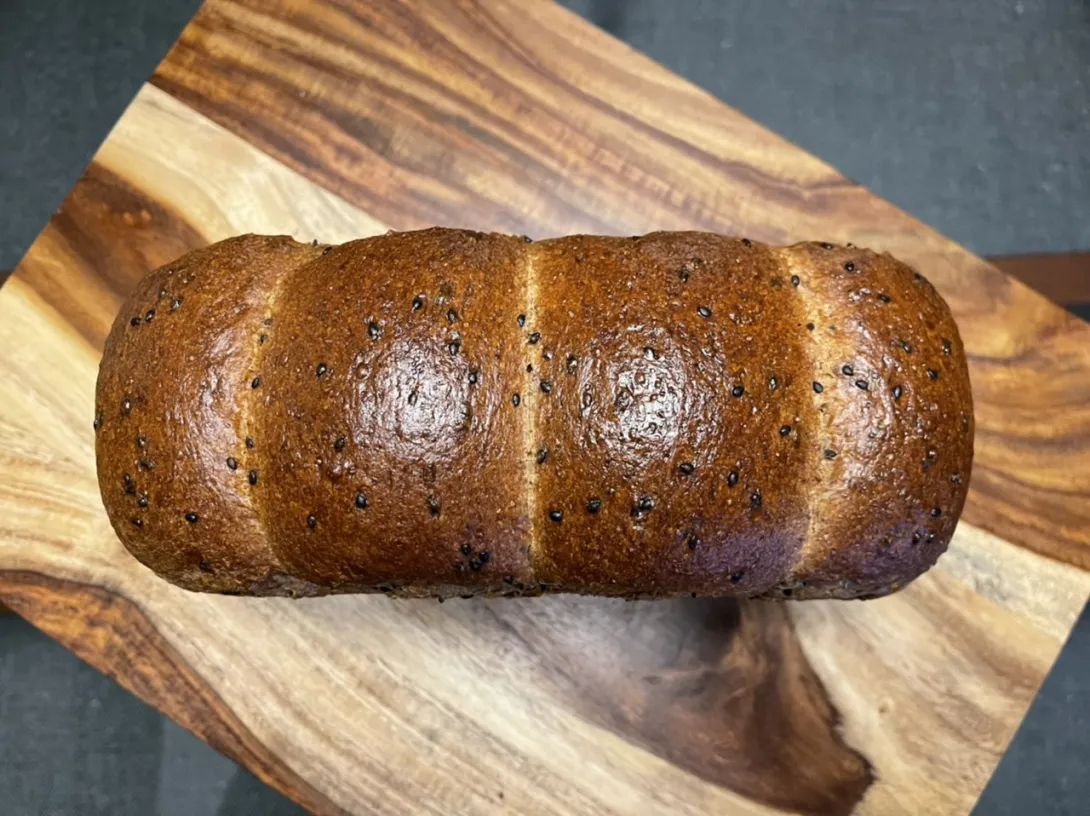
- Benito's Blog
- Log in or register to post comments
Beautiful bread, I am definitely going to try the milk bread but you know...,two tummies and so many formulas !! Your bread board is so beautiful. I love live edge wood. I think yu said it was a gift, Is this an artisan there in Canada ? A work of art like your breads. c
Thank you for your compliments on both the bread and the board. The board isn’t artisan nor does it have a live edge, now that would have been cool. Yes it was a gift for Christmas in 2020 and it is made of Indian Sheesham wood and it has rubber feet on the bottom so it doesn’t slide around if you cut on it. I agree it is pretty so I haven’t cut on it yet, only use it for pictures.😝
Benny
I saw the swirl on the side and thought it was the live edge. Very beautiful!
Hi Benny. Simply lovely looking bread. I see that steam is not necessary? I don't use steam in my sandwich loaves. I like the idea of the egg-milk wash as it gives the loaves a nice lustre. Looking forward to the crumb shot.
Cheers,
Gavin.
Thank you Gavin, I should try steam at some point just to know if it makes a positive difference or not. But on the other hand, it certainly works without. I agree about doing an egg wash, it really can give the top crust a beautiful look.
Benny
Looks like another awesome bakes. You’re becoming the king of this style of bread. Look forward to seeing that shreddable crumb…
Thank you Ian, it is taking some bakes of this to hone in on my formula, fingers crossed this one is the one.
Benny
Nailing it as usual Benny.
Interesting that the VWG has come down (I think! Can only recall how much you used with spelt).
Nice to see black sesame making an appearance. It is only a matter of time before this bread gets made with purple sweet potato too!
-Jon
Thank you Jon, I never used very much with this stoneground whole wheat since the gluten it has is good quality, just not quite enough. Whereas the spelt has so little good quality gluten so needs quite a lot more.
Now you’re just planting ideas in my head for future variations!
Benny
Super pleased with this updated formula now, the extra hydration from the increased portion of tangzhong just added the extra fluffiness to the crumb. I really like the black sesame in this and the hint of honey is nice. Now my understanding is that one of the major differences between Hokkaido Milk Bread and Shokupan is the sweetness and that Shokupan is less sweet. So I’m not sure if the sweetness is now in the shokupan range and maybe needs to be higher for a Hokkaido Milk Bread. Does anyone know?
That is the most beautiful crust. Such a glorious, rich, glossy colour. Looks like a magazine pic.
Lots of black sesame in the dough, too. Wow. How is the flavour with those inclusions? Are the sesames toasted?
My wife, native of Hokkaido and former cook (and daughter of a hotel cook), says shokupan is just plain white, unenriched, non-sweet bread baked in a Pullman.
She also mentions hotel bread which she says had butter and milk / cream but not sweet and no eggs. The butter may be integrated or maybe added to melt into a slash across the top. This is the most like the milk bread you are doing.
There is no Hokkaido milk bread in Hokkaido, but I guess there is hotel bread instead. Outside of Hokkaido, no idea what people may call stuff :)
Thank you David, I am quite pleased with this bake and the formula now. I always use toasted sesame seeds they just have such an amped up sesame nuttiness to them that I just can’t get enough of. The honey is really a background hint, I think when I use honey again I’d use more, perhaps 50% more to amp up the sweetness and honey flavour.
I’m sure what I’ve been reading and seeing on the internet written in English and by western writers isn’t necessarily correct but most will say that Shokupan and Hokkaido Milk Bread are one in the same. I’ve had a few bakers, also western tell me that Shokupan is Hokkaido Milk bread with less sugar. So your Japanese wife says that Shokupan is unenriched, just a simple white soft sandwich bread. Oh well, I’ll keep calling these Hokkaido milk bread then.
Benny
Well Hokkaido was to Japan what Australia was to Britain. So who knows how the descendants of hooligans might differ from their countrymen of the mainland, much less the Okinawans? :)
BTW your milk breads might make a nice bostock or (posted this evening) a honey-butter-icecream toast.
Yes I need to make bostock with this bread, your bostock sounds really good as does your honey butter ice cream toast.
Hi Benito,
I've made two of your recipes now - sweet potato sourdough bao and this one. We must have similar tastes, because I keep finding myself drawn to your recipes when browsing for my next baking project :)
For add-ins, I used a mix of toasted sunflower and pumpkin seeds. I'm vegan so had to make some other modifications too. I find vegan butter and vegan milks (especially soy) pretty foolproof substitutes. I used ground flaxseeds mixed with water instead of egg in the dough, and (oat)milk only for the wash.
I chose this one because my partner asked for "something soft but seedy". She says it fit the bill! It's in danger of disappearing quickly so I am already plotting my re-bake. Pictures: https://photos.app.goo.gl/8jAaB6wbPDXeet887
It's a long time since I've made any kind of sandwich-style bread, and I wasn't sure about my timing for the final rise. I did the bulk overnight and got nervous about when to bake. I ended up baking about 5 hours after taking the dough out of the fridge (including shaping time). Next time I'll organize myself so that I can follow your schedule more closely. I'll also flatten the rolled up balls in the pan more. I only have one pan so can't change its size, and they didn't quite fill out the width.
Thank you for converting these kind of doughs to sourdough and sharing your recipes with us :)
chapstick
We share similar taste, well then you have excellent taste of course 😝. Somewhere in my index you will find a vegan version of this bread if my memory serves me correctly, but it sound like you’ve already done a smash up job with your conversion. If you calculate the volume of your pan and mine, you’ll be able to alter the formula to hit the amount of dough you’ll need for your pan. My pan is a 9x4x4” so volume in cubic inches is 144 cu inch. If you pan is 8x4x3.5” then the volume is 112. 112/144 = 0.78 so just multiply all the ingredient weights by 0.78 and that is how much dough you’ll need for your pan.
Benny
Love the seeds!
Like you, I've found vegan butter and milk worked well although I did have difficulty keeping the seed topping on and you seem to have worked that out! And I did use some ground linseed to sub for the egg (described in the link) and think that worked nicely.
I found that those last few hours were when the bread got the extra volume as it filled out the pan, so it isn't worth rushing it into the oven too soon.
And, for the record, I used the same quantities as Benny for a 4lb loaf pan (23.5cm X 11.5cm X 8.5cm).
-Jon
thank you! Brushed the oatmilk wash and then sprinkled poppy seeds on top. I was surprised how well they stuck too. I like Benny's cornstarch glaze idea in the comments to your post. I am a pretty lazy baker but might try that next time I'm baking an asian-style bread for something other than immediate consumption by my partner and myself ;)
Awesome to see so many veganized loaves!! Found Benny's here. Toasted walnut oil sounds like it would be amazing in this loaf.
"the previous bread used a 'plant butter' that was really just a margarine with good marketing" - I love this :) I was never a big butter fan before becoming vegan, so I don't usually splash out on the fancy ones. The only time I did, I made croissants with it, which turned out great. I can't remember what brand that was though, and I'm not sure it even still exists.
That's good to know about the extra volume - I'll try my best to be patient next time.