A while back I reached out to Mariana about a comment she had made regarding keeping a starter's microflora consistent with the use of white flour. That led to some back and forth DM's, and in the end, I am in the process of attempting to create a Nancy Silverton grape starter. I may be building the starter and sharing my data/observations so far, but this post is as much Mariana's as it is mine. She has guided me through it step-by-step!
My starter isn't done yet, but I've made the transition from establishing a sourdough culture to feeding it and allowing the microflora to take on a life of its own. For now, I'll provide the method as it was described to me and my observations so far. I'll edit the post with any final observations and if all goes well, pictures of my first loaf using it!
Method
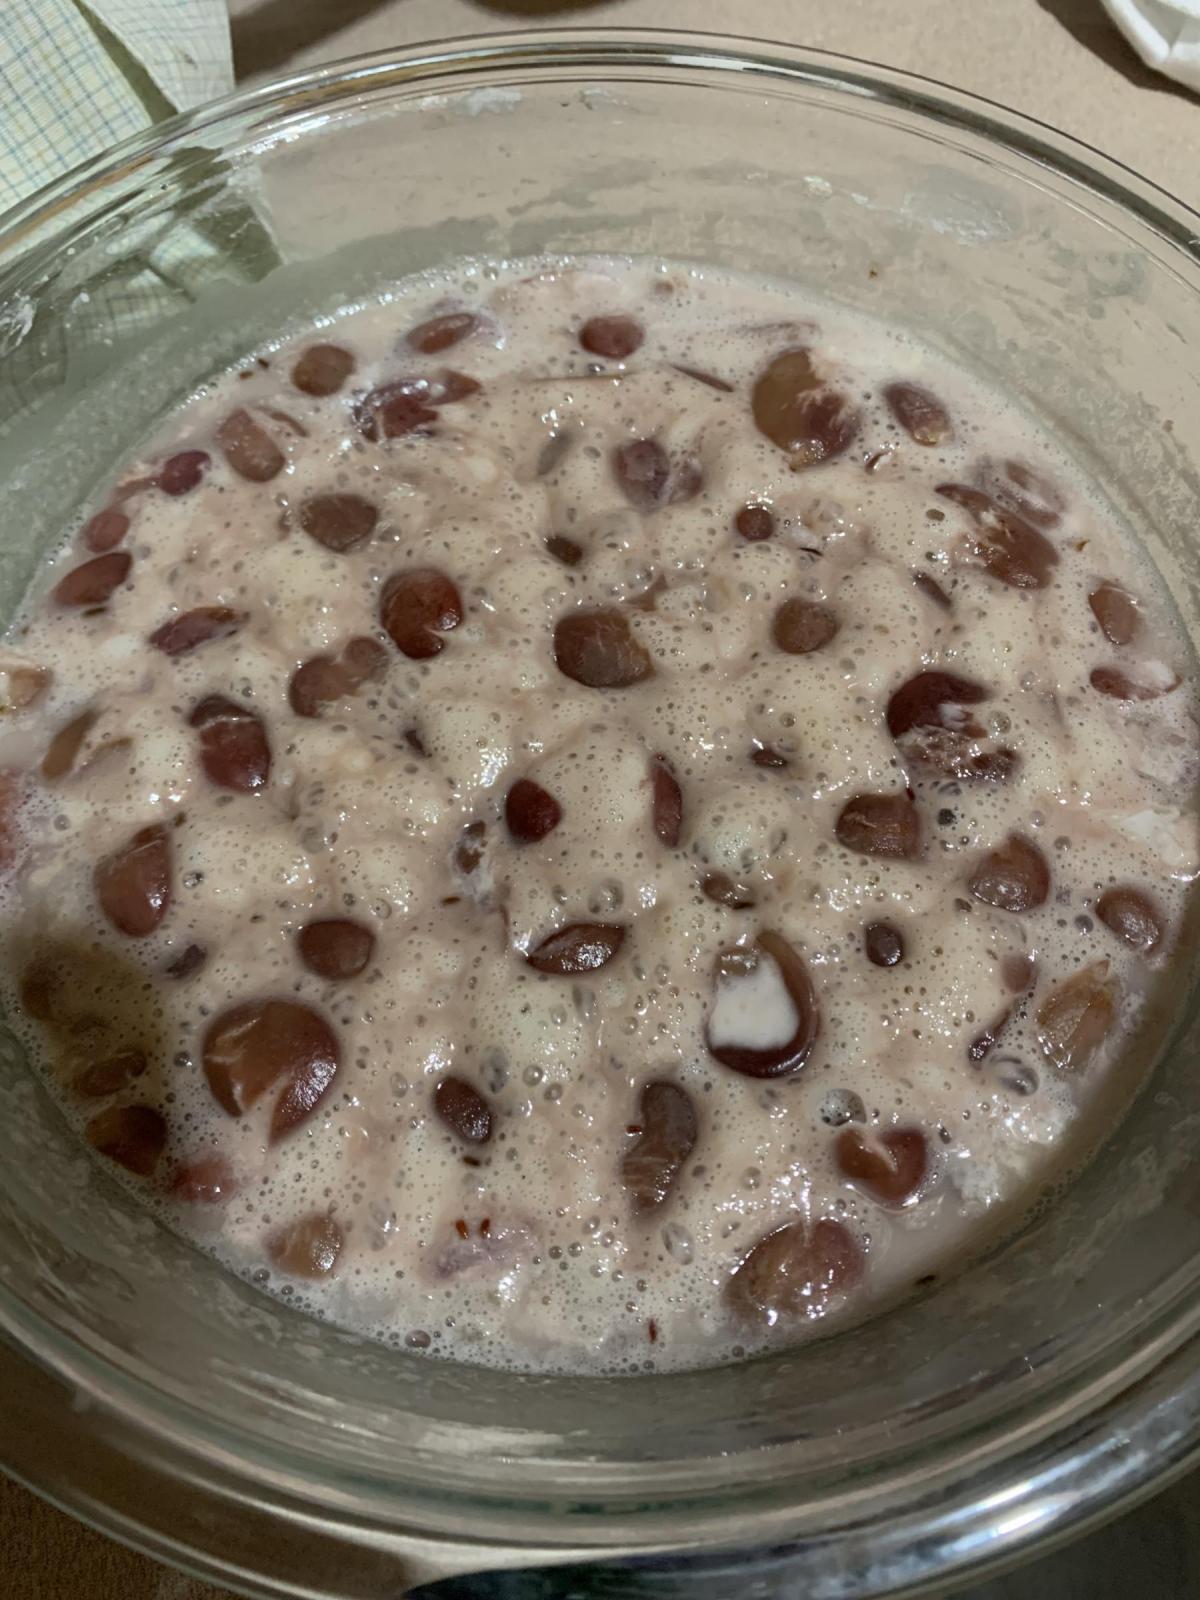
Day 1: Combine 400g unwashed red or black grapes (crushed), 800g water, and 480g bread flour (not AP flour). You can cut this amount in half, but do not go any less than that or you risk not forming a stable culture. Place the mixture in a bowl and cover with a cheese cloth or tea towel. Allow mixture to ferment anywhere between 70-80 deg F (I used my proofing box set at 76 deg F)
Day 2-3: Allow to ferment. Stir 1x per day if you want but not required. The gas generation due to microbial activity will naturally provide enough agitation to keep things well fed.
Day 4: Feed the growing culture a little snack. Add 200g water and 100g bread flour to the initial mixture.
Day 5-9: Allow to ferment and let natural selection take place. The microflora is feeding and sorting out who will survive and who will die off. It's taking on its own unique characteristics at this time. Again, you can stir daily but not required.
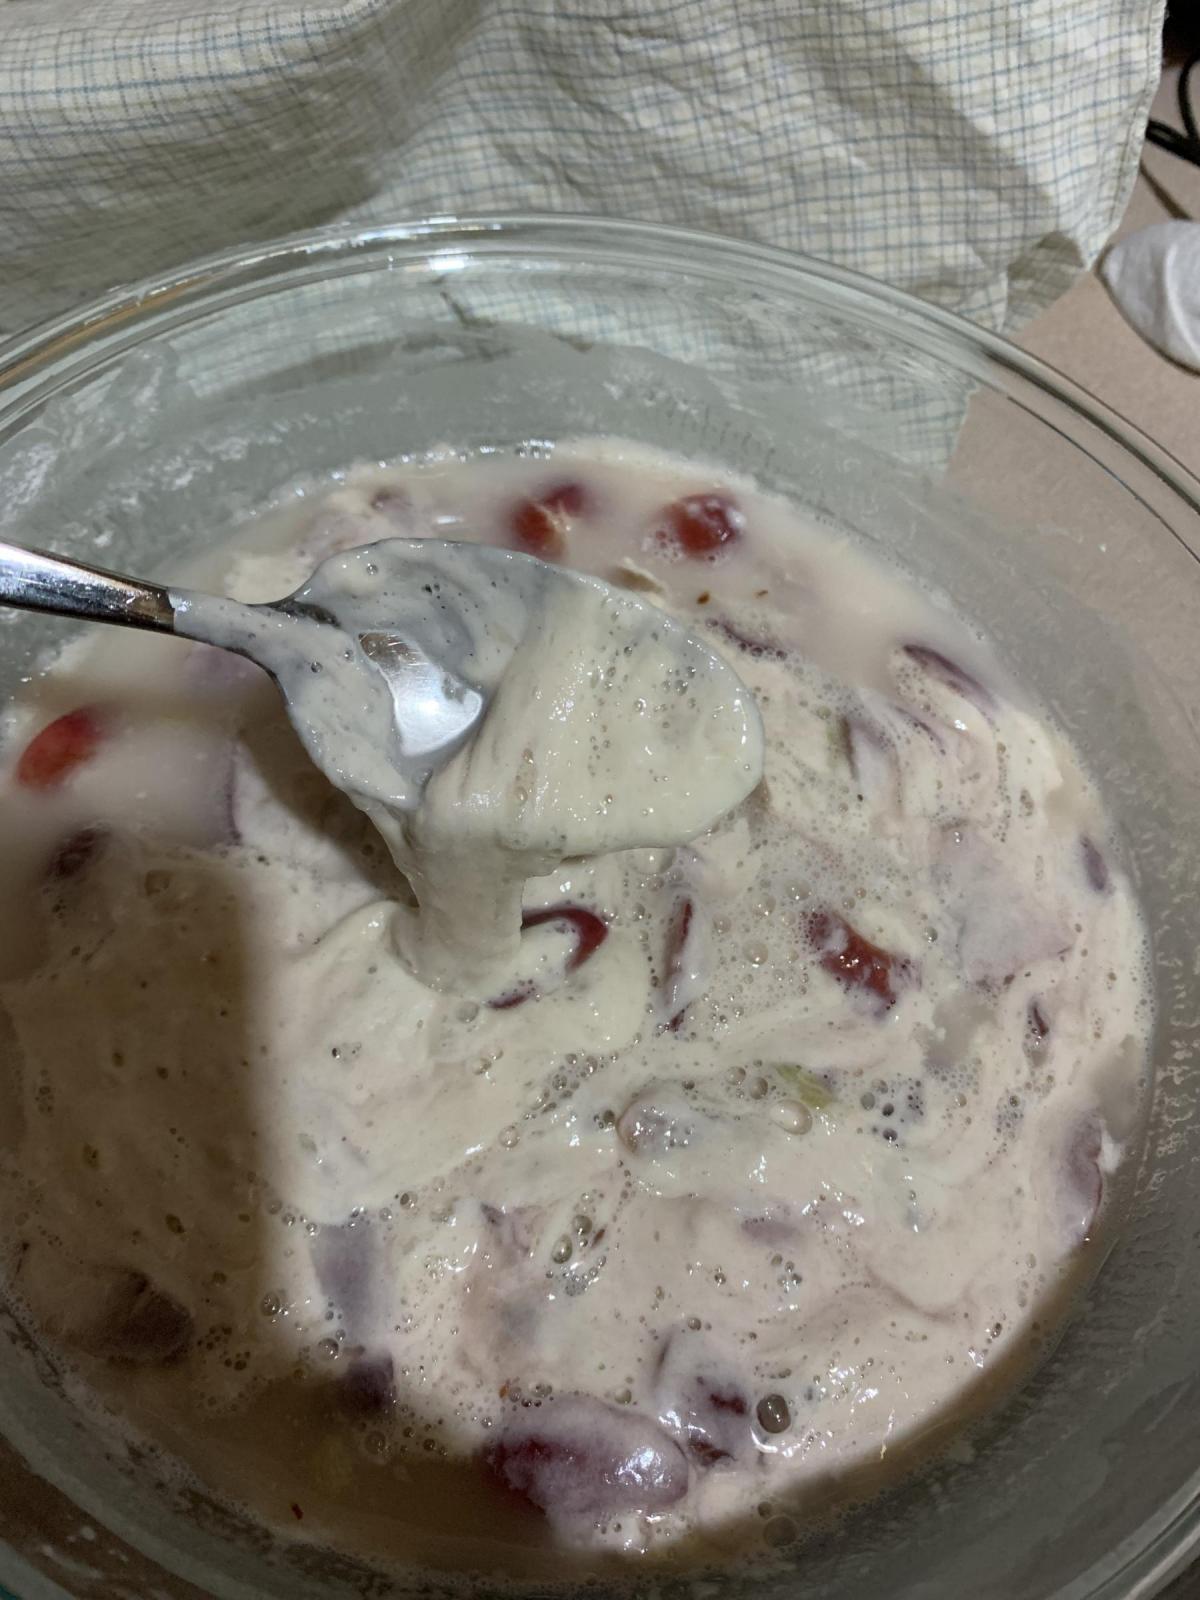
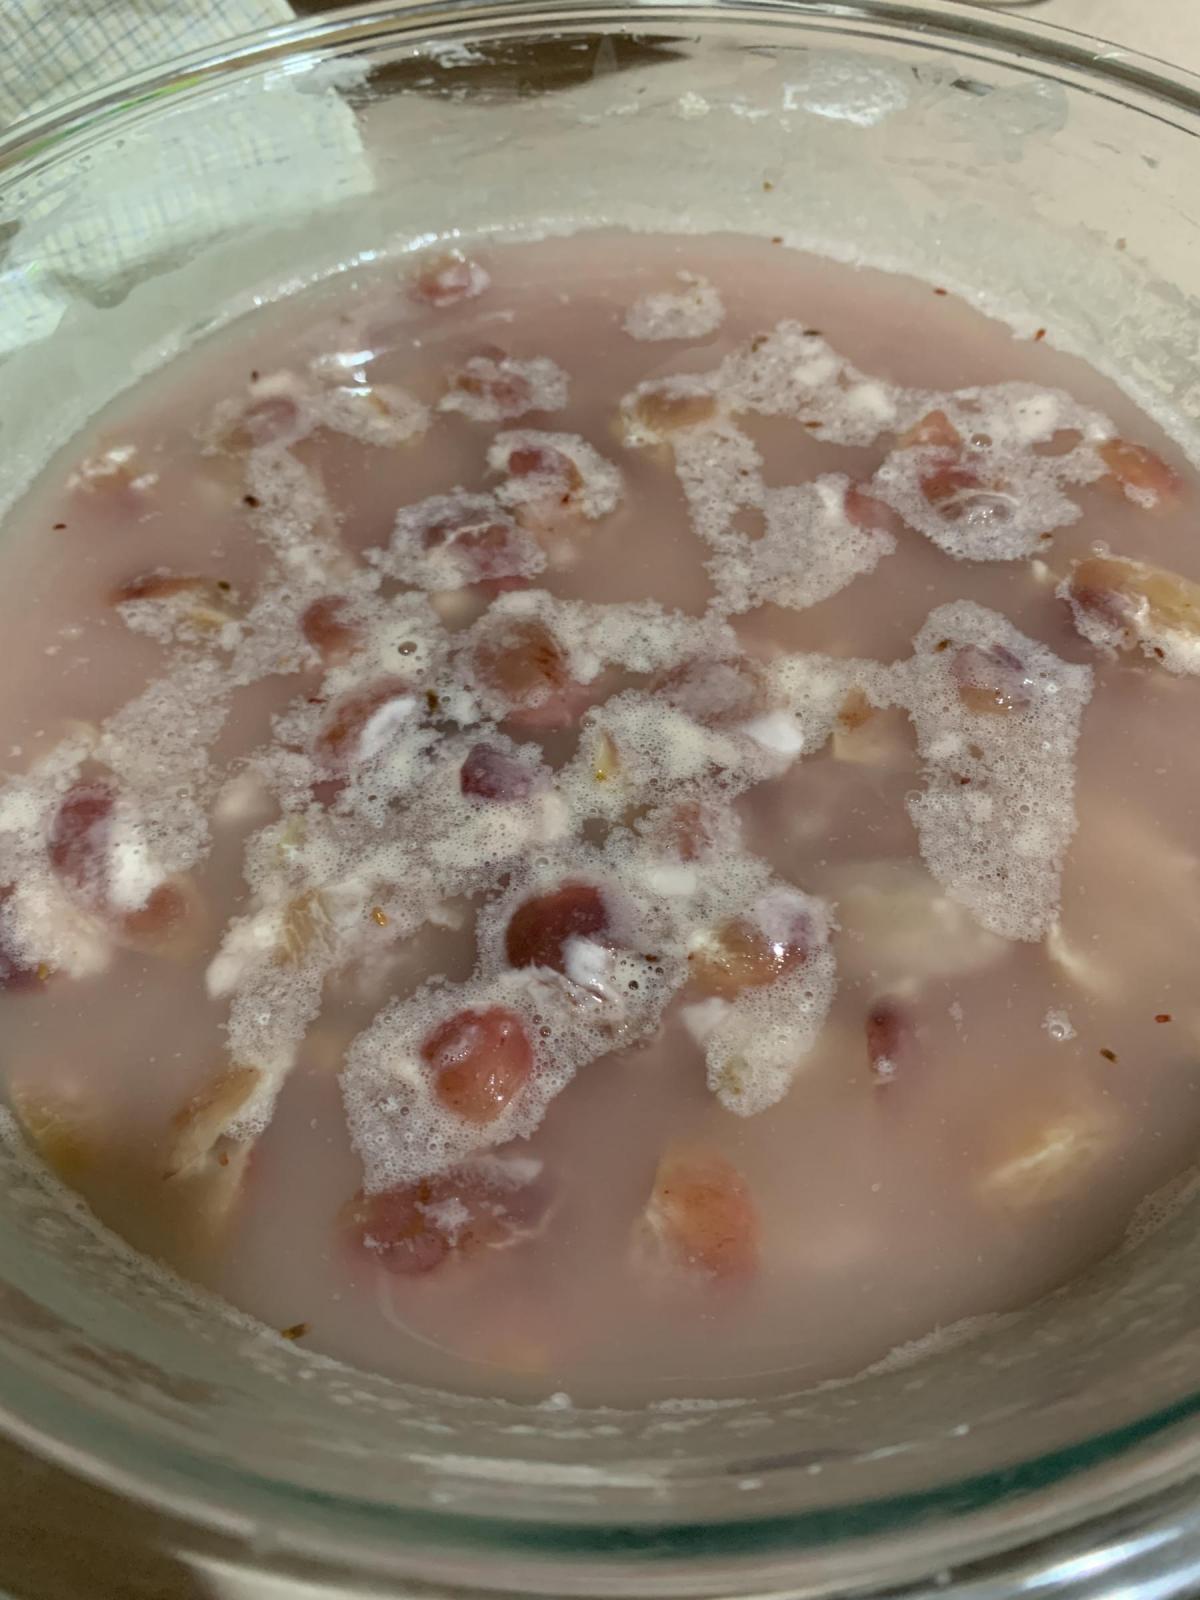
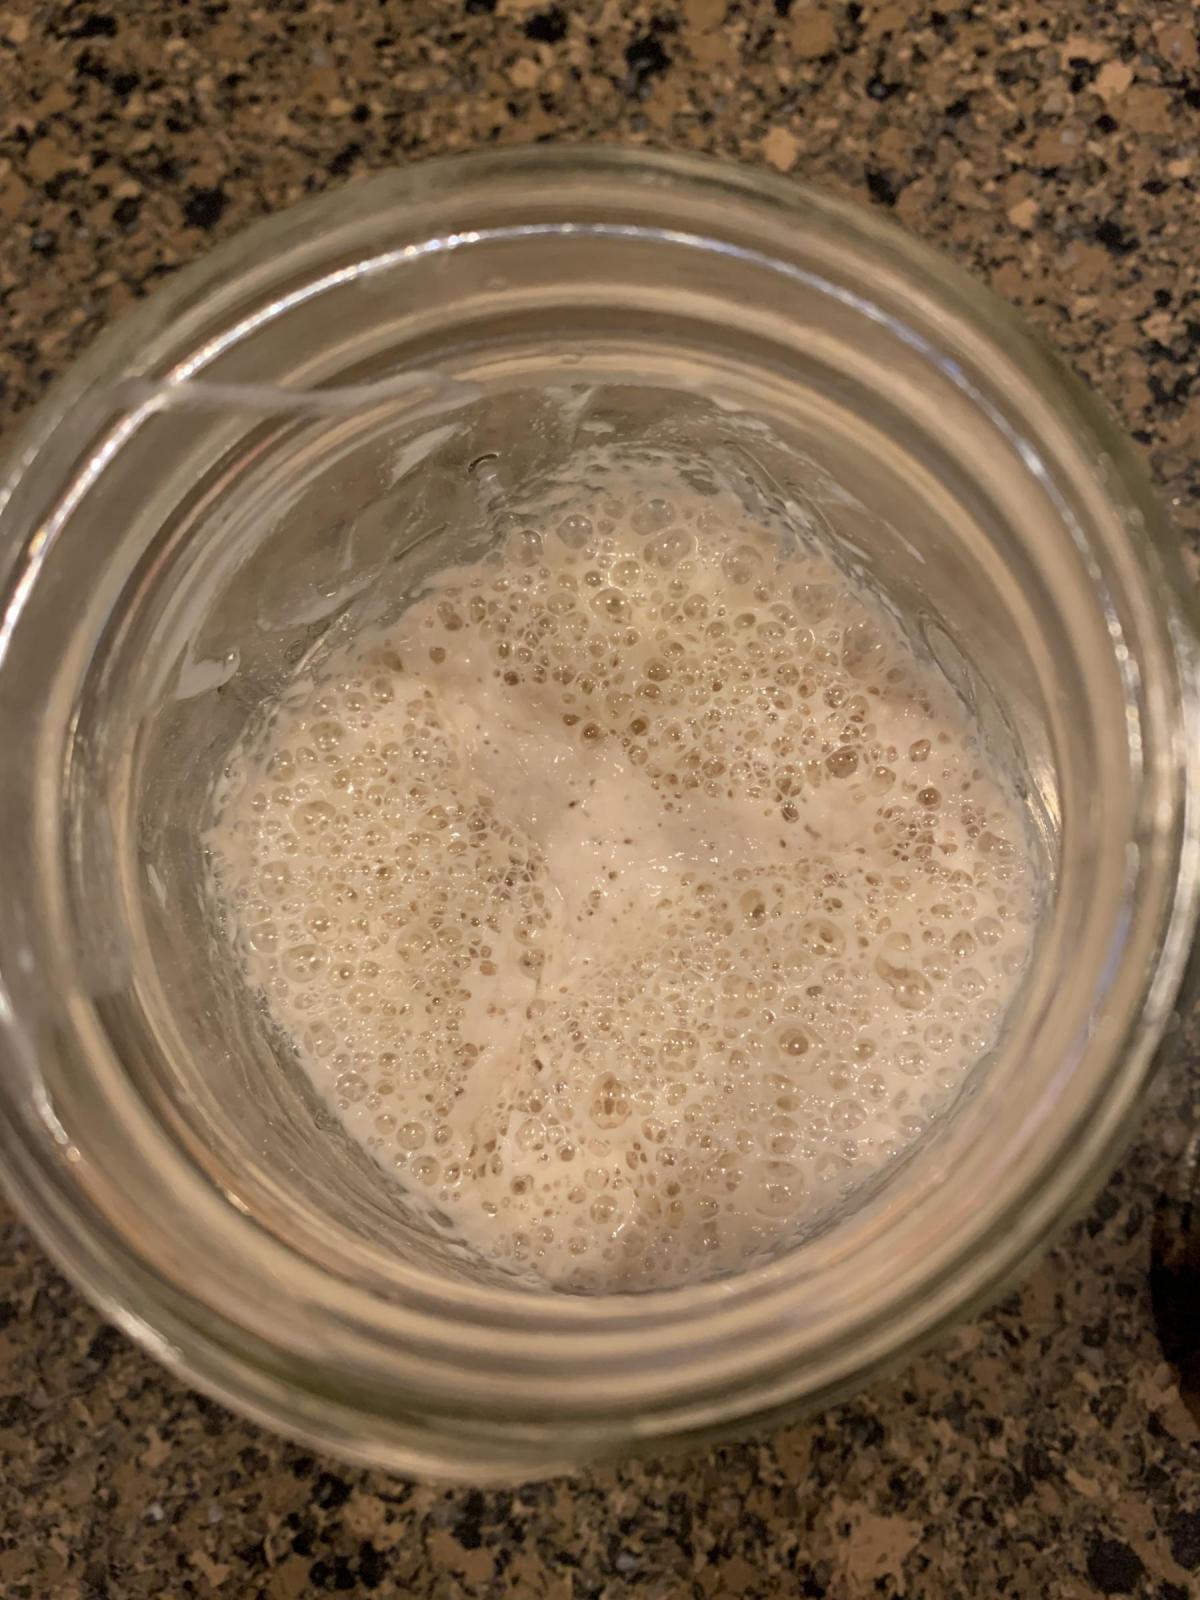
Day 10-14: Time to start feeding and strengthening the culture. The next 5 days take the mixture from a sourdough culture in its infancy to a strong sourdough starter. Take 200g of the mixture (strain out any grape pieces) and discard the rest. To that 200g, add 120g of water and stir. Then add 80g of bread flour (150% hydration) and mix enough to wet all the flour. Let rest for 10-60 minutes then "whip" the mixture with a fork to develop gluten. After whipping, let the culture sit still and ferment for the remaining time. Repeat the feedings 3x per day with the following schedule: 6-hour feeding, 6-hour feeding, 12-hour feeding. Because of the high hydration, the starter will not double like the traditional 100% hydration starter. It will develop a froth on the top and will swell. Do not worry about feeding at the "peak". Stick with the schedule. For the first couple of days, your starter may have a layer of liquid on top of the flour at the feeding point. Remove the liquid before stirring and then feed as described above. As the starter and gluten structure strengthen, the layer of liquid should disappear on the subsequent feedings. If you are in a climate with high humidity, you may need to drop to 125% hydration to keep the flour from separating.
Day 15: You now have a starter that's ready to use or be refrigerated. When you refresh, remove from the refrigerator and let warm up for 30-60 minutes. Give it three feedings as described above on the 6-6-12 schedule to re-establish the microflora.
Observations
I noticed a "sour" aroma that resembled Greek yogurt after 48 hours. The aroma changed to something more like wine/alcohol as things progressed.
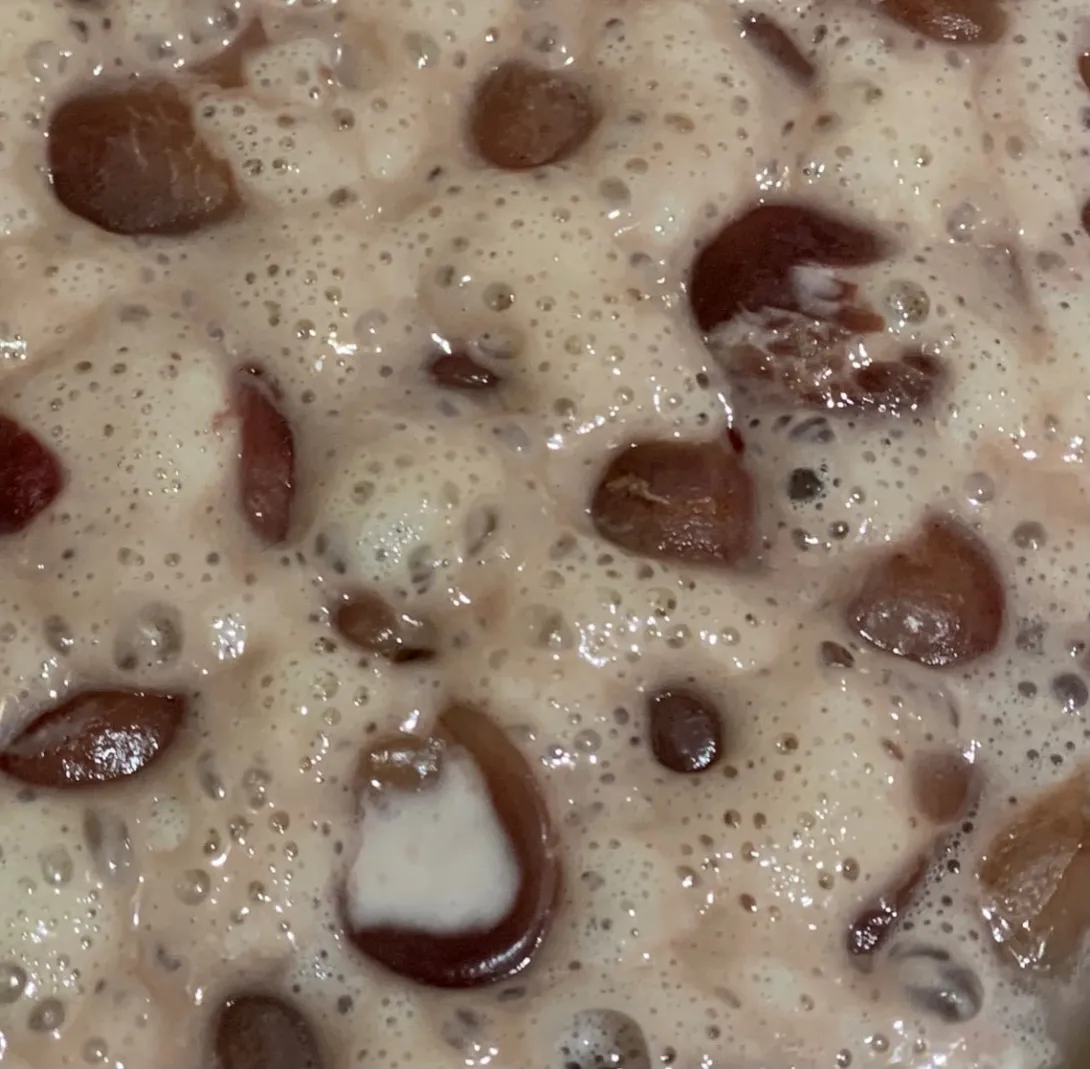
On Day 3 and again on Day 6-7, I had a gluten-like foam floating on the surface.
pH of the mixture dropped rapidly in the first 48 hours and then slowly dropped to just under 3.4 where it stayed.
pH Chart

Photos
Gluten-like foam after 46 hours...
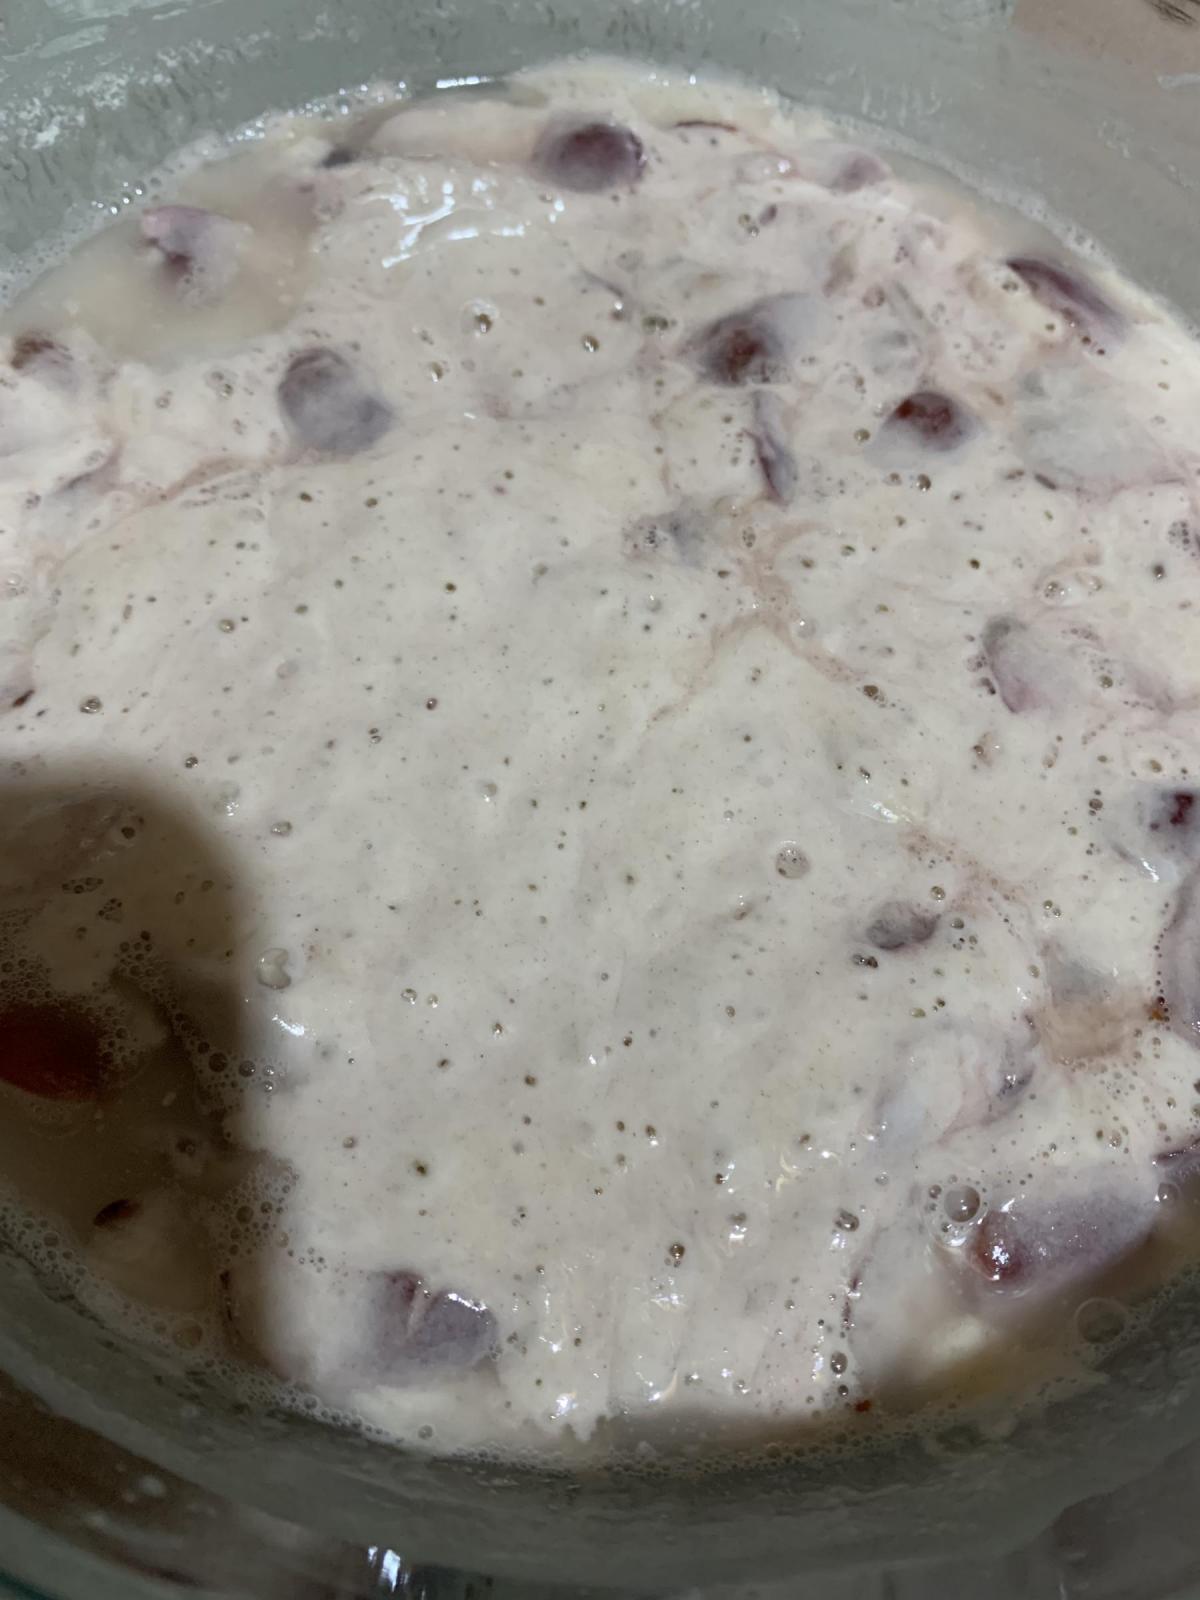
Liquid on top of flour with signs of slight yeast activity - Day 5
Strong yeast activity and foam floating on surface - Day 6
Nice foam formation at the end of the second feeding! - Day 10
Data Log
EDIT: Day 1 amount of KAF flour should be 360g. NOT 3600g.

That's it for now. Will post edits as the starter matures and the first bake is finished!
I shall be following. Once made a starter with basil leaves and to say it bubbled up well is putting it mildly. It practically climbed out of the container. I wonder if when made and established as a viable sourdough starter if using all these methods makes them so different or are these methods just to kick start them. Having said that if you get a good flour and perfect conditions one can make a starter with just flour and water within 2-3 days. Not guaranteed mind you but possible.
For me, it was as much curiosity as anything else. How do you get different aromas and flavors, and once you get something you like, how do you keep it from changing with subsequent feedings and the micro flora that comes in with a new batch of flour. I’ve had my rye starter change on me a few different times to the point where I just started over. Just curious to see if this stays more consistent and what flavors it produces (if my palette is refined enough to even notice a difference 😁).
This is an enormous amount of flour and days working toward a grape starter. I am wondering what the difference would be to simply make a grape yeast water with organic grapes and feed it fresh grapes every few days till it is nice and fizzy then take a small amount and create a levain with flour. You could then feed that at much much smaller amounts of flour and YW and build it in a couple days to a very viable yeasty levain. I am not clear on how the yeasts ultimately would differ and it would take a lot less material and fewer days.
Will be interesting to hear what others think. Looking forward to seeing the results of your experiment. c
I think you could make a great levain that way that would be viable and flavorful, but I'm not sure if there are much lactobacillus in YW. So, I'm not sure how much acidity it would develop. It would be interesting to see what happens with that.
I agree it's a lot of flour, but I've saved some discard and will make something from it. I'm committed at this point, so need to see it through till the end. Two days to go. :-)
If one makes the YW and then mixes 50g of it with 50g fresh ground rye. And each day takes out 50g of that and feeds it water and more rye you would have a flour and YW based levain that had been fed only flour after the initial infusion of the grape YW. But admittedly it wouldn’t be very grapey by then at all. Definitely want to see what happens with your experiment!
This whole project is very interesting! I had an idea for the discard you saved; wouldn't it make terrific sourdough crackers? King Arthur Baking website has a recipe for them that is easy to use and they can be seasoned with any fresh herbs you like. Could be a tasty prelude to the bread you'll eventually make from this starter.
Thanks and funny you should mention crackers! I was going through the recipe for them in Breadtopia’s “Sourdough for Beginners”. I think they are in the future. 😁
I have made several batches of discard crackers and really enjoy them. Some lightly salted, once with some herbs added. And the last couple of batches with a little cinnamon sugar sprinkled on top of the rolled out dough instead. Those have been my favorite so far. I have started making "discard" on purpose whenever I want to make crackers.
The biggest challenge for me is getting the dough rolled out to a consistent thickness. The edges tend to be thinner and bake faster than the center. And the center crackers are a tad thicker than I prefer. More experiments and experience required. 😉
I use my pasta machine to make consistent dough for crackers... thinner the better :)
I am not happy with the cracker recipes I've tried. Would love to see yours. We have a pasta machine we use all the time so that would be a great use for it in addition to pasta. Thank you.c
Full disclosure: Although I've made crackers a bunch if times, haven't made these since before COVID. It looks like my notes show I was playing around with it a bit and I can't remember why.
The key with crackers is to get them thin and crispy. If you try, use your judgment with the proportions i.e. add water slowly etc. and watch the dough as it forms. Adjust for your own taste.
I've made crackers with a manual pasta roller and my kitchenaid attachment. I prefer the kitchenaid as it is tiresome otherwise.
Crackers
2 cups AP flour
Quarter teaspoon salt
1.5 cups water
2 tablespoons oil
1 to 4 Tbsp each of seeds (toasted sesame, flax, mustard, hemp)
1 to 4 Tbsp other flour like wheat or rye
add all into mixer bowl
knead in mixer with dough hook until consistent dough
Divide into four portions
Shape into rectangular blobs
Run each portion through pasta roller five times for kneading, fold and rotate dough after each pass
Roll each portion from setting seven all the way down to five
(note if you add seeds to dough, larger seed size will get stuck in smaller settings of roller and tear dough... you can still bake it)
Cut into rectangles (you can also lay out dough on sheet and cut with a pizza cutter)
Place on baking sheet
Bake 400° for 17 minutes or 425f for 13 mins
Note: I have an insulated baking sheet so my stuff doesn't burn. If you don't, adjust or watch accordingly. You want lightly browned crackers that snap.
I am searching for tried and true successful recipes for crackers. So far I haven't been happy with the discard crackers that I have made. Thank you in advance. c
I have been using the KAF version, but scale it down to half because I don't keep much discard. A few did puff up the first time I made it, so their advice to prick the dough was good for making sure the crackers stay flat. The last couple of batches did not puff at all even though I didn't poke the dough, not sure why. I actually enjoyed the puffy ones and was hoping for that result. They reminded me of Life cereal, lol, but barely sour wheat flavored instead of oaty.
Mary
Very interesting Troy, I’ve never read about this process of creating a starter before, but it makes sense. What I do find particularly interesting is that the pH settled so quickly down to 3.4. I forget where I had read that starters never drop below a pH of 3.5. I’m looking forward to your bakes with this new starter.
Benny
I haven’t taken any pH readings at the end of a feeding, but I will grab one today.
pH is a fickle measurement. In my experience (industrial setting), it is difficult to get two meters to get the same reading, on the same water source, at the same time. You can get them close and can definitely get them in the same range, but difficult to get identical readings. To me, 3.4 vs 3.5 is not that different, especially if you go out to the one-hundredths place and round. I checked calibration on day 3 and day 7 with the 4.0 buffer, and both times the meter settled in at 4.01. I’m confident the meter held calibration and was consistent throughout the measurements, but can’t say how it would compare with another meter on the same mixture.
It’s speculation, but my guess is the other factor effecting the 3.5 minimum is time. If this would have been my typical starter routine, I would have started feeding it on day 4-5 when yeast activity first showed. Numerous times Mariana had to talk me off the ledge because I was worried the culture would starve out. 😁. If I had fed it, that would bring the pH back up, and you’d start the process all over. The yeast really bloomed on day 5-6, but the pH didn’t reach its minimum until day 7. I guess it would depend on the person, the experiment, and the starter, but the average person grabbing starter pH during feedings may never see the minimum because they would grab the pH when the starter is deflating, which is likely well before the pH reaches it’s minimum (would have been day 6 in the above data). I think with this method, you really drive the pH to a minimum and then stay there. Only those critters that can survive in that range make it. Then, you tend to lock in that microflora because you are feeding it white flour that should have less microbes on it. The subsequent feedings are 1 : 0.6 : 0.4 so there isn’t as large a pH increase at the start of a feeding as with something more typical of a rye starter like 1:2:2. That keeps the acid loving microflora happy throughout a refresh cycle. I don’t know that it makes any difference at all, but I can see how it would.
Will the bread be any different? No idea, but it’s been a fun journey. 😉.
EDIT: Benny, your 3.5 was spot on. pH was 3.54 after 10 hours (had to cut this 12-hour feeding short due to a conflict).
I'm sure you're right about pH meters, you have much more experience using them than I do. They do seem fickle to me though now having used a couple of different ones.
of flour does this process take to get the starter “ complete” according to the original formula? I read a much abbreviated version and then what was supposed to be her original formula. Neither sounds exactly like what you are doing. Thoughts ? Thank you your first loaf looks great! c
My understanding of the original method, as it was explained to me, would take approximately 4 lbs of flour. I can't say for sure on the different versions. There is also a French style starter that begins the same way but only takes 6 days and only takes a few refreshes to be ready to bake with. That starter will not be as sour as the one I'm making though.
I don’t want sour at all that’s the reason I use the YW and a regular SD levain as well in most of my breads. Many times I use 3 different levains one YW and a rye SD and a white SD . Always very young levains again to decrease sour.
Do you have a link to the French version you mentioned? I believe that would suit me. Thanks for the info and enjoying your adventure! C
I don't have any links. Everything was conveyed to me directly, but here's what I have. In making my sour starter, I did take some of the culture on day 6 and do the feedings as described. I dried that once it was matured. I haven't tried using it yet, but it's on the list. :-)
Here's the procedure for making the French style starter. It starts out the same way as the sour starter.
2 cups bread flour
2.5 cups water
250-500g red grapes.
Mix flour and water. Pound the grapes, submerge them in the flour&water mix, cover with cheese cloth and leave for 6 days. Every day stir this mixture a little bit.
Then strain, measure out 1 cup of this culture, add 1 cup of water, 1 cup of bread flour, mix/ Discard the remaining culture. Repeat two times every 3-4 hours. Now you have a ready to bake with French starter. It has yogurty fragrance upon refreshment, gives incredibly fragrant breads that are not sour to taste, and its culture (microbial community) will not survive refrigeration at temperatures below 50F/10C. You need a dedicated wine fridge set to 55-60F to keep this one going. Then it will be eternal if you refresh it once every three days (twice per week) and let it mature inside that wine fridge. This way it is always ready to bake with. Of course, you can always dry it and it is easily restored overnight from dry to fully capable.
I was all set to make it! Not going to dry and revive I’m sure I know me too well! I think I’m just going to do my grape YW and create a levain and see where it leads. Will post back soon. Thank you for your precise and interesting project. c
I'm way overdue for an update on this project.
The starter has matured and I have been using it successfully. However, I was unable to get and maintain good gluten development at 150% hydration. I slowly worked my way down to 120% and have been there for the last couple weeks.
For starter maintenance, I do refreshes at a 1:1 ratio (1 part starter to 1 part combined water and flour). Currently, that's 110s:60w:50f. The first refresh out of the refrigerator is 12 hours, and then I do either one or two 6-hour refreshes depending on how much time I have available. The final refresh before going into the fridge is 8-12 hours. I don't worry about catching it at the peak. That usually happens in about 3-4 hours. The mature starter can be used out of the fridge within 2 days. If it will be there longer than that, I stir in a teaspoon of brown rice syrup then carefully cover the starter with 3-4 inches of water (keep it in a quart jar). The water pulls the alcohols and other metabolic by-products away from the starter and keeps it clean. To use it, carefully pour off the water, stir the starter, and do a refresh.
So far, I'm really happy with it. The maintenance is a little more involved, but I like the flavor. The acidity is definitely there, but more mild than with a rye starter. And the following statement is more speculative and maybe I'm seeing what I want to see after going through this process, but it seems to respond and rise better on predominantly white flour loaves than my rye starter did.
Here's a picture of the starter just after it's peak (had receded maybe 1/2"). I usually get a good 2.5-3x rise.
Here's some of the bread made in the last couple weeks using the starter.