This bake went well enough, I think I am ready to move onto the next phase of perfecting this recipe... flavor.
Recap:
The wife has tasked me to come up with a sandwich bread recipe our family can bake at least once a weak to completely replace our regularly purchased box store sandwich bread.
Requirements
- Soft and light
- 100% whole wheat
- Recipe must be easily repeatable and easy to execute.
- Recipe must be designed for a covered pullman loaf pan.
(https://shop.kingarthurbaking.com/items/pain-de-mie-pan-pullman-loaf-pan-13) - My 12 year old daughter must be able to bake the bread from start to finish
- Sourdough leavening only.
- From start to finish, the bread must be completable in 1 day.
- Process must exist to enable the baker to know with reasonable certainty that the loaf is perfectly proofed.
- Dough needs to contain a few softened chewy seeds, grain berries, etc. for texture and flavor.
- Don't use bran flakes as a bread topping.
- 1.5 out of 10 on the TexasBakerDad sourness scale, whatever the heck that means :-)
Summary of the Bake
The Good:
- The loaf's density was acceptable. I might have been able to get the loaf slightly less dense. But I think I am to the point now where if I try to squeeze out better rise results, it won't be the best use of my time.
- The 15 minute bake time reduction seemed to be about right. The crumb was strong, the crust color was right. I might have been able to shave off another 15 minutes, but that would have been cutting it real close.
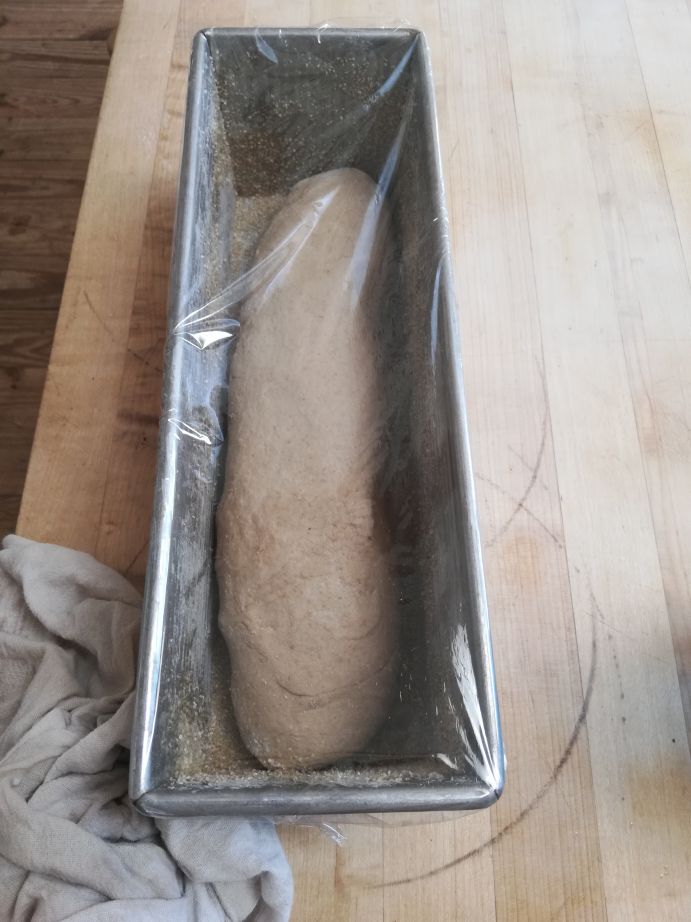
- I was pleasantly surprised by how the shaping went... I was worried that the dough wouldn't have enough structure and strength without a bulk rise for the shaping to do much, but my worries were unfounded. I mean, it was very different than shaping after the dough has built up some air pockets, but it was still shapeable and the shaping definitely had a positive effect on the rise.
The Bad:
- Shaping the dough right after kneading (skipping bulk ferment), was a bit tricky, the dough was quite a bit more sticky. I eventually got the hang of things and once I had some surface tension built up, the dough stopped wanting to stick to everything. My concern now is... can I teach my daughter to pull it off?
- I really wanted to try shaping the dough into mini loaves and then load them into the pullman side by side, but I TOTALLY FORGOT!
- Accidentally put flour on both sides of my dough during the final shaping... this doesn't seem to have negatively effected the final bake, but I figure I should annotate the mistake anyways.
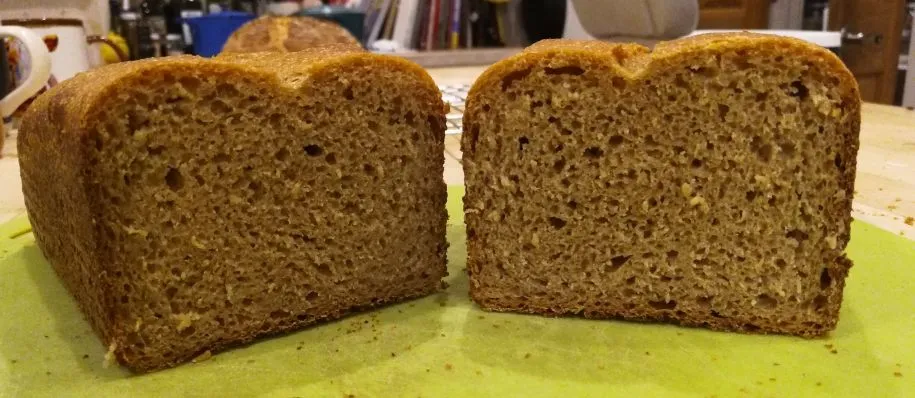
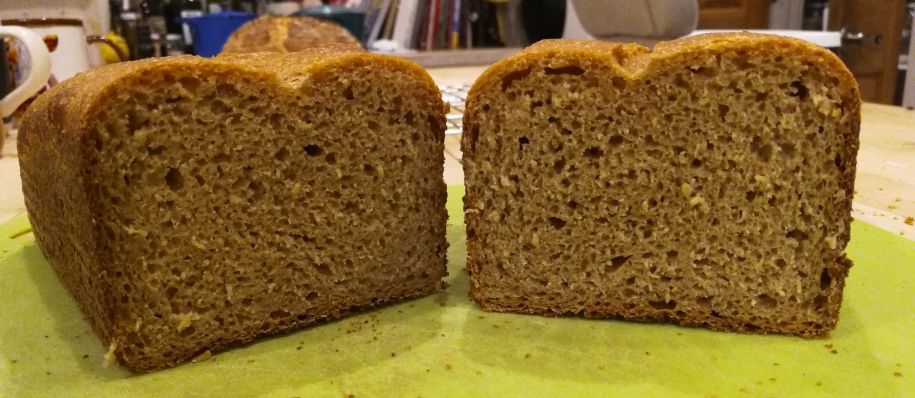
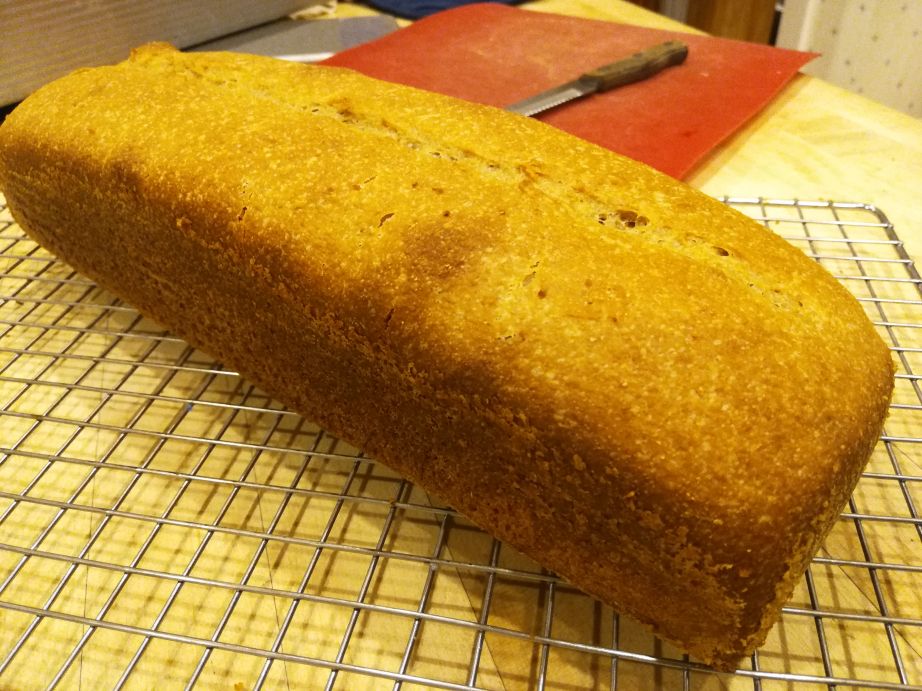
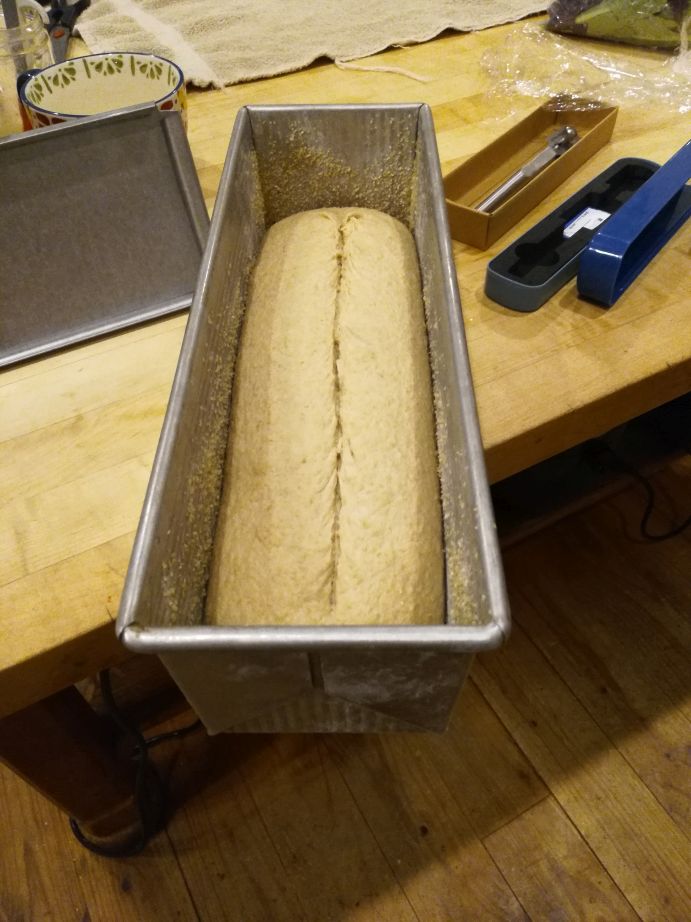
- I scored the dough. The scoring went fine, but I was surprised by the lack of spreading of the score during the oven bloom. You can see from the crumb shot, that score opened up a little, but what was weird was that the crust to the left and the right of the score rise higher... so, there was definitely some oven bloom, but not in the place where I scored. I don't know what to think of that... did I overproof a bit? Was I too rough with my scoring? maybe too deep? I guess it is something to think about.
What to do next:
- It is time to start experimenting with different additives... cracked wheat, seeds, other flours, milk/butter, etc. etc. There are so many direction I could take this, so I am going to create a TFL post getting some ideas on how I could narrow things down and give myself some direction.
- I will be shaping the loaf as 3 or 4 mini-loaves next bake.
The Final Results
Ingredients
- 60g (12%) sourdough starter (50:50 hard red)
- 50g rolled outs
- 30g (6%) honey
- 10g (2%) non-iodized salt
- 30g (6%) virgin olive oil
- 475g (95% if you include rolled oats) well water
- 450g hard white wheat (sifted to remove bran)
Process
- 9:25a: In large mixing bowl, add: 475g of boiling water, 50g rolled oats, 30g honey, 10g salt. Mix and let sit for 10 minutes.
- 9:35a: Mix in 30g olive oil
- 9:36a: Without kneading, mix the 450g of hard white wheat to combine into a shaggy mess. Let autolyze for 10 minutes
- 9:46a: Smear 60g starter over the top of the dough mess. Use drum on Ankarsum and knead until dough stops showing improvement (record time elapsed, about 8 minutes).
- 10:00a: Dump dough onto bench, siphon off 20g for aliquot, then preshape, then wait 15 min.
- 10:05a: Prepare pullman pan, liberally butter all sides and apply flour.
- 10:15a: Shape dough and load into pullman.
- Let dough proof in pullman until aliquot shows 1.70x rise over original volume
- 5:15p: Preheat oven 375dF
- 5:55p: Score, put lid on pullman and stick in oven for 1 hour 15 min. Bake covered the entire time.
- 8:25p: Pull from oven, transfer loaf to rack. Let rest until cool, probably 2.5 hours.
- 10:55p: Slice using slicer then put loaf in plastic bread bag to keep it soft.
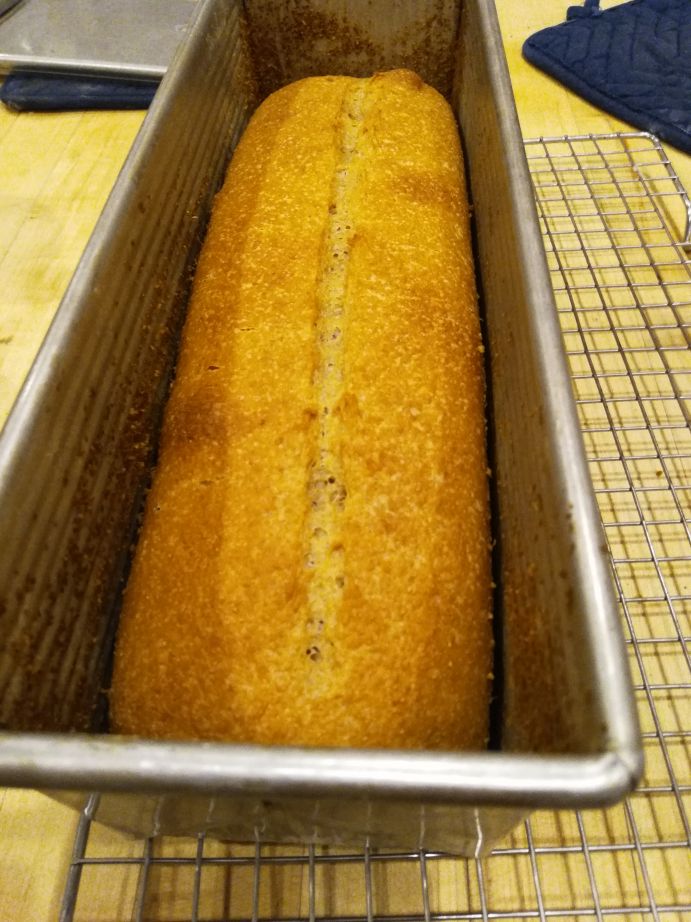
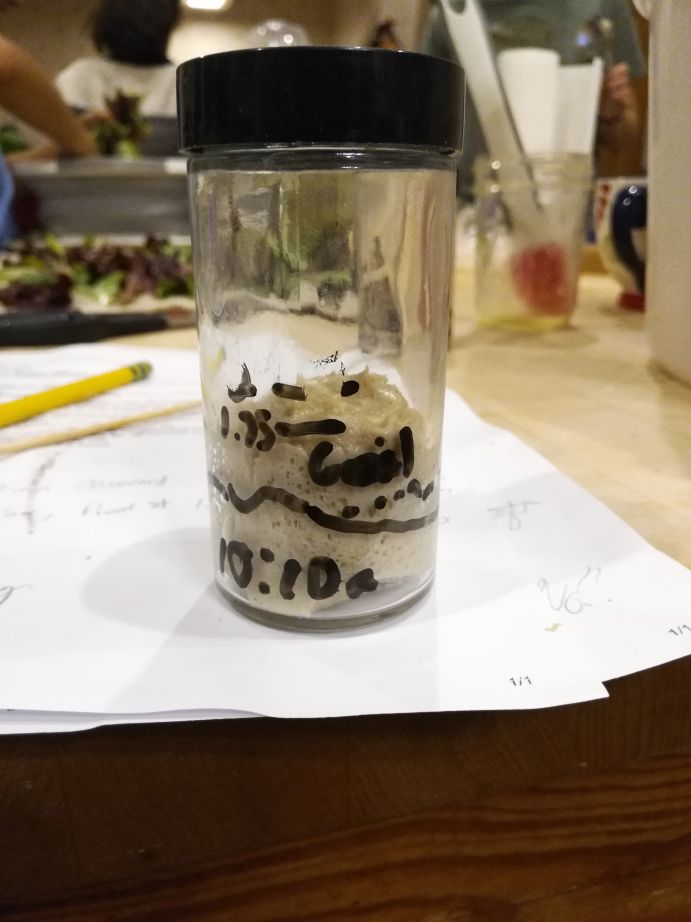
Aliquot right before loading into oven.
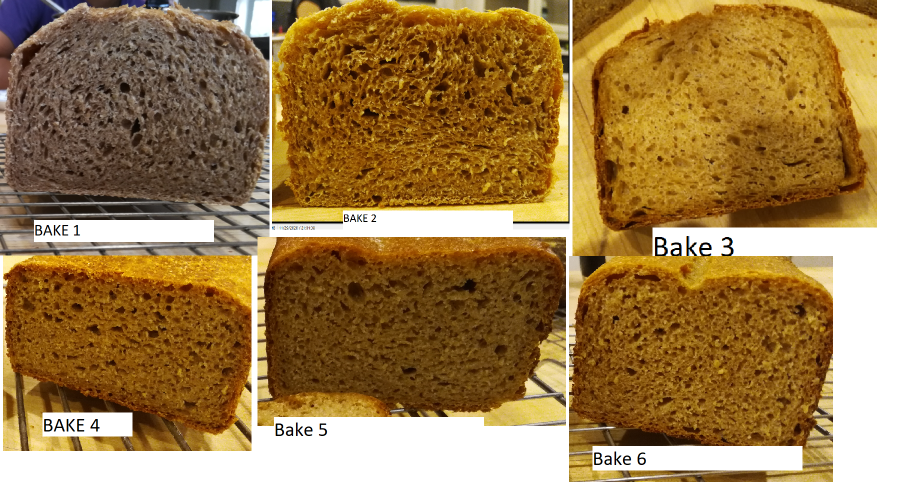
Crumb comparison of the last 6 bakes. All have the same recipe and weight, just different processes. Bake 4, 5, 6, skipped the bulk ferment. Bake 1, 2, 3 had a bulk ferment. Out of 4, 5, 6, only 6 was preshaped and shaped.
- texasbakerdad's Blog
- Log in or register to post comments
You should try to increase your total dough weight to 1300 grams to fill the pan. Usually 1100grams is recommended for white flour pullman loaf and since the rise is less with whole grain you should adjust the total to fill the pan.
I should probably put a note in every one of my posts. But, I probably mentioned it back on the 2nd or 3rd bake. For 2 reasons, I am intentionally not making the recipe the right size for the pullman pan.
Anyway, my plan is to spend a few bakes at the end of this process to zero in on the right dough amount for my particular recipe and my pullman pans.
I am glad you brought it up though. I have seen a wide range of dough recommendations for my pullman loaf size... I just measured it, 13"x4"x4". For bread flours I have seen as low as 900g. And for WW recipes as high as 1800g. Judging by the amount of rise I have been getting so far and the fact that my recipe is currently at 1105g (450g WW flour), I am thinking I would have to go all the way up to 1600g (650g WW flour) or so to fill out the pullman. But, most pullman recipe don't have as high of hydration as mine, which I think causes the numbers to vary quite a bit.
https://www.cooksinfo.com/pullman-loaf-pans
http://www.thefreshloaf.com/node/62981/pan-breads-simplified
I want to add that in my opinion, the perfectly sized pullman recipe should just barely kiss the lid of the pullman during oven bloom. Thus, allowing for maximum rise without the pullman pan inhibiting any of the rise potential.
for the sandwich loaf that you are trying to develop is in the Approachable Loaf.
http://www.thefreshloaf.com/node/62486/community-bake-approachable-loaf-bread-lab.
Except that it requires a little bit of instant yeast to make it truly reliable.
I'll have to read through that thread when I have some time and look for inspiration and nuggets of wisdom.