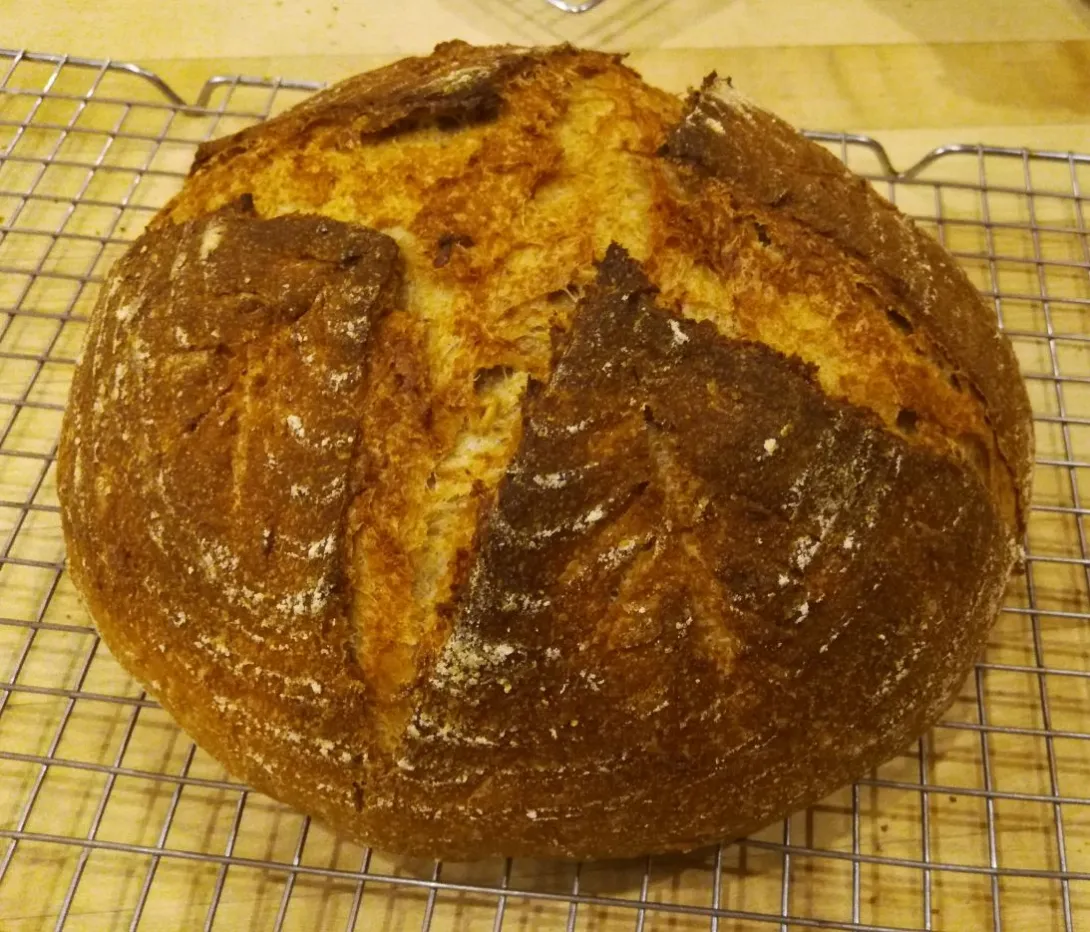
The Fresh Loaf

A Community of Amateur Bakers and Artisan Bread Enthusiasts.

texasbakerdad's blog

texasbakerdad's picture
texasbakerdad

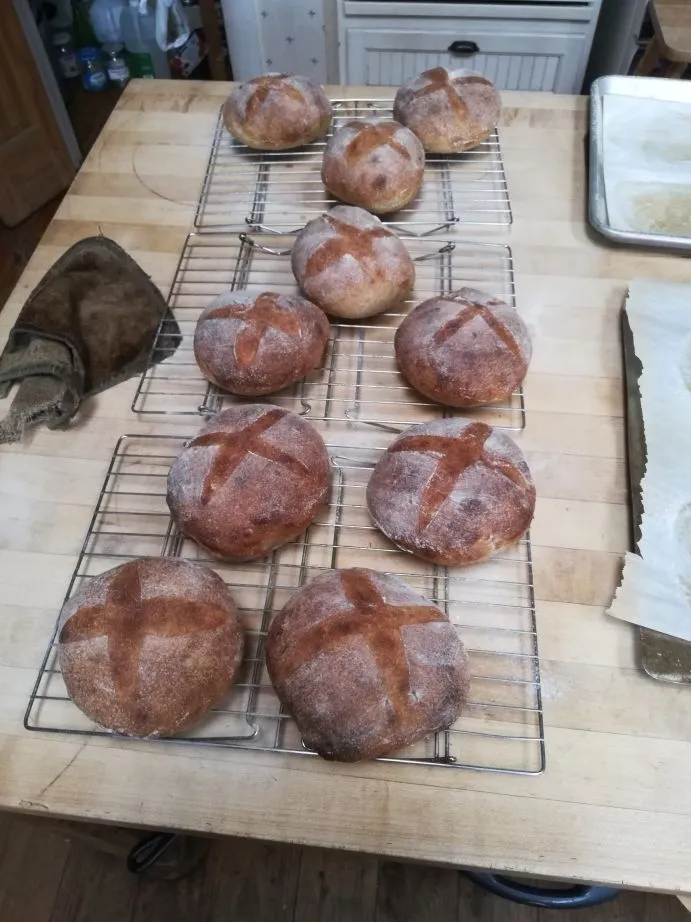
I have been trying to make good broccoli cheddar soup for years. I was always disappointed with the results. FINALLY, the stars aligned and I had both an excellent broccoli cheddar soup AND great tasting and great looking bread bowls to boot.

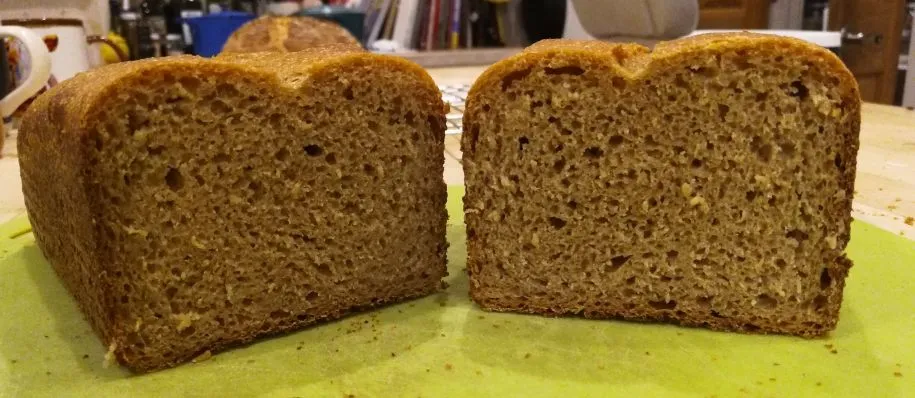
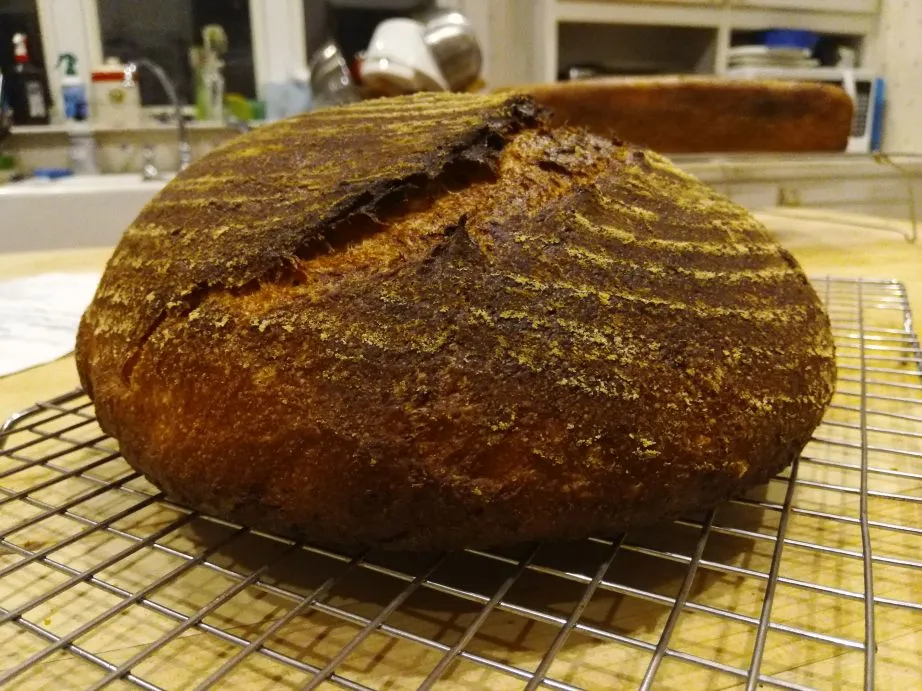
Bread Bowl Ingredients

  • 100g spelt
  • 300g white whole wheat
  • 1000g AP flour
  • 100g starter fed the night before (50:50 hard red)
  • 180g starter from the fridge (1 to 3 days old) (50:50 hard red)
  • 35g salt
  • 85g extra virgin olive oil
  • 85g honey
  • 1150g water (82% hydration not including starter)

Notes:

  • I needed the bowls done in time for dinner, so the extra starter and honey was intended to speed up my rise. Worked out great, bulk started at 8:54a and I loaded the loaves into the oven at 2:25p.
  • I really love the smell of spelt, at least I think that is the spelt I smell, a buttery smell.
  • Used AP flour because I didn't have any bread flour.
  • I poured the honey right on top of the flour mixture. This caused some problems. Next time I need pour the water in first and then add the honey, just to keep the honey from turning into little honey/flour balls that don't want to incorporate into the rest of the dough.

Process:

  • 8:30a: Mix all ingredients except for starter into shaggy mess, let sit for 15 minutes
  • 8:45a: Smear starter on top of shaggy mess and then knead until all ingredients evenly combined. About 5 minutes of working by hand.
  • 8:54a: Transfer dough into proofing container and cover, also transferred 20g to an aliquot jar.
  • 9:48a, 10:45a, 11:49a, 12:53a: Stretch and fold in bulk proofing container.
  • 1:00a: Pour dough onto counter, split into 10 loaves and preshape, then wait 15 minutes.
  • 1:10a: Preheat both ovens to 425dF (non-convection)
  • 1:15a: Prepare two cookie sheets with parchment. Shape each loaf into a buole. Let proof for 1 hour.
  • 2:15a: Score loaves and load into oven. Put 5 into each oven, spread as far apart as possible on the cookie sheets. Baked for 22-28 minutes (I think I baked mine for 25)
  • 2:40a: Set on rack to cool for at least 1 hour.
  • Dinner Time: Using sharp knife carve out bowls.

Notes:

  • Everyone agreed the bread bowls tasted fantastic. They were the right shape and size too. I wasn't as gentle as I should have been when carving out the bowls, but that is ok, because even though on 2 of the bowls I tore the side a bit, the thickness of the soup quickly patched the tear with a beautiful cheesy ooze.
  • My wife and I were in agreement that a slightly chewier crust and a more tart flavor would have been even better. I will try to make changes to improve on those things next time.
  • I am getting better shaping boules. This was the second time I felt like I got the boule nice and tight during shaping. But, I should have put more effort into pulling the dough towards me after stitching it, that way the seams from the stitching would disappear under the loaf. I'll try to do better next time.

Broccoli Cheddar Soup:

I started with the following recipe but made a few changes. I chose this recipe because I liked the recipe ingredients and process compared to other recipes.

https://www.foodnetwork.com/recipes/food-network-kitchen/almost-famous-broccoli-cheddar-soup-recipe-1972744

Changes to Recipe:

  • I did not use a blender at all. This worked out perfectly, in the past I had made similar recipes and blending even a portion of the soup gave the soup a baby food texture. Since the soup already had a roux and creamy cheese, blending was totally unnecessary.
  • For 1/3 of the cheese I used gruyere instead of sharp cheddar.
  • I took 1/2 of the carrots and cooked them with the onions. In the original recipe, all of the carrots were added with the broccoli.
  • I had 3 cloves of garlic to the onion/carrot mixture that was part of the roux.
  • The broccoli was cut into quarter size pieces, smaller than bite size, but not too small.

Notes:

  • I would have added diced celery to the roux, but I didn't have any. Outside of that one change, I don't think I would change anything. The soup was excellent. Heck, I don't know if the celery would have improved anything, but I just like celery in my roux.

Sorry for the already eaten dirty spoon photo, but I was hungry.


We had 9 mouths to feed and 10 bowls. So I took the smallest bowl and practiced cutting it and got to look at the crumb.

texasbakerdad's picture
texasbakerdad

We made gingerbread from scratch. Cutting the design by hand for 9 people was a PAIN IN THE BUTT! I cut two fancy Church style houses and it took forever, so I decided for the other 7 houses I would simplify things, but it still took forever.

Unfortunately, everyone had so much fun making the houses, I am sure we will be doing the same thing next year, so I want to take some notes to hopefully make the process less painful next year. My wife says I will forget how much work it was a year from now, she is right.

Ok, first, I need to give credit to the source of my recipe, I pretty much did exactly what they recommended. Main difference in the recipe, I used butter instead of lard:

https://www.youtube.com/watch?v=t5REhShQVt0

The gingerbread that was cooked properly (which was difficult for me), tasted better than any gingerbread I have ever had before, soft and chewy, but still plenty strong enough to build a house with. Really really good. The only problem was that I had difficult rolling the dough out to a consistent thickness, and as the dough was baked, the thinner dough was cooked too much.

Gingerbread Recipe:

  • 5 cups AP flour
  • 1 tsp baking soda
  • 3 tsp ground ginger
  • 1 tsp freshly grated nutmeg
  • 1 tsp cinnamon
  • 1 tsp coarse salt
  • 1 cup butter
  • 1 cup sugar
  • 1 cup molasses

Royal Icing:

  • 4 large egg whites
  • 1 tsp cream of tartar
  • 6 cups powdered sugar
  • water as needed

Process:

  • A couple days before baking, I googled "gingerbread house templates" for inspiration, then I painstakingly used GIMP (which I am not skilled with) to create a custom gingerbread house design that fit onto a 8.5"x11" paper. The idea being that I could roll the dough out to an 8.5"x11" square and transfer the design from paper to dough using toothpick pricks and a knife. The idea worked fine, but was tiresome and boring, especially after doing it 6 times.
  • Bake Day
  • Sift together flour, baking soda, ginger, nutmeg, cinnamon, and salt and set aside.
  • Melt butter in dutch oven and smear butter on sides of dutch oven to promote non-stickyness for later.
  • Add sugar and molasses and stir.
  • Bring to a boil then turn off burner but keep on heat and stir, let the sugar completely dissolve and get really bubbly.
  • 1 cup at a time, incorporate flour into hot mixture, reserving 1 cup of flour mixture for later.
  • Dust counter with some of the remaining cup of flour mixture, dump dough onto counter.
  • Knead in the rest of the flour mixture. If you cooked the butter mixture enough, you should end up with a very easy to work with dough, it won't be oily. If you didn't cook it enough, it will be an oily hot mess (I know because one of our batches was an oily hot mess).
  • As the dough cools, it becomes harder and harder to work with. If it gets too hard to work with, stick it in the microwave for 15 seconds.
  • Roll dough into 8.5"x11" square that is 1/4" to 1/2" thick. Try to be consistent.
  • Transfer to a parchment lined cookie sheet.
  • Cut shapes.
  • I tried removing the shapes and baking them separated and baking them together... baking them together gave the best results (cleanest lines) but was too tedious and some of the shapes broke while trying to separate them after the bake. Next year, I am going to bake the shapes separately, except for the doors and windows where the clean lines are important.
  • Bake at 350dF for 12 to 15 minutes
  • Set on racks to cool, except for walls with windows, put them back on baking sheet and put jolly ranchers in the windows and stick back in oven to create stain glass windows.
  • Let everything cool.
  • Royal Icing
  • Whisk egg whites and cream of tartar until they are frothy, DO NOT keep going to stiff peaks. Then add in powdered sugar one cup at a time. Icing will be thick, you want thick for structural integrity.
  • Make sure it is thick.
  • Store in plastic bags, cut the corner off of the bag so each person can have their own inexpensive pipette bag. 
  • Make a separate batch of royal icing for decorating that is the same recipe but slightly thinner (using water to thin)

Notes:

  • Make sure you boil the sugar, butter, molasses mixture long enough to get to that candy like boil, not a simple simmer. Failure to do so will result into oily dough mixture. The oily dough mixture still produced OK gingerbread cookies, they just weren't as fun to roll out and didn't taste as good or have the right texture.
  • Make sure the royal icing is thick enough for building the structures, we made 4 batches and 1 of them wasn't thick enough. My daughter mixed up that batch and I am not sure what was different.
  • If possible, assemble the structures day before. That way, you can make sure everyone uses thick icing for assembly and thin icing for decorating AND it gives the structures time too solidify before piling on all of the decorations. Also, splitting up the house making into two days makes the whole process more enjoyable, because things get less tedious.
  • The only way I can see to make the dough cutting enjoyable, it to make custom cutouts. A 3D printer would be perfect for this, or maybe there is an easy way to do it with metal.

Santa up at 2am starting the brisket for Christmas Day

My second time to smoke a brisket. All of it tasted great, some of it could have used a little more time on the smoker... smoking on my tiny offset smoker is hard, very uneven temperatures makes it hard to evenly cook the brisket.

Cinnamon rolls, I think we made something everyday for 7 days straight, I was exhausted... I didn't take any photos of the sourdough bagels.

Gingerbeer

Our livestock guardian slacking on the job. 

the barn cats.

texasbakerdad's picture
texasbakerdad

Christmas has been busy with activities so far. I am trying to stay disciplined and post my bakes, because I am finding the posts useful when I am trying to plan future bakes. I am going to post 3 blog posts today with the different bakes over Christmas I want to keep notes on.

Unfortunately or fortunately depending on who you ask, I am short on time this morning, so I will try to keep the posts brief.

Recipe:

  • 100g Spelt
  • 200g Hard Red Wheat
  • 1100g AP
  • 120g starter (8.5%)
  • 35g salt (2.5%)
  • 70g Honey (5%)
  • 980g Water (70%)

Process:

  • Mixed dough the night before to shaggy mess leaving out the starter, waited 10 minutes
  • Smeared starter over top and worked into dough, kneading very lightly, just enough to evenly distribute the starter
  • Let dough to ferment on counter for 1 hour then stretched and folder 4 or 5 times and then stuck it in the fridge to retard the fermentation.
  • In the morning, about 9am, pulled out of fridge and set on counter.
  • Stretch and folded every hour until about 3pm.
  • 3pm, preshaped, then waited 15 min.
  • Shaped into pies in 3 stages, with 5 minute rests in between to let gluten rest. 1st stage, slightly flatter than an english muffin. 2nd stage, thick 8 inch pies, last stage 10-12 inch pies. (I didn't really rest 5 min, I had 9 pies, so I would do each stage on all 9 pies and then start back over on the first for the second stage, probably more like 2-3 minutes).
  • Topped and loaded into oven 450dF for about 12 minutes (non-convection).

Notes:

  • My dough was lumpy, I didn't understand why until I made the same mistake 4 days later while making bread bowls. I poured honey directly onto my flour and it solidified into little balls that had to be hand smooshed... I should have dissolved he honey into the water first, or at least added the honey on top of water instead of dry flour.
  • The pizza and crust was amazing with regards to taste, and rise, and crumb, and cornicione. But, many times I have made pizza, I have been able to throw the pizza in the air to shape, I find that process so much fun, AND, when the dough is like that, the kids can shape the pizza without having to worry about messing it up. Once again, this dough was too difficult for a kid to work with. I need to figure out what I can do differently to make the dough easier to work with. On this bake, I was hoping the reduction of hydration to 70% and the addition of spelt would have gotten me there, but it did not, those changes definitely helped, but not enough. Maybe I will try an even lower hydration next time. I am open to advice on this.

Just showing off some Christmas gifts I made.

texasbakerdad's picture
texasbakerdad

100% AP flour, sourdough risen, 8 hour bake, 70% hydration 

Took a break from baking bread for a few days to work on Christmas presents out in the shop and fail to fix an unruly toilet.

Got to bake pizza tonight. My favorite type of bake. My wife is out of town, so I got to take a departure from my 100% whole grain bakes. Tonight, we dine on 100% Central Milling Organic Unbleached All Purpose Flour. Bag says it is a mixture of wheat flour and malted barley flour.

Since I was baking for 5 kids and myself, I ended up baking 7 different pizzas (one small bonus pizza at the end because I didn't weigh something right when dividing my dough). Having so many different pizzas to bake is nice because I get to experiment with bake times and other variables. I also get to see how the oven bloom changes throughout the bake.

Lessons to be Learned from this Bake:

  • Going back to processed flours after almost a year without using them in bread or dough was interesting. More different than I had remembered.
  • 70% hydration when using 100% AP flour was too wet to handle in a fun way for pizza. I like to throw my pizza in the air while shaping. This dough was a cloud, wonderful dough, but it needed gentle hands. I think next time I'll drop it to 65%... My guess is that the perfect hydration level would change if I were to change to a different brand of flour.
  • The crust was too chewy. I mean, it was excellent, but I would prefer less chewy. Two solutions: Shape a thinner crust (which was difficult at 70% hydration and because the gluten was fighting too much shaping at one time), use a different flour type that isn't as strong. When I make pizza with home milled 100% WW, the crust is never this strong. I guess another solution would be to add a little bit of another type of flour to the mix to knock down the strength just slightly, like spelt.
  • This is a personal preference thing... but I shaped the dough to have about a 5/8" thickness throughout. Which when baked properly produced a very nice crunch and a nice piece of pie. But, if you like those blistered cornicione, you had to leave a lot crust when adding toppings, and the crust would just be SOOO tall compared the topped parts of the pizza. The lesson here is... if you want a blistered and cornicione, a thinner pie is probably better, something closer to 1/4". If you have a pizza more than 1/2" thick, it is probably a good idea to get those toppings as close to the edge as possible.
  • I usually have thinner pies (1/4" to 3/8") and I usually bake my pies at 550dF convection. Well, with these thicker pies, 550dF was too high, the top burned before the middle of the pie had enough time to bake properly. One of these days I am going to buy or build a pizza oven and cook some pizzas at super high temps. When that happens, it think it will be interesting to see how thicker pizzas do in a super hot pizza oven (800-1500dF)... I bet they don't bake too well unless covered, or unless you have very specific toppings... or maybe the heat transferred from the stone bakes from the underside so quickly that the results would be surprising. Anywho, since I got to bake 7 pies tonight, I got to zero in on the a perfect bake temp... started at 550dF convection at 6 minutes, and ended up at 500dF non-convection for 12 minutes.

Comparing what I did to Vito Iacopelli:

I had watched this youtube video on hydration levels a few weeks ago. Vito recommends 70% hydration in the video. I'd say my 70% dough behaved much like his 70% dough. Vito was much more assertive with his dough handling than me, and a big difference between his shaping and mine... Vito pie is thinner in the middle and has a thick ring around the edge. I went for even thickness throughout. I wonder though... maybe there is some benefit to that approach... basically you get the fast cooking thin crust in the middle where the toppings will be, and the cornicione can be big and blister on the edge. I don't know... seems like you would end up with a lot of untopped cornicione, but maybe some people love that.

https://www.youtube.com/watch?v=tTas4Fn9xk4

Recipe:

  • 120g (13%) sourdough starter (50:50 hard white wheat:well water)
  • 916g Central Milling Organic AP Flour
  • 23g (2.5%) non-iodized salt
  • 51g honey

Toppings:

  • drained canned crushed tomatoes as the sauce, after putting on pie, sprinkled with salt, dried basil/oregano/thyme. This was a last minute pizza sauce, tasted quite good once I got the salt right.
  • fresh mozzarella from costco.
  • some OK sausage from costco, sliced diagonally to look cooler.
  • sliced pickled jalapeños
  • red pepper flakes
  • large granule garlic powder

Process:

  • 11:30a: Mix all ingredients till combined evenly and transfer to container for bulk proof, I siphoned off 20g for my aliquot jar.
  • 12:00p: The dough had no strength, stretch and fold about 5 times.
  • 1:00p: Very very mild increase in strength, stretch and fold about 5 times.
  • 2:00p: Some strength, stretch and fold about 5 times.
  • 3:00pdefinite strength, stretch and fold about 5 times.
  • 4:00p: I think I was at maximum strength at this point, stretched and folded 5 times.
  • 5:30p: Dumped onto bench and separated into 7 pies. Preshaped each pie.
  • 6:00p: Shaped each pie, gluten was strong, so I decided to shape in two steps. First pass got dough halfway to final size.
  • 6:15p: Shaped each pie to final size.
  • 6:20p: Preheat oven with pizza stone. (500dF non-convection is ideal)
  • 7:00p: Top and then load first pie into oven and bake until done (ideally 12 minutes)
  • 7:00p - 9:00p: Baked all pies topping while oven empty giving the oven about 10minutes to recover between pizzas.

6th out of 7 Pizzas

Crumb shot of 6th Pizza

Underside of 6th Pizza

Aliquot at 9pm

4th of 7 Pizzas

3rd of 7 Pizzas

1st of 7 Pizzas (My youngest chose the non-uniform topping distribution... he insisted)

Aliquot when the first pizza went in at 7pm

The pies after shaping and my son topping his.

texasbakerdad's picture
texasbakerdad

This was a stressful bake. Mainly because lots of things did not go as planned and I had to think on my feet. I prefer mindless baking... thinking baking is stressful. The loaf came out nice though, a bit gummy, but nice.

I was thinking how I would blog about this bake, if I walked through the bake in chronological order, the blog post would get even more tedious than my normal blog posts. So, I think I will write a short summary about what went wrong and then write down the bake as it actually occurred without including the missteps along the way.

Basically, I started with a recipe that had 325g of non-flour non-water ingredients, or 205g more than my previous bake. Considering my recipe only had 450g of flour, 325g of add-ins was a bit insane. And, I realized my oversight after I mixed all 325g of ingredients together (50g rolled oats, 50g potato, 25g chia seeds, 25g cracked wheat, 30g honey, 15g salt, 30g olive oil, 25g hemp hearts, 25g flax seeds, 50g quinoa) along with the water. Visually, it was obvious that this was too much!

So, before adding the flour, I made some adjustments, I gave half of the mixture to the chickens, added back some water, honey, salt, and oil to get back to the desired ratio, and then proceeded to mix in the flour.

Recap:

The wife has tasked me to come up with a sandwich bread recipe our family can bake at least once a weak to completely replace our regularly purchased box store sandwich bread.

Requirements

  • Soft and light
  • 100% whole wheat
  • Recipe must be easily repeatable and easy to execute.
  • Recipe must be designed for a covered pullman loaf pan.
    (https://shop.kingarthurbaking.com/items/pain-de-mie-pan-pullman-loaf-pan-13)
  • My 12 year old daughter must be able to bake the bread from start to finish
  • Sourdough leavening only.
  • From start to finish, the bread must be completable in 1 day.
  • Process must exist to enable the baker to know with reasonable certainty that the loaf is perfectly proofed.
  • Dough needs to contain a few softened chewy seeds, grain berries, etc. for texture and flavor.
  • Don't use bran flakes as a bread topping.
  • 1.5 out of 10 on the TexasBakerDad sourness scale, whatever the heck that means :-)

Summary of the Bake

The Good:

  • I was able to save the bake.
  • The flavor was mild and nice.
  • The crust was soft.
  • I think the density was just about perfect.
  • I liked the seed density from a visual perspective.

The Bad:

  • The dough was too sticky after mixing, I was able to shape it, but it wasn't fun.
  • The crumb was too gummy. I think this is probably due to too many starchy elements in the addins. I will try removing half of them (probably just remove all of the chia seeds).
  • The potatoes took too long to soften and I lost a lot of water while boiling them. Should be able to fix by using a grater instead of chopping into small cubes. And, I should only soften the potatoes and cracked wheat at first, then add the rest of the addins once they are softened.
  • The oats didn't stick too well when I rolled the dough in them.
  • The dough was hard to score... either my razor blade was dull after only 2 uses, OR, something about this dough makes it hard to score.

What to do Next:

  • Remove chia seeds, but add back in black sesame seeds. Hopefully this will help bring down the gummyness.
  • Boil the potatoes and cracked wheat seperately
  • Reduce moisture to hopefully reduce stickiness after mixing. This should also help bring down the gummyness.
  • Try brushing and sprinkling oats on top.
  • Measure weight before and after boiling potatoes so I can know exactly how much water is lost while softening the potato.
  • Get my hands on a sweet potato and try it instead of a russet.

Ingredients:

  • 60g sourdough starter (50:50 hard white wheat)
  • 25g rolled oats
  • 25g russet potato
  • 25g quinoa
  • 12g chia seeds
  • 12g hemp hearts
  • 12g cracked wheat
  • 30g honey
  • 10g non-iodized salt
  • 30g extra virgin olive oil
  • 550g well water
  • 360g hard white wheat
  • 45g dark rye
  • 45g spelt
  • More rolled oats used as topping.

Process:

  • 9:40a: Peel russet potato and chop 25g of it into tiny pieces
  • 9:43a: Put potato, rolled oats, quinoa, honey, sesame seeds, cracked wheat, and 550g of water into a sauce pan and bring to a boil. Boil until potatoes have softened. About 30 minutes.
  • 10:13a: Weight mixture, add water to get it back to 550g since water was lost during the boil.
  • 10:14a: Add oil and mix. Also wait until water comes down below 110dF, it was 90dF after all of my shenanigans.
  • 10:15a: Mix in all of the flours into a shaggy mess. Then let sit for 10 minutes.
  • 10:25a: Smear 60g starter over the top of the dough mess. Use drum on Ankarsum and knead until dough stops showing improvement (record time elapsed, about 8 minutes).
  • 10:37a: Dump dough onto bench, siphon off 20g for aliquot, then preshape into 4 equally weighted balls, then wait 15 min.
  • 10:45a: Prepare pullman pan
  • 11:05a: Shape dough and load into pan, roll tops into oats on bench, seem sides facing inwards?
  • Let dough proof in pullman until aliquot shows 1.7x rise over original volume.
  • 5:00p: Preheat Oven to 375dF 
  • 5:46p: Score, put lid on pullman and bake in oven covered for 1 hour 15 min.
  • 7:01p: Pull from oven, transfer to rack to cool. Let cool for at least 2.5 hours.
  • 9:30p: Slice and enjoy.

aliquot right before loading into oven.

right before loading into oven

Dough right after shaping and loading into pullman

preshaped dough

The dough right before preshaping it

The addins mixture after a long boil, before I gave half to the chickens.

texasbakerdad's picture
texasbakerdad

Time to start adding various ingredients to give this loaf some character. Not sure what ingredients to add, I asked for ideas in a separate post:

http://www.thefreshloaf.com/node/66656/help-narrowing-down-ingredients-add-recipe

To kick off this firsts bake, I am going to constrain my process. "7-Grain Whole Wheat" always sounded cool to me. So, I'll arbitrarily limit keep the recipe to 7 grains or additives. After reading everyone's responses to the thread linked above, I was really interested in trying Rye, Sweet Potatoes, and Spelt. Unfortunately, I don't have sweet potatoes or spelt in my pantry, so I will have to make due with what have.

Here are the 7 grains/additives I am going to go with this bake:

  1. Hard White Wheat
  2. Rolled Oats
  3. Russet Potatoes
  4. Rye
  5. Einkhorn
  6. Quinoa
  7. Black Sesame
  8. Cracked Wheat
  9. EDIT: Adding hemp hearts because of a recent comment from Mini Oven ("Soft little crunchies")

Yep, you read that right... 8. I just said 7, but my list is 8. OK OK OK... This is my bake, I can do what I want, but I really wanted both sesame AND cracked wheat. But now, I have to figure out how much to add to the recipe.

In the previous bakes I had 50g of rolled oats. That seemed to be about right, I could tell the rolled oats where there but they weren't overpowering the loaf. And, I think the sesame seeds and cracked wheat should be less, I don't know why I think that, I just do, maybe because they are least like flour. And the flours will replace the hard white wheat at 10%, versus the other ingredients will just be added to the recipe. AND then as for water... if any of these ingredients are likely to absorb water, I will guess at the absorbtion rate and add that much water to the recipe. The flours will have water added at roughly 95% hydration.

Here is the list again but with amounts and water additions.

  1. Hard White Wheat 360g (345g water)
  2. Rolled Oats 50g (50g water)
  3. Russet Potatoes 50g (25g water)
  4. Rye 45g (40g water) 
  5. Einkhorn 45g (40g water)
  6. Quinoa 50g (40g water)
  7. Black Sesame 25g (0g water)
  8. Cracked Wheat 25g (10g water)
  9. Hemp Hearts 25g (0g water)
  10. More salt for all of these extra ingredients

Am I doing this right? I don't know, it is just an experiment!

Side comments so I don't forget:

  • I really wanted to try hemp hearts. Maybe next time.
  • After this bake, I will be out of hard white wheat berries and won't be getting a new shipment until the end of the month. Next bake will have to be with store bought wheat... boohooo.

Recap:

The wife has tasked me to come up with a sandwich bread recipe our family can bake at least once a weak to completely replace our regularly purchased box store sandwich bread.

Requirements

  • Soft and light
  • 100% whole wheat
  • Recipe must be easily repeatable and easy to execute.
  • Recipe must be designed for a covered pullman loaf pan.
    (https://shop.kingarthurbaking.com/items/pain-de-mie-pan-pullman-loaf-pan-13)
  • My 12 year old daughter must be able to bake the bread from start to finish
  • Sourdough leavening only.
  • From start to finish, the bread must be completable in 1 day.
  • Process must exist to enable the baker to know with reasonable certainty that the loaf is perfectly proofed.
  • Dough needs to contain a few softened chewy seeds, grain berries, etc. for texture and flavor.
  • Don't use bran flakes as a bread topping.
  • 1.5 out of 10 on the TexasBakerDad sourness scale, whatever the heck that means :-)

Modifications from Previous Bake

  • Add a bunch of ingredients to the loaf and hope something resembling bread comes out of the oven.
  • Shape the dough into 4 mini loafs and then load into pullman.

Ingredients

  • 60g (12%) sourdough starter (50:50 hard red)
  • 50g rolled outs
  • 50g russet potato
  • 50g quinoa
  • 25g black sesame
  • 25g cracked wheat
  • 30g (6%) honey
  • 15g (3%) non-iodized salt
  • 30g (6%) virgin olive oil
  • 550g well water
  • 360g home milled hard white wheat (sifted to remove bran)
  • 45g dark rye
  • 45g home milled einkhorn (sifted to remove bran)
  • More rolled oat that the mini loaves will be rolled in upon shaping.

Process

  • 0:00: Peel russet potato and chop 50g of it into tiny pieces
  • 0:05: Put potato, rolled oats, quinoa, honey, sesame seeds, cracked wheat, and 550g of water into a sauce pan and bring to a boil. Then let sit for 10 minutes
  • 0:30: Test the cracked wheat to see if it softened enough. If it did good, if not, boil again and wait, do this as many times as needed to soften the cracked wheat.
  • 0:30: Add oil and mix
  • 0:31: Check the water temp and just make sure we are below 110dF, since we are heating up more water than previously it is possible the water is too hot.
  • 0:32: Mix in all of the flours into a shaggy mess. Then let sit for 10 minutes.
  • 0:42: Smear 60g starter over the top of the dough mess. Use drum on Ankarsum and knead until dough stops showing improvement (record time elapsed, about 8 minutes).
  • 0:55: Dump dough onto bench, siphon off 20g for aliquot, then preshape into 4 equally weighted balls, then wait 15 min.
  • 1:00: Prepare pullman pan
  • 1:10: Shape dough and load into pan, roll tops into oats on bench, seem sides facing inwards?
  • Let dough proof in pullman until aliquot shows 1.7x rise over original volume. roughly 8 hours later.
  • 8:20: Preheat Oven to 375dF 
  • 9:00: Score, put lid on pullman and bake in oven covered for 1 hour 15 min.
  • 10:15: Pull from oven, transfer to rack to cool. Let cool for at least 2.5 hours.
  • 12:45: Slice and enjoy.


texasbakerdad's picture
texasbakerdad

I think I am going to keep doing these bumper bakes while I work out the kinks in my sandwich loaf recipe. In case you were curious, I dubbed this a "bumper bake" in reference to a bumper crop. I am in the kitchen anyway, I have a double oven, why not just bake a second loaf, just for fun.

The Good:

  • This loaf looked BEAUTIFUL! Great oven bloom, nice shape, I was excited when I took the top off. Wow!
  • The reduced baking temp and/or the parchment paper stopped the loaf from burning.

The Bad:

  • The loaf was slightly undercooked... this resulted in the crumb being slightly gummy and the crumb not holding up when I had to push down with the bread knife to cut, the loaf probably lost a good inch of height when I cut it. I imagine another 15 minutes at 400dF would do the trick.
  • I need a sharper bread knife... my poor bread doesn't like the manhandling necessary to cut through a boule.
  • I think I might bake at 425dF for 15 minutes and then drop down to 400dF for the rest of the bake. I dunno why, it just feels like 400dF might be too low to get a nice crispy crust.
  • I got impatient and cut into the loaf about 45 minutes too early, the crumb was still a bit warm when I cut into the loaf.
  • Even though my crumb was fine. The dough was in bulk ferment about 80% of the time and proofing only 20% of the time. I really want to bulk only 30% of the time and proof 70% so I can see how the crumb responds.

What to do different next time:

  • Longer and or hotter bake.
  • Wait longer before cutting.
  • I was just reading that oil inhibits an open crumb. I might try this same recipe and leave out the olive oil.
  • Shape the loaf earlier.

Results

Ingredients

  • 38g (8ish%) sourdough starter (50:50 hard white)
  • 50g rolled outs
  • 31g (6ish%) honey
  • 10g (2%) non-iodized salt
  • 30g (6%) virgin olive oil
  • 475g (95% if you include rolled oats) well water
  • 450g hard white wheat (sifted to remove bran)

Process

  • 9:28a: In large mixing bowl, add: 475g of boiling water, 50g rolled oats, 30g honey, 10g salt. Mix and let sit for 10 minutes.
  • 9:37a: Mix in 30g olive oil
  • 9:38a: Without kneading, mix the 450g of hard white wheat to combine into a shaggy mess. Let autolyze for 10 minutes
  • 9:48a: Smear 60g starter over the top of the dough mess. By handle fold over a few time until starter is incorporated and some strength develops. About 10 to 15 stretch and folds. Siphon off 20g into aliquot.
  • 10:54a, 11:57a, 1:45p, 2:30p, 3:17p: Stretch and fold about 3 or 4 times.
  • Keep stretch and folding until aliquot shows 1.25x over original volume.
  • 4:56p: Preshape, let rest for 15 minutes
  • Prep banneton, sprinkle with finely ground WW flour (I used the flour from the dust filter on the nutrimill, this worked great, very fine stuff and the dough didn't stick to the banneton at all, this is in contrast to problems I had with normal nutrimill finely ground WW)
  • 5:15p: Shaped boule and loaded into banneton. Put banneton inside plastic tub and covered to keep it from drying out during proofing.
  • 6:00p: Preheat oven to 400dF and put cast iron into oven to warm up.
  • 6:42p: Transferred dough from banneton onto cast iron with the help of parchment apper and then covered and loaded into oven, baked at 400dF for 45min covered, and 7 min uncovered (I was going to bake for 10 minutes uncovered, but the loaf was getting dark).
  • 7:34p: Pull out of oven and put on rack to cool for 1.75 hours.
  • 9:19p: Slice and enjoy

The loaf was higher before I cut it. Because it was slightly underbaked and my dough knife is very dull, I accidentally smashed the loaf down about an inch while attempting to cut it.

Aliquot before loading into oven. My marker writing got washed off accidentally.

Aliquot before shaping

texasbakerdad's picture
texasbakerdad

This bake went well enough, I think I am ready to move onto the next phase of perfecting this recipe... flavor.

Recap:

The wife has tasked me to come up with a sandwich bread recipe our family can bake at least once a weak to completely replace our regularly purchased box store sandwich bread.

Requirements

  • Soft and light
  • 100% whole wheat
  • Recipe must be easily repeatable and easy to execute.
  • Recipe must be designed for a covered pullman loaf pan.
    (https://shop.kingarthurbaking.com/items/pain-de-mie-pan-pullman-loaf-pan-13)
  • My 12 year old daughter must be able to bake the bread from start to finish
  • Sourdough leavening only.
  • From start to finish, the bread must be completable in 1 day.
  • Process must exist to enable the baker to know with reasonable certainty that the loaf is perfectly proofed.
  • Dough needs to contain a few softened chewy seeds, grain berries, etc. for texture and flavor.
  • Don't use bran flakes as a bread topping.
  • 1.5 out of 10 on the TexasBakerDad sourness scale, whatever the heck that means :-)

Summary of the Bake

The Good:

  • The loaf's density was acceptable. I might have been able to get the loaf slightly less dense. But I think I am to the point now where if I try to squeeze out better rise results, it won't be the best use of my time.
  • The 15 minute bake time reduction seemed to be about right. The crumb was strong, the crust color was right. I might have been able to shave off another 15 minutes, but that would have been cutting it real close.
  • I was pleasantly surprised by how the shaping went... I was worried that the dough wouldn't have enough structure and strength without a bulk rise for the shaping to do much, but my worries were unfounded. I mean, it was very different than shaping after the dough has built up some air pockets, but it was still shapeable and the shaping definitely had a positive effect on the rise.

The Bad:

  • Shaping the dough right after kneading (skipping bulk ferment), was a bit tricky, the dough was quite a bit more sticky. I eventually got the hang of things and once I had some surface tension built up, the dough stopped wanting to stick to everything. My concern now is... can I teach my daughter to pull it off?
  • I really wanted to try shaping the dough into mini loaves and then load them into the pullman side by side, but I TOTALLY FORGOT!
  • Accidentally put flour on both sides of my dough during the final shaping... this doesn't seem to have negatively effected the final bake, but I figure I should annotate the mistake anyways.
  • I scored the dough. The scoring went fine, but I was surprised by the lack of spreading of the score during the oven bloom. You can see from the crumb shot, that score opened up a little, but what was weird was that the crust to the left and the right of the score rise higher... so, there was definitely some oven bloom, but not in the place where I scored. I don't know what to think of that... did I overproof a bit? Was I too rough with my scoring? maybe too deep? I guess it is something to think about.

What to do next:

  • It is time to start experimenting with different additives... cracked wheat, seeds, other flours, milk/butter, etc. etc. There are so many direction I could take this, so I am going to create a TFL post getting some ideas on how I could narrow things down and give myself some direction.
  • I will be shaping the loaf as 3 or 4 mini-loaves next bake.

The Final Results

Ingredients

  • 60g (12%) sourdough starter (50:50 hard red)
  • 50g rolled outs
  • 30g (6%) honey
  • 10g (2%) non-iodized salt
  • 30g (6%) virgin olive oil
  • 475g (95% if you include rolled oats) well water
  • 450g hard white wheat (sifted to remove bran)

Process

  • 9:25a: In large mixing bowl, add: 475g of boiling water, 50g rolled oats, 30g honey, 10g salt. Mix and let sit for 10 minutes.
  • 9:35a: Mix in 30g olive oil
  • 9:36a: Without kneading, mix the 450g of hard white wheat to combine into a shaggy mess. Let autolyze for 10 minutes
  • 9:46a: Smear 60g starter over the top of the dough mess. Use drum on Ankarsum and knead until dough stops showing improvement (record time elapsed, about 8 minutes).
  • 10:00a: Dump dough onto bench, siphon off 20g for aliquot, then preshape, then wait 15 min.
  • 10:05a: Prepare pullman pan, liberally butter all sides and apply flour.
  • 10:15a: Shape dough and load into pullman.
  • Let dough proof in pullman until aliquot shows 1.70x rise over original volume
  • 5:15p: Preheat oven 375dF
  • 5:55p: Score, put lid on pullman and stick in oven for 1 hour 15 min. Bake covered the entire time.
  • 8:25p: Pull from oven, transfer loaf to rack. Let rest until cool, probably 2.5 hours.
  • 10:55p: Slice using slicer then put loaf in plastic bread bag to keep it soft.

Aliquot right before loading into oven.

Crumb comparison of the last 6 bakes. All have the same recipe and weight, just different processes. Bake 4, 5, 6, skipped the bulk ferment. Bake 1, 2, 3 had a bulk ferment. Out of 4, 5, 6, only 6 was preshaped and shaped.

texasbakerdad's picture
texasbakerdad

Round #3 of experimenting with "Skipping the Bulk Ferment" step.

Recap:

The wife has tasked me to come up with a sandwich bread recipe our family can bake at least once a weak to completely replace our regularly purchased box store sandwich bread.

Requirements

  • Soft and light
  • 100% whole wheat
  • Recipe must be easily repeatable and easy to execute.
  • Recipe must be designed for a covered pullman loaf pan.
    (https://shop.kingarthurbaking.com/items/pain-de-mie-pan-pullman-loaf-pan-13)
  • My 12 year old daughter must be able to bake the bread from start to finish
  • Sourdough leavening only.
  • From start to finish, the bread must be completable in 1 day.
  • Process must exist to enable the baker to know with reasonable certainty that the loaf is perfectly proofed.
  • Dough needs to contain a few softened chewy seeds, grain berries, etc. for texture and flavor.
  • Don't use bran flakes as a bread topping.
  • 1.5 out of 10 on the TexasBakerDad sourness scale, whatever the heck that means :-)

Modification from Previous Bake

  • Bake for 1hour 15min covered instead of 1hour 30min.
  • After mixing in the ankarsum, immediately dump dough onto the counter and preshape, then wait 15 minutes and shape, then load into pullman.
  • Only knead in ankarsum once, last bake I waited 10 minutes and kneaded twice.
  • I am not going to butter the top of the loaf before loading into oven.

Sixth Attempt

Ingredients

  • 60g (12%) sourdough starter (50:50 hard red)
  • 50g rolled outs
  • 30g (6%) honey
  • 10g (2%) non-iodized salt
  • 30g (6%) virgin olive oil
  • 475g (95% if you include rolled oats) well water
  • 450g hard white wheat (sifted to remove bran)
  • sifted bran to be used as topping

Process

  • 0:00: In large mixing bowl, add: 475g of boiling water, 50g rolled oats, 30g honey, 10g salt. Mix and let sit for 10 minutes.
  • 0:10: Mix in 30g olive oil
  • 0:11: Without kneading, mix the 450g of hard white wheat to combine into a shaggy mess. Let autolyze for 10 minutes
  • 0:21: Smear 60g starter over the top of the dough mess. Use drum on Ankarsum and knead until dough stops showing improvement (record time elapsed, about 8 minutes).
  • 0:29: Dump dough onto bench, siphon off 20g for aliquot, then preshape, then wait 15 min.
  • 0:32: Prepare pullman pan, liberally butter all sides and apply flour.
  • 0:44: Shape dough and load into pullman.
  • Let dough proof in pullman until aliquot shows 1.75x rise over original volume. About 6 hours
  • 6:00: Preheat oven 375dF
  • 6:44: put lid on pullman and stick in oven for 1 hour 15 min. Bake covered the entire time.
  • 7:59: Pull from oven, transfer loaf to rack. Let rest until cool, probably 2.5 hours.
  • 10:29: Slice using slicer then put loaf in plastic bread bag to keep it soft.
texasbakerdad's picture
texasbakerdad

I kept thinking while perfecting and especially while shaping my 100%WW sandwich loaf recipe, that this dough is so wonderful, I bet it would make a nice boule. So, I doubled up on the recipe yesterday and made a pullman loaf and a boule. I kept the mixing and everything separate, but the ingredients and the process up until the kneading was identical. When it came to kneading, I kneaded by hand for the boule and used the Ankarsum for the bread loaf. This blog post only talks about the boule, see my previous blog post if you want to know how the pullman loaf went.

The Good:

  • The density of the loaf was quite nice. I was very happy with the loaf overall, with the oven spring, with the look.

The Bad:

  • I made an educated guess on bake times based on a previous bake I executed with a romertopf batard. I was too busy at the time to put more thought into it. Anyway, the loaf was darker than I would have liked and the bottom had burned a bit. Usually I used some parchment to help load the shaped boule into the cast iron, but this time I tried just rolling it into place. I think the parchment helps protect the bottom from burning just a bit. Anyway, if I try this again (I think I will today, I will use parchment AND reduce my oven temp). Also, my recipe includes some honey, which probably allows the crust to darken and burn more easily.
  • When I transferred the boule from the banneton to the cast iron, I rolled it into place, but it is such a small target to hit just right and I accidentally missed the mark by 1", which was annoying. I'd really like to stop using so much parchment, but at the same time, you put all that effort into a bake and it really stinks to mess the bake up at the very last step because you aren't deft enough with your hands. I think I am going to go back to my parchment paper crutch. Anyway, my mistake in loaded was barely noticeable in the end loaf... I mean, you would have to look really hard to see the minor mishapeness of the loaf and the pinch on one side of the loaf.
  • Looking at the crumb, there tends to be slightly bigger holes on top than bottom. I think this is a sign that I slightly overproofed the dough. I am going to try less proofing for next bake.

Lesson Learned:

I am loving my aliquot jar, it is really helping me get a feel for things better than before. Since the dough in the aliquot has very little strength, but it has the tall sides of the jar to help it out. I think I am starting to realize that in some ways the aliquot jar dough rises like it has strength, due to the jar, but in other ways it doesn't. I THINK my boule actually rose in volume FASTER than the aliquot jar. I think my boule was probably at 2.25-2.5x the original dough amount when I loaded it into the oven, but the aliquot jar only showed 1.75x. This could be explained by the aliquot dough allowing air to escape via bubbles out the top of the dough, but the boule letting very little air escape due to the surface tension of the loaf.

Results

Ingredients

  • 46g (9ish%) sourdough starter (50:50 hard red)
  • 50g rolled outs
  • 31g (6ish%) honey
  • 10g (2%) non-iodized salt
  • 30g (6%) virgin olive oil
  • 475g (95% if you include rolled oats) well water
  • 450g hard white wheat (sifted to remove bran)

Process

  • 9:46a: In large mixing bowl, add: 475g of boiling water, 50g rolled oats, 30g honey, 10g salt. Mix and let sit for 10 minutes.
  • 9:56a: Mix in 30g olive oil
  • 10:00a: Without kneading, mix the 450g of hard white wheat to combine into a shaggy mess. Let autolyze for 10 minutes
  • 10:17a: Smear 60g starter over the top of the dough mess. By handle fold over a few time until starter is incorporated and some strength develops. About 10 to 15 stretch and folds. Siphon off 20g into aliquot.
  • 11:10a, 12:00p, 1:18p, 2:01p, 3:02p, 3:50p: Stretch and fold about 3 or 4 times.
  • Keep stretch and folding until aliquot shows 1.3x over original volume.
  • 4:33p: Preshape, let rest for 15 minutes
  • Prep banneton, sprinkle with finely ground WW flour (I used the flour from the dust filter on the nutrimill, this worked great, very fine stuff and the dough didn't stick to the banneton at all, this is in contrast to problems I had with normal nutrimill finely ground WW)
  • 4:48p: Shaped boule and loaded into banneton. Put banneton inside plastic tub and covered to keep it from drying out during proofing.
  • 6:30p: Preheat oven to 450dF and put cast iron into oven to warm up.
  • 7:52p: Rolled dough from banneton onto cast iron and then covered and loaded into oven, baked at 450dF for 45min covered, and 4 min uncovered (I was going to bake for 10 minutes uncovered, but the loaf was getting really dark, it was already dark before pulling the cover off).
  • 8:41p: Pull out of oven and put on rack to cool for 2.5 hours.
  • 10:11p: Slice and enjoy

This is the aliquot right before I loaded the loaf into the oven.


This is the aliquot at the end of bulk and right before shaping.

Pages

Subscribe to RSS - texasbakerdad's blog