Hello all,
Please let me know if I'm in the wrong sub-forum. I am very new and only aspire to artisanshipness.
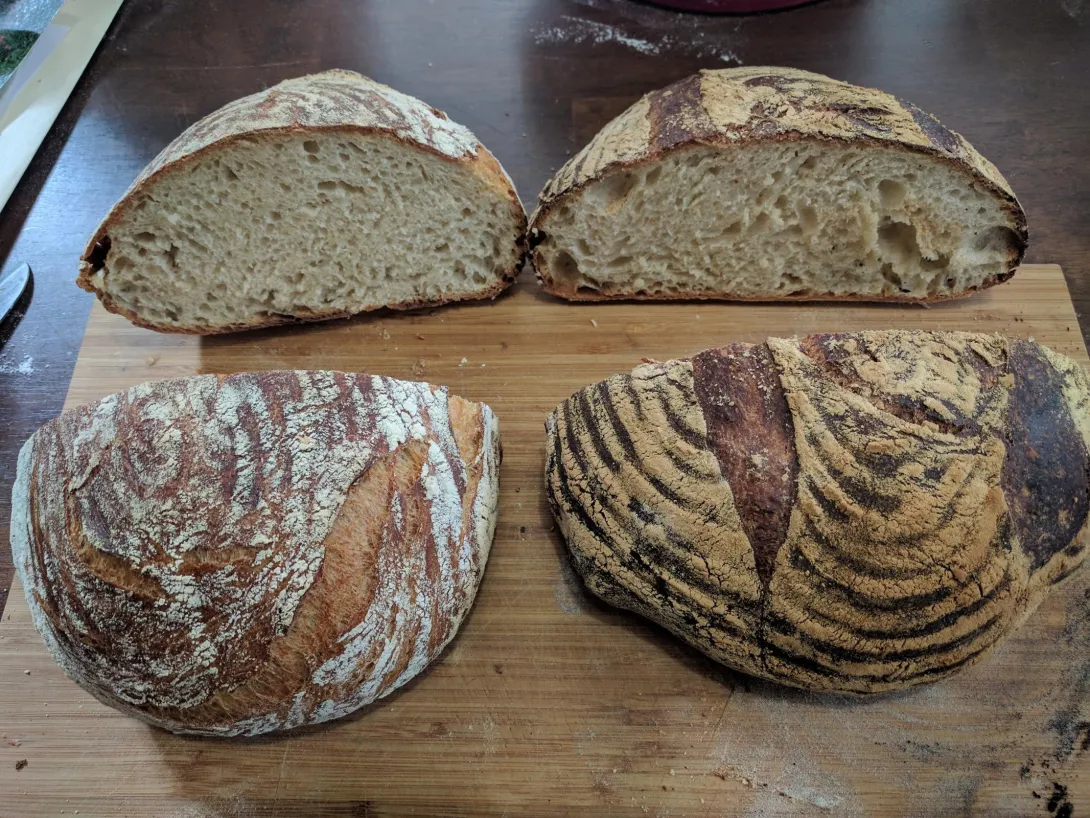
I just made a couple loaves of Overnight White Bread from FWSY, using 10% whole wheat flour, but otherwise following the recipe as closely as possible to as instructed.
I only have one dutch oven, but I wanted to bake at the same time, so the one on the left went in the dutch oven for 30 mins covered and 20 minutes uncovered. The one on the right (scored with a knife) was on a pizza stone for 45 minutes (with a cup of water in a broiler pan at the start).
This is an invitation for any feedback you think I could use. Not fishing for compliments. I think these loaves are ok, very edible, but they don't wow me. I expected more texture from the scoring in the crusts. The interior has smaller air pockets that expected/desired and seems cakier than I would hope for.
As my bread gets better, I expect my vocab for describing it will improve as well.
Thanks for taking the time to read and for any feedback you care to offer.
https://photos.app.goo.gl/ld3wAIt7X51vCme62
For a new baker they are very accomplished loaves. Keep reading, keep practicing. This place is a world of information. Scoring is an art in itself, you will get better as you go. Enjoy the journey.
Thank you.
That's a lovely bake.
As you progress in your baking, you will pick up tips that work for you. One of mine that I got from MiniOven was to stop handling the dough with kid gloves when shaping. Give it a good pull and really make that skin tight as possible. A preshape with a rest also helps which is something Forkish generally doesn’t do in his recipes.
You are off to a good start!
Thank you. I'm going to look into that "preshape with a rest".
First, these loaves look great. (I also bake simultaneously with one loaf in a Dutch oven and the other in a separate oven on a baking stone. It is neat to compare the results.)
As Danni3113 notes, Forkish skips over a bench rest in most of his recipes, but I hardly ever omit it.
Now for some curiosity questions, with a preface. I tried to make a Forkish bread that called for an overnight bulk fermentation and in the process learned a lot about that stage and in particular the signs and results of overfermentation. By the next morning my nice dough from the evening before had devolved into a slurry from the collapse of the dough. There was no saving it. If you search threads regarding Forkish's bulk fermentation and proofing times, you will find that many bakers have reduced those times. That was the preface; now for some questions.
Did you do a 12-14 hour bulk fermentation? What was the ambient temperature wherever the container was sitting? What did the dough look like the next morning?
How long did the proofing take? And what was your kitchen temperature during that period?
As indicated, these questions are purely from curiosity to see what occurred in following a FWSY recipe. I like his recipes, but I have learned to adjust my times and to pay attention to the temperature of the surroundings. As so many continue to say, "Watch the dough, not the clock."
Keep baking! Thanks for sharing the photos.
Thank you. In order:
I did a 12 hour bulk fermentation from 8pm to 8am. It was about 73 degrees when I went to bed and 70 in the morning. The dough was gassy with big bubbles in the morning, right at the 4 qt mark. Quite a lot of gas escaped just getting it out of the tub.
I gave it exactly 1:15 for the proofing, as the book suggests and since my kitchen was at about 70 degrees. It seemed like that was about right based on the poke test too, but I have very limited experience so take that for what it's worth.
"Watch the dough, not the clock." I like that!
I will google "bench rest" now.
Thanks again.
Thanks for the update. I did not expect to see 73 F and 70 F as the temps. Something more like 60-65 F was what I expected given the 12-hour bulk fermentation. You were pretty lucky, it seems, to have been able to shape the dough. Mine had risen nearly to the 4-quart mark at one point but then fell back severely (and became the slurry). Is it possible that you ended up past the optimal point of fermentation and could have seen a slightly larger hole population with a shorter bulk fermentation?
Both loaves look great and you did a fantastic job - you should be happy!
The only comment I'd add to the collection above is around relative humidity.
One of the key advantages of the dutch oven method (as I understand it) is that you have a lid covering the pot and that's trapping all the humidity as you bake within the pot as a small oven within your oven. That moist environment inside there lets the loaf bloom without letting the dough surface 'crust' too fast - and as a result you get a nice bloom (ie: higher rise from the bake). If the surface of the dough dries out too fast and starts to harden, then the rise can be restricted. Then, when you remove the lid for the second half of the bake time, and the humidity (or what's left of it) escapes from the pot, the top of your loaf within the dutch oven begins to form it's darker/harder/thicker crust until you remove it from the oven. But by this time the bloom/rise is in place and you're wanting to now brown the crust and finish the cook with a drier (less humid) environment in the oven - which is why you take off the lid of course.
With the second loaf on the stone, you've made the cooking environment the oven itself. And the amount of humidity within the loaf you're baking gets released as it bakes and will not be enough to cook that stone loaf with the same relatively humidity around it as was inside the dutch surrounding that oven. That's why we all add tons of humidity to the oven when we load our loaves onto our stones. I'm know there's more to the story about baking with a dutch oven versus stone, but that's how I understand the humidity to play itself out from my personal experience.
So with all that said, when you look the two loaves it make sense to me that your stone loaf has a slightly lower rise and is darker in colour - and given the drier bake environment had to be removed five minutes earlier. You could play with humidity and add more to your oven using the towel method that's talked about on this site and see if you can get them to bake at the same time, for the same length of time, with the same rise and/or crust browning.
Hope this helps.. bake happy.. bread1965
Thank you. I really appreciate the effort the you (and the others above) took to provide feedback.
I'll check out the towel method, as you recommend. And keep my eyes open for another dutch oven at local garage sales ;)
Another option for creating steam is to use a couple of disposable aluminum pie pans filled with lava rocks. A minute or so before putting a loaf onto a baking stone, pour some hot water on one pan of rocks, thereby producing steam that fills the oven (shut the door quickly, and be careful not to drip water onto the hot inside of the oven door). Then put your loaf onto the baking stone and pour hot water on the other pan of rocks.
Because of the heat loss from opening the door a couple of times, I generally preheat the oven to about 25 degrees F hotter than I want the bake to be and then lower the temperature once the loaf is in and the doors are closed following the second water bath for the rocks. (And you might also want to check on some day when you are not baking whether your oven runs hot or cold. Most ovens are not exactly what they say the temperature is, and a reliable oven thermometer is helpful. And at the risk of opening another can of worms, there are regions in your oven that are warmer than others. That can be the topic for another thread.)