Isand66's blog

Durum Potato Rolls
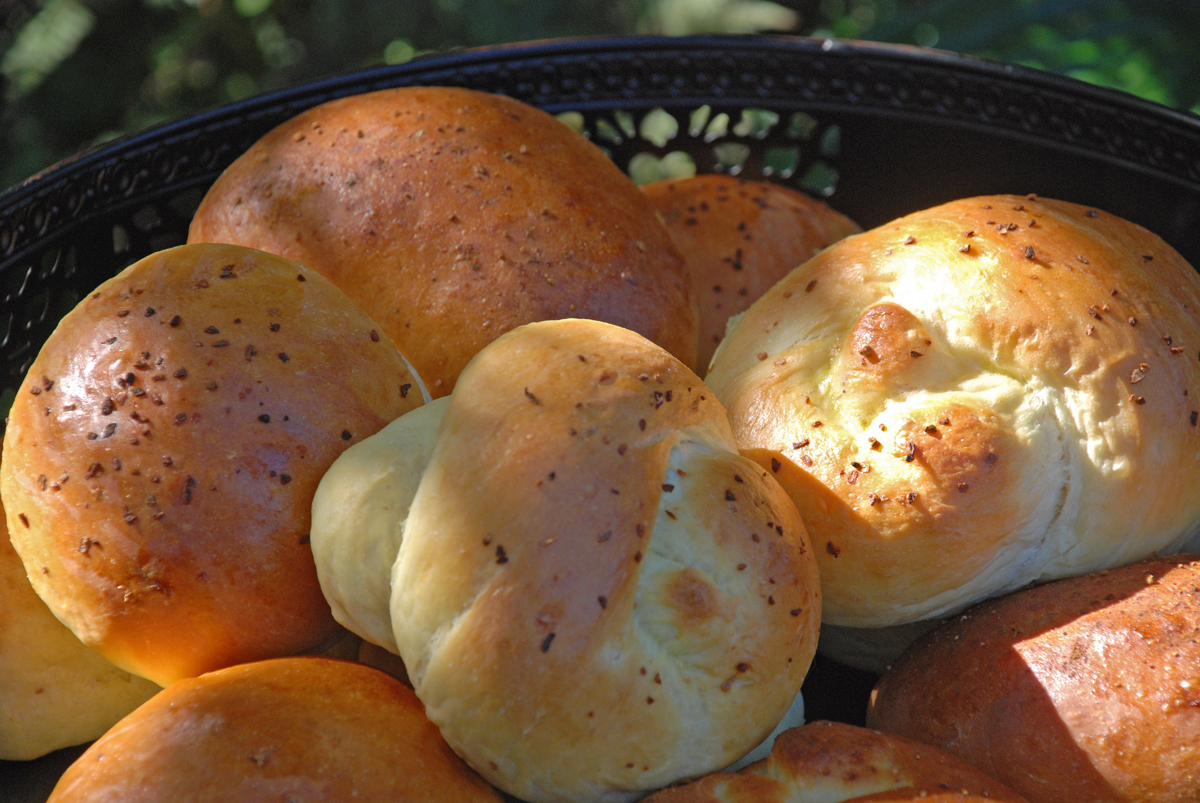 I have not made any rolls in a while and since my wife insisted on some "simple" rolls for our lunch sandwiches this weekend I decided to whip something up using instant yeast instead of my sourdough starter or yeast water starter.
- Log in or register to post comments
- 10 comments
- View post
- Isand66's Blog
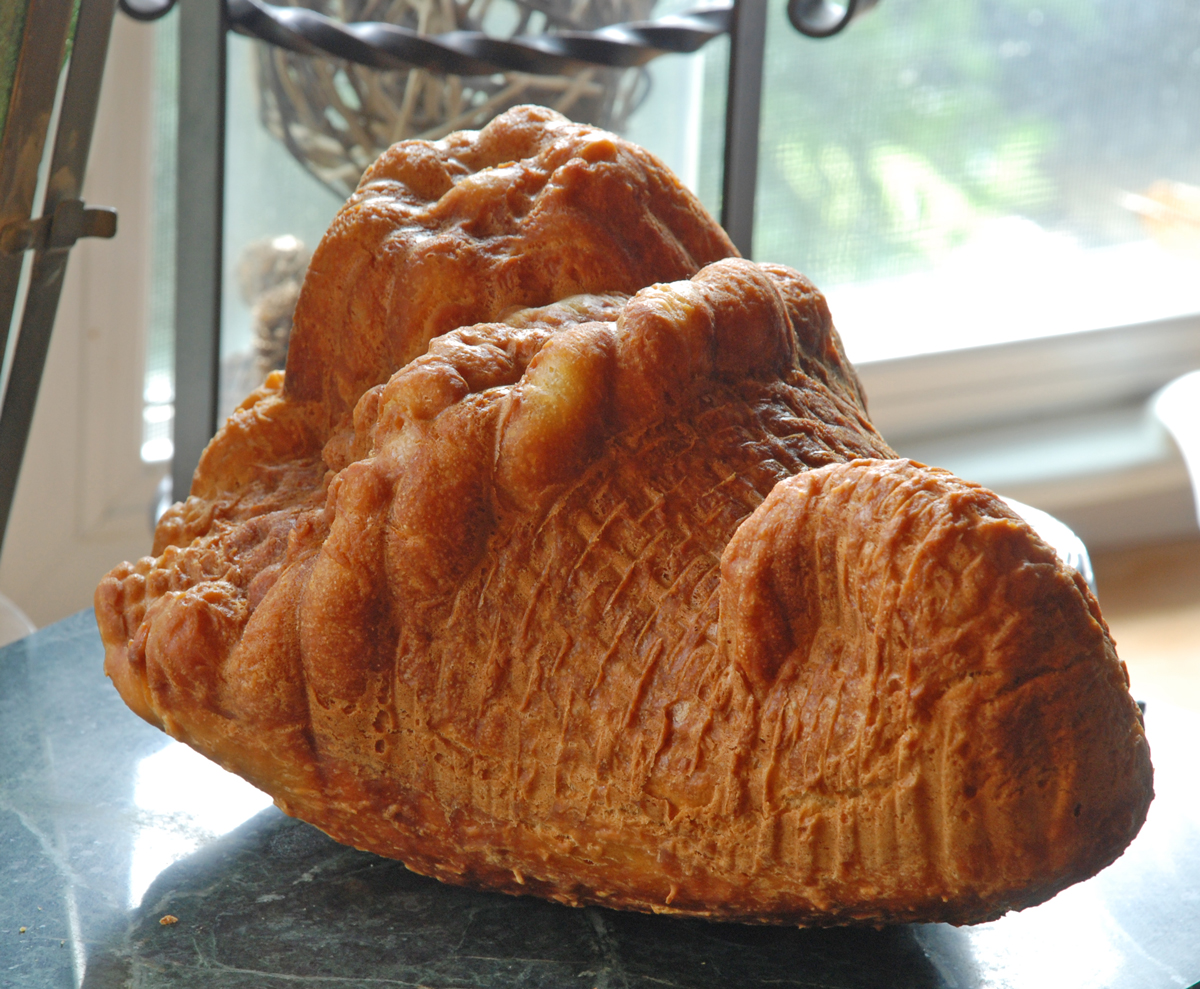
Durum Semolina 36 Hour Sourdough Bread
 A few weeks ago I finally had some good results with TxFarmer's 36 Hour Baguette recipe and I have been wanting to try making some boules with this technique and see how they turned out. I decided to make a Durum starter and I cut the hydration down slightly from the baguette recipe. I followed the same basic method for mixing and retarding the dough with some slight modifications including
Mookie's Hot Chocolate Potato Sourdough Bread

Mookie likes to get his way and when he wants something he lets me know it. For example, when he wants breakfast he will knock everything he can off of my night stand until I get up and feed him. When he wants dinner he will flop down by the door when I come home and insist on a belly rub until he is satisfied and then run to the kitchen and yell at me to feed him.
Coconut Yeast Water Challah
 I have wanted to try my hand at a Challah made with a Yeast Water starter for a while so I decided to give it a try this weekend. Naturally I needed to change it up a bit more and added some shredded coconut and used coconut water in place of the liquid.
TxFarmer's 36 Hour Baguettes
 A couple of weeks ago I tried TxFarmer's 36 hour sourdough version but I had some issues transferring the rested baguettes to my oven and the results were less than stellar. After experimenting with a different formula for a couple of bakes I decided to go back to this recipe and s
- Log in or register to post comments
- 22 comments
- View post
- Isand66's Blog
Merlot Cocoa Rouge Sourdough with Havarti Cheese
 Last weekend I baked a multi-grain bread using white wine with sweet potatoes which came out as good as I could have expected. This time I wanted to try using a red wine and what goes better with red wine but chocolate and cheese. I used a cocoa rouge which is a special type of cocoa that has an intense bittersweet character with a rich deep red color and fudge-like flavor.
- Log in or register to post comments
- 6 comments
- View post
- Isand66's Blog
White Wine Multi-grain Sweet Potato Sourdough
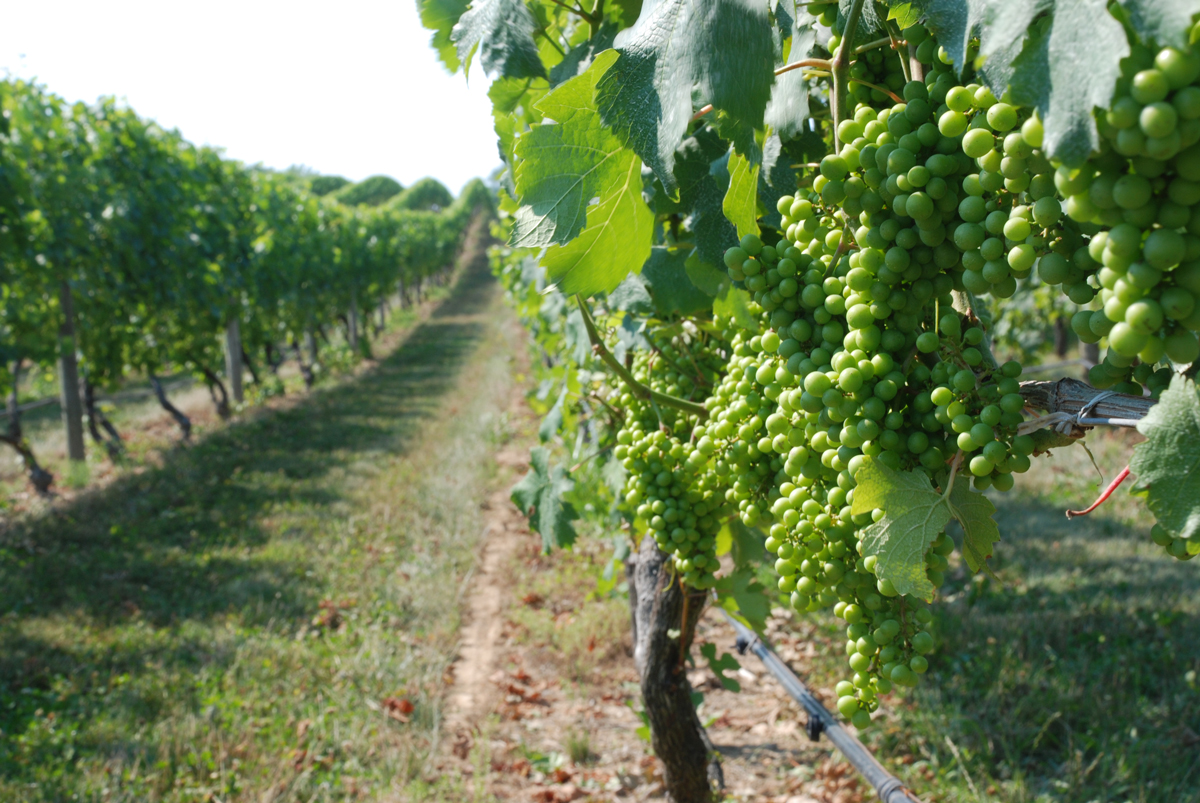 Here on Long Island, New York we have a ever-growing wine country on the East End of the Island. My wife and I like to go visit a few different wineries and enjoy sampling the different varieties of wine available. There is nothing more relaxing than to sit down with some good wine, cheese and bread and enjoy the cooler autumn air.
Durum Yeast Water Rustic Style Baguettes
 Over the last few weeks I have been experimenting with making different styles and recipes for baguettes. A couple of weeks ago I tried TxFarmer's 36 hour sourdough version but I had some issues transferring the rested baguettes to my oven and the results were less than stellar.&n
