The New York Times had a great article by Mark Bittman on making bread
http://www.nytimes.com/2006/11/08/dining/08mini.html
Ideas:
1. Use a very hydrated dough
2. Use only a small amount of yeast, 1/4 teaspoon
3. No kneading
4. Rise at cool room temperature for 18 hours and fold a few times at the end
5. Proof for a few hours
6. Dump into a preheated Dutch oven (a wrought iron or similar cast iron pot with a cover) at 450F, cover, and bake for 30 minutes, then uncover and let finish. You just dump the dough into the hot pot!
New ideas for me: the preheated covered pot! I shall have to try this.
This looks like the perfect solution to my chronic problems with shaping the super-hydrated doughs that give you the gorgeous crumb-and-crust. Can't wait to try it! (Of course, this is going to have me out scouring the discount bins for other shapes and sizes of covered pots....)
"I am not a cook. But I am sorta cooky."
After reading the title of this post you may have either one of two reactions. If you are a fellow bread freak you may be saying to yourself, "What?? Who is she kidding? That is so last decade. Mark Bittman wrote about Jim Layhey's revolutionary no-knead bread in 2006! Every food blogger worth her salt has reported on this bread." If you are not a bread freak, you may be saying, "What?? No knead bread. She's been inhaling too much bleached bread flour. How could that be possible?" So, to the bread freaks reading this, I apologize for reporting on something you have already heard about ad nauseam. To the rest of you, I say, yes, this is possible and it's spectacular.
Full report on my blog:
http://saltandserenity.com/2011/02/10/no-knead-bread/
I've already printed off the recipe to give it a try this weekend. I can't wait and experiment with sourdough!!! Thanks for sharing!!
I watched the video. I do notice his dough is less hydrated than mine. Mine is more batter-like. I will have to experiment with a less hydrated dough. For sourdough, though, I tend to believe (may not be true) that a more hydrated dough (80%?) works better for the yeasties and beasties to do their work.
I think that sourdough cultures multiply in the dough and the higher hydration makes this work better. Instant yeast gets distributed through the dry ingredient mixing part and doesn't reproduce in the dough so it doesn't need as much hydration.
What do you think?
Seems to me that is essentially Floydm's Daily Bread recipe (or similar plain rustic doughs) cooked in a cast-iron cloche.
sPh
I used regular bread flour, with cormeal to prevent sticking to the towel during bench proofing. The loaf turned out wonderful. I baked it at 450, pretty much followed the print recipe. I used a pound of flour rather than 3 cups, which was pretty much the same volume when I measured.
I'm bad at following directions.
I created probably 80% hydration sourdough dough with about 6 cups flour, 2tspns salt, and refrigerated overnight, and then let rise about 8 hours. Then I proofed for about 2, preheated the oven with a Dutch oven in it to 450F. It was too hydrated to get much surface tension into it although I tried.
I was a little apprehensive about getting the dough into the pot. But that was pretty easy. I covered and baked for 30 minutes then uncovered and baked for another 10 until the internal temperature was 205F.
My loaf had no oven spring and I think I should have baked it longer, perhaps at a lower temperature, maybe 425F.
It has a marvelous reddish crunchy crust that my bread hasn't had before and it tasted very good although I shouldn't have sneaked a slice as it wasn't yet cool.
I will definintely try this again and refine it for my style which is 1) sourdough, and 2) refrigerated immediately upon mixing, for 1 or 2 days.
From my experience with these kinds of doughs, if you don't (or can't) fold it, it won't rise much. Folding creates a tight surface around the wet dough. The tight surface traps much of the CO2 produced by the dough during poofing and baking. Without the tight surface, the CO2 will escape.
The solution is to add enough flour so that you can fold it. Or perhaps you are not comfortable folding a wet dough-- I certainly wasn't the first few times I tried it! There are a number of techniques to fold a wet dough. What I do is spray my counter with non-stick spray (I like Mazola the best because it sprays evenly). Then I pour the dough onto the coated surface. Then I spray the palms of both of my hand with spray oil. Finally, I fold the dough like a letter I'm getting ready to put in an envelope.I turn the dough 90 degrees and fold again like a letter. Then I flip the dough over so the seam side is down, cover the dough with plastic wrap covered with spray oil and let the dough sit for at least an hour.
Let me know how things turn out!
Like your observation - I too have noticed the same thing but never let it sink in.
If you can't fold it.
It sunk. I'm the cook and this is someone else's recipe, in someone else's kitchen and at someone else's altitude. I will make it my own way and on my terms. Forget what they say - I know what dough ought to look like and feel like.
Crud, I feel better all ready.
I had more or less the same problem. The dough was very liquid. I baked it in a Römertopf (I have no Le Creuset), which I soaked in water. This was probably a mistake. The bottom of the bread was crispy but very clear. Disapointing!
Pics you can find here: http://kochtopf.twoday.net/stories/2928503/
1 x umrühren bitte - http://kochtopf.twoday.net
I got the same problem. I tried adding more flour and more yeast and it finally rose a little bit but still not nearly as much as it should've. Leftit in he oven with the lightbulb with plenty of time to rise... Like an insane amount of time.
Not sure what I did wrong here.
Thanks for the great post. I watched the video at least three times, immediately ordered a cast iron pot and took the following leap of faith---
I had been making Pain Levain from BA (using 50% whole wheat 50% KA white bread flour, and orange juice to get the wild yeast going). On day 3, I read your post and fell out of my chair. "If Bittman is right, any dough that sits for 12 hours at 70-75% hydration may not require kneading" At the end of day three, I mixed in flour to bring the hydration down to 75%. Then I folded the dough, placed it seam side down in a bowl covered with a flour-dusted towel and let the dough sit overnight (12 h). The next morning I flipped it onto a peel, slashed it, baked it at 500 deg for 28 minutes. Note that I no time did I knead the dough.
It was ugly (possibly slightly overhydrated), but it rose well and had the best crust and crumb I have ever made with my own hands. The taste was the perfect mild-sour that I have only been able to produce one other time. The crumb was wide open and chewy. HERE'S the best part-- my one year old twin daughters loved it (they only eat the crumb as they only have 6 teeth)!
SO-- (European) sourdough, no added yeast, no kneading, great bread, AMAZING!
Your bread history and experience inspires me! You accompanying photographs also paint a beatufiul story and augment the inspiration. One question about the Lahey input: why does his recipe suggest inverting the raised dough so that the "pinched" rough side is to the top? The second is how did you get such a beautiful looking loaf that you could slash on the top? Third, what recipe did you use? Thanks so much.
I am an amateur baker, after many disappointing tries at making thre old-fashioned NY bagel of my youth, I decided to make this no knead bread for company last night.... it was a resounding success- I still can't believe I made bread that was so delicious and so professional looking as well.
Before my company left, they wanted me to start a new bread - took all of five minutes, now just have to wait the 20 hours to try again!
Thank you for a wonderful and helpful site.
Anyway, here's what I ended up with:
It got very little oven spring, and spread out quite a bit in the cloche. I don't have a covered cassarole, and when I went looking for one, I found they're a lot more expensive than a cloche! And since I already have a cloche, I figured I'd use it.
The holes were nice, but the flavor was very "whole wheaty." I think I prefer whole wheat breads when they're cut with a little bit of butter or oil in the dough. There's a dry, sharp taset which I assume is the bran in the crust that I just don't find appealing. However, the crust was definitely the crispiest I've eaten with 100% whole wheat, and the crumb was nice and chewy.
Probably not something I'll do again, though. Not with whole wheat, anyways.
I'm from Venezuela - South America- and discover this site about a week ago and, since then, I visit it every day. I'm in love with bread, its smell, taste, crust, and how wonderful it is be able to bake it at home. I've taken two levels - of 4 - in a baking school here in my country, and studying about bread.
I've tried it on three batches so far and the only real disaster was one loaf that came out burnt on the outside -- the result of mindlessly following directions without the old eyeball tests (I way set the timer and walked away for the final lid-off bake).
It's true this dough is mighty slack after 12 hours of fermenting. It's not really possible to shape it in the traditional way. Basically I floured my hands and pulled it into a rough circle. Final raise does in fact tend to go sideways instead of up. But that didn't affect the quality of the final loaf except in leading to some strange wrinkles in the surface.
Apparently, it's really the pan that dictates the loaf shape. I used a big oval dutch oven and a smaller round covered Pyrex baking dish and ended up with two quite different loaves -- both delicious! I may be that the lack of oven spring some folks are seeing would be remedied by using a slightly smaller pan.
I just ordered a long covered cast-iron casserole dish -- http://www.sportsmansguide.com/cb/cb.asp?a=254669 -- that I believe will allow me to use this formula to turn out long loaves. I'll post pix if it works!
"I am not a cook. But I am sorta cooky."
> I would love to find a cast iron pan in the shape
> of a baguette---say 20" x 3" x 4".
Send these guys an e-mail and suggest it; can't hurt:
http://www.lodgemfg.com/support.asp
sPh
Here's a link to the full description at the King Arthur Flour site.
I actually have one of those, and it works OK. But the results with my very heavy cast-iron camping Dutch oven have got me thinking that masss has a lot to do with it, and the cast iron might work better than the cloiche (which I had been thinking about buying).
That is why I suggested to the OP that he submit his suggestion to the cast iron company.
sPh
You are correct, sir. That's the big giant pan. I meant to link to a smaller version -- which would, I think, produce something more along the lines of a large Italian loaf. But never mind; they were out.
But the idea of a cast-iron baguette pan? Brilliant!
So what percentage of yeast would this be? I'd like to try this on a larger scale, maybe 10-15 loaves. I wouldn't bake it in the pan as he does, but I like the idea of mixing the dough one day, and then just folding/shaping/proofing the next. Could you do this same sort of this as a cold ferment for even longer, say 2-3 days? I'm trying to figure this out as I had a disaster one time experimenting with this. I won't go into detail...ahem. It's hard for me to scale it when most recipes I use are using close to 20 lbs of flour, so a percentage of instant yeast would be most helpful. Thanks.
Ed
I start to suspect that part of the key to the puzzle is the type of pot used, and that my relative success was due to the coincidence of using the cast iron camping dutch oven which is _very_ heavy and has a reasonably tight-fitting lid. I think the heat capacity of the cooking vessel is coming into play quite strongly here.
I again raise the question about the le Cruset dutch oven shown in the NYT picture. It appears to be one with a resin handle, which per the instruction is limited to 200 deg.C/390 deg.F. This recipe needs 450-550 deg.F temperatures to work as far as I can tell.
sPh
Yes, my results were similar to verminiusrex's above. I followed the printed recipe (not the video), but I did use my banneton for the final rise.
sPh
I've made the bread twice, using roughly measured cups of flour (stick the cup in the flour bag, shake it level and throw it in the bowl) and the bread has worked beautifully both times. When first mixed, the dough is not slack at all, almost looks like one of those biscuit type doughs where one is admonished to not over mix. I would guess that those who are getting batter like results at first are adding too much water. After 18 hours it becomes quite slack but still holds together when I dump/scrape it out on the surface to to fold. Once folded and shaped I have found it useful to let let it rise on a plate/platter (on a well floured dish towel) that has raised edges that contains the edges of the dough a little, encouraging vertical rise. Obviosly one that mimics the shape of the baking vessel. Since I'm baking an oval loaf I'm using an oval serving platter for the final rise. It also facilitates the final plop into the superheated baking vessel as you can hold the edges of the dishtowel and the platter together and simply tip the dough in.
I'm using one of those oval covered clay roasters. I was a little worried that it might crack when 475 degree clay met 70 degree dough but no worries.
Total labor: 3 minutes, 10 minutes if you include clean up.
One of the joys of this bread is listening to the crust crackling about 5 minutes after it comes out of the oven as it cools and shrinks. You look at the bottom of the loaf and see a fine network cracks in the crust.
I have been very pleased with the results, it tastes, looks, feels like a good basic bread store french boule. You know, the kind that seduces you with it's delicate, brittle crust, its creamy just soft enough interior, a delicate salty sweet flavor with sublte hints of hidden complexity. A classic that doesn't embark on a hostile takeover over of your taste buds but cries out for good butter, some left over sauce on the plate for mopping and promises of great toast in the morning.
This is definitely a case of less is more. And a keeper!
I was very excited about this but my loaf very moist and pretty dense. Not edible so had to be thrown away.
I'll give it another shot as everyone else seems to have got on OK with it.
It would make my life much easier if it did work!
I use home-milled flour - do you think this was the problem? It's wholewheat ground to the finest setting.
I see that several of you have posted details of your successes with sourdough so I will try that next (no yeast at the moment!)
Yesterday I tried this recipe again using the printed recipe directions and instant yeast. My first try was using my sourdough starter and was pretty much an inedible failure.
I still think this recipe needs a little more salt, but I followed the written instructions to the letter. After a 12 hour rise in a cool room, I folded the dough on a cornmeal sprinkled pastry cloth. Then I attempted to gather it in a ball and plopped the dough in a cloth lined basket that had been heavily floured and sprinkled with more cornmeal, covered the basket with a cloth and let it rise another two hours.
Transferring the dough to the hot pot from the basket was so much easier. And the dough only stuck to the basket cloth in a couple of places and was easily pulled loose. The bread had little if any oven spring, but was a good loaf of bread - moist, chewy interior with a thick, crunchy bottom crust and an appearnce good enough to serve guests. I'm not sure if I care for the very thick bottom crust that results from this technique, but I want to try baking my regular sourdough recipe in the hot pot and see how I like that.
If this recipe gets a lot more people to try baking their own bread, then it is definitely a baking breakthrough and I celebrate that!
I have tried this bread three times. I am using a 4qt enamel pot with lid. I have twice used wheat bran to dust and once used cornmeal. The cornmeal loaf had a golden crust and the bran had a darker one.
The dough is made up in the morning (10am) and baked the next day about the same time.
The dough is kept in the fridge during this time and pulled out and allowed to warm for 3 hours. The one time I kept the dough on the counter, it did not rise in the baking and looked like asourdough starter with a thin amount of hooch on the top. (I live in the tropics and the kitchen is about 85-90F )
I cut back the salt from the original recipe as the first loaf was too salty for me. I continue to use about 3/4 of a tsp.
The crust on this loaf is better than anything I have acheived using the traditional bread making procedure. The crumb was full of holes. I think this would be excellent toasted .
Of all the bread styles I bake, my husband says this is his favorite.
Today, I will make a batch up using whole wheat 1:1 ratio with AP.
Somewhere I read about a pot discolouring with the use of oil. I do not use oil in the preheated pot.
Rather than do the towel step. I found that putting the cornmeal into a standard 9" pieplate and then coating the top by hand works wonderfully. There is no messy towel to clean and I have greater control getting the dough into the preheated pot. (Though the first time Ramona did this she threw the dough against the side of the pot and it seeped down into a heap) Surprisingly, at the end, this did not matter.
I find that perhaps if I increased the recipe by a third, I would have the perfect amount for for the bottom of my 4 qt pan.
I enjoy making this bread, and will continue to do so in the future.
Hi merrybaker.
I put it immediately into the fridge. Is there a bread theory that you should let it "start" at room temp?
My sourdough came out gummy too. I'm trying a second time. My theory is that I need to uncover open the pot sooner which I hope will let the moisture evaporate quicker from the baking bread.
I plan to cover for 15 minutes and then uncover.
Also I made my dough less hydrated this time. Now it closely matches the hydration levels on the video.
I'll let you know!
The articles on the NYT website aren't available anymore and I stupidly didn't watch the video bit.
The problem wiht measuring in cups is that it's very inacccurate. And flour is so variable in thirstiness too. I think that's why I've been having problems
The video is still up. Just reviewed it again. Here is the link:
click to view
I've booked marked this and will now try it since it does look simple. Just waiting for my cast iron pot from amazon!
Well, OK, Let's try this one. Either way it is still listed on their website and can be found:
click to view
well as my first try at any sour-ish fermented bread, I tried this one.
So far I am 15hours in. The dough is gooey/battery and has lots of bubbles.
I am excited :)
I went out and bought an earthenware casserole dish to try with this. :S I hope it works.
I am taking photos of this, and also its made with 100% spelt. I am interested to see how it goes.
So now, 18 hours on, I decided 2.5 hours ago that it looked fermented enough to fold and rise. So I waited in total 16 hours. I think :S
I folded it, which I thought was going to be difficult. but turned out pretty easy. I was very confident. :) I generously floured a tea towl with some white spelt flour and thought some poppy seeds would be nice so I aded them also. I put the dough in, rested it in a collander and covered it and left it.
Well, it was time to put it in the pot, and it stuck with force to the tea towl. :(
I had to scrape it off! I hope it still works! I have a feeling the pot is too big and I will end up with a flat loaf.
Oh no! I just realized I turned off the oven by accident! I think it was about 15-20 mins ago! I realized as I took the lid off for the crust to harden and thought the oven didnt feel very hot......not for 500 degrees F or 260 deg C. I looked and saw the light wasnt on!
Instead of turning off the dishwasher at the wall it was the oven! I hope this doesnt effect the bread quality. I was making it for a "pot luck" dinner tonight.
Well, at least I can see where I went wrong.
I took the lid off too soon.
The bread seems ok considering I turned the oven off for 20mins by accident.
The loaf is flat, dark brown (almost burnt but surprisingly the bottom is stil pale) and ugly. Mainly because the mixture was too little for the pot. Next time (if there is one) I will double the mixture.
I will see how it tastes when it cools down.
I will also let it rise in an oiled bowl. So it doesnt stick to the tea towl as if it didnt want to be baked! So. I can definitely say that may future efforts at bread are going to be interesting to say the least and a bit (or more) of a learning experience.
Look forward to it though :)
So it looks as though its Soda bread for the pot luck!
Last Edit.
Had to add, Beside from the burned top crust and the flatness of the loaf. It tastes pretty good.
I was surprised to find the crumb so open and the bread actually feeling like bread. (I was skeptical with my previous Spelt experience) So to find the bread spongy and full of holes was great. No matter the outside.
I will make this again.
Make your one:
Large flower pot: $8-10
Large Eye Bolt and washer: $2-3
No shipping costs, no waiting. Total expense: $10-13
your local nursery will also sell you a large flower pot base-- which if sized correctly, to fit your flower pot cloche, can act as your baking stone. Downside: Not so easy to slide bread, pizza off a peel due to the raised edges. But still, total investment: $20-25.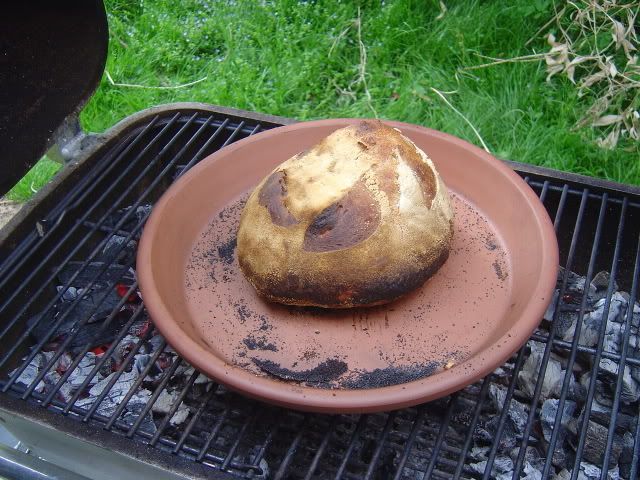
Has any one done any testing to see which is better clay pot or a cast pot or glass/ceramic. Cast and glass/ceramic would be non-porous and might keep steam level higher, whereas clay/terracotta/pizza stones are porous and would let steam escape more readily. Also a heay cast pot would have different thermal mass than clay/glass/ceramic.
Just interested if there are significant advantages to using a metal pot. I would expect that the crust development in particular might be different.
PM
I've been using a covered clay roaster-- the bottom part is glazed and therefore non-porous and the top part is unglazed and porous. Also the lid has a very loose seal. The bread has been coming out perfectly. (the rest of the pics can be seen at my Bakers Blog, Kneadless Bread) I don't own a Le Creuset or other cast iron vessel of appropriate size to compare. My guess is that the differences would be minimal.
1 cup SD starter
1 5/8 Cup water
3 Cups AP flour
1/3 cup Rye flour
1 1/2 t salt
16 hour rest
fold, wait 20 mins, fold again, shape into batard, place on platter, then, sealed in plastic bag and retarded in the fridge overnight (18 hrs). Out of the fridge, final rise for 4 hours, then into the preheated covered roaster at 500 fro 30 mins, uncovered at 450 for 15 mins.
Tastes great, toasts up beautifully, excellent crostini, rub it with raw cut garlic, some good EV olive oil, some sea salt...oh boy.
BUT,
Not the oven spring I hoped for, loaf is about 3". And the crust, while chewy, flavorful and substantial is alas, not brittle and crackery. And the crumb, moist, dense and clearly nutritious can lay no claims to sublte seductions of the tongue. This bread could feed a small family for a week but will not transport anybody to a cobblestone alley outside a boulangerie in St. Germaine-des-Pres.
Compared to the commercial yeast version, It is quite dense. Is this the nature of Sourdough? Or could it have benfited from some kneading after the 16 hour sitting period and more folding and a longer final rise?
So far the commercial yeast version comes out on top for me in the No knead sweepstakes.
Andrew
an idea of how many grams per cup would be very useful!! Presumably the weight of flour and water being so different, a straight conversion isn't going to work - e.g. 3 cups of flour will equate to metric in one way - but the same weight to cup ratio couldn't be applied to any liquid? So I shall need to know the amount of grams of flour in a cup, and the weight of water in grams to a cup also, and do two conversions for each recipe?
The recipes themselves in her book loook fine - but confusing none the less!!!!!
Andrew
For bread flour, 156 g/cup
sPh
My dough really sticks to the cloth like mad.
Is there any solution to this?
If the dough is too wet then probably not. But i've been succesful with relatively high hydration doughs (even when retarding them overnight in the fridge enclosed in a plastic bag--plenty of opportunity for the dough to stick) by using the tighest weave dishtowels I have-- the tighter the weave the less likely the dough is going to get "into" the weave and stick; and generously coating the surface of the towel with a 50/50 of coarse yellow corn meal and flour. I use 1/3 to 1/2 cup of this mixture--perhaps over kill but flour is cheap and it works. Also, press the four/meal mixture into the fabric, thus filling the gaps in the weave with flour, preventing the dough from getting into those gaps and sticking.
I saw a video of Nancy Silverton (I think) and she said that she never washes the dishtowels she uses for this purpose, just hangs them out to dry completely after each use. the result is that the towels become so impregnated with flower that they are virtually stick proof and only need a light dusting with each new use.
I was having the same issues so many others have reported with dough sticking even to well floured towels. So I don't use them at all. In fact, I rarely do a two-hour second rise at all, and have been getting great results.
What I do instead is give the dough a few in-bowl "folds" with a spatula -- the same kind of folding motion you'd use when adding egg whites to cake batter, for instance -- once or twice during the long initial rise.
When I'm ready to cook, I pour the risen dough out onto a floured board, very lightly pat it down and fold it over envelope style, cut it into sections (if I'm making more than one loaf) with kitchen shears, dust with with some more flour just to make it possible to handle, then form it into kinda-sorta boules. I give it maybe a 15-20 minute rest, then toss it in the hot pots. No problemo, beautiful loaves, excellent oven spring.
The dough is so wet that it doesn't form a crust during the rest period. If I need to protect it, I just put an inverted mixing bowl over it.
"I am not a cook. But I am sorta cooky."
I originally read this article and thought "this is good for people who don't know how to really bake bread" but after all the hubbub and internet peer pressure I finally tried it today. I used my camping dutch oven, which is great because it gave me an excuse to use it! Oh and one note I rose my loaf on a floured cloth that I placed inside a bowl to give it some structure as it rose--I suspect that helped with oven spring, as mine was pretty tall.
Everything transpired just as described--I was worried about the dough sticking to my cloth, but I had no troubles (it's a well used piece of canvas I use all the time so it has a lot of flour in it).
Things I liked: It was very simple, nice for a busy weekday bread. It was also an easy way to handle very wet dough. It looked very attractive coming out of the oven.
Dislikes: I don't like the crust as much as my usual stone-baked loaves. It's not very thick, and not very crunchy. I could always pop it out and finish on the stone, but that brings me to my other dislike--handling a preheated heavy pot was rather annoying and dangerous. If I do it again I'll use my peel and stone.
My crumb is not as big-bubbled as I hope--I'll take a pic once I'm a few more slices into it. It also has sort of a metallic taste. Again, I think I'll skip the cast-iron part next time.
I do think I'll try the mix and overnight rise method for my ciabatta next time--I'm not satisfied with my process and think this might be a good method to adapt to rustic breads.
Thanks so much for that video link. Very useful.
The original article says that this method works well with wholewheat and rye.
Surely they can't mean 100% wholewheat and definitely not 100% rye. What proportions do you think the rye should have?
I've tried 70% wholewheat and 30% white and that worked well.
Regarding the dough sticking to the tea towel: on the video he uses bran torather than flour in the tea towel. I used cornmeal and it didn't stick. I think flour would just be absorbed by the wet dough.
Interesting to note how the video differs from the article.
In the video he scoops up 3 ROUNDED cups of flour. Also he only uses 1.5C water and not 1 5/8C that the article states.
I also noted that when transferring the dough from the tea towel to the pot he just tosses it in. I was being really careful but today I just tossed it in and it was my best loaf yet.
As fro 1 cup of one flour being different to one cup of another flour I think the key is to aim for a similar consistency to what is in the video.
This has been a fascinating thread to follow. I cannot believe that I have not actually taken the plunge, although I read the original article/viewed the video within a day or so of it being published. For those of you who donot have a suitable vessel, Cooks Illustrated latest issue rated Dutch ovens and gave a best buy to Target's Chefmate pot, which at $40 USD was about $200 cheaper than the big name brands. I picked one up today, hope to try this out soon. The tag indicates the handle is good to 350 deg., but I noticed it screws off, and I intend to remove it, to avoid meltdown.
In terms of dough sticking to the towels, I use rice flour in my bannetons, and it seems to work better than regular flour. I intend to use the banneton, actually rather than a towel, when I make this.
Due to the large response to the article, there's an update in today's paper with addendums to the recipe.
http://www.nytimes.com/2006/12/06/dining/06mini.html?ref=dining
... or I'll be tempted to make this Sullivan St. bread all the time. Gotta get back to the whole wheat thing before my blood sugar levels turn my blood vessels into syrup spigots.
I finally made the bread with yeast, not sourdough, and it really is amazing. I lowered the hydration a tad to 72%, and weighed out the ingredients to ensure that I hit it. That results in a bread that really isn't all that sticky after 18 hours, and is pretty easy to handle, so long as you're not afraid of flour flying everywhere. I had no trouble with the dough sticking to the banneton I used (I shaped it into a boule, this time, after the stretch and fold). A pastry brush got rid of the excess flour very nicely.
Man. Easily the best tasting white bread I've ever made.
Can anyone suggest alternatives? Pyrex loaf pans?
Cajun Cast Iron has an oblong casserole cast iron that looks like just the ticket.
sPh
Today's NYT has an update on the bread--most of what they offer today is common sense, though.
Going to make my next loaf with whole cloves of roasted garlic added before baking. A friend has also had great luck substituting a cup of semolina for an equal volume of flour.
slashing the loaf?
I have notices some laoves were slashed others were not
So my question is when and how does one does it with this wet dough?
thanks
If you make the NYT / Sullivan St. recipe as stated, it's probably going to be too wet to slash. You can use a wet razor blade or a wet serrated knife, but at 80% hydration, which is what this loaf is at, slashing is pretty much impossible.
If you cut the water down a tad to 1 1/3 cups or even 1.25 cups, the bread should still turn out great, and you'll be able to slash it. I weigh my ingredients, and have been making this bread at 72% hydration, with great results.
yes thank you I thought so hydration will make it almost impossible to slash the loaf.
Another comment is this guy at the bakery uses commercial flour which is different from the supermarkets flour. I too use commercial flour of various types so I hope and expect to make this bread with no problems.
Andrew
I have used the proportions given in the revised and refined version and the dough. It is slack but nowhere near as highly hydrated as other people suggest in fact it is rather dry and with few dry flour lumps around the dough. Perhaps because here is summer and yesterday was 42C the flour requires lot more water I don't know.
Right now that I have prepared the dough and covered the bowl with a glass lid leave it for an hour before moving it into the fridge for an overnight stay.
The water you'll need to get the dough to the same consistency would vary by how much gluten/protein your flour has-- if you use unbleached all purpose (USA), you'll need less water for a really wet dough. If you use bread flour, it has more gluten and you'll need more water to get it more slack and, well, batter-y.
Krusty, Toronto
First, thanks to Pepetaco for the link to Breadtopia.com, where the instructions are clear, unambiguous and free of contradictions, and the videos are vastly better than on the Bittman/Lahey NYT postings. I followed the Breadtopia method and made my personal best bread, using 2/3 multigrain and 1/3 Nutriflour (contains bran) plus 1 TBS of gluten flour. Thin crackly crust; moist open chewy crumb; complex flavour.
Forgive me if this observation has already been made, but:
This method is clearly described in Elizabeth David's marvellous book "English Bread and Yeast Cookery" (1977) starting at page 303. She calls it "Under-Cover Breadbaking." It's disingenuous to describe it, as Bittman does, as an innovation and revolutionary. In fact, the method is ancient.
The breads came out beautiful but when it was over my Le Creuset lid had two breaks. One is 3" long and one is about 1". Also, a half inch piece popped out of the knob. The La Cloche got very dark but that's ok. I would also say the La Cloche is easier to use because of the handle on top and the shallow 1 or 2" base makes it easy to put the dough in and to remove the bread after cooking. The loaf baked higher and nicer in the clay also.
The clay pot, for me, is the only way to go. I feel very bad about my Le Creuset so I'm letting you know cracking is possible. I use an ordinary GE electric oven.
I have neither a LaCloche nor any enameled cast iron. I tried this last week in a 6-quart Simply Calphalon non-stick stockpot with a steel lid, atop the baking stone-- I fidgeted with the dough composition, so I can't blame the recipe for my gummy, bland crumb (in spite of breaking 210 degrees in the middle of the middle), but I was thoroughly impressed by the generously crunchy bottom crust.
I suspect that the material of your pot matters less than its shape, lid, and degree of preheating.
I have to echo an earlier post here by asking, is kneading such a chore? Maybe if I had come out better on my single try (and hadn't foolishly blistered my thumb and 2 fingers on a 500 degree pot lid) I'd be totally sold on this method. As it is, it's not so hard to get lots of steam in the oven, and I baked some boules and a three pound round today with no pans and a comparable crust (though a chewy bottom) that were much easier and less messy to get into and out of the oven on a peel.
This combines the method for pain a l’ancienne (BBA, page 192) with the Lahey/Rusch method.
9 ounces hard white unbleached flour (250 grams)
4.5 ounces multigrain flour (125 grams)
10 ounces ice water (280 Ml)
1 tsp instant yeast
1 tsp salt
1 tsp apple cider vinegar
Mixed the dough by hand for about two minutes.
10 hours in refrigerator in a lightly oiled bowl covered with plastic wrap
10 hours at room temperature
Sprinkled the board with ¼ cup flour. Turned out the dough and sprinkled some more flour on top. Formed and stretched the dough, which only absorbed about half the flour on the board. The dough was moist, but very easy to handle. Put the dough in a lightly-oiled baking pan 12”x 4”, bottom sprinkled with corn meal, to rest while pre-heating the oven, about 20 minutes. No further proofing needed. Heated an oblong clay baker to 500°, and turned the dough into it. Baked at 475° for 30 minutes lid on and 10 minutes lid off.
Exceellent oven spring. Crust cracked, and crackled while cooling. Thin crisp crust. Chewy crumb, with lots of holes. Complex flavour.
This recipe has no sour dough starter?
Correct. No sourdough starter, and it works perfectly.
Also: I have baked this as a boule in an unglazed clay tagine (must be seasoned first), and that works perfectly. The domed lid of the tagine acts as a cloche.
will someone re-post the formula in this thread?
Thanks!
Here's the recipe (edited for space) that kicked it all off. As you have seen from this thread, the adaptations are purt-near endless. Many folk are using less water, more or less salt, tinkering w/rise time, baking temp etc. And those towels! Drive people crazy. See thread for alternatives.
Enjoy!
3 cups all-purpose or bread flour, more for dusting
Combine flour, yeast and salt. Add 1 1/2 cups water, stir until blended (dough will be shaggy and sticky)1/4 teaspoon instant yeast (active yeast also works, no proofing necessary)
1 1/4 teaspoons salt
Cornmeal or wheat bran
Cover bowl and let dough rest at least 12 hours, preferably about 18, at about 70 degrees.
Dough is ready when its surface is dotted with bubbles. Lightly flour a work surface and place dough on it; sprinkle it with a little more flour and fold it over on itself once or twice, envelope style. Let rest about 15 minutes.
Using just enough flour to keep dough from sticking, quickly shape dough into a ball. Generously coat a cotton towel (not terry cloth) with flour, wheat bran or cornmeal; put dough seam side down on towel and dust with more flour, bran or cornmeal. Cover with another cotton towel and let rise for about 2 hours.
When ready, dough will be more than double in size and will not readily spring back when poked with a finger.
At least a half-hour before dough is ready, heat oven to 450 degrees. Put a 6- to 8-quart heavy covered pot (cast iron, enamel, Pyrex or ceramic) in oven as it heats.
When dough is ready, carefully remove pot from oven. Slide your hand under towel and turn dough over into pot, seam side up. Shake pan once or twice if dough is uneven.
Cover with lid and bake 30 minutes, then remove lid and bake another 15 to 30 minutes, until loaf is brown.
Yield: One 1 1/2-pound loaf.
"I am not a cook. But I am sorta cooky."
Just in case you measure your ingredients by weight the recipe is available through this link:
http://www.realbakingwithrose.com/2006/12/noknead_balloon_bread_loaf_10.html#c016810
The recipe on this link has been tested and retested and so on and slightly modified. Mainly what is found on this link has 80% hydration where I believe in the original recipe in the article has 75%. Even at 80% the dough is pretty easy to work with since you only HAVE to fold it once. You can do more, but the I think whole purpose of the article was to inspire people to make bread at home and keep it as simple as possible. Good luck!
demegrad
http://www.demegrad.blogspot.com
This probably has been discussed to death here, but with all of the chatter about the NYT No-Knead technique, I had to try it too. So, I made a basic dough a bit less wet than the article (about 73% hydration, I wanted the resultant dough to be more easily handled) and a touch more salt. Mixed the shaggy dough (took about 15 seconds) and let it sit in the kitchen (about 65-70 F) for about 21 hours (I got home a bit later that night than I intended). Did the folding being careful to not degass too much. Waited 15 min, then gently shaped the loaf and put it seam side down on some cornmeal on top of parchment paper (I don't have a dutch oven, so I just decided to shape and bake on a stone) and let proof for about 2 hrs. Heat stone in oven (550 for 40 min). Slash bread and popped it on the hot stone. Immediately dropped temp to 475 and baked for 10 min (with occasional spritzing of water for steam). Open the oven, removed the parchment paper, spun the loaf around for more even baking and dropped the oven temp to 400. Baked another 30 min.
Results? It worked! Really great oven spring. A loaf of bread with a decent crust (well for me that is) and really nice open crumb structure. My wife thought that it tasted great too.
I haven't baked much the past year because my work and family activities have kept me too busy. This was sad as it is always nice to have good bread for our meals. Because of food allergy issues (my boys are allergic to sesame seeds and nuts), we can't just trust buying good bread at an artisan bakery (which was why I was trying my hand at baking my own). But this technique is so minimal in terms of effort that it fits really well for my busy life. I think that for now (or at least until my life gets less hectic), this technique allows me to get some descent bread on the table. I bet if I dose the dough with a touch of whole wheat and a bit of dark rye, the resulting bread will be pretty good.
Mr. Peabody
Lehey made the no knead bread on Martha's show yesterday. A "top of the world mom" moment. Where can he go from here?
George
Just to report that this technique has worked wonderfully for my SD bread:
1c starter
1.5c water
1 1/4 ts salt
3c flour
Thinking of trying baguettes in some pre heated (brand new and washed!) sections of cast iron guttering... should get an excellent oven spring and the shape of the guttering sections would stop the loaf from going flat or spreading....
Andrew
I've made quite a few runs with this technique and like other's who have posted here, I've had a few gummy loaves (one so bad, it literally could not be toasted!) I now believe that it is necessary to get the internal temp over 215 F. Has anyone else considered this?
George
Almost sacrilege I suppose - I make a double batch - the first loaf is eaten almost immediately by my children so never any left overs - I cut the dough in two and rolled and kneaded it for about 1 -2 minutes and the results were brilliant crumb - no great holes like it has when I do not touch it - well worth doing
Gerry
450g flour, 1/4 t yeast, 2 t kosher salt, 320g water
Floured towels don't work for me but parchment paper with a dusting of flour and cornmeal or wheat germ does.
I tried two different pots (8qt Calaphalon stock pot and 6qt AllClad stock pot) My results were inconsistent until I broke down and bought the Lodge 5qt Dutch Oven. Works wonderfully.
I recently baked Cooks Illustrated's "almost no-knead" bread. It was beautiful to look at and very tasty. I didn't have a cast iron pot, and just used a moderately heavy stew/ dutch oven pot. So-o-o easy and "almost" no kneading.
Hi, I'm new to this site and would appreciate it if someone could tell me where I can go to print this recipe from start to finish with all the details.
.