
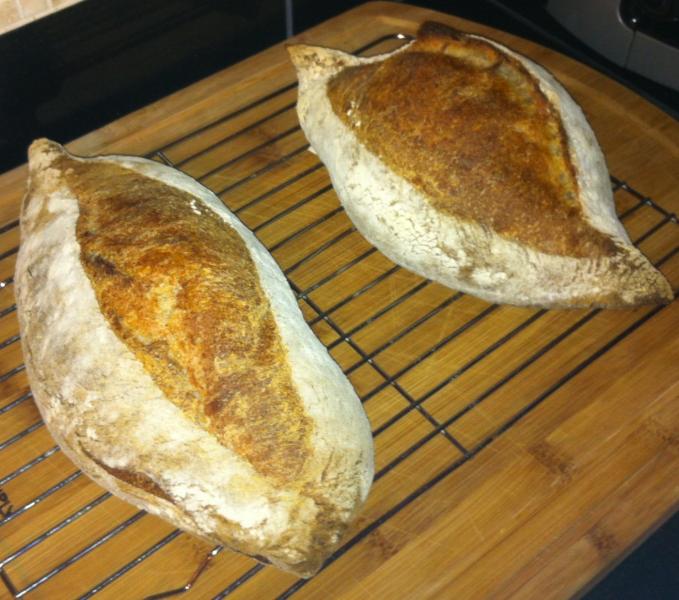
So ... I finally got an ear (!!) which is good and I'm very happy. Huzzah!!
The "good" loaf is misshapen (the "bad" loaf is horribly misshapen) ... I did not do what I normally do, which is to jury-rig a couche with kitchen towels. I need a real linen couche, which is on my list of things to get. My older daughter (14 yo) was very surprised when I pulled the finished loaves from the oven and noted the ear (lol).
I made 2 loaves and was focusing on developing good surface tension, so I followed Dave Snyder's method of preshaping by forming into a ball, followed by final shaping and proofing. I put the loaves on floured cutting boards and let the final loaves proof seam-side up. When I went to bake I flipped the loaves, cut them, and loaded the oven (bakes at 520F for ~15 minutes, then 475F until browned ... interestingly this time it took quite a long time to brown to the degree I wanted). Steaming was accomplished with ice cubes every 3 minutes in a roasting pan, which was placed on the oven floor.
I followed Reinhart's BBA recipe, slightly modified it to use 1/8th ww and 1/8th rye flours. Also went to a bit over 14.5 ounces of water to get hydration in the neighborhood at 72%. I had some timing problems ... after kneading I placed the dough in the refrigerator with the intention of a 24-hour cold ferment. It ended up cold fermenting for 36 hours before I could do the final shaping, etc. Didn't seem to negatively impact the loaves. I bought some white rice flour and used it for the kneading, shaping, and final proofing. I might have used a bit too much but I'm not overly worried about it.
The better looking loaf was formed 2nd, and is closer to the right shape. I'm not sure if they're underproofed, I usually let the loaves proof at 80F for like 2 hours but for these I proofed them at 80F for about 45 minutes.
So I'm almost there. Need to focus on the final shape and use a couche.
On the flavor ... the bread is excellent. It's not sour despite the use of sourdough starter, but I really don't care about that. Interestingly my younger one had a slice for breakfast, and had to have a second slice because she liked it so much(!).
Crumb shots are from the "bad" loaf, one shot with a flash and one without.
Cheers-
Dave


- dosco's Blog
- Log in or register to post comments
bread and you must be thrilled with your progress. Well Done! You might consider Sylvia's Steaming Pans - steaming kitchen towed rolled up in pans half full of water or David Snyder's Steaming Lava Rock Pans - pans also half full of water but the bottom covered in lava rocks (found in the garden centers) to produce steam rather than ice cubes which won't produce the mega steam you need. Both work well and i use (2) pans sometimes mixing them up:-)
Happy baking
Not only a great ear, but a nice, glossy crumb and humongous oven spring. Congratulations!
Well done! How satisfying it is when you feel that you are making some progress! And even better when it is tasty too.
Thank you for the compliments. Despite the funky shaped loaves, I'm happy with the result.
I think the ice cubes in the roasting pan are more effective than my previous method of water in a stainless steel bowl. With that said, I think Dave Snyder uses ice cubes in a pie tin, the pie tin has holes on the bottom; the tin sits on a cast iron pan loaded with lava rocks. I think I might try this approach when I get the chance to pickup a beater cast iron pan (I've seen many cast iron pans at antique shops) and some lava rocks.
Cheers-
Dave