The Fresh Loaf

A Community of Amateur Bakers and Artisan Bread Enthusiasts.

hanseata's blog

hanseata's picture
hanseata

Gerd Kellner, aka Ketex, is not only an accomplished baker, but, also, writes one of Germany's best bread baking blogs. A book with his recipes: "Rustikale Brote aus deutschen Landen" is available as e-book at Amazon.

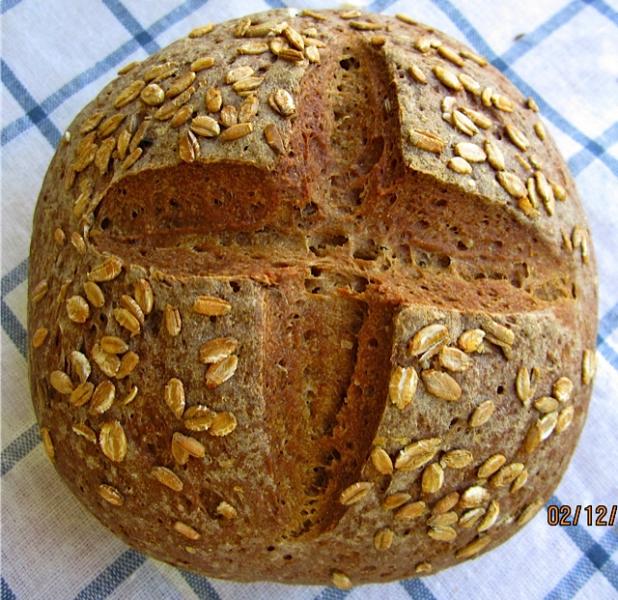
When I saw his post on Bauernbrötchen, I wasn't only attracted by the attractive look of these rustic rolls, but, also, intrigued by his use of old dough as leaven.

"Old dough" in bakers' lingo means a piece of dough, cut off before shaping the bread, and kept in the refrigerator for later use. After I learned how to make a wild yeast starter, and bake my first bread from a French cookbook, I had always saved a portion of the dough for my next loaf.

Advancing from a series of weapon grade, dense and chewy "bricks" to more edible breads, this method had worked very well for me, until I branched out and started baking other types of bread than just my everyday German Feinbrot.

German Feinbrot - originally made with old dough

The old dough was replaced by a whole wheat mother starter, and all but forgotten as a viable rising agent.

With Ketex' beautiful Bauernbrötchen in mind, I reserved a piece of dough from a yeast bread I made, and put it for later use in my basement refrigerator - and then promptly forgot all about it!

About 3 months later, when I was looking for something in the depth of the fridge, I came upon the little container, and remembered what it was.

 Though I was rather suspicious about how this might affect the taste, my distrust was unfounded, the rolls, though not looking as nice as Gerd's, rose well and tasted surprisingly good. And I had a new, interesting formula to work with.

I opened it gingerly, expecting nothing good after all the time, and the old dough, indeed, looked, shall we say, "antique", and didn't smell very nice, either. At least there was no mold on it!

Rose Hip Levain - made from accidentally fermenting jam

Always curious, and open for experiments before I throw something in the trash, I just wanted to see whether there was any life left in the mummified relic, and proceeded with the recipe.

For my second bake I did just the opposite: my old dough had slumbered only for 3 days in the fridge. With my first batch of Bauernbrötchen, I had followed Ketex recipe to the t, using a poolish as preferment and adding the piece of preserved dough later to the final mixture.

"Old dough" - refreshed and ready to go!

I didn't quite see the rationale for an additional poolish, especially since the dough was to be retarded in the refrigerator overnight. Why not, instead, feeding the old dough up front, and let it act the part of the poolish?

And, since the percentage of rye flour in the dough was not so high that a change would influence the crumb, I used whole rye instead of medium rye (easy to come by in Germany, but, alas, not readily available in the US.)

Rather than kneading the dough for 15 minutes, and folding it only once, I followed Peter Reinhart's procedure in "Artisan Bread Every Day" (my default S&F) with a brief mix, an autolyse, and 4 stretches and folds over a period of 40 minutes.

Measuring spoon for very small amounts

Ketex adds a tad of yeast to his dough. For these very small amounts (that, nevertheless, make the rising time more predictable) you need a special scale, able to accurately weigh a few grams or ounces.  Mine looks like a big spoon, and is easy to use (about $15 at Amazon)

The second batch, without the poolish, performed just the same, but tasted a bit heartier with the whole rye. I had to adjust the baking temperature and time, but every oven is different, and you have to adapt to this, anyway.

We found these crusty rustic rolls great for open faced sandwiches, and they, toast well, tool. You can easily freeze them, therefore it's worth it to make a double batch.

But don't forget to save a piece of the dough: for your next Bauernbrötchen!

My first batch of Bauernbrötchen - made with truly "antique" dough!


BAUERNBRÖTCHEN WITH OLD DOUGH  (adapted from Gerhard Kellner/Ketex) 

OLD DOUGH
100 g/3.5 oz old dough
    5 g/1 tbsp whole rye flour
  42 g/3 tbsp water

FINAL DOUGH
147 g/5.2 oz refreshed old dough (all)
400 g/14.1 oz bread flour
  45 g/1.6 oz whole rye flour
258 g/9.1 oz water
    8 g/0.3 oz olive oil
  10 g/0.4 oz salt
 1.8 g/0.06 oz instant yeast (or 5 g fresh yeast)
 3.5 g/1 1/2 tsp barley malt
 rye flour for sprinkling


Rejuvenated old dough

DAY 1:
In the morning, feed old dough with rye flour and water. Cover, and leave at room temperature until lively and bubbly (like poolish.)

In the evening, mix final dough ingredients at low speed (or with wooden spoon) until all flour is hydrated, 1 - 2 minutes. Let dough rest 5 minutes. Then knead at medium-low speed (or by hand) for 2 minutes, adjusting with a little more water or flour if necessary (dough should be a bit sticky.) Continue kneading for another 4 minutes. Dough should be still more sticky than tacky.

Ready for S & F on oiled work surface

Transfer dough to lightly oiled or wet work surface. With oiled or wet hands, pull and stretch it into a rough square. Fold dough from top and bottom in thirds, like a business letter. Then do the same from both sides. Gather dough together in a ball, and place it, seamside down, in a lightly oiled bowl. Cover, and let it rest for 10 minutes.

Repeat this stretching and folding 3 more times, at 10 minute intervals. After the last fold, reserve 100 g/3.5 oz of the dough (for the next "old dough".) Refrigerate reserved piece (container with lid.) (Ketex recommends using it within 10 days, but it keeps longer.

Place remaining dough also in an oiled container with lid, and refrigerate it overnight.

I find these kinds of containers very practical for overnight retardation

DAY 2:
(Since these are small pieces, you can shape them cold.)

Divide dough into 8 pieces (à 100 g/3.5 oz) and shape them into balls. Let them relax for 20 minutes, then roll them into strands with pointed ends. 

The dough pieces are first pre-shaped into rolls

Place rolls in a couche, seam side up. Sprinkle with rye flour. Cover, and let proof for 1 - 2 hours. (Preheat oven 45 minutes before baking.)

Preheat oven to 500ºF, including steam pan. 

Bauernbrötchen are proofing on a couche

Place rolls, seam side down, on perforated or parchment lined baking sheet, sprinkle them with whole rye flour, and score lengthwise.

Bake Bauernbrötchen for 20 - 26 minutes at 450ºF, steaming with a cup of boiling water. (Rotate the baking sheet 180 degrees after half the baking time, and remove the steam pan). They should be golden brown, and register at least 200ºF.

Submitted to YeastSpotting

Submitted to Panissimo:  Bread & Companatico

                                          Indovina chi viene a cena                                             


hanseata's picture
hanseata


Visiting my hometown Hamburg in May, I didn't really expect to bake anything. But our little Airbnb apartment in Schanzenviertel, Hamburg's youngest and dirtiest most colorful quarter, had a fully equipped kitchen, and I had some time on hand.

Occupied house in Schanzenviertel

Richard was attending a full immersion German language class: "so that you can't say nasty things about me on the phone anymore!"

Some mornings I visited my Mom, helping her detailing her car - my mother is 93, her Honda Civic 19 years old, and both in great shape! Some mornings I enjoyed coffee and quality time with my son (who lives around the corner and works from home.)

Enjoying the sun with my Mom at the Alster river

My ABC baking group's project of the month were ENGLISH MUFFINS, so, rather than going cold turkey on baking withdrawal, I bought eggs, milk, flour and yeast, and started mixing the dough.

Out of habit, and to save tedious waiting time, I mixed the dough in the evening, and let it rise in the refrigerator overnight.

It is a bit tricky to handle the soft and stubbornly sticky dough, but oiling your work surface, hands and tools, and generously sprinkling your pan and baking sheet with semolina helps quite a bit.

The cooking was easy, each time it took about 15 minutes for one side, but only 4 to 5 for the other.

Nooked and crannied - English muffins taste best when toasted

The muffins split open into nice, nook-ed and crannied halves, toasted well, and we ate them with butter and raspberry rhubarb jam. According to my spouse they were "exactly as English muffins should be."

Just the right snack for a hungry, homecoming "school boy"!

Richard wrestles with his German homework, while I enjoy leisurely mornings

ENGLISH MUFFINS  (16 large muffins) adapted from King Arthur Flour

1 3/4 cup/397 g lukewarm milk

3 tbsp/43 g softened butter

1 1/4 - 1 1/2 tsp salt/6 - 8 g (I used 1 1/2 teaspoon)

2 tbsp/25 g sugar

1 large egg, lightly beaten

4 1/2 cups/539 g bread flour (I used, of course, German 550 flour)

2 tsp instant yeast (6 g was plenty)

semolina or farina, for sprinkling the griddle or pan

German ingredients for English muffins

DAY 1

Combine all dough ingredients in bowl of stand mixer, fitted with paddle (to handle the very soft dough). Beat at medium-high speed, until dough starts coming away from sides of bowl, and is satin-smooth, shiny, and very stretchy (about 5 minutes.)

Using a bowl scraper, transfer dough to a lightly oiled bowl, fold it from all sides to coat with oil, then cover bowl with plastic wrap, and place in refrigerator overnight. (Or, if you want to bake the same day, let it rise until it's nice and puffy, about 1 to 2 hours.)


DAY 2

Sprinkle a large well-seasoned or non-stick pan or griddle heavily with semolina or farina. Also, sprinkle a baking sheet generously with semolina (or farina.)

Remove dough from refrigerator, and scrape it onto an oiled work surface (it is quite sticky!) With oiled hands and bench knife or large kitchen knife (also oiled to prevent sticking) gently deflate dough, and cut it into 16 pieces.

Roll pieces in your hands (re-oil, if needed) into fairly smooth balls, flatten until they're about 3" to 3 1/2" in diameter, and place the first 4 muffins on the prepared (cold) pan (or as much as fit, on the griddle,) the others on the baking sheet (they can be fairly close together.)

After their 20 minute rest the muffins look a bit puffed, but not much different

Sprinkle all muffins with more semolina or farina, cover them with parchment or plastic wrap, and let them rest for 20 minutes. They won't rise much, but puff a bit.

Cook muffins over low heat for 7 to 15 minutes per side, until crust is golden brown, and interior cooked through, registering about 200°F. (If they are brow, before they're done, place them into preheated 350°F oven for about 10 minutes, or until they're thoroughly cooked.)

English muffins are baked on a bed of semolina or farina on the stove top

Let baked muffins cool on wire rack, and cook remaining muffins in batches, until they are all done.

REMEMBER: use a fork to split, not a knife to cut. Fork-split muffins will have wonderful nooks and crannies; knife-cut ones won't.

First of May holiday in Schanzenviertel - it couldn't be more idyllic

For the First of May we were warned to stay indoors as there might be riots in the streets, by occupiers and their supporters. But absolutely nothing happened, and the mood of the crowd was festive, not ugly.

Time for another visit at our favorite café around the corner. Their wide selection really needed several trips to decide which one of their tortes and bars we liked best. After all, inquiring minds want to know!

Chocolate Mousse Torte and Cappucchino at Cafe Stenzel, around the corner

Did I mention that our apartment was "athletically located", on the fifth floor? Without elevator! We took that as a pass to unrestricted intake of pastry, brötchen, böreks, döners, and other delicacies that the surrounding eateries had to offer.

Eateries in Schanzenviertel have whimsical names, like "Four Fists"

Recently, occupied houses and graffiti covered back yards have become regular stops for tour buses. Their punky inhabitants are not too happy to be viewed as interesting tourist destination!

Tourist destination: graffiti covered occupied houses and backyards

So they put up this sign:

"In this back yard there is absolutely no: dealing, pissing, photos, police patrols! "


hanseata's picture
hanseata


When my husband decided to open up a furniture store in Portland, ME, he found a big old garage in Fore Street. After spending a month with scrubbing, painting and cutting new panes for each of the high windows, he turned the dark and dirty place into a beautiful, light space, to showcase his contemporary furnishings.

Eventually Richard Parks Gallery moved to Commercial Street, and the first floor of the old store became Fore Street Restaurant, one of Portland's foodie temples.

The souterrain was turned into a bakery, and, instead of housing French sofas and bistro tables, it's now home of Standard Baking Co., maker of the best French breads and pastries in Maine!

Richard Parks Gallery on Fore Street in the early Nineties

Whenever we visit Portland, we get Pain au Levain, Seeded Fougasse, Croissants, or, on Fridays, Rugalachs.

Last time we came into the bakery, I saw a pile of books: Standard Baking Company had published "Pastries" with many of their recipes, including those of the croissants and rugalachs we were just about to buy. Of course I didn't hesitate one second, grabbed one of the little books, and, while driving home and munching on a walnut filled rugalach, studied the recipes.

Though I bake (and sell) lots of breads, I have little experience with French baking, and couldn't wait to try making one of those mouthwatering pastries myself.

I was also wondering whether Alison Pray and Tara Smith had dumbed down their formulas to make them "everybody's darling". Or, jealously guarding their secrets, changed them so that the home baked pastries would never taste the same as their professional counterparts at the store (try finding the original Sachertorte in Hotel Sacher's pastry book!)

Worth every penny!

To my utter delight neither was the case. Every piece of pastry I made so far was outstanding - and tasted as good as its sibling at the bakery. (No, I don't get a kickback for my gushing!)

Croissants, with their multi-layered, buttery dough, are the gold standard of pastry baking. I had made them only once before. Those had turned out quite nice, and I was curious how the Standard Baking ones would compare to them.

I found the formula easy to follow, with clear, detailed instructions and explanations for every step of the way. Involved as the process is, it's not rocket science, and you really can do it at home!

You have to plan ahead, though, because you'll achieve your best results when you allow the dough sufficient time to rest. As with most of my breads, time and the refrigerator are your friends, achieving three important goals: relax the gluten (readying the dough for the next turn), keep the butter cold (preventing it from seeping out) and develop the taste.

Therefore, make yourself familiar with the whole procedure before you start! This is your schedule for the 3-day process (no worries, the actual hands-on time is much less!)

Pure buttery, flaky goodness!

 TIME PLANNER

DAY 1 (Mixing the dough)
Hands-on time: 20 minutes mixing           Resting time: 1 hour plus 1 night

DAY 2: (Laminating the dough)
Hands-on time: 2 to 2 1/2 hour                 Resting time: 2 hours plus 1 night

DAY 3: (Shaping and baking)
Hands-on time: 30 minutes                       Resting time: 1 1/2 to 2 hours
            

If you don't want to use all the dough for regular butter croissants, use part of it for Sticky Buns, Pain au Chocolat or Ham & Cheese Croissants. You can also freeze the laminated dough up to 10 days, thaw it in the refrigerator overnight before baking.)

And if you have leftovers, recycle them into utterly delicious Almond Croissants!


BUTTER CROISSANTS   (12)  (adapted with Alison Pray's permission from Standard Baking Co. "Pastries")

Dough
630 g all-purpose flour (4 1/2 cups)
    7 g instant yeast (2 1/4 tsp)
  50 g sugar (1/4 cup)
  14 g salt (2 1/2 tsp)
  28 g unsalted butter*) (2 tbsp), cool, cut in pieces
186 g water, at room temperature (about 70ºF) (3/4 cup)
186 g milk, at room temperature (about 70ºF) (3/4 cup)

Butter Roll-In
280 g/10 oz unsalted butter*), chilled

Egg Wash
1 egg
2 tsp. water
1 pinch salt

*) If you have the chance, get European style butter with a higher percentage of fat (like Cabot's European style butter or Plugra)

DAY 1
For the dough, whisk together flour, yeast, sugar and salt in a large bowl. Using your fingertips, rub butter into dry ingredients until it is evenly distributed and coated with flour mixture.

  
Rubbing the butter into the dry ingredients is easy

Using a stand mixer with dough hook: Combine water and milk in mixer bowl. Add dry ingredients on low speed and incorporate for 3 minutes, scraping down sides of bowl as needed.

Increase to medium speed, stopping mixer after 2 minutes to check consistency of dough. It should be medium-soft. (If it feels stiff, add more water, a tablespoon at a time.) Resume mixing for 2 minutes more. Dough will not be completely smooth, but hold together. (Don't over-mix, you don't want the dough to become tough!)

Using a food processor: Pulse for about 2 minutes, or until dough comes together in a ball. (Don't over-mix, otherwise dough becomes more difficult to roll out, and result in less tender croissants.)


Place dough in lightly oiled container, turn around to coat with oil, cover, and let rise in a warm spot (ideally 75ºF) for about 1 hour, or until it has grown by about half.

The dough has risen 1 1/2 times its original size   

Transfer dough to a lightly floured work surface and pat it into a rectangle about 2 inches thick. Wrap it in plastic and seal it well to prevent it from escaping when it rises. Refrigerate dough overnight (or at least for a minimum of 4 hours.)

(I placed the dough on lightly floured cutting board, sprayed it lightly with baking spray,  put the whole thing first into an unscented garbage bag, and then in the fridge.)


DAY 2
About half an hour before rolling out the chilled dough, prepare butter roll-in: cut cold butter into large chunks, and place them in mixer fitted with dough hook. Beat butter on medium speed until completely smooth and pliable, but not warm (about 3 minutes.)

(You can also pound the butter with a French rolling pin until it is flat and pliable, but the mixer works great.)

After kneading the butter is pliable but still cold

Transfer butter to a piece of plastic wrap or parchment paper. Press it into a 6-inch square, 1/2 inch thick. (I measured and marked parchment paper at 6 inches, and folded it into a square, then closed it with the butter inside, and pressed on the package until the butter filled the edges.)

Chill butter square in refrigerator for about 15 minutes (it should be just firm, but not hard.)

Folded parchment paper helps pressing the butter into a square

And now the fun starts: you are about to create something absolutely wonderful, a tender, buttery, multi-layered (laminated) croissant dough.

Room temperature and work surface should be on the cool side, and each step should be done as quickly as possible, to prevent dough and butter from getting warm. Put everything you need (flour for dusting the work surface, roller pin, brush for excess flour, and ruler for measuring) within easy reach.

The butter square covers half of the dough rectangle.

If the chilled butter feels too firm, take it out of the fridge a few minutes before using. Dust work surface lightly with flour. Remove dough and butter block from refrigerator. Roll dough into rectangle twice the size of the butter square: 12 x 6 inches. Brush off excess flour from top of dough. Place butter square (unwrapped) on one half of rectangle, so that edges are neatly stacked.

Fold other half of dough over butter, and press open sides together to seal butter in. Lightly re-flour work surface, if necessary, and roll out dough rectangle into a square, about 1/2-inch thick and twice as long as it is wide (the long side should be facing you.) Brush dough surface to remove loose flour.

Roll out dough into rectangle twice as long as it is wide

Fold dough lengthwise in thirds like a business letter, always brushing any loose flour from the surface before you fold: first fold left third over center, then right side over left. Using a bench knife, straighten and square edges, so that layers are neatly stacked. Congratulations! You just made your first turn (aka envelope fold.)

Wrap the dough "envelope" in plastic wrap and refrigerate it for 45 - 60 minutes, so that you and the gluten can relax and cool down. In the meantime, clean your work surface from any remaining bits of dough, and dust it again lightly with flour.

After its workout the dough needs another break in the fridge

Unwrap cooled dough and place it on work surface, the long, folded side facing you. Roll out dough as before into a 1/2-inch thick rectangle. Fold it again in thirds, always brushing off excess flour between folds. The second turn is done! Re-wrap and re-chill dough again for 45 - 60 minutes.

Now you're already a pro, and know how to handle the third and final turn. Unwrap, roll out, fold, and use the brush in between! You don't want flour to keep the layers from adhering.

Brushing off any flour from the top of the dough is important

So, that's it for the day, wrap your (beautifully laminated) dough in plastic and place it in the freezer. Before you go to sleep, take it out, and put it in the fridge so that it can slowly thaw overnight. (Or, if your mouth waters too much, and you need to bake it the same day, give it at least 2 hours chill-out time before shaping.)

TO MAKE AHEAD: You can also freeze the dough up to 10 days, thawing it in the fridge overnight before baking.

DAY 3
Line 2 baking sheets with parchment paper. On a lightly floured work surface, roll dough into 12-inch x 25-inch rectangle (1/4 inch thick.) Re-dust with a little flour, if needed, to prevent sticking. If dough springs back and is difficult to lengthen, let it rest a few minutes, before you continue. When desired length is reached, trim and straighten narrow ends with pizza wheel or chef's knife.

A same size piece of parchment paper with markings helps with the cutting

Cut rectangle into long, skinny triangles, 4 inches wide at base and 10 to 12 inches long on sides. (It's easier if you cut parchment paper into a same size rectangle, and measure and mark bases and tips of triangles on it. Place paper over dough, and then mark dough in the same way with little incisions.)

Make a 3/4-inch incision in the center of each triangle base (this notch helps to create the desired length in the final shape.)

To shape each croissants, pick up a triangle, holding base edge with one hand. With the other hand about 1 inch from base, pull dough gently to lengthen it slightly, without causing any tears. Place triangle down again, base towards you, and gently but firmly roll it up towards the tip. (If done properly, you should have 6 to 7 tiers.)

Leftover dough scraps: Place cut off half-triangles from both edges side by side, pinch the middle seam together, put any other small scraps on top, and roll this patchwork triangle up, too. It will be a little "malfatti" (badly made) as my half Italian spouse calls it, but nothing of your precious dough will be lost.

The triangles get a notch at the base to make lengthening easier

Put shaped croissants on prepared baking sheets, evenly spaced, the tips should be tucked underneath.

For the egg wash, whisk together egg with water and salt in small bowl until smooth. Brush croissants lightly with egg wash, carefully avoiding open edges, so that the egg can't glue them together and prevent tiers from rising. (Refrigerate remaining egg wash for the second application.)

The croissants need to proof for about 1 1/2 to 2 hours. Place baking sheets in the (unheated!) oven, then put a pan with hot, steaming water on the bottom to provide the ideal rising environment: humid, to prevent a skin from forming, and warm, but not too warm - you don't want the butter to melt, resulting in less flaky, greasy croissants.

Half an hour before baking, remove proofing croissants from oven. Position racks in upper and lower thirds, and preheat oven to 430º F.

Cover croissants, and continue to let them rise, until they have almost doubled in size, and dough springs back slightly when pressed gently with a finger tip, but the dimple should remain visible. Each tier should still hold its distinct shape. (Check croissants frequently after the first hour of rising, if they overproof, they will have loose their flakiness and have a bread-like structure. The room temperature should not be too warm.)

Proofed croissants. The "malfatti" on the upper right is not much different from the others
  

A few minutes before they go into the oven, brush risen croissants again with a thin coat of egg wash, carefully avoiding the edges (you don't want to screw up now!)

Bake croissants for 10 minutes, then quickly rotate baking sheets from top to bottom and from front to back, for more even browning, taking care not to leave the door open too long. Continue baking for another 4 - 6 minutes, until they are evenly baked, with deeply browned, crisp edges.

Remove sheets from oven, and transfer croissants to wire rack, to cool a bit. They are best when eaten while still warm, or shortly after baking.


If you cant eat all of the croissants right away, you can wrap them individually in plastic wrap, and re-crisp them at 375ºF for a few minutes.

OR YOU TURN THEM INTO HEAVENLY ALMOND CROISSANTS!

There is no such thing as stale croissants when you recycle them into these!

Submitted to YeastSpotting

hanseata's picture
hanseata


One of my most favorite cookbooks is "Ancient Grains for Modern Meals".

Award winning Author Maria Speck combines her German father's love for hearty grains, and her Greek mother's culinary talents in dishes that make you grab your shopping bag, hop on the bike or in the car, and drive to the next natural food store to buy those ancient grains, veggies and fruits for Maria's mouthwatering meals.

Normally I consider a cookbook worth its money, if it contains at least one recipe I really like to cook. "Ancient Grains" has so many, that I still haven't prepared all the ones I want to try. (No, I DON'T get a commission!)

 A few of the dishes are breads, among them the Aroma Bread. A no-knead bread by trade, its evocative name spiked my interest, and my love affair with the spicy loaf began.

"Ancient Grains" is very user friendly, with detailed, easy to follow instructions, no sophisticated culinary equipment needed. No-knead breads meet these expectations, a mixing bowl, a wooden spoon, a clean kitchen towel, a Dutch oven, and you are all set.

These low maintenance breads don't want you to slave over them, they are free spirits, and perfectly willing to go and develop themselves, if you give them enough time (and a little bit of yeast.) They show their gratitude by rising eagerly, and tasting better than many other loaves that had been kneaded, slapped and punched into submission.

You have the choice between a crunchy, and an XX-crunchy Aroma Bread. If you opt for the super chewy, you need to soak whole grain berries for several hours, before mixing them into the dough. This is definitely no impulse bread, so plan to bake it 24 hours ahead.

Maria called her loaf "Aroma Bread" for a good reason. This truly aromatic loaf is not for the faint hearted! But in our old home country Germany breads are often flavored with coriander, fennel and caraway, these herbs are even commonly referred to as "Brotgewürz" (bread spices.) You can use them whole, or coarsely ground.

Bread spices fennel, caraway and coriander

As easy as no-knead breads are to mix, handling wet dough always remains a bit of a challenge. And here comes the sticky wicket: the dough has to be shaped into a loaf, and transferred from the mixing bowl to a place where it can rise. And, after that, it has to be turned out into a piping hot Dutch oven.

That leaves you with two choices: either to lower the bread gently into the pot, risking nasty burns (aka Baker's Badge of Honor). Or you let it drop from a secure height - and have your bread sigh and deflate!

Maria solves the problem by having you scrape the bubbly fermented mass onto a well floured countertop (flour is your friend, creating a barrier between the sticky dough and its surroundings), so that you can fold it into a round.

Then you place the loaf on a floured kitchen towel, fold the corners over it, and, voilà, you have a cozy proofing place. Of course, it takes a rather amorphous shape from being bundled in a kitchen towel. 

My first bread went into a large, oval Dutch oven (I didn't have a smaller one), and eagerly spread to fill the void.

My first Aroma Bread - shaped like a roly poly!

Baked into a rather flat loaf, it reminded me of those little things that scurry away when you lift a stone. But when I took the first bite, my eyes glazed over. My flat roly poly bread tasted awesome!

The next time I decided to set the bread more boundaries, changing its Armadillidiida appearance. Instead of proofing it simply in a towel, I used my pretty brotform to contain it.

Proofed in a rising basket, the bread is round but still...


It came out of the oven nice and round, but still... way too much room to spread during the baking.

Alas! My main source for discounted kitchen gadgets, Home Goods, was letting me down when I needed it most. Still without the right sized pot, I decided to experiment with a free-standing, self- contained sourdough version, made with pre-doughs à la Peter Reinhart's "Whole Grain Breads".

Aroma Bread made as free-standing loaf (with sourdough)

My hearth baked sourdough loaf turned out beautiful. Though I couldn't find much difference in taste, this method is a good alternative for people who either have no Dutch oven, love wild yeasts, hate wet doughs, or prefer to bake their bread as free-standing loaf.

The next time I visited Marshall's (another treasure trove for kitchen stuff) I found a snazzy turquoise cast iron pot in just the right size - for half the price! And soon was mixing the ingredients for my fourth Aroma Bread - again the no-knead version.

And out of the oven came (TATAAA!): the perfect Aroma Bread - looking just as good as it tasted!

The last task left to do for inquiring minds, was to try the sandwich version of Aroma Bread, baked in a loaf pan. A cold cut-friendly shape, and the easiest way to make this wonderful bread. And it has an additional benefit: you can bake more than just one loaf at a time. (My customers will be happy!)

Aroma Sandwich Bread - the easiest version


COMMENTS:

  • If you use the optional whole grain berries (I made the bread with and without, both versions are great) add more salt: 9 g/0.3 oz instead of 7 g/0.25 oz. 
  • Instead of sunflower seeds you can also take pumpkin seeds (or a mixture of both.)
  • Toast the seeds, before adding them to the dough.
  • For an easier, risk free transport of the proofed bread into the hot pot, use a large piece of parchment paper as a sling to lower the bread gently into the pot. You don't have to remove it.


AROMA BREAD    1 (2-pound) loaf


Grain Berries (optional):

1/2 cup whole wheat, rye, kamut, or spelt berries

cold water, for soaking


Dough:

340 g/12 oz whole spelt flour (3 cups)

107 g/ 3.75 oz whole rye flour (1 cup)

  57 g/2 oz coarse or medium stone ground cornmeal (1/2 cup)

  67 g/ 2.35 oz sunflower or pumpkin seeds, toasted (1/2 cup)

  35 g/ 1.25 oz flax or sesame seeds, toasted (1/4 cup)

   2 tbsp. aroma spice blend*)

    7 g/ 1 1/2 tsp fine sea salt (or 9 g/0.3 oz if using whole grain berries)

    1 g/ 1/4 tsp. instant yeast

     all soaked whole grain berries (if using)

475 g/2 cups cold water

cornmeal, for sprinkling

 *) Aroma spice blend: mix 6 tablespoons whole coriander seeds with 3 tablespoons each fennel and caraway seeds (enough for 6 loaves).


 DAY 1

In the morning, place whole grain berries in a bowl and cover with at least 1-inch cold water. Cover, and leave at room temperature to soak. Before using, drain them through a strainer (by the way, the soaking water is an excellent fertilizer for your plants.)

Mixed dough - I used black sesame seeds for a nice contrast

In the evening, whisk together all ingredients for the dough in a large bowl, except for soaked grain berries and water. Scatter grain berries on top, and add almost all the water. Stir with a dough whisk or wooden spoon until all flour is hydrated. (Dough will be wet and sticky, if not, add a bit more water.) Cover with plastic wrap, and let sit at room temperature to ferment for 12 - 18 hours.

Overnight the dough grows to a puffy, swollen mass

 DAY 2

Use a rising basket, (or improvise by placing a clean kitchen towel over a basket or bowl.) Sprinkle with fine cornmeal (other flours work, too). Generously flour your work surface. Using a bowl scraper or rubber spatula, scrape the stringy, bubbly dough onto the work surface.

Scraping out the fermented dough you will see its spongy structure

 With floured hands (or two oiled bench knifes or bowl scrapers), fold dough exactly 4 times, always towards the center, from the top, the bottom, the right and the left side. Turn the dough package around and place it, seam side down, into the towel lined rising basket. Sprinkle with cornmeal or flour, cover with a kitchen towel, and let it rise for about 1 hour.

After 30 minutes, position a rack in the bottom third of the oven, and preheat oven to 475ºF. Place a 4 1/2- to 5 1/2-quart cast iron pot or Dutch oven (with lid) on the rack to heat up.

When the dough has grown about 1 1/2 times its original size, poke it gently with your finger. The dimple should not fill up again (it can come back a little bit, but should remain visible). If not, wait another 15 minutes.

Fitting snugly in the Dutch oven, the bread will rise more than spread

Remove hot pot from the oven and open the lid. Gently turn out the proofed bread from the rising basket into the Dutch oven, seam side up, guiding it with your hand, (or turn it out onto a parchment paper and, holding the paper on both sides, gently lower the bread into the pot (with paper).

Cover with the lid, and bake for 30 minutes. Uncover, and continue baking for 20 - 25 minutes, until the loaf is nicely browned, sounds hollow when thumped on the bottom, and an instant thermometer, inserted in the middle, registers 200ºF.

Remove bread from cast-iron pot and transfer it to a wire rack to cool.


AROMA SANDWICH LOAF

Grease a 9 x 5-inch loaf pan with oil, and sprinkle it with 1-2 tablespoons of flax- or sesame seeds. After folding the risen dough, place it, seam side up, right in the prepared loaf pan. (My suggestion: brush top with water, and sprinkle it with more flax- or sesame seeds.) Let it proof as described.

Preheat oven only to 425ºF, placing an oven proof pan or broiler tray for steaming on a the lowest level to heat up.

When loaf is proofed, place in the middle of the oven, pour 1 cup boiling water in the hot steam pan , and bake loaf for 30 minutes. Remove steam pan, rotate bread 180 degrees for even browning, and  bake it for about 30 minutes more, or until it registers 200ºF.

Let loaf cool in the pan for 5 minutes, than turn it out onto a wire rack (if it sticks to the pan, loosen it with a butter knife or spatula.)


AROMA SOURDOUGH BREAD 

Starter:

64 g/2.25 oz rye mother starter (100%hydration)

205 g/7.25 oz whole spelt flour

124 g/4.4 oz lukewarm water


Soaker:

  57 g/2 oz coarse or medium ground cornmeal

  75 g/2.65 oz whole rye flour

  92 g/3.25 oz whole spelt flour

168 g/6 oz water

    4 g/0.15 salt


Final Dough:

   all soaker and starter

  43 g/1.5 ozwhole spelt flour

    5 g/0.2 oz salt

    1 g/1/4 tsp. instant yeast

  67 g/2.35 oz sunflower- or pumpkin seeds, toasted

  35 g/1.25 oz sesame seeds, toasted

    2 tbsp. aroma spice blend (see original recipe)

182 g/6.4 oz water, add more as needed


DAY 1

In the morning, stir together all ingredients for soaker. Cover, and leave at room temperature.

Mix all starter ingredients at low speed (or by hand) for 1 minute, until all flour is hydrated. Knead for 2 minutes at medium-low speed (or by hand.) Let rest for 5 minutes, then resume kneading for another minute. Cover, and leave at room temperature.

In the evening, mix all ingredients for final dough for 1- 2 minutes at low speed (or by hand) until all flour is hydrated. Knead at medium-low speed (or by hand) for 4 minutes, adding more water as needed. Dough should be very tacky and not dry to the touch. Let dough rest for 5 minutes, then resume kneading for 1 more minute. (Dough should be tacky, but not sticky.)

Gather dough into a ball, and place it in a lightly oiled bowl, turning it around to coat it with oil. Cover well, and place it in refrigerator overnight.


DAY 2

Remove dough from fridge 2 hours before using, to warm up. (It should have risen nicely overnight.)

Preheat oven to 500ºF, with bread stone and steam pan.

Transfer dough to lightly floured work surface, and shape into a round. Place boule, seam side down, in a floured rising basket. Sprinkle with more flour. Cover, and let it rise for 45 - 60 minutes, or until it has grown 1 1/2 times its original size, and a dimple stays visible when you gently poke it with a finger.

Turn bread out onto a parchment lined baking sheet (or use a peel) and place it in the oven, pour a cup of boiling water in the steam pan and reduce heat to 475ºF. After 10 minutes, reduce heat to 425ºF. Continue baking for another 10 minutes, rotate bread 180 degrees, remove steam pan, and bake for about 30 minutes more, or until it is nicely browned, sounds hollow when thumped on the bottom, and registers 200ºF.

Cool on wire rack.

This Aroma Bread was made with whole kamut berries

 You can also follow Maria Speck on facebook or on twitter (I do!)

 (Reprinted with permission from Ancient Grains for Modern Meals by Maria Speck, copyright © 2011. Published by Ten Speed Press, a division of Random House, Inc.)

 Submitted to YeastSpotting

hanseata's picture
hanseata

10/7/18 This post has been updated to include a sourdough starter here

Facebook friend and co-baker David Wolfe asked me to help him understand some terms in a German recipe. Google translate (always good for a laugh!) is not too fluent in professional German baking lingo.

The formula, published by a German bakers' association, Bäko Gruppe Nord, seemed quite intriguing, combining rye meal and cracked wheat with mustard and cheese. The amounts, of course, were calculated for a commercial bakery (19 kg/43 lb), as were the instructions.

My curiosity was wakened, especially after I saw David's appetizing photos in his blog "Hearth Baked Tunes" so I downsized the formula for two small loaves.

The original recipe requires 16% of the white flour as preferment, all the remaining flour, including the coarse grinds, is worked into the final dough. The breads are baked "bei Brötchentemperatur" ("at roll temperature") - leaving hapless hobby bakers clueless as to what that might be.

But I don't donate for nothing to Wikipedia, a quick research at the German site showed me the light: the breads were to be baked at 465ºF/240ºC.

Since I'm a friend of long fermentation (also from a physician's point of view,) I re-wrote the procedure from using just a small amount of preferment,  to preferment plus soaker for the coarse ground rye and wheat, as well as an overnight bulk fermentation.

I can honestly say I never noticed a difference between adding the salt with all the other ingredients, or adding it later to the almost finished dough, as the recipe stated. Peter Reinhart (my guru) mixes everything together at the same time, and I do, too.

For the cheese you can choose between Gouda or Tilsiter. I don't care for stinky cheeses, so I went for the Dutch. Though the recipe didn't specify what kind, I was sure that middle aged cheese (18-month) would work better, as I use it for gratins. Young Gouda is too mild, and really old Gouda unnecessary expensive.

I was very pleased with the result, a beautiful red golden bread, covered with seeds, with a pleasant spiciness, but not too much. It tasted great with cold cuts, and was a wonderful surprise when toasted: a bread with in-built grilled cheese!

The crumb has a nice yellow color from the mustard


SENFBROT - MUSTARD BREAD  (2 small loaves)

 Preferment

140 g/5 oz bread flour

  84 g/3 oz water

    1 g/ 1/4 tsp. instant yeast

    2 g/0.12 oz salt


Soaker

104 g/3.7 oz wheat meal, coarse

  70 g/2.5 oz rye meal

130 g/4.4 oz water

    3 g/0.12 oz salt


Final Dough

all preferment

all soaker

556 g/19.6 oz bread flour

  15 g/0.5 oz instant yeast

  16 g/0.6 oz salt

408 g/14.3 oz water

  66 g/2.3 oz mustard

122 g/4.3 oz middle aged Gouda (18 month old), coarsely grated or cut in chunks

 mustard for brushing

sunflower or pumpkin seed for topping (I used pumpkin seed)


After shaping the loaves are brushed with mustard - I used a medium-hot one from Düsseldorf

DAY 1:

In the morning, mix preferment and soaker. Leave at room temperature until using.

In the evening, mix all final dough ingredients at low speed (or by hand) for 1 - 2 minutes, until all flour is hydrated. Let rest for 5 minutes, then knead at medium-low speed (or by hand) for 6 minutes, adjusting with a little more water or flour, if necessary (but beware: dough should be somewhat sticky, clearing only sides of bowl, but stick to bottom!)

Transfer dough to a lightly oiled work surface. With oiled hands, stretch and pat it into a square, first fold top and bottom in thirds, like a business letter, then do the same from both sides.

Gather dough into a ball, place seam side down into a lightly oiled bowl, cover, and let it rest for 10 minutes.

Repeat S & F 3 times, at 10 minute intervals. After last fold, place dough in lightly oiled container with lid and refrigerate overnight. (I divide the dough at this point already in halves, and refrigerate them in two containers.)


DAY 2:

Remove dough from fridge 2 hours before using.

Preheat oven to 465ºF/240ºC, including baking stone and steam pan. Place seeds for topping on a plate.

Shape dough into 2 boules, brush them with mustard, and then roll them in sunflower or pumpkin seeds.

Place breads, seam side down, on parchment lined baking sheet, and proof, until they have grown 1 1/2 times their original size.

Bake for 15 minutes, steaming with 1 cup of boiling water. Remove steam pan, and rotate breads 180 degrees.

Reduce temperature to 210ºC/410ºF,  and continue baking for another 25 minutes, or until breads are a deep reddish brown, sound hollow when thumped at the bottom, and register at least 200ºF/93ºC.

Let breads cool on a wire rack.


After brushing the loaves with mustard, they are rolled in pumpkin seeds.

Submitted to YeastSpotting

hanseata's picture
hanseata


Brussels Sprouts Soufflé

My mother is an amazing woman. A retired gynecologist at 93, she is still going strong, grocery shopping with her bike, climbing up the stairs to her third floor apartment, staying on top of the news, and struggling to keep up with the pile of medical magazines on her table (I inherited those qualms to throw out unread newspapers - you never know what you might miss!)

Three years ago she even learned to use a computer in order to join Facebook. She didn't want to be the only family member not able to see my daughter's photos from Bhutan, my sister's from her garden on Mallorca, or pictures of my Maine kitchen ventures.

When I visited my mother last fall in Hamburg I wanted to bake something with her, something light, healthy and, of course, delicious.  No bread, alas - much as she likes it, she suffers from heartburn if she eats fresh bread.

Kitchens resemble owners - Mutti's kitchen is a spacious, cheerful place, a cooking/dining/living room with a no nonsense, no frills, and waste-not-want-not attitude.

  My Mom's no-frills kitchen

The tall cabinet - painted in neon pink, yellow and blue by my 14-year old sister (50 years ago, when my mother was not looking!) - holds an abundance of supplies, kitchen gadgets, odds and ends.

Many of those were left behind whenever my sister and I were moving ("You never know when somebody might need them," Mutti insists,) but the strangest item is an enameled strainer - made from a recycled WWII helmet, with holes for the strap!

Baking there is a bit of a challenge, because the oven also serves as storage space for pots and pans, that have to find another place in a kitchen full of mother flower pots, their numerous offspring, newspaper clippings, and other things my mother likes to have around.

But I am a baker, and where there is a will, there is a way. So one morning we went shopping and purchased Brussels sprouts, limes, graham cookies and sweetened condensed milk (not an easy thing to find in German supermarkets).

Brussels sprouts are the base for a wonderful soufflé that will turn even Brussels sprouts haters into fans. But  it can be also made with broccoli or cauliflower.


BRUSSELS SPROUTS SOUFFLÉ     (3-4 servings)
(adapted from Johanna Handschmann: "Aufläufe aus der Vollwertküche")

300 g Brussels sprouts (or broccoli or cauliflower)
 40 g butter
 40 g whole wheat flour
250 ml heavy cream or milk
1/2 cube vegetable broth or tsp. granules
pepper, freshly grated, to taste
nutmeg, freshly grated, to taste
herbal salt, to taste
50 g Emmental cheese, coarsely grated
3 - 4 eggs, separated
butter, for gratin form

Cut large Brussels sprouts in halves, broccoli or cauliflower in florets. Cook in steamer for ca. 5 - 7 minutes until almost done. (Or cook in a pan with tightly fitting lid, with a cup of water and 1 tsp. of lemon juice.) Drain and set aside.

For the Béchamel sauce, cook butter in a large sauce pan until foaming. Add flour and cook over medium heat for 1 - 2 minutes, stirring frequently, until slightly browned. Remove from heat, and whisk in cream or milk in a slow stream. Add herbal salt and spices, then bring to a simmer, stirring constantly, until mixture has thickened. Set aside.

Preheat oven to 400º F/200º C. Adjust rack to middle rung. Place high rimmed gratin form in oven for 5 minutes, to warm up.  

Using a food processor, immersion blender or chef's knife, finely chop Brussels sprouts (or broccoli or cauliflower).


Stir purée into butter/cream mixture. Add cheese and egg yolks and mix until well blended. Season with herbal salt, pepper and nutmeg to taste.

Remove hot gratin form from oven, and melt a piece of butter, tilting pan to grease bottom.

Whisk egg whites with pinch of salt until stiff. Fold into vegetable mixture. Pour into gratin form, smooth top with rubber spatula, and immediately place into oven.

Bake gratin for 20 - 25 minutes (don't open the oven door during the first 10 minutes, or the soufflé will deflate), or until top is well browned. The middle can be soft, but shouldn't be totally runny. Let cool for 5 minutes in switched-off oven with door slightly ajar, then serve immediately.


My mother loves desserts - she often says with conviction: "The dessert is always the best part of a meal!" We both prefer tart fruits, and don't like it overly sweet. Therefore I chose a citrus-y dessert that is as delicious as it is simple:


KEY LIME BARS  (16 servings)  (adapted from "Cook's Illustrated")

Crust
142 g/5 oz animal crackers or other dry cookies
1 tbsp. brown sugar
1 pinch salt
57 g/4 tbsp butter, melted

Filling
57 g/2 oz cream cheese
1 tbsp. lime zest (1 lime)
1 pinch salt
1 can sweetened condensed milk (399 g/14 oz)
1 egg yolk
½ cup lime juice ( 1-1/2 limes)
lime zest , for garnish

Preheat oven to 325ºF/160ºC. Line an 8 x 8" (20 x 20 cm) square pan crosswise with aluminum foil strips, allowing extra foil to hang over edges of pan. Mist with oil spray.

For the crust, process crackers in food processor until finely ground (or place cookies in ZipLock bag and crush them with roller pin), add brown sugar and salt, and pulse to combine.

Drizzle with melted butter, and pulse until all crumbs are moistened. Press crumbs evenly into bottom of pan.

Bake crust until deep golden brown, 18 - 20 minutes. Let cool on wire rack (don't turn off the oven!)

For the filling, combine cream cheese, lime zest and salt in mixing bowl. Add sweetened condensed milk, and mix until well blended. Whisk in egg yolk. Add lime juice, and mix gently until incorporated.

Pour filling in cooled crust, and smooth top with spatula. Bake until set, and edges begin to pull away slightly from sides (15 - 20 minutes.)

Transfer pan to wire rack, and let cake cool to room temperature. Decorate with lime zest. Cover pan with foil and refrigerate until thoroughly chilled, at least 2 hours.

Remove cake from pan by lifting foil extensions. Cut into 16 squares.

  Key Lime Bars

I could never find fresh Key limes, when I baked these, but you can as well use regular (Persian) limes. But don't substitute with bottled lime juice - the bars will not taste the same!

Since the sweetened condensed milk supplies plenty of sugar, I cut down on the sugar when making the crust (from 3 tablespoons to 1 tablespoon.)

"Cook's Illustrated" suggests toasted shredded coconut as garnish for those who don't like it too tart. Mutti and I, of course, love citrus flavor and used lime zest curls as decoration.

The Key Lime Bars keep fresh for several days if stored in the refrigerator - if they last that long!

My mother Gisela, my older sister Ingrid and me - in the Fifties.

hanseata's picture
hanseata

Dan Lepard, master baker from England ("The Art of Handmade Bread"), travels (and bakes) all over the world. He also contributes regularly to the weekend issue of the "Guardian", and is always good for an interesting recipe.

I tried several of them, and never had a bad experience. Whether marmalade, pancakes, pasties, cakes or his "boozy" Ale House Rolls, we liked them all. When I saw his recipe for Stilton Crust Sausage Rolls, I was intrigued by the idea to spruce up simple store-bought puff pastry with layers of blue cheese.

There was still some puff pastry in the freezer, and I overcame my inner Scrooge to purchase real, imported Stilton.

Preparing the crust was easy. I crumbled the Stilton evenly over one sheet of thawed puff pastry, placed the second sheet on top, pressed it down with my hands to adhere, and then rolled it out to two times its original size.

The package is then folded, re-rolled, and folded again, creating several layers of cheese within the pastry. After these turns it needs a nap in the refrigerator for at least half an hour.

While the dough was resting, I prepared the sausage filling. An opened package with Johnsonville's "Stadium Brats" - the only American bratwurst that tastes like a German one - was my sausage choice, and, instead of the ground pork the recipe suggests, I took 80% lean ground beef (another leftover in the fridge.)

The idea of a fennel seasoning didn't appeal to me too much. Though I like fennel, and use it regularly in my breads, I do not care for the pervasive anise-y flavor of American Italian sausages (something never heard of in Italy, as my half Italian husband assures me.)

Bratwurst, ground beef, marjoram and white breadcrumbs are mixed for the filling

With the German type bratwurst a marjoram seasoning instead of the fennel seemed the obvious choice (I used only 1/2 teaspoon.) "Stadium Brats" don't have casings that need removing, and my food processor made mixing a cinch. (I recommend chilling the filling until using.)

The next step was arranging the filling on the chilled pastry. I wasn't quite sure what size of rolls I would end up with - you have to consider that before you roll out the dough - but mathematical imagination is not my forte, and my rolls turned out a bit larger than Dan Lepard's.


The blue cheese is visible through the  pastry

I placed the filling on the lower half of the pastry, leaving a free edge for the seam. The upper half is then folded over, and crimped with a fork. To create a neat edge, I used a pizza roller to cut off the excess dough.

Shaped loaf with crimped edges

Since I wanted to freeze some of the rolls, I did not apply egg wash over the whole loaf, but cut it first into slices. My loaf yielded 10 slices/rolls (about 1 1/2 inch wide.)

After brushing the rolls with the beaten egg, I slashed them with a sharp knife, parallel to the cut sides.

The sausage rolls baked for 25 minutes, at 400ºF/200ºC, to be golden brown and sizzling. I realized, though, that a lot of fat was rendered from the filling during the bake, leaving the bottom of the rolls soft. Next time I would follow Breadsong's advice to render the fat from the meat before mixing the filling. Or elevate the rolls with a rack on top of the baking sheet.

We had the Stilton Crust Sausage Rolls for dinner, and LOVED them! The blue cheese in the crust added a pleasant spiciness, and the seasoning of the sausages, plus the marjoram, was sufficient to flavor the whole filling - no extra salt or pepper is needed.

Dan Lepard's recipe in the "Guardian" you can find here.

TO MAKE AHEAD: The cheese pastry and the filling, or the filled loaf (without egg wash), can be kept in the refrigerator for at least a day.

The shaped rolls (without egg wash!) can be easily frozen, individually wrapped in plastic, and placed in a container with lid. They don't need to be thawed, but before baking, brush them with beaten egg, and slash the top with a sharp knife. The baking time will be a bit longer for frozen rolls.

hanseata's picture
hanseata

Long time no see - after I baked four breads from my Equal Opportunity Baking list that I wasn't 100% satisfied with, I got a bit burned out on them. The anal Virgo me didn't want to continue with yet another Fair Baking Bread without having tried to coax and tweak the grade C candidates to a better performance or more satisfying taste.

Slowly I revisited and rebaked (I learned to use the prefix "re" from the creators of our daily crossword puzzle - it is amazing how you can put a "re" in front of any given verb and come up with a new term never heard of before!) the soso breads, Arkatena Bread, Muesli Rolls (both fine now), Camembert Grape Bread, and then the Beer Rye.

I had picked Bill Middeke's contribution to Kim Ode's "Baking with the St. Paul Bread Club" because of the combination stout and rye. In my opinion nothing made with beer can be bad (unless, perhaps, it's made with Bud Light, aka dish wash water, or other beer abominations).

The amount of sweeteners, molasses and brown sugar (both 1/4 cup for two small loaves) seemed a lot, so I reduced them by half, to 1/8 cup each.

The recipe, originally been posted in the "St. Louis Globe-Democrat", had called for lard or bacon fat instead of the shortening listed in Kim Ode's book. As a German accustomed to cooking with lard, and no friend of shortening, I switched back to the original piggy fat.

For the active dry yeast I used instant, my default, and, also employed my preferred S & F, plus overnight cold fermentation, instead of making and baking the breads on the same day.

Everything worked well, only the baking time was a bit longer. The bread looked really pretty, but even with the reduced amounts of sugar and molasses it was still way too sweet for my taste!

Bill Middeke, an ardent bicyclist, surely needs sufficient carbohydrates to fuel him for his athletic rides, but my bike carries me mostly to the nearby supermarket, and I get plenty of extra carbs from chocolate and desserts.

Not only that, the best of all husbands complained about the caraway. While I like it, Richard doesn't care for the taste and always finds it overdosed.

So I had another go at the Beer Rye Bread, this time cutting sugar and molasses again by 50%, adding a little more water, to make up for the molasses reduction, and using only 1 teaspoon caraway instead of 1 tablespoon.

We were eager to try the new bread - the sweetness was just right, but with less sugar the bread was a bit bland, and clearly needed more salt. And my spouse, known to be a delicate little flower, found himself OD'd on caraway again....

Relentlessly adapted to the Andersons' preferences, this final version received the stamp of approval: a tasty bread, slightly sweet, with a hint of caraway, and full of the good stuff: black Ruthless Rye.


BEER RYE BREAD

(2 small breads)

1 ½ cups stout, or other dark ale (350 g)

70 g water
34 g lard
9 g light brown sugar
21 g molasses
12 g salt
1 tbsp. orange zest, (ca. 8 g)
1 g caraway seeds, (1/2 tsp), or more, to taste
5 g instant yeast
325 g rye flour
320 g all-purpose flour


DAY 1:

In saucepan, heat beer and water until just starting to bubble. Add lard, sugar, molasses, salt, orange zest, and caraway seeds. Let cool to lukewarm (not more than 95 F.)

Stir yeast into beer mixture, until dissolved. Pour in mixer bowl, and add flour. Mix at low speed (or by hand) for 1 - 2 minutes, until all flour is hydrated. Let rest for 5 minutes, then knead at medium-low speed (or by hand) for 6 minutes, adjusting with more water or flour, if necessary (dough should be soft and still sticky.)

Transfer dough to lightly oiled work surface. Stretch and pat into square, fold top and bottom in thirds, like a business letter, then the same way from both sides. Gather dough into a ball, place seam side down into a lightly oiled bowl, and let it rest for 10 minutes.

Repeat this S & F 3 times, with 10 minute intervals, after last fold cover and refrigerate overnight. (I divide the dough at this point in halves, and refrigerate it in two containers.)


DAY 2:

Remove dough from refrigerator 2 hours before using, it should have doubled.

Preheat oven to 350ºF, including steam pan. Shape dough into 2 boules or bâtards. Place on parchment lined baking sheet, seam side down, and score. Mist with water, sprinkle with rolled rye, cover, and let rise until doubled, ca. 45 - 60 minutes.

Bake breads for 25 minutes, steaming with 1 cup boiling water. Rotate breads 180 degrees, and continue baking for another 25 - 30 minutes. ( temperature at least 195 F.)

Cool on wire rack.

As pretty as it gets - whether as boules or bâtards - here with rye flakes as topping

hanseata's picture
hanseata

 When we traveled for the first time to the Yucatan, I wanted (of course) to try some typical Mexican breads. The bakeries in Cancun and Tulum had beautiful displays, and we were very eager to purchase a selection of those pretty little breads and pastries.


But what a disappointment! The attractive exterior was misleading - everything we bought tasted more or less bland and sweet.

   Bakery in Tulum - a pretty disappointment!

I couldn't believe that this was all there is to Mexican breads. Moreover, I remembered having seen once a ghoulishly decorated bread for Halloween, and, back at home, consulted with my trusted advisers on all things food - "Fine Cooking" and "Cook's Illustrated".

Fany Gerson's recipe for Pan de Muerto in "Fine Cooking" seemed promising, and had already some good reviews.

This Bread of the Dead is traditionally baked during the last weeks of October, before the Dia de los Muertos (November 1 and 2), and eaten at the cemetery, at the grave of a family member. The bone decoration is a reminder of the deceased, and the little roll on top represents a tear of grief.

I made some slight changes to the original recipe, substituting 10% of the white flour with whole wheat, and changing the technique to my preferred stretch and fold (S&F), with a slow overnight rise in the refrigerator.

Since other reviewers of the original "Fine Cooking" recipe warned that the actual baking time was shorter than stated in the instruction, I checked early, and found that my breads were done in approximately 36 minutes.


PAN DE MUERTO  (adapted from Fany Gerson's recipe in "Fine Cooking")

127 g/4.5 oz whole milk, (1/2 cup)
  78 g/2.75 oz unsalted butter (5 1/2 tbsp.), cut into small pieces
2  4x1-inch strips orange peel
1 tbsp. orange blossom water (or more)
       3 eggs, lightly beaten
    6 g/0.2 oz instant yeast (2 tsp)
400 g/14 oz all-purpose flour
  47 g/1.75 oz whole wheat
  50 g/1.65 oz sugar (1/4 cup)
    2 g/0.1 oz salt (1/2 tsp)
  14 g/0.5 oz butter (1 tbsp) melted, for brushing
  22 g/0.8 oz sugar (1/8 cup) for sprinkling

Peeling the orange with a vegetable peeler is easy.

 DAY 1
1. Put milk, butter, and orange peel in small saucepan over medium heat; stir until butter melts, 2-3 minutes. Remove from heat and let cool until warm. Discard orange peel, add orange blossom water, and whisk in eggs.

  Melt butter in milk with orange peel

 2. In mixer bowl, stir together flour, yeast, sugar, and salt. Add milk mixture, then mix at low speed until dough comes together and all flour is hydrated (1-2 minutes). Let dough rest for 5 minutes.

3. Resume kneading at medium-low speed for 6 minutes, dough should be smooth but still slightly sticky. (Resist the urge to add more flour, it is not necessary!)

4. Place dough on lightly oiled work surface. With oiled hands, stretch dough into a square and fold it in thirds like a business letter. Repeat this folding from both sides. Make a ball, pulling edges underneath, and place it in lightly oiled bowl. Cover with plastic wrap, and let rest for 10 minutes. 

5. Repeat S&F 3 times, in 10 minute intervals. After last fold, place dough, tightly covered, in refrigerator overnight. (Remove from the fridge 2 hours before using.)

DAY 2
6. Cut off lemon-sized piece (100 g/3.5 oz) of the dough and reserve. Divide remaining dough in halves and shape pieces on lightly floured surface into 2 rounds. Place rounds on parchment lined baking sheet and flatten tops with your hands.

7. With some of reserved dough, form 2 small rolls (à 7 g/0.25 oz), cover with plastic wrap and set aside.

8. Divide rest of reserved dough into 6 equal pieces.  Roll into ropes (slightly longer than width of loaves.) Starting in the middle, press and twist ropes with your index and middle fingers about 1 inch apart to make knobs (the pinched parts should be really thin, too keep the pattern when the bread rises.)

Pinched into knobs to resemble bones

6. Arrange 3 ropes on top of each dough round, overlapping in the center and tucking ends under a bit. Mist with baking spray, cover with plastic wrap and let rise in warm place, about 45 - 60 minutes, or until breads are doubled in size. Poke dough gently with your finger, the indentation should not fill back again (if breads don't rise long enough they will burst in the oven and destroy the pattern!)

Decorated breads (without the "tear" on top) before rising

7. Preheat oven to 350°F. Adjust rack in oven middle.

8. Dab a little cold water on top of each round where ropes meet, and put reserved dough balls on top, pressing slightly so that they stick.

Ready for the oven

9. Bake breads for 18 minutes, then cover loosely with tin foil, and continue baking for another 18 minutes, or until they are golden brown (internal temperature at least 190ºF.)

10. Let breads cool for a few minutes on wire rack. Then brush them all over with melted butter. Holding loaves from the bottom, sprinkle sugar over the top, tilting them slightly to help coat them evenly.


Variation: Use 147 g/5.2 oz whole wheat and reduce all-purpose flour to 300 g/5.6 oz. Adjust with a little more milk, to keep the dough a bit sticky.


Orange blossom scented Pan de Muerto - better enjoy it while you are among the living!

hanseata's picture
hanseata

When I made my wonderful rose hip jam a month ago, temperatures were in the eighties, t-shirt weather for weeks, and we even used the air condition in our bedroom - in Maine!

The glasses were sitting on the kitchen counter, waiting to be properly tagged before going into the basement. But my husband, immobilized by a broken foot, needed special attention, and, between baking twice a week for our local natural food store, answering student questions online, and taking care of our undeserving critters, I didn't get to it for quite a while.

After a week or so, I noticed that one of the glasses showed ominous signs of frothy activity. Obviously I didn't fill it quite high enough to establish a vacuum, and, with the prevailing heat as incubator, my rose hip jam had started to ferment.

I was pretty annoyed with myself. Why didn't I pay more attention, and place the compromised glass into the fridge, before it could turn itself into booze?

No help for it, this was a goner, and had to be thrown out..... Or not? Suddenly I remembered my experiences with apple yeast water two years ago. Made from fermenting apples, the yeast water had proved to be a powerful leaven, my bread even grew a horn!

But in the end the apple yeast water died a slow death from starvation in a dark corner of my fridge, all but forgotten, since we preferred the tangier taste of sourdough.

Wouldn't it be worth a try to experiment a bit, and see what would happen if I fed the tipsy jam with  flour?

I measured a teaspoon of jam in a little bowl and added equal amounts of water....

....and whole wheat flour to the bowl: 

5 g fermented rose hip jam + 25 g water + 25 g whole wheat flour.

Eleven hours later the reddish mixture had become bubbly and spongy, and emitted a wonderful fruity-sour smell.

I fed it two times more, aways with 25 g flour and 25 g water. It ripened faster each time, first after 3, then even only after 2 1/2 hours.

   Fully developed rose hip mother

I was very pleased and contemplated my next move.

I wanted to make a fairly simple levain, with a bit of whole grain, but not too much. I expected a rather mild taste, but I didn't want the blandness of an all-white bread, nor a too hearty loaf that overwhelmed more subtle nuances.

So I adapted a recipe for Pain au Levain, made with apple yeast leaven, from Jan Hedh's "Swedish Breads and Pastries". I had made this bread before, with apple yeast water, it had been nice, but rather mild.

Hedh's book is gorgeous, with wonderful recipes, though not without some pesky errata - my first attempt of an attractive looking Levain with Bran and Vinegar had ended in a dense, compact brick - thanks to one erroneous Zero too many in the bran department.

Even though it was already evening, I didn't want to wait, and started with 16 g of my newborn rose hip mother - mother, chef and levain are the classic French terms for the 3 steps to make a leaven - to make the second stage: the chef.

 Chef after kneading

I woke up at midnight, went downstairs, eager to see how my starter was doing, and found a nicely grown chef, wide awake, and hungry for more.

  Fully developed chef

After feeding the little guy with more flour and water, I tottered back to bed. The next morning my levain was fully ripened and ready to go!

 Fully developed rose hip levain

PAIN AU LEVAIN  (adapted from Jan Hedh: "Swedish Breads and Pastries")

CHEF
21 g mother starter (it doesn't have to be rose hip, an ordinary mature wheat or rye starter will do)
   8 g water
21 g bread flour

LEVAIN
  50 g chef (all)
  50 g water
100 g bread flour

FINAL DOUGH
200 g levain (all)
 16 g spelt flour
 16 g rye meal
282 g bread flour
219 g water
    6 g salt

DAY 1:
1. Mix together all ingredients for chef. Knead for 2 minutes, then let rest for 5 minutes. Resume kneading for 1 more minute. (Dough should be stiff, but not hard, moisten your hands to incorporate more water, if needed.) Cover, and let sit for 4 hours, or until doubled in size.

2. Mix together all ingredients for levain. Knead for 2 minutes, then let rest for 5 minutes. Resume kneading for 1 minute more. (Dough should be stiff, but not hard, moisten your hands to incorporate more water, if needed.) Cover, and let ripen for 5 - 6 hours, or until doubled in size. Knead briefly to degas, and refrigerate overnight.

DAY 2:
3. Remove levain from refrigerator 2 hours before using, to warm up. Cut into smaller pieces and place with flour and water in mixer bowl. Knead for 3 minutes at low speed, then let dough rest for 5 minutes.

4. Add salt and continue kneading for 7 more minutes at medium-low speed. Stretch and fold 1 x, gather dough into a ball, place it in lightly oiled bowl, turn it around to coat with oil, cover, and let rest for 90 minutes.

5. Transfer dough to lightly floured work surface, place hands in the middle and push out the air, stretch and fold 1 x, gather dough into a ball, return it to the bowl, and leave it for another 80 minutes.

6. Push out air again, and let dough relax for 10 more minutes. Shape into a round, place in banneton (seam side up), or on parchment lined baking sheet (seam side down).

7. Sprinkle bread with flour, mist with baking spray, cover, and proof for 60 - 90 minutes (in a warm place), until it has grown 1 3/4 times its original size.

8. Preheat oven to 250º C/482º F, including steam pan. Score bread.

9. Bake bread for 5 minutes, reduce heat to 200º C/400º F, and continue baking for another 15 minutes. Rotate bread 180 degrees, remove steam pan, and bake for 20 minutes more, venting the oven once to let out steam in between.

10. Leave bread in switched-off oven with door slightly ajar for another 10 minutes. Transfer to wire rack and let cool completely.

  Rose Hip Levain crumb

I changed Jan Hedh's recipe a bit. Instead of long kneading, I added a period of rest (autolyse) while mixing the dough, thereby shaving off some hands-on time.

A total baking time of 60 minutes, as stated in the recipe, was not necessary, my bread was already done after 40 minutes. And leaving it a while longer in the switched-off oven with the door a bit ajar guaranteed a nice crisp crust that didn't soften soon after baking.

Did it taste like rose hips? No. But is was delicious! And not only that: The best of all husbands found it "the crustiest bread you ever made". 

One question remains: what was it exactly that gave the bread its marvelous lift? The rose hips? The apples? Or the red wine the jam was made with?

Bar Harbor Shore Path - where Rugosa roses grow in abundance

Pages

Subscribe to RSS - hanseata's blog