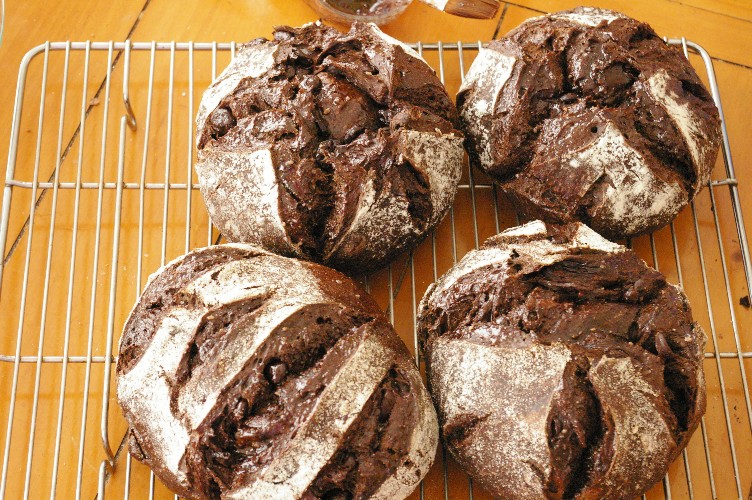
The Fresh Loaf

A Community of Amateur Bakers and Artisan Bread Enthusiasts.

cake diva's blog

cake diva's picture
cake diva

Fall has arrived.  It's been a gloomy, drizzly few days in SW Ohio.  I should really go out and finish preparing the garden for the long winter ahead. Something's holding me back, though.  Maybe I'm avoiding the feeling of melancholy that comes with pulling the last tomato plant off the ground.  No more sweltering hot days, busy bees, giant zucchinis, crisp green beans, sweet eggplants;  no more grilled Pizza Margheritas, kabobs, and sipping mojitos in the patio...  In the end, I think what I really try to deny but can't is the stark parallel that the seasons have to our own lives, and the inevitability of where we all must go as others before us have.

And so I turn to baking.  This time, I'm piggybacking on to PMcCool's endeavors to create a sweet bread popular in the Philippines, the ensaymada.  It's a brioche type of bread, most likely brought by the Spaniards who colonized the country and stayed there for 300 hundred years before turning it over to the Americans after the Spanish-American war. The bread is exponentially richer than any brioche I've had (a typical batch made with 7 cups of flour also contains 22 yolks and butter), but the presence of grated Edam cheese nicely balances the richness of the bread and the butter-sugar glaze that comes with it.

Where I differed was how I treated the dough after the bulk fermentation.  At this point, I divided the dough into 10 boules, then let rest for 10 minutes.  The rested boules were then deflated and rolled into thin, almost transparent rectangles.  About 2 tbsp. of grated aged Edam cheese were sprinkled on the dough;  the dough was then rolled into skinny logs.  The logs were wound into the characteristic brioche shape, sprinkled with more cheese on top, then allowed to double in volume (about 45 minutes).  The rolls got an application of Vanilla glaze before baking in a 350F oven for 40 minutes.  Once cooled, the brioche received the final treatment- a light frosting of room temperature butter and sugar.  So here it is.

ensaimada

And the crumb shot.

ensaimada crumb shot

The bread isn't as sweet and rich as I remember it, but it's a perfect treat for the calorie and cholesterol-conscious.  Me- I throw all caution to the wind, so next time, I'll try being truer to tradition.  Maybe when they have eggs on sale at Jungle Jim's.

cake diva's picture
cake diva

Off to my hometown for a big birthday party.  Must make sure I bring everything

Checklist:

1.  chocolate sourdough bread.  Check.

chocolate sd

2. Chocolate zucchini cakes.  Check.

chocolate zucchini cake

3. panetonne.  Check.

panetonne

4. Portuguese filled rolls (sweet bean paste, almond paste). Check.

Filled POrtuguese rolls

5. Malasadas filled with passionfruit curd.

malasadas

Uncheck!  OOOps, forgot we ate them just as they came out of the fryer.  Supposedly, these are only good fresh- so we had to eat them right away.  Don't you just hate it when they twist your arm to eat donuts?

6. Frozen bread from last week's bake-off.  Check.

sept bake

7. Tropical chiffon cake, crumb-iced.  Check.

tropical chiffon cake

8. passionfruit tart. Check.

passionfruit tart

And a stack of full-sized crepes, frozen (not pictured) + caramel sauce.

Hmmmnnn... did I forget anything?

cake diva's picture
cake diva

Over the years, many people have said to me that I have all the luck:  loving husband, respectful, bright children, fulfilling career in a fun-filled industry, health and a relatively comfortable life.  So when I took a voluntary separation package at the end of last year, it  might have seemed that my luck had stalled.  I never for a second believed that: I had been feeling so burned out at my last workplace that I felt more than half a year of paid vacation was exactly what I needed at this point in my life.

With my retraining allowance, I signed up for short breadmaking and pastry courses at SFBI.  I jetted back and forth from the Midwest to the West Coast to spend long stretches of quality bonding time with my parents, siblings and children.  I travelled to my childhood hometown in Asia and spent a month there visiting relatives and friends, feeling for the first time in a long time like the carefree child that I was when I lived there.  Back at home, I went on a bread and pastry self-enrichment extravaganza- with occasional detours in chocolate and ice cream, tackling recipes that I didn't have the time and confidence to make before.  I am proud to say that I have come out this last 10 months happier, wiser, richer in non-material things.

My lazy, hazy days are coming to a close.  I have a solid offer and another one in the works, both back in the big, cosmopolitan city that was home to me for the greater part of my life.... Maybe that's why lately I have been baking more frenzily than usual.  Yesterday's bake yielded the below.

sept bake

The banetton-risen bread is from Janedo's recipe of Pane de Genzano;  the loaf is cinnamon-raisin using the sourdough challah recipe I found on this site.

Below is my attempt at the Pearl Bakery's (Maggie Gleazer, Artisan Baking) fig-anise panini.  It has a definite tang from the starter, and the bread is hearty with a dense crumb and hard crust.  The anise gives it a heady aroma and the figs some sweetness but the bread itself is not sweet.

fig anise SD

I prefer Columbia's Sweet Perrin, also from Artisan Baking.

sweet perrin

The bread contains plenty of firm pears (mine came from a friend's tree), figs, and Brazilian nut instead of hazelnuts.  The crumb and crust are soft just as I like them.  The fruit and nut combination makes this bread a  delightful snacking treat. 

sweet perrin crumb

Maybe I'll make panetonne today.

cake diva's picture
cake diva

cherry peppers grilled

... a bowl of cherry peppers, grilled.

Every summer, my husband buys pepper plants, even though I have never had any success growing them.  Eggplants, zucchini, cucumbers, Chinese long beans- no problem, but peppers- just can't grow them.  So, this year B. says maybe you'll have better luck with cherry peppers, and proceeds to buy 3 plants.

Coming back from a month-long vacation in Asia, I find the cherry peppers ripe for picking.  Excited, I grilled, peeled and deseeded them- visions of cheese-stuffed, batter-dipped, fried torpedoes dancing in my head.  Better imagined than done!  After an hour of prepping, I quickly realized it would be a daunting task to batter and fry each one of what was left of the starting vegetable, let alone stuffed them with cheese.  Thus was Plan B born.  I would use the peppers judiciously in a sourdough bread.

For my sourdough bread, I turned to a recipe from Janedo (http://aulevain.canalblog.com/archives/a_propos_du_blog___/index.html) which was her interpretation of Leader's Pane di Genzano, and made my own loose version. (Sorry, Janedo, I can't find the exact page to insert here for reference.)

Two days prior to bake, build your sourdough starter.  You would need 368g of SD. I chose to make 480g of a target 60% hydration preferment because that is what I had on hand and I already have the calculation from a previous bake.

Day 1:

  • 17.78g 60% hydration starter
  • 22.22g AP flour
  • 13.33g water

   12 hrs. later:

  • all of the above
  • 66.67g AP flour
  • 40.0  g water

Day 2:

  • all of the above
  • 200g AP flour
  • 120g water

   When the starter is active, about 4 hours...

  • 370g of the active starter (refrigerate the rest for future bakes)
  • 400g water, room temp
  • 500g flour (I used 300g bread flour, 120g First Clear flour, 75g AP flour, 6g vital wheat gluten. No particular reason for the amounts;  I had run out of bread flour)
  • 4 g instant yeast
  • 8 g of Kosher salt (reduced from original 15g amount in anticipation of dry cheese addition)

Making:

  1. Combine the above in the bowl of a mixer and mix with a pastry blade until a wet dough forms.  Now comes the cautionary part.  You may choose not try this at home with your regular benchtop mixers as the procedure calls for cranking the speed to settings above manufacturer recommendations.
  2. Turn on the mixer to medium-high speed and let knead for 10 minutes. Here I switched to the dough hook and placed my Hobart N50 to the 2nd setting (the model only has 3).  Be careful as Janedo cautions as the mixer can start to move and fall off the counter.
  3. Now increase the speed to high for 8-10 minutes. The dough is expected to form stringy strands and then thinner ones, and will eventually pull away from the sides of the bowl to form a ball, but slide down when the mixer is stopped.  Here was when I got really nervous as the mixer jiggled and made loud noises.  I was perhaps lucky this time that nothing got blown up.
  4. Do a windowpane test to make sure gluten has formed.
  5. Transfer the dough to an oiled bowl, cover, and let ferment for 1.5 hrs.
  6. Then punch dough down, and do a couple of folds (I used my scraper since the dough is sufficiently wet);  cover and again let rise for 1-1.5 hrs.
  7. When doubled, take dough, degas and shape tightly.  (I made 2 boules).
  8. On one of the boule, I added cherry peppers and grated Parmegiano Reggiano).

folding peppers

     9.  Cover and let rise until doubled, about 1.5-2 hrs. (I did mine on parchment).  In the meantime, with an hour to go, preheat oven to 500F.

     10.  Score bread and slide onto hot stone, while reducing oven temp to 450F.  (I also took the hot water on cast iron pan + misting-the-oven strategies).  

     11.  After 30 minutes, turn the oven down to 410F and bake for another 20 or so minutes until very dark.  (I skipped this step because I prefer my bread lighter in color.  I also typically mist my bread right after the bake to get a softer crust if I'm not going to consume the bread immediately).

cherry pepper boules

I know, my scoring remains a weakness. These I scored using sanitized wallpaper knife.

Results:

Crumb was satisfactory with enough holes.  The flavor of the bread is just as I like it- with moderate tang.  Now for the Cherry Pepper Parmesan bread- wheww!  It was hot!  I didn't know cherry peppers were that hot.  (Now mind you, I only go as high as 3 on a scale of 0-10 in Thai restaurants).  The dried cheese was, needless to say, fantastic and probably would have been more so had it been left on its own.

Cherry pepper cheese bread is being sent away to K. who can appreciate the heat, but daugher #1 and I, we're keeping the unflavored one. She's having her slice, as I write this, right off the panini grill, to be topped with fresh goat cheese.  Me- I'm having mine grilled and topped with good old-fashioned peanut butter.  I love the simpler things in life.

hot boule

cake diva's picture
cake diva

One of the consequences of being unemployed is that you have all this free time to do whatever your heart wants to do, and my heart wants to cook and bake and spend my waking moments in the kitchen (if I'm not in front of the computer trying to look for long-lost high school classmates).  This makes my college-age daughter, home for the summer, happy as a clam for about 3-4 days, then she starts to plead with me to stop else she tips the scale more than she wants to.

So I thought today I might try to back off a bit by making a brown wheat bread (it's got to be healthful, right?) that's also delightful to eat.  The following is a recipe that a fellow TFL'er pointed me to when I inquired about a honey wheat bread similar to the one The Cheesecake Factory used to make.  The recipe is called Outback Steakhouse Honey Wheat Bushman Bread from www.cdkitchen.com.

Ingredients:

  • 1 1/2 cup water, warmed
  • 2 tbsp. butter, softened
  • 1/2 cup honey
  • 2 cups bread flour
  • 2 cups wheat flour
  • 1 tbsp. cocoa
  • 1 tbsp. sugar
  • 2 tsp. instant coffee
  • 1 tsp. salt
  • 2 1/4 tsp. yeast
  • 1 tsp. caramel color (optional;  I used raw buckwheat honey instead)

Directions:

  1. Place all the ingredients in the bread machine and process on dough setting.  The dough will be a litte on the wet side and sticky.

hw in bread machine

     2.  Let rise for one hour.

before bulk ferment

    After one hour bulk fermentation....

post bulk ferment

    3.  Punch down and divide into 2 large or 4 medium or 8 small portions.  Shape into logs.

shaping hw

    4. Cover and let rise for one hour.

Solstice

Oh wait!  While I was in the kitchen, my husband had sneaked into the car dealer's in the guise of taking advantage of the Cash for Clunkers Program, and brought home this beauty to test drive. Hearing my shriek, my next door neighbor gave a thumbs up and said it would totally look good on me!  So off we went!

    5. About an hour later, after dough has doubled, place logs in parchment, slash, mist, then bake in hot stone at 350F for 20-25 minutes. 

final rise

      6. Serve warm with butter!

finished

The requisite crumb shot.  Don't be fooled- crumb may look tight, but this is one soft bread, slightly sweet from the honey, and just delightful for snacking even unadorned.  I'd try doing a preferment next time to inject some flavor complexity to the finished bread if I weren't the impulsive, down-to-the-last-minute type of baker.

crumb

cake diva's picture
cake diva

My husband woke up Saturday morning to an early morning show featuring the best doughnuts in the country.  So he announces he wants doughnuts for breakfast.  Unfortunately, doughnuts are not like pancakes or waffles that you can just whip up without notice.  He had to settle for sourdough (from starter scraps) waffles with fresh raspberries and cream and of course, bacon.  And then I got off to starting the doughnuts for next day's breakfast.

The recipe I used is Lightest Fluffiest Doughnuts from Country LIving.  Instead of manual kneading, I opted to use my Hobart N50.

Ingredients:

  • 1/2 cup whole milk
  • 1/3 cup olive oil
  • 1/2 cup water, warmed to 110F
  • 4 1/2 tsp. active dry yeast (2 packets)
  • 3/4 cup + 1/4 tsp sugar
  • 1/2 cup sour cream (I used homemade Greek-style yogurt)
  • 2 large eggs + 2 large egg yolks
  • 2 tsp salt
  • 2 tsp vanilla extract
  • 4 1/2 cups AP flour
  • Glaze:  1/2 cup confectioners' sugar + 1 tbsp. whole milk

Directions:

To make the dough:

  1. Combine water, yeast and 1/4 tsp. sugar in large mixing bowl.
  2. After 5 minutes, add warm milk and oil and stir.
  3. Add the remaining sugar, sour cream, eggs, yolks, salt and vanilla and stir.
  4. Add the flour gradually.
  5. Using a dough hook, knead the dough at medium speed until you have a soft, smooth, shiny dough- about 6-8 minutes.  The dough is quite wet and will not completely clear the sides of the bowl to form a ball.
  6. Place dough in a large oiled container and cover.  Let rise at room temp. until doubled in size, about 2 hrs.
  7. After doubling, punch dough down, recover, and refrigerate for 2 up to 12 hrs.

To make the doughnuts:

  1. Turn the dough into a generously floured surface.
  2. Lightly flour the dough and roll out to about 3/4 inch thick.
  3. Cut doughnuts using a 3 inch cutter.  I used a 4-inch tumbler lid.

cutting doughnut rounds

      4.  Transfer rounds to a baking sheet.  Gather scraps, reroll, and repeat cutting doughnut rounds until all dough is used.

     5.  Chill doughnuts for 30 minutes before frying.

To fry the doughnuts:

  1. Heat about 4 inches of vegetable oil in a large deep skillet with a thermometer until oil reaches 350F.
  2. Fry doughnuts 3 at a time until golden brown, about 2 minutes per side.
  3. Remove doughnuts with slotted spoon and drain on paper towels.

To make the glaze:

  1. Combine glaze ingredients in a shallow bowl until smooth.
  2. Dip doughnuts while hot then transfer to wire rack to cool.
  3. Try different flavors like lemon, raspberry chambord (raspberry preserves + Chambord to thin), chocolate Kahlua sauce, etc...

glazed

Up close...

The requisite crumb shot...

doughnut crumb

Results:  Bite was like getting your teeth down into a soft pillow without collapsing like you would with those doughnut chains, texture was smooth and airy. mouth feel was substantive, flavor not too sweet which is how you would want it with the glaze on top, and simple, i.e., no added flavors, no hint of tang from the longish fermentation.  I'm sure this would be even better with the Kahlua chocolate sauce, or a fruity glaze like Raspberry-chamboard.  I give this recipe a thumbs up for its ease of making and deeply-satisfying results.

Subscribe to RSS - cake diva's blog