The Fresh Loaf

A Community of Amateur Bakers and Artisan Bread Enthusiasts.

a_warming_trend's blog

a_warming_trend's picture
a_warming_trend

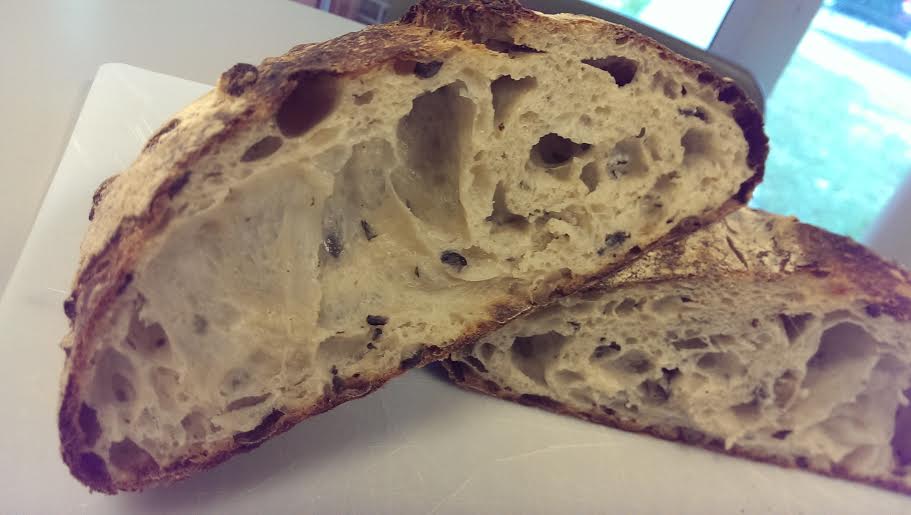
I don't have the book in front of me, but there's a single sentence in FWSY where Forkish describes serving a traditional French version of pain au chocolat in his bakery: Not the chocolate croissant with which I was familiar, but instead a simple slice of bread with a swipe of butter and a sprinkle of dark chocolate. 

That's what I served to my coworkers today, after a very long week of weather-related stress. 

I used my 80% hydration, 5% levain formula to make some torpedos. These were actually retarded for 48 hours in the fridge during bulk, and the result was an incredibly moist and springy crumb. A slice of it with butter and that chocolate sprinkle + a cup of strong black coffee...the perfect fuel for a packed Friday. 

I'm tempted to make this a weekly thing. Here's to FRIDAY. 

--Hannah

a_warming_trend's picture
a_warming_trend

A few weeks ago, I mentioned to a coworker that I was interested in acquiring spent grains from local breweries. I'd read a few different sources on baking with spent grains, and a few were sort of intimidating (my apartment is tiny, so I don't know where I'd lay them out to dry!), but some just described dumping them in with the dough. Appealing to my experimental spirit.

A few days later, she appeared in my doorway with a plastic bag full of wet spent grains from Big Boss Brewing Company right here in Raleigh, North Carolina. 

As I pondered my bag of wet grains, it occurred to me: What if I used one of the brewery's beers as well as the brewery's spent grains...in a single bread?

Take One: For my first attempt, I mixed 475 g AP flour with 355 g (one bottle) Bad Penny Brown Ale, and 20 g water, and autolysed for 8 hours. I then kneaded in 50 grams of 100% hydration white starter, 11 g salt, 5 g diastatic malt, and 60 g spent grains. I stretched and folded every 30 minutes for 2 hours. The mixture fermented at room temperature for 12 more hours, and was about 80% risen at that stage. I then refrigerated the dough for about 12 hours. Then, I had the bright idea to try to do a cold proof on top of that cold bulk. I shaped the batard and let it proof in the fridge for 12 hours. 

Even with 1.5 hours at room temperature, I had a funny feeling about this one. I had to bake it off, though (475, 20 minutes with steam, 25 without), and get to work! Sure enough, the ovenspring wasn't great. Definitely underproofed. I broke one of the most important rules of bread-baking. I listened to my own internal clock, rather than the dough! 

It actually tasted better than I was expecting -- interesting and pleasant enough to keep me pressing forward with my experiment...

Take Two: Along with sticking to just ONE cold rising stage, I knew I wanted to also increase the amount of spent grains, and also work in some whole wheat. This one was the same as the previous loaf, except that I replaced 50 g of AP flour with whole wheat and upped the spent grains to 80 g. Same 14 hrs of room temperature bulk, then retarded for 24 hours in the fridge. Shaped and proofed for 1.5 hours. Baked at the same temp as the previous loaf, for the same amount of time. 

Better! Better flavor...more noticeable earthiness from the spent grains. But...still not there. 

Take Three: The one I'll settle on for awhile. 

Formula: The Big Boss

400 g AP fl

75 g WW fl

355 g (one bottle) brown ale

20 g water 

5 g diastatic malt

15 g packed dark brown sugar

100 g spent beer grains (no need to dessicate them!)

50 g 100% hydration rye starter 

(80% hydration)

Method:

1) Autolyse flour and beer for 8-10 hours. 

2) Mix in the rest of the ingredients. Some sources have suggested holding out on incorporating the spent grains due to the sharpness of the edges, but I don't mind making them one with the gluten network right after the long autolyse. 

3) Slap and fold for 4 minutes. 

4) Stretch and fold every 30 minutes for 3 hours, anywhere from 1-4 turns (4-16 folds). 

5) Allow to ferment for 10-13 hours more (until roughly doubled). 

6) Place dough in the refrigerator for 12-48 hours (Mine was in for 36). 

7) Divide and rest for 10 minutes. Shape into torpedo batards. 

8) Proof for 1 hour at room temp, and transfer to freezer for 20 minutes (freezer trick, freezer trick!). 

9) Score and bake at 475 for 14 minutes with steam, 16 minutes without. 

I really like this bread. The addition of whole wheat and brown sugar just brings out the maltiness of the brown ale. I didn't originally think that brown ale would be a great baking beer, because it's less intense than a porter or an IPA...but I ended up really liking the subtle nuttiness. I'm looking forward to having this bread with a range of winter soups. 

Bonus photo of one more heart-scored pain au levain from the weekend. 

Hope everyone is staying safe and warm! I find it helpful to stay near the oven whenever possible...

--Hannah


a_warming_trend's picture
a_warming_trend

And Happy Friday! Thanks for being so welcoming to an enthusiastic newcomer.

--Hannah

a_warming_trend's picture
a_warming_trend

Inspired by necessity: I had a lot of pesto, and I hate wasting food.

Rather than mixing the pesto into the dough, I decided to create a simple sourdough, and then spread the pesto onto the pre-shaped loaves just before final shaping, to create a sort of "filled" effect. Pretty good results!

Ingredients:

350 g AP flour

100 g whole wheat flour

350 g water

100 g ripe white starter

11 g salt

10 g sugar

5 g toasted wheat bran 

5 g toasted wheat germ

Method:

I mixed the flour and water and autolysed for 10 hours. I then mixed in the rest of the ingredients fully. I performed stretch-and-folds ever 30 minutes for 2 hours. I let the dough ferment for 5 hours at room temperature, then I retarded for 5 hours. I divided, and pre-shaped. Rested for 10 minutes. I spread pesto over the ovals, leaving about 1-inch margins (I was nervous about the pesto seeping out!). I shaped into pointy batards, then proofed for 1 hour at room temperature. I placed the loaves in the freezer for 15 minutes. I scored, and baked at 450 for 14 minutes with steam, 16 minutes without.

I was surprised at how easy it was to shape batards with a filling! I didn't even notice the difference, really. But I did keep the filling thin. The bran and germ lent a nuttiness to the final loaf. The pesto was strong and savory, and really nice as a complement to sourdough flavor. 


 --Hannah

a_warming_trend's picture
a_warming_trend

I'm still on this 5% levain, 80% hydration kick! Both of these loaves built on the formula I referred to in my previous post.

The first was inspired by Dave's recent rosemary and black olive loaf. I just added a tablespoon of fresh rosemary, 60 g black olives, and 60 g green olives:

And then the formula, with the addition of 100 g of old dough, which reduced the fermentation time by about 2 hours, and made the loaf many times more fragrant (pate fermentee is amazing, even in small amounts):

Maybe not the ideal crumb for sandwiches...but pretty good with olive oil and cracked pepper!

--Hannah

a_warming_trend's picture
a_warming_trend

Phew. I've baked for a number of friends over the last few days! Many of them just wanted or needed a very generalized designation of "bread" for events, so I was able to experiment a bit with sourdough baking.

Disclaimer: All ciabatte described are "pre-dabrownman-flip-recommendation," so don't judge me too harshly...I still haven't acquired a second pastry scraper, so all ciabatta experiments are on a temporary hold...

Saturday, I baked some whole wheat ciabatte and a few small simple batards.

also, a small parmesan-encrusted boule, and a small sesame-encrusted batard.


Then on Sunday, a few more ciabatte -- this time with cream cheese and chive. 


And then just this morning, Monday, before work: A simple 80% hydration batard with 5% levain. Still working on my shaping. Still striving for those ears. 

Because my friend just emailed me saying that this was her favorite bread I've given her, I'll post a very basic formula:

Ingredients:

425 g AP flour

50 g whole wheat flour

375 g water 

5 g wheat germ

11 g salt

10 g sugar (in place of 5 g malt)

50 g 100% hydration white starter 

Steps:

1) Mix flour and water, and autolyse at room temperature for 6-12 hours. 

2) Incorporate all other ingredients using the pincer method. This should take about 4 minutes. You'll notice that because the dough was already so wet, incorporating that small amount of 100% hydration levain, salt, sugar, and wheat germ is a surprisingly smooth process. 

3) Stretch and fold vigorously every 30 minutes for 3 hours. The number of turns depends on how the dough feels! Anywhere from 1-4 turns (4-16 folds), each session, performing the turns until the whole mass of dough wants to lift from the container.  

4) Rest on the counter for 8-12 hours, until dough has increased 80% - 100%, but no more.

5) Retard for 2-24 hours.

6) Sprinkle flour over the top of the dough in the container, and allow the flour to coat the edges as you gently release it. Pour onto a floured surface and rest for 10 minutes.

7) Shape and place seam-side up in a a brotform of some kind, cover with plastic, and proof at room temperature for 1.5 hours. 

8) Place  the brotform in the freezer for 15 minutes (I really like this freezer trick for high-hydration doughs proofed at room temperature...I genuinely think it helps with ovenspring!).

9) Score and bake at 460 for 20 minutes with steam, 25 minutes without.

The recipient has confirmed the appropriateness of the loaf for egg-dipping. 

More soon!

--Hannah

a_warming_trend's picture
a_warming_trend

As it turns out, the only bread style that could tear me away from my preoccupation with the intricacies of batard shaping and scoring is a style that shines brightest with the least possible handling. The process of guiding the ciabatta from bulk container to baking stone is uniquely challenging and satisfying.

As is the case with most of my bread quests, this one came about through a frustrating mistake. Last Saturday, I had two doughs going for two different friend-bakes. It was really early in the morning, so of course I divided the dough that was meant to be a single boule for Mary. YARGH. I had to think quickly. I remembered txfarmer’s stunning sourdough ciabatta made with her legendary 36-hour recipe, and I was pretty sure she had done nothing but pour, cut, proof, and bake. So that’s what I did. Here’s one of the ciabattas with one of the torpedos I also baked that morning. I got a good ear on that one!

Mary liked the ciabatta, but when I saw a picture of the crumb, I noticed that most of the air rose to the top of the bread, sort of like a huge thick pita. The airiness was all in the cavern between the crumb and the top of the crust. I wasn’t satisfied with that. I had to try again, and soon.

My next attempt was a much more deliberate stab at ciabatta. I liked this formula a lot and, with just slight variations, it’s the one I’ve now baked three times.

Sourdough Ciabatta with Old Dough

Ingredients

500 g AP flour

400 g cool water (water 1)

10-20 g cool water (water 2)

11 g salt

15 g sugar (I’m out of diastatic malt. Darn it!)

100 g old dough (pate fermentee)

Method

  1. Mix together flour and water 1, and autolyse for 2 - 12 hours. I really, really like the long autolyse for ciabatta. I remembered reading somewhere that one of the biggest challenges with ciabatta is building strength with such a high hydration; this is all the more important if you're working by hand, as I am. The long autolyse does wonders for the gluten structure, and it happens while I go about my work day. I don’t know if others experience this, but when I handle dough that’s been autolysed that long, there’s this eerie balance of strength and extensibility.

  2. Sprinkle 10 g of water over the dough. Sprinkle salt and sugar atop the water. Pinch off pieces of old dough into the bowl. Mix the mass together with the pincer method for about 3 minutes.

  3. Slap and fold the dough for 3-4 minutes, until you feel no noticeable pieces of old dough or signs of unincorporated salt. With such a wet dough, this is way easier than I could have imagined.

  4. Stretch-and-fold every 30 minutes for 2.5 hours. I’ve come to approach my stretch-and-folds this way: I perform as many turns as I think the dough “wants.” My criterion there is the point at which I am lifting the whole dough mass off the bowl when I pull up from the corner. This will be anywhere from 4-16 turns, every time.

  5. Rest at room temperature for anywhere from 10-16 hours--until roughly doubled in bulk...but not more than doubled. If anything, go for 80% over 120%. Mine doubled all three times. Each time, it took 12 hours at room temperature.

  6. Optional: Retard for 12-24 more hours in the refrigerator.

  7. To shape, sprinkle flour generously on the surface of the dough, then carefully release it from the sides of the container. Pour onto a well-floured surface, flour-side down.

  8. Rest for 5-10 minutes

  9. Divide into two equal pieces, then very, very, very gently fold each in half. Gently scrunch the dough to roughly 5 x 10 inch loaves. I really like the way the slight scrunch marks look on the final loaves.

  10. Proof for 1.5 hours or until very puffy, but not doubled.

  11. Place a piece of parchment on an upside-down cookie sheet (or other very large smooth surface--my pizza peel isn’t big enough for this task!) Gently transfer the loaves to the parchment, at least 4 inches apart from one another.

  12. Gently slide parchment onto your baking stone.

  13. Bake with steam at 460 for 10 minutes, for 450 without steam for 20 minutes. Turn the loaves after 20 minutes, if possible.

Loaves baked without additional retarding during bulk (24 hours total)


Loaves baked with additional 12-hour retarding during bulk (36 hours total)


I really like the effect of the single fold on the crumb of ciabatta, but I am, of course, open to a whole lot of shaping experimentation. This recipe yields a tangy, almost traditional San Francisco-style taste -- I think that this is the result of the long, slow room temperature bulk resulting from the use of a very small amount of old dough. I have used up to 400 g of old dough with a new dough of this weight, with great results, it just happens in about 1/3 - 1/4 of the time. I will try this recipe holding everything constant, but changing the amount of old dough. My prediction is that it will yield a milder loaf. The tang is nice, though. 

I served one of these with butter and chocolate shavings, the other with olive oil and cracked pepper. I highly recommend both. 

Off I go to daydream about fermentation...

--Hannah

a_warming_trend's picture
a_warming_trend

Who could have imagined that the lid of a cheap turkey roaster would give me the confidence to explore whole new areas of shaping and scoring my sourdough loaves? I feel like it’s given my baking stone a new purpose in life.

Last weekend I posted my first pointy batards. I have done a number of early morning bakes since then, and I'm pretty much transfixed by the shape. They just have this...I don't know...this subtle elegance, I guess. And working with them also allows me to practice some of the most classical vertical scoring techniques, with hopes of occasionally actually seeing those ears bloom.

I am also always, always experimenting with tricks and techniques to work long-fermented sourdough into a busy 40+ hour non-baking-related work week. I didn’t set out to focus on the “48-hour” mark, but that’s how this week turned out. Here are three different methods for producing sourdough torpedos in 48 hours, even when you’re at home for very little of that time. Both formulas emphasize a long room-temperature autolyse. This just seems to do wonders for the extensibility of the dough, and the quality of the crumb...no matter what type of flour is involved.


Torpedos #1 and #2:  I include these together, because they use the same hydration and the same levain %...just slightly different flours and mix-ins...

#1: The Simplest

50 g 100% hydration sourdough starter

475 g all-purpose flour

365 g water 

11 g salt

5 g malt powder or sugar

#2 Olive and Herb 

50g 100% hydration sourdough starter

300 g all-purpose flour

175 g whole wheat flour

375 g water

11 g salt

5 g malt powder or sugar

1/2 cup sliced olives (black and green)

1.5 tsp herbes de provence

2 tsps lemon zest

Day One

1) Mix together water with flour in the morning.

2) Autolyse all day (whatever your 'all day' ends up being...mine was 10 hours).

3) Mix in levain, salt, malt, and extra ingredients. This will take 3-4 minutes. 

4) Perform 4-point stretch-and-folds ever 30 minutes for 2.5 hours (I actually sometimes add 1-4 more stretches. If the dough seems extensible enough, I add a few folds!).

5) Rest on the counter for 8-12 hours. The small amount of levain will require this length of bulk ferment!

Day Two

6) After 8-12 hours, place in the refrigerator. I retarded both of these for 24 hours during bulk fermentation. 

Day Three

7) Divide and rest for 10 minutes. Shape into torpedos and proof for one hour. 

8) Trick: Place in the freezer for 20 minutes! I truly think that this encourages ovenspring in high-hydration loaves proofed at room temperature. 

9) Score and bake for 15 minutes with steam, 17 minutes without. 

The Simplest:

Olive and Herb:


I am amazed by old dough as a method of leavening. I still can't believe that I can use a small hunk of dough from a previous loaf to leaven a new one. And it's incredibly flexible, because you can simply decide exactly the hydration percentage and flour makeup of a loaf, autolyse, everything...and then cut in the dough. No worries about levain changing hydration percentage. It's just added mass. Magical.

#3: Pate Fermentee 

300 g old dough (I actually can't remember exactly what the flour makeup of the dough was...I've been baking too much!)

400 g all-purpose flour

100 g whole wheat flour

400 g water

11 g salt

5 g malt or sugar

Day One: 

1) Mix flour and water, and autolyse for your full work day (mine was 9 hours)

2) In the evening, mix in the old dough and the rest of the ingredients. This will take about 5 minutes. 

3) Perform stretch-and-folds every 30 minutes for 2.5 hours.

4) Allow to rest for 2-4 hours more. 300 grams of old dough will actually ferment new dough more quickly than one might think!

5) Place in the refrigerator. 

Day Three:

6) That's not a typo. There's no second day, because the dough was in the fridge at the end of Day 1, and was there for nearly 36 hours. Now we're at the morning of the third day. 

7) Divide and rest for 10 minutes. Shape into torpedos and proof for 1 hour. 

8) Place in freezer for 20 minutes!

9) Score and bake with steam for 15 minutes, without for 17 minutes. 

All of these loaves tasted good. I will say that #1 and #2, the ones with the longer room-temperature ferment, had a deeper tang. The pate fermentee loaf spent much less time at room temperature, with a long, cold bulk, and it tasted much milder...but not necessarily less complex. Maltier, even. I've read wildly conflicting descriptions of the role of room temperature vs. cold fermentation. So I guess I'll just have to keep trying...testing...exploring...

--Hannah


a_warming_trend's picture
a_warming_trend

Many loaves for friends this weekend! My most consuming experiments were with 1) loooooong room temperature autolyse, and 2) pate fermentee as all of the leaven in a loaf. Unfortunately, I don't have crumb pictures for all loaves. The plight of the gifted loaf. 

For this dark chocolate chunk levain, I did a 12-hour autolyse of only flour and water, added levain at 5% of the total weight, carried out a 12-hour room-temperature bulk fermentation, retarded for 12 more hours, shaped and proofed in the refrigerator for another 10 hours:


Much shorter autolyse for this olive and herb levain:

For these (my first-ever pointy/torpedo batards!) I mixed a full dough and then added a chunk of old dough about equal to 1/2 the weight of the flour in the recipe. In this case, that was 400 grams of old dough added to a recipe of 440 grams of flour, total. I have baked with pate fermentee 5-6 times now, and I've always been so, so happy with the speed of fermentation and the ultimate result. 

And I can't stop finding opportunities to practice various approaches to batard-shaping (and various batard styles). So...here's a very long walnut and golden raisin sourdough torpedo I baked for a friend this morning, also having used the long room temperature autolyse (in this case, 6 hours). She's always great about sending pictures of the crumb:

Batards have a certain mystique to them. Pate fermentee does too. Gotta keep exploring!

a_warming_trend's picture
a_warming_trend

That's what my closest coworker calls me, and she's probably not wrong. Ever since falling in love with baking bread, I've found myself unconsciously (it really is unconsciously!) seeing the world around me through the lens of bread-creation. I'm not TRYING to glance at the wicker baskets on friends' desks, only drift out of the conversation to imagine how they would make perfect brotforms. I can't walk down the aisles of a hardware store without thinking about how something I see (a blade?) might help me actually score my loaves well, or something (a particular pan?) might help me create steam in my terrible apartment oven.

So I found myself at Bed Bath and Beyond the other day, searching for a gift for a friend. (As a sidenote: That store is overwhelming and slightly disconcerting.) Anyway, I fixated on one particular huge, inexpensive turkey roaster. A large, curved metal object with a handle! I've been using combo cookers and dutch ovens for all of my breads (and I've been intrigued by the lava rock cast iron pan approach), but I couldn't help but ponder how this metal dome could work when placed over a baking stone. 

I've tried it a few times this week, and I'm pretty excited. The boules are similar to those I've baked in dutch ovens or combo cookers, but the batards...these are the first real ears I've ever achieved on batards (which I am still flailing about trying to shape, honestly). they're modest ears, but they're ears, so I'll take them!

1) Rosemary & Parmesan

2) Cranberry-Pecan with 50% Sprouted Whole Wheat

I'm not sure there's a cure for Bread Brain. But I think I'm okay with that. 

--Hannah

Pages

Subscribe to RSS - a_warming_trend's blog