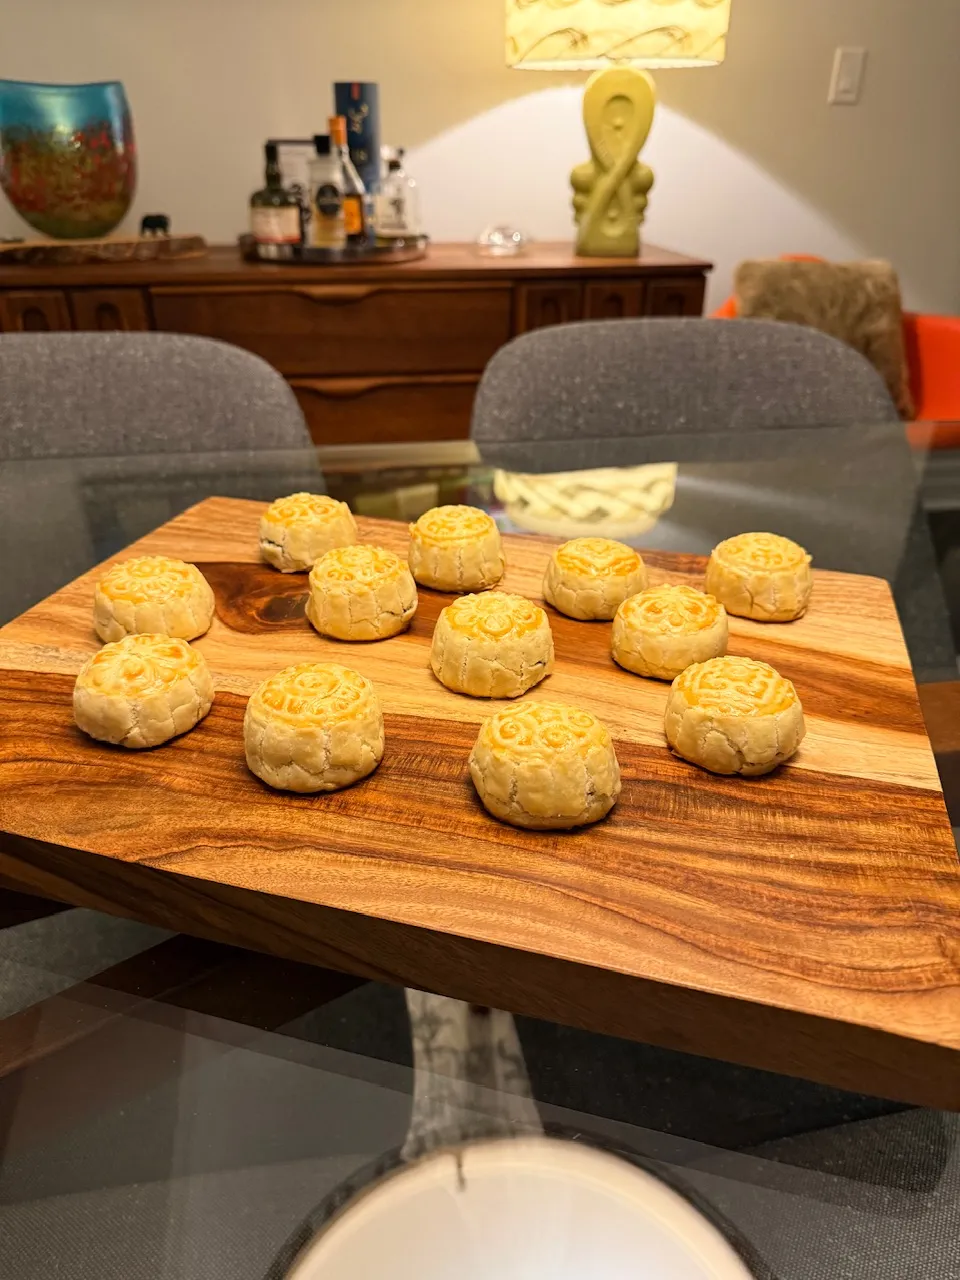
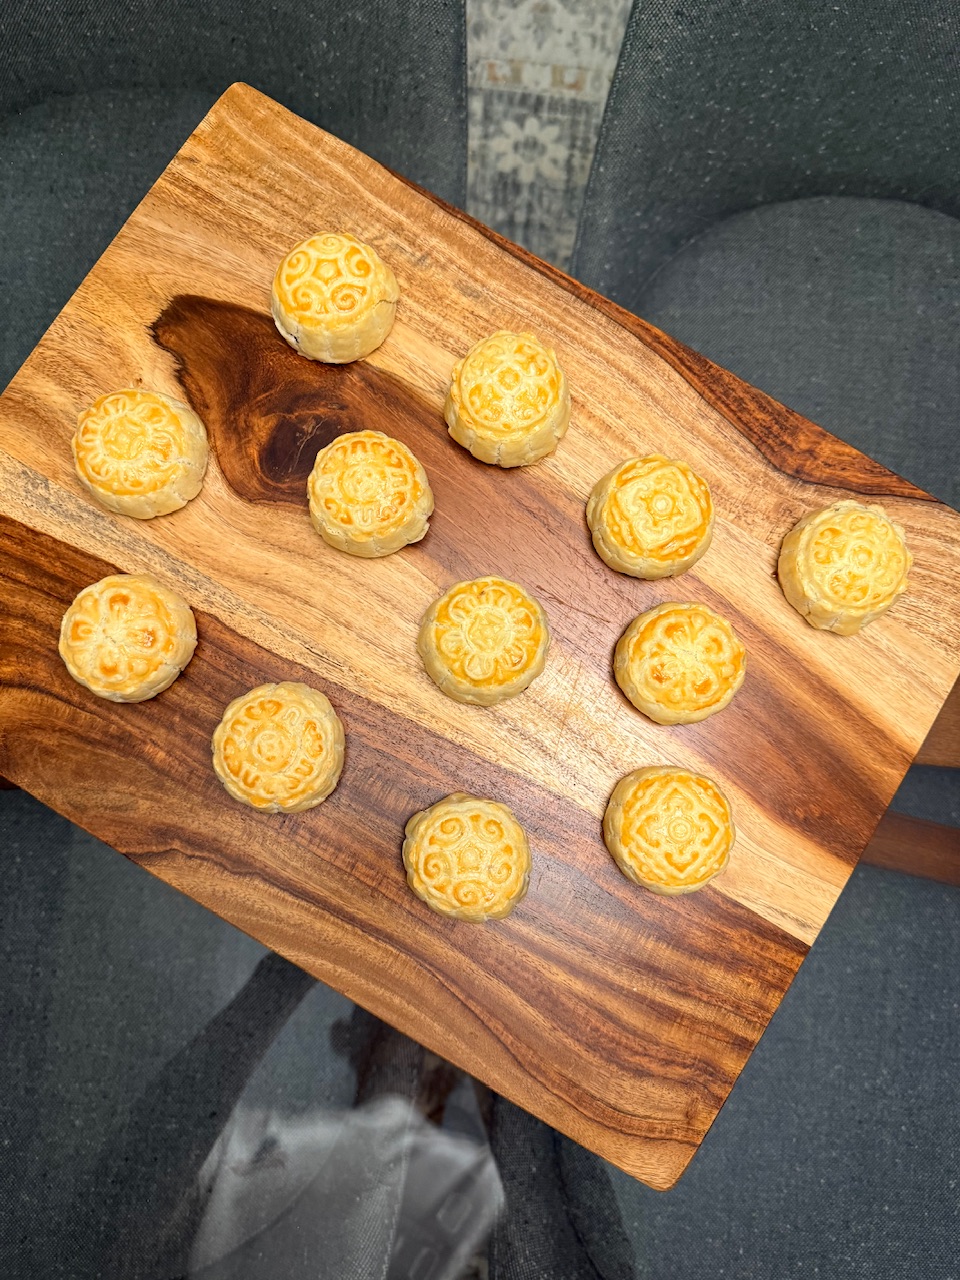
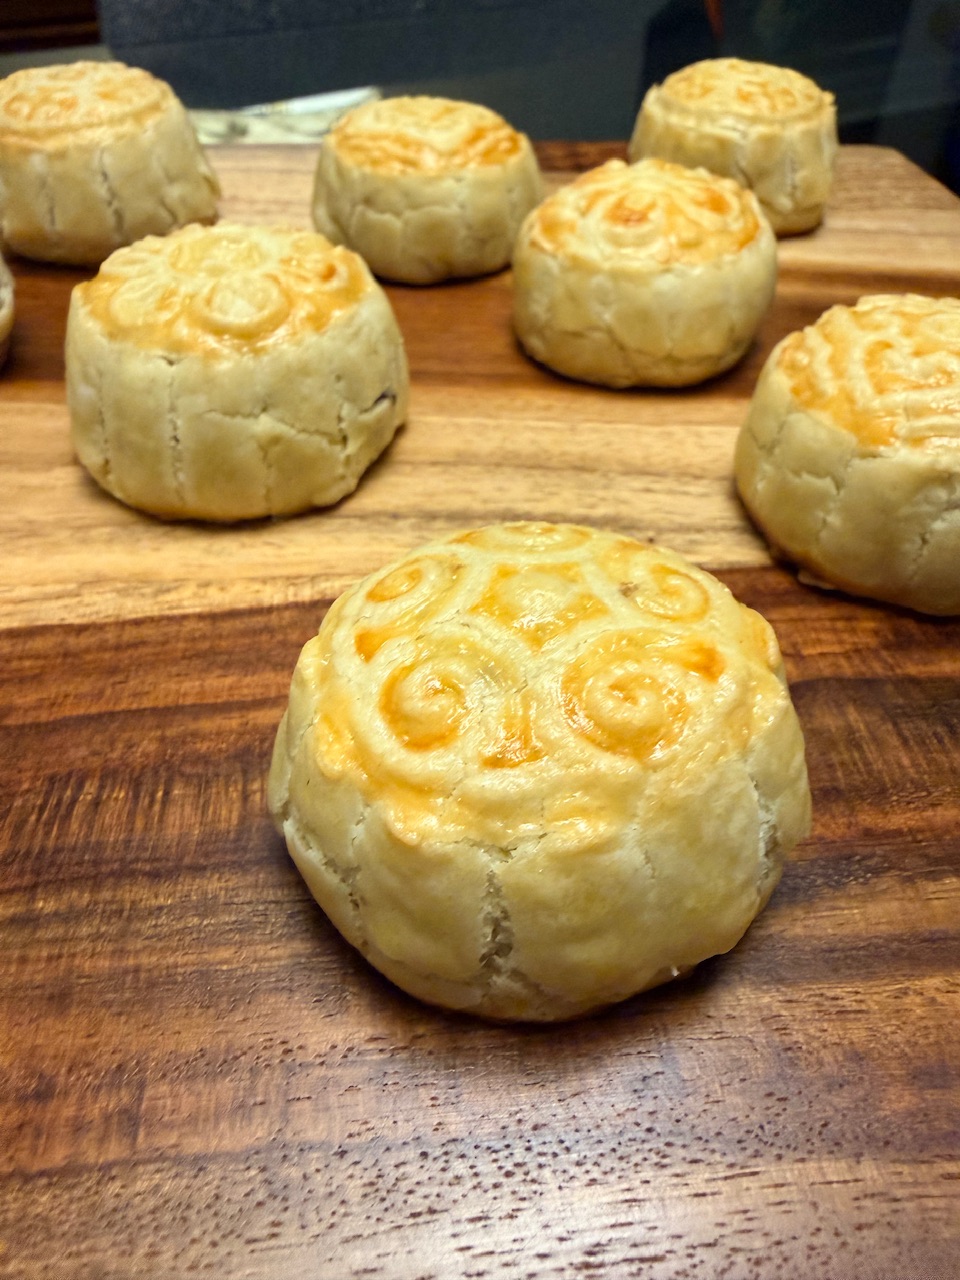
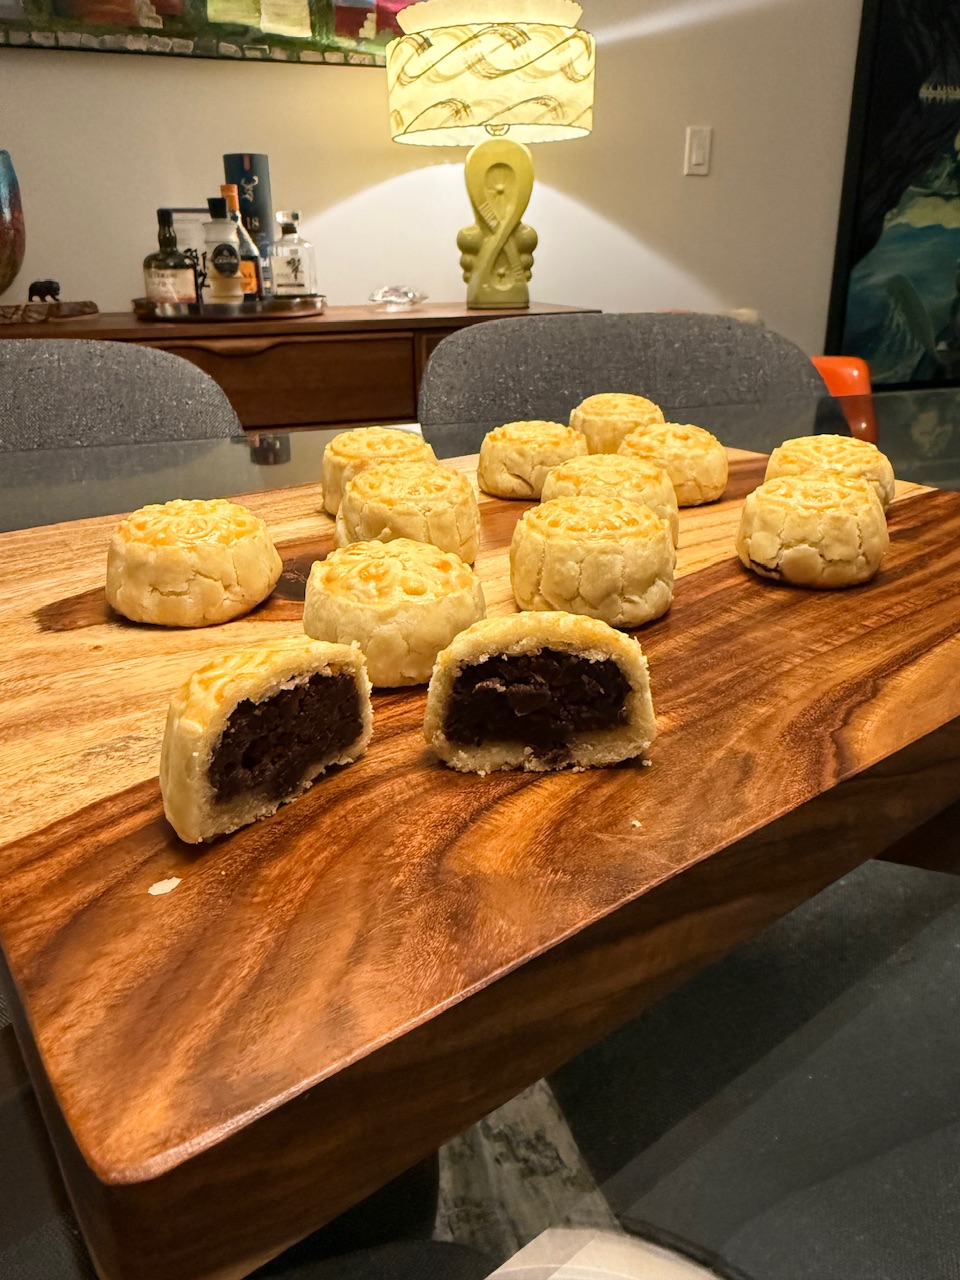
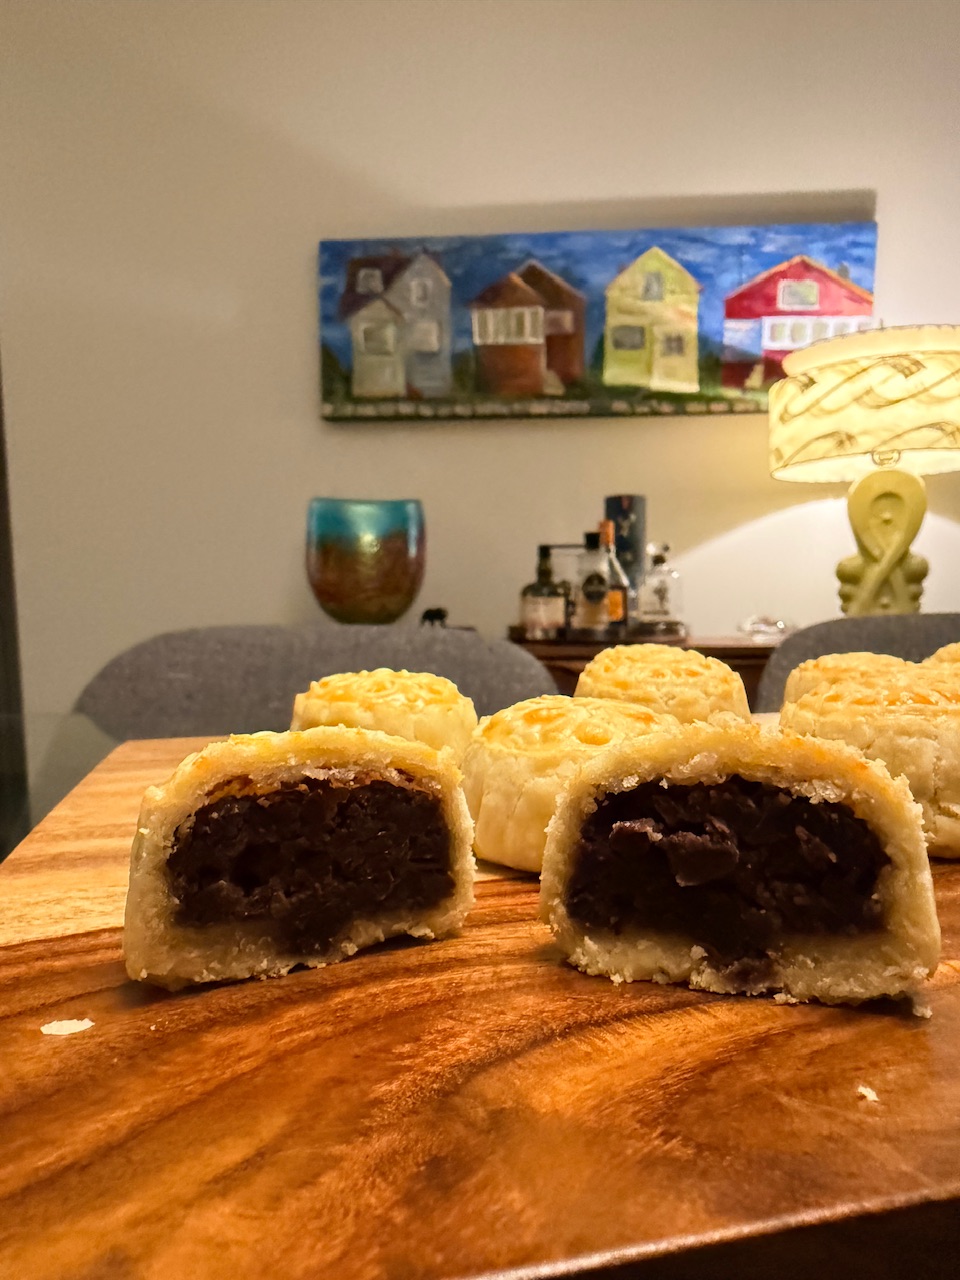
I love moon cakes and these are the first ones that I made in celebration of the Mid Autumn Festival. I don’t love the salted egg yolk that is traditionally in the middle of each moon cake to represent the moon, so I didn’t include these. These are filled with homemade azuki bean paste which I make less sweet than commercially available azuki bean paste. I just ate the cut one and they are truly delicious, just enough sweetness and a bit of texture from the paste as I didn’t blend it down. The pastry is nice and short and crisp, yummy.
I know you’ve seen my Taiwanese pineapple cakes before that I’ve used the same presses to shape. Moon cakes are actually what is usually made using those presses.
Azuki Bean Paste
- ▢
300 g azuki beans - ▢
1200 ml water (The ratio of azuki beans to water is 1:4; 300 g beans:1200 g water) - ▢
240-300 g sugar (Read Notes below to use the proper amount; should be around 1 ¼ cup to 1 ½ cup) - at 200-220 g is enough - ▢
⅛ tsp kosher/sea salt (I use Diamond Crystal; use half for table salt) - Put the 300 g (1 ½ cup) azuki beans in a strainer and place it inside a large bowl. Rinse the azuki beans in running water until water is clear. Discard any pieces that are floating. Drain water.
- Transfer the beans to the Instant Pot and add 1200 ml (5 cups) of water to your pressure cooker.
- Cover and lock the lid of your pressure cooker. If you’re using an Instant Pot, turn it on and press the “Bean/Chili” button. Press the “minus” button to decrease the cooking time from the default 35-minute cooking time to 25 minutes.
- Before you walk away, make sure the steam release handle points at “sealing” and not “venting”.
- If you’re using a stove-top pressure cooker, cook on high heat until high pressure is reached. Then reduce the heat to low to maintain the pressure for about 20 minutes.
- When it’s done cooking, the Instant Pot will switch automatically to “Keep Warm” mode. Let the pressure slowly release by itself for 15-20 minutes. If you are using a stove-top pressure cooker, remove the pot from the heat, and let the pressure release naturally. Before opening the lid, turn the steam release handle to vent and release any leftover pressure.
- Scoop the foam on the surface and discard (if you prefer the more refined taste). Pick one bean and mash it with your fingers. If it is mashed easily, it's done.
- Then drain the azuki beans through a fine sieve. If you're making Oshiruko (Zenzai) or red bean soup, don't drain and continue the next step with the cooking liquid remaining in the pot.
- Put the azuki beans back in the Instant Pot and add the sugar. Press the “Saute” button and select "Low" option.
- Let the sugar dissolve completely, stirring occasionally with a wooden spoon.
- Tsubuan (chunky azuki bean paste)
- Continue cooking until you draw a line in the azuki bean mixture with the wooden spatula and see the bottom of the pot for 2 second. Then turn off the Instant Pot and transfer the mixture to a baking sheet (or flat rimmed plate) to let it cool.
When it’s cooled and thickened more, it’s ready to use. If you don’t use it right away, transfer to an airtight container and store in the fridge for 1 week and in the freezer for up to a month. I also recommend diving into 100 grams of anko paste in each plastic wrap and put it in a big freezer bag.
Pastry
- 150 g (1 1/4 cup) all-purpose flour
- 20 g (2 tbsp) confectioner's sugar
- 20 g (2 tbsp) tapioca starch
- 1/4 tsp coarse salt
- 113 g (1/2 cup) cold unsalted butter, cut into cubes
- 1 large egg
- Egg/milk wash
Pastry - In the bowl of a food processor, pulse to combine the flour, confectioners' sugar, tapioca starch, and salt. Next add the cubes of butter, pulse until sand like. Add egg and pulse until a cohesive dough forms.
- Transfer the dough to a sheet of plastic wrap, pat into a 1-inch-thick disc, and tightly wrap. Refrigerate the dough until firm but still somewhat pliable, 30 to 45 minutes.
- Line a large rimmed baking sheet with parchment paper.
- Use a bench scraper to divide the dough into 12 or 18 equal-size pieces (use a digital scale if you have one). Working with one piece at a time, roll the dough into a smooth ball. Place the dough ball on a lightly floured work surface, gently flatten with the palm of your hand, and roll out to a 3-inch round with a dowel rolling pin. Aim to roll the edges thinner than the center, that way when you fold the edges to form the base, it won’t be excessively thick.
- Place a teaspoon filling in the center of the dough (if making 18, for 12 use 1.5-2 tsp), pull up the edges, and pinch together to seal. Place the filled cake inside the pineapple cake mold, seam side down, and gently press down with the plunger until it evenly fills the mold. Remove the shaped cakes from the mold and place on a parchment lined cookie tray. Repeat until all 18 are on the tray. Transfer the pineapple cakes to the fridge and preheat the oven to 350°F.
- Just before baking, brush egg/milk wash on them (optional)
- Once the oven is at 350°F, bake until the cakes are golden brown, 25 to 27 minutes. Transfer the sheet to a wire rack and allow the cakes to cool on the sheet for 5 minutes. Allow the cakes to cool completely on the rack. Enjoy the cakes fresh or store in an airtight container for 24 hours to allow the shortbread to soften.
Can be stored in an airtight container (a resealable bag works great) at room temperature for up to 5 days.
- Benito's Blog
- Log in or register to post comments
This is fascinating, and I’m wondering how to get the azuki beans… amazon maybe? I have been buying prepared red bean paste for about year now, and it’s one of my favorite things. I’ll check out the pineapple bun mould.
The look absolutely delicious, can’t wait to try!
Thank you Benito!
I hope you do give these a try Sue. They are so much better than store bought. You can adjust the texture and the sweetness of the azuki paste to your taste. If you don’t have any Asian grocery stores around I suppose Amazon might have them. Bulk stores might also carry them.
The press/mold I purchased from Amazon. I believe they sell them as moon cakes molds.
Benny
We recently went to Warsaw and brought with us a few gifts from Vancouver for friends and neighbours there. Given the time of year we had the idea of bringing moon cakes. They are nice and compact and keep well for some time when refrigerated. They were a big hit! While you see a decent number of tourists from China in Poland now, I didn't see any Chinese markets or bakeries like we have here. The moon cakes were beautiful and unfamiliar to the people we gave them to.
I’m certain your friends appreciated the mooncakes that you brought them Floyd. I’d say they were quite a new thing for them. Most western cities without large Asian communities would never have seen or heard of them before.
Benny
A lot of work . You have great skills. I’m sure they will be gone in no time. c
Thank you Caroline, you are too kind.
Benny
The cakes, I hope, not the skills!
Cakes only.
LOL, you’re right Tom, now that I’ve read Caroline’s post again I can see that now too.
Benny
I’ve had some if these during my travels to China. Yours look perfect.
Best,
Ian
Thank you Ian, I’m glad you’ve had the chance to try these before.
Happy Baking,
Benny