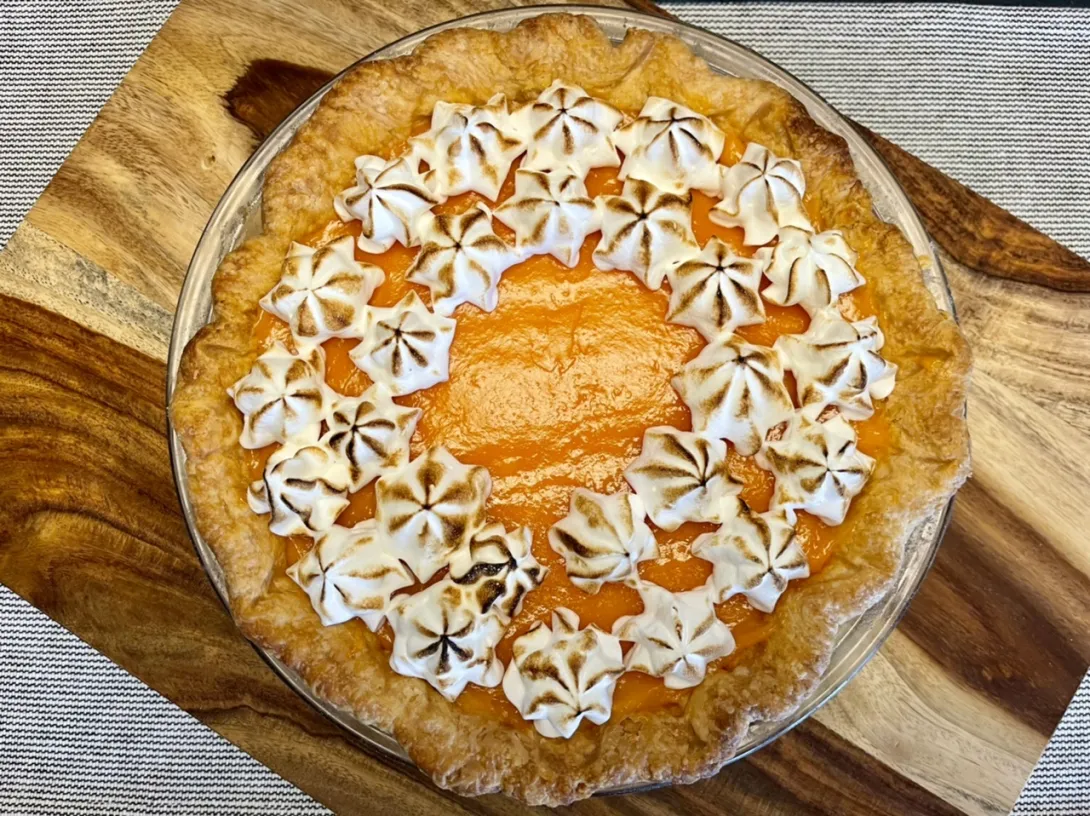
I wanted a dessert to celebrate an occasion tonight so decided I’d try a different curd than my last one and rather than a pate sucrée used a pate brisée. For the pastry I decided I would try J Kenji Lopez-Alt’s recipe which I’ll share below. I was interested in trying his newest recipe because instead of incorporating the butter such that it is in sheets separated by the dough, the butter is first made into a paste with ⅔ of the flour. Only after the paste is made do you then add the flour, blitz and then fold in the water by hand. The reasons why are below.

Easy Pie Dough Recipe - J Kenji Lopez-Alt
WHY IT WORKS
- Using all butter, instead of a combination of butter and shortening, gives this pie dough extra flavor.
- Combining the flour and butter in two distinct phases creates a dough that is tender and flaky yet extremely easy to roll out.
- Using a spatula to incorporate the water ensures flakiness.
What I'm after: The kind of crust that's substantial enough that it doesn't sog-out from a juicy filling but tender enough that it flakes in your mouth into buttery shards. A crust with substance, but not chew. A crust that divides along deep faults into many distinct layers separated by tiny air spaces and that cracks when bent. A crust that is never leathery or pliant, but not so tender or crisp that it crumbles instead of flakes. And of course, it should have a deep butteriness coupled with a balanced sweet and salty flavor.
You see, it turns out that when it comes to pie dough, our existing model has it wrong. In fact, it's not the fat that's coating pockets of dry flour. It's the reverse. It's the flour that's coating pockets of pure fat. With this model, things make much more sense. You can easily and intuitively see how fat gets coated with flour (think about dropping a pat of butter into a pile of flour, but on a much smaller scale), and with this model, when you add water, you are indeed moistening dry flour so that it can form sheets of gluten.
But there's a third element at play here that is often ignored: the flour-fat paste that forms at the interface between the pure fat and the dry flour. With this paste, what you're getting is essentially single particles of flour that are completely coated in fat. Since they can't absorb any water, they end up behaving in much the same way as pure fat.
This over-processed dough is mostly composed of a flour-fat paste. Even without adding water, it'll come together into a ball, though when baked, it won't form flaky layers. Or will it?.
To summarize, here's what we've got as we're forming a pie dough:
- Dry flour, completely uncoated by fat, that absorbs water when you add it, forming gluten that then gets stretched out into wide layers.
- Pure pockets of fat that will flatten out into long, wide, thin sheets as you roll out your dough, separating the layers of gluten-enforced flour from each other so that rather than forming a solid, leathery mass, they separate and gently puff as they bake.
- A flour-fat paste that functions much in the same way as pure fat does. As it bakes, the fat melts and a tiny amount of individually separated flour bits will deposit themselves and become incorporated into the gluten-enforced layers.
And if this flour-fat paste functions similarly to pure fat, doesn't that imply that we can completely replace the pure fat with this paste? Indeed, we can.
This beautiful, flaky pie crust was made with an over-processed dough like you see in the image directly preceding this one. But in order to get this crust, I had to take one additional step: add some more all-purpose flour to the flour-fat paste I'd formed, pulse it a couple times in the food processor just to distribute it evenly, then proceed just like a normal pie dough. I added water, chilled it, rolled it, and baked it.
The Benefits of The Food Processor Method
So that's all very interesting, but the real question is: Why should you care? How does this make forming pie dough any easier?
It does so in two ways. First off, this method completely removes the variability of a traditional pie dough recipe. By weighing out a given amount of flour and fat, combining them together until they form a near homogeneous paste, and then adding the remaining dry flour to that paste, you are very strictly defining exactly how much flour is used for gluten formation and how much ends up coated with fat. No more trying to visually judge whether the fat is properly cut into the flour. No more adding ice water a drop at a time until a dough is formed. The dough comes out the same, every single time.
The other key advantage is that your dough becomes much more pliable. The flour-fat paste formed at the beginning is much softer and more malleable than pure butter, which means that your final dough rolls out smoothly and easily with little-to-no risk of cracking like a traditional pie crust, even without the vodka.
On Butter, Shortening, and Lard in Pie Dough
The question of which fat makes the best pie crust is prime stomping grounds for eternal debate between bakers, and it comes down to a battle between texture and flavor.
Butter
- Pros: Excellent flavor. Forms distinct, large, flaky layers once baked.
- Cons: Difficult to work with. Butter melts at a relatively low temperature (below body temperature) and has a very narrow workable range. It's also got a relatively high water content (around 15–17%), which can cause excess gluten to form and turn your crust leathery if you aren't careful.
Shortening
- Pros: Very easy to work with. Produces crusts that are extremely tender once baked.
- Cons: It has very little flavor of its own. (This could be a pro, if you want a neutral-flavored crust.) It's also soft over a wide range of temperatures, greatly increasing your chance of overworking your dough and turning the resulting crust crumbly instead of flaky.
Lard
- Pros: The best for working with—it has a wide workable temperature range and is not nearly as soft as shortening. Creates very tender, flaky crusts once baked.
- Cons: Unless you slaughter your own pigs and render your own leaf lard, or you have access to a good butcher, it's extremely hard to find high-quality lard. The stuff sold in supermarkets has a very savory, porky aroma, which makes for very porky-tasting crusts. Unless you're making savory pie, that's not generally desirable.
Because of these various characteristics, many recipes call for some combination of butter and shortening. In that case, shortening is so much softer than butter at room temperature, it's much more likely to form the fat/flour paste while the butter remains in discrete chunks. However, when using the method I've outlined above, you can cut the amount of shortening down to nothing, if you'd like. Depending on how tender you want your crust to be, anywhere below a 4:1 ratio of butter to shortening will work. To be honest, most of the time I'll make all-butter crusts, simply because shortening is just not something I keep lying around the house.
Tips For A Perfect Pie Crust
Finally, let me offer you a few tips to make the most out of your crust, no matter what recipe you decide to use.
Weigh Your Flour
Get yourself a scale. Honestly. Do it. You will not regret it. Measuring dry ingredients—anything more than a few teaspoons—by volume is simply not accurate. Depending on how tightly packed it is, the weight of a cup of all-purpose flour can vary by as much as 50 percent. 50 percent!!! No such problems with a scale. Five ounces of flour (the equivalent of one cup) is five ounces of flour, no matter how tightly it is packed.
Use a Food Processor
If there's one reason to own a food processor, it's to make pie dough. Nothing is as efficient or as consistent at cutting fat into flour. A stand mixer will do the job reasonably well; a pastry cutter will, too, though it requires much more work. You can even get a great dough using just your fingers. But, for the sake of pure ease, if you've got the processor, use it.
Keep Your Dough Cold
Just like with grinding meat, the key to great pie dough is to make sure that your fat doesn't melt too much. If your home is hot, make sure that you chill your dough as you work with it. In the summer with my oven on, the apartment pushes 80°F (27°C). Under these conditions, I'll put my dough back in the fridge three times: for 10 minutes immediately after incorporating the fat, for at least 2 hours after forming the dough into a disk and wrapping it, and for another 10 minutes after draping it in the pie plate before trimming and fluting the edges.
Use a Spatula to Incorporate Water
Your processed flour and butter are sitting there in the bowl of your food processor and you're tempted to save yourself a bit of cleanup by just adding the water directly in there, right? Don't do it! Sure, it'll work out okay, but you won't form nearly the same level of flakiness as you do if you incorporate with a spatula. Here's what a crust made 100% in the food processor looks like:
Compare that to the crust I made with the spatula:
See the difference? By using the spatula to fold the water into the dough, you're even more likely to end up with flaky layers.
Use a Tapered Rolling Pin
While a ball-bearing-based heavy-duty cylindrical rolling pin might fit in a Norman Rockwell painting, the slender, slightly tapered French-style rolling pin offers far more control when rolling dough, is easier to clean and store, and is usually cheaper.
And that's basically all I know about pie crust.
For a more traditional dough that's extra flaky but a little less beginner-friendly, check out our old-fashioned flaky pie dough.
Ingredients
- 2 1/2 cups (12.5 ounces; 350g) all-purpose flour, divided, 233 g with the butter and 117 g after.
- 2 tablespoons (25g) sugar
- 1 teaspoon (5g) kosher salt; for table salt use same weight or half as much by volume
- 2 1/2 sticks (10 ounces; 280g) unsalted butter, cut into 1/4-inch pats (see note)
- 6 tablespoons (3 ounces; 85ml) cold water
Add to Shopping List
Directions
- Combine two thirds of flour (233 g) with sugar and salt in the bowl of a food processor. Pulse twice to incorporate. Spread butter pats evenly over surface. Pulse until no dry flour remains and dough just begins to collect in clumps, about 25 short pulses. Use a rubber spatula to spread the dough evenly around the bowl of the food processor. Sprinkle with remaining flour (117 g) and pulse until dough is just barely broken up, about 5 short pulses. Transfer dough to a large bowl.
Sprinkle with water. Then, using a rubber spatula, fold and press dough until it comes together into a ball. Divide ball in half. Form each half into a 4-inch disk. Wrap tightly in plastic and refrigerate for at least 2 hours before rolling and baking.
When ready to shape the dough, pull out one ball, set it on a well-floured work surface, and sprinkle with more flour. Use a tapered rolling pin to start rolling the dough out into a circle, lifting the dough and rotating it while rolling to achieve an even shape. Continue rolling, changing the angle of your rolling pin as you go to get an even shape and thickness. The finished dough should overhang your pie plate by an inch or two.
Pick up the dough by carefully rolling it around your rolling pin, using your bench scraper to help lift it off the work surface. Unroll it over a pie plate. Gently lift and fit the dough into the pie plate, getting down into the corners.
For a single-crusted pie, use a pair of scissors to trim the dough so that it overhangs the edge by 1/2 inch all around. For a double-crusted pie, at this stage, fill it and drape your second round of pie dough over the top. Trim it to a 1/2-inch overhang along with the lower crust. Either way, tuck the overhanging edge(s) under itself all the way around the pie.
Flute the edges of the pie crust using the forefinger of one hand and the thumb and forefinger of the other. The single-crust pie shell is ready to be blind-baked or filled. For a double-crusted pie, brush with an egg white, sprinkle with sugar, and cut vent holes in the top with a sharp knife before baking.
Special equipment
Food processor, tapered French rolling pin
Notes
For a slightly more tender crust, replace up to 6 tablespoons of butter with vegetable shortening. Pie dough can be frozen for up to 3 months. Thaw in refrigerator before rolling and baking.
The following is how I baked the pie crust fully.
PROCEDURE and BAKING
- Roll out dough 2 inches (5 centimeters) larger than the size of your pie pan. Gently place it in a chilled pie pan. Flute or crimp the edges. The dough may shrink some in the bake so be sure it extends all the way to the edge of the pie pan.
- Dock the dough by lightly piercing the bottom and sides with a fork. Dock well not lightly - when I docked lightly the bottom crust blew up higher than the sides
- Cover with plastic and place in freezer until frozen (at least 30 minutes). The freezing helps with the shrinkage of the crust during the bake, although there may still be some.
- Remove plastic wrap, and cover dough with a sheet of parchment paper (or aluminum foil) that is cut about 2 inches (5 centimeters) larger than your pie pan. Be sure to cut the paper large, as you need enough above the rim of the pie pan so you can lift the hot pie weights out. You don’t want to spill the beans into the pie crust or onto the floor, which I learned the hard way.
- Fill with pie weights of choice.
- In an oven preheated to 375°F (190°C), bake the pie shell for 20 to 25 minutes. Other bakers bake at 425ºF for 15-17 mins (Erin McDowell)
- Remove from oven, and carefully take out the parchment paper and weights. If a bit of the dough has stuck onto the backside of the parchment because of the weight of the beans, no one will ever know if you scrape it off and gently pat it back onto the spot in the crust where it came from. Keep the pie weights for your next blind baking session. At this point you can brush with a beaten egg white to protect the crust if you like.
- Put the pie back in the oven and bake for another 10 minutes at 325°F (162°C) to dry out the crust more and give it a golden color.
- Remove from oven and cool completely before using.
For the Grapefruit lemon curd
- 8 tablespoons (1 stick) unsalted butter
- 1 cup granulated sugar
- 1/3 cup cornstarch
- 2 medium lemon for ¼ cup juice
- 1 cup pink grapefruit juice, preferably freshly squeezed
- 8 large egg yolks
- 1/4 teaspoon kosher
- Optional a few drops red food gel colour
I also used the zest of the grapefruits
Make the curd:
- Melt 8 tablespoons unsalted butter in a medium saucepan over medium heat. Meanwhile, place 1 cup granulated sugar and 1/3 cup cornstarch in a small bowl and whisk to combine. Juice 2 medium lemons until you have 1/4 cup juice.
- Reduce the heat to medium-low. Add the sugar mixture, lemon juice, 1 cup pink grapefruit juice, 8 large egg yolks, and 1/4 teaspoon kosher salt and optional red food colour gel to the butter. Continue to cook, whisking constantly, until the curd begins to thicken, 1 to 2 minutes.
- Switch to a silicone spatula and continue to cook, stirring constantly (be sure to get into the edges and corners of the pot), until the curd thickens and fat bubbles begin to break the surface in the center of the pot, 2 to 3 minutes.
- Place a fine-mesh strainer onto the crust. Pour the mixture through the strainer and press through the strainer into the crust (make sure to scrape the underside of the strainer). Spread into an even layer and discard the contents of the strainer. Press a sheet of plastic wrap directly onto the surface of the filling. Refrigerate until cooled completely, at least 2 and up to 24 hours.
For this curd since it is fully cooked you will need to fully bake your crust not just par baked.
For the Swiss Meringue, I used Stella Parks’ recipe.
Yield 8 cups enough to generously top a 9 inch pie
1 cup | 8 ounces egg whites, from about 8 large eggs
1¾ cups | 12 ounces sugar or Roasted Sugar (page 102)
Consider reducing sugar as the meringue is very sweet.
½ teaspoon Diamond Crystal kosher salt (half as much if iodized)
¼ teaspoon cream of tartar
¼ teaspoon rose water, or seeds from 1 vanilla bean (optional)
Key Point: With gently simmering water, the meringue should cook fairly fast. If you find the temperature climbing too slowly, simply crank up the heat.
Fill a 3-quart pot with 1½-inches of water and place over medium-low heat, with a ring of crumpled foil set in the middle to act as a booster seat. In the bowl of a stand mixer, combine egg whites, sugar, salt, cream of tartar, and rose water or vanilla bean (if using). Place over steamy water, stirring and scraping constantly with a flexible spatula until thin, foamy, and 175°F on a digital thermometer, about 10 minutes. Transfer to a stand mixer fitted with the whisk attachment and whip on high until glossy, thick, and quadrupled in volume, about 5
minutes. Use immediately.
TROUBLESHOOTING
If a speck of yolk slips into the whites, fish it out with an egg shell. If the yolk can’t be neatly removed, reserve whites for Tahitian Vanilla Pudding (page 255) or White Mountain Layer Cake (page 110), and start fresh, as fat can inhibit both the volume and stability of meringue.
Oil-based extracts, like lemon, orange, and mint can destabilize the meringue. Use sparingly and fold in by hand when the meringue has finished whipping.
I reduced the sugar from her recipe as I always find meringue cloyingly sweet so I used 1.25 cups instead of 1.75 cups of sugar.
- Benito's Blog
- Log in or register to post comments
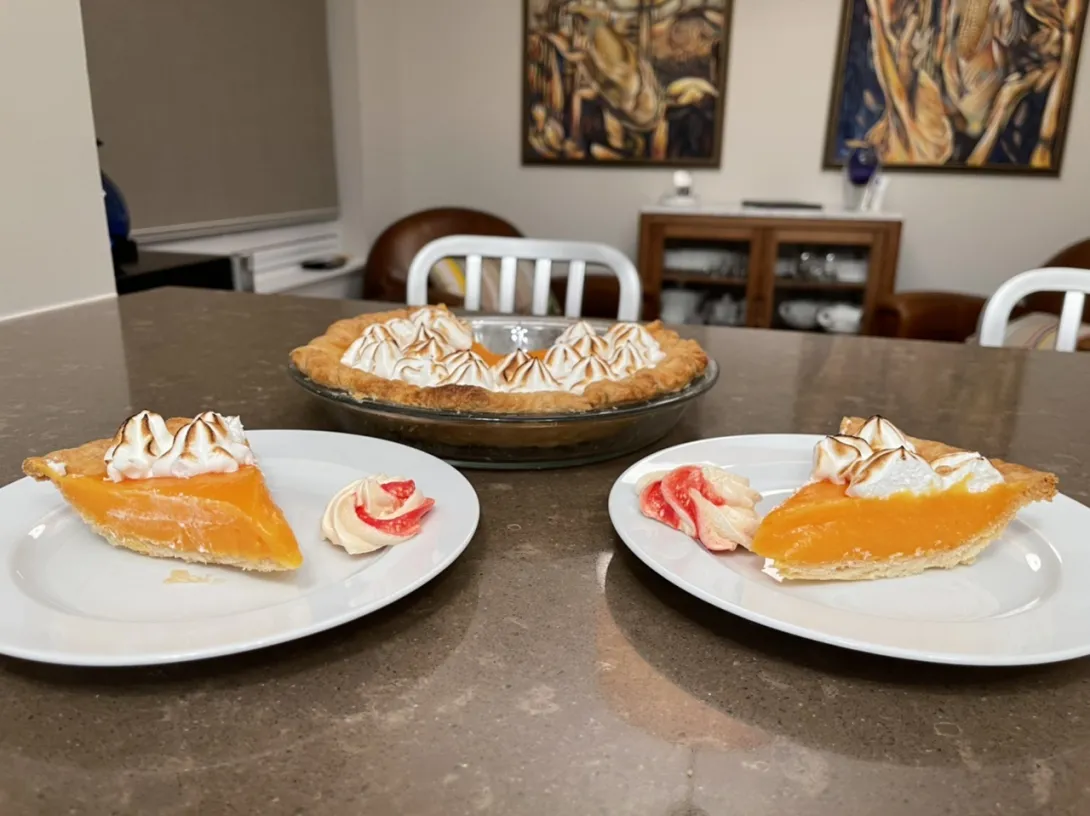
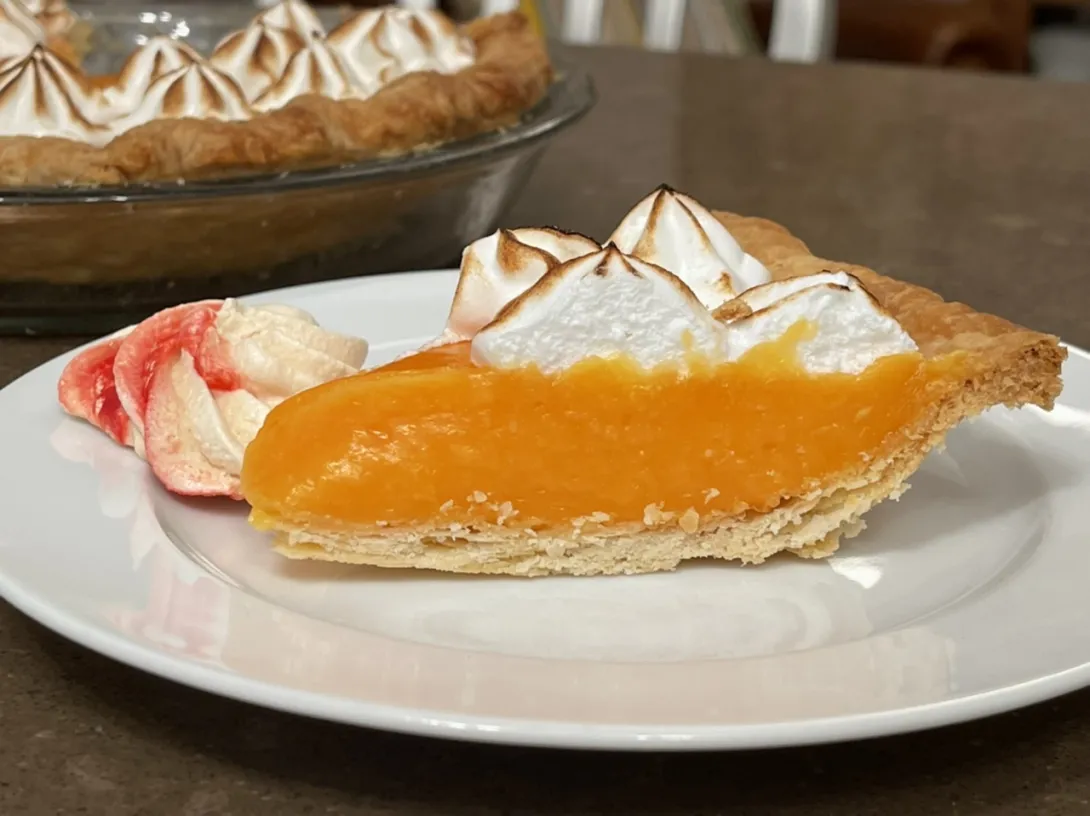
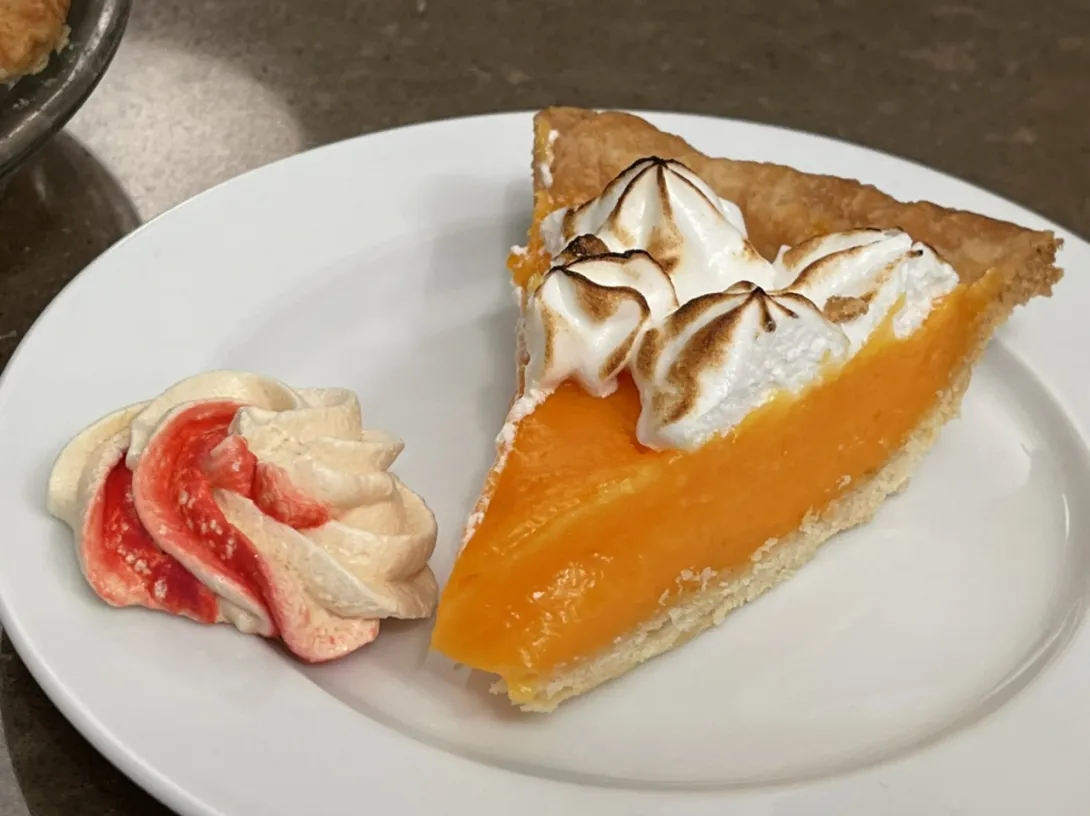
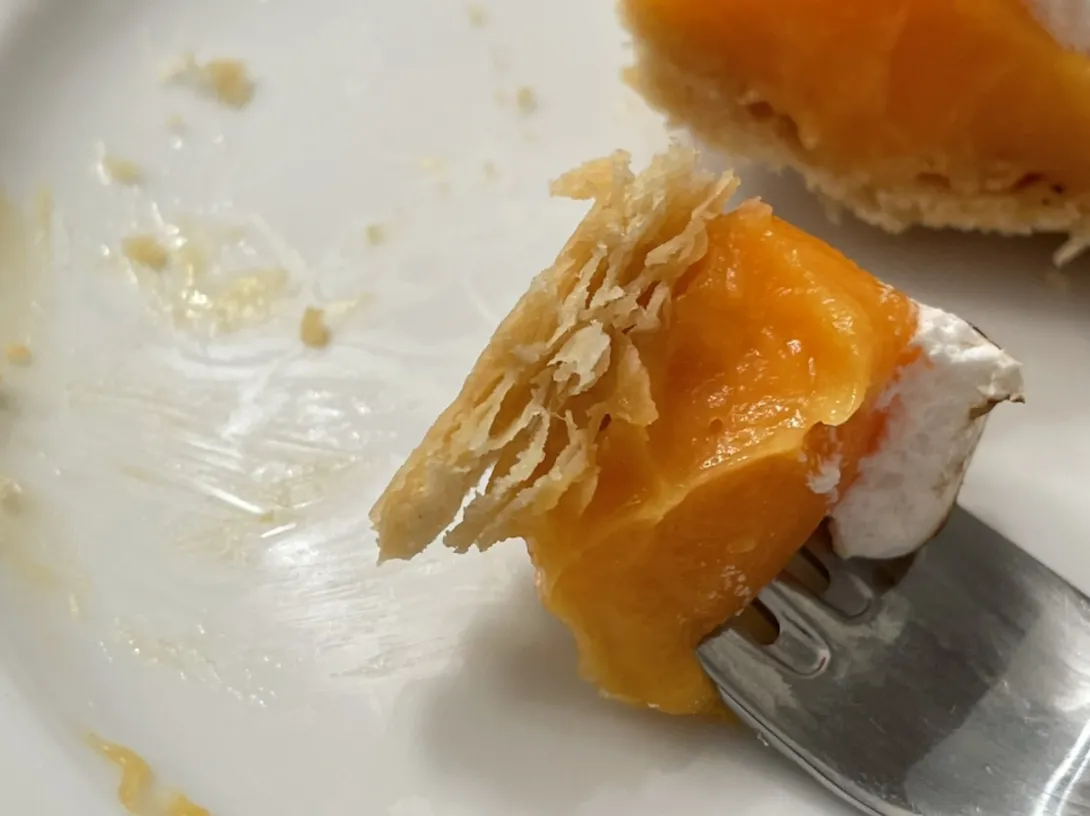
I have baked a lot more than a few pies over the years and I have decided today that this might be the only pate brisée recipe I’ll ever use again. The science works. This has the tenderness of a lard crust yet the laminations and flavor of the all butter crust that it is. This is the perfect crust for me. The photos don’t show the layers but this had great tender buttery layers. The grapefruit lemon curd was sharp and delicious. I made bonus meringue kisses with some of the excess Swiss meringue.
Image
Image
Image
I used to use the Martha Stewart food processor method but have been using this method because I like the way the water is added and it is easier to roll out. We used to make pie often and only with butter but my wife has almost given up dairy products so it is not often on the menu. I never really liked lard or shortening in pie crust compared to a flaky butter crust. Yours looks divine
Don
Don that’s a pity that your wife is fully off dairy. Pies are my favorite desserts not that we have them that often. The laminations of this pastry are pretty good. 😎
Image
She is not fully off dairy and me not at all. I have tried her oat milk yogurt and it's not bad and might be an interesting addition to bread. A really good pie crust is a rare beast and not easy to master. I see WW pastry flour in the markets but it never appealed to me try it but maybe with your current fervor for WW you should give it a go and let us know.
I’ve actually done whole red fife crusts twice and they are actually quite good. They use about 50% whole grain in the crust. The whole grain gives the pastry a bit of a graham cracker flavour.
Plumcot ginger whole red pie
Blueberry Rhubarb with whole red fife pastry pie.