I have a method for making a really nice, lactic-acid-tang sourdough bread that was handed down to me from my dad. He got the recipe from some neighbors who are farmers in Washoe Valley, Nevada, the List family. I call it San Fransisco Style because it's nice and sour like that style of bread, but this recipe was actually a little different as practiced in Northern Nevada at a high altitude. My dad always said he wished he could get a thicker crust like they do in San Fransisco. I think that his thin, crisp crust was likely a result of the dry, high-elevation climate he baked in. I make it in Portland, Oregon and wish I could get the thin, crisp crust I grew up with in Nevada.
As for SF Sourdough proper, I know I had it as a kid growing up in the 80's. San Fransisco was the nearest big city, about a 3 hour drive, and we would go there to do big city stuff, including getting some authentic SF sourdough bread. I was pretty young though and I don't remember the bakeries we went to. We'd always visit the wharf. What I do remember very clearly is my dad's sourdough he made every weekend, and the sourdough discard pancakes we'd have on Sunday. I really missed this bread once I moved away and when I got into making sourdough about ten years ago, I was able to recreate this recipe gluten-free with a lot of help from kind people here on TFL including Mini Oven. You can find my 24-hour sourdough recipe here on my blog: https://glutenfreegourmand.blogspot.com/2014/03/gf-24-hour-sourdough-bread-recipe.html
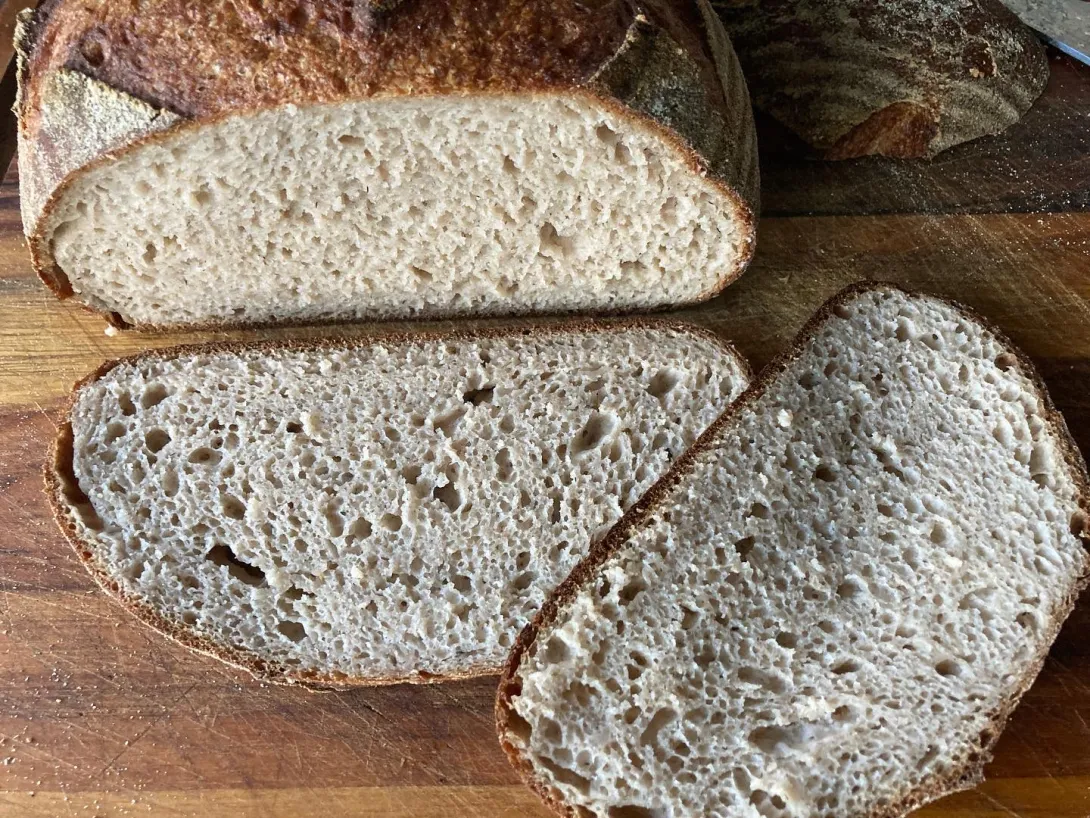
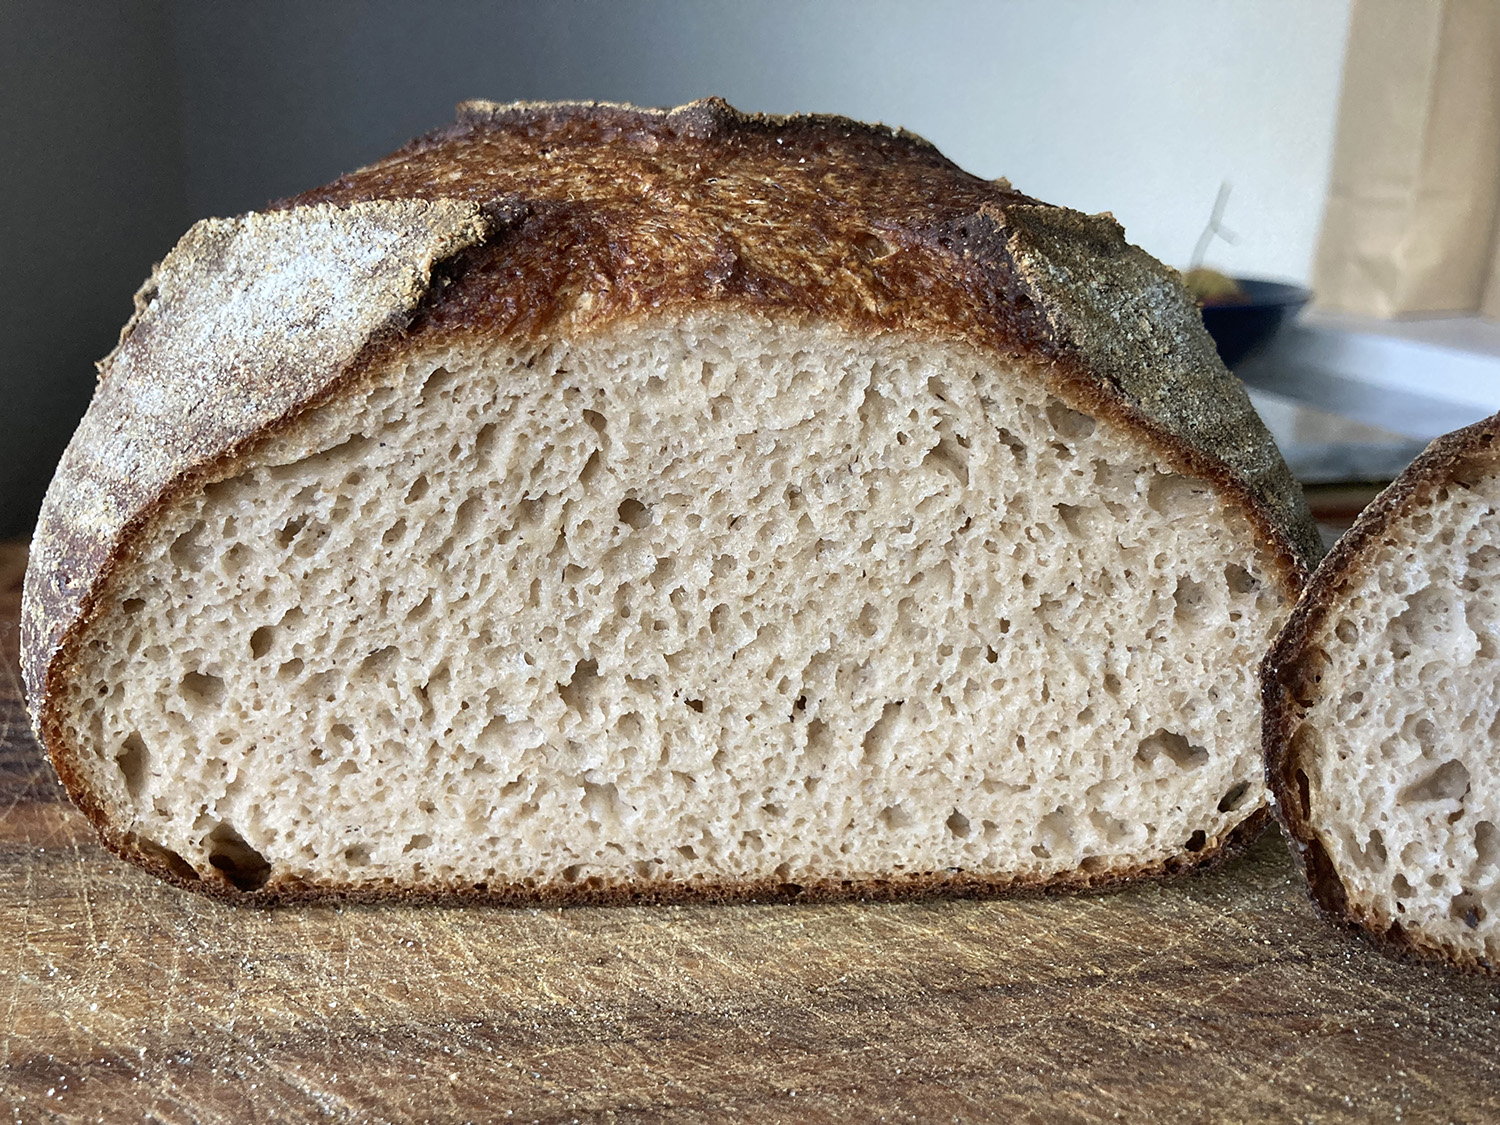
I'm now working on a version that gives the recipe more of the look of SF SD with a more "white flour" visual, though due to the practicalities of gluten free it's still about 60% whole grain.
I mentioned this method in another thread and Paul (pmccool) and Alcophile asked me to post separately so it didn't get buried. Keep in mind that all of this should be taken with a grain of salt because I have not made the wheat version of this bread myself, and it's been so long for my dad that he doesn't remember the nuances. He did like my GF version when he tried it this spring though, and said it tasted right. (The texture is different, but palatable enough to my family members who eat wheat.) Here's roughly how I interpret the original wheaten version of the recipe as my dad baked it.
Starter:
My dad made a liquid white starter using commercial yeast, but I made my GF starter using the Ars Pistorica/Ian Lowe 3-day method with whole grains as outlined here: https://www.thefreshloaf.com/node/69051/sourdough-starter-ready-use-37-days
For this bread, I find that using the starter when very, very ripe works for me. The idea is to slow down the bulk ferment considerably, so to my mind using the starter at peak is contraindicated.
The idea is to get the inoculation percentage right for your flour/temperature/conditions so that the dough doubles in volume in 12-18 hours. For me this ends up being about 5% innoculation.
First Rise/Bulk Ferment:
Starter, 5-10% inoculation
Flour, about 66% of total desired flour weight (reserving the rest for the second rise). My dad used unbleached AP flour.
Salt, about 2% of total desired flour weight
Water (room temp or cooler) to make a shaggy dough. (The original recipe as written is all in cup measurements, but converted to grams it has this dough at just below 50% hydration. That seems really low to me but maybe the fermentation produces a lot of liquid)
Mix all together and ferment overnight, at least 12 hours, in cool conditions approximately 50-65°f. In the winter we'd just let it sit on the counter in the kitchen and the house would get down to about 55° and that was perfect. It shouldn't double until the temps warm up again the next day.
Second Rise:
Punch the dough down and turn it out onto a heavily floured bench. Knead the dough, incorporating the remainder of the flour or as much as needed to make a smooth, elastic dough, about 8 minutes. Shape into a boule or divide and do multiple loaves.
Let the dough rise, anywhere from 1-4 hours as determined by activity of the dough and ambient temps. Use a banneton, bowl, or whatever your normal method is. Sometimes I even proof right-side up on the bench, covered, but it spreads out a bit more with this method.
Bake:
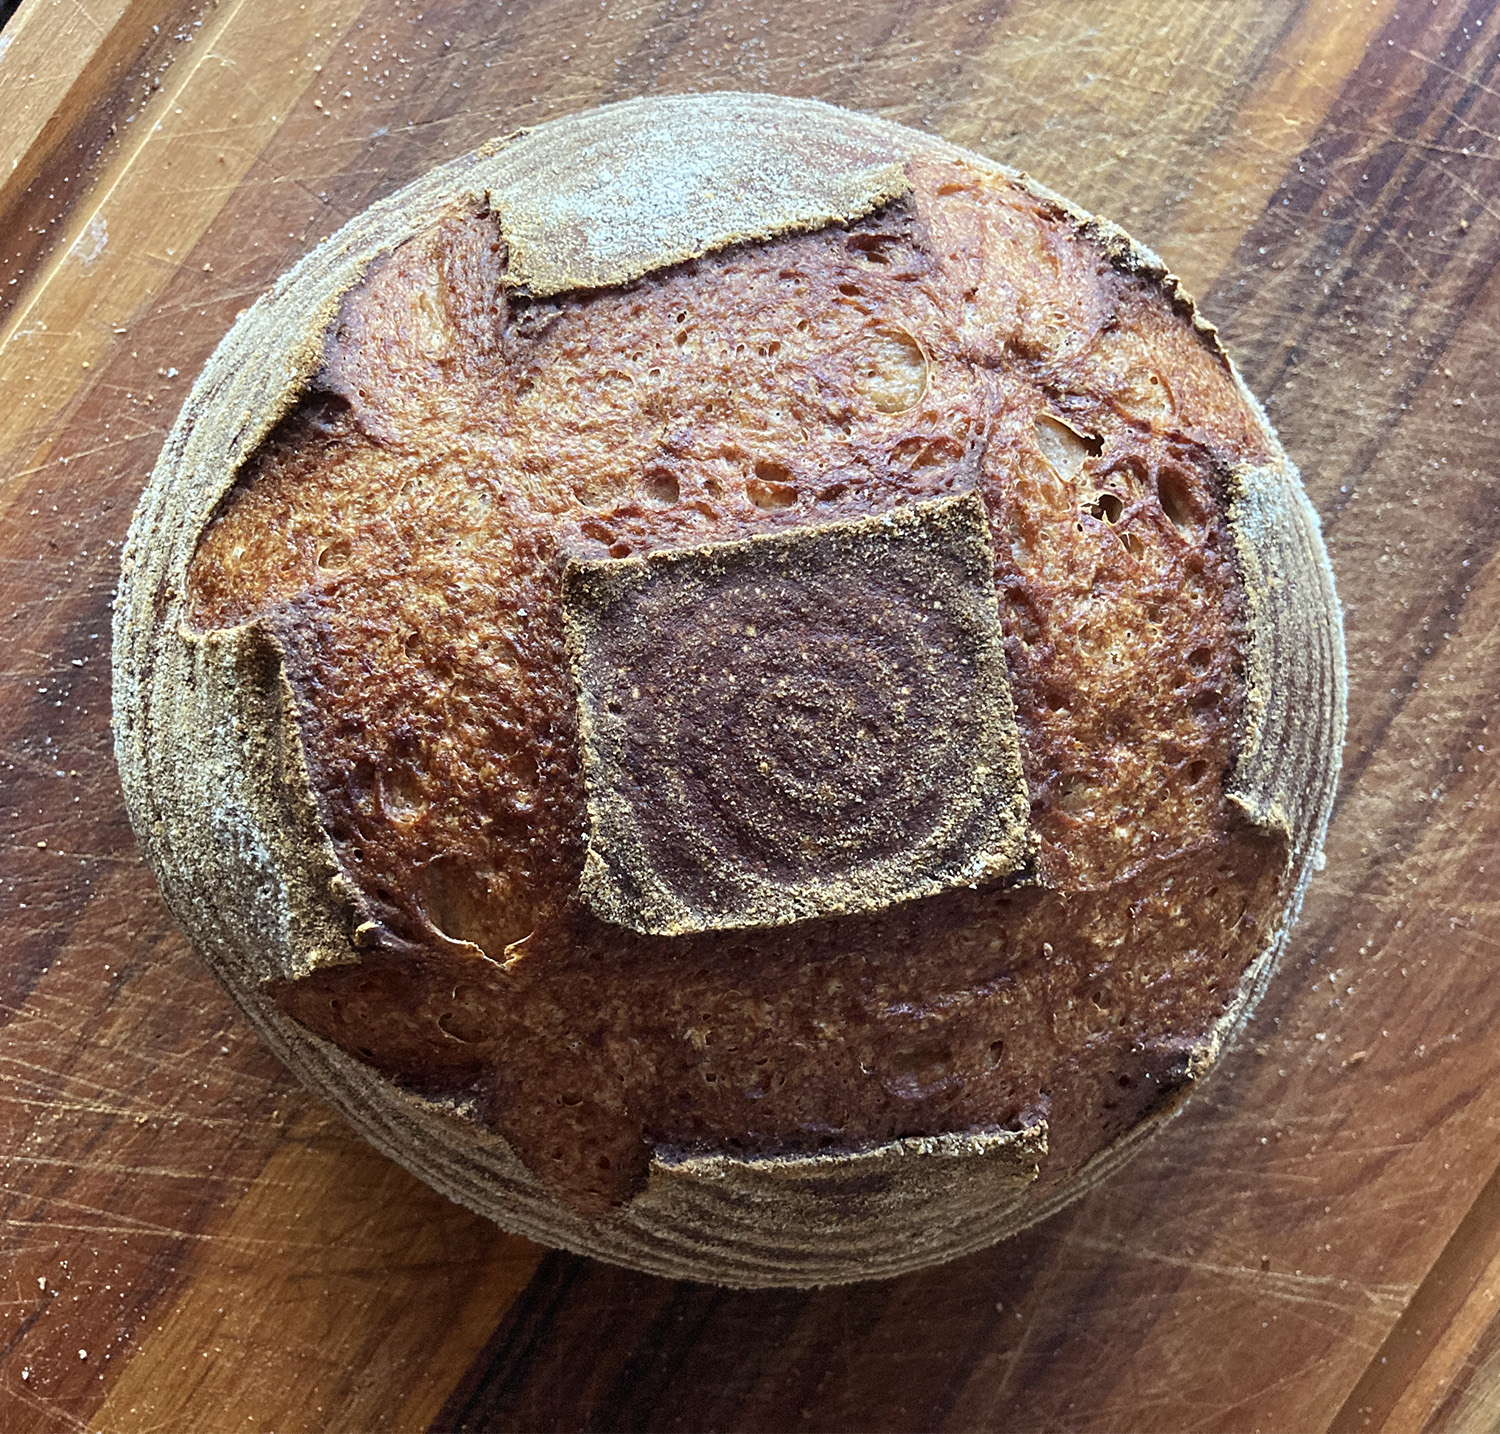
Once the bread has doubled in size, brush/spritz with water, score with a hashmark, and bake as you are set up for sourdough - I use a dutch oven or cloche. The original instructions say to bake at 400° for 45 minutes with steam but again this was for high altitude, so I don't know if that needs adjustment for other climates. Obviously altitude/climate/hydration/other conditions will affect the bake. I love this instruction: "Water in oven makes crisp French type crust." In dry Nevada the steam water would have baked off in 15-20 minutes giving the steaming conditions of most normal sourdough bakes.
Hacks for sour flavor:
The original recipe comes with a bunch of hacks for making both the starter and the bread more sour, and I have some hacks of my own as well
1. Mix the starter with half water, half milk. I haven't tried this one but I think my dad did this occasionally if he thought the starter was getting too mild.
2. Sub out half the water for milk in the recipe. I've done all milk and it was incredibly sour - finally too sour for me. Half was good. I can usually get a good sour with just water though.
3. This hack is mine. I monitor the sourness of the bread as it rises. I suppose you could use a ph meter to be perfectly safe and to get consistent results, but I go by scent/taste. I don't eat raw dough of course! I don't know if it's because I'm using a high amount of whole grains, but I can overproof the dough a bit on the bulk and it's fine on the second rise. I can get it more sour this way. I think this is the same idea for white wheat flour: incorporating the extra flour before shaping buffers the extra acids and strengthens the gluten to prevent it from turning into goo. The more you've overproofed on the first rise, the more flour you'd have to incorporate to strengthen it, so the more you're diluting the flavor. I'm sure there's a sweet spot in there somewhere.
4. I'm not sure if it's just a good hack for GF bread, but the original recipe calls for a little bit of sugar so I'm including it. I use a little sugar on the second rise to make sure the dough bounces back from overproofing if needed. This helps me get a good second rise. At 2%, it shouldn't affect the final flavor for wheat. GF seems to need a little more, about 4%.
I'm curious to hear peoples' thoughts. To me this is a very standard, traditional American method of making bread, with a double rise and kneading after bulk/before shaping. A lot of recipes were like this when I was growing up, but the method seems to have fallen out of fashion. I think it has a lot of advantages - as long as you don't want an open crumb. For Gluten-free bread, the advantage is to feed the yeast, but also to even out the hydration between the psyllium husk and the whole grains and to buffer the acid. In GF it's the starches that turn to goo when overproofed, as there is no gluten to degrade. With wheat flour, I think the kneading after bulk serves a similar function, to feed the yeast and also to re-distribute liquid and buffer the acids with fresh flour. I think this method is a traditional American way to get good results on a second rise under various, uncontrolled conditions.
Gina
It looks stunning. Thanks for sharing!
Thanks Marta!
That's a wonderfully thorough write-up with even more information available via the links.
Paul
Hi Paul,
You're welcome, it was good to revisit this method and think about the wheat version again. In the last 15 years, I've baked with wheat once to show my niece some bread making techniques. There are so many things that are the same, but handling the dough is so different. I'm sure it would take me several tries to nail this recipe again with wheat. Maybe my niece will get into sourdough!
Gina