I haven’t been able to definitively find out what the difference between shokupan and Hokkaido milk bread is. What I think is correct is that shokupan has less sweetness to it than Hokkaido milk bread. If that is the case then I think my recent formulas for Hokkaido milk bread with the decreased sugar probably are more like a shokupan. For this bake I wanted to know whether or not I really needed the VWG in the dough or not. I also decided that I would also shape differently for shokupans than Hokkaido milk breads to further differentiate them by look.
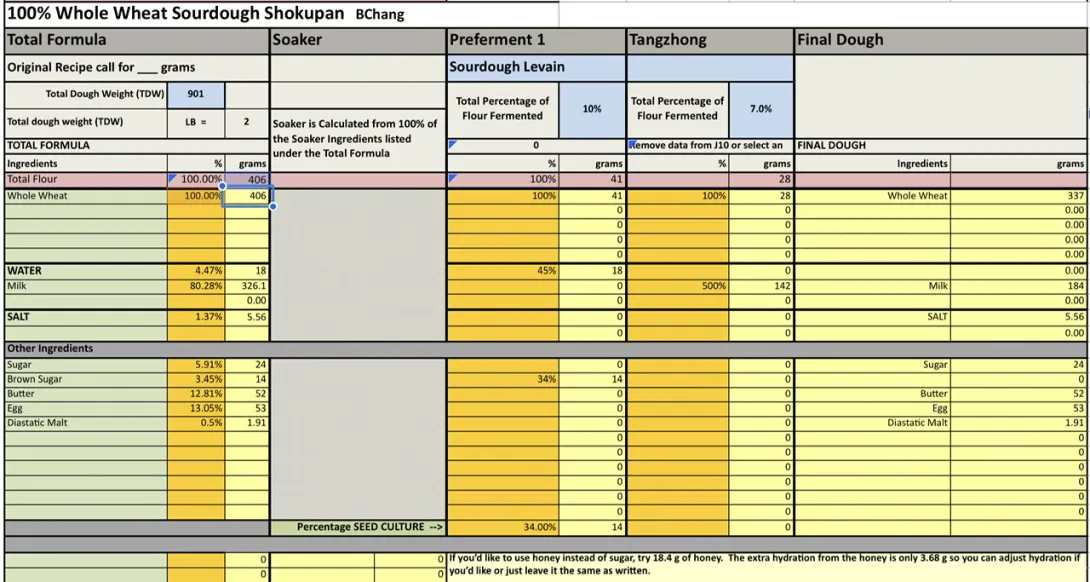
For 9 x 4 x 4” pullman pan
Overnight Stiff Sweet Levain fermented at 76-78°F
14 g starter + 14 g brown sugar + 18 g water + 41 g whole wheat
Tangzhong prepared the night before and refrigerated
28 g whole wheat + 142 g milk
Final Dough
184 g milk + 1 large egg (53 g) + 24 g sugar + 5.56 g salt + all Tangzhong
+ all Stiff Sweet Levain + 337 g whole wheat flour + 1.91 g diastatic malt
+ 52 g butter
Pre-bake Wash
• 1 egg beaten
• 1 Tbsp milk
Post-bake Wash
• 1 Tbsp butter (optional)
Instructions
Levain
Mix the levain ingredients in a jar or pyrex container with space for at least 300% growth.
Press down with your knuckles or silicone spatula to create a uniform surface and to push out air.
At a temperature of 76ºF, it typically takes up to 10-12 hours for this sweet stiff levain to be at peak. For my starter I typically see 3-3.5 times increase in size at peak. The levain will smell sweet with only a mild tang.
Tangzhong
In a sauce pan set on medium heat, stir the milk and flour until blended. Then cook for several minutes until well thickened, stirring regularly with a spoon or heat-resistant spatula. Let cool in the pan or, for faster results, in a new bowl. Theoretically it should reach 65ºC (149ºF) but I don’t find I need to measure the temperature as the tangzhong gelatinizes at this temperature. You can prepare this the night before and refrigerate it, ensure that it is covered to prevent it from drying out.
Dough
In the bowl of a stand mixer, add the milk (consider holding back 10 g of milk and adding later if this is the first time you’re making this), egg, tangzhong, salt, sugar, diastatic malt and levain. Mix and then break up the levain into many smaller pieces. Next add the flour. I like to use my spatula to mix until there aren’t many dry areas. Allow the flour to hydrate (fermentolyse) for 20-30 minutes. Mix on low speed and then medium speed until moderate gluten development this may take 5-10 mins. Next drizzle in the melted butter a little at a time, or alternatively add room temperature butter one pat at a time. Slow the mixer down to avoid splashing the butter at you. The dough may come apart, be patient, continue to mix until it comes together before drizzling or adding in more butter. Once all the butter has been added and incorporated increase the speed gradually to medium. Mix at medium until the gluten is well developed, approximately 10 mins. You can consider resting the dough intermittently during this time You should be able to pull a good windowpane, not quite as good as a white flour because the bran will interrupt the windowpane somewhat. This is a good time to add inclusions such as my favorite black sesame seeds, that way they do not interfere with the gluten development. If you add inclusions mix until they are well incorporated in the dough.
On the counter, shape the dough into a tight ball, cover in the bowl and ferment for 2.5-3.5 hours at 82ºF. There may be some rise visible at this stage.
You can next place the dough into the fridge to chill the dough for about 1.5 hours, this makes rolling the dough easier to shape. Remember, if you do so the final proof will take longer. Alternatively, you can do a cold retard in the fridge overnight, however, you may find that this increases the tang in your bread.
Prepare your pans by greasing them or line with parchment paper.
Lightly flour the top of the dough. Scrape the dough out onto a clean counter top. Roll the dough out into a large rectangle. We do want to degas the dough as this point as this will give us a finer crumb. You will then do a letter fold of the dough and then roll it up into a boule shape to fit into your pan.
Cover and let proof for 6-8 hours at a warm temperature. I proof at 82°F. You will need longer than 6-8 hours if you chilled your dough for shaping. I proof until the top of the dough comes to within 1 cm of the top edge of the pan.
Preheat the oven to 350F and brush the dough with the egg-milk wash. Just prior to baking brush with the egg-milk wash again.
Bake the loaves for 50 minutes or until the internal temperature is at least 190ºF, rotating as needed to get even browning. Shield your loaf if it gets brown early in the baking process. After 50 mins remove the bread from the pan and bake a further 10 mins by placing the loaf directly in the oven on the rack with the oven turned down to 325ºF. You can brush the top of the loaf with butter if you wish at this point while the bread is still hot to keep the top crust soft.
- Benito's Blog
- Log in or register to post comments
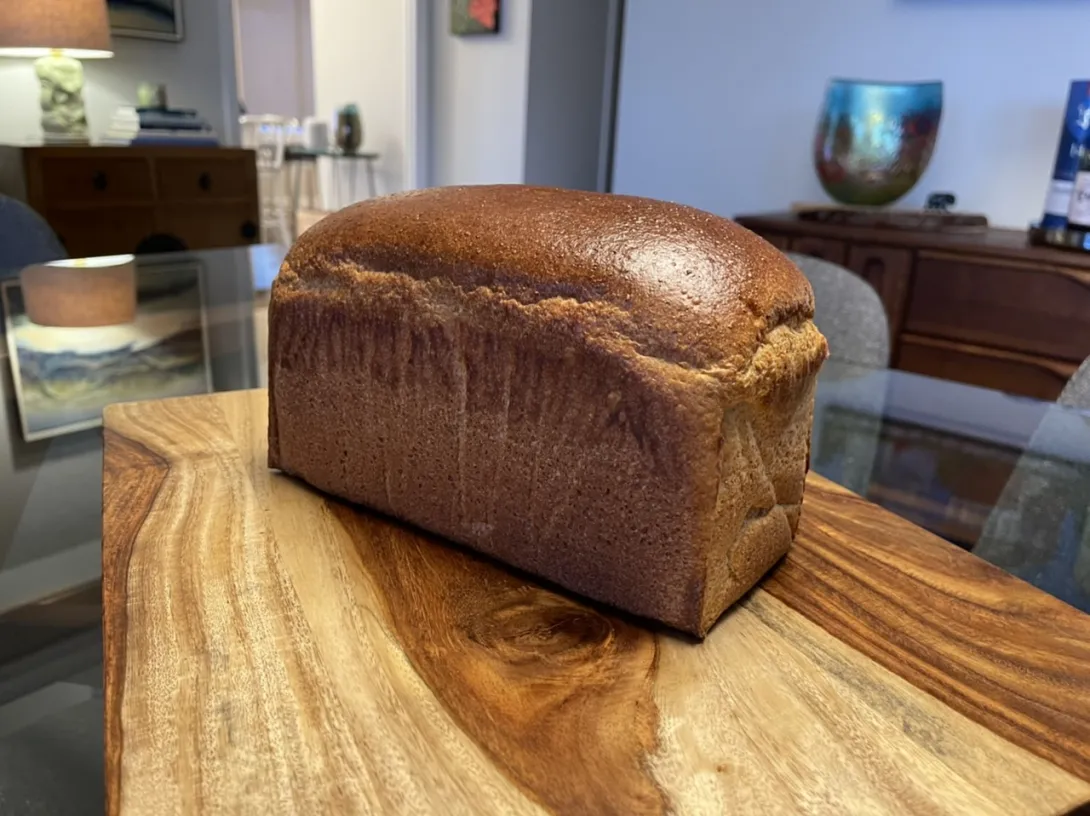
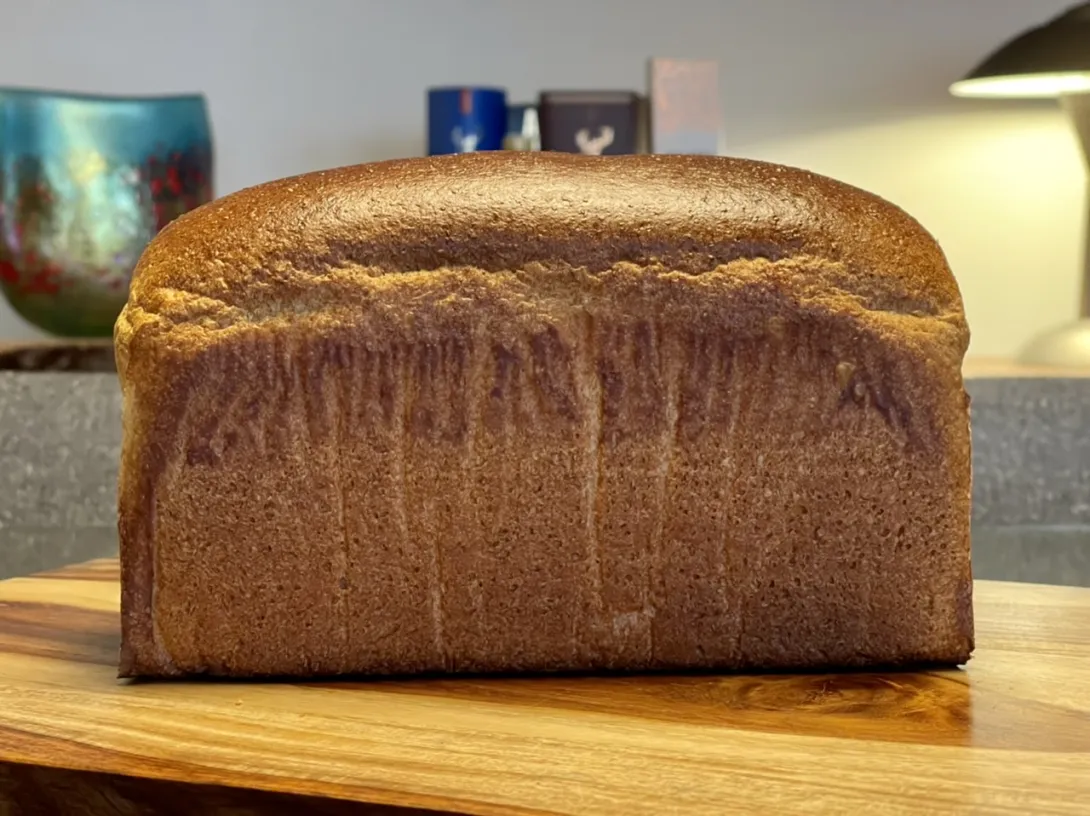
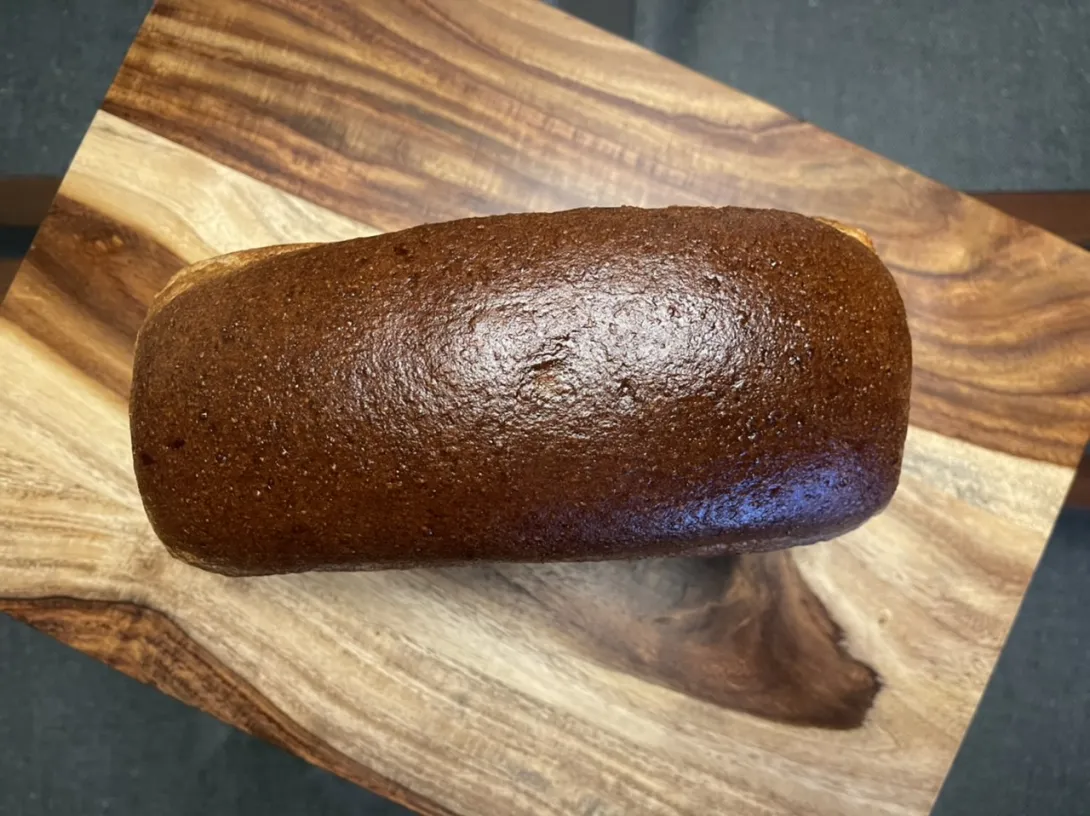
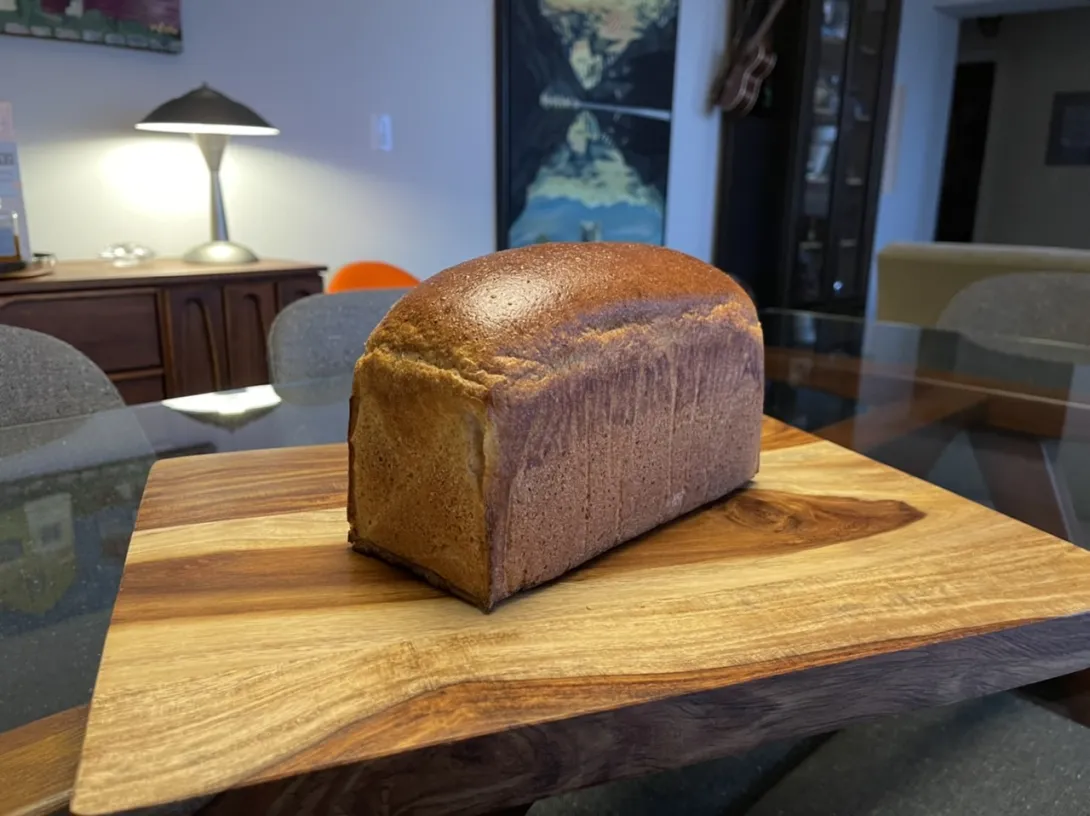
Here’s the baked loaf. I think that at least with this shaping that I do not need the VWG. This loaf has good oven spring and I’m happy with it.
Image
Image
Image
Image
Welcome back and it looks like you haven't missed a beat. ;-)
Thank you Troy, I was so happy that my starter revved up so quickly and baking bread was successful.
Benny
Nice bake Benny. It sure looks like you don't need the VWG. Let know the taste and crumb.
Aside: In the total formula, should the whole-wheat flour be 100%?
Thanks for noticing that error in my spreadsheet Gavin. I hope it is now correct.
Glorious crust as usual. Much respect for your devotion to this loaf type.
Wish I had that level of weekly discipline... then I'd have bread for lunch this week :)
Thank you David, I am a tinkerer by nature so wanted to see if I really needed the VWG or not. I think the answer is whether or not I want a super tall loaf or just a tall loaf LOL. Also this type of bread is so little work and was easy to fit in to my day’s schedule and I wanted to test out the new spiral dough hook I purchased while in Florida. The hook did shorten the time to develop the dough, I’d say by about ⅓ or so.
Benny
That's awesome. Glad your new hook is saving time. If the mixer struggles the same or less, then you're probably extending its life as well. It's tricky when everyone refers to a KA but there are multiple machines and hook types :)
You're right, clearly I should purchased many years ago the better model, but at that time I wasn't baking much of anything let alone bread.
Very nice pan loaf Doc. I have placed an order for a loaf pan, can't wait to bake my first pan loaf with it. I plan to do some first simple pan loafs at the beginning but eventually I would like to make one like what you have here. Thanks.
Thank you you Min, you will find this type of bread fun to bake and less hands on work than your baguettes.
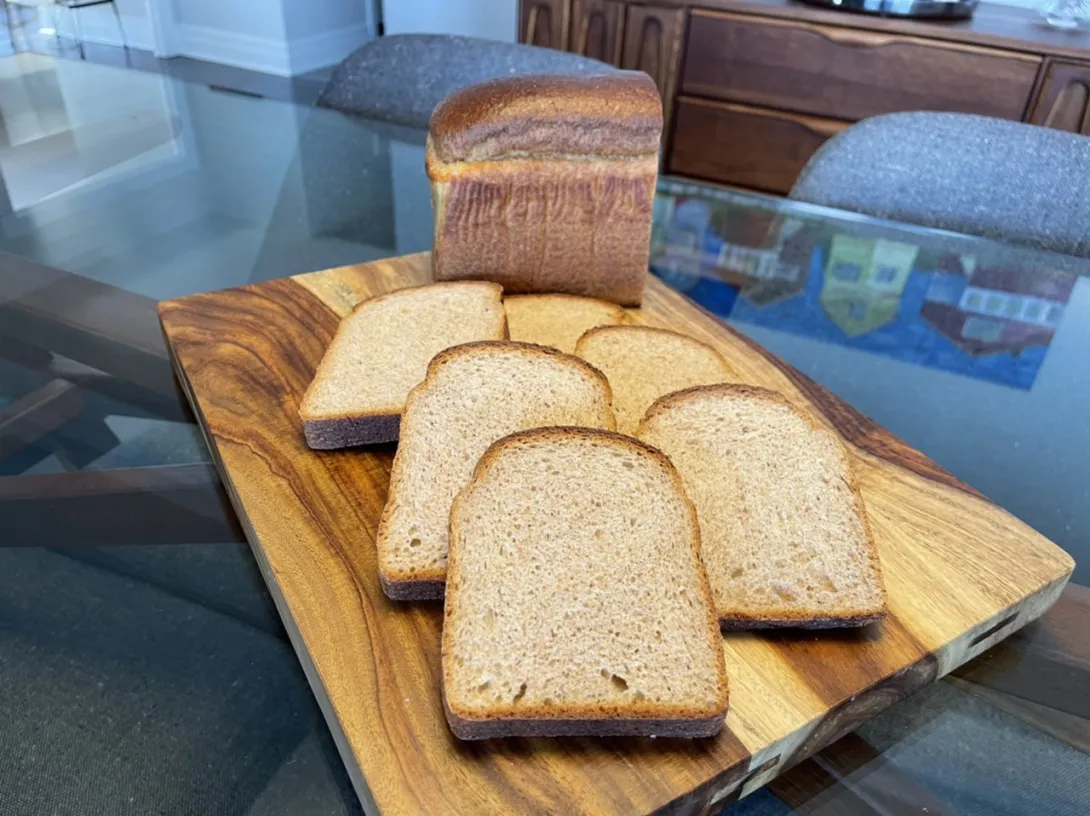
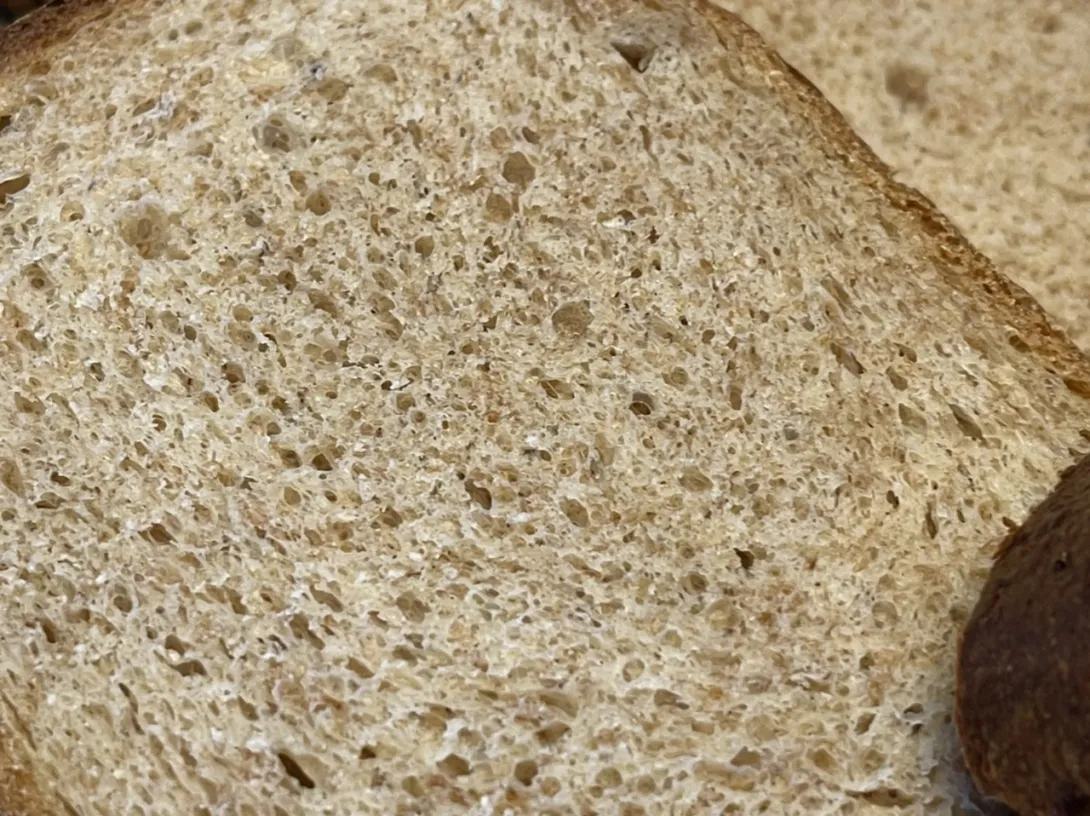
I’m not sure if it is my mind playing tricks on me or that it has been a while since I last ate Hokkaido milk bread fresh but this loaf seems a bit softer and more tender. Possibly not adding the VWG could explain this as well.
Image
Image
Good to see how well the bread turned out, Benito. Looks like your VWG-free results are a lot like mine.
Paul
Thank you Paul, yes very similar to yours.
Benny
Shokupan 食パン is Japanese traditional sliced pan bread, which is already softer and sweeter than western sliced loaf bread. Hokkaido milk bread 北海道乳パン is softer (because of richness), sweeter than Shokupan. It uses milk from Hokkaido region.
There is newer addition to this type of bread loaf in Japan, which is also very popular in Pacific Asia: Nama Shokupan 生食パン. Nama 生 means raw literally, but what it means here is you can eat it AS IS (no toasting). The main ingredients are flour, honey, milk, cream & butter. Normally the crust is not as dark as others. You can hardly notice the crust (as shown in the 2nd video).
This one does not use honey.
Ah thank you that is so helpful. I think I am now understanding the slight differences between shokupan and Hokkaido milk bread.
That nama bread I’ve seen before but called cloud bread or something along those lines. Thanks for sharing.
Benny
OK for some reason this question has really driven me into an obsession :p
Ok, so what could I piece together?
So my guess is shokupan was the application of a roux method to wheat to make a palatable form of white bread that was soft and sweet like sushi-grade rice dishes. It was a bread for survival and a kind of substitute for rice for portions of history. Perhaps post-WWII there was a focus on making the best of cheap wheat and powdered milk.
Perhaps with improved quality of wheat and milk it's been brought back as some kind of specialty.
This is what I could piece together. Unfortunately, historians and anthropologists are not bakers.
Wow you did some great research David and I thank you for that.
Yes I too read that shokupan just mean eating bread in Japan and I surmise that sandwich loaves of bread and simply call shokupan broadly. I’ve also since read like you have, that Hokkaido is well known for their milk products. From what I can tell, Hokkaido milk bread should theoretically be made with milk from Hokkaido and it tends to be somewhat sweeter than the usual shokupan. However, Westerners have sort of bastardized it and now (like me) are using the name eventhough the milk I’m using is from Ontario. Maybe I need to name it Ontario milk bread!
Benny
I like the volume and color of the bake. I tried VWG and maybe I over did it but it brought a tasteless rubber like quality to the bread so I stopped using it. I am intrigued by the sugar in the levain that you are using in this recipe. Does it ferment faster, taller, stronger with more staying power? Have you tried it in lean doughs? Does the brown sugar need to be organic? I have been waiting to see if other bakers are using it but I guess I will have to see for myself. Nice to see you busy in the kitchen again.
Don
Thanks for the comments Don. I didn't use VWG in this loaf and it is nice to see that I can get decent volume without it. In other breads I have used it I never found any negative taste from it, but perhaps I never used enough to be able to taste it.
In regards to the brown sugar, I do not use organic so no it doesn't need to be. The idea with the stiff sweet levain is that the low hydration along with the osmotic pressure exerted by the sugar has a dehydrating effect on the microbes. In this case a greater effect on the LAB than the yeast. As a result you get a larger yeast population compared with the LAB in the levain. This altered ratio is transmitted to the dough so you can bake a sourdough bread with much less sour tang. I have used this for both enriched and non enriched loaves, tinned and hearth. In the non enriched loaves there is no sweetness from the sugar in the levain that I could taste at all.
I do not find that the levain grows faster, in fact you will notice that it takes longer to peak than usual because the yeast are affected by the low hydration along with the sugar. However, the levain will hold peak much longer and the dough of the bread will also be able to withstand a longer bulk than usual because it isn't nearly as acidic as it would have been if you had used a standard levain.
You need to try it. I've done it numerous times now and checked pH and the results are all very consistent.
Benny
Hi Benny,
Thank you for posting this beautiful-looking formula. I'm planning this bread as the inaugural bake for my newly-accquired yecora rojo wheat! The hard red at my grocery store tastes so bland I never want to use it and end up only baking with spelt, which tastes lovely but some limitations in terms of how far I can push it before the crumb starts to compress. Anyhow, I'm looking forward to playing around with this recipe. I might even break out my sadly-neglected sourdough and build a levain, although since I doubt it will be active enough to really raise the bread I'll probably need to throw in a few grams of yeast when I mix the final dough. I know that some acidity helps the gluten strength on a whole wheat bread, so I don't want to leave it out completely.
Thank you again for your inspirational posts! I'll put a photo here once it's baked.
P.S. I think you meant to take out the mention of the VWG in the instructions. :D
Jess thank you for your comments and picking up on the VWG that was still in the instructions, I’ve edited that out now. If you do use your starter, you will want to get it really active and potent before trying this. The stiff sweet levain is challenging for the starter so if it isn’t strong enough, your levain will be weak and then your dough will ferment really slowly. I always look for my stiff sweet levain to grow 3-3.5 x before using it.
I hope you share your results, I look forward to seeing your bake.
Benny
Hi Benny,
Thank you for the encouragement! I figured the stiff sweet levain emphasizes yeast, so the formula would respond well to converting to a yeast process. But I confess I am kinda sweating bullets over the hydration.
Having made the tangzhong and the preferment, they both seem at a decent hydration already. I can't imagine trying to push the remaining 190 grams of flour into the mix. So I’m worried. But I do still have the egg and cream so maybe it will be ok.
I double-checked the numbers and as best I can come up with, your formula seems to pencil out at about 79% overall hydration, if:
Does that seem right to you? Anyhow, here's what I came up with for my IDY-converted formula/process. The Final Mix and Knead is where I’m worried things will go wrong. I don’t know. Maybe I should just incorporate the flour by hand and correct the hydration as needed, and then move the dough to the mixer for the kneading.
***********
Benito’s WW Shokupan Converted to IDY: Experimental Bake Using Fresh Fine-Milled Yecora Rojo Whole Wheat Flour
Note Overall Hydration 80%
Tangzhong:
30 g WW Yecora Rojo flour
145 g soy milk
Preferment with 3:1 ratio of fresh to fermented milks:
Final Dough Mixing:
Using dough hook in Bosch mixer, beat together:
Final Mix and Knead:
Proofing and Shaping:
My Yecora Rojo berries were still frozen when I milled them so the flour came out exceedingly fine; the bran is invisible. I’m excited to see how it tastes, assuming I can get it to all come out ok!
Hi Jess, sorry to take so long to reply. I usually consider milk to be 87% water and eggs 74%. Based on this I get the hydration to be about 84%, which isn’t all that high for a 100% wholegrain loaf. I also find that the tangzhong, doesn’t affect the way the dough handles despite it adding quite a bit of water to the dough. So although I estimate the hydration to be 84%, it handles like a lower hydration dough. If you’re worried, hold back a couple of percent of hydration somewhere, it is easier to add a bit more milk if needed later if the dough is too stiff.
Another consideration, you are using freshly milled flour where mine was not. That might benefit from a reduction of hydration as well. I don’t have any experience with freshly milled flours so I’m not sure about this.
Benny
I’m looking forward to seeing your bake. Good luck, but you won’t need it.
Benny
My shaping skills have a ways to go. I have a tendency to over-tighten and unevenly tighten, which leads to cute lopsided loaves like this. But the crumb was velvety and moist. The flavor was a little sweet for my taste but others loved it. The scent is the crumb was a bit odd. It was sort of winey or beery. That disappeared when it was toasted. Altogether a very fun and educational loaf of bread. And the Yecora Rojo mills and kneads like a dream.
Looks good. Next time try 30% less dough weight in the pan.
That windowpane is something!! Your crumb looks lovely and even. The loaf being lopsided is simply because the dough weight was too much for your pan. My formulas are for a pullman style pan 9x4x4”, your pan appears to be shallower so the dough simply wasn’t supported as it rose well past the rim during ovenspring. I’m sure your shaping was more than fine. I haven’t experienced the beer flavor, even when I have made this with IDY, not sure why that would be. But I’m glad you tried it Jess.
Benny
In the end I took the egg out, used 40 grams of cream and only 30 grams of butter.
The Laurels Kitchen Bread Book says that egg deadens the flavor of the wheat, and I really wanted to be able to see what the Yecora Rojo tastes like. So I decided to give up the structural support of the egg in favor of maximizing flavor.
Fortunately, the dough kneaded up beautifully and has a lovely silky springy quality. It made a nice windowpane, too, the nicest I've seen on whole wheat. (Probably something to do with how finely the frozen grain milled.)
The dough is getting the first bulk proof right now. I'm having a lot of fun with this project so thank you again for posting, Benny!