I'm a new sourdough baker and not sure where I went wrong with my first loaf. I followed this recipe to a tee: https://www.theperfectloaf.com/beginners-sourdough-bread/
Here's my sad, dense crumb:

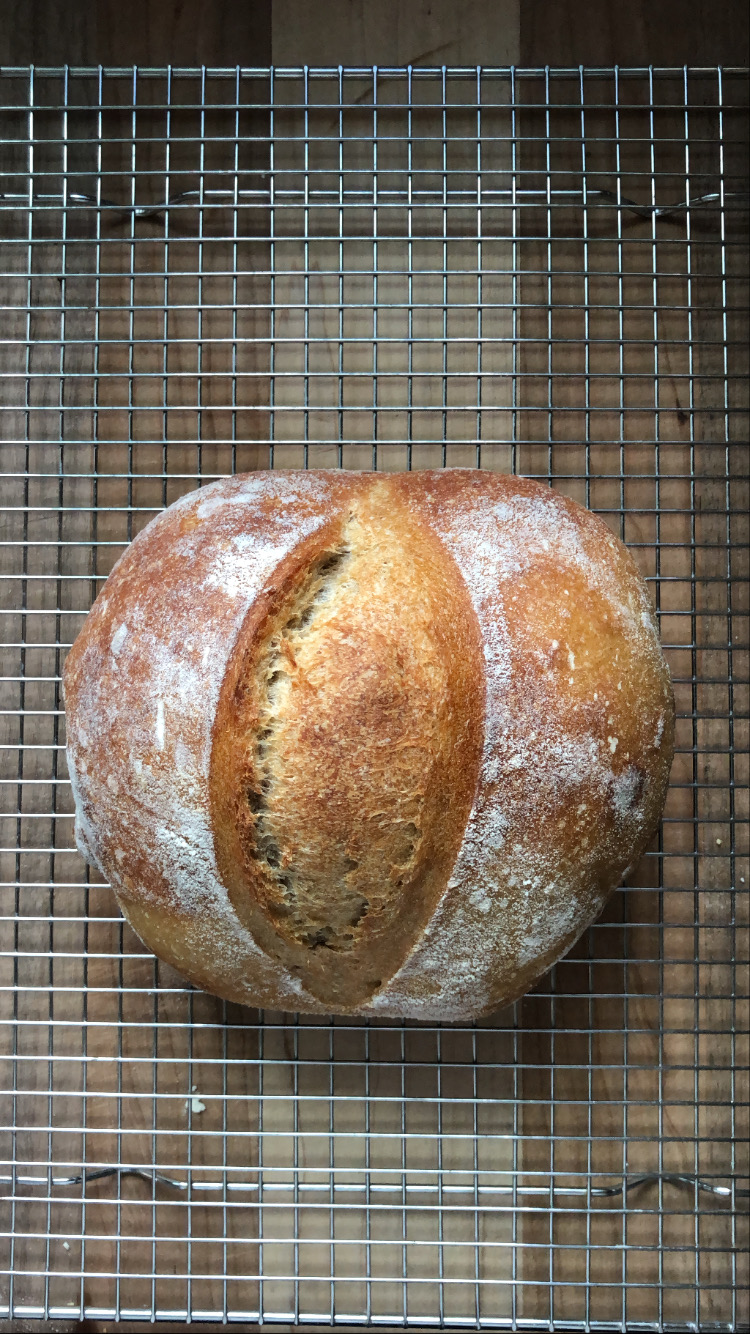
The outside looked better than the inside:
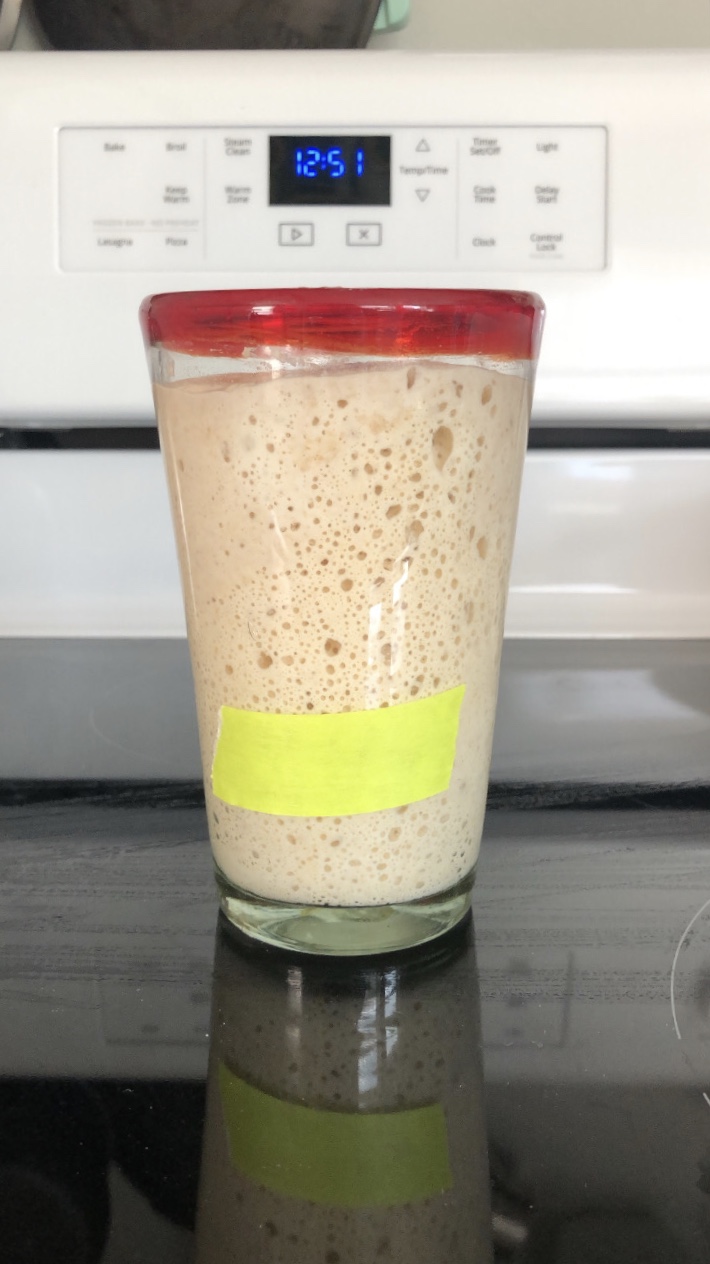
I'm wondering if it had something to do with the fermentation? Because the starter seemed really active. This was after 4.5 hours:
Any advice on how I should proceed in the future would be greatly appreciated. Maybe I should try a more hydrated dough? This recipe was 72%, which was recommended for a beginner.
First of all, good job on your first loaf! I'm sure that bread still tasted great.
This actually looks a little underfermented to me. An over fermented dough wouldn't have that rise or "oven spring". Slightly underfermented doughs tend to have an irregular crumb and rise, like in your picture. The fermentation is really the key here to get the crumb you're looking for.
You don't have to worry about the 72% hydration, that's fine. In this case, I'm pretty sure that all you have to do is let it ferment a little longer. Unless you happened to use cold water when you mixed it?
I just made a video on what I think is the easiest way to make sourdough as a beginner, I hope this can help you:
https://www.youtube.com/watch?v=RUf1WgyPOx4
Let me know if you have any other questions and I'll gladly help you out! Best of luck!
Thank you for the detailed feedback! This is really helpful. I watched your video and subscribed. I'm interested in trying this method but I'm curious why the autolyse step is skipped. Do you find it unnecessary?
My pleasure! Oh, thank you!
I'd love to hear how it works out for you. Well, the autolyse is not unnecessary but nor is it crucial. I made this recipe mainly with the intention to simplify and not discourage new bakers. I autolyse myself sometimes when I have the time for it but you can still get great results without it. It all comes down to the rest of the method and most importantly, gauging the fermentation.
The feeding ratio of your starter will also affect the fermentation time. So try to keep that consistent too, or at least keep it in mind if you change things up. That way you'll be more aware of what's happening and why.
Just let me know if there's anything else I can help you with!
Wow, this bread forum is like the last nice place left on the internet. Everyone on here is so helpful! If I try your method I'll definitely come back and share the results.
Looks like just a few tiny tweaks like degassing a little bit more before shaping. This alone will let you ferment longer when wtching the volume so that is my suggestion, pop those big bubbles when shaping the dough. If there are no big bubles to pop, let it bulk ferment just a tad longer. :)
Underfermentation seems to be the consensus! What signs do you look for with a properly fermented dough? I think following the recipe timings so closely was part of my downfall, but I'm unsure what to look for.
First - you're probably right about what happened - nothing to worry about as I'd estimate 90% of issues purple run into, especially when starting out, are due to following the recipe - namely the timings.
What to look for - most go by a % rise, whatever that happens to be. My go to test is how it feels. I'll call it the Jello jiggle - when the jiggle feels right it's good. For both fermenting and proofing.
I'll add a note on recipes timings - BEWARE - caps intentional. If you're using the exact same ingredients with the exact same starter in the exact same environment, odds are good timings will be close - that's all, close. As the odds are good that most everything will be different, the "recipe" will be different - and the really big difference appears in timings. The good thing is, once you get used to how your starter is working, adjusting a recipe will be easy (till the starter changes - and they can - another thing to watch for). Enjoy!
The Jello jiggle! I love it. Mine definitely did not have that, it seemed way stiffer. When I shaped the loaves, I remember thinking, "Well that wasn't that hard, I don't see what all the fuss was about with that step." But, now maybe I see that it wasn't ready!
Funny thing is - it really is like a bowl of Jello - feels alive almost. It takes a little getting used to, but once ya get the right feel you'll remember it (feel is a good asset to have - it's all I go by).
Oh, when shaping it may feel a bit stiffer anyway as it deflates a little, but it'll still have that jiggle. Enjoy!
Why do you pop bubbles when shaping? I thought the whole point was to keep the bubbles in. Thanks for the info--I learn so much from you!
Those bubbles are formed because of air getting trapped when folding/shaping and they will cause really large alveoli/holes in your bread when baked if you don’t pop them during folding/shaping.
Here's a useful post from KAF/Maurizio Leo on the bulk fermentation process and what visual clues to look for:
https://www.kingarthurbaking.com/blog/2019/07/22/bread-dough-bulk-fermentation
Thank you for the resource! I think I was so obsessed with keeping my starter thriving that I didn't even think about fermentation. This is really useful info.
I agree with the others that this loaf is under fermented. I didn’t see any mention of temperature, sorry if I missed that. You should treat temperature as an ingredient. Even if everything else was exactly the same as the recipe, if the temperature at which you’re bulk fermenting at isn’t the same, your dough won’t finish bulk at the same time. Higher faster and lower slower.
I baked that same bread many many times and if my memory serves me correctly Maurizio tells you to aim for a final dough temperature of 78ºF. If you finish mixing and your dough is 78ºF and then ferments at 78ºF then your timings should be similar to his. If you’re bulk fermenting at a lower temperature it could take a lot longer which perhaps is what happened.
Benny
Thanks Benny! So you're saying it should be a consistent temperature throughout, preferably close to 78? I only measured the temperature once when I mixed my levain with my autolyse, and it was 80 then. That's all I know.
Hi Sarah. Yes that’s great that it started out at 80ºF, that is very close to the Final Dough Temperature that Maurizio aims for in his recipe. Ideally if you expect to follow his timings, you will want to check the dough temperature frequently and try to keep it around 78ºF. If it goes a lot higher, your dough might ferment quite a bit faster and you could end up with overproofed dough. If your dough is much cooler and you follow his timings then you will have underproofed dough as yours was. So don’t forget, temperature is an ingredient in that way because it affects the fermentation just like the levain. Once you get used to what well fermented dough feels like then you’ll know when to stop bulk, but until then, if you’re following a recipe, also follow their recommended temperatures.
I don't think I fully understood the "temperature is an ingredient" thing until I tried it myself and started reading about these pitfalls. It makes so much sense. I really appreciate your help.
Sarah I’m sure your next bake will be more successful. Please report back how things go, it is true this forum is probably one of the last places on the internet that is still a nice place to be. The members are always super helpful, they certainly were with me a year ago when I was starting out.
Good morning bread friends,
I tried veideway's beginner/paired down method and had better results! I did bench shape the loaf because that's what I was used to; otherwise, I followed the method and looked out for signs of fermentation. I also added a little water to the recipe because mine looked stiffer than the video (I wonder if my scale is off or my bread type is way different). I'm not sure if I got the jiggle as much as I expected to, but I did let the loaf shape in its proofing bowl at room temperature much longer than my other loaf, and used the poke test with success!
This one doesn't look as good on the outside as my other one, needs a little more browning I think (I was kind of rushed this morning tbh).
Not as high either.
But look at my little baby ear!!!
Not sure what this weird dent is about... (but you can see my extremely active starter in the background!)
But look at my crumb!!!!! So much better and lighter and tastier! Obviously there's still a lot of room for improvement but I think this is worlds better than the other one.
Side-by-side comparison The first one from last weekend rose more but also kind of slumped, and the crumb was soooooo dense. The whole thing feels very brick-like in comparison to my new loaf. Maybe not fair to compare since they're different recipes, but I think I'm on to something with paying more attention to the fermentation.
Thank you to everyone who helped me troubleshoot! If you have any more thoughts on how I can improve, let me know <3
Love the side-by-side comparison...
extending the bulk rise by 30 minutes. Can you see how the outside shape is firming up to hold itself during baking? This gives you a little more time in the final rise. If the room is cool, cover loaf in banetton with a folded towel tryingto keep the upper and lower dough the same temperature.
The new one looks great! I think the majority of the openness at the top indicated overproofing (after shaping), right?