For about the last year I have been working to understand exactly what is going on when a properly proofed and slashed loaf is baked with steam. What is the role of the steam? What is the role of the yeast? How does hydration and proofing impact the results? Deep slash or shallow slash? What are the differences between large and small loaves? ...
After a number of false starts, I have produced a short video showing what is going on. It is annotated but not narrated. I offer it for critique. What is missing? And what questions are not addressed?
You can find it at:
Doc
- Doc.Dough's Blog
- Log in or register to post comments
Will try harder to produce a slash that helps - not hinders - the oven spring.
That was helpful. Thanks for posting!
of why we need to score at an angle. I never knew why. Once I know why, it will help me remember to slash at an angle. Thanks!
And awesome video!
I like to think of it as a flap that has to be thin enough for gravity to hold it closed until the steam gets the surface cooked. If you are underproofed, the dough will expand as soon as you slash and open the gap. If you are over proofed it is hard to get a clean slash without deflating the loaf and it tends to re-connect and not open cleanly. The longer you wait from slash to oven entry the more likely you are to have it not open the way you want it to. I usually slash less than 60 sec before it goes in the oven.
I always like those speeded up videos showing the process in action. Super looking batards too!
Your oven looks deeper than a typical oven. Or are these mini-batards as I have been making recently.
I guess whether it is a baguette or a batard depends on whether your definition of each is based on diameter or length/width ratio. To me these are short baguettes served as dinner rolls. Each roll is 128g of dough at 68% hydration (for me, but it will depend to a small extent on your specific flour). They finish at around 105-110g.
BTW - the critical minimum diameter of 2.5" is for a proofed loaf. Somewhat smaller than that and I can still get it to open but not enough that I can pick it up by the ear. At some even smaller diameter it just doesn't have enough cross-sectional area:circumference ratio to stretch the skin to the point of fracture.
The oven is a small Rational/HennyPenny combi so it will take 6 half-sheet pans that are 12" x 24" (approx).
Well done and thanks again for the help with the bran levain project.
Happy baking
Thanks. The other project is still open, waiting for a better understanding of the underlying chemistry. We both know that it works empirically but I don't like to publish until I think I really understand what is going on, and so far I have more questions than answers.
Just to have the notes here in case the YouTube video goes away, here they are:
This is an 8X time lapse sequence of some mini-baguettes baking in a Rational/Henny Penny combi oven. It shows in good detail exactly what is happening when a properly slashed loaf blooms in a steam injected convection oven. At realtime speeds this is a very boring clip, but when accelerated you can almost see how the surface of the dough is initially cooked by the condensing steam, followed by volume expansion that occurs fast enough to stretch and tear the surface along the line of the slash (before it has a chance to cook), followed by continued opening of the slash and exposure of more uncooked dough surface, then browning ( which is not complete at the end of this clip). To get this behavior, you need to slash in a way that hides the bottom of the slash from the heat of the oven until the rest of the (exposed) surface is cooked enough that it is inelastic and the oven spring begins to open the seam. This requires a shallow slash angle and a cut that is about 3/8" deep. If you slash too deep, the loaf circumference will expand by twice the depth of the cut, then allow the dough to stretch without tearing. If you don't slash deep enough, the surface of the dough on the sides of the cut will become tough and be too resistant to tearing when it begins to expand. When the internal pressure reaches the bursting point, the surface will give way someplace you didn’t choose and it will blow out (generally along the side near the bottom where the side meets the heat of the pan). If the dough is over-proofed it will expand without ripping along the slash. If it is under-proofed it will open along the slash but also blow out in other locations and the crumb will be tight. If the loaf is too small, there is not enough potential volume expansion to tear along the slash line (minimum loaf diameter needs to be at least 2.5"). Slash along the length of the loaf rather than on the diagonal - slashing on the diagonal allows the dough between the slashes to act like belts and keep the loaf from fully expanding (you can use three or four overlapping longitudinal slashes if done correctly - but a single full-length slash is probably easiest for beginners).
David
Picture-perfect like the ones seen in bread books! Thanks for sharing the helpful video and analysis!
Yippee
Getting there is less difficult if you know which pieces matter and which do not contribute so much.
My two cents worth on the order of importance (but others may have a different opinion):
Hydration - the dough has to have enough stiffness to tolerate being cut (I like 68% hydration but it will be a little different depending on your flour)
Proofing - over/under proof tolerance is narrow but underproofed is better than over (and retarding/refrigeration makes it handle better in any case)
Oven and steam - you need immediate heat to cook the surface starch before the dough begins to expand; steam does this most quickly.
Slashing technique - a curved lame is helpful but not critical (though it makes it much easier), and a very sharp blade
Dough development - (this includes the effects of your flour choice) there has to be enough gluten development to hold it together but perhaps not as much as you might think.
Doc:
In your opinion, what's the optimum time for steam to achieve a crackly crust?
Yippee
By that time, the surface starch is fully cooked and strong enough to hold up to the internal pressure of the expanding CO2 everywhere except where you have designed for it to break open.
What happens to the dough if it's over steamed?
it looks a though the Doc is working with professional equipment and a steam injection oven. And although I will not parry what he said about adequate steam I, as a home baker, have a different steaming strategy and timing. And I believe that it works out fine for me.
I employ both Sylvia's Steaming Towel and also a 9"x13" panned loaded with lava rocks - which gets splashed with 2 cups of near boiling water just after the dough is loaded. What dabrownman calls "mega-steam". And I let it go for 12-14 minutes during the initial bake cycle. After that I vent the oven to release the remaining steam and remove the towel.
I can find no negative impact of allowing the steaming phase to continue for this long. It takes approximately the first 5 minutes under steam for the dough to really start to bloom, so I perceive that 5 minutes is too short a period for me. If I removed the steam after 5 minutes, I'd have concern that the crust on the dough would begin to set too early.
There is one way to find out what happens and that would be to test both ways to see whether your results are better, worse or unchanged using a shorter and longer steaming phase. Do tell....
when I start baking again. Thanks for your input, Alan.
Yippee
When you toss two cups of even boiling water on your lava rocks, there is an energy balance that still has to be dealt with. If the heat stored in the rock is insufficient to boil all of the water, the oven will have to make up the difference and effectively takes away from the capacity of the oven heat source until all of the water has evaporated. You can do the calculation to figure out how much energy it takes and adjust the amount of water accordingly.
This comment made me go back to basics to rethink what is going on in the oven when there is steam in the mix. Here is what I think:
The oven is filled with a mixture of air and water vapor (steam) and at whatever altitude you are baking there is a surface temperature below which the steam will condense and deliver the heat of vaporization and some hot water. Even in the rare oven that is air-free (filled with water vapor only) the dew point is below 100°C/212°F. Thus when the dough surface exceeds the local dew point, the steam stops condensing and further heat transfer by condensation ceases. So the value of steam after the bread reaches that point is zero since everything thermal that happens after that is convective, conductive, or radiative heat transfer. The timing of when that occurs will depend on lots of factors, some of which you can control. If your oven walls are not really hot, then the radiative component is less and the period of condensation can last longer. Water on the surface of the dough will evaporate and keep the local temperature lower than it might be otherwise. A convection oven can greatly accelerate the heating of the dough surface too (and also accelerate evaporation). A hot baking surface (I am thinking tile or ceramic plate) will deliver bottom heat quickly but also will slow down heat delivery after a few minutes as it cools to near the surface temperature of the loaf (hot enough to drive the Maillard reaction and occasionally hot enough to fully char it too, but if not fully pre-heated the bottom can suffer).
So you have lots of knobs to twiddle with in determining how your bread bakes.
loading the dough and introducing the big steam burst via the lava rocks. In fact each and every time that I open the oven door, whether to rotate the breads for even baking or for release of steam, I re-fire the oven to try and minimize temperature drift.
The pan of lava rocks resides immediately above the heating element, and after 45 minutes or so of the rocks pre-heating the water starts to bubble and creates billows of steam instantly. The water in the lava rock pan has long since dissipated by the time that I remove the towel and its steaming capabilities.
My baking deck which is directly above that pan does have two different temperature zones. I picked up an infrared temperature gun when I bought this new oven two years ago and there is something like a 20dF-25dF difference in temperature between the left and right sides of the baking deck. (Not so) coincidentally the pan sits just below the cooler side of the baking deck. Yet another reason to rotate the dough inside the oven.
Understood that the dough cools down the surface of the baking deck where they reside. I also remove the parchment paper sheets when I release the steam and rotate. Even that creates a buffer between the dough and deck. The rotation of the breads has another function. The breads are moved so that they are not sitting exactly on top of where their brethren dough had just been. Close but not exact, and therefore the rotation provides some new, previously virgin deck area which had not been occupied by dough a few seconds earlier.
One additional area that I remain cautious of is the distance between any two doughs in the oven. Too close together and they act as mutual insulators with underbaked side-walls.
You clearly know how to adjust the levers and knobs.
Check the oven wall temperature as that is the source of the radiant heat for browning. What is the deck material? And does it look like it is all the same color? The IR thermometer reading has an emissivity term in the calculation that converts diode current into observed temperature. Most devices assume a value of 0.9 and residual char on a deck can effect that a little which can make the observed temperature differ somewhat more across the surface from what you would measure with a thermocouple.
And It sounds like you have water in the pan of rocks during the pre-heat cycle and I suspect that is not the case.
Unfortunately for me, your technical discussions are over my head, so I can only absorb a small portion of tech-talk. And although I'd like to contribute on your level, it is beyond my scope, so I'll have to speak on simpler terms :-( .
The oven walls seem to be close to the requested temperature but once I was comfortable that the oven was adjusted properly with the gun and an analog oven thermometer I haven't checked them in a long while at this point.
My oven deck is composed of unglazed 1/4" Saltillo paving tiles, although through a few years of continuous tile cracking I'm about to try out a scrap piece of granite instead (ala Lazy Loafer, but only a single slab for one deck).
One other point is that with this being a convection oven, the re-fire cycle engages the fan to facilitate the recovery and then shuts off. I have never otherwise used the convection feature on the oven, and the fan is employed by design rather than my initiating it.
The only pre-bake water introduced is at ~15 minutes prior to loading the oven. And that is via the Sylvia's Steaming Towel. The lava rocks get bathed only after the dough is loaded, and then the oven door is shuttered for the duration of the steaming cycle.
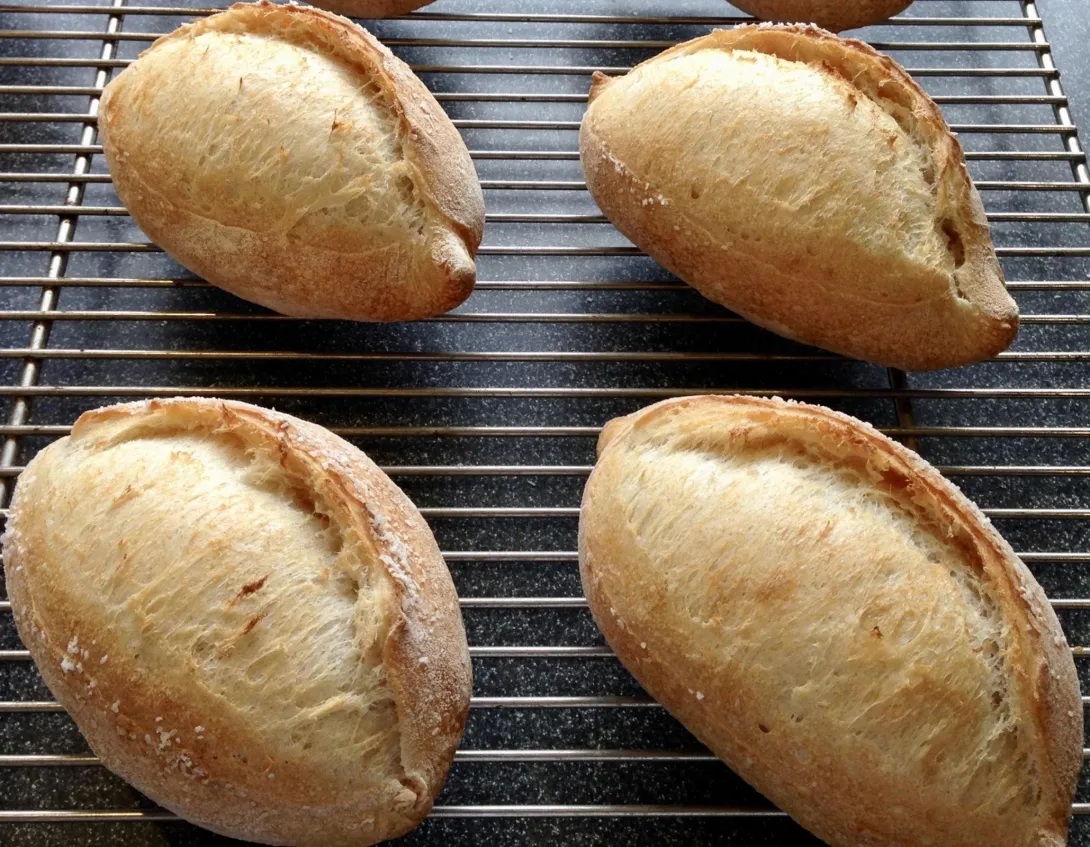
This is what my set-up looks like just after steam is released, parchment paper removed and dough rotated. Quite similar to your video, just by chance. These are ~250g sesame semolina batard-ettes.
Your little sesame rolls look spectacular; I can tell you have been at this for a while.
I still have two sets of quarry tile, some old 1/4" red 6x6 and some 3/8" 4x8 wood-grain versions. Still use them occasionally if I want to make naan or a big pizza (bigger than the 11" dia that fits in my combi), or as weights for a Ciccioli terrine. Work great, but recently I have found that a metal plate works better for pizza (called a pizza steel if you go looking for them on-line). I use a 3/8" thick aluminum plate rather than 1/4" thick steel. Essentially the same heat storage but it heats up faster and give it up faster so pizza takes less than 3 min if it starts at 550°F.
You might try using the cloth towel as a wick to move some of the water that is not immediately flashed to steam on the rocks up to where the oven convection will evaporate it more quickly. Put the towel under the lava rock and drape the ends up and over a wire fixture to get it into the air stream. If you can find some old woven fiberglass drapery material it will take the temperature and it will wick the water too. It is a little hokey looking but it works great.
Another trick you might want to consider is to get another oven rack (that same rack has been in production for at least 15 years and there are lots of them out there on Ebay) and put a layer of thick (1/2") tile on it and load it as the top rack in the oven. If you preheat to 550°F which as I remember is the top setting (but one that the oven never actually gets to) the top tiles will give you another mechanism to stabilize the temperature fluctuations. The convection feature (which may be called Fastbake or Quickbake) dramatically reduces the temperature cycling and the extra thermal mass helps even more. I don't remember if there is a way to offset the thermostat for "calibration" to get another 25°F at the top end.
Doc,
Nicely done video. Great demonstration of what is meant by "oven spring". Nice Batardette - perfect for catering biz...,
Wild-Yeast
Great video!!
Here is a test matrix that examines the effects of proof time and various aspects of slashing technique. The baseline batch proofed for about 1:40.
Terminology: A curved blade is a double-edged razor blade on a Starbucks stirring stick; a straight blade is 60XT scalpel (otherwise known as a cadaver blade). A shallow slash is less than 1/8" deep; a deep slash is about 1/2" deep. Unless otherwise noted, all slashes are between 1/4" and 3/8" deep.
Note the consistent blowout of the unslashed rolls - if you don't tell it where to break, the dough and the oven will decide. And waiting does not increase oven spring as you can see from the approximately equal size of the blowouts on the unslashed rolls. The blowout on the unslashed and most overproofed roll is what I think of as a classic case where the weak spot is close to where the loaf meets the pan.
Also note that the baseline + 60 min proof produces slightly less oven spring irrespective of how it is slashed (perhaps because the dough has begun to leak before it is fully expanded).
The deep slashes produce areas on both sides of the cut where the dough is stretched and you can see the residual imprints of the small bubbles that were sliced by the blade.
As the dough becomes overproofed, it benefits from a more shallow slash, but it does reach a point where even that doesn't save the final appearance of the product as the dough becomes too weak to bloom much at all.
Bread need high heat and steam to spring well. These two things don't go well together. I tested my two stones using Maga Steam three ways. If I let the stones heat up to 500 F and then added the steaming towels (from the microwave) and dropped a cup of water on the lava rocks as I closed the door when the bread was loaded this gave me the most instant steam without lowering the heat of the top and bottom stones and the bread springs the best.
2nd best is to heat the oven with the stones inside to 500 F then load the towels and the lava rocks with the pans half full of water and then let them heat for another 15 minutes before loading the bread. There was steam but not the burst of steam you get from the lava rocks in option 1 plus the stones were no longer as hot option one.
Option 3 is the least effective, This is where you load the Mega Steam when you start the preheat and when the oven reaches temperature you load the bread. You have the steam but the stones are not as hot.
I determined that it was more important to have hot stones and surfaces rather than lots of steam but hot stones and lots of steam is the best. A DO is a compromise. Hot surface but not much steam in the beginning to gelatinize the starch quickly so it is more like Mega Steam option 2. The beauty is that the DO is easy compared to Mega Steam but Mega Steam option 1 is the best and when making a bunch of bread at once it is by far the best and cheapest way to go than a load if DO's. If I'm making 1 loaf if bread I use a DO because it is easier and nearly as good..
Happy baking
do you steam, DBM?
longer. A 1000 g loaf about 20 minutes and a 500 g one about 12. My usual is about 18 for most of the ones I bake.
It turns out that the oven and dough conditions determine when you effectively stop steaming. If the surface temperature of the baking bread exceeds the dew point in the oven, the steam can no longer condense on the surface and you stop getting any benefit from the remaining water vapor in the oven. Every oven is different but the second most important heat transfer mechanism is usually radiation - the exception is a professional convection oven. In that case the wall temperature is very close to the air temperature and the walls are probably stainless steel and thus reflective, so the emissivity is reduced and the effective radiant temperature is actually less than the air temperature. In that case, convection is the second most important heat transfer mechanism. Of course conduction from the surface that the dough rests on dominates what happens on the bottom.
From a practical perspective, if you have not cooked the surface starch before oven spring begins stretching the total surface area, the value of further steam is reduced so it is a competition between surface heating by condensation and radiation, and volume heating of the dough by conduction through the outer layers.
My experience is that after 5 minutes you are not getting a lot of benefit.