After some very rewarding attempts at baking a poolish-based grain-loaded Swedish Rye Bread, a biga-based caraway-seasoned Schwarzbrot and a Tangzhong-based Fluffy Milk Bread, I decided to be really bold :-) and try my hand at some simple baguettes!!!
To make it easier on this overly enthusiastic neophyte, I decided to try my hands, literally, at JMonkey's adaptation of Hamelman's Poolish Baguettes.
No bread machine this time around! Not even in its dough cycle!
The whole process, although time-consuming (almost 5 hours from the initial mixing of the final dough to the end of the baking of the baguettes), was easy enough and everything went smoothly from start to finish.
The only problems I encountered were related to my natural shortcomings at (1) kneading the dough, (2) s&f-ing it, (3) dividing and pre-shaping it, (4) shaping the baguettes and (5) baking with steam. There is a whole lot to be learned and mastered about these phases of the process!!!
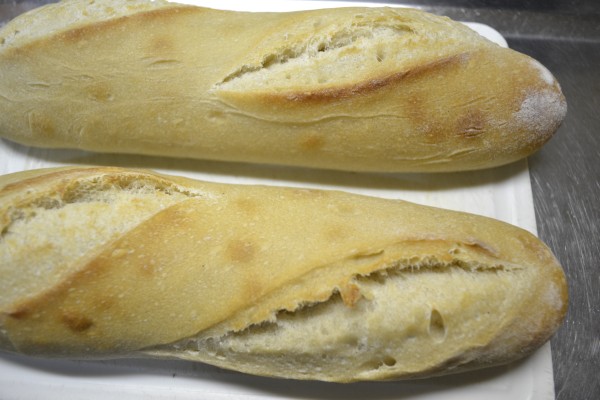
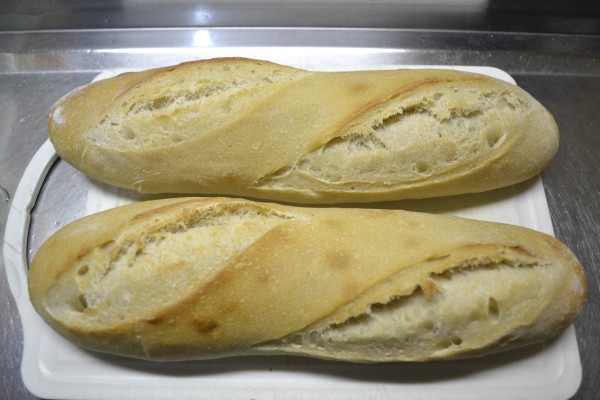
Surprisingly enough, my first ever scoring of loaves yielded very nice results, even though I used a regular kitchen knife with a very sharp 3" blade.
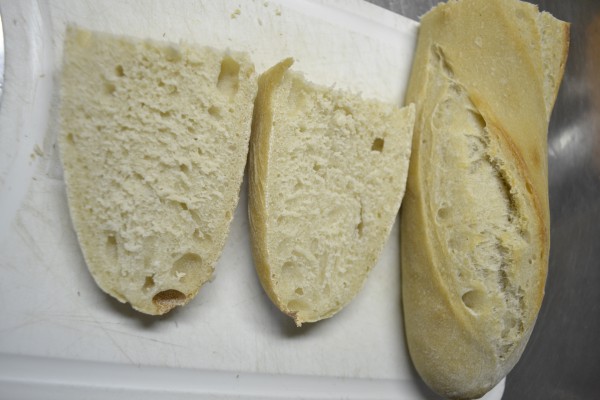
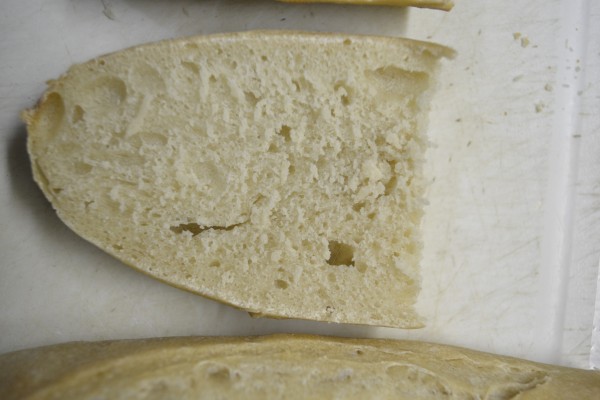
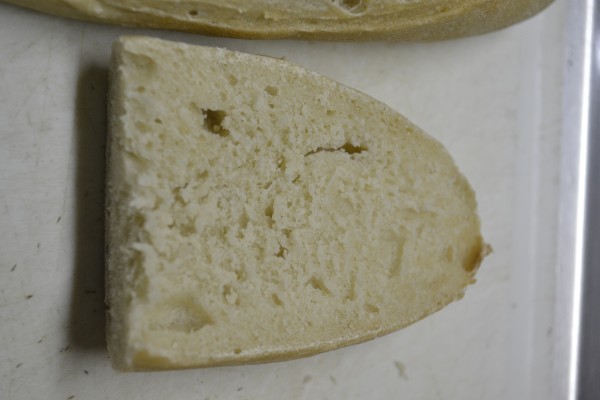
The baguettes came out very nice looking and very good tasting. However, neither the crust was as crisp as I had expected nor the crumb was as open I had hoped for.
One factor might have been a not-high-enough oven temperature; another, my lack of experience in baking with steam. The rising obtained after shaping the baguettes and/or the oven spring verified while baking, might`ve been insufficient given that the final shape of the baguettes was more hemicylindrical than should have been (the bottom was flatter than should`ve been).
By the way, the baguettes were all baked on the back of an aluminum tray (sorry, no stones available!) in a conventional oven preheated to 460 oF (or at least that`s what I thought). Steam was provided by boiling water in a tray placed at the base of the oven and by some room temp water sprayed on the side walls at the start of the baking process and also after 5, 10 and 15 minutes.
Well, let`s cut to the chase and have a look at some pictures.
The crust
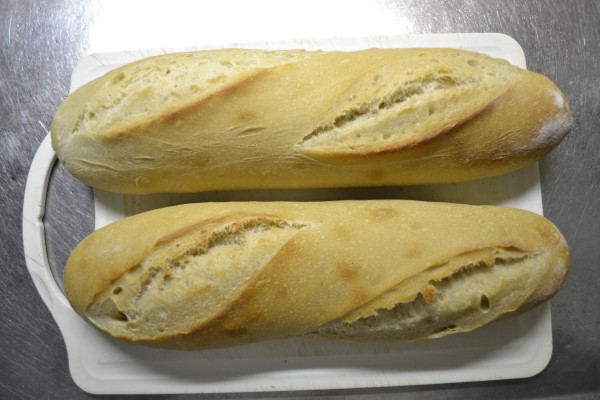
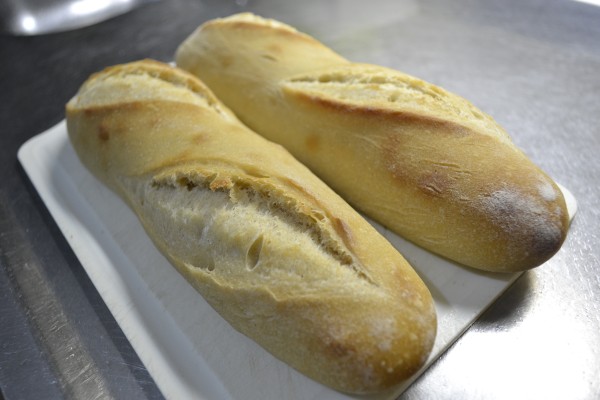
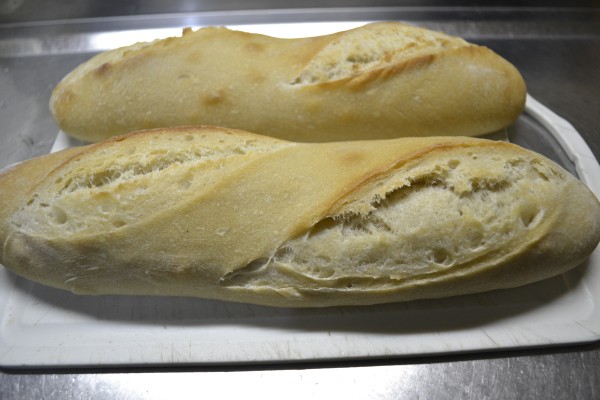
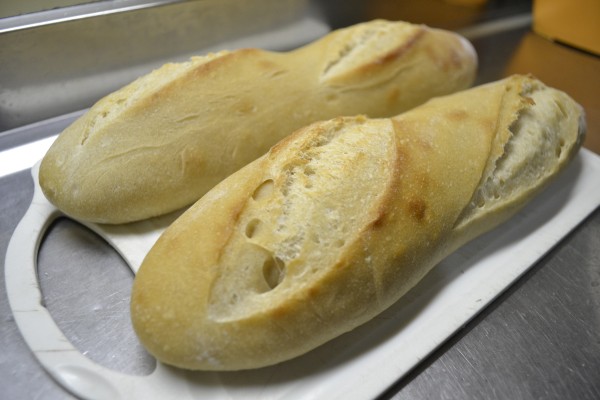
The crumb
So, this was my fairly successful first attempt at baguette making.
All suggestions and comments that might help me improve my baguette making in the future are 100% welcome!
Have a great week!
I can't offer suggestions, other than to say that is some pretty good looking baguettes for your first approach. Hamelman points out in his Baquette recipe that the most basic of recipes can be the hardest to master. I haven't looked at the Jmonkey adaption in very much detail, but see it recommends passing the window pane test while mixing. Hamelman advises against that saying it hurts the flavor - instead he wants it under kneaded. Here is a youtube where he shows the consistency of the dough leaving the mixer - no where near a window pane http://www.youtube.com/watch?v=ZnxiawZoL4A
If you have 2 of the same baking sheets use two of them overturned to bake on instead of 1. Also throw a rolled up kitchen towel in the pan with the water and use two of them. I bake with (2) Pyrex loaf pans with a towel in them half full of water and a 12" cast Iron skillet with lava rocks in it also half full of water. This produces mega steam. make sure your oven is heated to 500 F for the preheat and give it time to stay there.
Baguettes are the hardest bread to make and get right but every attempt will get you closer to what you want. I think the KA website has baguettes at 67% hydration. Eventually, you will want to get that up to 75% for the big holes.
For a first attempt yours look pretty good - a little on the fat side. Maybe longer and thinner with 3 slashes will fit on the back of the baking sheet, on a angle, one at a time.
Happy baking
Thanks for the advice!
Actually, I did already use 2 overturned baking sheets, one on top of the other. On the other hand, the rolled up kitchen towels in the pan with the water is a new idea to me. I'll certainly use them next time. Unfortunately, I have no lava rocks! :-(
Should I have squished some water on the oven ceiling over the baguettes? I only did it on the sides.
The recipe I used is indeed of a 67%-hydration baguette (480 g flour x 320 g water). To get it up to 75% hydration would be just a matter of increasing 40 g in the total amount of water.
I could do this when preparing the final dough, by adding the final 320 g of flour with 200 g of water, instead of the 160 g specified in JMonkey's recipe. Would this be a good idea?
Yes, indeed the baguettes were a little fatter than they should've been. Credit this to my utter inexperience on the subject. Fortunately, this is pretty easy to fix in future attempts, using the shape you suggested.
A propôs, wouldn't the baguettes benefit if the final 320 g of flour were autolysed for, say, 30 minutes before mixing it with the poolish?
Thanks for your help. Have a great day!
You don't have to have lava rocks any rocks will do. But don't do like I did by putting Colorado Mountain rocks collected while hiking. Wash them first and bake them off ahead off time ....to remove any lingering outdoorsy smells that will transfer their linger to your house :-)
Don't tell anyone about my super secret stone replacement that follows. If you can find some smaller rocks say 1/2 " thick, you can nest them between your two cookie sheets and replicate a stone much better too - but don't tell anyone! If you are really nutzoid like my apprentice, you can also pour some sand between these rocks and really get a nice stone like effect.
I would do an autolyse at 67% hydration and use the extra 40 g of water to dissolve the salt in and then add it to the dough 15 minutes after the 20 minute autolyse meets the poolish. Just squish the dough through your fingers until the water and salt are incorporated. You might want to go up 20 g at a time till you get the hand of wet dough. I would do a couple of minutes, maybe 4, of slap and folds to get the gluten development half underway then switch to S&F's so that the bigger holes won't be harmed. Use a very light hand with the S&F's too. Check out txfarmer's blog on 36 hour baguettes too - beautiful magic and a wonder to behold!
With proper steaming apparatus you don't need to spray anything.
Happy baking
... mon cher dabrownman, your tips in the next to last paragraph above almost overwhelmed this poor neophyte!!! :-)
Let me see if I got it right? Let`s go over all of it one step at a time.
Step 1: With the poolish ready, I should autolyse the remaining 320 g of flour with 160 g of water (as called for in the original JMonkey`s recipe). Is that it?
Remember, while the final dough is at 67% hydration and the poolish at 100%, these 320 g flour that will undergo autolysis will be at only 50% hydration. Will this autolysis work properly?
Roger, mon cher dabrownman!
with jmonkey's recipe but knowing what I know now I would be tempted to reduce the hydration of the poolish down to say 85-90% and use that extra water plus 30 g of the 40 g more you are adding - to up the overall hydration to 75% to get the hydration of the autolyse to over 60%.
You can then dissolve the salt in the remaining 10 g of added water and squish it into the dough through your fingers. The poolish which is heading toward a liquid biga, will be a little slower to rise since yeast love wet and less wet for yeast means more time to get to the point is it ready to use - but not much.
You can speed it along by putting the poolish on a heating pad that is moderated with layers of towels to 82 F. Just cover the whole shebang with a towel to hold in that 82 F
Let`s see!
Step 0: prepare poolish with 160 g flour, 140 g water and 1/32 tsp (0.11 g) ADY (87.500% hydration) and let it rest for 12-16 hours at room temperature.
Note: this way, we are reserving an extra 20 g water for the final dough.
Step 1: when poolish is ready, autolyze for 20 minutes the remaining 320 g flour with 210 g water (65.625% hydration) at room temperature.
Note: now, we are reserving the final 10 g water for dissolving the salt.
Step 2: dissolve the salt (9 g) in the remaining 10 g water.
Note: combining these three items will yield a final dough at exactly 75% hydration.
Step 3: thoroughly mix poolish and autolyzed flour and let the resulting dough rest for 15 minutes.
Question: shouldn`t the remaining ADY (about 1.6 g) be incorporated into the dough during this step?
Step 4: mix salted water into the dough by squishing the wet dough thru your fingers.
Step 5: slap-and-fold the wet dough for 2 to 4 minutes.
Step 6: follow with some stretching-and-folding using very light hands.
Question: how long should the stretching-and-folding last?
Up to this point, would these be the correct first 6 steps in making the 75%-hydration baguettes?
Please, be patient! I`m a very meticulous learner! :-)
Take care, mon cher! (good rhyme, ain`t it?)
to adding the ADY there. When i say light hands I mean to get txfarmer ( I call her Empress Ying who I think is Emperor Ming's daughter because her baggies are out of this world) to to come over and do the S&F's for you :-) Don't moosh it ( a real baking term that gets little use in my book) out too much before gently flipping / folding the letter, 1/3rd over the middle 1/3 and then the other 1/3 over the stacked 2/3rds. And then gently put it under cover to rest. Folks, especially men, are too rough with baggie dough - I know for a fact I am. It is easy to over do it and almost impossible to under do it if you aren't Ying.
Floyd should pay her to do a video of how she does her 100% whole wheat baguettes and gets those huge holes in them.
just hunky dory and everything looks good. This batch will be much better than the last one i'm guessing but your first attempt was so good the jump on the 2nd bake won't be as great
It will be more difficult to slash when it is more wet. On one of them you might try supporting the dough gently like a clamp between thimb adn index finger with the left hand as you slash, with a double edge razor blade in a lame iwith the right hand just to give it some lateral support and see if that works better.
Some say they are easier to slash when the top skin dries out a little bit too. Slash at 30 degress to the top surface a very shallow angle that doesn't see like the right thing to do. I am the worst slasher of all time like I used to be but I think I know how to do it even if i can't do it right hardly ever :-)
Happy baking