I am back today, to tell you all about one of our favourite breads these days: Pain au Levain. I’ve baked this bread using one of Codruta‘s recipes and we loved it!
Time schedule:
Day 1: Make the preferment, leave for 8-12 hours at room temperature to mature. I don’t know exactly what the temperature in my kitchen is over night…I guess not above 21C. I usually leave my preferment for around 12 hours until it’s nice and bubbly and has not sunk. You can test if it’s ready by putting a spoon of it in a bowl of water, if it floats it’s ready, otherwise it needs more time. This time I only left it for 11 hours.
Day 2: Make the bread
- Mix the preferment with the water and flour.
- Leave to rest for 45mins (autolyse) – The initial recipe calls for only 30mins, but I just couldn’t attend to it due to having some other stuff to do, so I’ve left it for 45minutes.
- Add the salt and mix for 1 minute on speed 1 and another 3 minutes on speed 3.
- Leave to rest for 50mins
- Perform 1st stretch and fold
- Leave to rest for 50mins
- Perform 2nd stretch and fold
- At this point we had to leave the house so I’ve put the dough in the fridge for 3 hours. The recipe called for another 50mins rest and then the shaping, but I couldn’t do that. If you are at home, by all means don’t put it in the fridge just give it another 50mins rest after the 2nd stretch and fold and then pre-shape it.
- I took the dough out of the fridge after the 3 hours, performed another stretch-fold and left it for another hour to come to room temperature. Skip this if you have done this the proper way with 3 – 50 mins rest sessions and 2 stretch and folds.
- I shaped my bread in a batard shape and left it to proof in a floured banneton closed in a plastic bag for 2 hours 30 minutes.
- Bake at 250C for 5 minutes then reduce the heat to 220C for another 35 minutes then bake for another 5 minutes with the oven door ajar. If you have a bigger oven you can try to bake it the proper way: 45 minutes in total at 230C with the last 5 minutes with the oven door open.
Sourdough culture: I use a 100% hydration sourdough culture: 90% whole wheat, 10% dark rye.
Recipe for 1 loaf (aprox. 69% hydration)
Flour: For this loaf I used very strong Canadian white flour (that has 15% protein) and organic dark rye flour from Shipton Mill.
Ingredients for the preferment
Make it 12 hours before you want to start on your bread. The overall hydration of your preferment (including the water and flour in the sourdough culture is aprox. 60%).
| Ingredient | Quantity | Baker’s % |
| Strong white flour | 53gr | 93% |
| Organic dark rye flour | 4gr | 7% |
| Water | 31gr | 54% |
| Sourdough culture | 14gr | 24% |
Method for the preferment
Dissolve the starter in the water. Add the flour and mix until well combined. Cover tightly with cling film and leave it to rest at room temperature for about 8-12 hours or as I said above: until it’s bubbly and floats. As I said I’ve left mine for 11 hours for this particular bread.
Ingredients for the bread
| Ingredient | Quantity | Baker’s % |
| Preferment | 102gr | 29% |
| Strong white flour | 333gr | 95% |
| Organic dark rye flour | 17gr | 5% |
| Water | 240gr | 69% |
| Salt | 8gr | 2% |
Final baker’s percentage (including preferment)
| Ingredient | Quantity | Baker’s % |
| Flour | 407gr | 100% |
| Water | 271gr | 66.58% |
| Sourdough culture | 14gr | 3.47% |
| Salt | 8gr | 1.96% |
Method for the bread
I dissolved the preferment in about 2/3 of the water and then added it to the flour. Mix and add the rest of the water until you have quite a weird and not smooth mass of wet flour coming together. Do NOT add the salt at this point.
I covered the bowl and left to rest for 45 minutes for the autolyse. As I said the original recipe calls for only 30minutes of autolyse..but I couldn’t get to it until after 45minutes. Still works.
When the 45 minutes were up I added the salt. I used the Kitchen Aid with the hook attachment this time: 1 minute on speed 1 and another 3 on speed 2. If you want to knead it by hand do it for about 10 minutes or so.
Transfer the dough to a clean greased bowl (I used an oil spray to grease the bowl), cover it with cling film and leave it to rest for 50 minutes.
When the 50 minutes are up you are ready for your first stretch and fold.
I did my stretch and folds directly in the bowl, but you can either tip the dough onto a lightly floured surface or you can initially place your dough in a large rectangular container so you can do them directly in there.
Now cover the bowl again and leave to rest for another 50 minutes. Do another stretch and fold (the last one) and again leave to rest for 50 minutes. I couldn’t do that, as we had to go out so I’ve put my dough in the fridge for 3 hours. When we returned I took it out, performed another stretch and fold and left it to come to room temperature for another hour.
After this final rest you need to shape your bread. I shaped this one as a batard, not a great one, but getting there. I moved my shaped loaf in a floured banneton, placed it in a plastic bag that I closed tightly and left it to proof for 2 hrs and 30 minutes.
You will need your oven to reach 230C so start pre-heating sometime after the proofing period has started, depending on your oven.
To bake the bread I use a 3cm thick granite baking stone, that needs at least 1h20 minutes in a 250C oven to heat up properly.
So, after the 2hrs and 30 minutes of proofing, I tipped my bread on a baking sheet scored it with one good score and another 3 rubbish ones, but hey I am learning and put it in the oven.
I also keep in the oven one of the trays, while it is pre-heating, so it gets hot hot. Then, immediately after transferring the bread on the stone, I add a cup of hot water to the tray below to create some steam and shut the door quickly.
You will need to bake this bread for 45 minutes at 230C. To get a nice crust open the oven door 5 minutes before the baking time is up, to release some of the steam. In my case as the oven is very small I baked it for 5 minutes at 250C then reduced the temperature to 220C for the next 35 minutes and kept it with the oven door opened for another 5 minutes.
Resulting bread:
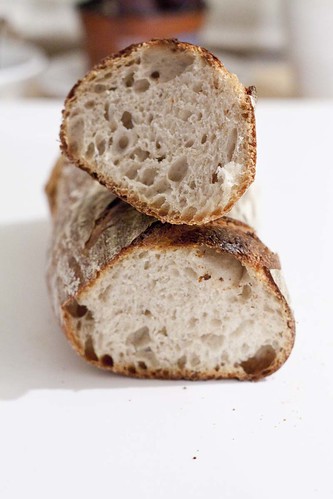
This is now one of our favourite breads. It had a nice crust with a bit of crunch and the crumb was sweet and with a very nice chewy texture.
- Raluca's Blog
- Log in or register to post comments
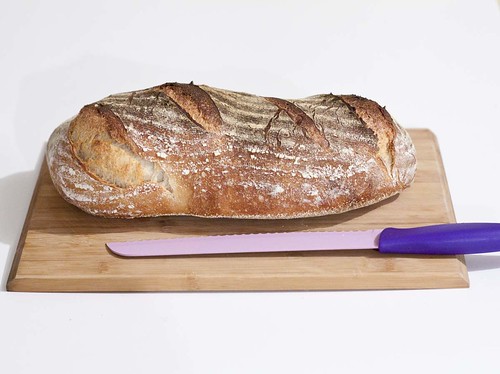

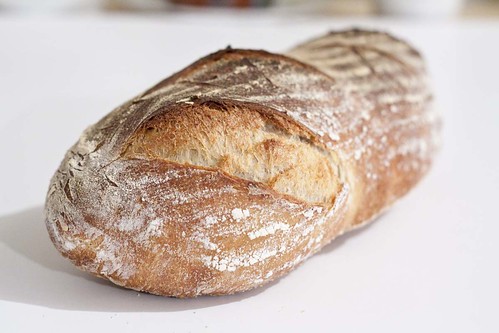
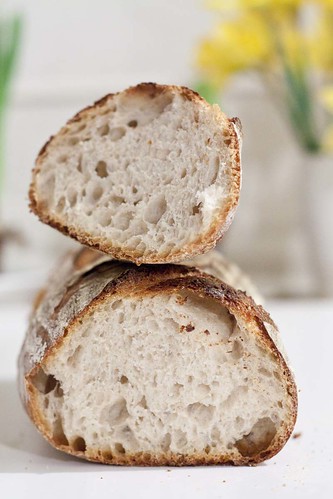
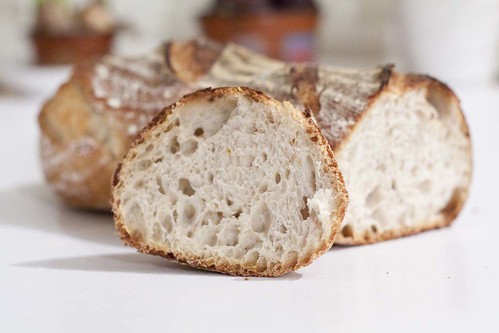
That's a beauty! Thanks for Sharing
Cheers,
Wingnut
Thanks a lot!
Very Inspiring!
Thank you, I am trying ;)
Very nice! Would you mind if I featured it on the homepage for a bit?
-Floyd
Thank you! Of course, that would be amazing, thank you!
Thank you for featuring the bread on the homepage, just seen it now!
Raluca, thanks for sharing this great post! Your bread looks amazing :-) Yuko
Thank you very much! It's really great coming from bread lovers!!!
Thanks for the post! It gave me the incentive to finally put my SD starter (born on 2/12/13) to work. I used KA AP with one tablespoon of vital wheat gluten and Hodgson Mills stone ground rye flour (the only rye flour I had). All in all, I was very happy with the way this one turned out. Unfortunately, there are no crumb shots as this was brought as a gift to a dinner party with friends. I didn't think taking bread pics at the dinning room table was appropriate :) Overall this dough was very easy to handle and produced a very tasty, chewy crumb with a slightly crunchy crust. I'll double up on this next time.
Wow! Your bread looks amazing!!! really glad you liked the recipe, I wish I could manage such good scores on mine...can't wait to see your next one.
...I have to admit that this was the first time I've been able to score a loaf that didn't look like Dr. Frankenstein was wielding the lame :)
You should be very proud then as it looks great!
You should be very proud then as it looks great!