This is going to be kind of a long story. I am making 100% whole wheat sourdough bread in a hearth loaf pan. I am working towards the goal of a bread that can be used for sandwiches. It needn't be light and fluffy, but breaking in two when squeezed around the filling is not desirable. I am making progress but need a little help sorting out what is causing what.
The first loaves that I made, that were any good, were made by a recipe adapted from Jonathan Kandell's Whole Wheat Desem Bread. My adaptation of that recipe was as follows.
18 ounces whole wheat starter, made by feeding the mother starter with 8 ounces of water and 10 ounces of flour the night before
21 ounces whole wheat flour, soaked for 30 minutes in 8 ounces kefir whey plus 8 ounces water
2.5 tsp salt
1 tbls sugar
4 ounces flax seeds
1 ounce sesame seeds
Mix and then knead for 5 minutes with dough hook. Rest 5 minutes. Knead for another 5 minutes.
Let rise for 4 hours, stretching and folding once every hour for a total of three s&f.
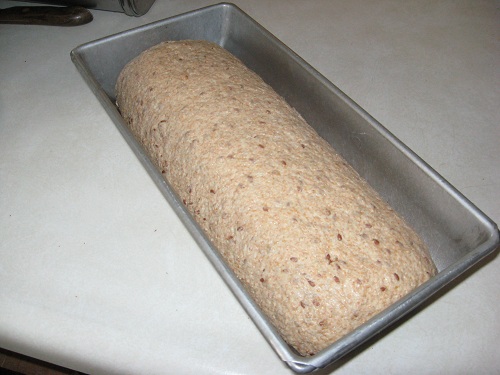
Form into loaf in pan greased with coconut oil. Here is the formed loaf.
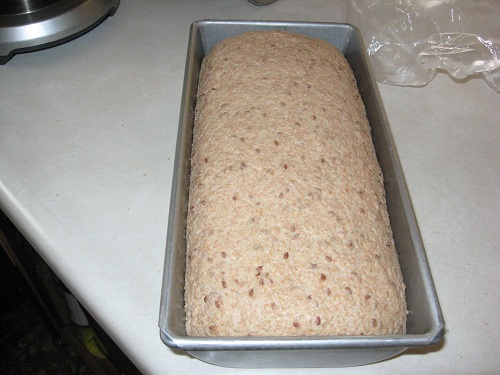
Let rise for 90 minutes plus the time it takes to pre-heat the oven to 450 degrees F. Here is the proofed loaf.
Just before putting the loaf in the oven, pour 1/4 cup kefir whey over the surface.
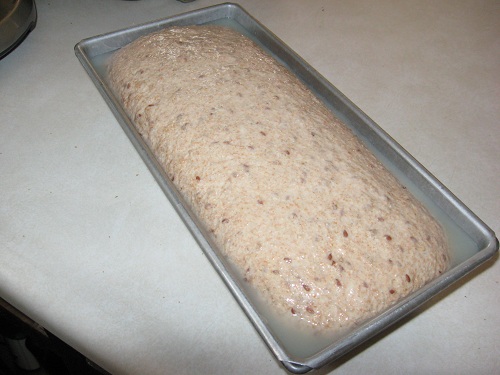
Cover and bake for 25 minutes at 450 degrees F. Remove covering and continue baking at 350 degrees F for 40 minutes. Interior temperature of loaf is 200 degrees F.
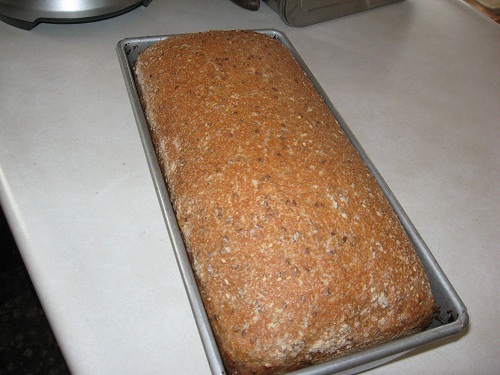
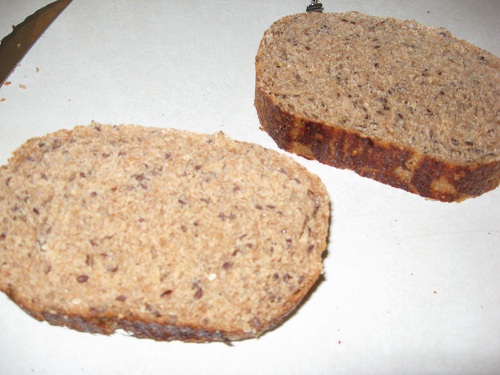
Comparision between this fresh loaf and last week's mostly consumed loaf of same recipe.
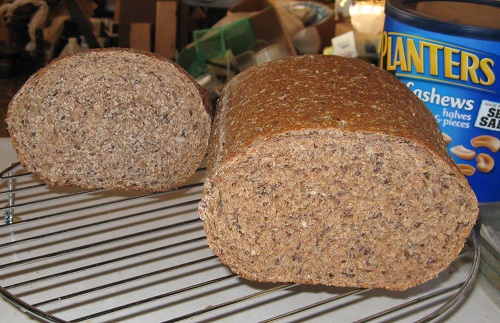
We liked this bread except for the fact that the slices broke when we used it for sandwiches. You could spread it with cheese or butter and eat it okay. It was just bending it that caused it to break.
At this point I got an electric grain mill. Up until this time I was grinding my flour by hand. I also got the book "Tartine Bread". I was intrigued by the author's suggestion that the flour could be soaked overnight instead of just for 30 minutes. I thought that might remedy the scratchy feeling I got in my throat when I ate my bread, so I decided to try an adaptation of Tartine Bread.
The first time I did this I adhered as directly as I could to his recipe, including uses grams instead of ounces.
200g starter made by feeding the mother starter with 100g each flour and water the night before
1000g flour soaked overnight in 400g water plus 400g kefir whey, in the refrigerator because my whey may be biologically active
combined soaked flour and active starter with 20g salt in the morning
followed previous kneading, rising, s&f, forming, and baking as before, except that it took 50 minutes for the interior temperature to reach 200 degrees F.
The dough did not rise very well, but there was oven spring.


We liked this bread really well for sandwiches. It had the flexibility that we wanted. We could fill the bread with meat and cheese, squeeze it in our hands, and it didn't break and crumble. The bread did not irritate my throat. There were a few holes, and there was a small tear along the side that isn't shown here. The next week I tried again, adding some flax seeds to the soaking dough. I also raised the temperature of the second part of the baking to 375 degrees F, to try and make the bread cook a little faster since Tartine Bread is supposed to cook at a higher temperature the whole time.
First of all, the rising and proofing was even worse than before. The dough tested as overproofed when I put in in the oven. The depression from my finger was even still in the baked loaf, but it had oven spring. This time the rip was large. It doesn't look like a floating crust to me, unless one defines the crust as the entire upper two-thirds of the bread.
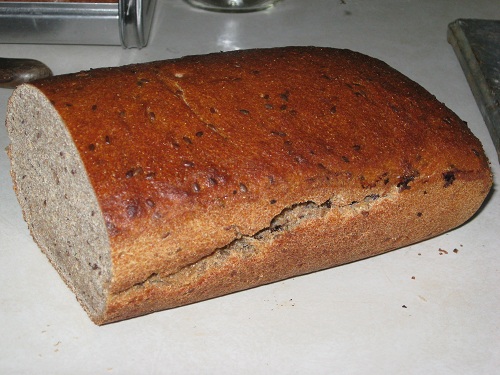
Here you can kind of see a flaw line running across the sliced end of the loaf, which becomes the crack in the side.
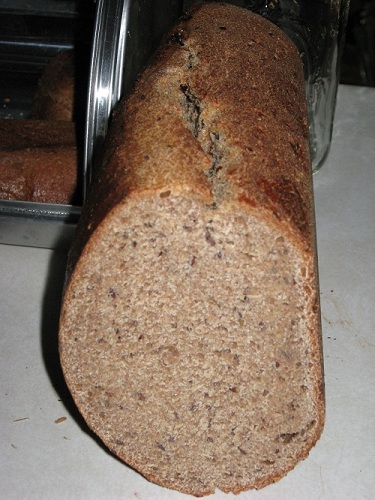
Here is the crust and the crumb. The bread is once again flexible, chewy, and tender.
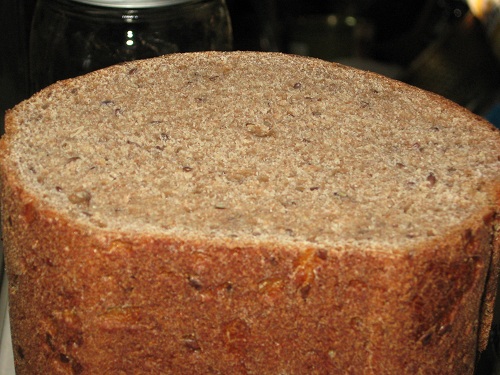
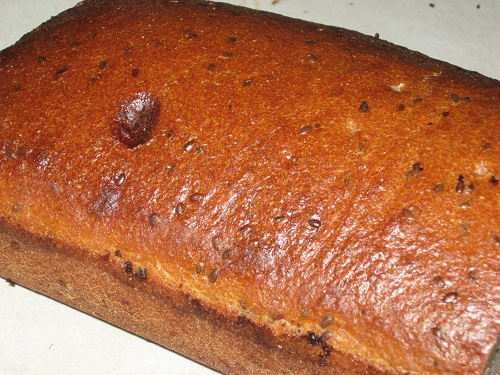
I don't know what this dark spot is. That isn't the mark from my finger.
I started digging through the forum and read that it is okay to autolyse overnight in the refrigerator, although it might not be much more use than doing so for 30 minutes. I also read that putting acid in the autolyse defeats the purpose of it because it prevents development of the gluten. I also read that too much autolyse can overdigest the dough and remove all the gluten. That is supposed to result in grey dough. It was hard to recall what color the dough was before I added the starter, because it was kind of dark in the kitchen, but afterwards it was a normal tan color. It was very stretchable, but not stringy like the time I kneaded some dough for 20 minutes with the dough hook. When it was ready to be put into the oven, the dough shook like jelly, resembling descriptions I have read for proofed ciabatta dough. The amount of liquid that I used was exactly that recommended in Tartine Bread for whole wheat flour, which is 100g more than for refined flour.
What I am hoping to find out here from you very knowledgable folks is:
1. Is there too much water in my dough for good rising?
2. Is the kefir whey preventing the development of gluten during autolyse?
3. Am I kneading and/or s&f too much?
4. Why is the loaf cracking so badly? The other recipe did not crack when it had no slashing.
5. What caused that dark spot?
6. Can I fix any of the above without losing the chewy tenderness that allows us to bend the slices without them breaking?
My grain is hard red winter wheat. My water is non-chlorinated, hard and alkaline. I use olive oil on the rising bowl and coconut oil on the loaf pan. I keep vessels covered with a plastic hair cap when rising and proofing the dough. I cook the bread in a convection oven which appears to be working properly. My house is not temperature controlled on the high side, but was between 70 - 85 degrees F during the most recent baking day. It was probably only 70 degrees F when the earlier loaves were baked. Both the hand-powered mill and the electric mill use stone burrs. I did grind fairly fine flour with the hand-powered mill, but the electric mill probably puts out more uniformly fine flour because I don't get tired out and let the spacing slip like I sometimes did with the manual mill.
Edit: I moved the photos to my own server since I have so many. *wide-eyed look*
I have never seen the technique of flooding the pan with whey before baking. Very interesting and accounts for the smooth crust. Almost the same concept of boiling a bagel before baking. Is the crust the same texture as a bagel crust?
The dough looks like the hydration level is fine. You already learned that one of the necessities of a flexible crumb is to make sure the dough has an opportunity to absorb moisture over time and has enough moisture present to do so. I frequently mix my WW dough up the evening before and let it rise in the refrig overnight. Even in the cold it usually manages to either double or almost double. Goes in sticky and comes out perfect.
The loaf would probably benefit from some slashing so it can expand rather than crack. It may lighten the crumb a bit,also.
The dark spot looks like a subsurface bubble whose thin skin got a little darker than the surrounding thicker surface with baking.
The dough looks like it had a nice texture-it was holding its shape nicely in the pan. It could probably have used a little longer proofing. Take a look at your crumb shot and notice that the bottom of the loaf has a slightly darker, denser looking area that is about 1/2 inch wide and is just on what would be the bottom of the loaf (on the right in the crumb shot with the loaf on the side). Minor detail and I find my WW is a bit difficult to judge proper proofing.
If you want a flexible crumbed whole wheat, you might try using the water roux technique. Just enter water roux in the search box. Most of the recipes are for white bread but I just adapted it for my WW. Works great.
The surface of the bread just after removing the covering from the pan looks boiled, like a bagel. The crust just after baking was crisp, but not crackly, for the earlier version. The current version is not as crisp. It is not vapid, either, like the crust of a loaf of Wonder Bread. I think of the difference between the two versions as being less brittle overall. The crust does not crunch, but neither does the bread break into pieces when squeezed around sandwich fillings. Now I have not answered your question about whether it is like the crust of a bagel, but I have not had many bagels in my life. I did make some once, so I know how they are made. I think the answer is probably yes, except that my bread crust is thicker and at least initially a little harder because the bread is baked for longer than a bagel would be baked. This is only true of the upper crust, of course. The sides and bottom are protected from the boiling liquid/steam by the pan.
The dough for the current version did not hold its shape like the earlier version. I do not have photos of that. It filled the pan to about the same level but stayed level the entire time it was proofing. When whey was poured over it, it covered the entire surface instead of puddling around the edges, because there was no mound in the middle. Nevertheless the loaf did rise in a mound during baking. I do see the darker area that you are referring to. It doesn't taste undercooked, but it looks that way when compared to the rest of the loaf. It makes sense that it is simply denser.
I searched water roux on this forum. The word "springy" ... well, sprang ... out at me. That kind of describes the difference I see between my earlier version and my recent version. I need to read more entries about it. So far what I have read seems to indicate that it somehow causes the dough to absorb more water, allowing for higher hydration. Does cooking the flour form a gel similar to the polysacchrides that are sold as bread enhancers? And this gel contains water to make the dough springy while the untreated flour provides the structure for the loaf? I might be able to work this into my recipe, but using my own supply of polysacchrides. I also keep water kefir, and small gel particles drop out of the beverage while it is in bottles stored in the refrigerator. I have used these in bread before. They didn't appear to hydrate the flour, but they did something to the texture of the loaf. Since I didn't understand what they were doing, I stopped trying to use them in bread. Maybe if I use them in place of some of the water, in the dough mixing after the soaking, and use less water to soak, I will get springy bread with more rise?
MangoChutney, the formula you have posted has two basic things working against it as a sandwich bread. First, it is all whole wheat. Second, it is lean; i.e., it contains no fats. Your use of autolyse (soaking) and the 5 minutes kneading, 5 minutes resting, 5 minutes kneading techniques are good for a bread like this, in that they permit the bran time to absorb water and soften while the gluten is developing.
My suggestion would be the addition of some form of fat when you mix the final dough, whatever type you prefer. That could be eggs, butter, oil, lard, you name it. The fat will tend to soften the crumb, making it more flexible and less crumbly. Quantity to add? Well, that may take some experimentation to arrive at the crumb characteristics you desire. You might want to start with 1-2 tablespoons per loaf, then adjust up or down from there.
Your bread, by the way, looks lovely.
Paul
You don't need any additional additives-just use a portion of the flour and 4-5 times the amount of water.(1 tbsp flour with 4-5 tbsp water). Use a microwve on 15 sec bursts (takes less than a minute here) or over a low burner (can take 15 minutes here) to form a gel.Stir constantly til it forms.Remove from heat and cool,covered, so a skin doesn't form.Like making a cooked pudding. Add the cooled gel to the dough with the liquids. Just subtract that flour and water from the original recipe or adjust it slightly. Remember that the gel will cause the dough to feel stickier. Don't be tempted to add more flour! Use damp hands and counter to stretch or knead or oiled hands and counter (I keep a small dipping bowl of water handy. I also do a lot of S&F in the bowl using a nylon bench scraper).
Bread is a starch/gel matrix and a gluten/netting matrix that work together to trap the gas bubbles formed by the yeast. When you use a water roux, you are just enhancing the gel formation. Works really well with softening up the crumb (and making it more flexible) without the addition of fats but personally I like a little fat in mine-usually an oil. The oil helps with the shelf life but so does the roux.
If I want a really soft loaf, I may pull out all the stops and add egg,oil,milk AND water roux and make sure it soaks overnight.All of these add to crumb softness/richness but I don't want them all the time.
Your getting there! Your loaf looks delicious with the flax and sesame-very similar to what I make.
I bake with whole grains that I grind at home only and Peter Reinhart's book 'Whole Grain Breads' really helped me improve the breads I was baking. He uses 2 pre-doughs both which sit for 8-12 hours before the final dough is mixed.
He has a wonderful sandwich loaf recipe that is a favorite here.
I first checked the book out at our library. I knew I wanted it so I bought it off of Amazon and now I convert most of the recipes I bake into his method.
Janet
Thanks for the encouragement from all of you. I made bread again today, using a kind of hybrid of the two recipes, but the biggest change I made was that I got some Wheat Montana Bronze Chief hard red spring wheat from WalMart. Wow! The oven spring actually pressed against the cover that I use, which is a second hearth pan inverted over the first. You can see the angles on the sides mirror-imaged in the top, from the bottom. I don't think it actually hit the top though, because it is not flat on top.
There was no splitting along the sides, although the bottom didn't get sealed as nicely as one might have hoped for. I think the dough was a little too dry because I was trying to use some polysaccharides from my water kefir for a water-retaining gel to function similarly to water roux. As I noticed before, the water kefir sediment doesn't really make the dough feel less stiff, but only slicker. As an additive for tenderness it might be fine, but I think maybe the flour needs the missing water also. I had to add one ounce back in any event, because the dough was almost too stiff to knead.
Soaked overnight in refrigerator:
32 ounces hard red spring wheat flour
16 ounces liquid (50/50 water/kefir whey), which became 17 the next day and should probably be 20
4 ounces sediment from the bottom of filtered water kefir kept in the refrigerator
2 ounces flax seeds
2 ounces sesame seeds
Pre-fermented overnight on the counter:
16 ounces 100% hydration sourdough starter, fed hard red winter wheat flour
Next morning mixed:
Pre-ferment
2 tsp salt
soaked flour and seeds
kneaded as best could, considering how stiff it was, for probably a total of 10 minutes with rests for all of us (me, the dough, and the stand mixer)
rise in olive oil-coated bowl for four hours with s&f every so often
shaped but not sealed very well, dough a little too dry
proofed in coconut oiled hearth pan for 90 minutes plus oven preheat time
1/4 cup kefir whey over loaf, covered with second pan, inverted
baked 450 degrees F for 25 minutes, covering pan removed, baked at 350 degrees F for 50 minutes
final interior temperature was only 198 degrees F
The dough should end up sticky even without the roux technique. The extra moisture making it sticky will be absorbed in the overnight soak. Whole wheat needs extra water available in the soaking time so the bran can absorb it and not rob it from the crumb after it is baked.
Looks really delicious! I will have to try the whey soak technique.